
Rookie's first attempt at a restoration...
 07-19-2011, 08:20 AM
#1941
Safety Car

Thread Starter

There was only a crack in part of the frame. I applied some some Loctite super glue accelerant, which speeds the curing of super glue. I bent the frame (to open the crack up for the glue), applied the glue, and let the frame go back to its original shape...when it was partially cured I slowly took a chisel and "kissed" the top surface to remove the excess glue. The problem with the frame is that it has a texture on the top surface, so its a little harder to make cosmetically nice repairs (I was able to get away with it because of being extremely clean with the super glue). I'll get a few pics of the finished repair after I get home from work today.
Last edited by stinger12; 07-19-2011 at 08:22 AM.
 07-19-2011, 02:15 PM
#1942

Thanks Jeremy...
I have CA glues with accelerant but my frame has a big chunk broken out where the middle compartment door latch is. I don't think the CA glue will hold up with such a large repair. I don't want to buy new if I don't have to, always try to restore what I have first. I'm sure you understand that one !! ..
..

I have CA glues with accelerant but my frame has a big chunk broken out where the middle compartment door latch is. I don't think the CA glue will hold up with such a large repair. I don't want to buy new if I don't have to, always try to restore what I have first. I'm sure you understand that one !!
..
07-20-2011, 11:53 PM
#1943
Safety Car
Thread Starter
Yeah, I know exactly what you mean.
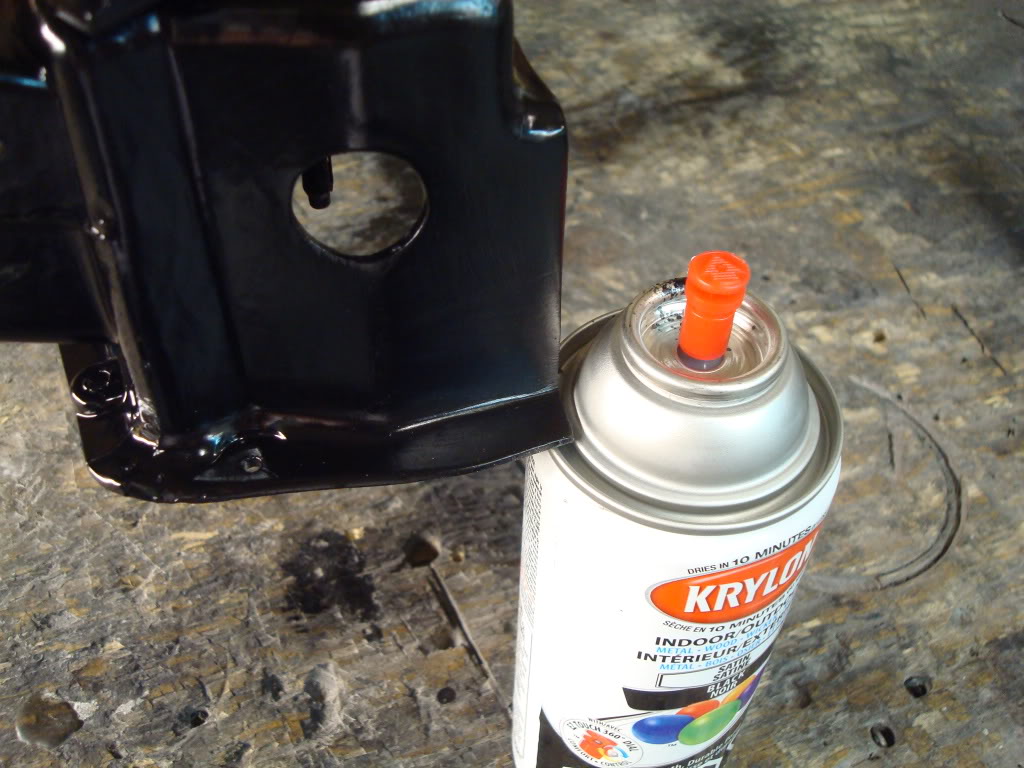
Here is the heater box painted.
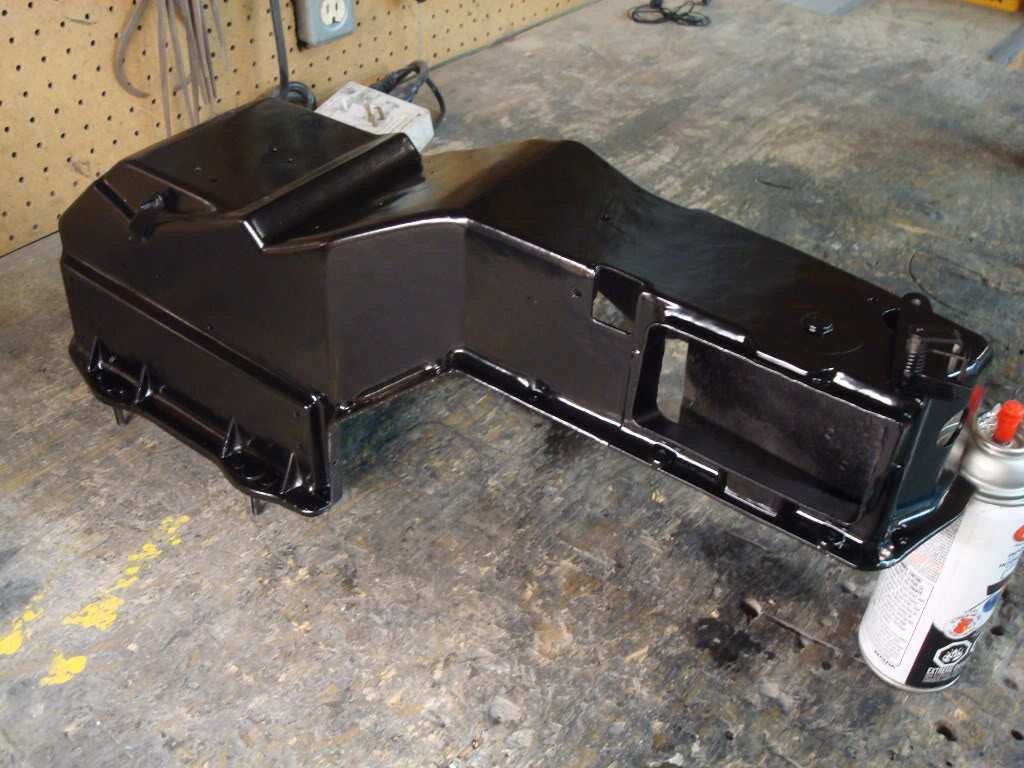
And here is the finished repair on the corner.
I sandblasted and painted the seat latch release mechanism for one of the seats. The other seat's latch (and the strap) is destroyed...so I'm now in the search for one of those.
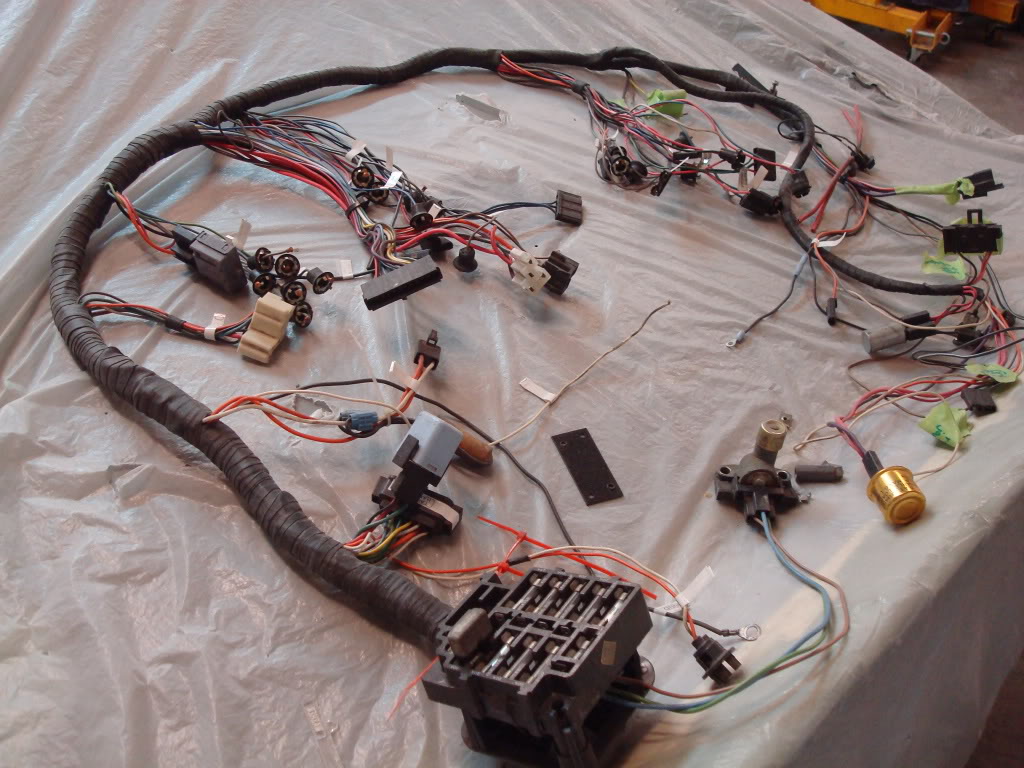
I also finished the console wiring harness. Mike labelled every wire for me off the top of his head...that guy is unreal.
Here is the heater box painted.
And here is the finished repair on the corner.
I sandblasted and painted the seat latch release mechanism for one of the seats. The other seat's latch (and the strap) is destroyed...so I'm now in the search for one of those.
I also finished the console wiring harness. Mike labelled every wire for me off the top of his head...that guy is unreal.
Last edited by stinger12; 07-21-2011 at 12:14 AM.
07-21-2011, 10:37 PM
#1944
Old Fart Pilot

I saw an article in AMOS Auto Enthusiast that mentioned something about not completely wrapping the lengh of wire runs with tape to allow the wires to stay cooler. It recommended only using bands of tape every so often along the run rather than covering the whole 'enchalada.' The harness in your picture looks mostly completely wrapped, which is probably how the car was originally made...
What do you (Jeremy and all other thread followers) think of this?
Paul
What do you (Jeremy and all other thread followers) think of this?
Paul
07-21-2011, 11:32 PM
#1945
Le Mans Master

I saw an article in AMOS Auto Enthusiast that mentioned something about not completely wrapping the lengh of wire runs with tape to allow the wires to stay cooler. It recommended only using bands of tape every so often along the run rather than covering the whole 'enchalada.' The harness in your picture looks mostly completely wrapped, which is probably how the car was originally made...
What do you (Jeremy and all other thread followers) think of this?
Paul
What do you (Jeremy and all other thread followers) think of this?
Paul
i used to zip tie runs of wire (car audio installs) about every 8-12" or so..... a few times i would solid wrap some wires, only if i felt the need to group them tighter/etc
zip ties are easy to cut of also.... thing i hate about tape is that it gets gooey and is a pain to wrap/unwrap in tight areas
 07-23-2011, 06:08 AM
#1947
Instructor

Member Since: Dec 2010
Location: Merritt Island Florida
Posts: 169
Likes: 0
Received 1 Like
on
1 Post

The purpose of wrapping wiring is more for protection from the elements than it is for neatness. And wiring should not get hot, unless wire gauge is too small for the load. It's more important to protect wiring from external heat, wrap or loom of some kind really helps.
I've seen many old, hard, dirty wire harness's where if you peel open the wrapped area's the wire looks brand new.
There is wire wrap tape without adhesive for this, so it will not get gooey - its just necessary to secure the end of the wrap with a tie wrap.
Carl
I've seen many old, hard, dirty wire harness's where if you peel open the wrapped area's the wire looks brand new.
There is wire wrap tape without adhesive for this, so it will not get gooey - its just necessary to secure the end of the wrap with a tie wrap.
Carl
07-26-2011, 01:22 AM
#1948
Safety Car
Thread Starter
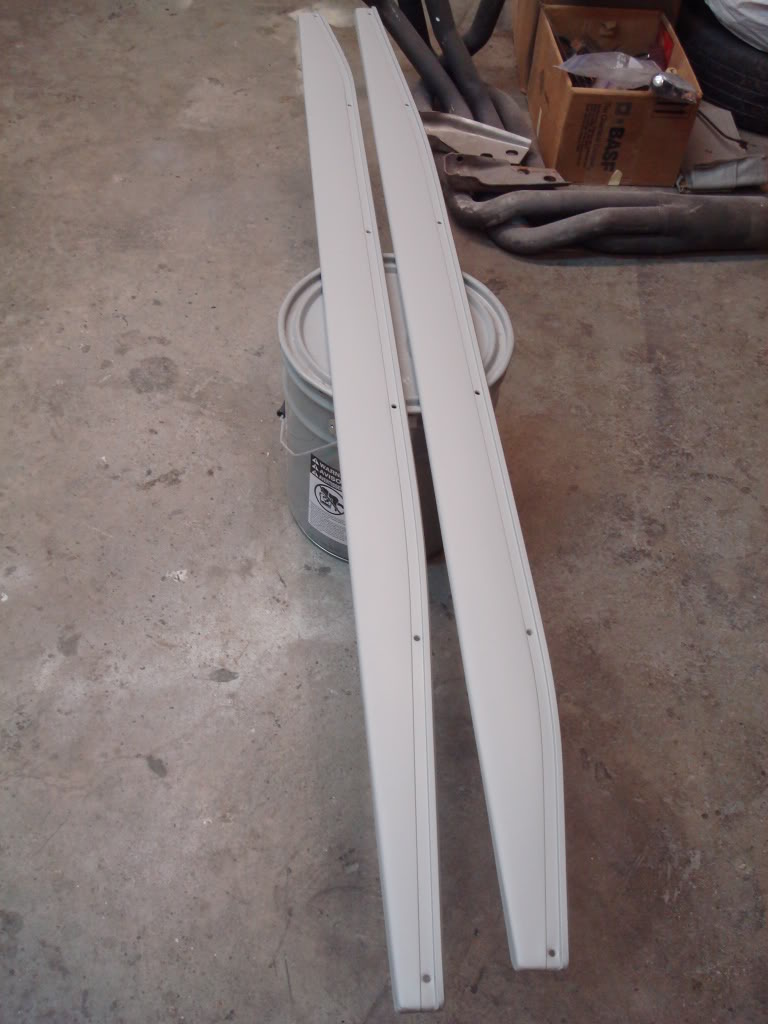
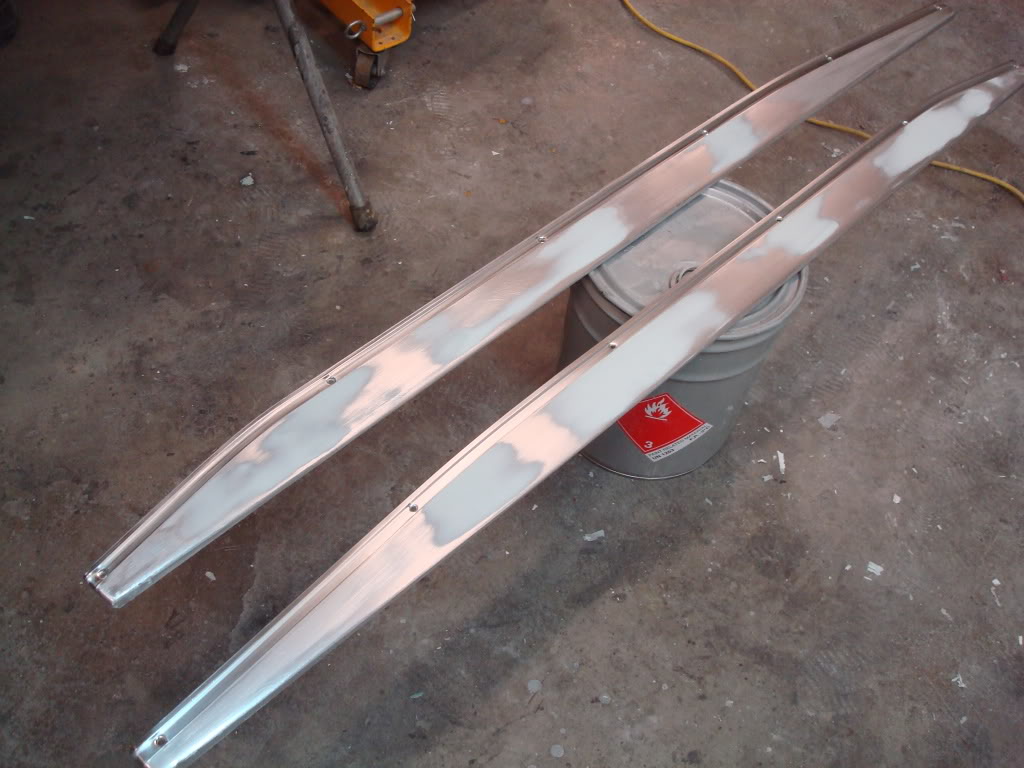
Binnie "donated" his rocker panels to me (once again, thanks a bunch Binnie!). They were in awesome shape. I decided to go one step further and puttied the dents in the panels, then I primed them.
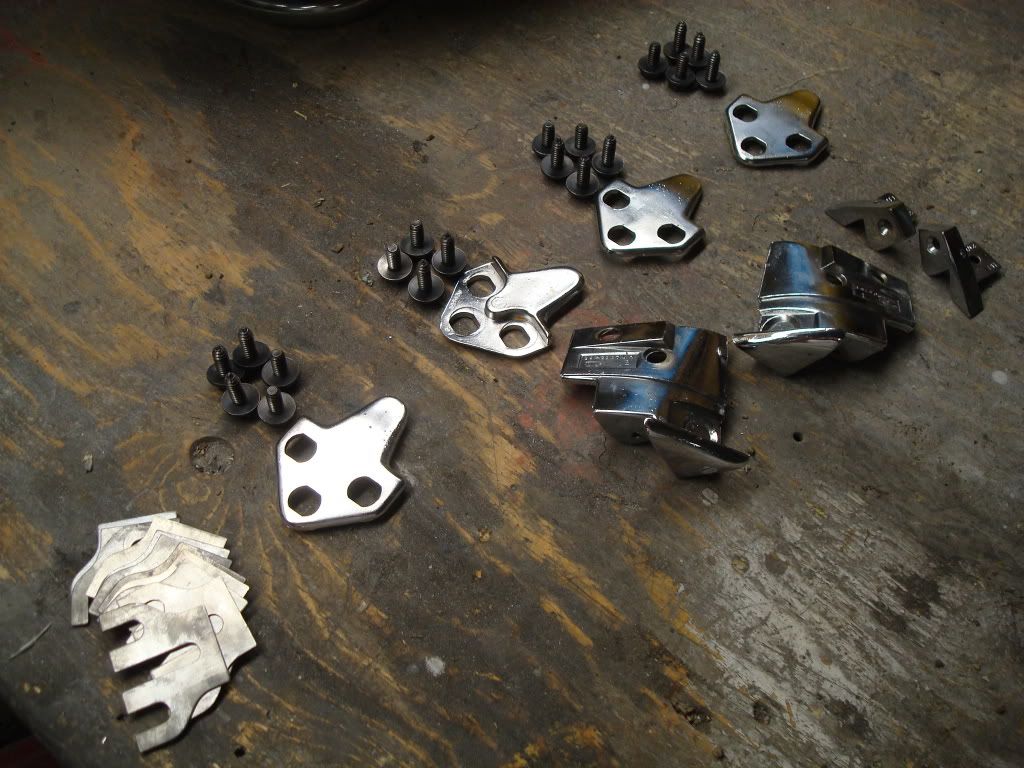
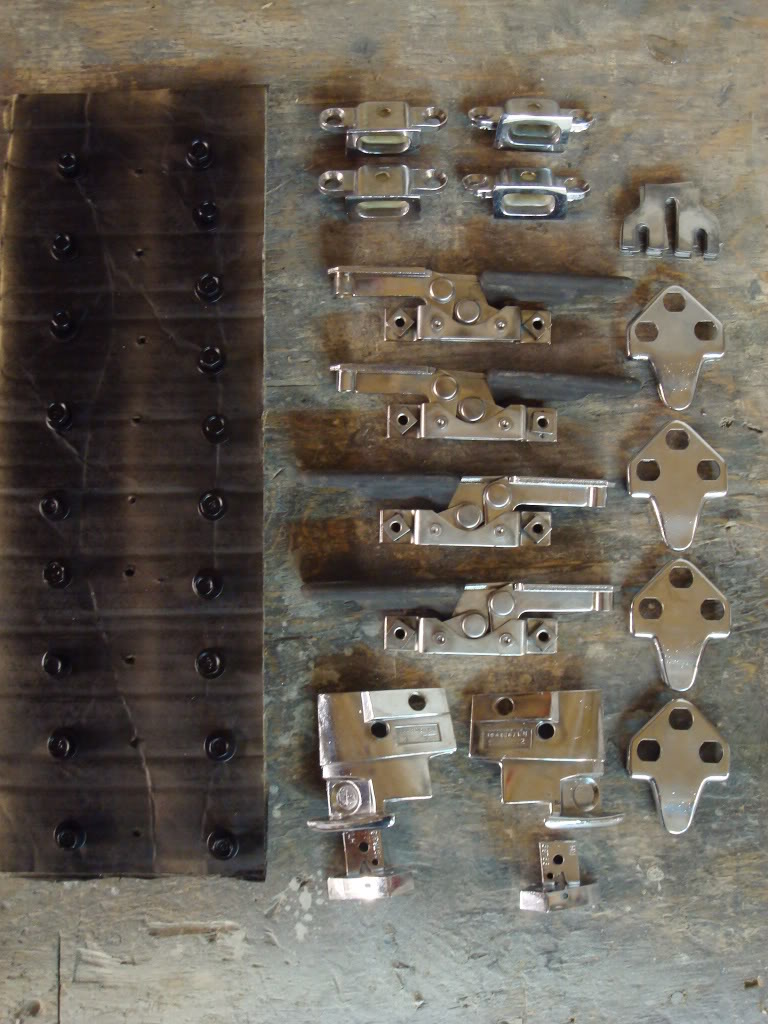
I also cleaned up some of the t-top hardware.
I also cleaned up some of the t-top hardware.
07-26-2011, 07:48 AM
#1949
Melting Slicks


Since you've started to get some of the misc. hardware cleaned up (T-Top hardware, rocker moldings; etc.) does that mean the body is getting closer to being paint ready?
If the body still needs work, and it's none of my business, I would leave these "little" projects for the winter when it's too friggin' cold to be messing with fiberglass, and finish up the body work. But, what the heck do I know, I have to pay people to work on my cars. (I envy your talent and wish I could do a fraction of what you've done to your car).
If the body still needs work, and it's none of my business, I would leave these "little" projects for the winter when it's too friggin' cold to be messing with fiberglass, and finish up the body work. But, what the heck do I know, I have to pay people to work on my cars. (I envy your talent and wish I could do a fraction of what you've done to your car).
07-27-2011, 09:22 AM
#1950
Drifting

In Jeremy's defense, you can only fiberglass, grind, sand, repeat for so long until you need a break. The miscellaneous little jobs keeps progress going while you get some of your sanity back.
07-27-2011, 11:46 AM
#1951
Drifting
07-28-2011, 12:13 PM
#1952
Safety Car
Thread Starter
Exactly. You've got to understand that I do this 40 hours a week ay my job. Sometimes I just don't feel like sanding for 8 hours, then going home and sanding for another 4 hours...I need a break from the body right now.
I'm currently installing a flared fiberglass body kit on a car at work right now, and just like my car, its a ton of work.
Once I'm feeling up to fiberglassing again, I'll get right back at it.
I'm currently installing a flared fiberglass body kit on a car at work right now, and just like my car, its a ton of work.
Once I'm feeling up to fiberglassing again, I'll get right back at it.
07-28-2011, 08:16 PM
#1954
Safety Car
Thread Starter
07-29-2011, 02:51 AM
#1955
Safety Car
Thread Starter
I finished cleaning up the t-top hardware.
I also did a bit of fiberglassing!
Mike ordered my Dewitts radiator this week. He also got the AFR heads for the engine.
I also did a bit of fiberglassing!
Mike ordered my Dewitts radiator this week. He also got the AFR heads for the engine.
Last edited by stinger12; 07-29-2011 at 02:53 AM.
07-31-2011, 04:41 AM
#1956
Safety Car
Thread Starter
Jeremy made a mistake.
I primed the rocker panels a week ago with some spray can primer...which did not harden. I have no idea why...I shook the can forever to get it to mix before spraying.
I ended up stripping everything and starting over. This time I sprayed it with some K36.
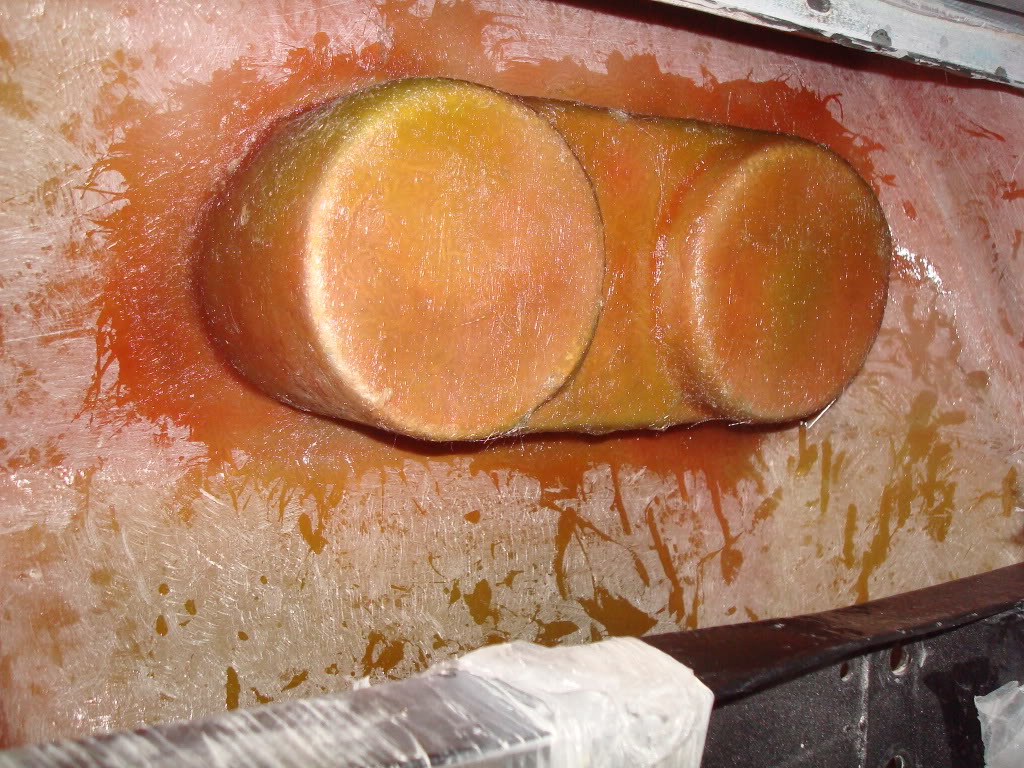
I also fiberglassed for 4 hours last night...I'm almost done the inside of the rear bumper, which is a major milestone!
I primed the rocker panels a week ago with some spray can primer...which did not harden. I have no idea why...I shook the can forever to get it to mix before spraying.
I ended up stripping everything and starting over. This time I sprayed it with some K36.
I also fiberglassed for 4 hours last night...I'm almost done the inside of the rear bumper, which is a major milestone!
Last edited by stinger12; 07-31-2011 at 02:00 PM.
08-01-2011, 02:15 AM
#1957
Instructor

Member Since: Nov 2007
Posts: 185
Likes: 0
Received 0 Likes
on
0 Posts
well I finally made it reading from page one. It took me a couple of days but it was well worth it. You have given me an idea of how a corvette should be restored and many hours of entertainment, and maybe a little eye strain from the screen lol Its truly amazing how far you have come and how you have grown during your build. its a good feeling to go through every triumph and set back with someone as passionate about their car as you are. You are doing it right and one day you will be able to give that car to your kids and it will be in just as good of shape as it is in now. The only way I would be more impressed with your work is if you were an American  j/k
j/k
j/k
08-05-2011, 03:24 AM
#1959
Safety Car
Thread Starter
I need to thank forum member black75 (Jon), for the heater box he sent me for free. Jon, I can't express how much this meant to me! Like I've told you guys before, I never expected to get anything in return from this thread. I just wanted to document my progress and teach others what Mike has taught me, and what I have taught myself. Binnie just shipped me his t-tops free of charge too (with the interior panels)  . Thank you Binnie!
Here is what it looked like when I opened the box.
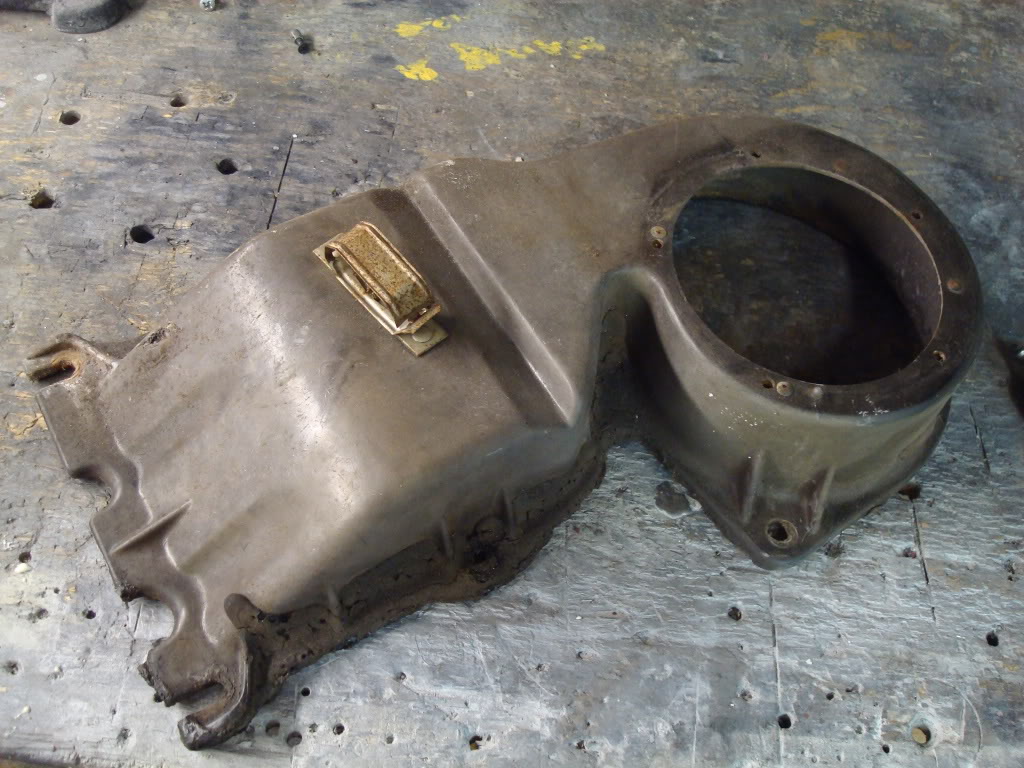
I scrubbed it with thinner and scotchbrite until it was clean.
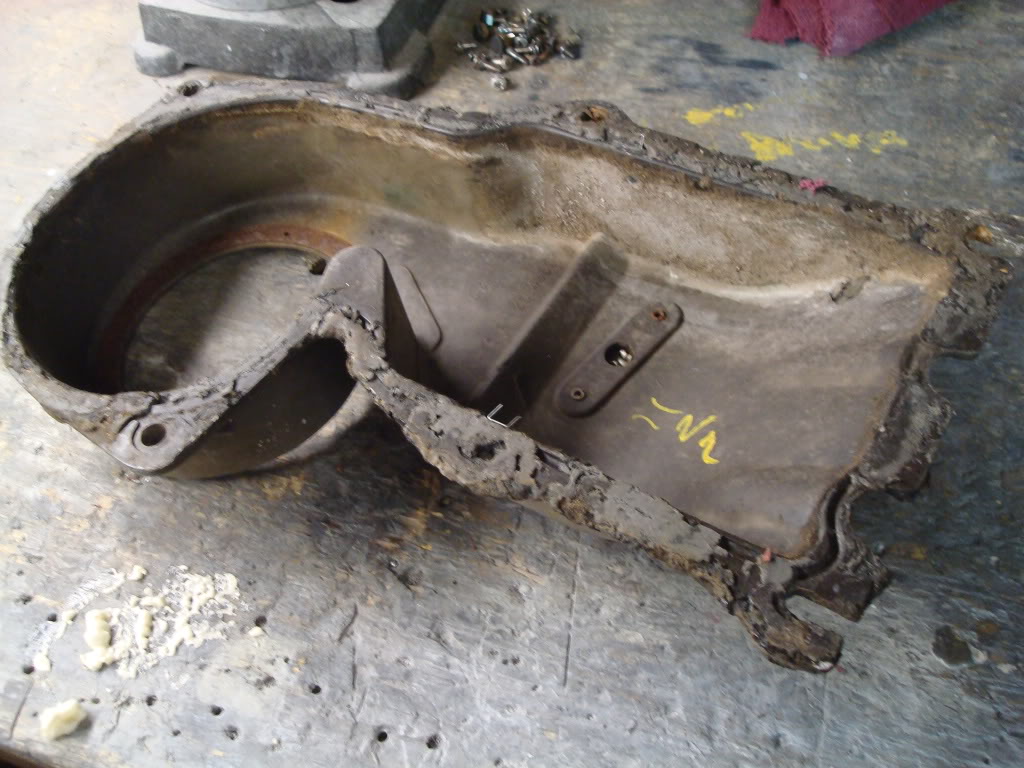
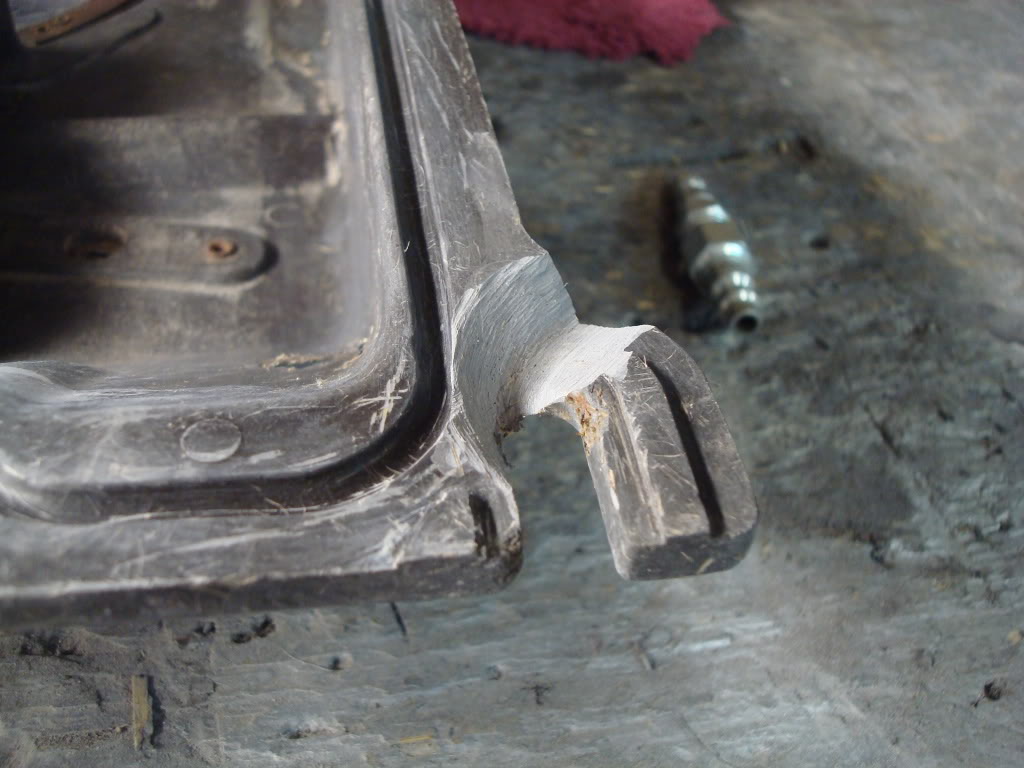
This tab was broken, and there was a hole in the face of the cover.

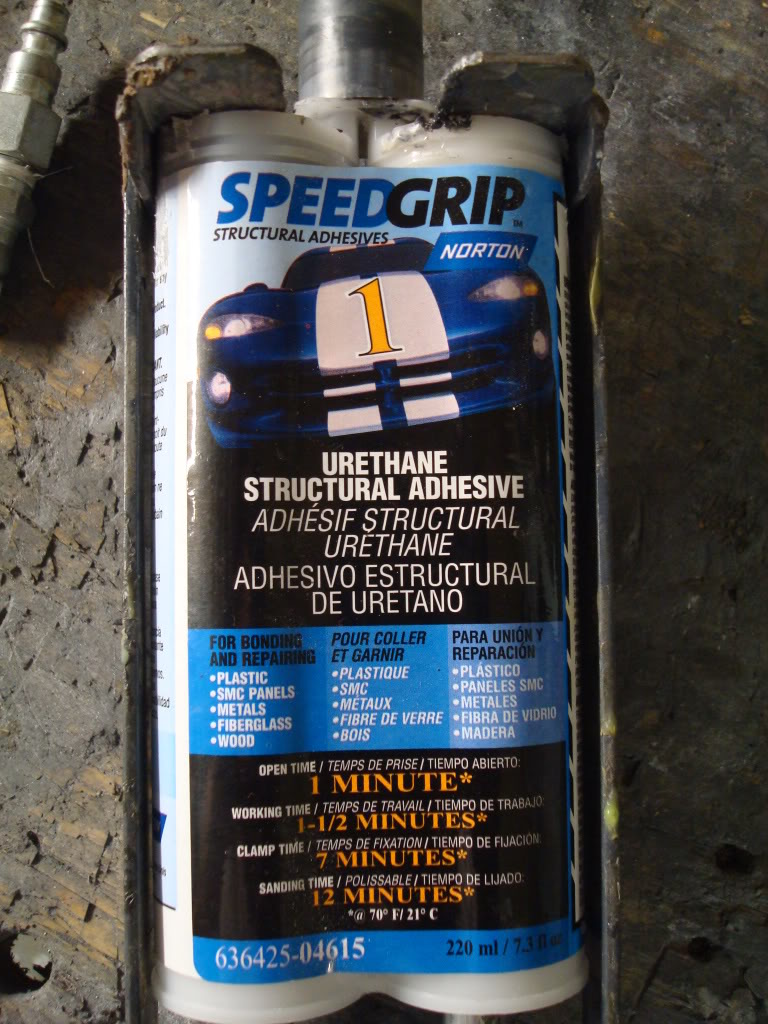
I glued the piece back on with this glue to hold it in place for the time being...
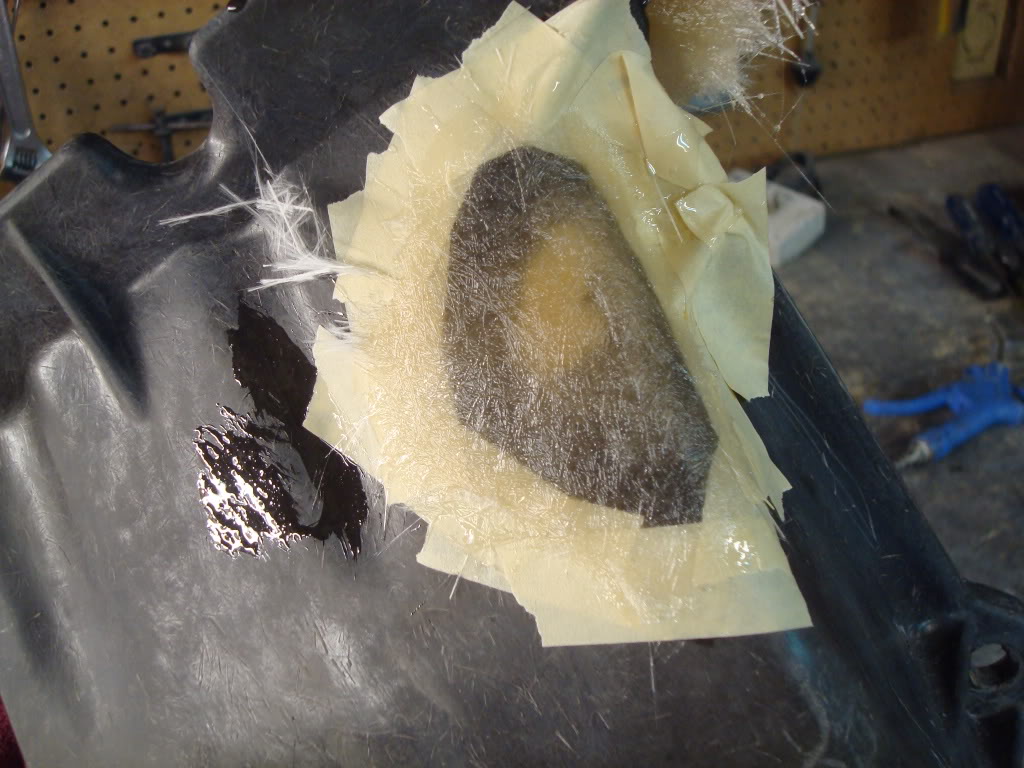
Then I v'd it out...
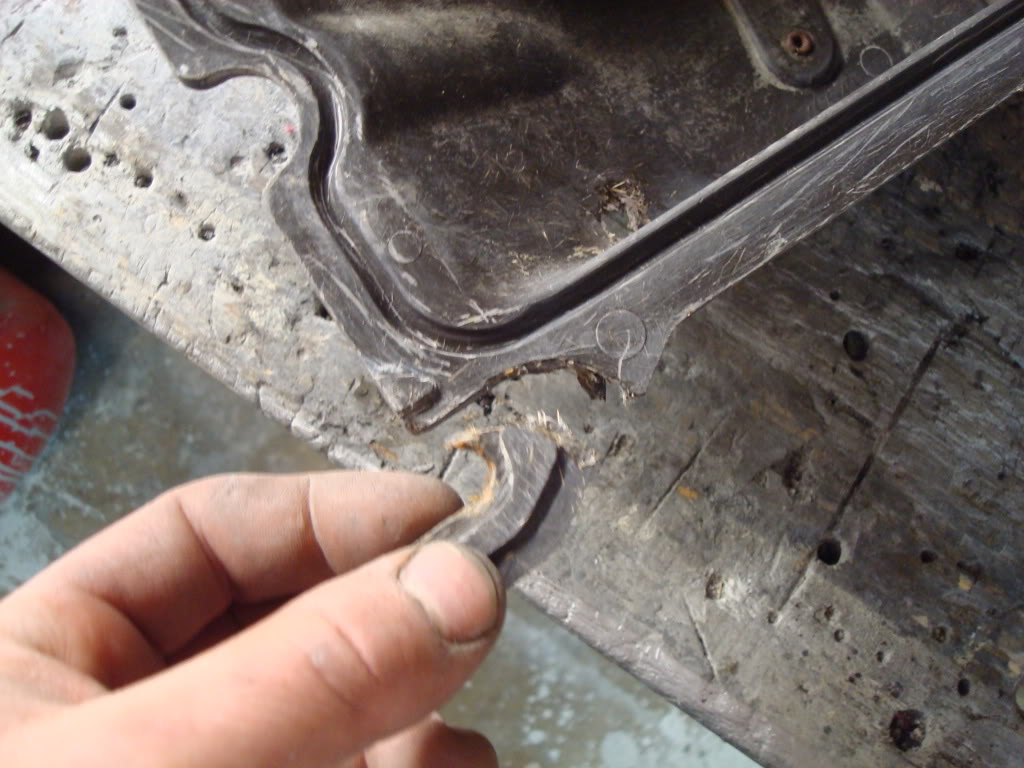
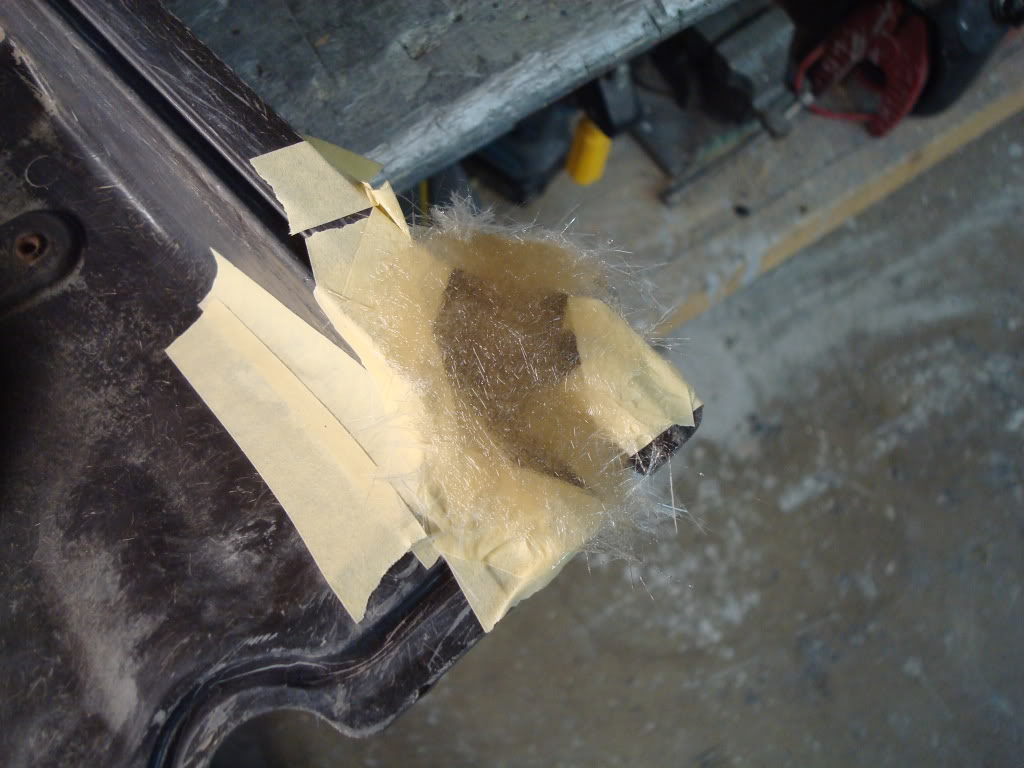
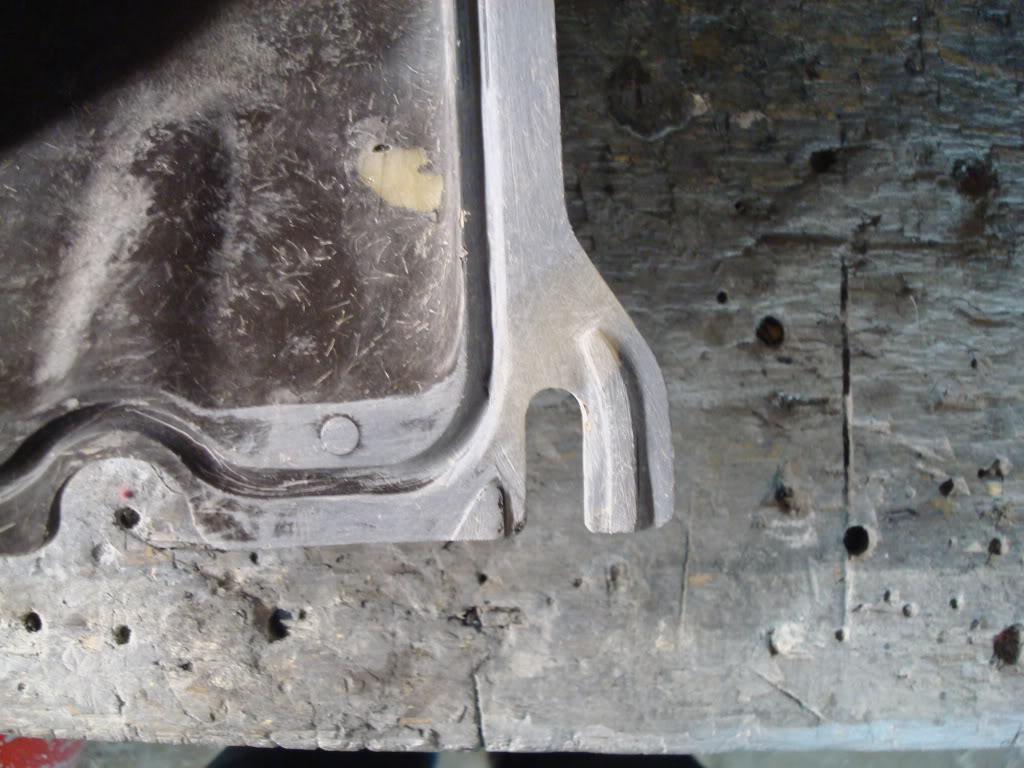
I masked it, then glassed it with epoxy resin and matt. I carefully sanded it back into shape.

Here is the other repair.

I primed the rocker panels with K36 this time. Sanded with 320 grit, then painted them.
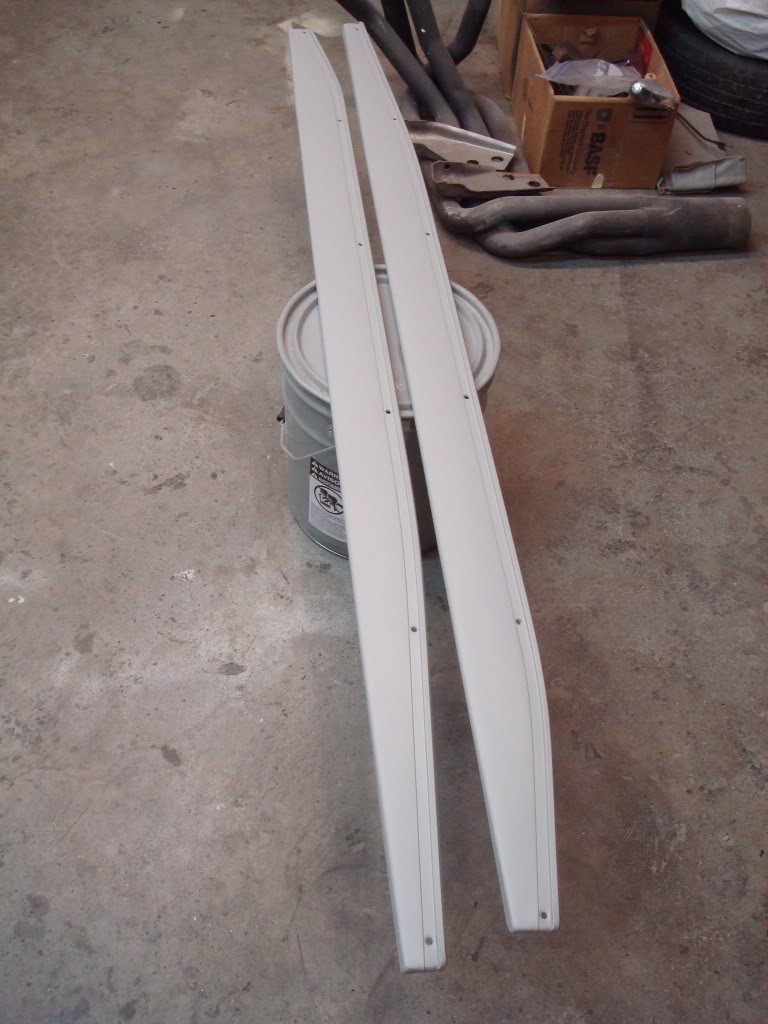
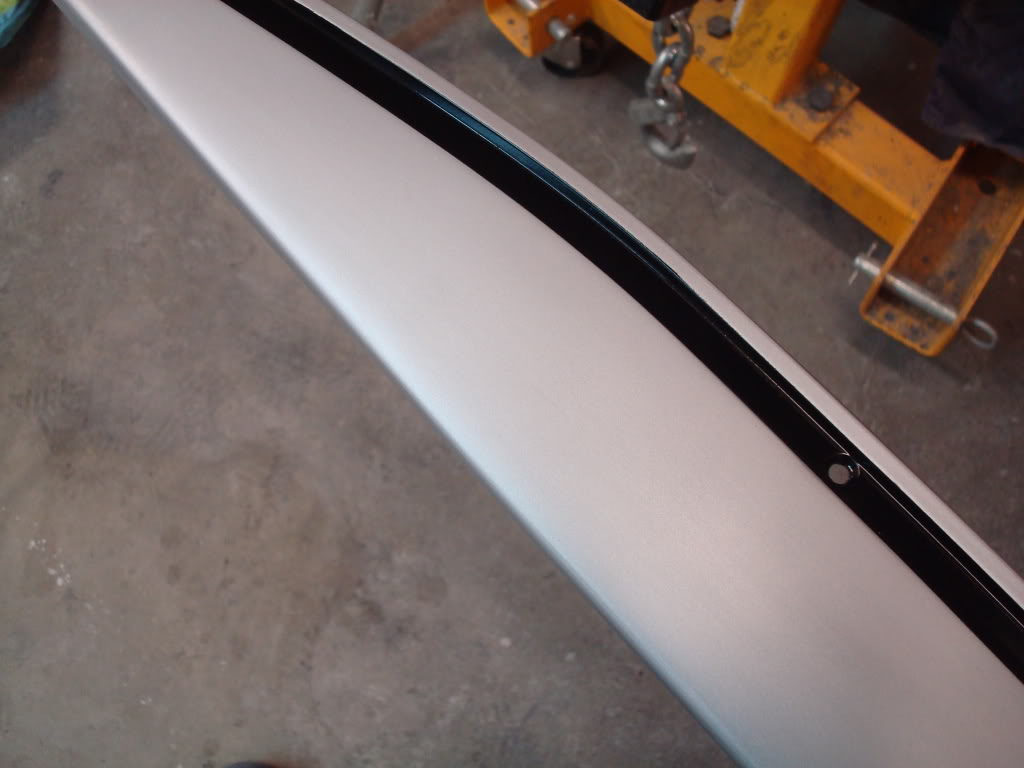
Its too bad most of the panel will be covered up by the sidepipes, because these things look perfect!
PS: Mike is being featured in the next issue of Auto Enthusiast magazine. Its about flippen time he's hit the magazine rack. Way to go Mike!
. Thank you Binnie!Here is what it looked like when I opened the box.
I scrubbed it with thinner and scotchbrite until it was clean.
This tab was broken, and there was a hole in the face of the cover.
I glued the piece back on with this glue to hold it in place for the time being...
Then I v'd it out...
I masked it, then glassed it with epoxy resin and matt. I carefully sanded it back into shape.
Here is the other repair.
I primed the rocker panels with K36 this time. Sanded with 320 grit, then painted them.
Its too bad most of the panel will be covered up by the sidepipes, because these things look perfect!
PS: Mike is being featured in the next issue of Auto Enthusiast magazine. Its about flippen time he's hit the magazine rack. Way to go Mike!
Last edited by stinger12; 08-05-2011 at 03:35 AM.
08-08-2011, 11:14 AM
#1960
Drifting
Jeremy--
All I can say is "Awesome" and keep it up... Can't wait until you are driving your vette!! I followed how you were cleaning all the old undercoating from underneath the body... What plans do you have for a "finish" to the underside of the body??
Thanks much
Rogman
All I can say is "Awesome" and keep it up... Can't wait until you are driving your vette!! I followed how you were cleaning all the old undercoating from underneath the body... What plans do you have for a "finish" to the underside of the body??
Thanks much
Rogman