
Rocker channel pics
 01-09-2008, 12:41 PM
#1
Pro

Thread Starter

A few pics I took after removing the driver's side rocker channel. Pretty glad the pass. side is solid as I'd hate to have to do it again. Thanks to redwingvette and NHvette for posting theirs as it gave me the courage to jump in. Rick


 01-09-2008, 01:23 PM
#2
Le Mans Master

I was wondering if you plan on fabricating your own repair pieces or will you try to find replacement metal elsewhere? The affected area at the rear of the rocker channel looks like some basic bends but the front does appear to have some curved surfaces. At any rate, if you removed all of this material in one or two days then you are obviously equipped to perform the necessary repairs. Be sure and post pics of the reapirs. I know I would enjoy seeing them.
Mudbone64
Mudbone64
 01-09-2008, 01:56 PM
#3
Pro
Thread Starter
Mudbone, Thanks for the encouragement. My plan was to do just as you say, Take it out, make the repairs and reinstall. It would take longer to get new ones than to fix the old parts. But I was just out there looking at them and I think it's too many patches to bother with. I counted them up and it was about 7 or 8 separate pieces that i'd have to make. It's worse in person when you can really look at it from every angle. I guess I'm going to order the new parts and wait. I think Caledonia has them. I have to start looking. Of course there's plenty of other stuff to do but I really want to get this fixed. Rick
01-09-2008, 04:30 PM
#4
Le Mans Master
I've heard about Caledonia before but I can't very much about them on the internet. I've also heard they have a catalogue.
By the way your moving along you should have this part of the project wrapped up by oh, Sunday night! Good luck and post some pics of your repairs.
Mudbone64
By the way your moving along you should have this part of the project wrapped up by oh, Sunday night! Good luck and post some pics of your repairs.
Mudbone64
01-09-2008, 04:54 PM
#5
Burning Brakes

Member Since: Nov 2006
Posts: 947
Likes: 0
Received 30 Likes
on
11 Posts
2022 C3 of the Year Finalist - Modified

I saw at Ebay Rocker channel -
Item number: 120200994803
http://cgi.ebay.com/ebaymotors/CORVE...spagenameZWDVW
Item number: 120208266809
http://cgi.ebay.com/ebaymotors/CORVE...spagenameZWDVW
Go to my thread and see how I fixed my birdcage:
http://forums.corvetteforum.com/show...ighlight=avner
Avner
Item number: 120200994803
http://cgi.ebay.com/ebaymotors/CORVE...spagenameZWDVW
Item number: 120208266809
http://cgi.ebay.com/ebaymotors/CORVE...spagenameZWDVW
Go to my thread and see how I fixed my birdcage:
http://forums.corvetteforum.com/show...ighlight=avner
Avner
Last edited by avner; 01-09-2008 at 05:03 PM.
01-09-2008, 05:51 PM
#6
Pro
Thread Starter
I saw at Ebay Rocker channel -
Item number: 120200994803
http://cgi.ebay.com/ebaymotors/CORVE...spagenameZWDVW
Item number: 120208266809
http://cgi.ebay.com/ebaymotors/CORVE...spagenameZWDVW
Go to my thread and see how I fixed my birdcage:
http://forums.corvetteforum.com/show...ighlight=avner
Avner
Item number: 120200994803
http://cgi.ebay.com/ebaymotors/CORVE...spagenameZWDVW
Item number: 120208266809
http://cgi.ebay.com/ebaymotors/CORVE...spagenameZWDVW
Go to my thread and see how I fixed my birdcage:
http://forums.corvetteforum.com/show...ighlight=avner
Avner
01-09-2008, 09:58 PM
#7
Burning Brakes

Your doing nice work, most people would have a heart attack seeing the damage,,
Anyway,, I went through a similar situation last winter and fabed all my parts up. The parts on ebay look interesting,,,but you still end up repairing old parts,, heres a couple pics,, I have more if your interested.
All four corners and rockers cost about $50. of steel.
Anyway,, I went through a similar situation last winter and fabed all my parts up. The parts on ebay look interesting,,,but you still end up repairing old parts,, heres a couple pics,, I have more if your interested.
All four corners and rockers cost about $50. of steel.

 01-10-2008, 01:35 PM
#9
Pro
Thread Starter
Nice job Michael. Looks like a hard job but like redwing says, Just get busy. It's worse thinking about it than to get going and do it.
I talked to Gary at Caledonia and he's only got the channel inserts. I really wanted the oem style channels and pillar supports but nobody has them. Have to get them out of a parts car. Gary says they may make them some day but He's working on producing complete MidYear birdcages and is busy with that.The ebay links Avner sent me looked tempting and are better than what I have but are apparently far from perfect.
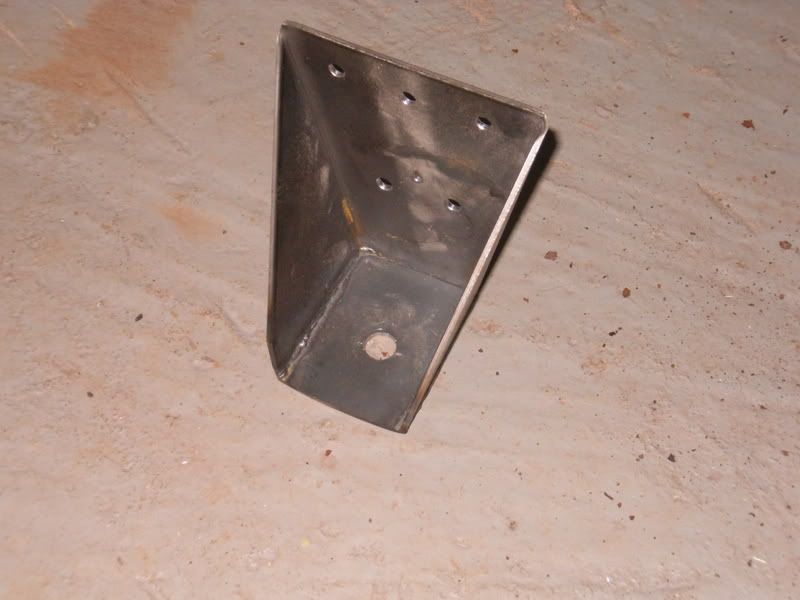
I've decided to repair what I have. Spent the morning making 9 patch pieces. I took some pics but wont have them up until later. They are all made but now I have to prep the old channel and get it ready for welding. rICK
I talked to Gary at Caledonia and he's only got the channel inserts. I really wanted the oem style channels and pillar supports but nobody has them. Have to get them out of a parts car. Gary says they may make them some day but He's working on producing complete MidYear birdcages and is busy with that.The ebay links Avner sent me looked tempting and are better than what I have but are apparently far from perfect.
I've decided to repair what I have. Spent the morning making 9 patch pieces. I took some pics but wont have them up until later. They are all made but now I have to prep the old channel and get it ready for welding. rICK
01-10-2008, 09:18 PM
#10
Pro
Thread Starter
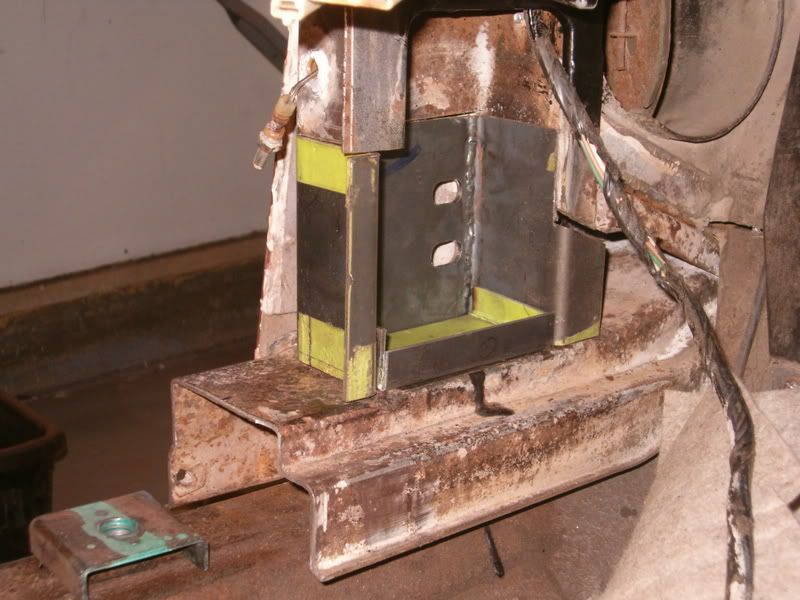
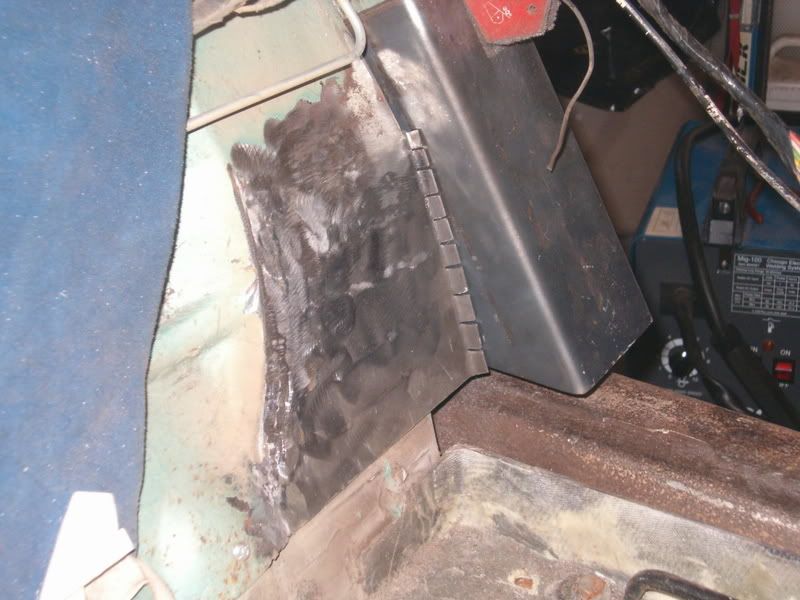
Fixed the rocker channel today. here's a few more pics.
If you do this then get a big box of wheaties and eat the whole box. You'll probably need them... Then you can use the cardboard to make the templates. heh
I'm just about the worst welder in the world so don't laugh.


If you do this then get a big box of wheaties and eat the whole box. You'll probably need them... Then you can use the cardboard to make the templates. heh
I'm just about the worst welder in the world so don't laugh.
01-11-2008, 07:21 PM
#12
Racer

Member Since: Feb 2006
Location: Valley AL
Posts: 361
Likes: 0
Received 0 Likes
on
0 Posts
[QUOTE=69L46vert;1563567164]Fixed the rocker channel today. here's a few more pics.
If you do this then get a big box of wheaties and eat the whole box. You'll probably need them... Then you can use the cardboard to make the templates. heh
I'm just about the worst welder in the world so don't laugh.
[QUOTE]
You are doing some good work. Part of your welding problems are due to the galvanized metal that you are using. Plain old mild steel will weld and clean up much better. Good Luck.
01-12-2008, 08:15 AM
#14
Pro
Thread Starter
Thanks tobyte1, The galvy was all I had on hand that matched the thickness. I ground the galvy away before welding. I started to get a little better at it towards the end. I used mig but the original material is about .100" thick so one could use a stick welder I think.
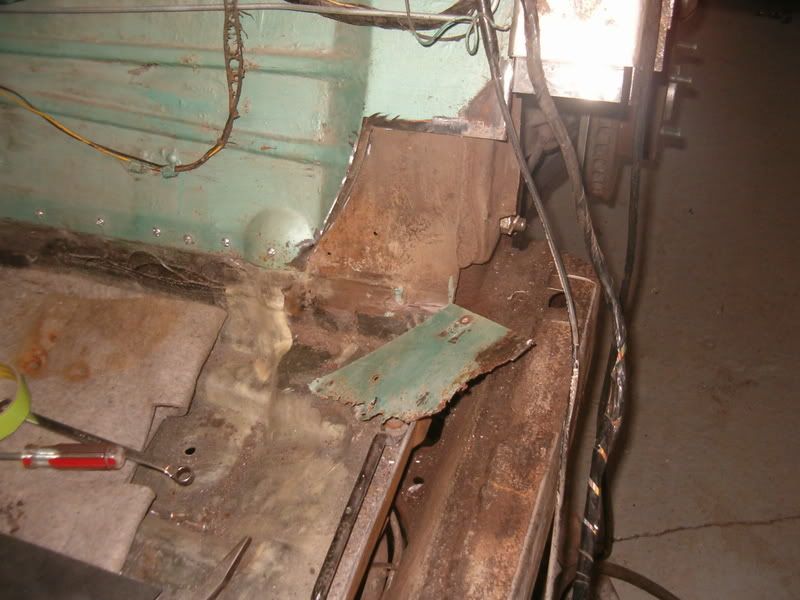
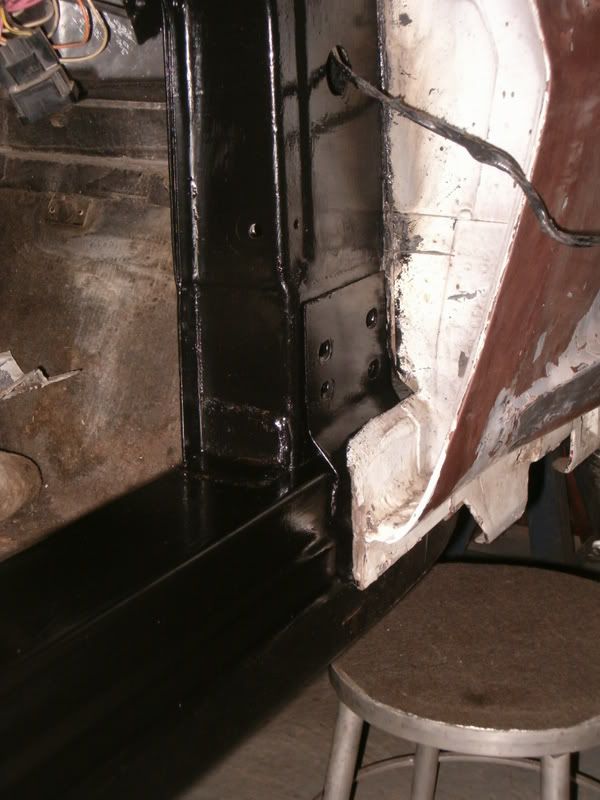
Miles, check the 3rd picture. There you will see the portion of the B pillar fiberglass that I removed to get access to actual steel b pillar and rear of the rocker channel. The rear was much easier than the front though. I used the AIM to see how it was put together. Once the fiberglass was removed I simply cut the rear steel b pillar above the rusted area with a sawzall but in the front I drilled out the spotwelds that held the A pillar "reinforcement" to the A pillar and left the reinforcement attached to the rocker channel so that it all came out in one piece.
I didn't work on it yesterday but today I should be able to blast it and get a coat of epoxy primer on. Rick
01-12-2008, 06:42 PM
#15
Pro
Thread Starter
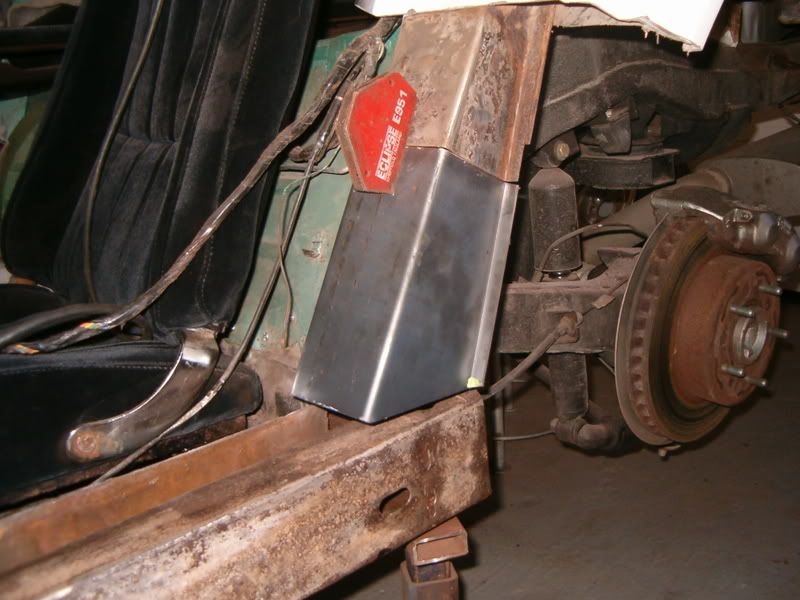
sandblasted and primed today. here are 3 pics, rick


01-13-2008, 09:05 AM
#16
Burning Brakes
looking good !!,, you will really see the differance after it is all welded in place, the body becomes so solid !!!!!! you wonder how dangerous it would have been in a colision with a rusted birdcage,, the car would have crumbled, This still gives me goosebumps thinking the chances I'v taken without knowing.
01-17-2008, 01:56 PM
#17
Pro
Thread Starter
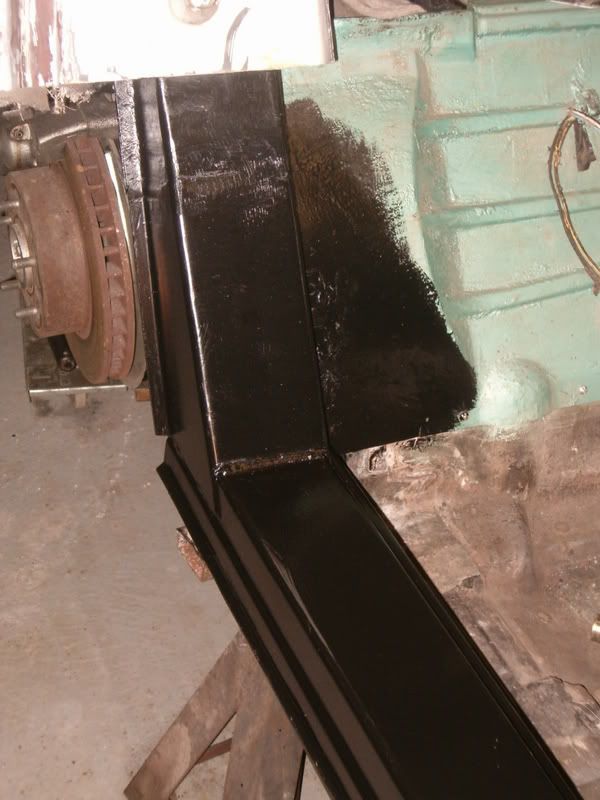
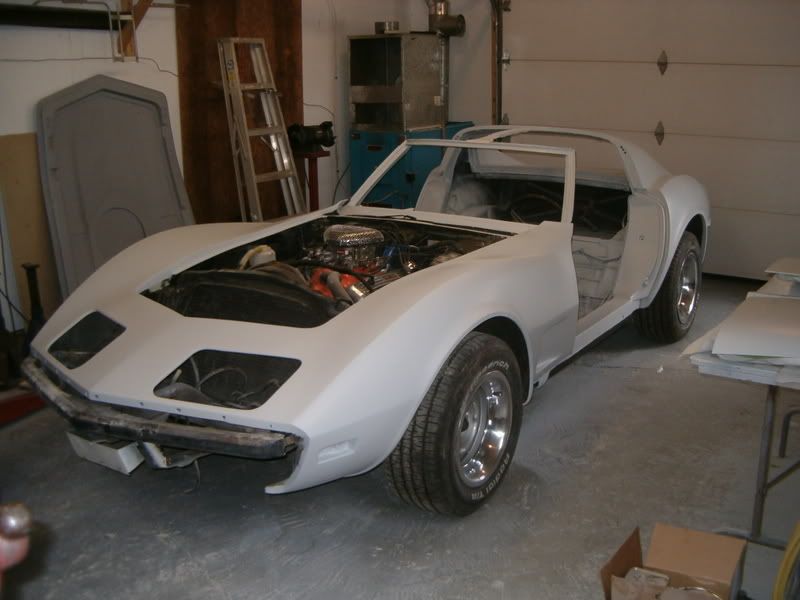
Rocker channel is back where it belongs and the body is back on the dolly.
Michel, Please post some more of your pics if you get time, Rick


Michel, Please post some more of your pics if you get time, Rick
01-17-2008, 06:48 PM
#19
Burning Brakes
I'm posting a couple more for ya,, but you Know as I was looking at them it was like looking at yours,,, lol,,

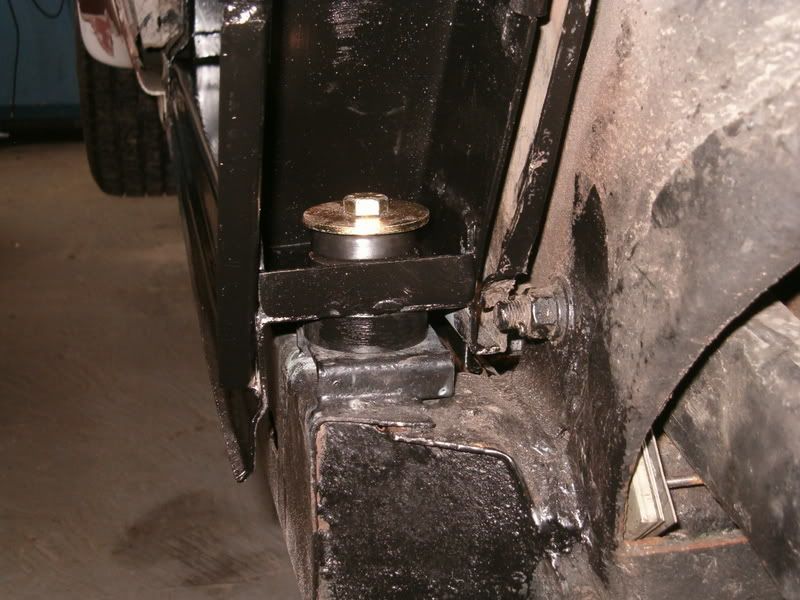
This is the #1 mount bracket
This one is for encouragement,,, its what your working for !!!

This is the #1 mount bracket
This one is for encouragement,,, its what your working for !!!
