



1972 outside mirrors

Thread Starter
Advanced

Joined: Sep 2005
Posts: 61
Likes: 0
 1972 outside mirrors
last year i bought new outside mirrors for my car and now they are loose as can be. I plan on getting new ones BUTTTTTTT, i dont want to buy the same junk i got last time. Anyone been through this? Have any idea who has a good mirror the will hold up longer than a few months? Thanking you in advance. Ray

Burning Brakes


Joined: May 2007
Posts: 1,108
Likes: 11
From: No Prov RI
Trim parts repro mirrors at Zip............... 
http://www.zip-corvette.com/ProductDetails/Kits/KitDetails.aspx?KitItemID={89716124-ec49-43f1-ac96-df47aa391bf1}&gid={8520b985-55ed-4cf2-ac93-b247df43307a}&GroupName=68-79+Outside+Mirror&pname=68-74+Outside+Mirror+Set+(U.S.+Made+Reprodu ction)&Referer=&Alias=&ptct=SGR-SR&CTitle=&
 ..........doesn't look like your normal link but it works
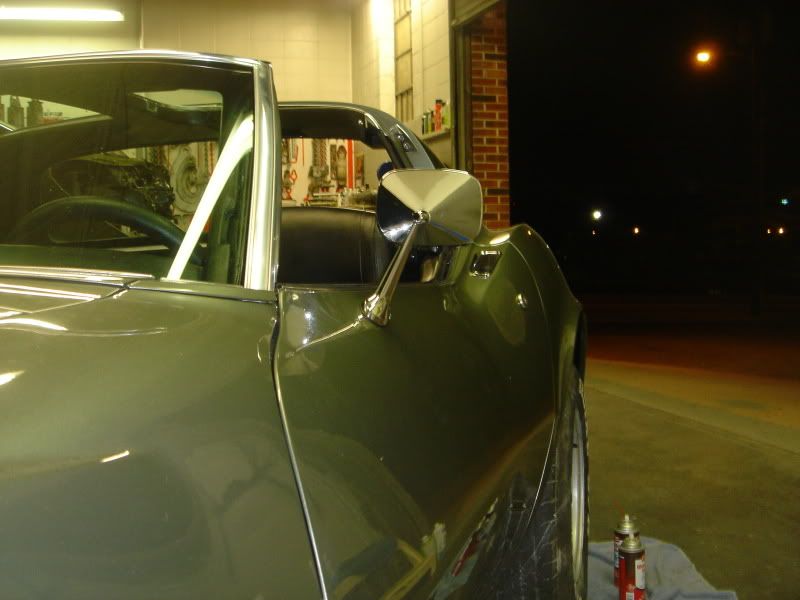

Hammadown
http://www.zip-corvette.com/ProductDetails/Kits/KitDetails.aspx?KitItemID={89716124-ec49-43f1-ac96-df47aa391bf1}&gid={8520b985-55ed-4cf2-ac93-b247df43307a}&GroupName=68-79+Outside+Mirror&pname=68-74+Outside+Mirror+Set+(U.S.+Made+Reprodu ction)&Referer=&Alias=&ptct=SGR-SR&CTitle=&
..........doesn't look like your normal link but it works Hammadown
Last edited by hammadown; Mar 7, 2010 at 07:19 PM.

Race Director

Joined: Jul 2001
Posts: 15,892
Likes: 42
Many of the present day aftermarket mirrors wiggle due to a manufacturing error on the base (the piece that attaches to the door)
The end are too thick and prevents the mirror base from sitting flat on the gasket. Five minutes with a file will fix this.
The end are too thick and prevents the mirror base from sitting flat on the gasket. Five minutes with a file will fix this.

Melting Slicks

Joined: Mar 2008
Posts: 2,023
Likes: 6
From: Austin Tx
If the mirror is flopping at the ball joint, you can tighten it up.
There was a thread not to long ago that showed how to do it. In the thread it is about original mirrors, they use rivets to hold the connection together, and the fix involves inserting shims to tighten it up.
Mine were repros, and they use screws that hold a plastic washer over the ball joint. My washers had broken, replaced the washers, retightened, and they have been very tight ever since.
There was a thread not to long ago that showed how to do it. In the thread it is about original mirrors, they use rivets to hold the connection together, and the fix involves inserting shims to tighten it up.
Mine were repros, and they use screws that hold a plastic washer over the ball joint. My washers had broken, replaced the washers, retightened, and they have been very tight ever since.

Burning Brakes
Joined: Jun 2008
Posts: 1,086
Likes: 1
From: Michigan
As mentioned there is a thread about fixing the floppy OSRV mirror issue. It is a quite common problem. I did mine and it has been fine since last summer. I have this fix with pictures in a .pdf file. If you PM me your email I can send it to you.
The only suggestion I have about removing the glass is to use mineral spirits instead of the gasoline mentioned. It will come off sooner (mine took 5 hours and the glass just fell off) and it is safer.
C3 (1968 to 1979) “head flopping” chrome mirror repair
2 different chrome mirrors used during this period. 1968-74 large
head mirror with glass measuring 3 9/16 x 5” and 1975-79 wide
head mirror with glass measuring 3 3/8 x 6” - Rivets: flat-head for
‘69 and round-head for ‘77 Mirror examples pictured are
GM3914529 (1969) and GM3913063 (1977)
(One was already done before I started taking pictures)
Glass is dated J-AX-9 (October 1969) and 6-DMI-7 (June 1977)
1. Soak mirror in mineral spirits
for 24 hours. It is
important to put enough
to completely cover the
whole head. This allows
the gasoline to penetrate
to the silicone.
(keep it outside and
covered - paint thinner
may also be used ....)
I use heavy duty aluminum
foil in a plastic
dishpan for soaking.
2. After the glass has loosened, it will fall away. If not, very carefully
pull it away from the housing. If the glass won’t come free, let
it soak some more.
3. After removing the glass, clean off the silicone residue from the
back of the glass and from the 4 mounting pods on the housing.
Also, clean off the plate and rivets that hold the mirror post ball in
place. This area needs to be completely clean.
(at this stage, some have used a ball peen hammer to hammer the
rivet into place and a center punch to expand and tighten down the
rivet. This may not work, and if it does, it may only be a temporary
fix ... )
4. Fashion a “shim” from some spare sheet metal. The open end in
the “shim” should be approximately the width of one of the rivets.
The bottom opening in the “shim” should be slightly wider than the
open end. With a pair of pliers, insert the shim between the head of
the rivet and the plate. After you get it started, use a small hammer
to finish securing the shim. When it’s all the way inserted, use a pair
of needle nose pliers to pinch the open ends of the shim together.
This will seat the shim.
5. When seated, cut
the excess from the
shim. Use JBWeld
around the edge of
the shim and the rivet
head and let the
JBWeld cure for at
least 48 hours. After
curing, add a high
strength epoxy over
the entire shim and rivet area. Give the epoxy a couple days to cure.
This may be overkill, but you sure don’t want to do this again in your
lifetime. If you’ve never used JBWeld (the longer it cures, the
stronger the bond), there are only 2 rules to remember ...
Rule 1: be PATIENT !!
Rule 2: if you’re not patient, see Rule 1.
(Before the next
step begins, it’s a
good time to clean
& chrome polish
around the edges
of the mirror housing
before the
glass is reinstalled)
6. After the
JBWeld and Epoxy have completely cured, apply a RTV primer (Locktite
or Permatex brand) to both glass and the 4 housing posts where
contact will be made. Then apply a good bead of RTV to each of the
4 posts and press the mirror glass into place. Put a thick, clean rag
on the glass, add a little weight and allow it to cure for at least 24
hours.
Note: pictures show 1 of each mirror - the ‘75-79 mirror (right)
having a cured shim in place ... and, a before-during-and-after with
the ‘68-74 mirror.
5 minutes to get the mirror housing soaking in gasoline
24 hours soaking in gasoline
20 minutes to clean up, install the shim and the JBWeld
48 hours to allow JBWeld to cure
5 minutes to mix and apply the Epoxy cement
48 hours to allow Epoxy cement to cure
20 minutes to clean and chrome polish the housing
10 minutes to prime and apply the RTV
24 hours to allow the RTV to cure
Total time to repair a mirror .... 1 hour work, 6 days waiting
The only suggestion I have about removing the glass is to use mineral spirits instead of the gasoline mentioned. It will come off sooner (mine took 5 hours and the glass just fell off) and it is safer.
C3 (1968 to 1979) “head flopping” chrome mirror repair
2 different chrome mirrors used during this period. 1968-74 large
head mirror with glass measuring 3 9/16 x 5” and 1975-79 wide
head mirror with glass measuring 3 3/8 x 6” - Rivets: flat-head for
‘69 and round-head for ‘77 Mirror examples pictured are
GM3914529 (1969) and GM3913063 (1977)
(One was already done before I started taking pictures)
Glass is dated J-AX-9 (October 1969) and 6-DMI-7 (June 1977)
1. Soak mirror in mineral spirits
for 24 hours. It is
important to put enough
to completely cover the
whole head. This allows
the gasoline to penetrate
to the silicone.
(keep it outside and
covered - paint thinner
may also be used ....)
I use heavy duty aluminum
foil in a plastic
dishpan for soaking.
2. After the glass has loosened, it will fall away. If not, very carefully
pull it away from the housing. If the glass won’t come free, let
it soak some more.
3. After removing the glass, clean off the silicone residue from the
back of the glass and from the 4 mounting pods on the housing.
Also, clean off the plate and rivets that hold the mirror post ball in
place. This area needs to be completely clean.
(at this stage, some have used a ball peen hammer to hammer the
rivet into place and a center punch to expand and tighten down the
rivet. This may not work, and if it does, it may only be a temporary
fix ... )
4. Fashion a “shim” from some spare sheet metal. The open end in
the “shim” should be approximately the width of one of the rivets.
The bottom opening in the “shim” should be slightly wider than the
open end. With a pair of pliers, insert the shim between the head of
the rivet and the plate. After you get it started, use a small hammer
to finish securing the shim. When it’s all the way inserted, use a pair
of needle nose pliers to pinch the open ends of the shim together.
This will seat the shim.
5. When seated, cut
the excess from the
shim. Use JBWeld
around the edge of
the shim and the rivet
head and let the
JBWeld cure for at
least 48 hours. After
curing, add a high
strength epoxy over
the entire shim and rivet area. Give the epoxy a couple days to cure.
This may be overkill, but you sure don’t want to do this again in your
lifetime. If you’ve never used JBWeld (the longer it cures, the
stronger the bond), there are only 2 rules to remember ...
Rule 1: be PATIENT !!
Rule 2: if you’re not patient, see Rule 1.
(Before the next
step begins, it’s a
good time to clean
& chrome polish
around the edges
of the mirror housing
before the
glass is reinstalled)
6. After the
JBWeld and Epoxy have completely cured, apply a RTV primer (Locktite
or Permatex brand) to both glass and the 4 housing posts where
contact will be made. Then apply a good bead of RTV to each of the
4 posts and press the mirror glass into place. Put a thick, clean rag
on the glass, add a little weight and allow it to cure for at least 24
hours.
Note: pictures show 1 of each mirror - the ‘75-79 mirror (right)
having a cured shim in place ... and, a before-during-and-after with
the ‘68-74 mirror.
5 minutes to get the mirror housing soaking in gasoline
24 hours soaking in gasoline
20 minutes to clean up, install the shim and the JBWeld
48 hours to allow JBWeld to cure
5 minutes to mix and apply the Epoxy cement
48 hours to allow Epoxy cement to cure
20 minutes to clean and chrome polish the housing
10 minutes to prime and apply the RTV
24 hours to allow the RTV to cure
Total time to repair a mirror .... 1 hour work, 6 days waiting

Team Owner


Joined: Jul 2004
Posts: 40,440
Likes: 793
From: Redondo Beach, California
One culprit behind a floppy mirror problem can be a car cover.
For instance, if you take the palm of your had, place it on the mirror glass and push forward, you can bend the friction plate inside the mirror thereby creating a floppy mirror. This same thing will happen if, when you remove your car cover, you inadvetently tug the cover forward while the mirror is still in the car cover pocket.
For instance, if you take the palm of your had, place it on the mirror glass and push forward, you can bend the friction plate inside the mirror thereby creating a floppy mirror. This same thing will happen if, when you remove your car cover, you inadvetently tug the cover forward while the mirror is still in the car cover pocket.
Corvette Stories
The Best of Corvette for Corvette Enthusiasts

5 Best & 5 Worst Corvette Daily Drivers
Joe Kucinski
The Headlights of Every Corvette Generation Explained
Joe Kucinski
5 Best & 5 Most Overrated Corvette Track Packages of All Time!
Joe Kucinski
Every 2027 Corvette Engine Explained
Joe Kucinski
Designer Imagines A Corvette That Looks More Like a Corvette Than the Corvette
Verdad Gallardo
10 Ugly Corvettes That We Still Kinda Love
Joe Kucinski
Top 10 Most Expensive Corvettes Ever Sold on Bring A Trailer
Brett Foote
10 Things Every Corvette Owner Needs (2026 Edition)
Michael S. Palmer
8 Most "Only Corvette Owners Understand" Quirks and Problems
Pouria Savadkouei
Le Mans Master


Joined: Jan 2007
Posts: 5,485
Likes: 7
From: Peekskill NY


Platinum Supporting Vendor


Joined: May 2004
Posts: 2,309
Likes: 30
From: Mechanicsville VA
Trim parts repro mirrors at Zip...............
http://www.zip-corvette.com/ProductDetails/Kits/KitDetails.aspx?KitItemID={89716124-ec49-43f1-ac96-df47aa391bf1}&gid={8520b985-55ed-4cf2-ac93-b247df43307a}&GroupName=68-79+Outside+Mirror&pname=68-74+Outside+Mirror+Set+(U.S.+Made+Reprodu ction)&Referer=&Alias=&ptct=SGR-SR&CTitle=&
..........doesn't look like your normal link but it works
Hammadown
http://www.zip-corvette.com/ProductDetails/Kits/KitDetails.aspx?KitItemID={89716124-ec49-43f1-ac96-df47aa391bf1}&gid={8520b985-55ed-4cf2-ac93-b247df43307a}&GroupName=68-79+Outside+Mirror&pname=68-74+Outside+Mirror+Set+(U.S.+Made+Reprodu ction)&Referer=&Alias=&ptct=SGR-SR&CTitle=&
..........doesn't look like your normal link but it works Hammadown
__________________
Zip Corvette Parts and Accessories - Corvettes Are All We Do!
Selling Quality Corvette Parts & Accessories Since 1977
Corvette Parts Catalogs | Subscribe to our newsletter
Corvette Tech Articles
Zip Corvette Parts and Accessories - Corvettes Are All We Do!
Selling Quality Corvette Parts & Accessories Since 1977
Corvette Parts Catalogs | Subscribe to our newsletter
Corvette Tech Articles
