
1971 Journey
 02-18-2013, 08:03 PM
#201
Melting Slicks

Thread Starter


Then fill it up all the way.
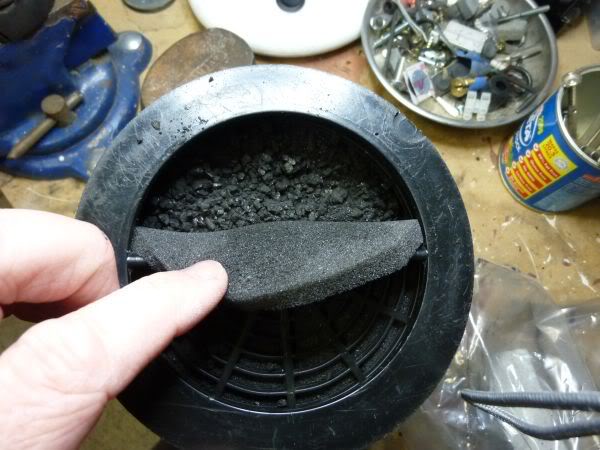
And put the filter in so it sits under the outer lip of the canister.
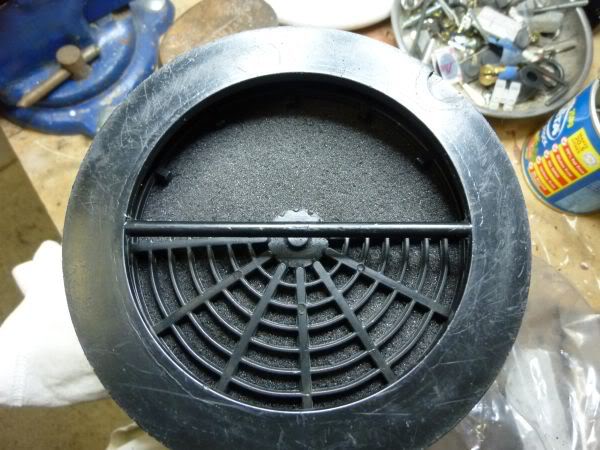
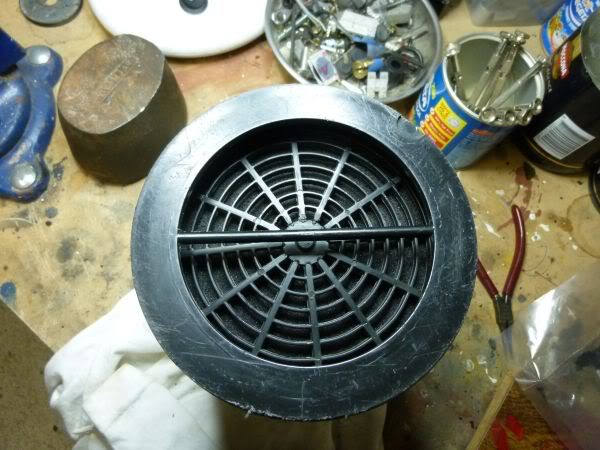
Put the grill that was cut out before back in and glue it in place.
Then insert the external filter.
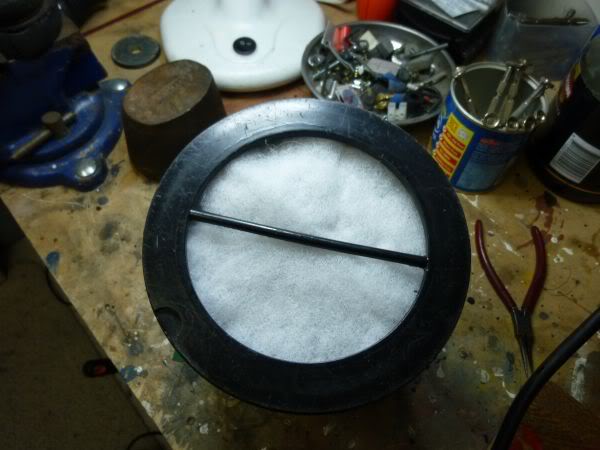
And put the filter in so it sits under the outer lip of the canister.
Put the grill that was cut out before back in and glue it in place.
Then insert the external filter.
Last edited by CraigH; 04-09-2023 at 09:14 PM.
 02-18-2013, 08:05 PM
#202
Melting Slicks
Thread Starter
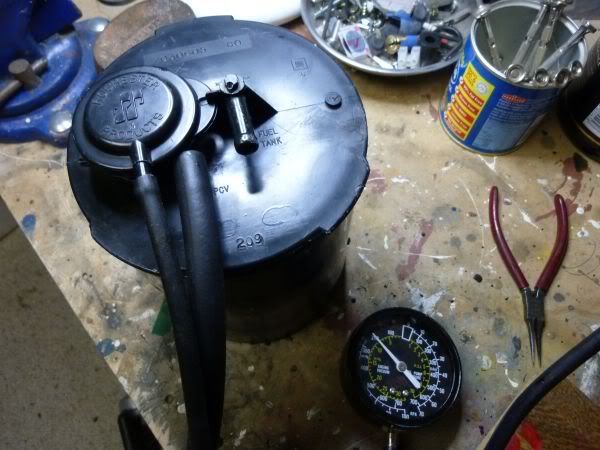
Final test of the operation.
1) Vacuum on the PCV barb.
2) Ported vacuum on the carb barb.
Valve Closed - no fumes evacuated on carb barb
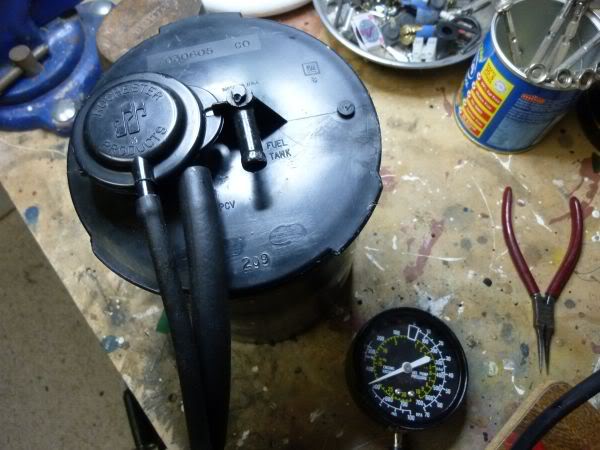
Valve Open - fumes evacuated on carb barb
1) Vacuum on the PCV barb.
2) Ported vacuum on the carb barb.
Valve Closed - no fumes evacuated on carb barb
Valve Open - fumes evacuated on carb barb
Last edited by CraigH; 07-20-2023 at 07:45 AM.
02-18-2013, 08:06 PM
#203
Melting Slicks
Thread Starter
And being the type of person I am I spent a fair few more hours adjusting the passenger side T-Top during the week.
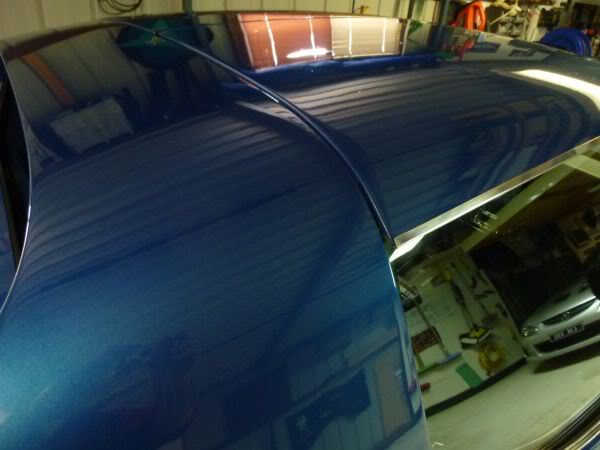
It seems to be as good as it will get.
I event checked the radius of each top and they are not the same on the outer edge - I suppose thats what 40 years of exposure to the elements will do to fiberglass.
It seems to be as good as it will get.
I event checked the radius of each top and they are not the same on the outer edge - I suppose thats what 40 years of exposure to the elements will do to fiberglass.
Last edited by CraigH; 07-20-2023 at 07:53 AM.
02-18-2013, 08:07 PM
#204
Melting Slicks
Thread Starter
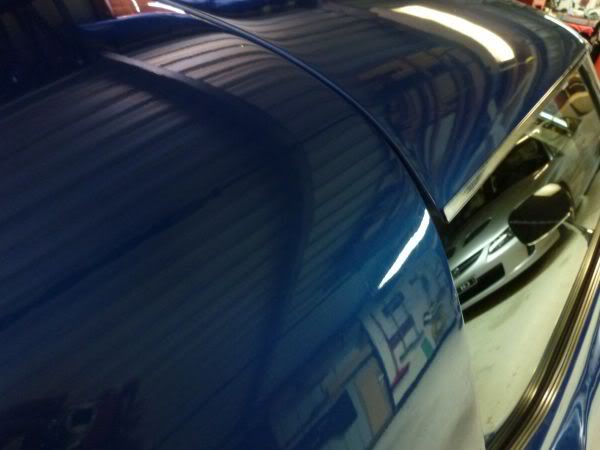
The rear window glass had a number of bad scuff and scratch marks in it.
Probably from when the car was being sanded for paint at some stage in the last 40 year........ Why you would not just remove it - who knows.
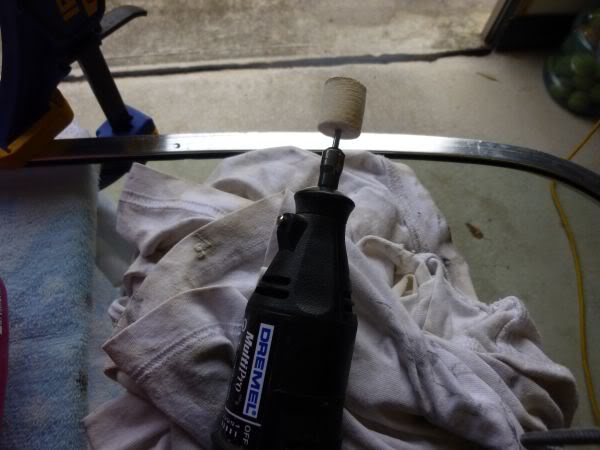
I had purchased a glass repair kit with some special abrasive powder that you make into a paste then using polishing bobs you work the marks.

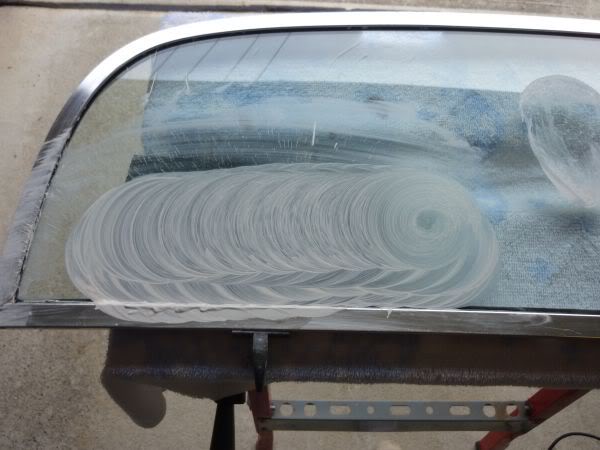
A combination of Dremell and drill and it got rid of all but a few deeper marks.
Cleaned up and back in the car.
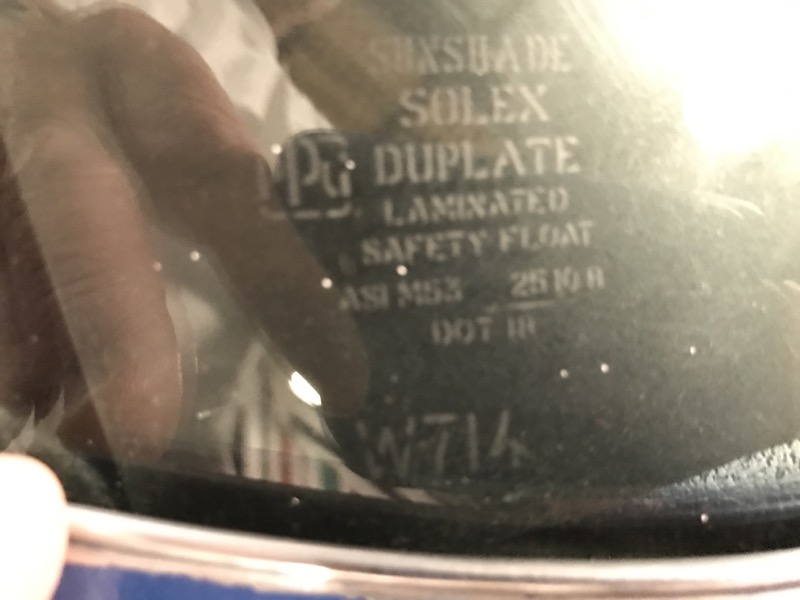
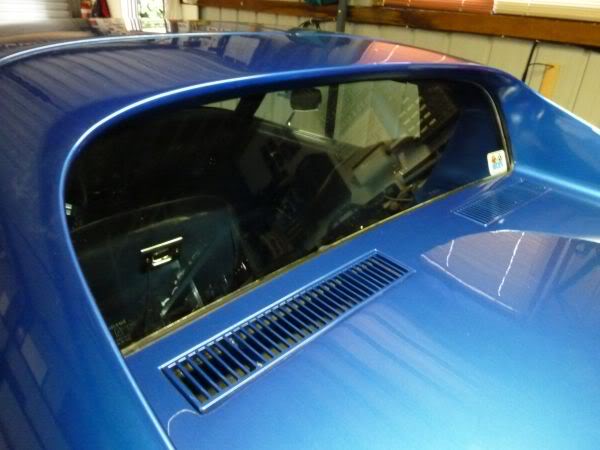
Have not had the glass in since last October, prefer it out all the time but now its clean and looking good I will try it in for a while.
Probably from when the car was being sanded for paint at some stage in the last 40 year........ Why you would not just remove it - who knows.
I had purchased a glass repair kit with some special abrasive powder that you make into a paste then using polishing bobs you work the marks.
A combination of Dremell and drill and it got rid of all but a few deeper marks.
Cleaned up and back in the car.
Have not had the glass in since last October, prefer it out all the time but now its clean and looking good I will try it in for a while.
Last edited by CraigH; 07-20-2023 at 07:52 AM.
02-20-2013, 05:55 AM
#205
Melting Slicks
Thread Starter
Went for a drive with my wife this morning looking for a new lounge for the family room and decided I need to look at the idle and get it down a little.
Was sitting at over 850+ and did not matter what you did with the idle stop screw it would not go lower.
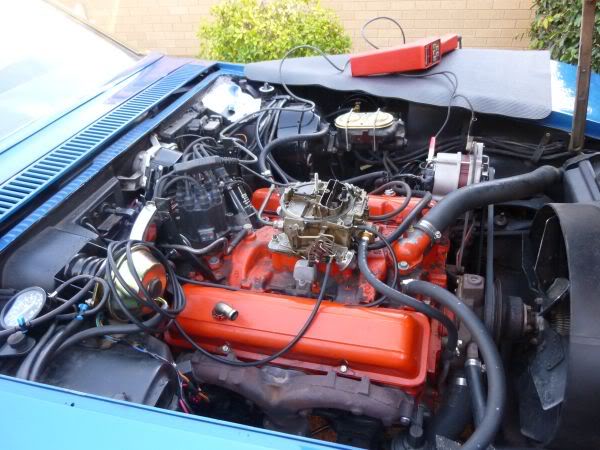
So I followed some of the tuning documents on the Corvette Forum.
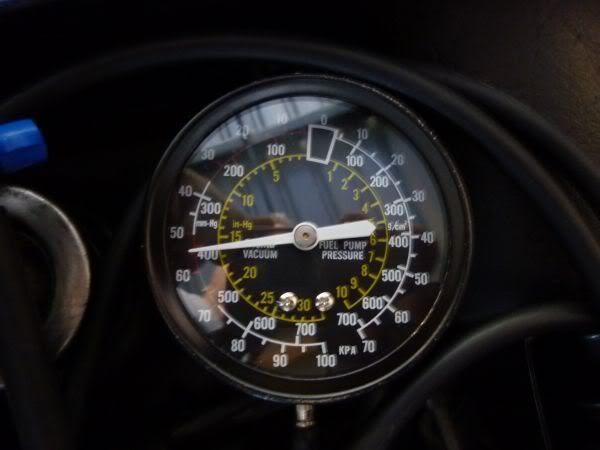
The biggest change was to turn the mixture screws in a fair way to get maximum vacuum in the manifold.
Also some minor adjustment of the initial timing.
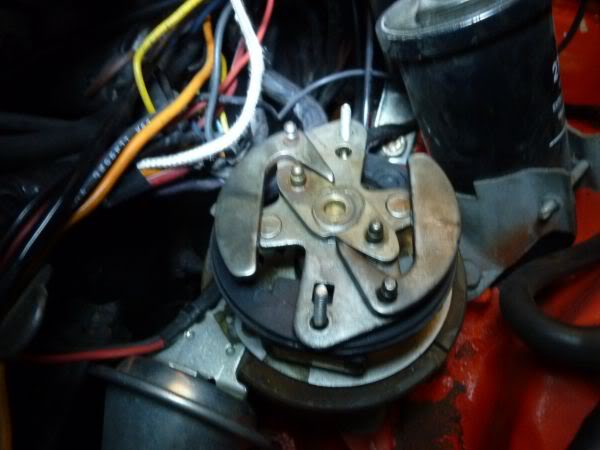
Also checked out how much vacuum and mechanical advance there was and that they were coming in as expected.
Was sitting at over 850+ and did not matter what you did with the idle stop screw it would not go lower.
So I followed some of the tuning documents on the Corvette Forum.
The biggest change was to turn the mixture screws in a fair way to get maximum vacuum in the manifold.
Also some minor adjustment of the initial timing.
Also checked out how much vacuum and mechanical advance there was and that they were coming in as expected.
Last edited by CraigH; 07-20-2023 at 07:49 AM.
02-20-2013, 05:56 AM
#206
Melting Slicks
Thread Starter
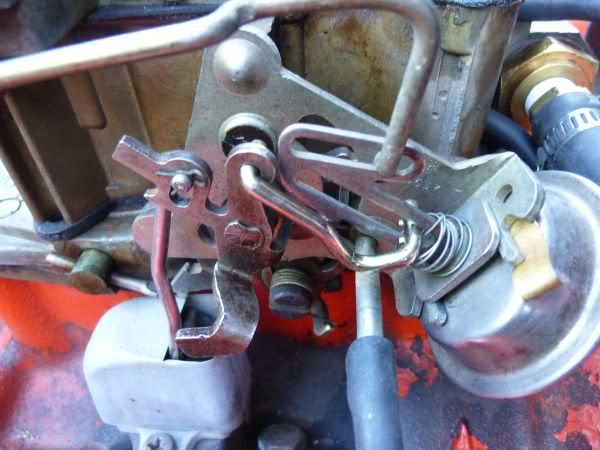
While I was in there I also fitted the correct choke linkage I had picked up in the US and removed the temporary one I had made from a piece of coat hanger.
Last edited by CraigH; 07-20-2023 at 07:54 AM.
02-20-2013, 05:56 AM
#207
Melting Slicks
Thread Starter
I did some more research and decided to follow Lars method to set up the timing.
- 36-38 Degrees of base + Mechanical Advance all in by 2,500 – 2,800 rpm.
- Plus Vacuum Advance to a potential max of 52 degrees
I checked my Vacuum Canister and its a B9
Vacuum Canister B9 16-18 Degree Advance
Non-HEI Distributors:
P/N ID# Application Starts @ “Hg Max Adv
(Distr. Degrees @ “Hg.)
VC1605 B9 1965 impala 396 Exc. High Perf. 7-9 10.3 @ 16-18
1965 327 All Exc. FI
1969 327 Camaro, Chevelle, Impala
1969-70 Corvette 350 Exc. High Perf.
1969-70 350 4-bbl Premium Fuel
1970 350 Camaro, Chevelle, Impala High Perf.
1971-72 350 2-bbl AT
1971-72 307 All
So first step is to set total timing at 36
The easiest way is to remove the springs from the mechanical advance otherwise I would have to be revving the engine way too much.
With the timing light set at 36 degree advance I re-timed the car and checked it was constantly at that level through the rev range.
Put the springs back on and then checked the timing to see when the springs allowed it to come in.
Was not all in by 2800 so I will order some lighter springs to adjust that.
Next I put the vacuum canister back on and reset the idle.
Went through the process of adjusting the idle mixture screws to get best revs and vacuum.
All done and took it for a good drive. Feels much better and will be interested to see what the softer springs and earlier advance do.
Last edited by CraigH; 07-20-2023 at 07:48 AM.
02-20-2013, 05:57 AM
#208
Melting Slicks
Thread Starter
I am looking for a replacement carb with correct numbers 7041212 and produced early in 1971.
That will give me the correct model for my car.
Have found a few in the US and will get rebuilt, plated etc over there.
That will give me the correct model for my car.
Have found a few in the US and will get rebuilt, plated etc over there.
02-20-2013, 05:58 AM
#209
Melting Slicks
Thread Starter
Whats so good about this hobby - There is always something to learn.
Was looking through the figures I had from re timing the car and I realized that the centrifugal advance was 32 of the 36 Degrees that I had set up.
Did some research and found that it should not be skewed that much.
Should be 18-24 mechanical dependent on what model distributor I have.
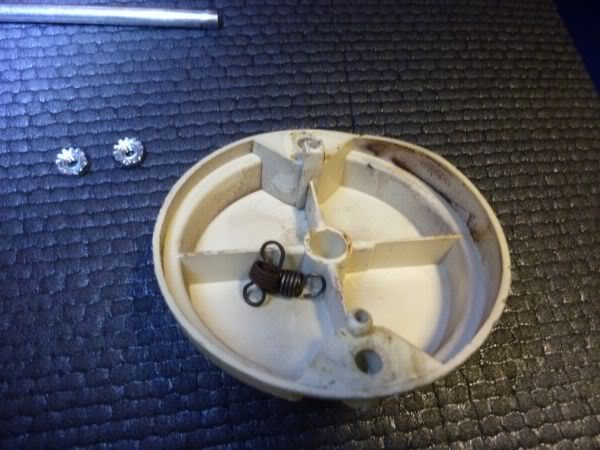
I pulled it apart again and had a closer look and it turns out the Stop Bushing and Retainer Clip were both missing allowing the weights to move further out causing the higher advance.
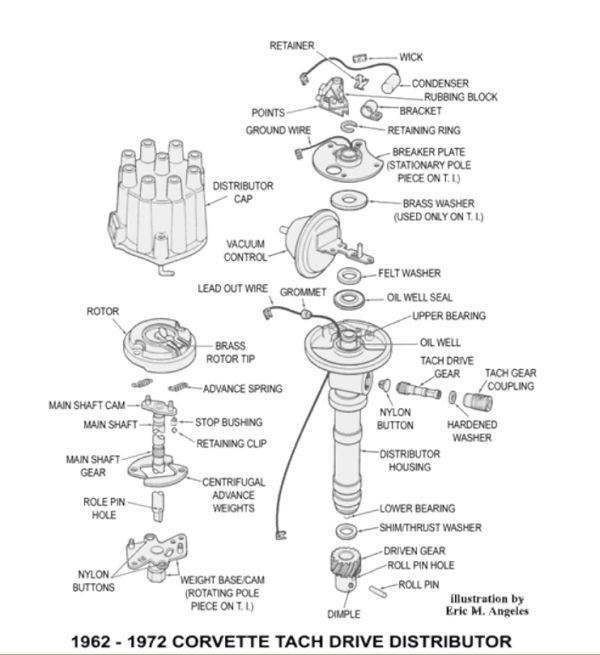
I put a short piece of plastic tube on it as a temporary fix and got to be
12 degrees Base
24 degrees Mechanical
---------------------
36 Degrees Total
I see that the kits with looser springs come with a new bush so have that on my list.
Was looking through the figures I had from re timing the car and I realized that the centrifugal advance was 32 of the 36 Degrees that I had set up.
Did some research and found that it should not be skewed that much.
Should be 18-24 mechanical dependent on what model distributor I have.
I pulled it apart again and had a closer look and it turns out the Stop Bushing and Retainer Clip were both missing allowing the weights to move further out causing the higher advance.
I put a short piece of plastic tube on it as a temporary fix and got to be
12 degrees Base
24 degrees Mechanical
---------------------
36 Degrees Total
I see that the kits with looser springs come with a new bush so have that on my list.
Last edited by CraigH; 07-20-2023 at 07:46 AM.
02-20-2013, 05:58 AM
#210
Melting Slicks
Thread Starter
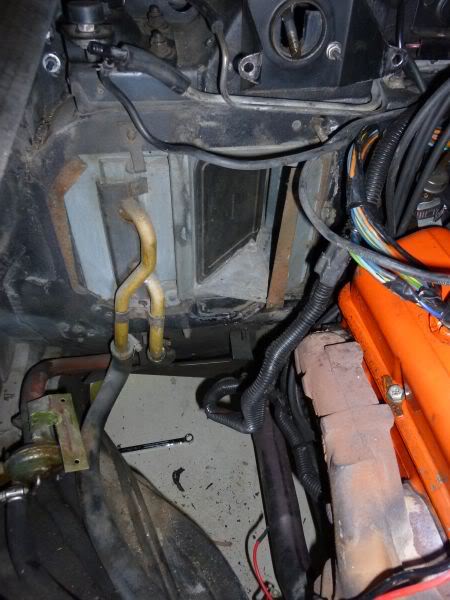
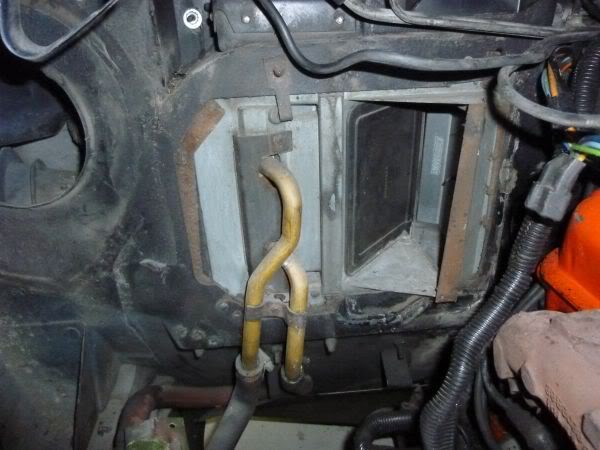
Decided it was time to take out the old A/C unit on the firewall. Just makes access difficult and does not work anyway.
After reading all the stories about what a pain it would be I set about doing it and 30 minutes later all gone.
First step remove egg crate grill
The view through the opening shows some bolts that need removing.
There are are a number of bolts around the unit that connect the 2 halves together as well as ones that connect it to the firewall.
Last edited by CraigH; 07-20-2023 at 07:55 AM.
02-20-2013, 05:59 AM
#211
Melting Slicks
Thread Starter
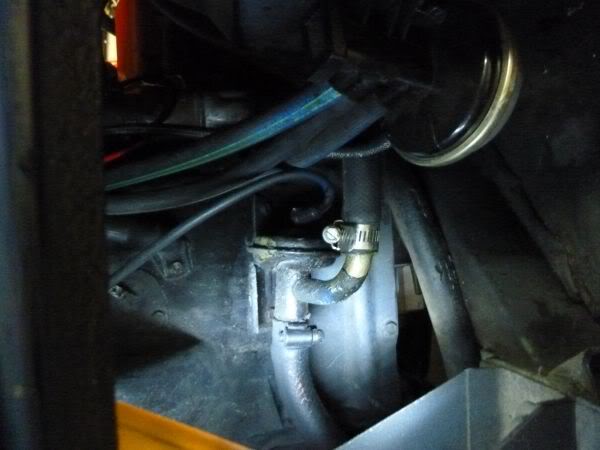
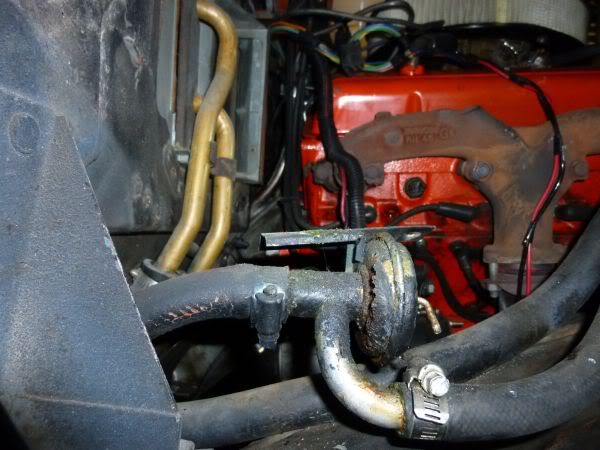
First remove the vacuum water tap from the housing.
Then remove the blower motor and fan.
Up top take off the vacuum solenoid for the wiper door to give more working room and start to pry it away from the firewall.
Came away very easily.
Then I pried in half and removed each half separately from engine bay.
Then remove the blower motor and fan.
Up top take off the vacuum solenoid for the wiper door to give more working room and start to pry it away from the firewall.
Came away very easily.
Then I pried in half and removed each half separately from engine bay.
Last edited by CraigH; 04-10-2023 at 09:46 PM.
02-20-2013, 06:00 AM
#212
Melting Slicks
Thread Starter
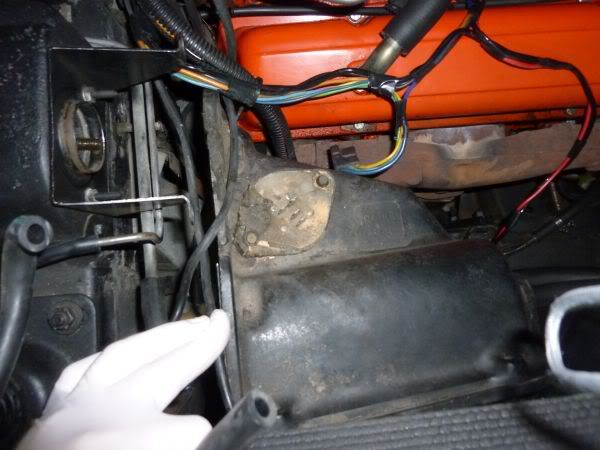
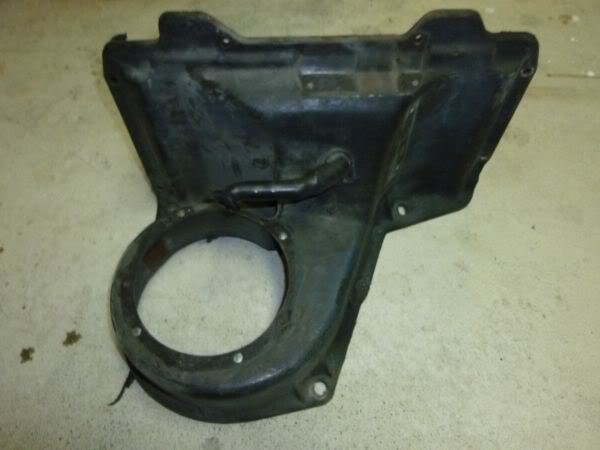
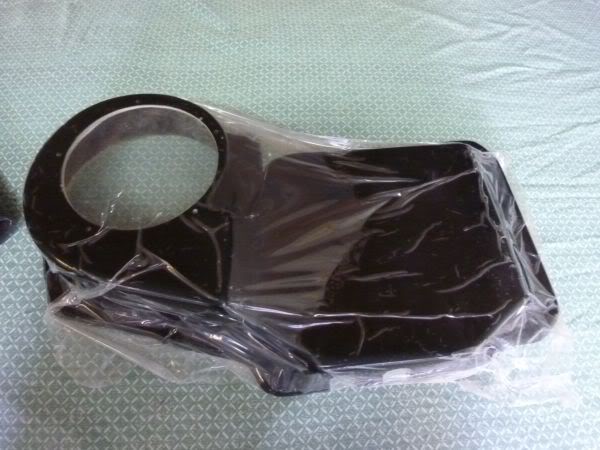
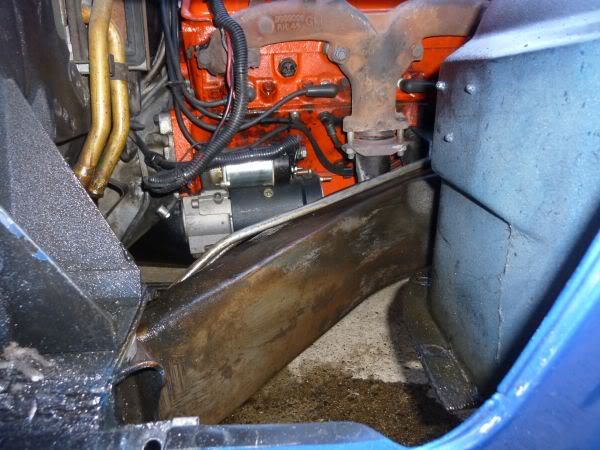
This is what I am left with
The view through the vent opening is much better than before.
Once it is all cleaned up I can install the new cover
The view through the vent opening is much better than before.
Once it is all cleaned up I can install the new cover
Last edited by CraigH; 07-20-2023 at 07:58 AM.
02-20-2013, 06:00 AM
#213
Melting Slicks
Thread Starter
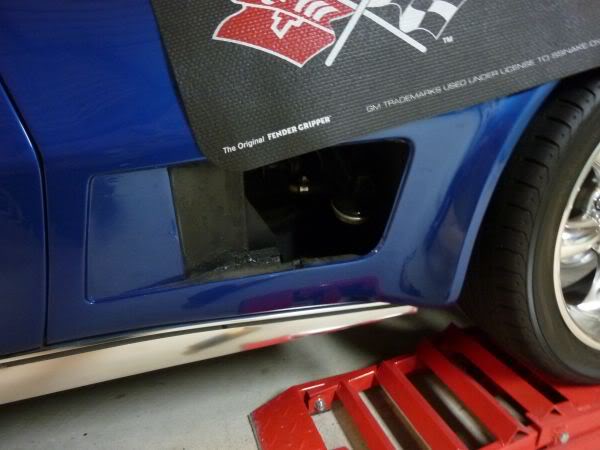
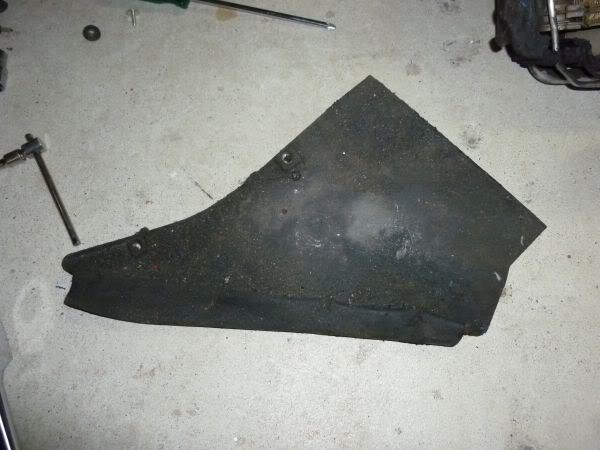
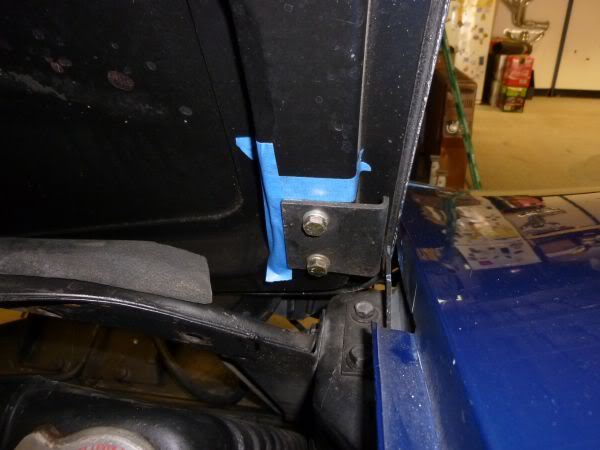
While I was in there the panel that fits between the guard and the frame seems like a perfect place to accumulate dirt.
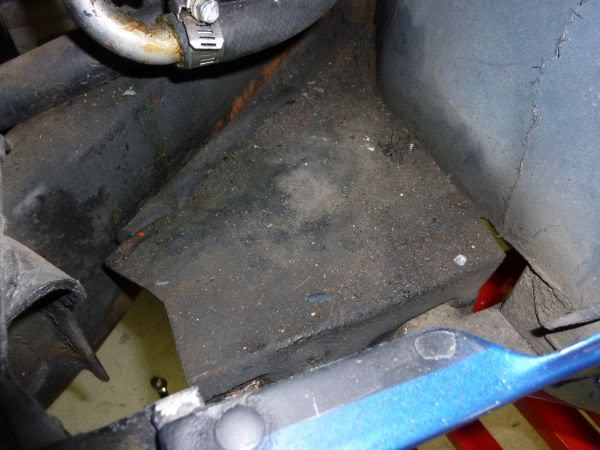
To remove it you need to remove a couple of bolts from below and 2 behind the side rocker panel.
To remove it you need to remove a couple of bolts from below and 2 behind the side rocker panel.
Last edited by CraigH; 04-10-2023 at 09:46 PM.
02-20-2013, 06:01 AM
#214
Melting Slicks
Thread Starter
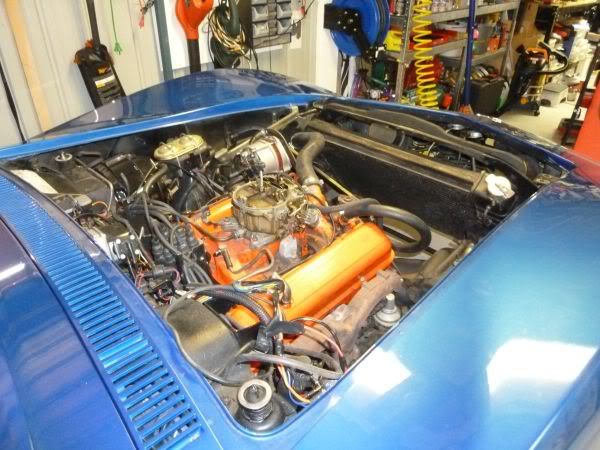
Started clean up of the frame rails under the hood.
Removed most of the vacuum hoses, solenoids, and tank as well as anything else that could be unbolted from the inner guards.
Lots of degreaser and kerosine and steel wool.
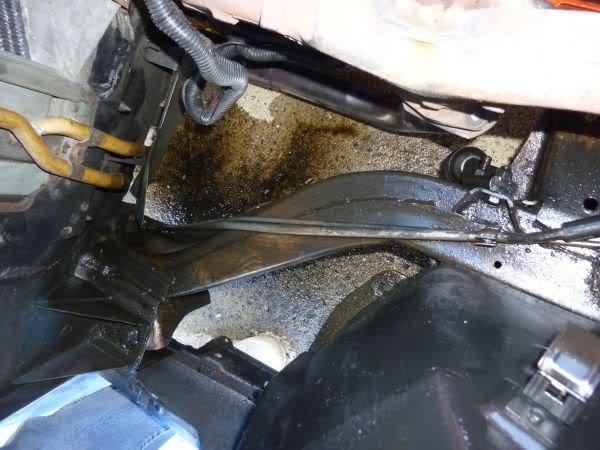
Long way to go but I will need to pull the front control arms, steering box etc to finish it off properly.
Removed most of the vacuum hoses, solenoids, and tank as well as anything else that could be unbolted from the inner guards.
Lots of degreaser and kerosine and steel wool.
Long way to go but I will need to pull the front control arms, steering box etc to finish it off properly.
Last edited by CraigH; 04-10-2023 at 09:47 PM.
02-20-2013, 06:02 AM
#215
Melting Slicks
Thread Starter
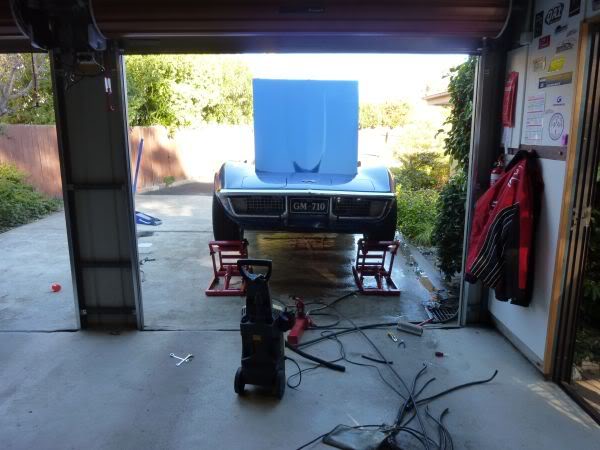
To get in and clean up the engine bay the Hood needs to come off.
Marked around the hinges.
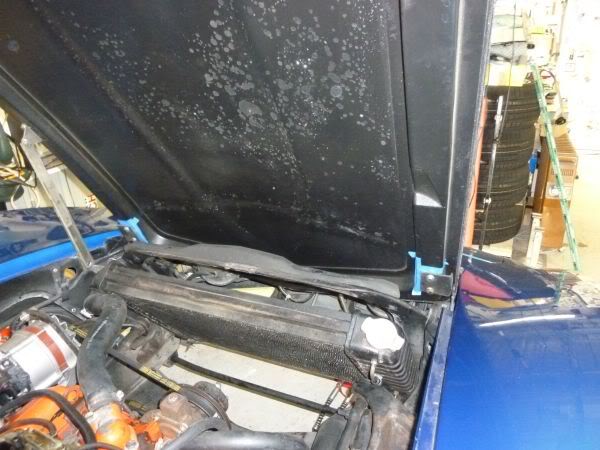
You can see that the old paint on the underside of the hood is blistered so will need to sand it back and respray.
Not sure if I need some sort of special High temp paint for that or any Low Sheen auto black.
With the Hood off there is heaps more access.
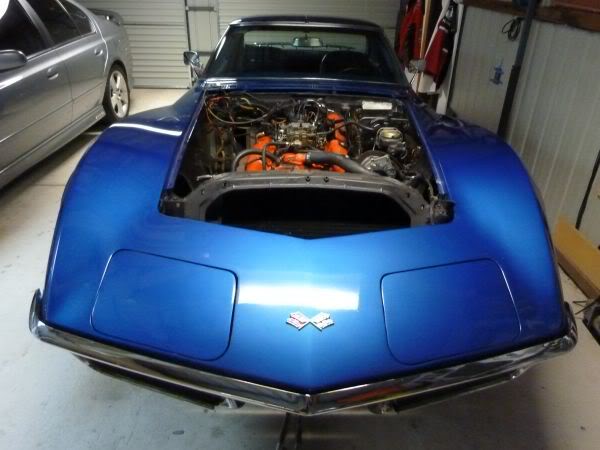
Radiator and possibly the support panel next.
Marked around the hinges.
You can see that the old paint on the underside of the hood is blistered so will need to sand it back and respray.
Not sure if I need some sort of special High temp paint for that or any Low Sheen auto black.
With the Hood off there is heaps more access.
Radiator and possibly the support panel next.
Last edited by CraigH; 07-20-2023 at 07:59 AM.
02-20-2013, 06:02 AM
#216
Melting Slicks
Thread Starter
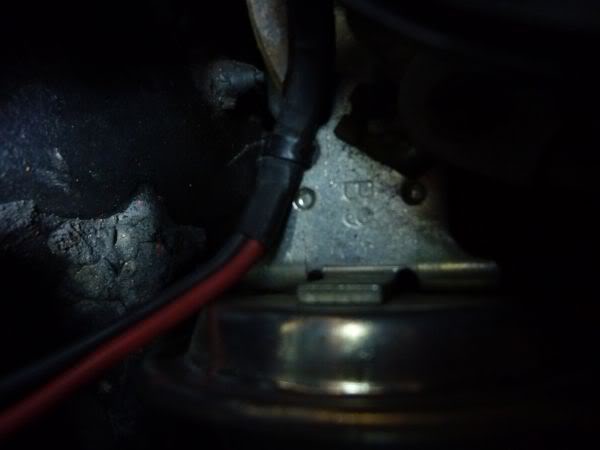
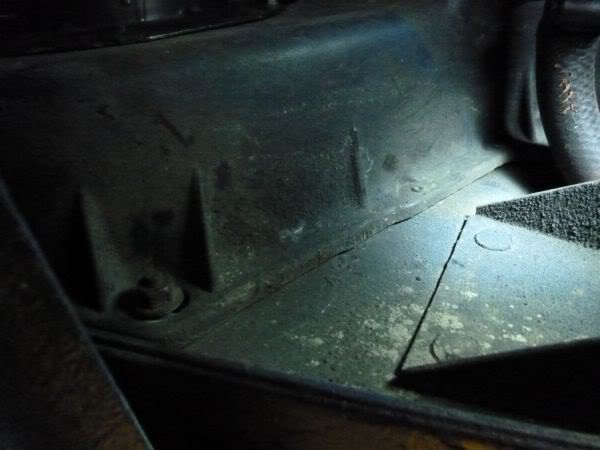
After Cleaning up under the car I found these marks from manufacturing on either side down low that designate the car is Power Steering and Air Conditioning.
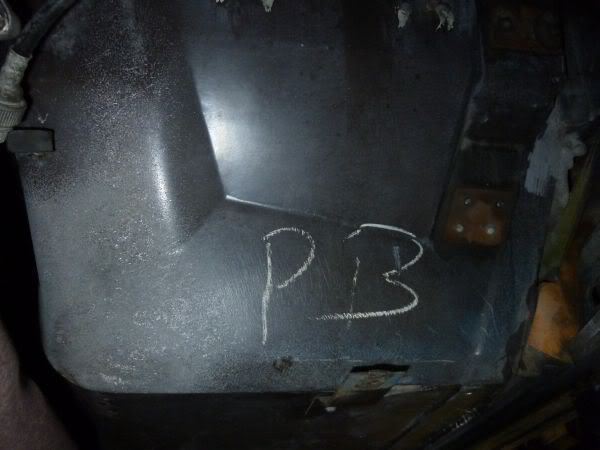
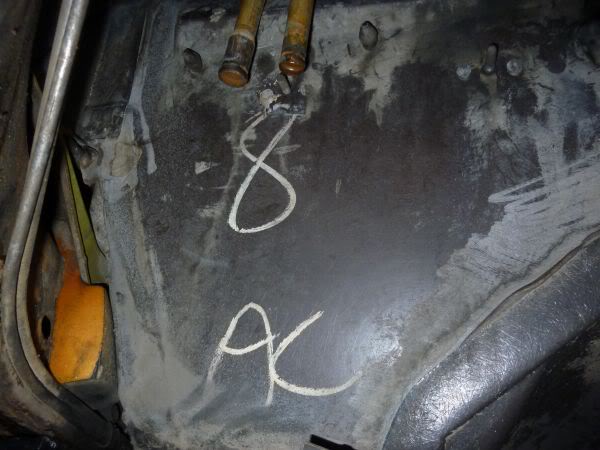
Will probable be painting over the panels so at least i will have evidence.
Will probable be painting over the panels so at least i will have evidence.
Last edited by CraigH; 04-10-2023 at 09:47 PM.
02-20-2013, 06:03 AM
#217
Melting Slicks
Thread Starter
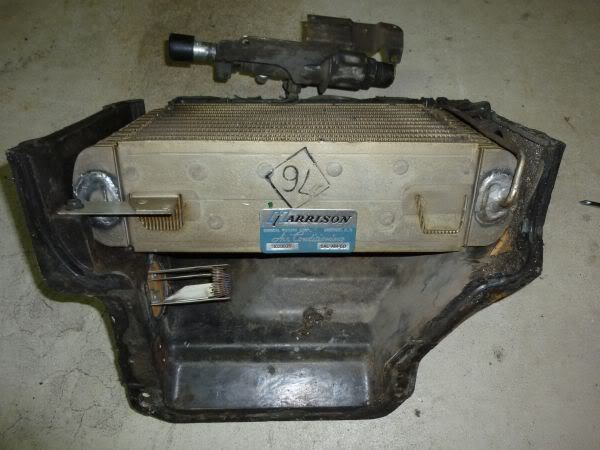
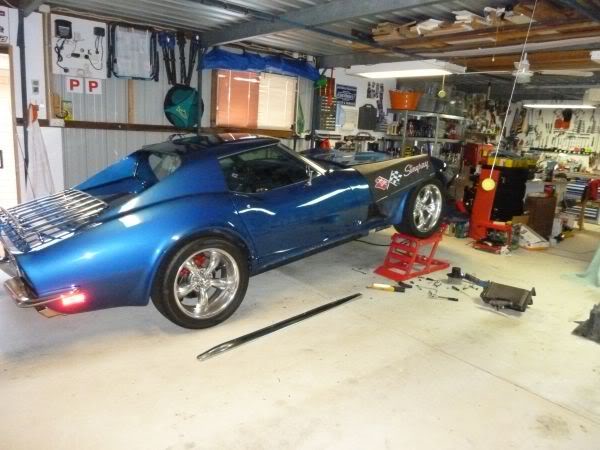
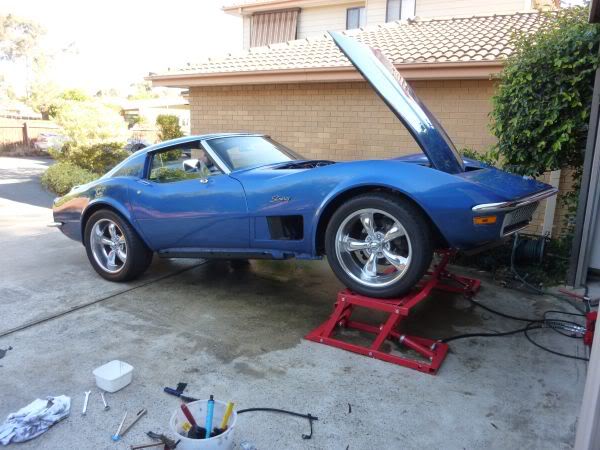
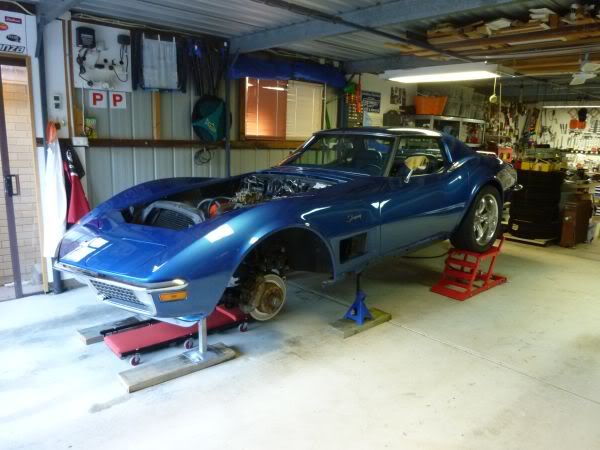
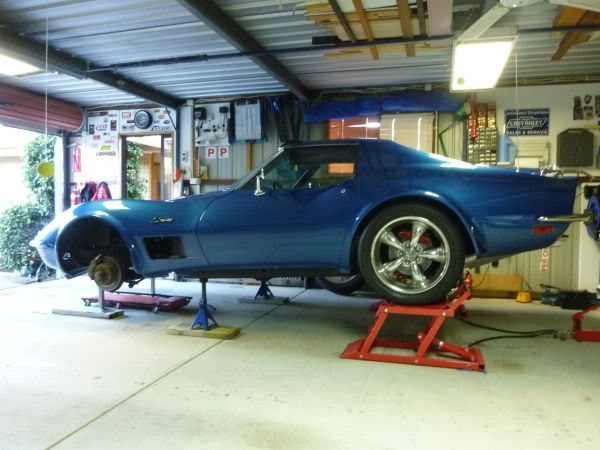
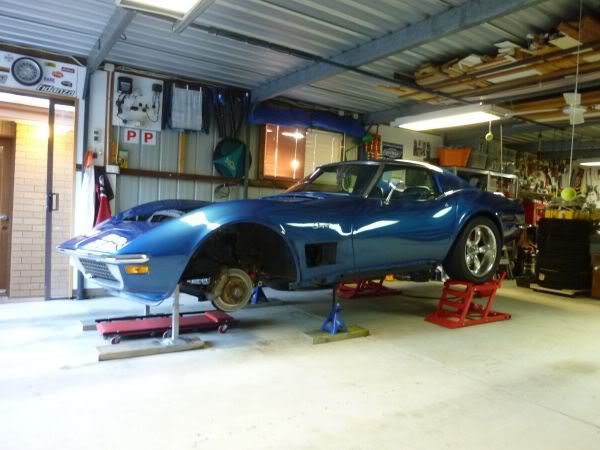
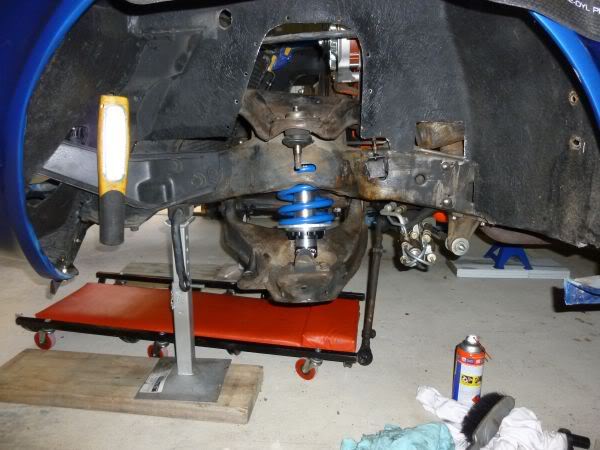
Radiator flushed out and drained and now up on stands so I can start work on the front suspension and steering.

Last edited by CraigH; 04-10-2023 at 09:47 PM.
02-20-2013, 06:04 AM
#218
Melting Slicks
Thread Starter
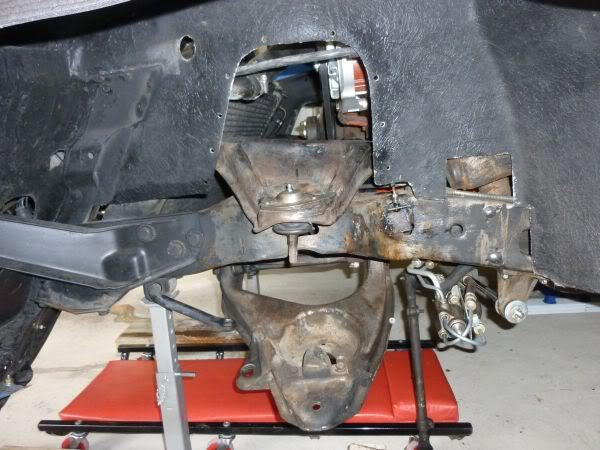
Spent some time this morning on the drivers side suspension.
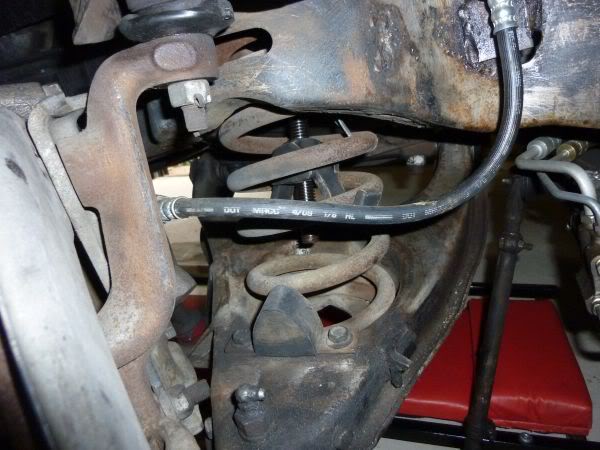
Removed the shock absorber.
Disconnected the brake line
Disconnected the sway bar.
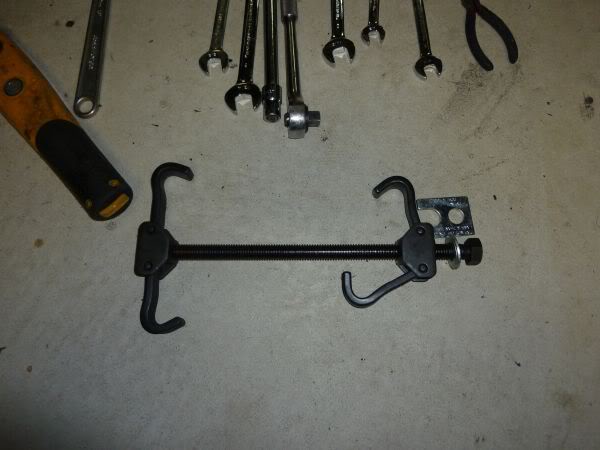
Fitted a spring compressor on the spring.
Popped of the tierod.
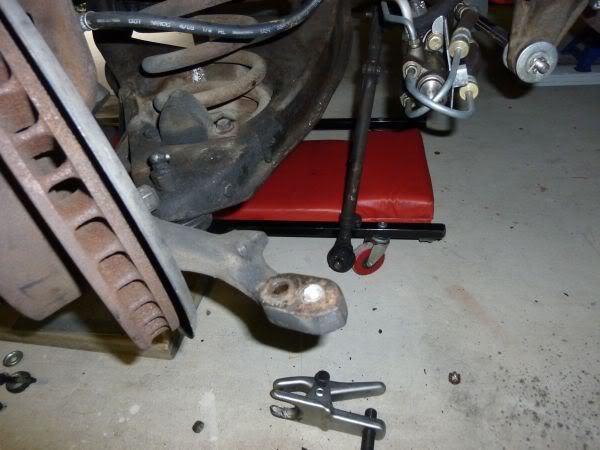
Put a jack under the bottom arm and removed bolt from ball joint and then used the remover to pop it.
Makes an interesting sound when it goes.
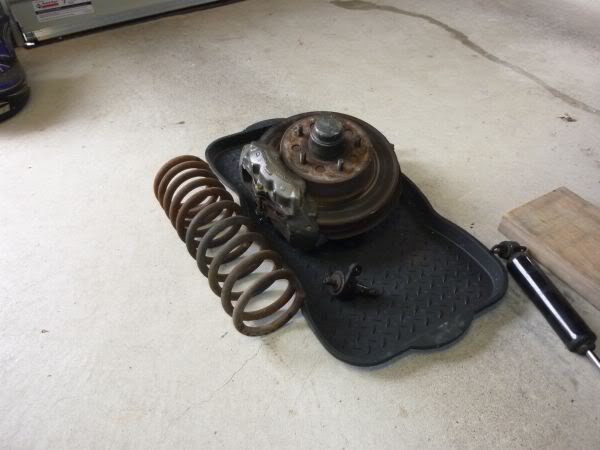
Took out the spring and the remainder of the front suspension just leaving the arms.
Removed the shock absorber.
Disconnected the brake line
Disconnected the sway bar.
Fitted a spring compressor on the spring.
Popped of the tierod.
Put a jack under the bottom arm and removed bolt from ball joint and then used the remover to pop it.
Makes an interesting sound when it goes.
Took out the spring and the remainder of the front suspension just leaving the arms.
Last edited by CraigH; 04-10-2023 at 09:47 PM.
02-20-2013, 06:05 AM
#219
Melting Slicks
Thread Starter
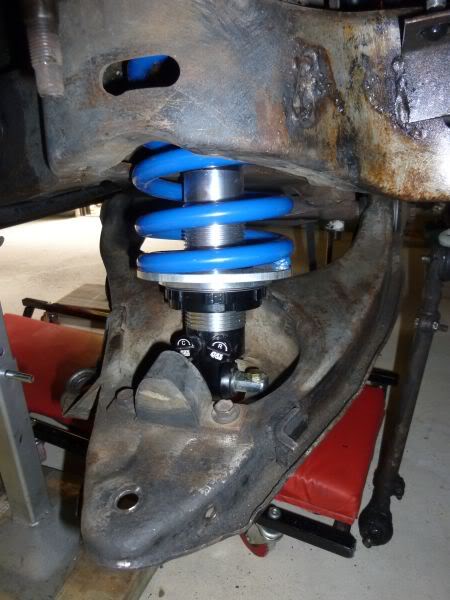
Did a trial fit for the front coil overs.
They now come with a set of bearings for between the base plate and the adjusting nut that makes changes very easy with some weight still on them.
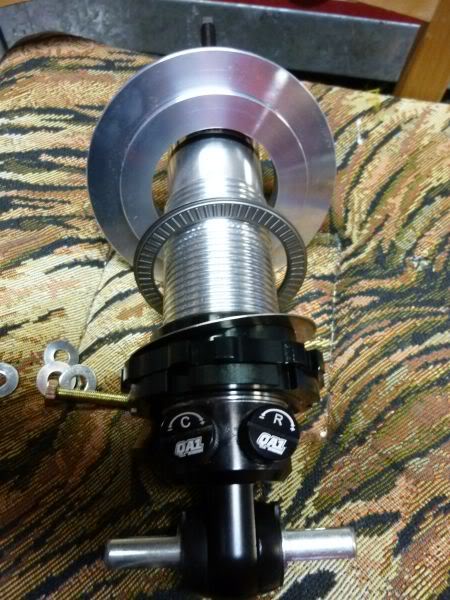
They now come with a set of bearings for between the base plate and the adjusting nut that makes changes very easy with some weight still on them.
Last edited by CraigH; 04-10-2023 at 09:47 PM.
02-20-2013, 06:05 AM
#220
Melting Slicks
Thread Starter
July 2011
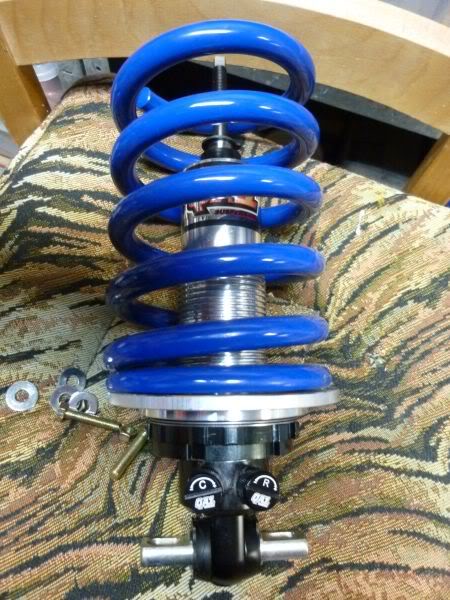
Bolted in to see how they fit.
Separate adjustment for compression and rebound.
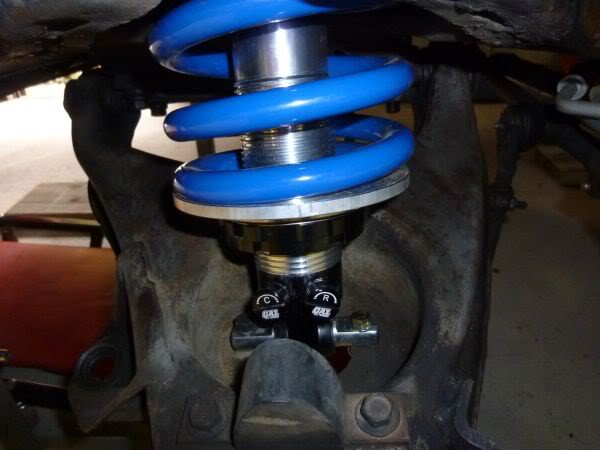
Should be an relatively easy to fit up once I get the arms stripped, powder coated and new bushes.
Bolted in to see how they fit.
Separate adjustment for compression and rebound.
Should be an relatively easy to fit up once I get the arms stripped, powder coated and new bushes.
Last edited by CraigH; 04-10-2023 at 09:47 PM.