


1971 Journey

Thread Starter
Melting Slicks


Joined: Apr 2010
Posts: 2,794
Likes: 1,195
From: Canberra Australia
2025 C3 of the Year Finalist - Modified
October 2010
Started today with the stereo.
Tested a few different capacitor values to cut down any bass signals going to the dash speakers.
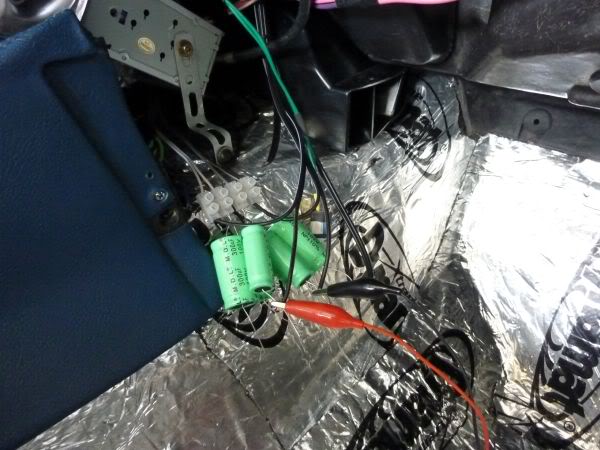
Any bass just makes them vibrate and distort so cut anything below about 150 and they sound much clearer and can go louder.
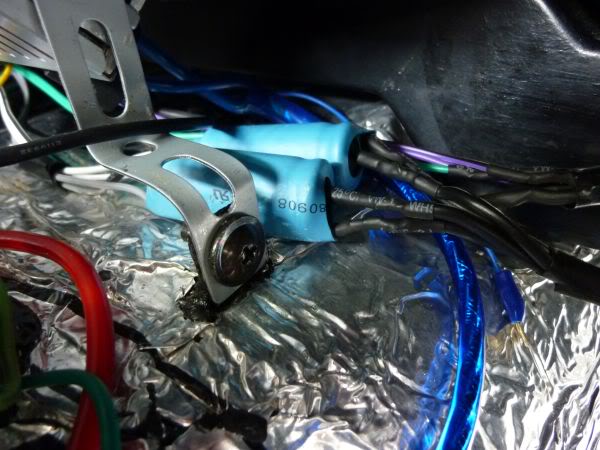
220uf was the final choice. Soldered in and then shrink wrapped.
 .
.
Started today with the stereo.
Tested a few different capacitor values to cut down any bass signals going to the dash speakers.
Any bass just makes them vibrate and distort so cut anything below about 150 and they sound much clearer and can go louder.
220uf was the final choice. Soldered in and then shrink wrapped.
.
Last edited by CraigH; Apr 9, 2023 at 06:52 AM.
Thread Starter
Melting Slicks
Joined: Apr 2010
Posts: 2,794
Likes: 1,195
From: Canberra Australia
2025 C3 of the Year Finalist - Modified
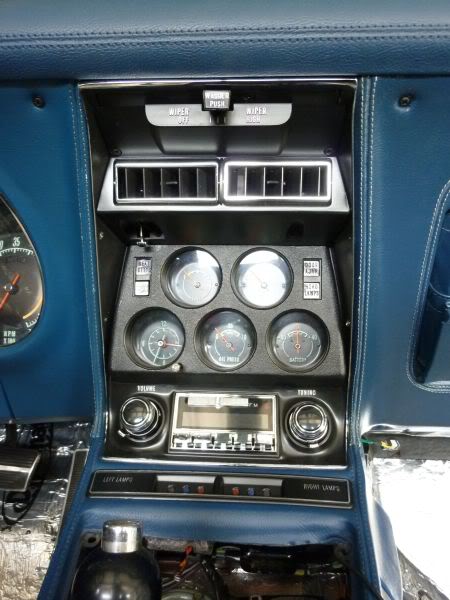
Ran all the wires as per the AIM then neatened it up a bit.
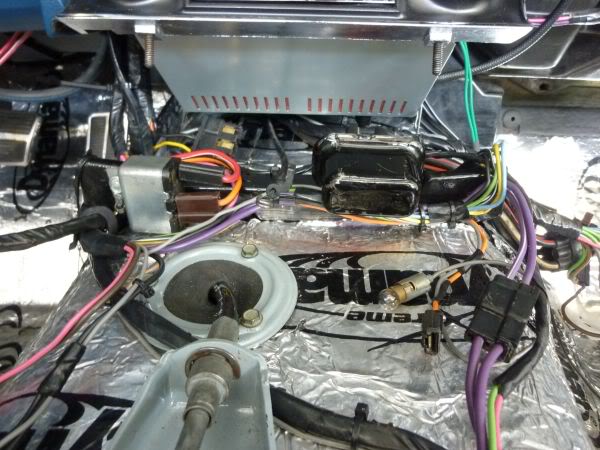
Added some RCA's for a sub in the rear at some stage and also a direct power wire from the battery for the deck.
The deck is a modern unit that looks like the original.
Will be using a combination of 72 outer and 71 inner radio ***** as they fill the space properly and look best to my eyes.
Now ready for the console to go back intomorrow.
Last edited by CraigH; Apr 9, 2023 at 06:53 AM.
Thread Starter
Melting Slicks
Joined: Apr 2010
Posts: 2,794
Likes: 1,195
From: Canberra Australia
2025 C3 of the Year Finalist - Modified
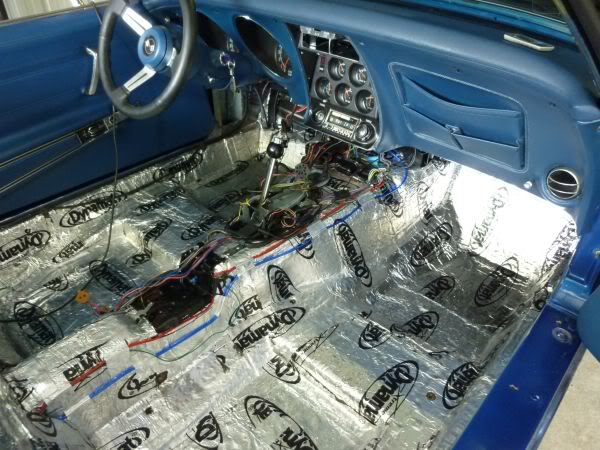
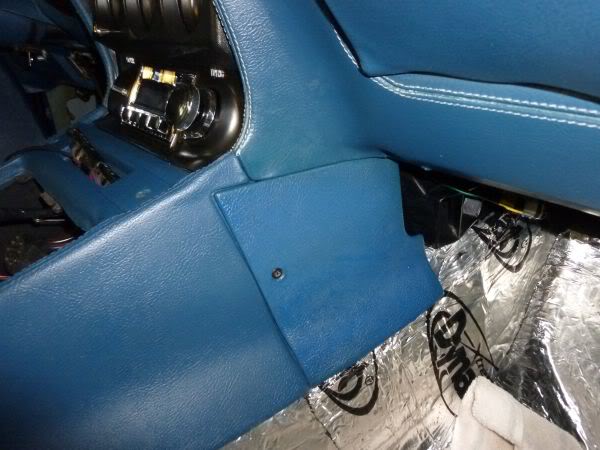
Spent some more time aligning the console and lower dash pads etc.
Used some aluminum as spacers in brackets to get it to sit better.
Got it as good as I can now ..... so on to the rear storage area.
Took out the storage unit, carpets and underlay.
Removed the drain tubes and cleaned out the drainage areas on back deck - they were full of crap from when the Vette was painted.
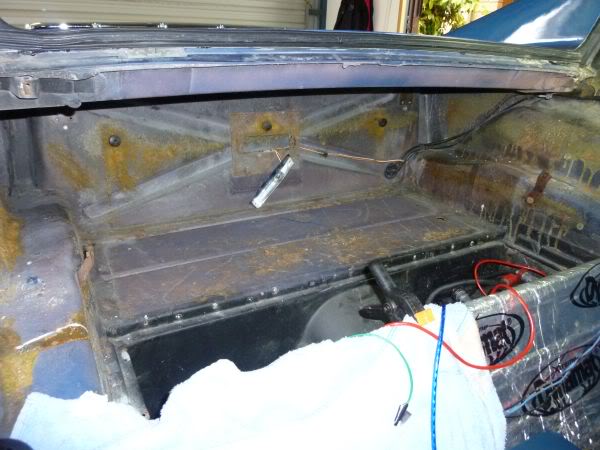
Will spend tomorrow scraping all the old underlay and glue off and will fiberglass up a few of the screw holes .
Used some aluminum as spacers in brackets to get it to sit better.
Got it as good as I can now ..... so on to the rear storage area.
Took out the storage unit, carpets and underlay.
Removed the drain tubes and cleaned out the drainage areas on back deck - they were full of crap from when the Vette was painted.
Will spend tomorrow scraping all the old underlay and glue off and will fiberglass up a few of the screw holes .
Last edited by CraigH; Apr 9, 2023 at 06:59 AM.
Thread Starter
Melting Slicks
Joined: Apr 2010
Posts: 2,794
Likes: 1,195
From: Canberra Australia
2025 C3 of the Year Finalist - Modified
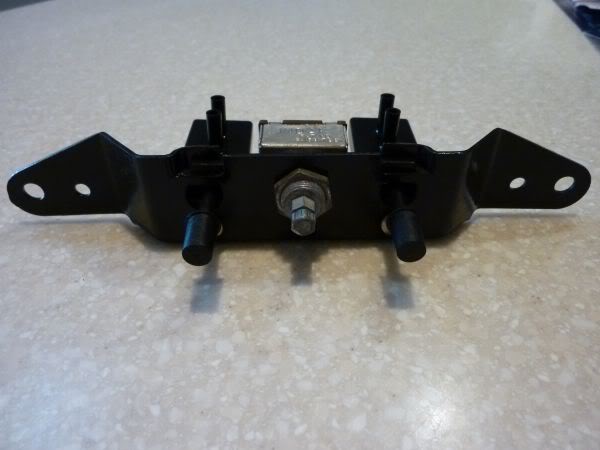
Decided to catch up on a few left over items.
Finished the vacuum override brackets and switches. refitted them to the car.
Replaced all the door ajar and courtesy light switches.
Removed and refitted the drivers door weatherstrip (Used black rather than the yellow adhesive used previously)
Refitted Handbrake lever and cover etc.
Enough for one day.
Last edited by CraigH; Apr 9, 2023 at 07:00 AM.
Thread Starter
Melting Slicks
Joined: Apr 2010
Posts: 2,794
Likes: 1,195
From: Canberra Australia
2025 C3 of the Year Finalist - Modified
Working on the HVAC controls.
Disassembled it and cleaned all the parts up
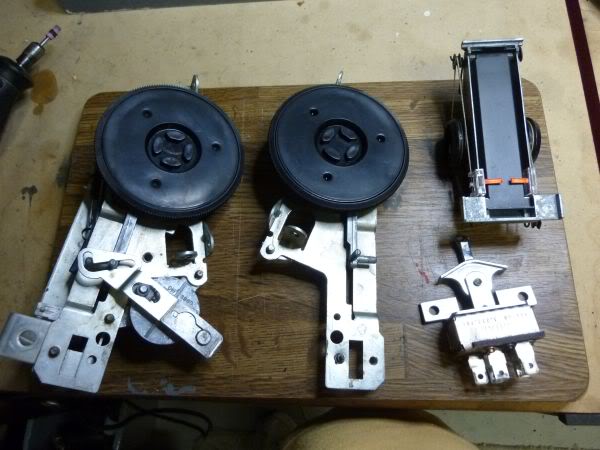
Once it stops raining I will respray the thumb wheels with SEM satin black.
The plastic lens cleaned up ok but was not very clear in the areas that had been exposed to the elements for 40 years.
So I used toothpaste (non Gel) to buff the outside of the plastic up.
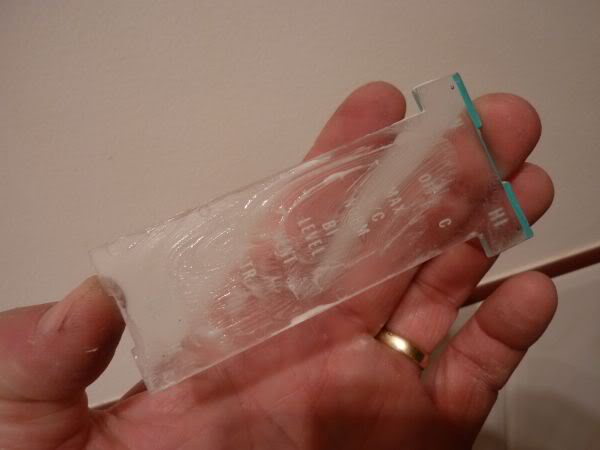
End result (and this picture does not do it justice) is very clear lens.
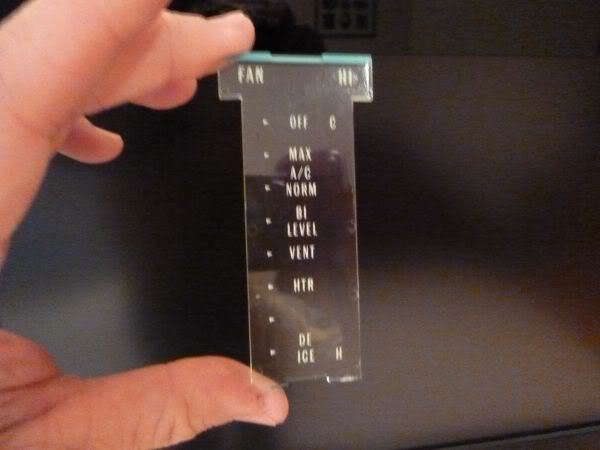
All I need now is some flouro paint for the 2 indicators and respray the fascia and it can go back together.
Disassembled it and cleaned all the parts up
Once it stops raining I will respray the thumb wheels with SEM satin black.
The plastic lens cleaned up ok but was not very clear in the areas that had been exposed to the elements for 40 years.
So I used toothpaste (non Gel) to buff the outside of the plastic up.
End result (and this picture does not do it justice) is very clear lens.
All I need now is some flouro paint for the 2 indicators and respray the fascia and it can go back together.
Last edited by CraigH; Apr 9, 2023 at 07:00 AM.
Thread Starter
Melting Slicks
Joined: Apr 2010
Posts: 2,794
Likes: 1,195
From: Canberra Australia
2025 C3 of the Year Finalist - Modified
Always wondered why my battery did not sit perfectly flat.
Turns out at some time in its life the battery box got a hit and was repaired with way way... more than enough glass on the inside.
The outside did not get glassed up smooth so that's another project.
On the inside I got stuck into grinding down layers of matt and resin until I now have a flat surface again.
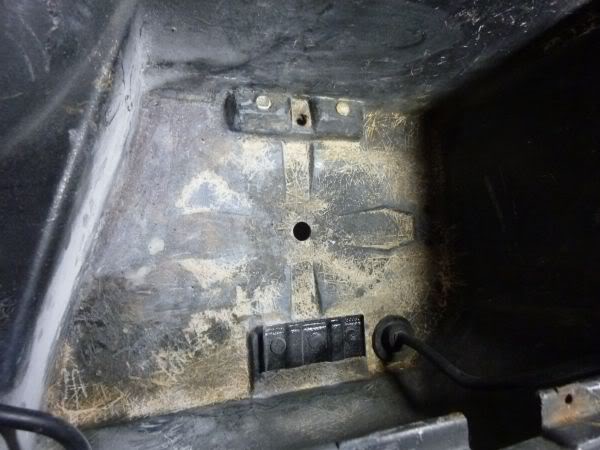
Then a very thin coat of resin.
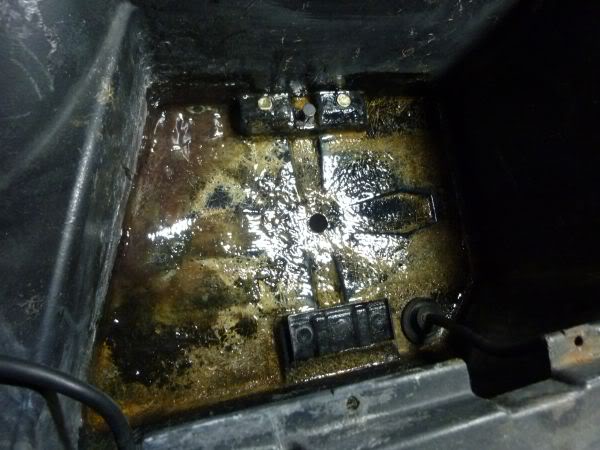
Once dry it should be ready for paint
Turns out at some time in its life the battery box got a hit and was repaired with way way... more than enough glass on the inside.
The outside did not get glassed up smooth so that's another project.
On the inside I got stuck into grinding down layers of matt and resin until I now have a flat surface again.
Then a very thin coat of resin.
Once dry it should be ready for paint
Last edited by CraigH; Apr 9, 2023 at 07:01 AM.
Thread Starter
Melting Slicks
Joined: Apr 2010
Posts: 2,794
Likes: 1,195
From: Canberra Australia
2025 C3 of the Year Finalist - Modified
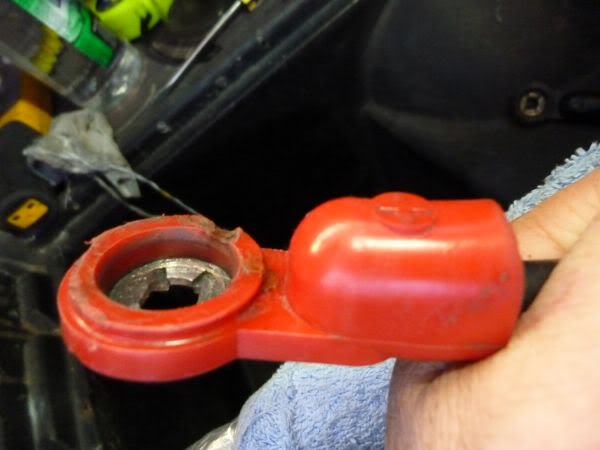
Had a few minutes yesterday afternoon before going out so I cleaned up the battery terminals - They were adapted to top mount rather than side so I will take them back to side mount.
My battery has both side and top mount but I think I will get a Federal 775MF to replace it that way I will pick up a bit of space above the battery for a possible amp location.
This is after an initial clean...wow its red :-)
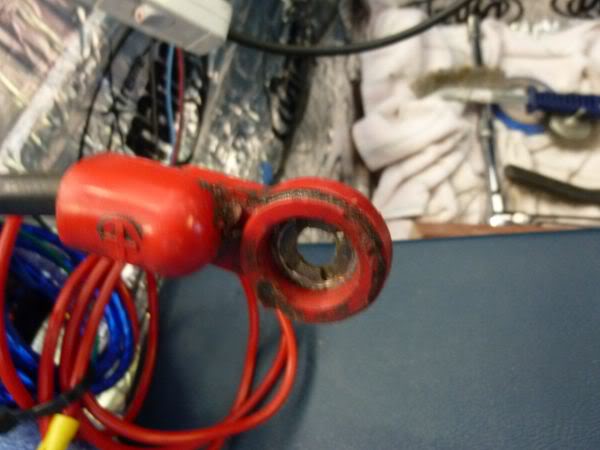
After a bit more.
My battery has both side and top mount but I think I will get a Federal 775MF to replace it that way I will pick up a bit of space above the battery for a possible amp location.
This is after an initial clean...wow its red :-)
After a bit more.
Last edited by CraigH; Apr 9, 2023 at 07:02 AM.
Thread Starter
Melting Slicks
Joined: Apr 2010
Posts: 2,794
Likes: 1,195
From: Canberra Australia
2025 C3 of the Year Finalist - Modified
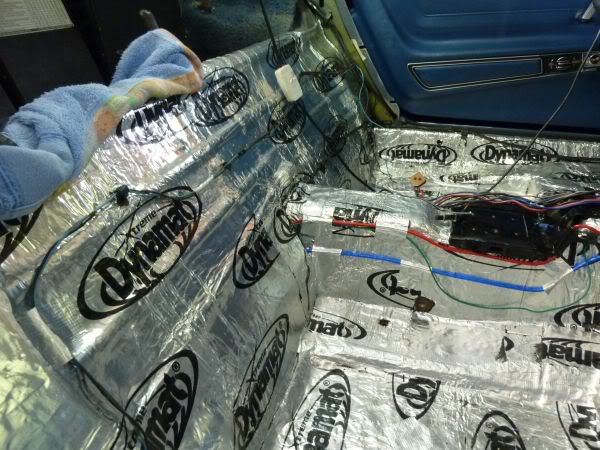
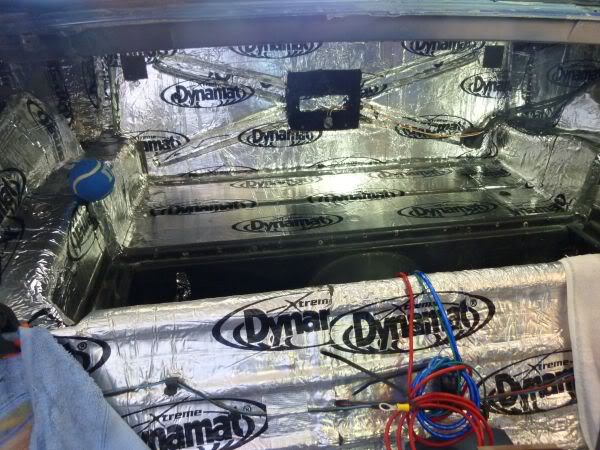
I have two more days of leave so I need to get the area behind the seats done.
Started the Dynamat and by lunch time I had the back panel and one side done.
It is very cramped in there to work.
Started with the rear panel and filled in the indent areas.
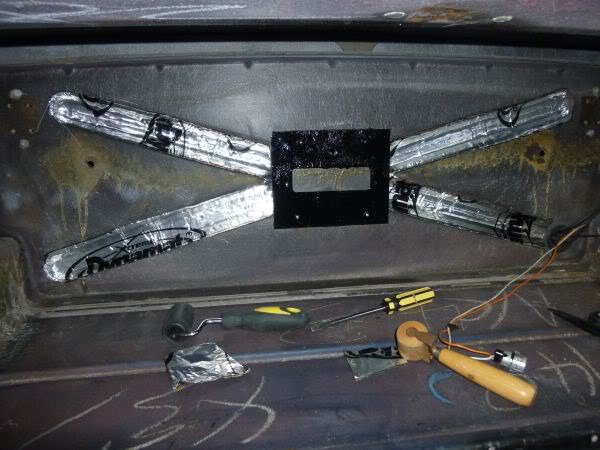
Then sheet the back itself.
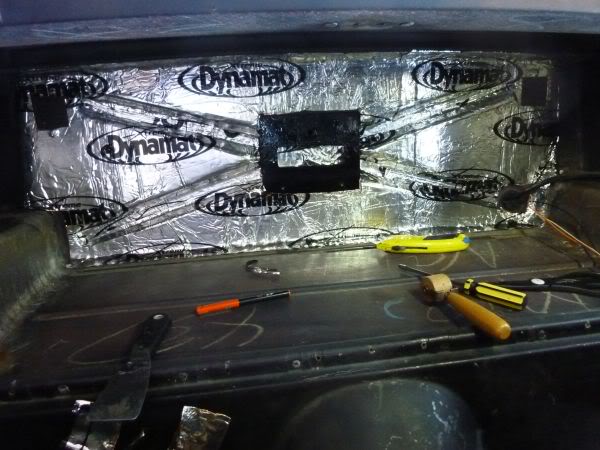
Then start on the side which is made of of too many pieces to count. Lots of templates cut then trim etc etc.

A bit of a break to let my back recover then back to work.
Started the Dynamat and by lunch time I had the back panel and one side done.
It is very cramped in there to work.
Started with the rear panel and filled in the indent areas.
Then sheet the back itself.
Then start on the side which is made of of too many pieces to count. Lots of templates cut then trim etc etc.
A bit of a break to let my back recover then back to work.
Last edited by CraigH; Apr 9, 2023 at 07:02 AM.
Corvette Stories
The Best of Corvette for Corvette Enthusiasts

Top 10 Most Expensive Corvettes Ever Sold on Bring A Trailer
Brett Foote
10 Things Every Corvette Owner Needs (2026 Edition)
Michael S. Palmer
8 Most "Only Corvette Owners Understand" Quirks and Problems
Pouria Savadkouei
10 Reasons the C6 Z06 is Still A Performance Benchmark After 20 Years
Joe Kucinski
How Much Horsepower Every Corvette Engine "LOST" in 1972
Joe Kucinski
Top 10 DOs and DON'Ts for Protecting Your Convertible Top!
Michael S. Palmer
Top 10 Most Explosive Corvettes Ever Made: Power-to-Weight Ratio Ranked!
Joe Kucinski
150 hp to 1,250 hp: Every Corvette Generation Compared by the Specs That Matter
Joe Kucinski
8 Coolest Corvette Pace Cars (and Replicas) of All Time
Verdad Gallardo
Thread Starter
Melting Slicks
Joined: Apr 2010
Posts: 2,794
Likes: 1,195
From: Canberra Australia
2025 C3 of the Year Finalist - Modified
To finish the Dynamat I need to replace the drain tubes so the rivets need to be drilled out.
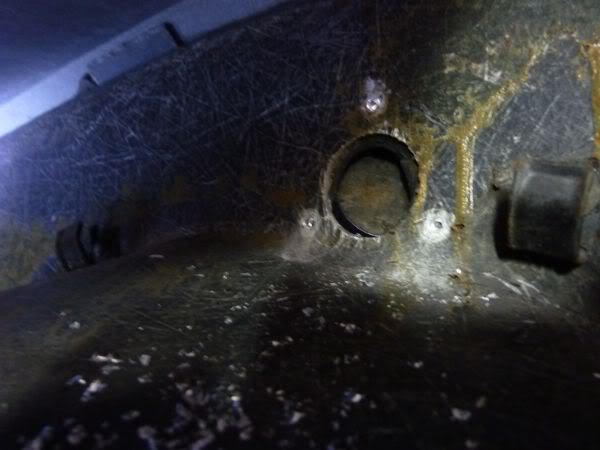
And the covers gentry pried off from within the wheel arch.
Once the Dynamat is in I will replace them after being media blasted and painted.
And the covers gentry pried off from within the wheel arch.
Once the Dynamat is in I will replace them after being media blasted and painted.
Last edited by CraigH; Apr 9, 2023 at 07:02 AM.
Thread Starter
Melting Slicks
Joined: Apr 2010
Posts: 2,794
Likes: 1,195
From: Canberra Australia
2025 C3 of the Year Finalist - Modified
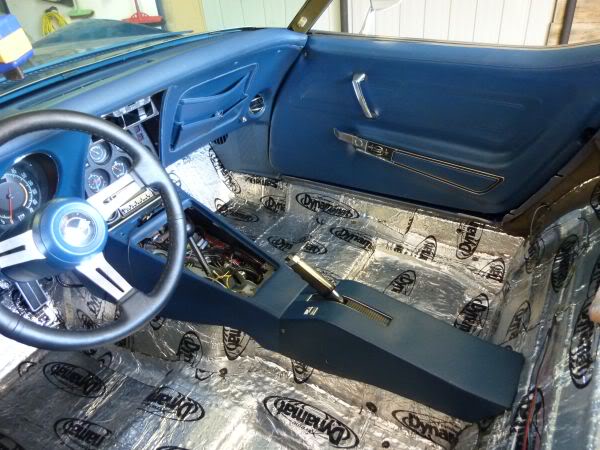
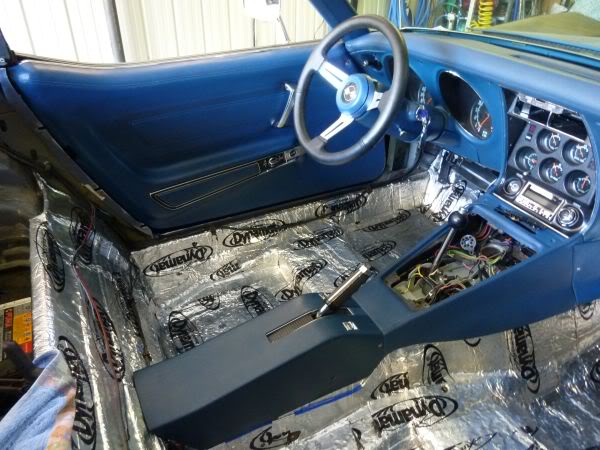
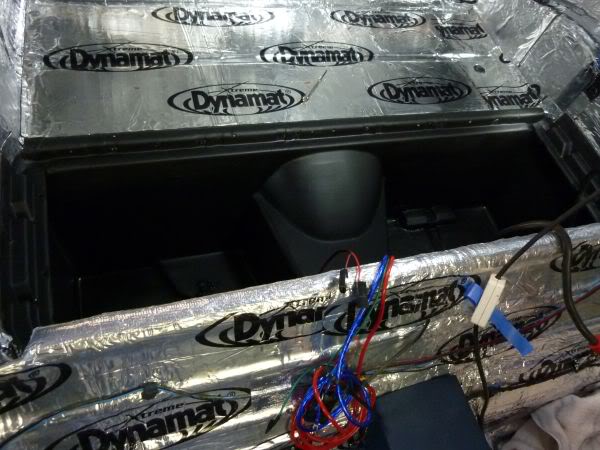
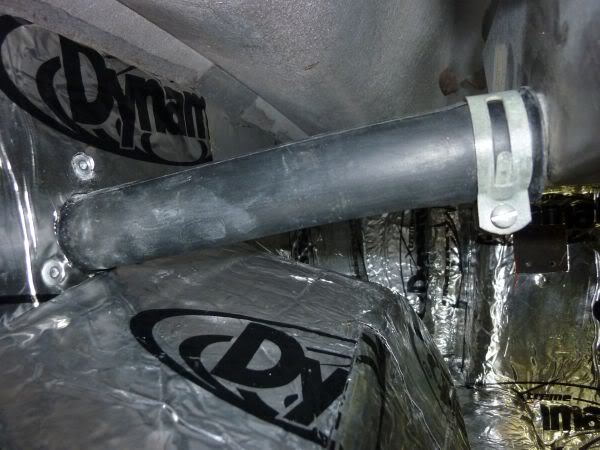
Continued to Dynamat the drivers side.
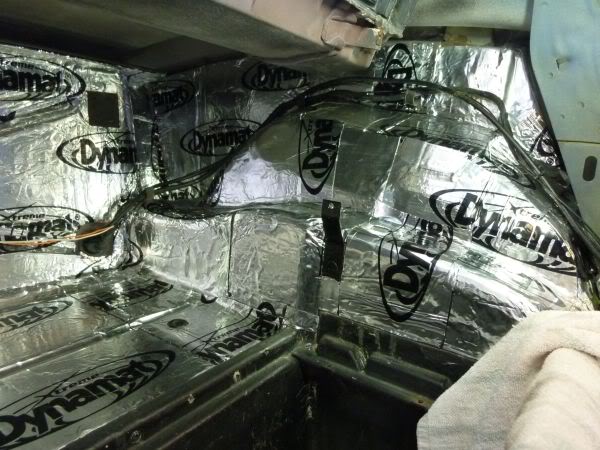
Then the floor and the underside of the rear panel behind the drains. Was fairly hard to get the Dynamat in position up under the rear panel by yourself.
The tennis ball is to protect me from the brackets that I hit with my hands, head etc too many times while working in there.
Then the floor and the underside of the rear panel behind the drains. Was fairly hard to get the Dynamat in position up under the rear panel by yourself.
The tennis ball is to protect me from the brackets that I hit with my hands, head etc too many times while working in there.
Last edited by CraigH; Apr 9, 2023 at 07:03 AM.
Thread Starter
Melting Slicks
Joined: Apr 2010
Posts: 2,794
Likes: 1,195
From: Canberra Australia
2025 C3 of the Year Finalist - Modified
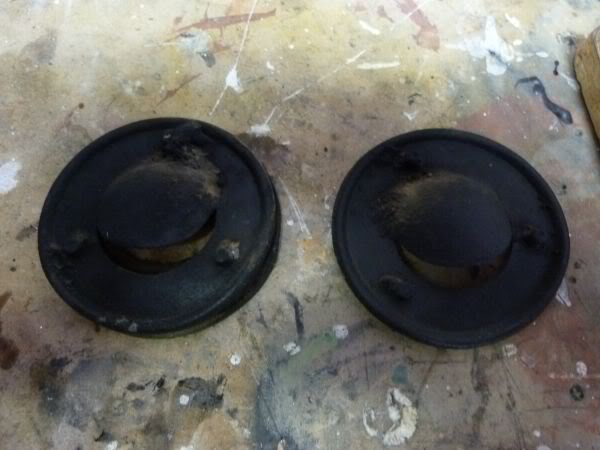
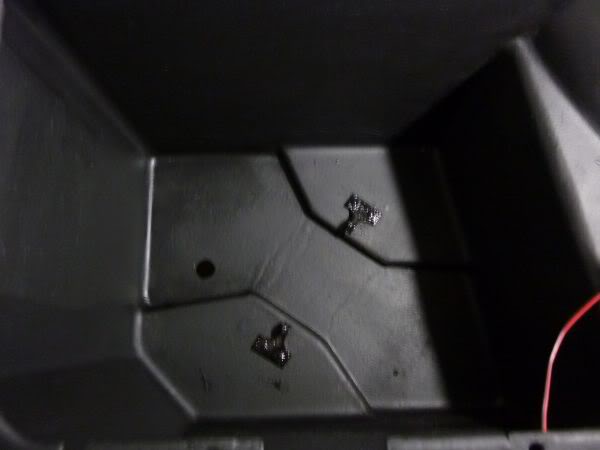
Now to move on to final painting of the storage compartments.
Amazing how much better they can look after a clean, sand and paint.
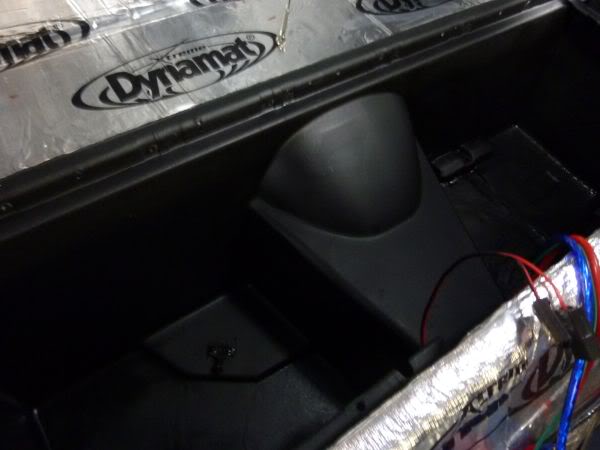
Amazing how much better they can look after a clean, sand and paint.
Last edited by CraigH; Apr 9, 2023 at 07:03 AM.
Thread Starter
Melting Slicks
Joined: Apr 2010
Posts: 2,794
Likes: 1,195
From: Canberra Australia
2025 C3 of the Year Finalist - Modified
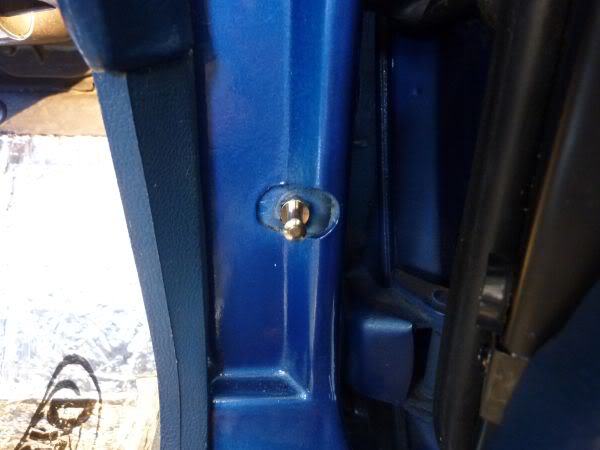
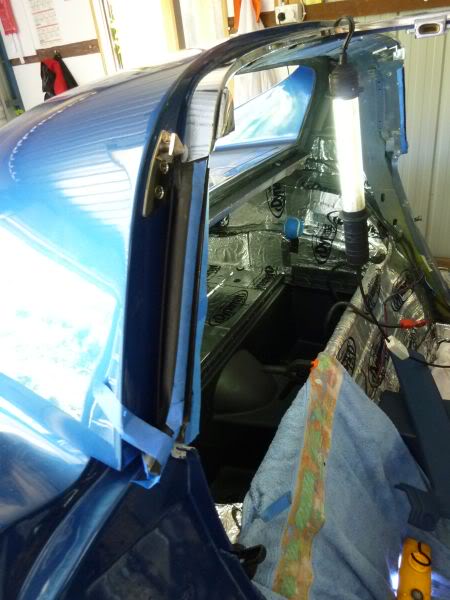
Cleaned up and painted around the rear window seal with matt black enamel. There is always some minor parts visible through the trim so wanted it to not stand out.
Moved on to the B pillar and repainted the trim that holds the weatherstrip in with satin black enamel
Moved on to the B pillar and repainted the trim that holds the weatherstrip in with satin black enamel
Last edited by CraigH; Apr 9, 2023 at 07:04 AM.
Thread Starter
Melting Slicks
Joined: Apr 2010
Posts: 2,794
Likes: 1,195
From: Canberra Australia
2025 C3 of the Year Finalist - Modified
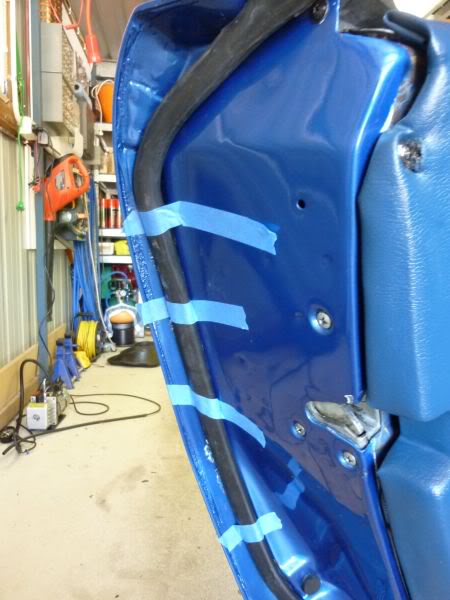
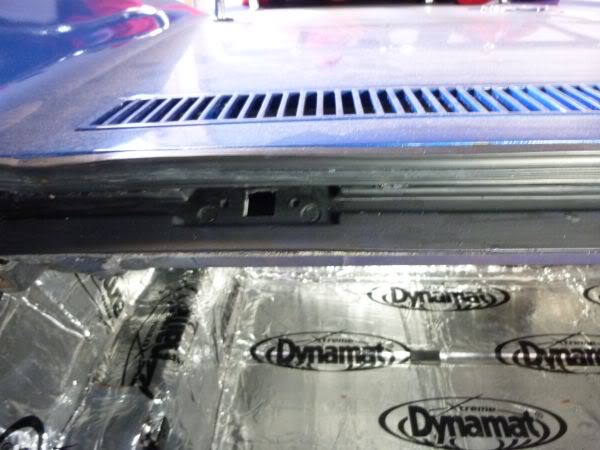
The front pillar weatherstrip is next.

I have had it all off before when I was checking for and fixing water leaks.
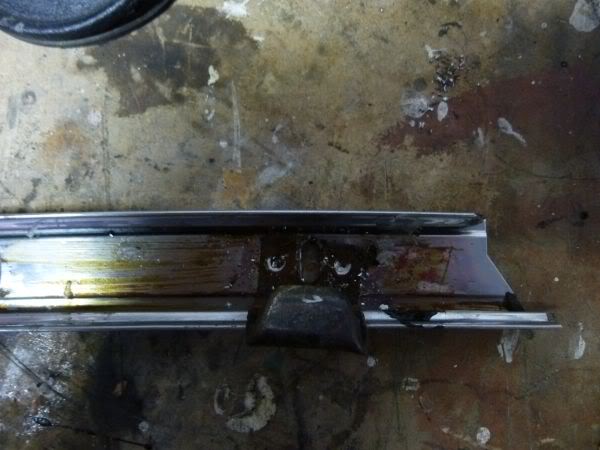
Remove the inner and outer stainless steal parts.
Drill out the rivets on the channel piece that holds the weatherstrip to allow new strip holder to be attached.
After cleaning up the pillars I masked them of and painted them with satin black enamel.
All the SS has been cleaned in paint thinners to remove any old glue etc.
I have had it all off before when I was checking for and fixing water leaks.
Remove the inner and outer stainless steal parts.
Drill out the rivets on the channel piece that holds the weatherstrip to allow new strip holder to be attached.
After cleaning up the pillars I masked them of and painted them with satin black enamel.
All the SS has been cleaned in paint thinners to remove any old glue etc.
Last edited by CraigH; Apr 9, 2023 at 07:04 AM.
Thread Starter
Melting Slicks
Joined: Apr 2010
Posts: 2,794
Likes: 1,195
From: Canberra Australia
2025 C3 of the Year Finalist - Modified
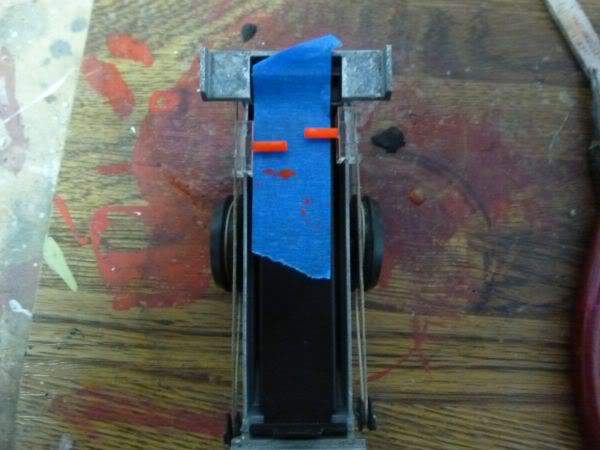
Finished off a couple of the interior pieces for the console and HVAC

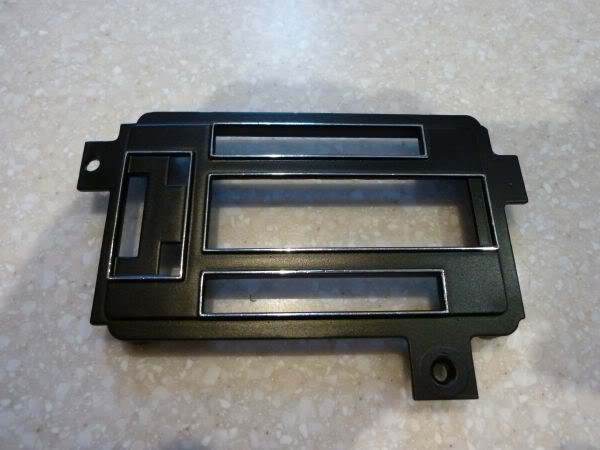
The HVAC wheels are ready to be painted with SEM vinyl paint.

Shift plate was previously stripped then cleaned in paint thinners then prepsol.
Sprayed in 2 coats or satin black enamel (16 hours between)
Then I will use a razor to expose the chrome edges etc like the other pieces. Comes off in nice strips.
The HVAC wheels are ready to be painted with SEM vinyl paint.
Shift plate was previously stripped then cleaned in paint thinners then prepsol.
Sprayed in 2 coats or satin black enamel (16 hours between)
Then I will use a razor to expose the chrome edges etc like the other pieces. Comes off in nice strips.
Last edited by CraigH; Apr 9, 2023 at 07:05 AM.
Thread Starter
Melting Slicks
Joined: Apr 2010
Posts: 2,794
Likes: 1,195
From: Canberra Australia
2025 C3 of the Year Finalist - Modified
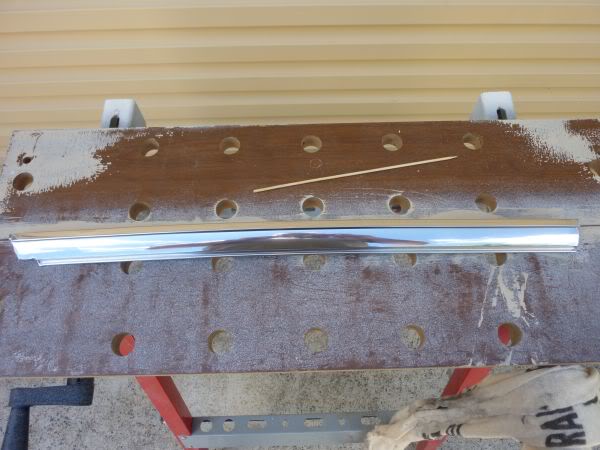
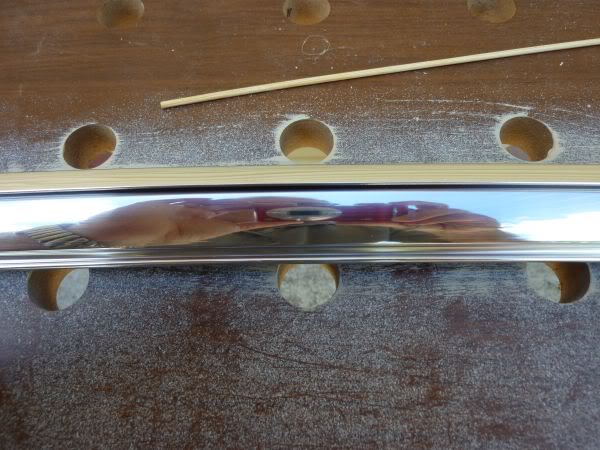
Started the prep of the A pillar stainless steel.
Previously cleaned in thinners.
Now they got a clean with fine steel wool and kerosene.
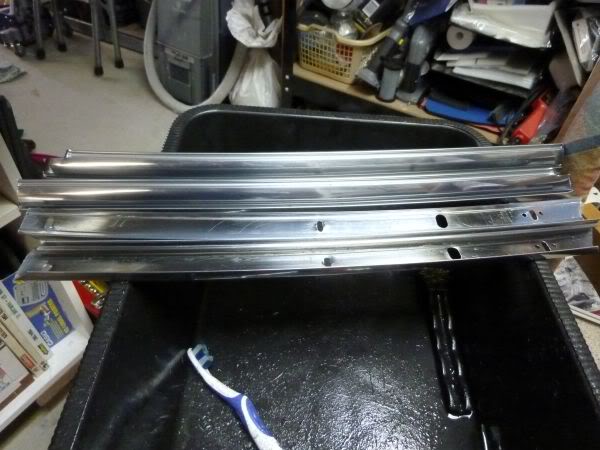
Next onto some polishing.
But there is some motor racing on today so I wont get much more time.
Previously cleaned in thinners.
Now they got a clean with fine steel wool and kerosene.
Next onto some polishing.
But there is some motor racing on today so I wont get much more time.
Last edited by CraigH; Apr 9, 2023 at 07:05 AM.
Thread Starter
Melting Slicks
Joined: Apr 2010
Posts: 2,794
Likes: 1,195
From: Canberra Australia
2025 C3 of the Year Finalist - Modified
Finishing off the upper dash air vent.
After using a razor blade to expose the letters.
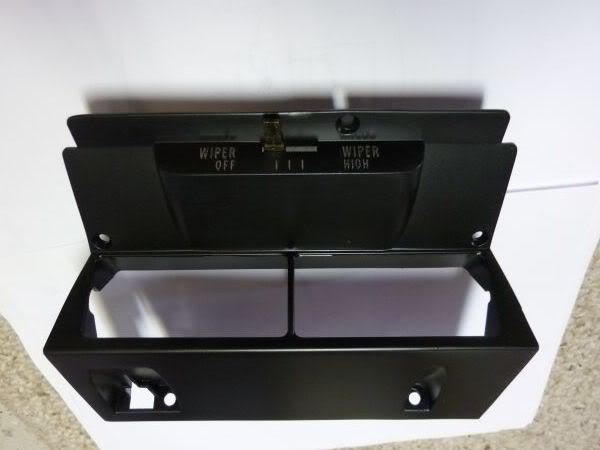
Fit the wiper switch back in with numbers to top.
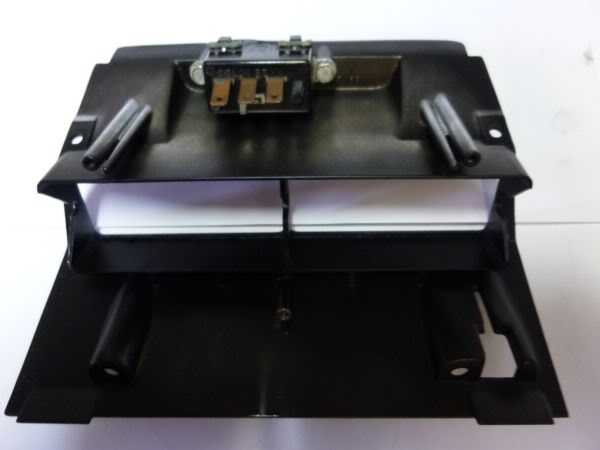
Apply felt strips to top and bottom areas to hold vents in position when moved.

Install vents and rear duct.
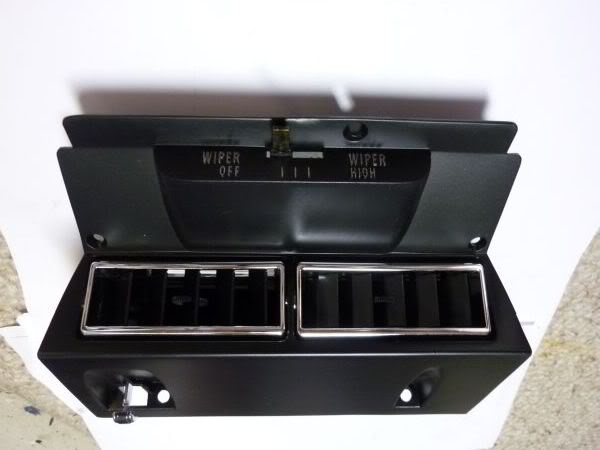
Install back in car.
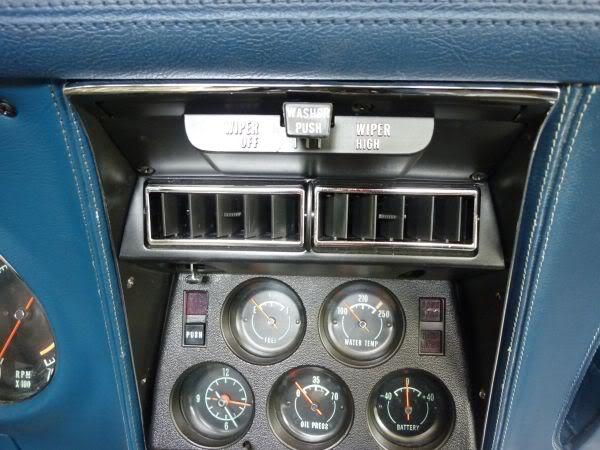
Same with fiber optic unit, razor off edges and letters then refit after cleaning ends of fiber optic off with metho.
After using a razor blade to expose the letters.
Fit the wiper switch back in with numbers to top.
Apply felt strips to top and bottom areas to hold vents in position when moved.
Install vents and rear duct.
Install back in car.
Same with fiber optic unit, razor off edges and letters then refit after cleaning ends of fiber optic off with metho.
Last edited by CraigH; Apr 9, 2023 at 07:09 AM.
Thread Starter
Melting Slicks
Joined: Apr 2010
Posts: 2,794
Likes: 1,195
From: Canberra Australia
2025 C3 of the Year Finalist - Modified
Fitted the drain tubes and riveted the outer plates on in the wheel wells.
Last edited by CraigH; Apr 9, 2023 at 07:09 AM.
Thread Starter
Melting Slicks
Joined: Apr 2010
Posts: 2,794
Likes: 1,195
From: Canberra Australia
2025 C3 of the Year Finalist - Modified
Needle paint turned up in the mail today.
Repainted the needles on the heater controls.
With daylight savings I decided to do a bit this evening.
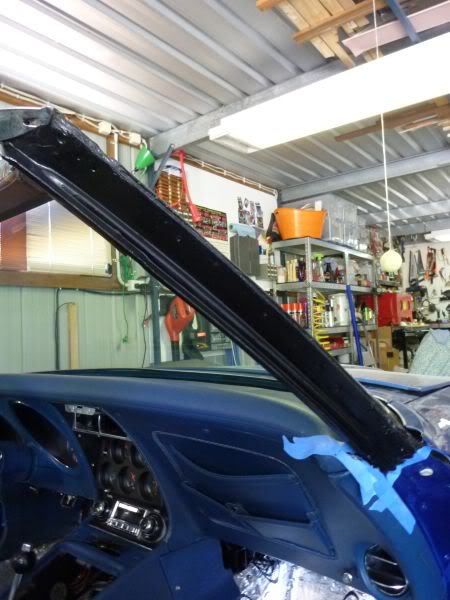
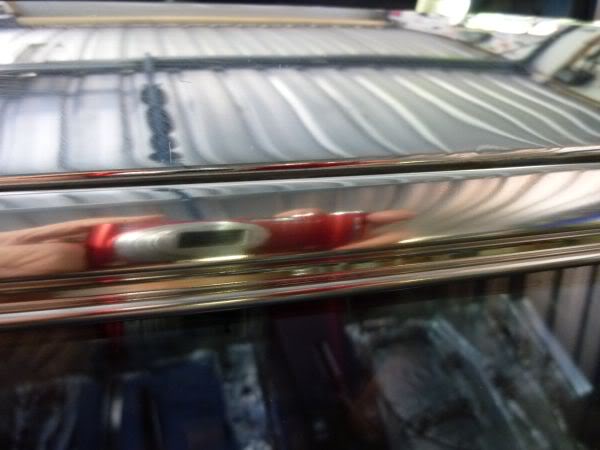
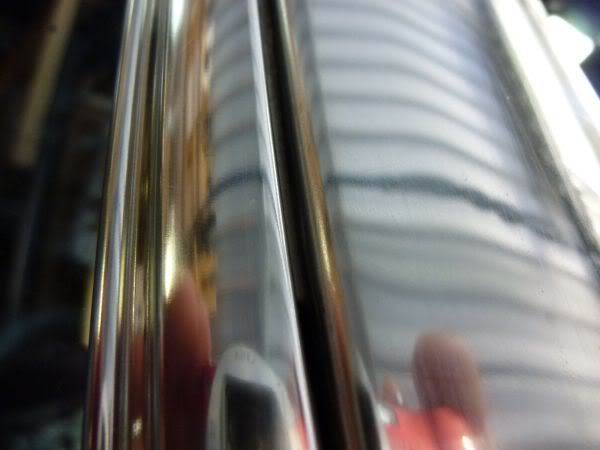
The A pillar stainless was looking good but decided to try some machine polishing of it.
Came up even better than I imagined.
Small amount of polish and a cloth wheel then a paddlepop stick inside a cheese cloth to do the indented areas.
When I put it on the car it made the indented pieces on my screen look bad so i needed to do them using the same method. Had already done stainless on top of screen but did not focus on the delicate indent areas closest to screen.
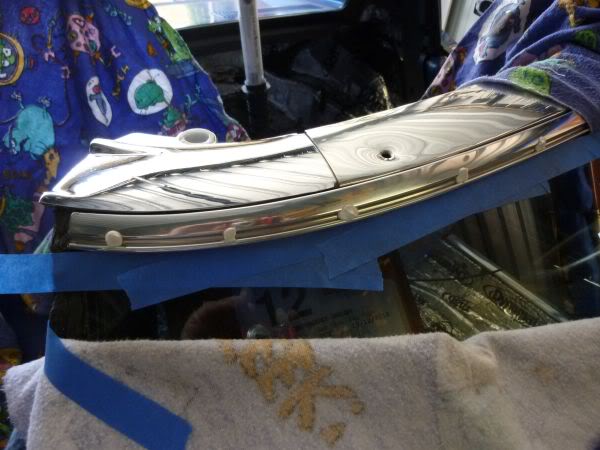
Bit by bit same method, paddlepop stick then machine buff.
Repainted the needles on the heater controls.
With daylight savings I decided to do a bit this evening.
The A pillar stainless was looking good but decided to try some machine polishing of it.
Came up even better than I imagined.
Small amount of polish and a cloth wheel then a paddlepop stick inside a cheese cloth to do the indented areas.
When I put it on the car it made the indented pieces on my screen look bad so i needed to do them using the same method. Had already done stainless on top of screen but did not focus on the delicate indent areas closest to screen.
Bit by bit same method, paddlepop stick then machine buff.
Last edited by CraigH; Apr 9, 2023 at 07:10 AM.
Thread Starter
Melting Slicks
Joined: Apr 2010
Posts: 2,794
Likes: 1,195
From: Canberra Australia
2025 C3 of the Year Finalist - Modified
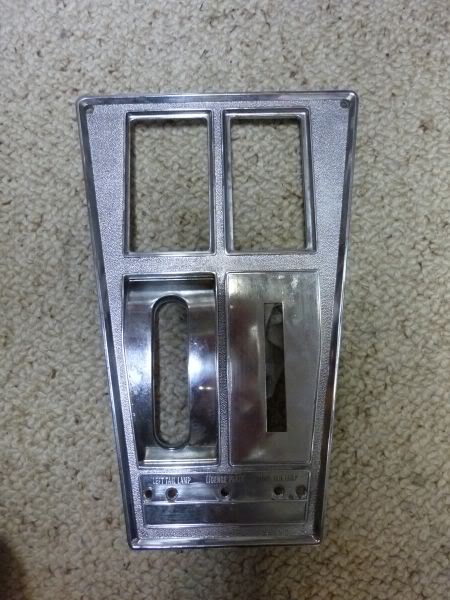
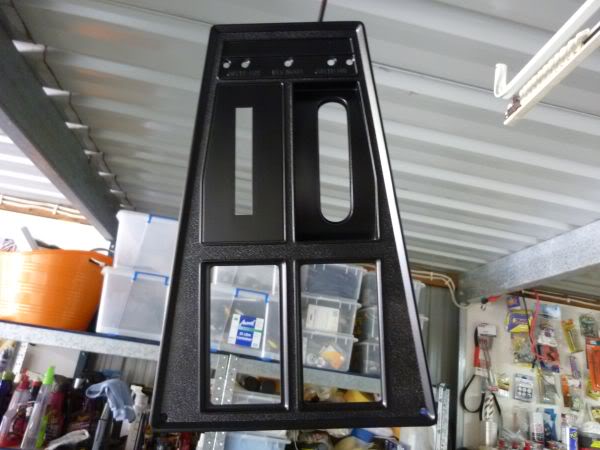
Been a busy week so have not got to the vette much at all.
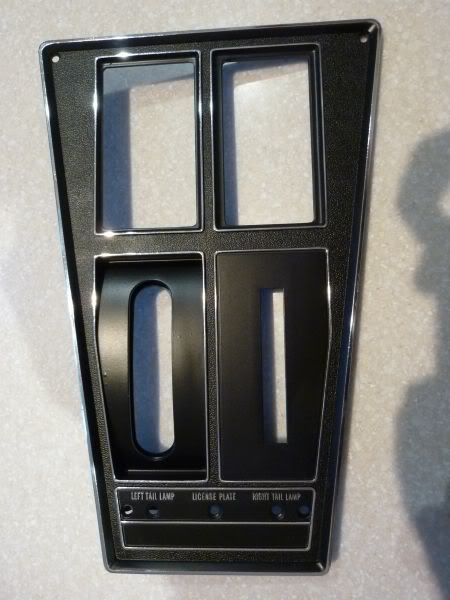
Did finish the console plate though.
Next week will be worse with travel etc so I may start to get withdrawal :-)
Did finish the console plate though.
Next week will be worse with travel etc so I may start to get withdrawal :-)
Last edited by CraigH; Apr 9, 2023 at 07:10 AM.
Thread Starter
Melting Slicks
Joined: Apr 2010
Posts: 2,794
Likes: 1,195
From: Canberra Australia
2025 C3 of the Year Finalist - Modified
Originally Posted by YLLA 88
Originally Posted by CraigH
Did hear today that my wheels are in customs in Sydney
Hit with GST and a few fees but back on track now.
Hit with GST and a few fees but back on track now.
UPS say they will turn up early next week but I wont see them till next weekend....:-(
I had an interesting experience re the tyres i was after as well, Yohahama Advan Sports V103's.
Bob J etc were about 450 - 550 each.
Ebay parallel import 300 each (+ ship + Fit) for the 245's only did not 255's
Rang Yokahama to ask a few Q's re parallel imports and see if they are some model tyres etc etc
Was early in morning and got a guy called Steve.
Very helpful, did not bag the parallel importer but told me the differences and the choice was mine. Yokahama would probably still warranty to protect their name even if parallel.
Difference: Parallel's lower speed rating, lower load rating, possible compound difference and if asymmetric type possible bias difference, not to mention that a lot is old stock is imported and could be going a bit hard.
He then offered to get another local dealer to quote a price for me and he would ring them with the details etc.
Rang the local shop and they offered them at under $400 each...
Turns out Steve is the CEO of Yokahama and just answered the phone when I rang.
What great customer service.
Tyres on order.