


1971 Journey

Thread Starter
Melting Slicks


Joined: Apr 2010
Posts: 2,794
Likes: 1,195
From: Canberra Australia
2025 C3 of the Year Finalist - Modified
November 2010
Originally Posted by CraigH
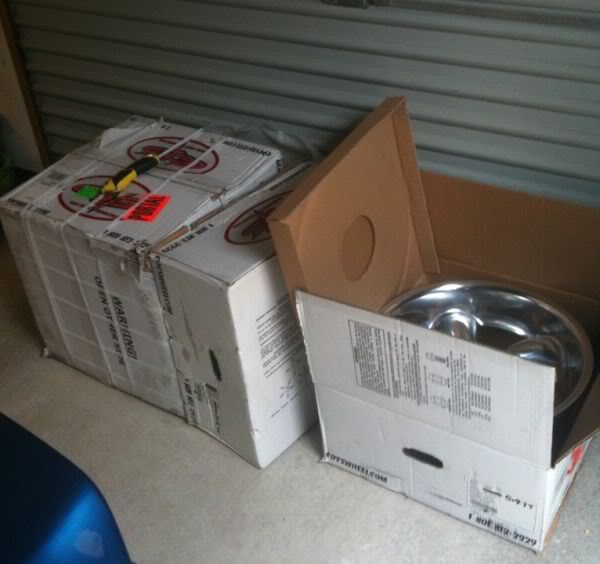
My rims turned up yesterday.
A couple of phone pictures from my son.
[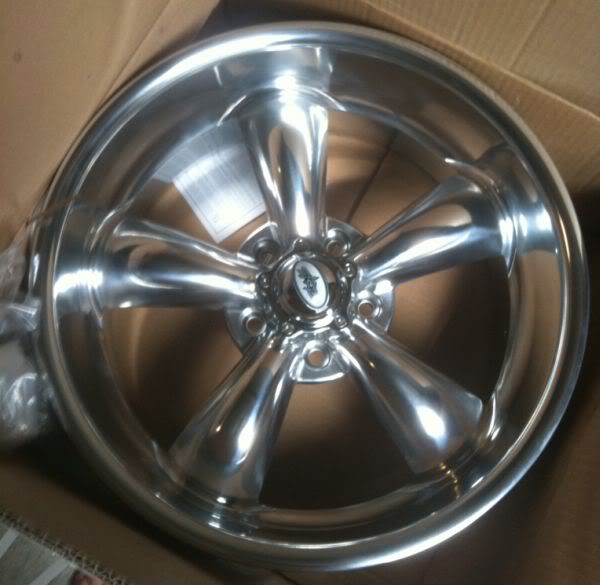
Cant wait to get home and get some tyres fitted up and try them out.
A couple of phone pictures from my son.
[
Cant wait to get home and get some tyres fitted up and try them out.
Last edited by CraigH; Apr 9, 2023 at 07:11 AM.
Thread Starter
Melting Slicks
Joined: Apr 2010
Posts: 2,794
Likes: 1,195
From: Canberra Australia
2025 C3 of the Year Finalist - Modified
A week away and a busy weekend at home but I need to get some more done.
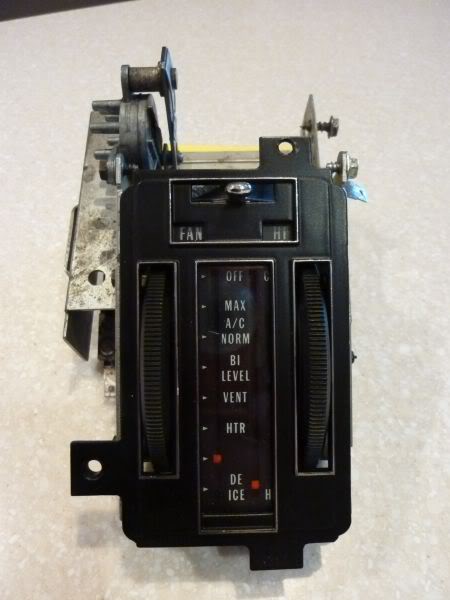
Started to assemble the HVAC controls.
First put the indicator assembly back into the faceplate.
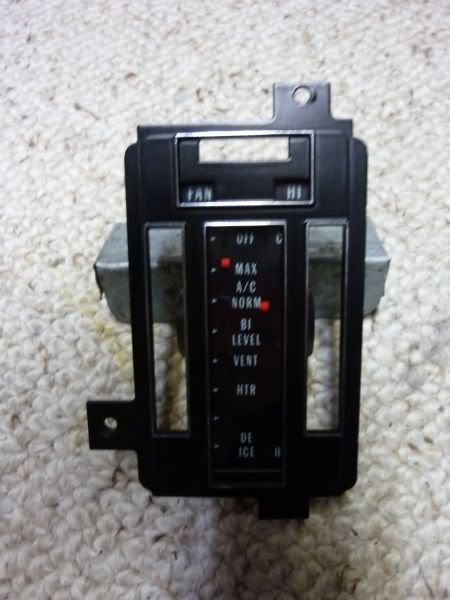
The thumb wheels had been painted with SEM black vinyl.
They needed to be put back into the assemble that had been cleaned and greased.
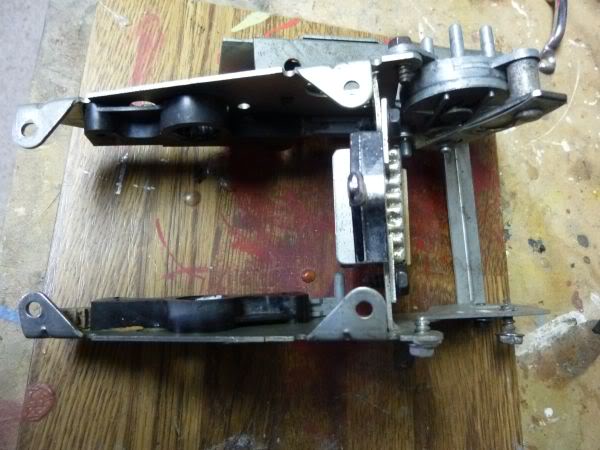
I found that I then needed to split it in half and work each side into the faceplate/Indicator assembly. A little tricky as you need to link the thumb wheels with the wheels on the indicator and if you get them out at all the indicators wont line up properly.
Back into the car and tested all the vacuum connections and blower speed settings. Tested the heater and all the flow positions worked great with minimal air bleed between them.
Lots of fiddling to get it to slide in to position as the wires, hoses etc are a bit like trying to put an egg back in its shell. Possibly if I loosened off the console it would have been easier but I did not want to do that.
Will fit it properly tomorrow when I have better light.
Started to assemble the HVAC controls.
First put the indicator assembly back into the faceplate.
The thumb wheels had been painted with SEM black vinyl.
They needed to be put back into the assemble that had been cleaned and greased.
I found that I then needed to split it in half and work each side into the faceplate/Indicator assembly. A little tricky as you need to link the thumb wheels with the wheels on the indicator and if you get them out at all the indicators wont line up properly.
Back into the car and tested all the vacuum connections and blower speed settings. Tested the heater and all the flow positions worked great with minimal air bleed between them.
Lots of fiddling to get it to slide in to position as the wires, hoses etc are a bit like trying to put an egg back in its shell. Possibly if I loosened off the console it would have been easier but I did not want to do that.
Will fit it properly tomorrow when I have better light.
Last edited by CraigH; Apr 9, 2023 at 06:15 PM.
Thread Starter
Melting Slicks
Joined: Apr 2010
Posts: 2,794
Likes: 1,195
From: Canberra Australia
2025 C3 of the Year Finalist - Modified
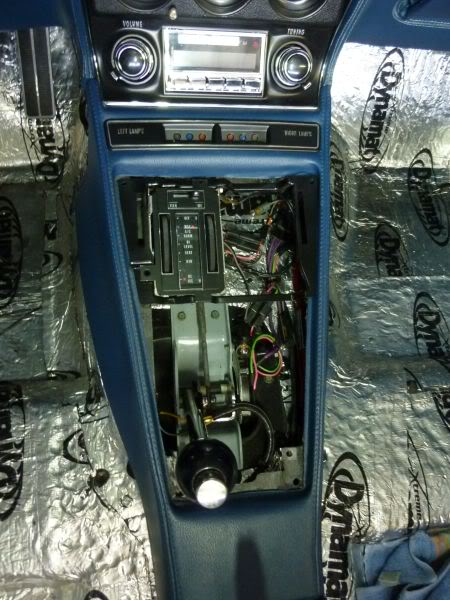
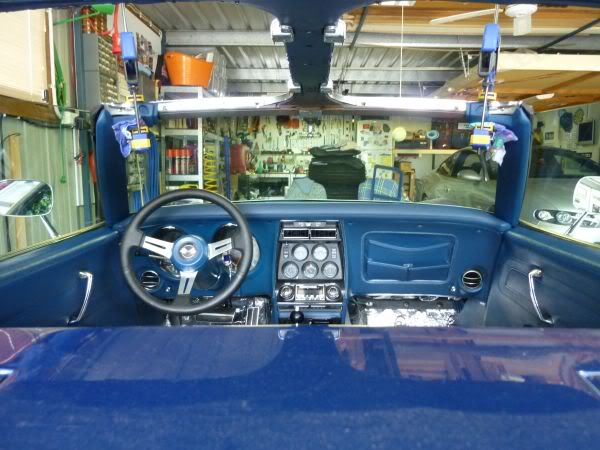
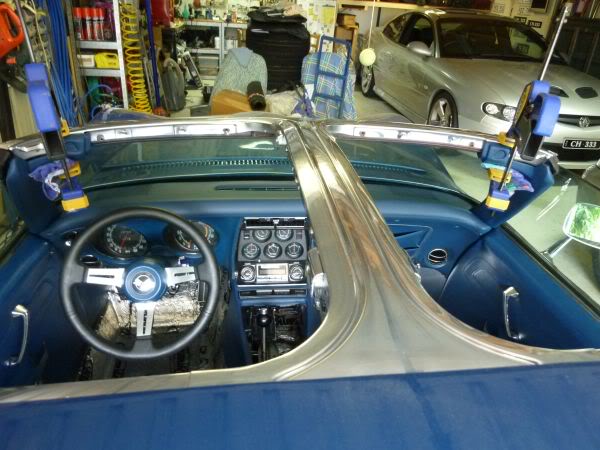
Refitted the HVAC controls with the main cable going to the side this time and it fitted much better.
Then trial fit of the console plate to ensure it was level......hmm out again and adjust the frame that holds the HVAC controls then try again.
Much better this time.
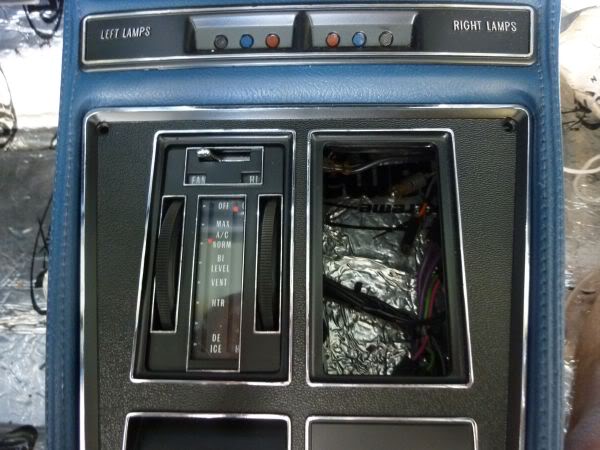

Now shift plate back out and start to wire up for the ipod charger and audio input into deck.
Am thinking of running it up into the cig lighter area and getting one of the new Nano units tats all screen.
Need to do a bit of testing.
Should be able to get the remainder of console put back together in a few days and also the rear window assemblies and window tray.
Then trial fit of the console plate to ensure it was level......hmm out again and adjust the frame that holds the HVAC controls then try again.
Much better this time.
Now shift plate back out and start to wire up for the ipod charger and audio input into deck.
Am thinking of running it up into the cig lighter area and getting one of the new Nano units tats all screen.
Need to do a bit of testing.
Should be able to get the remainder of console put back together in a few days and also the rear window assemblies and window tray.
Last edited by CraigH; Apr 9, 2023 at 06:16 PM.
Thread Starter
Melting Slicks
Joined: Apr 2010
Posts: 2,794
Likes: 1,195
From: Canberra Australia
2025 C3 of the Year Finalist - Modified
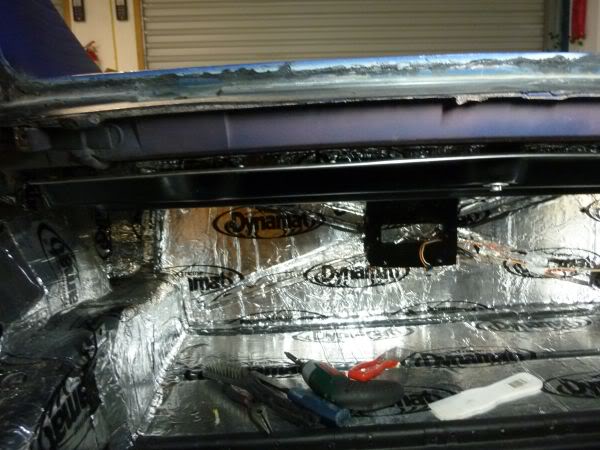
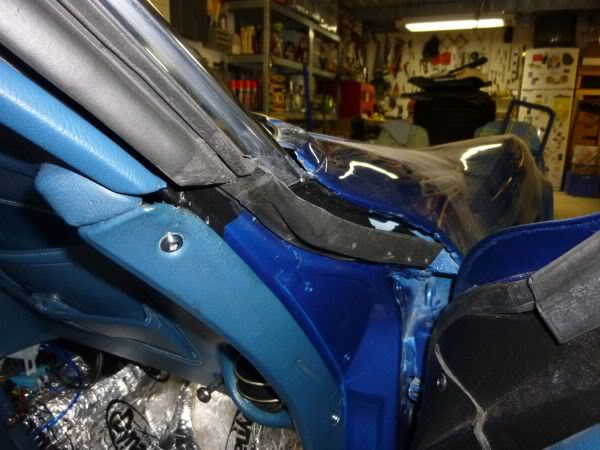
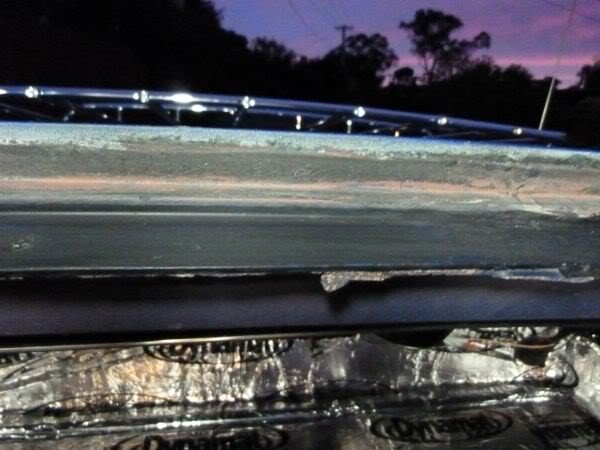
Started to refit the rear window hardware.
Started with the fittings where the window sits on the bottom. Parts media cleaned, screws painted and fitted
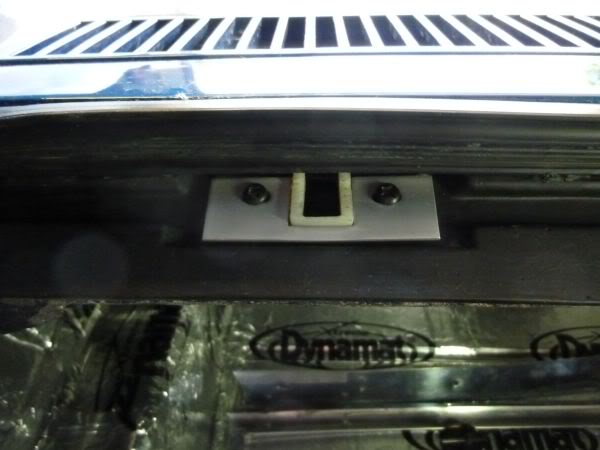
Top clamps in place after cleaning and a new foam pad added that goes between window and bracket.
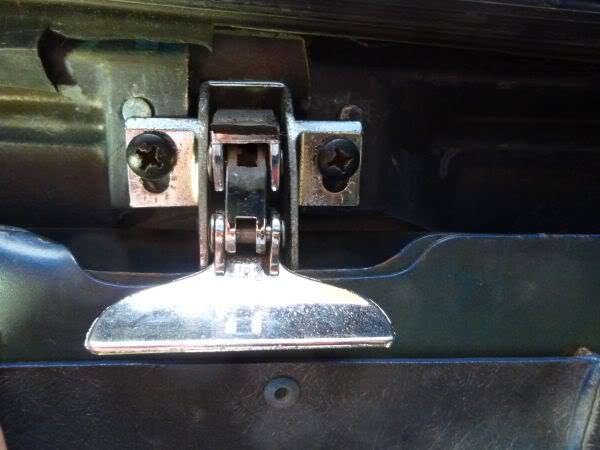
I then fitted the removable window to test and did a bit of adjusting to get it to fit nice.
While looking at it I wondered what happened to water that went down between the metal frame and the rubber seal......It is meant to pool in a small channel under the window, but where does it go.
I found signs that there was once some drain holes (3 on each side). So out comes the dremel and I opened them all up again and repainted the channel.
The water then goes into the same drain as the rear deck. That would explain a few drips when I washed the car before.
I have been using VHT satin black enamel for all the bolts as it dries fast. Everything else that is satin (like console etc) are all White Night satin black enamel, Dries slower but is a better finish (closer to my view of what satin is) and dries very hard.
Started with the fittings where the window sits on the bottom. Parts media cleaned, screws painted and fitted
Top clamps in place after cleaning and a new foam pad added that goes between window and bracket.
I then fitted the removable window to test and did a bit of adjusting to get it to fit nice.
While looking at it I wondered what happened to water that went down between the metal frame and the rubber seal......It is meant to pool in a small channel under the window, but where does it go.
I found signs that there was once some drain holes (3 on each side). So out comes the dremel and I opened them all up again and repainted the channel.
The water then goes into the same drain as the rear deck. That would explain a few drips when I washed the car before.
I have been using VHT satin black enamel for all the bolts as it dries fast. Everything else that is satin (like console etc) are all White Night satin black enamel, Dries slower but is a better finish (closer to my view of what satin is) and dries very hard.
Last edited by CraigH; Apr 9, 2023 at 06:16 PM.
Thread Starter
Melting Slicks
Joined: Apr 2010
Posts: 2,794
Likes: 1,195
From: Canberra Australia
2025 C3 of the Year Finalist - Modified
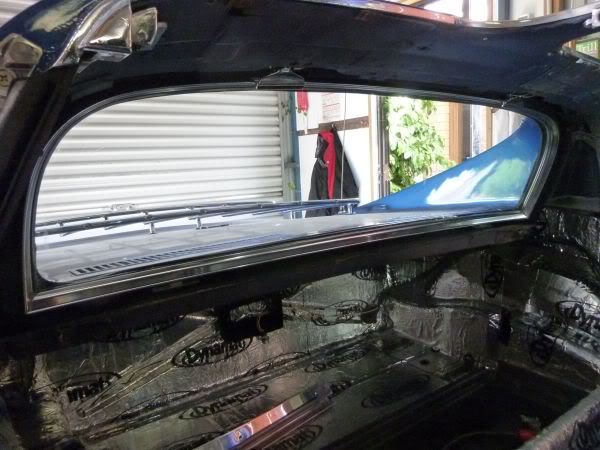
Thought I would do something simple last night and refit the rear window tray.
Well it was simple but......
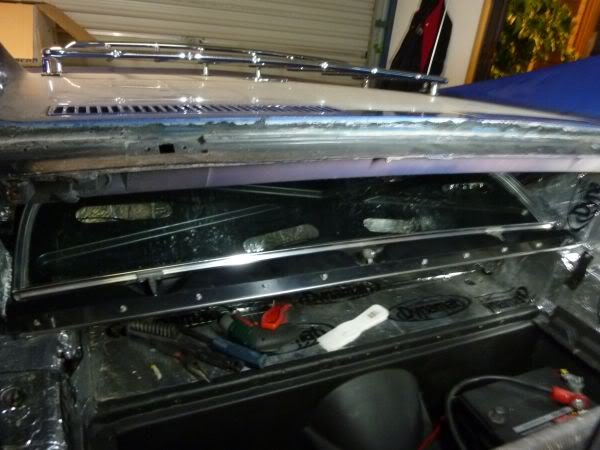
I then decided I did not like how the rear window weatherstrip was done so I ripped it out.
Then spent a few hours trying to clean up the old layers of glue.....what a pain I have so much more to get off before I can fit a new one. I think I will have to look for a release agent for this stuff, thinners or even acetone don't really move it.
Well it was simple but......
I then decided I did not like how the rear window weatherstrip was done so I ripped it out.
Then spent a few hours trying to clean up the old layers of glue.....what a pain I have so much more to get off before I can fit a new one. I think I will have to look for a release agent for this stuff, thinners or even acetone don't really move it.
Last edited by CraigH; Apr 9, 2023 at 06:17 PM.
Thread Starter
Melting Slicks
Joined: Apr 2010
Posts: 2,794
Likes: 1,195
From: Canberra Australia
2025 C3 of the Year Finalist - Modified
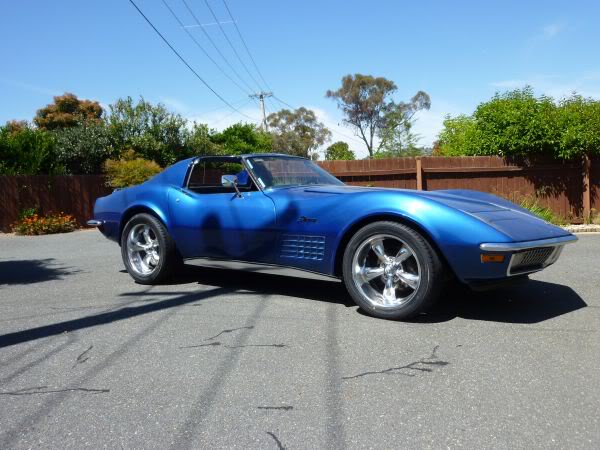
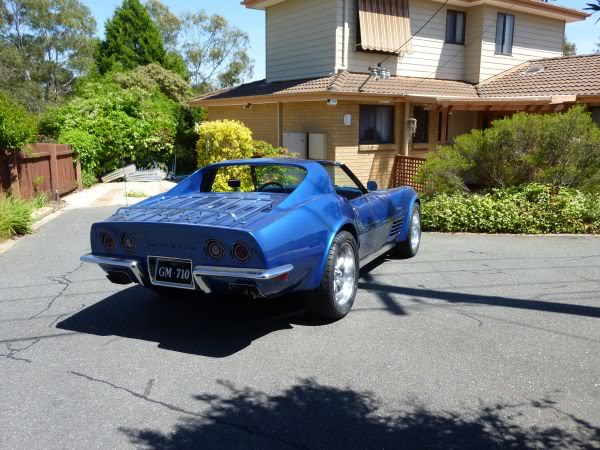
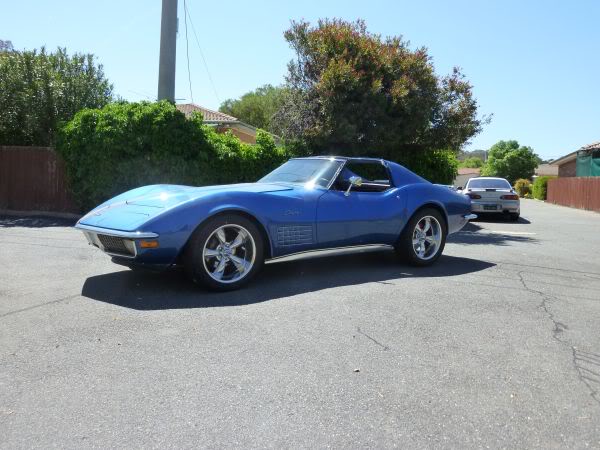
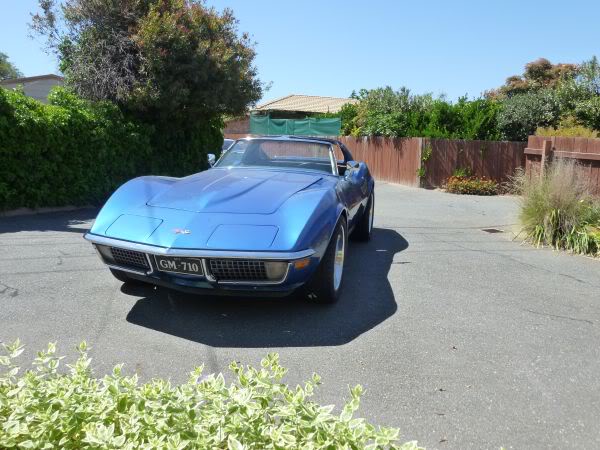
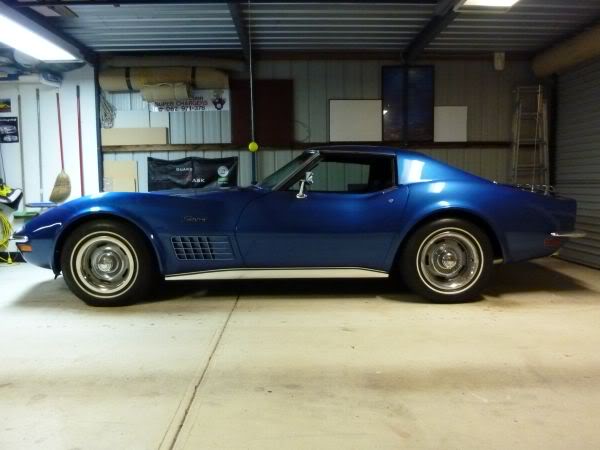
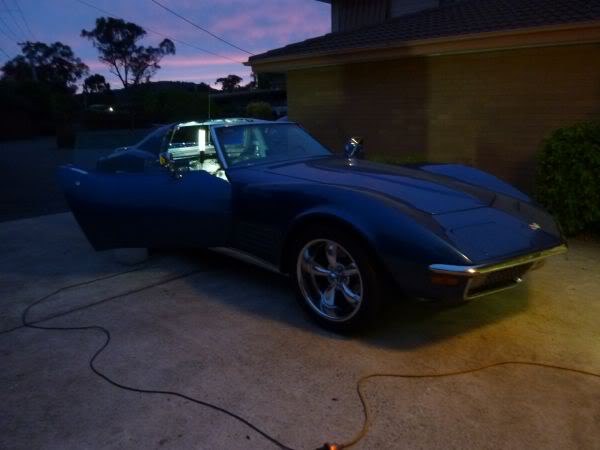
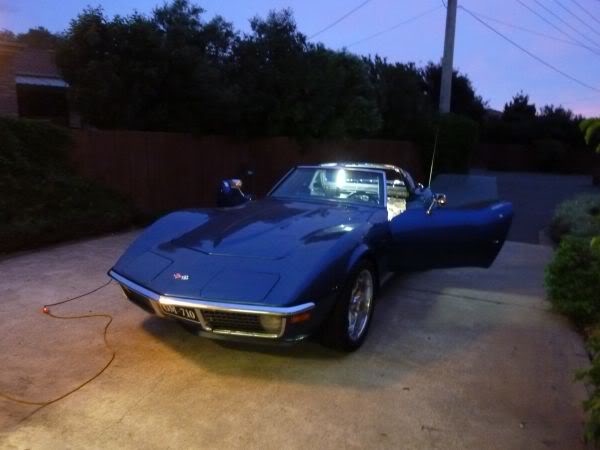
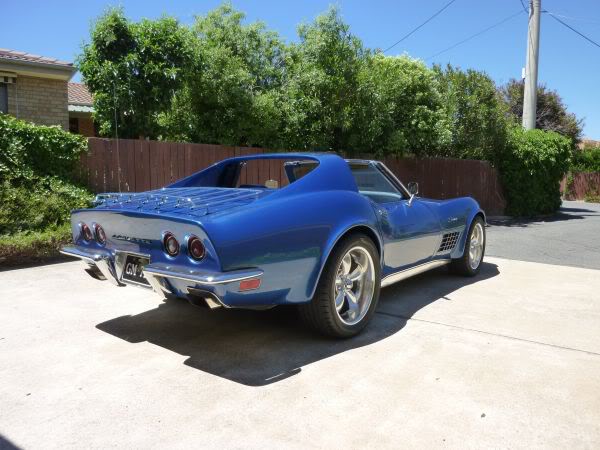
Ok here are a few shots after wheels were on.
Vette has not been driven more than 50m so it will settle down a bit more for sure. Bit hard without seats :-)
Still will probably want it lower as i like the wheels to sit in the guards, but that can be a 2011 project.
In for an alignment next week as well.
Please excuse the missing A pillars etc and the fact its filthy.
Last edited by CraigH; Apr 9, 2023 at 06:18 PM.
Thread Starter
Melting Slicks
Joined: Apr 2010
Posts: 2,794
Likes: 1,195
From: Canberra Australia
2025 C3 of the Year Finalist - Modified
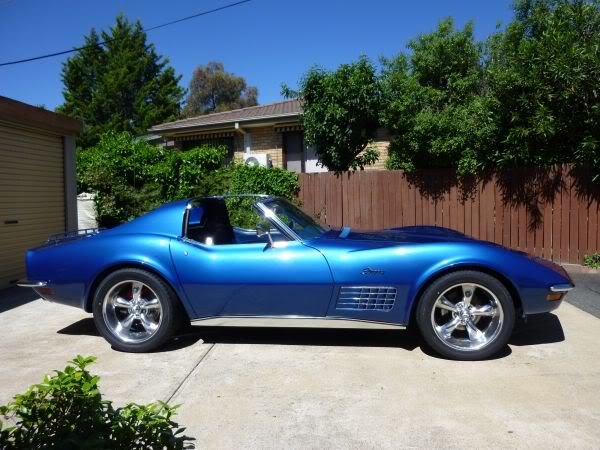
Originally Posted by moto
Yeah bewtifull Craig - they're exactly the wheels I've got in mind for the '73. How do you get i to sit lower if it's not a stupid question ? I know what you mean about that gap! You see it so often on C3's and it kills the whole profile ay !
Well given it has not been driven yet since I jacked it up and put them on it will settle down a bit.
Once I see what that looks like I will decide what to do next, if anything.
The rear is easy.
I already have 8" bolts in the rear suspension and had adjusted them to about 1" from the end. The original bots are 6"
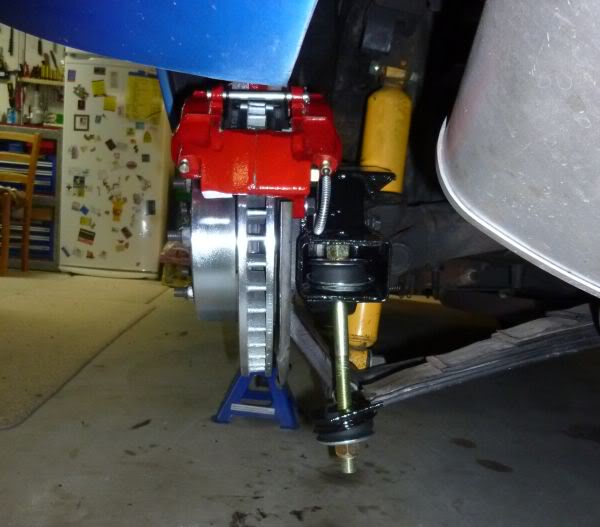
That how I got the back to sit like below.
So I can get another inch in the back easily with the 8" bolts.....or with 10" bolts way more.
The front would be either
1) new springs
2) VB&P monospring front end
3) coilovers.
Springs are the cheapest but you cant guarantee the height.
Initially I will just lower the back so the gap is event front and back between wheel and guard.
Last edited by CraigH; Apr 9, 2023 at 06:18 PM.
Thread Starter
Melting Slicks
Joined: Apr 2010
Posts: 2,794
Likes: 1,195
From: Canberra Australia
2025 C3 of the Year Finalist - Modified
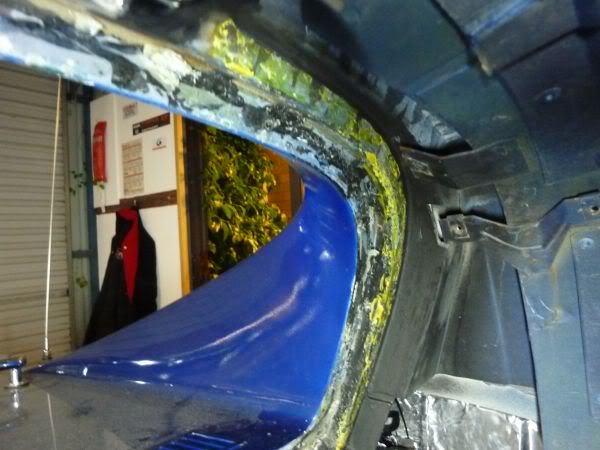
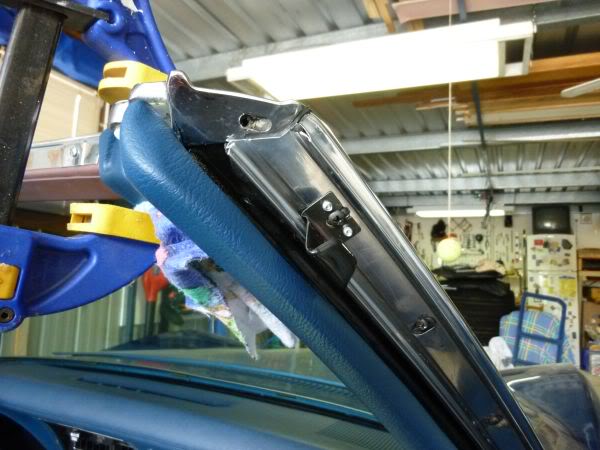
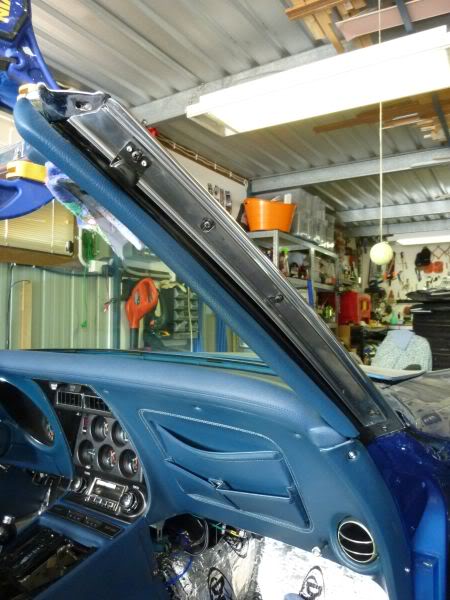
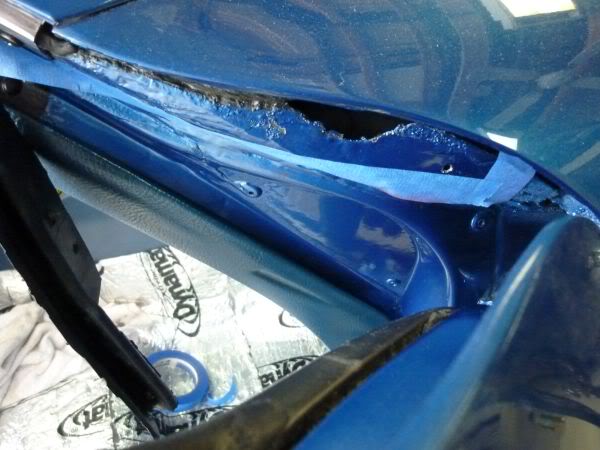
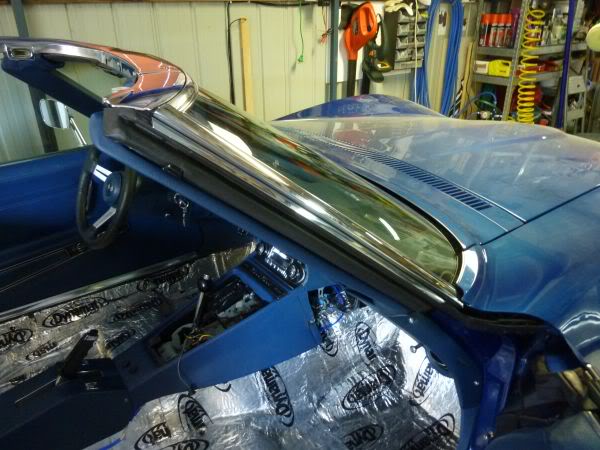
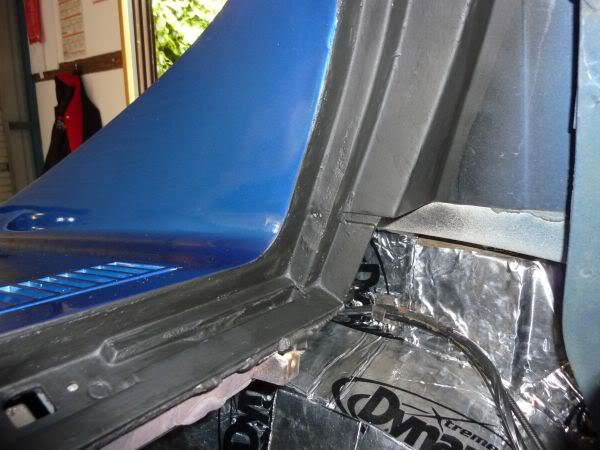
Started to do the A Pillar weatherstrip today.
The Pillar was already painted with black enamel a few weeks back.
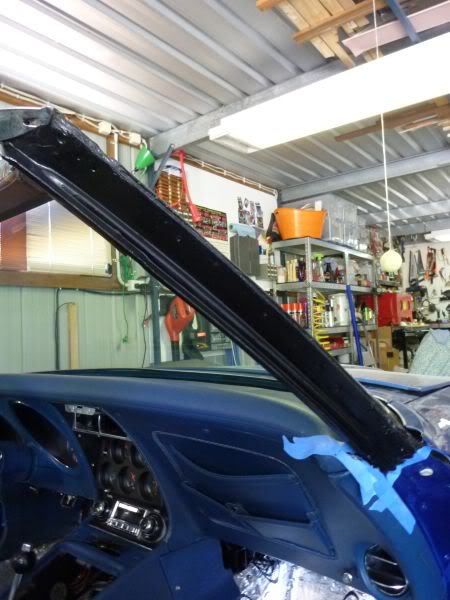
Now using 3M Strip caulk I ran a number of lines down the pillar on either side of the screw holes and on the outer edge of the pillar itself.
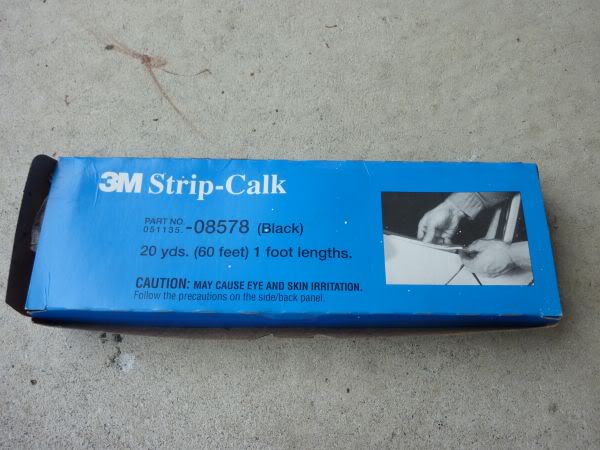
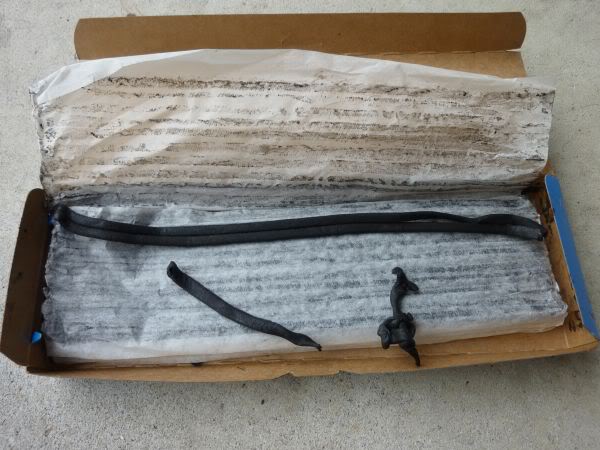
I read a lot of posts that talked about what to use between the layers but in the end the strip caulk allows you to work and adjust it and take off later so it was the best in my view.
The reveal trim is then fitted and bedded down to spread the caulk.
The Pillar was already painted with black enamel a few weeks back.
Now using 3M Strip caulk I ran a number of lines down the pillar on either side of the screw holes and on the outer edge of the pillar itself.
I read a lot of posts that talked about what to use between the layers but in the end the strip caulk allows you to work and adjust it and take off later so it was the best in my view.
The reveal trim is then fitted and bedded down to spread the caulk.
Last edited by CraigH; Apr 9, 2023 at 06:19 PM.
Corvette Stories
The Best of Corvette for Corvette Enthusiasts

Top 10 Most Expensive Corvettes Ever Sold on Bring A Trailer
Brett Foote
10 Things Every Corvette Owner Needs (2026 Edition)
Michael S. Palmer
8 Most "Only Corvette Owners Understand" Quirks and Problems
Pouria Savadkouei
10 Reasons the C6 Z06 is Still A Performance Benchmark After 20 Years
Joe Kucinski
How Much Horsepower Every Corvette Engine "LOST" in 1972
Joe Kucinski
Top 10 DOs and DON'Ts for Protecting Your Convertible Top!
Michael S. Palmer
Top 10 Most Explosive Corvettes Ever Made: Power-to-Weight Ratio Ranked!
Joe Kucinski
150 hp to 1,250 hp: Every Corvette Generation Compared by the Specs That Matter
Joe Kucinski
8 Coolest Corvette Pace Cars (and Replicas) of All Time
Verdad Gallardo
Thread Starter
Melting Slicks
Joined: Apr 2010
Posts: 2,794
Likes: 1,195
From: Canberra Australia
2025 C3 of the Year Finalist - Modified
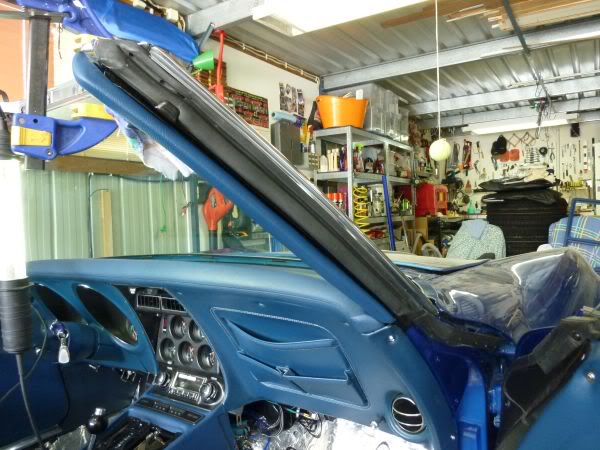
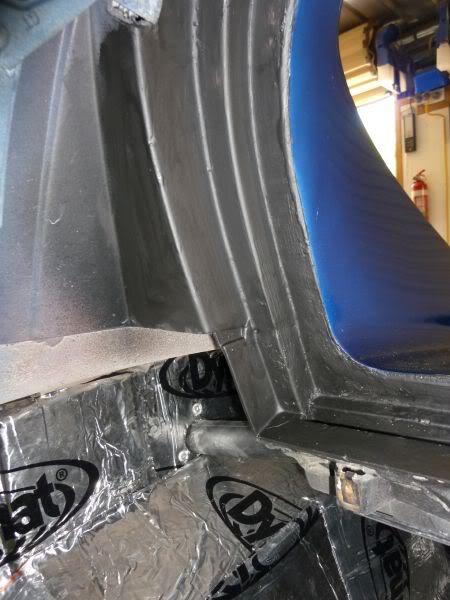
On the weatherstrip channel I pop riveted the brackets near the top.
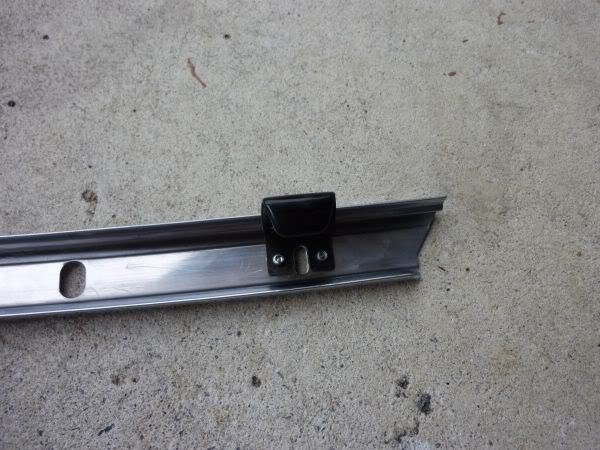
Then once the reveal trim piece was fitted and tightened up with 2 screws I went on to the channel that holds the weatherstrip and ran one bead of strip caulk.
It is then fitted to the reveal trim and screwed in.
Then once the reveal trim piece was fitted and tightened up with 2 screws I went on to the channel that holds the weatherstrip and ran one bead of strip caulk.
It is then fitted to the reveal trim and screwed in.
Last edited by CraigH; Apr 9, 2023 at 06:20 PM.
Thread Starter
Melting Slicks
Joined: Apr 2010
Posts: 2,794
Likes: 1,195
From: Canberra Australia
2025 C3 of the Year Finalist - Modified
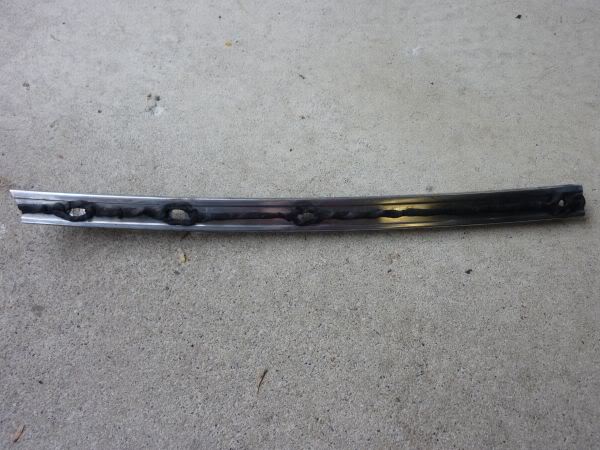
The weatherstrip was then test fitted.
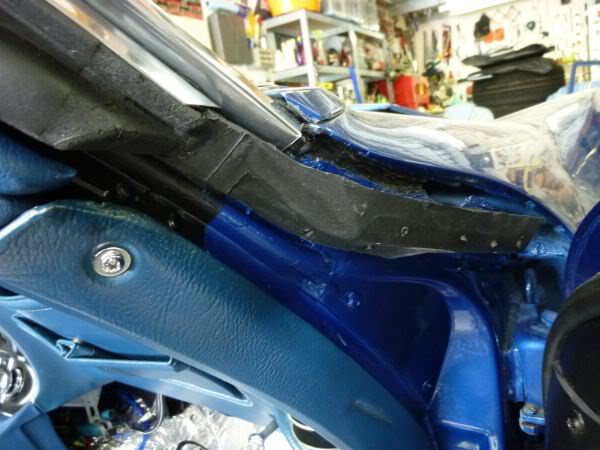
The glass was run up and down and the weatherstrip removed and the channel adjusted.
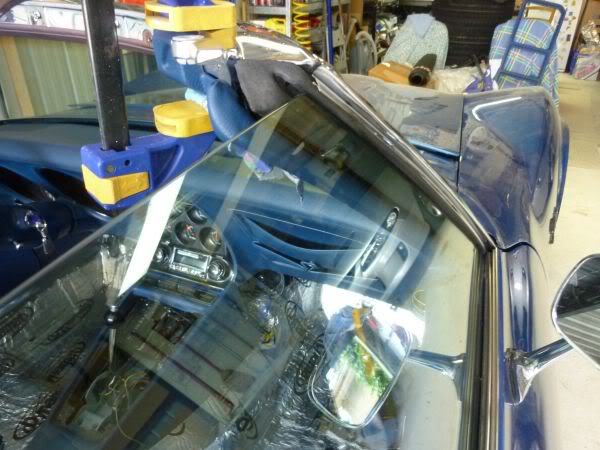
The glass was run up and down and the weatherstrip removed and the channel adjusted.
Last edited by CraigH; Apr 9, 2023 at 06:20 PM.
Thread Starter
Melting Slicks
Joined: Apr 2010
Posts: 2,794
Likes: 1,195
From: Canberra Australia
2025 C3 of the Year Finalist - Modified
I have masked the bottom area around the drip channel of the weatherstrip to be painted black.
Probably not correct but will look much neater.
Probably not correct but will look much neater.
Last edited by CraigH; Apr 9, 2023 at 06:21 PM.
Thread Starter
Melting Slicks
Joined: Apr 2010
Posts: 2,794
Likes: 1,195
From: Canberra Australia
2025 C3 of the Year Finalist - Modified
Now I just compared both sides and the readjusted the channels etc to ensure it looked even and the glass would go up and down properly..
Will leave the windows up and doors shut for a day to settle it all down.
Now I just need to take the weatherstrip off again, paint the lower piece and fit it properly with adhesive.
I picked up some DIGGERS XYLENE thinners from Bunnings that should help with removing any remaining sealer around the rear window.
Last edited by CraigH; Apr 10, 2023 at 09:42 PM.
Thread Starter
Melting Slicks
Joined: Apr 2010
Posts: 2,794
Likes: 1,195
From: Canberra Australia
2025 C3 of the Year Finalist - Modified
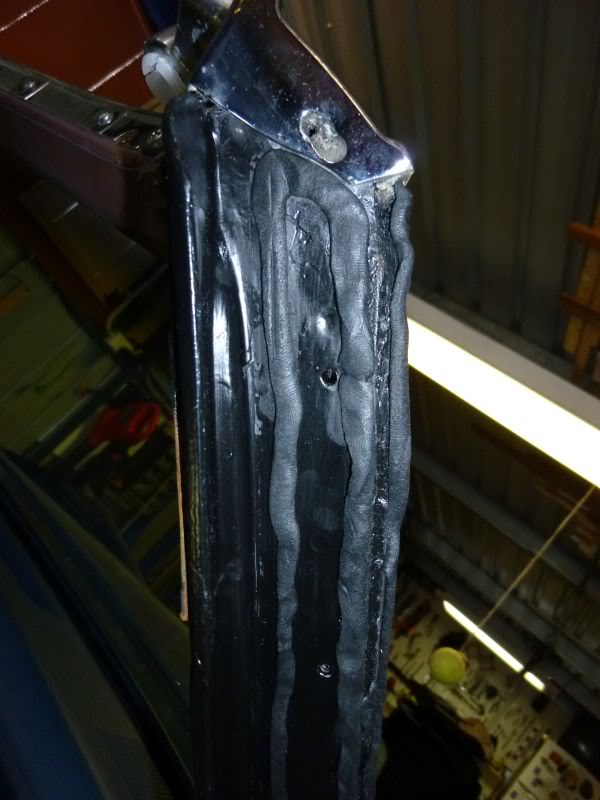
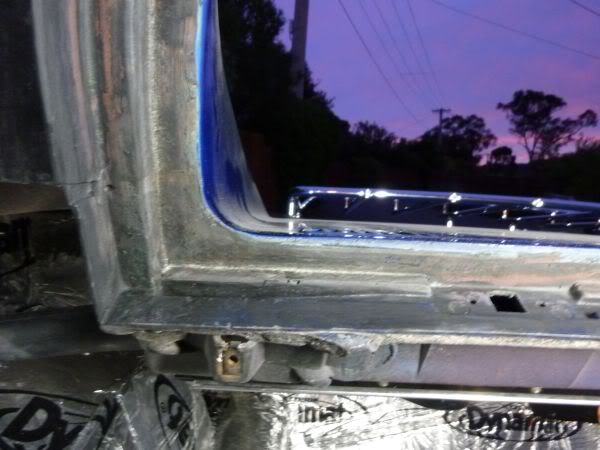
A Pillar weatherstrip is progressing.
All the channels etc are adjusted and paint done.
The Strip is in but I wont glue it for a little while so I am sure its sitting 100%
I have fitted the A Pillar trim as well. Took a fair bit of adjusting the piece then one new screw hole needed as the old one did not align.

The rear weatherstrip is sitting for a while to get flat and more to shape.

All the channels etc are adjusted and paint done.
The Strip is in but I wont glue it for a little while so I am sure its sitting 100%
I have fitted the A Pillar trim as well. Took a fair bit of adjusting the piece then one new screw hole needed as the old one did not align.
The rear weatherstrip is sitting for a while to get flat and more to shape.
Last edited by CraigH; Apr 9, 2023 at 06:22 PM.
Thread Starter
Melting Slicks
Joined: Apr 2010
Posts: 2,794
Likes: 1,195
From: Canberra Australia
2025 C3 of the Year Finalist - Modified
Nice night tonight so I spent some time on cleaning up the weatherstrip glue from the rear window seal.
I used XYLENE and it did a great job but you would not want to do it in a confined space.
A coat of paint and it will be ready for the new window seal.
Getting a wheel alignment tomorrow.
Put a seat back in and took it for a spin tonight.
Feels great with the new wheels and tyres.
I used XYLENE and it did a great job but you would not want to do it in a confined space.
A coat of paint and it will be ready for the new window seal.
Getting a wheel alignment tomorrow.
Put a seat back in and took it for a spin tonight.
Feels great with the new wheels and tyres.
Last edited by CraigH; Apr 9, 2023 at 06:22 PM.
Thread Starter
Melting Slicks
Joined: Apr 2010
Posts: 2,794
Likes: 1,195
From: Canberra Australia
2025 C3 of the Year Finalist - Modified
November 2010
Just picked vette up at lunch after having an alignment and suspension check.
Still want it a bit lower (not a lot) but I am looking at these to get it done from Speed Direct.
Seem to get fairly good reviews in the US.
Just need to decide on strength 400, 450 .....etc
Dont want it too hard but 450 is the stiffer of their soft springs (Normally for BB).
Last edited by CraigH; Apr 9, 2023 at 06:23 PM.
Thread Starter
Melting Slicks
Joined: Apr 2010
Posts: 2,794
Likes: 1,195
From: Canberra Australia
2025 C3 of the Year Finalist - Modified
I have finished off the ipod integration I was after.
The deck has a simple 3.5 audio input so I went onto ebay and got.
1) ipod cable with audio and usb tails. @$5
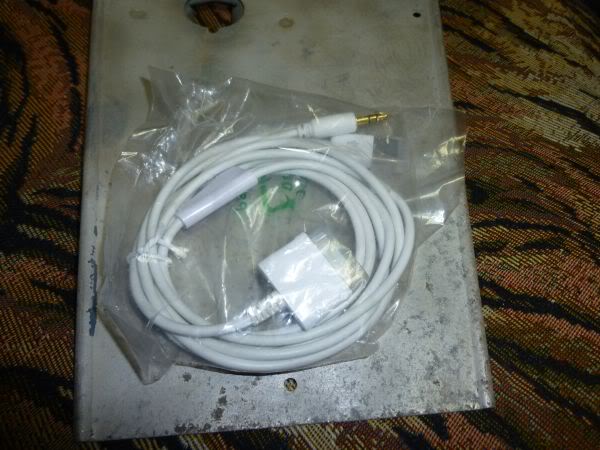
2) Belking micro USB Charger. @$5
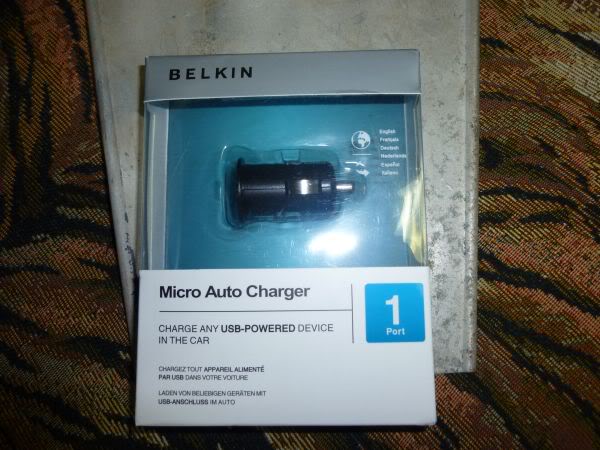
3) small small cigarette lighter.
From the new cigarette lighter I put a couple of piggyback connectors so it can go into the normal switched lead as used by the stereo.

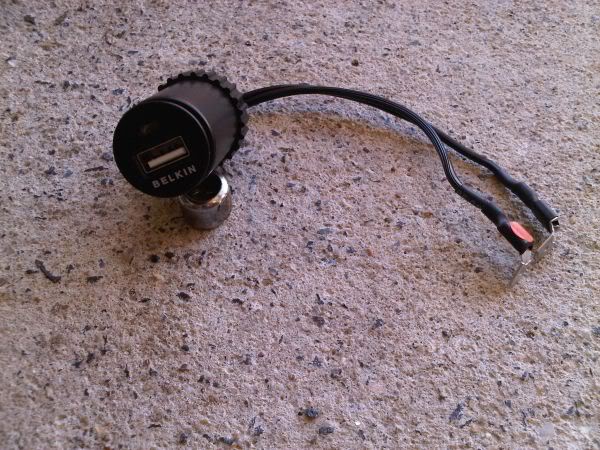
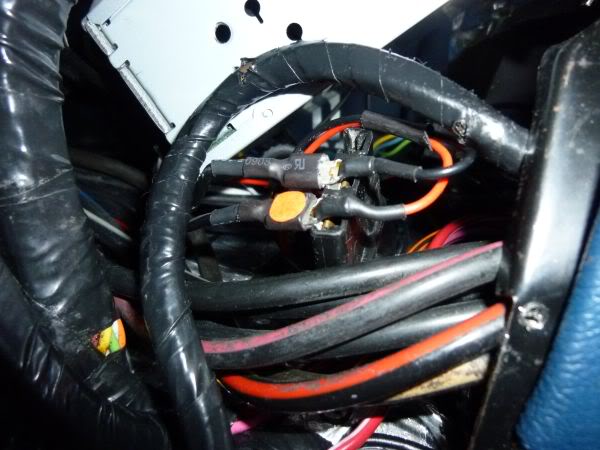
Then the ipod cable plugs into the deck and the charger and its all nice an neat and charges all the time I have the ignition on.
Once shift plate is in I will modify the ash tray area to mount an ipod hidden behind the door.
The deck has a simple 3.5 audio input so I went onto ebay and got.
1) ipod cable with audio and usb tails. @$5
2) Belking micro USB Charger. @$5
3) small small cigarette lighter.
From the new cigarette lighter I put a couple of piggyback connectors so it can go into the normal switched lead as used by the stereo.
Then the ipod cable plugs into the deck and the charger and its all nice an neat and charges all the time I have the ignition on.
Once shift plate is in I will modify the ash tray area to mount an ipod hidden behind the door.
Last edited by CraigH; Apr 9, 2023 at 06:24 PM.
Thread Starter
Melting Slicks
Joined: Apr 2010
Posts: 2,794
Likes: 1,195
From: Canberra Australia
2025 C3 of the Year Finalist - Modified
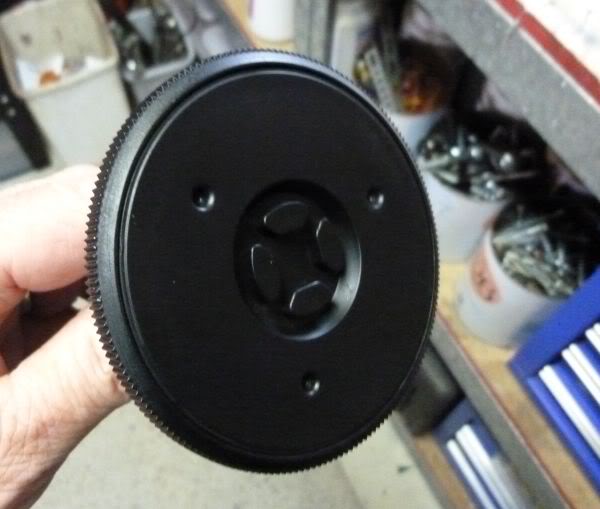
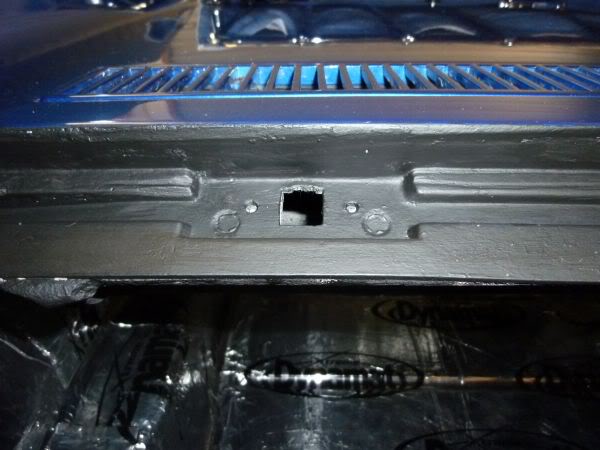
Cleaned up and refinished the antenna base plate.
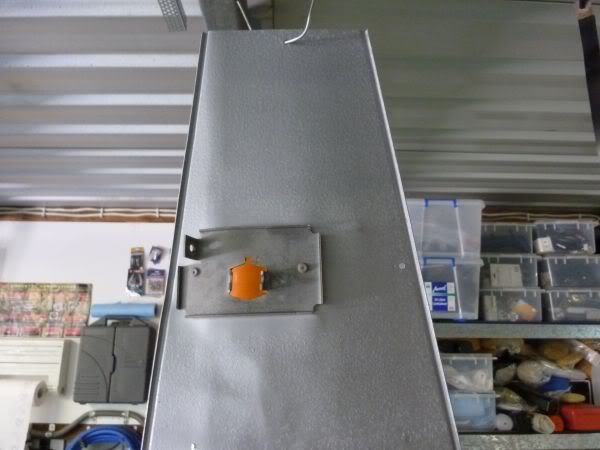
Ready to go back once I get the replacement rubber feet that go between it and the fiberglass.
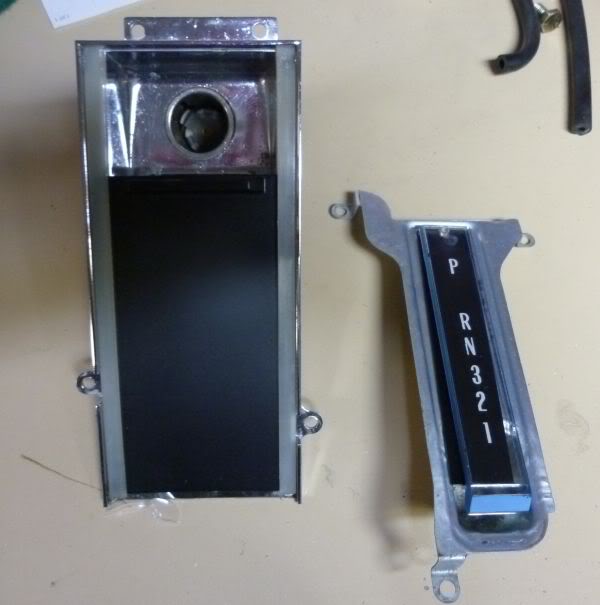
Also got all the shift plate parts ready to go once the clip for the ashtray door fronts up.
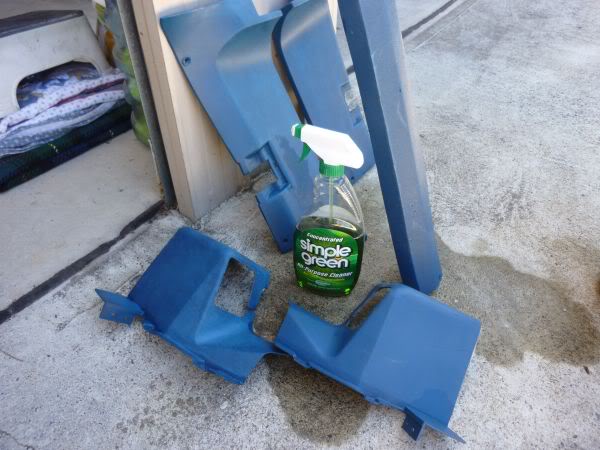
I have a number of new panels for inside the car but will be repainting some existing and new ones with vinyl paint to ensure an even color. (Dying is what everyone calls it but I will stick with painting as I cant see how you dye plastic or vinyl.
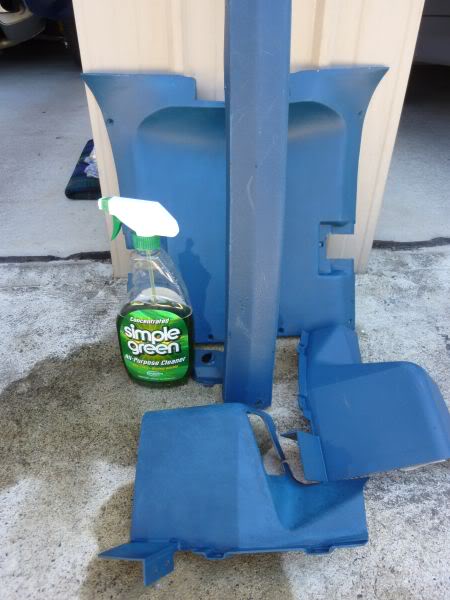
Good clean with simple green and a scotch pad.
I have a few vinyl nicks that I want to fill but need to work out what would work best to do that.
You can see in this picture how I have enlarged the seat belt hole on the covers to take the larger Australian belts and to stop any belt rubbing.
Also created a slit to get the belt in and out so getting seats out of the vette will be simpler once done.
Ready to go back once I get the replacement rubber feet that go between it and the fiberglass.
Also got all the shift plate parts ready to go once the clip for the ashtray door fronts up.
I have a number of new panels for inside the car but will be repainting some existing and new ones with vinyl paint to ensure an even color. (Dying is what everyone calls it but I will stick with painting as I cant see how you dye plastic or vinyl.
Good clean with simple green and a scotch pad.
I have a few vinyl nicks that I want to fill but need to work out what would work best to do that.
You can see in this picture how I have enlarged the seat belt hole on the covers to take the larger Australian belts and to stop any belt rubbing.
Also created a slit to get the belt in and out so getting seats out of the vette will be simpler once done.
Last edited by CraigH; Apr 9, 2023 at 06:25 PM.
Thread Starter
Melting Slicks
Joined: Apr 2010
Posts: 2,794
Likes: 1,195
From: Canberra Australia
2025 C3 of the Year Finalist - Modified
Have finished off the rear window surround rady to fit the new weatherstrip.
Will let the paint dry for a few days first.
I painted up to the lip as far as I could to cover and signs of the masking that was done when it was repainted. Also touched up the air vents under the grills.
You can just see the black paint edge from outside but once weatherstrip is in it should not be visible

[
Will let the paint dry for a few days first.
I painted up to the lip as far as I could to cover and signs of the masking that was done when it was repainted. Also touched up the air vents under the grills.
You can just see the black paint edge from outside but once weatherstrip is in it should not be visible
[
Last edited by CraigH; Apr 9, 2023 at 06:26 PM.
Thread Starter
Melting Slicks
Joined: Apr 2010
Posts: 2,794
Likes: 1,195
From: Canberra Australia
2025 C3 of the Year Finalist - Modified
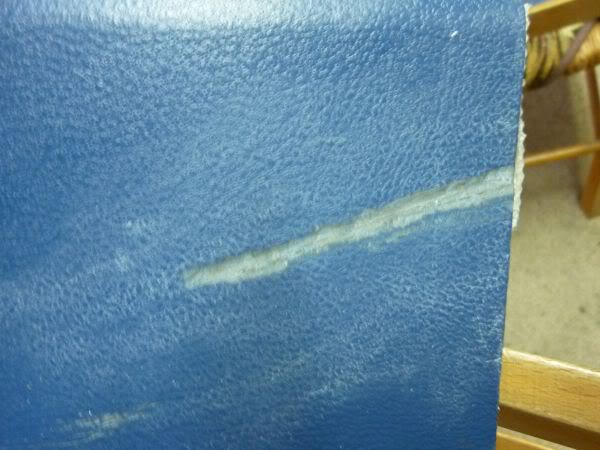
Did a bit of repair work on a few interior panels.
They had some knicks through the vinyl here and there.
Filled them with body filler.
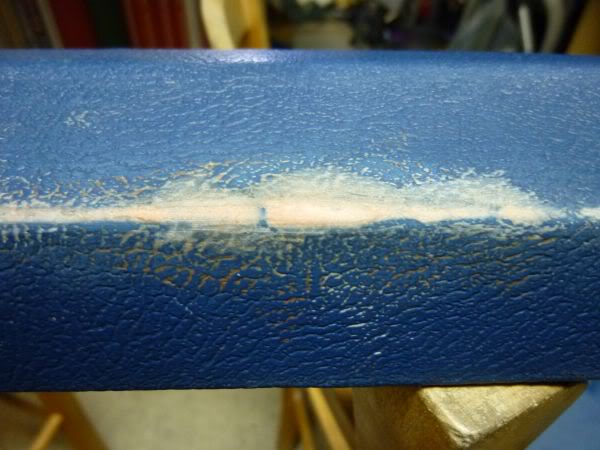
Sanded them back and a good coat of plastic primer.
On the seat belt covers there were some cracks that I fiberglass up on the back then ground out the front to give somewhere for the filler to go.
Then filled and sanded back.
Finally a coat of plastic primer.
The seat belt opening has been enlarged for our larger belts.
They had some knicks through the vinyl here and there.
Filled them with body filler.
Sanded them back and a good coat of plastic primer.
On the seat belt covers there were some cracks that I fiberglass up on the back then ground out the front to give somewhere for the filler to go.
Then filled and sanded back.
Finally a coat of plastic primer.
The seat belt opening has been enlarged for our larger belts.
Last edited by CraigH; Apr 9, 2023 at 06:27 PM.
Thread Starter
Melting Slicks
Joined: Apr 2010
Posts: 2,794
Likes: 1,195
From: Canberra Australia
2025 C3 of the Year Finalist - Modified
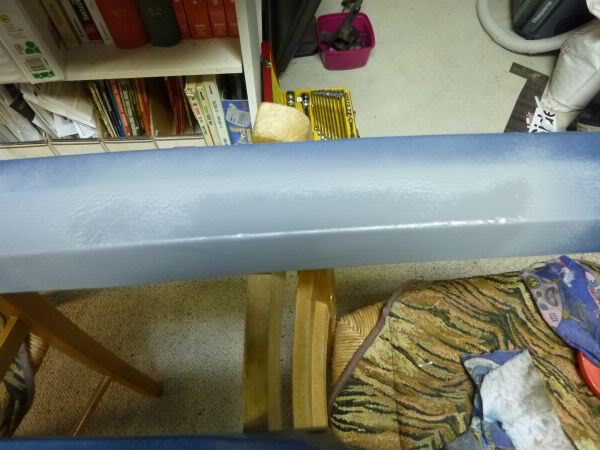
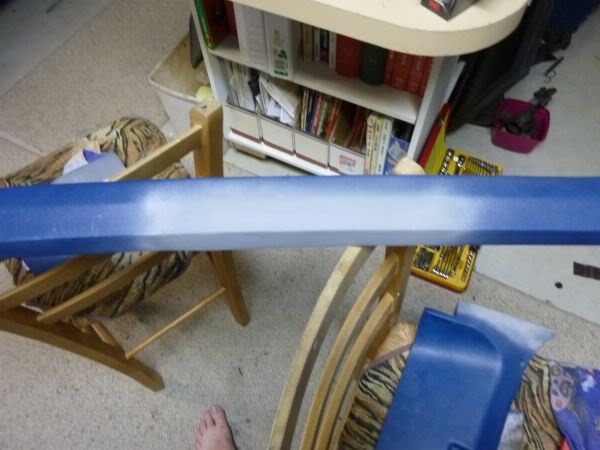
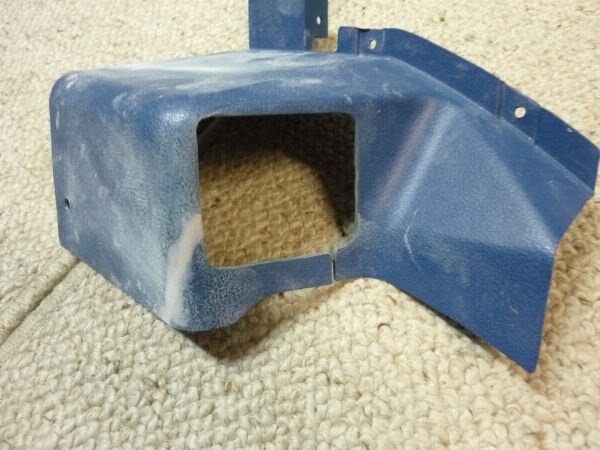
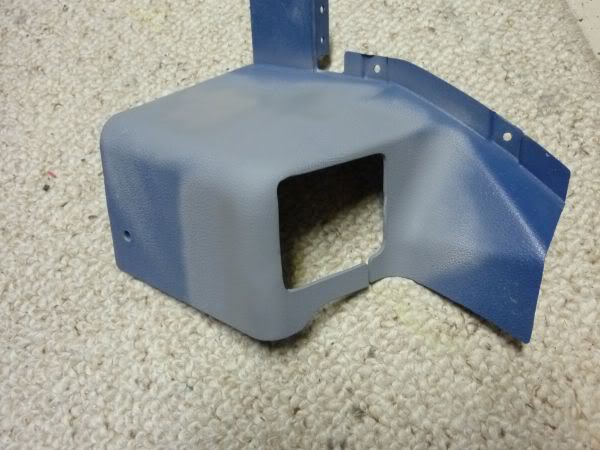
Finishing off most of the interior panels.
Was fun to see it come together and I have always enjoyed spray painting.
When I was 17-18 I did it and panel beating at tech college for a few years at night so I could learn and use all the equipment for free.
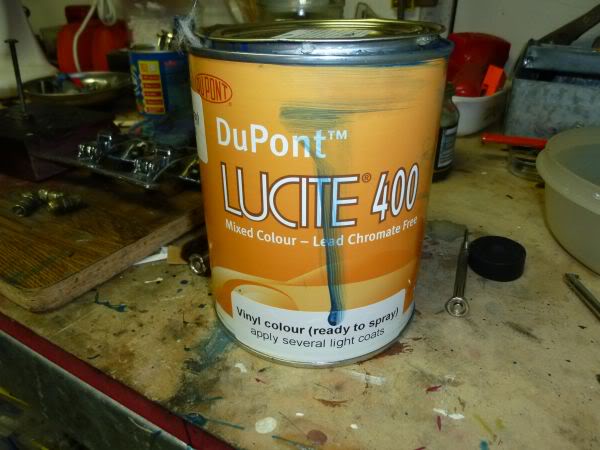
The panels are being sprayed with Dupont lucite Vinyl paint.
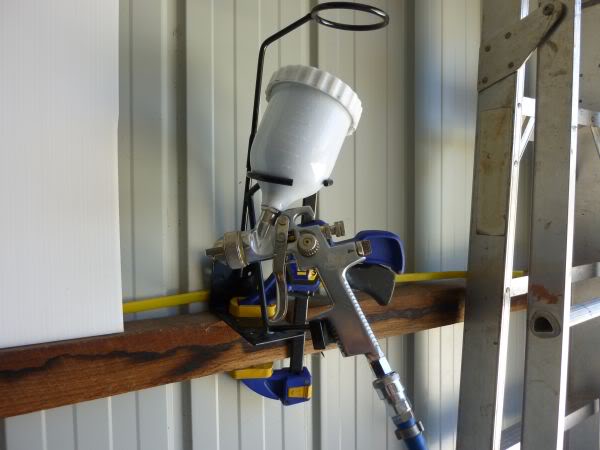
Using a simple high volume low pressure gun.
Was fun to see it come together and I have always enjoyed spray painting.
When I was 17-18 I did it and panel beating at tech college for a few years at night so I could learn and use all the equipment for free.
The panels are being sprayed with Dupont lucite Vinyl paint.
Using a simple high volume low pressure gun.
Last edited by CraigH; Apr 9, 2023 at 06:28 PM.