
Three... two... one... lift off!


 06-16-2019, 04:48 AM
#464


The following users liked this post:
SuperBuickGuy (06-16-2019)
06-16-2019, 01:19 PM
#465
Burning Brakes

Thread Starter
I have also been working on the underside of the t-tops, with VPA. I won't put the front and side edge trims back.


 07-04-2019, 05:34 PM
#466
Burning Brakes
Thread Starter
One more step behind me 
Prepped the rear clip area behind the t-tops with VPA. I want to shoot some epoxy and slick sand before the end of the summer!


I mounted the plates to test fit the t-tops.
Prepped the rear clip area behind the t-tops with VPA. I want to shoot some epoxy and slick sand before the end of the summer!


I mounted the plates to test fit the t-tops.
07-04-2019, 05:42 PM
#467
Burning Brakes
Thread Starter
Then came time to adjust the gap around the t-tops.
My fake weatherstripping:

Squeeze the middle, build up the rear with VPA, and sand for a regular gap:


The resulting T:

My fake weatherstripping:

Squeeze the middle, build up the rear with VPA, and sand for a regular gap:


The resulting T:


The following users liked this post:
caskiguy (07-13-2019)

 07-13-2019, 06:43 PM
#470
Burning Brakes
Thread Starter
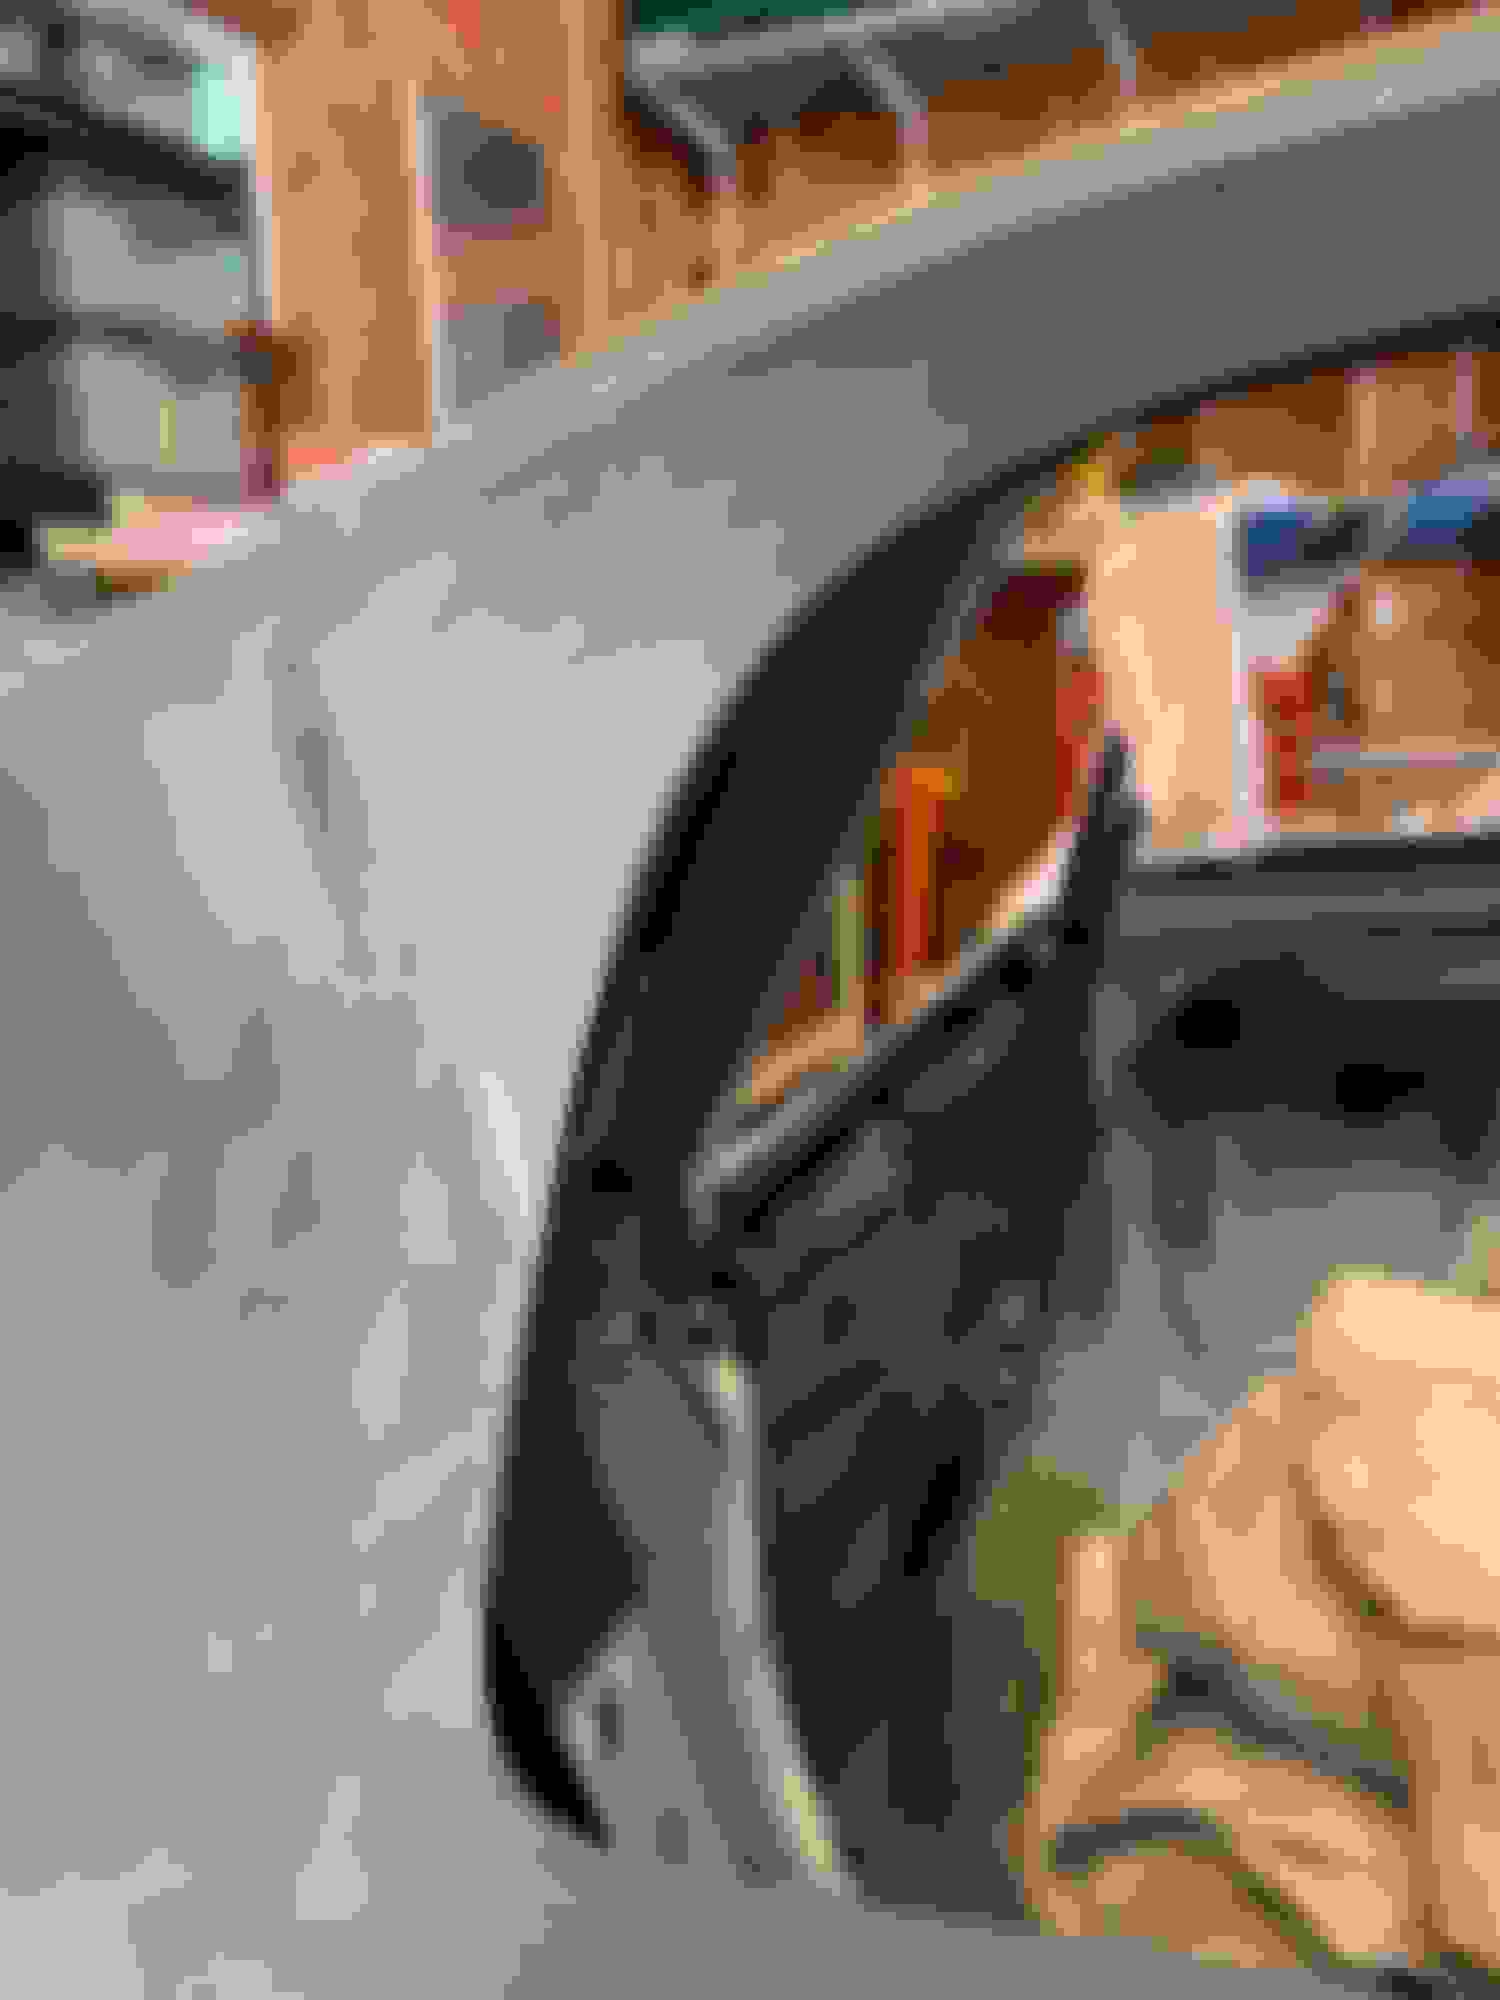
This is my favorite occupation: drilling holes into my vette's fiberglass body:

Whole holes:

...and a few shots without the mirror gasket:


Whole holes:

...and a few shots without the mirror gasket:


 07-13-2019, 06:49 PM
#472
Burning Brakes
Thread Starter
Next will be the passenger side holes in a perfectly virgin door:

I'm so excited to drill more holes into the body:

(pre-shower selfie)
Thanks for taking a peek!

I'm so excited to drill more holes into the body:

(pre-shower selfie)
Thanks for taking a peek!
 07-13-2019, 10:47 PM
#474
Burning Brakes
How thick did you have to build up the VPA along the driver's side of your hood? My stock hood looks like it's about 1/8" low in one area on the driver's side but I'm unsure if that's too much to correct with just VPA. I can't correct it with the rubber blocks without the corner near the windshield being up too high.
07-14-2019, 01:23 AM
#475
Burning Brakes
Thread Starter
Indeed, but I think I'll get my youth color back once it's drivable again.
Both the driver side hood and passenger side clip are 1/8". Many will say that's too much, but I'm more comfortable applying VPA than mat and resin. Maybe time will tell us if it was a bad decision.
How thick did you have to build up the VPA along the driver's side of your hood? My stock hood looks like it's about 1/8" low in one area on the driver's side but I'm unsure if that's too much to correct with just VPA. I can't correct it with the rubber blocks without the corner near the windshield being up too high.
07-20-2019, 12:32 PM
#476
Burning Brakes
Thread Starter
Passenger door butchering? Checked.
I will get Low-Profile Socket Head Screws from McMaster to attach the sport mirror.


Oh, look, boxes from England! What could it be?

I will get Low-Profile Socket Head Screws from McMaster to attach the sport mirror.


Oh, look, boxes from England! What could it be?

The following users liked this post:
caskiguy (07-28-2019)
08-15-2019, 12:59 PM
#477
Burning Brakes
Thread Starter
Just spent three weeks vacationing in France. Back home now and saw your abondance of imagination. Impressive.
OK, so here are the British goods: Got the Minilites about three months after placing the order. 15x10 for the rear & 10x9 for the front, with the smallest backspace that they offer.

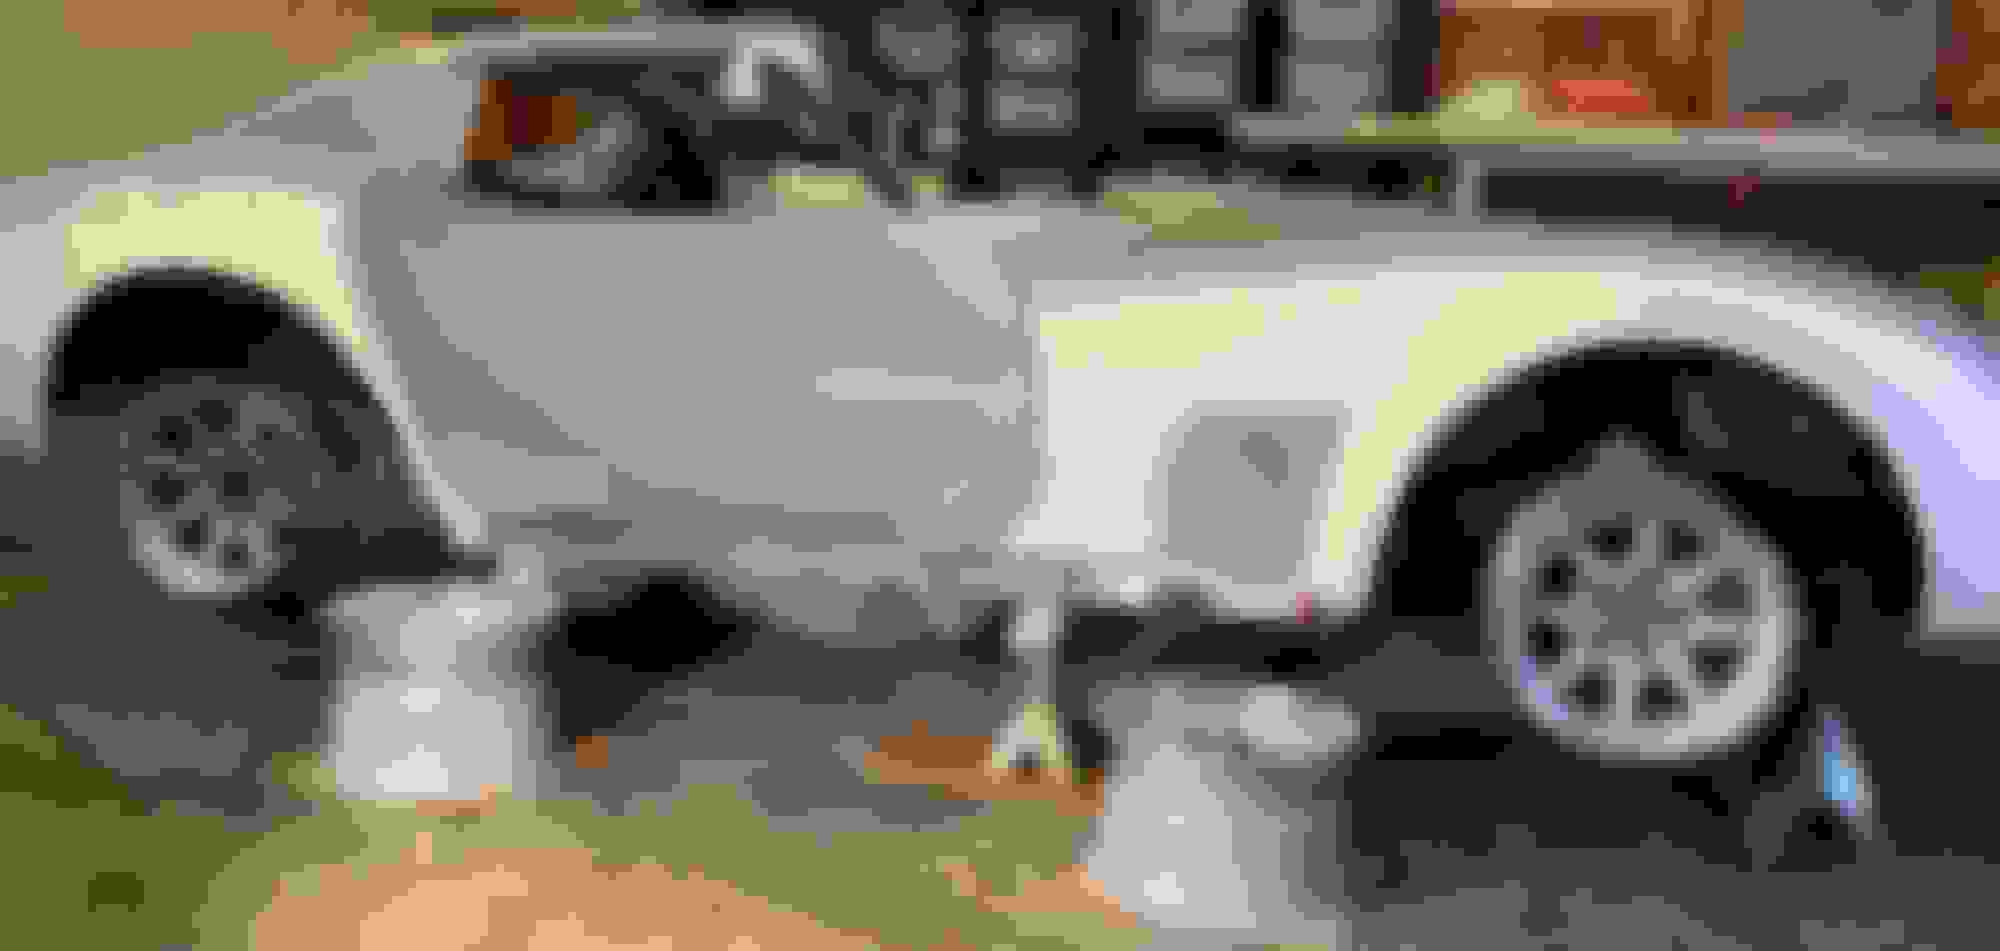

OK, so here are the British goods: Got the Minilites about three months after placing the order. 15x10 for the rear & 10x9 for the front, with the smallest backspace that they offer.


 08-15-2019, 01:08 PM
#478
Burning Brakes
Thread Starter
...and with the 295-50-15 / 265-50-15 Hankook Ventus H101 tires:


Trimming the plexiglass headlight covers comes next...
Thanks for taking a peek!


Trimming the plexiglass headlight covers comes next...
Thanks for taking a peek!
The following 3 users liked this post by RBrid:

The following users liked this post:
RBrid (09-21-2019)
09-21-2019, 08:59 PM
#480
Burning Brakes
Thread Starter
(yes, not king - sym�trie is feminine in French)
Time for an update folks. Here are the 9 steps I went through to set up the L88 headlight covers.
First, cut one edge of each aluminum bracket so that the 7 holes are centered. Could not live with an asymmetrical layout.
Here's a picture from years ago showing what triggered my OCD.

Time for an update folks. Here are the 9 steps I went through to set up the L88 headlight covers.
First, cut one edge of each aluminum bracket so that the 7 holes are centered. Could not live with an asymmetrical layout.
Here's a picture from years ago showing what triggered my OCD.
