
PSlow's '72 Restomod Project
 04-30-2019, 01:00 PM
#601
Tech Contributor

Thanks so much for that tip. I'll check it out and I'll have to recoat the part if it needs adjustments.
**edit** now that I have more than 2 seconds to reply; I really appreciate the info you constantly provide and I will absolutely take you up on the offer to take a look at my trailing arms. This brings up a couple of questions:
First, is there some reason why you tap the holes and bolt the rotors in place instead of simply using the lug nuts?
Secondly, my original trailing arms are rusted to hell so I have used replacement arms which are bare. I was planning on refinishing them shortly. Would this be ok for your seminar? Do they need to be partially assembled, etc for the seminar?
Thanks!
I like to know when I dial in my rotors they stay there. Now the factory rough faced the axles, they probably had 010 runout in them on the lathe. The rotors were then riveted on the axles and final faced for -0- runout. For the fronts pretty much the same deal only easier if you wanted to turn them-- those can be done on a brake lathe unlike the rears.
So the brakes were good until the rotors were played with, removed turned perfectly on lathe and reinstalled- only to have more runout then before- because they were not matched.
Running lip seal calipers, which is all I have used for the past 42 years, is fine but if the runout or bearing endplay is over 005 you get movement and that leads to air pumping and loss of the brakes. Simply installing rotors without cleaning up the hubs/axles and rotors can lead to a lot of runout and problems. So I set them up and have never had any come back.
You can rivet the rotors on, face them in a 14" or larger lathe and you're good until you pop a spring on the parking brakes or some other odd ball thing happens, and who knows it may never happen but if it does you have to drill out the rear rivets all over again. By bolting them on you can remove them, you won't get any variance with torqueing the wheel to the axle and you don't have to worry about them. It's your call, rebuilders won't typically do it saying it's not needed but it also adds to the labor and we all know time is money- unless you are doing it for yourself- as you have been doing. I will cover all this in detail, probably a couple of hours easy so I hope you can attend. Where else can you get this info and for free! Many have attended my Carlisle seminars and those were great but I was limited by time and being out of my shop I didn't have everything to show how to do the work. So these are actually better then Carlilse. If anyone else wants come then go to the NE section and respond. Yes, bring your arms bring them both they will add to my demo's as well.

The following users liked this post:
bmans vette (05-12-2019)
05-01-2019, 10:35 AM
#602
Burning Brakes

Thread Starter
Mike,
I like to know when I dial in my rotors they stay there. Now the factory rough faced the axles, they probably had 010 runout in them on the lathe. The rotors were then riveted on the axles and final faced for -0- runout. For the fronts pretty much the same deal only easier if you wanted to turn them-- those can be done on a brake lathe unlike the rears.
So the brakes were good until the rotors were played with, removed turned perfectly on lathe and reinstalled- only to have more runout then before- because they were not matched.
Running lip seal calipers, which is all I have used for the past 42 years, is fine but if the runout or bearing endplay is over 005 you get movement and that leads to air pumping and loss of the brakes. Simply installing rotors without cleaning up the hubs/axles and rotors can lead to a lot of runout and problems. So I set them up and have never had any come back.
You can rivet the rotors on, face them in a 14" or larger lathe and you're good until you pop a spring on the parking brakes or some other odd ball thing happens, and who knows it may never happen but if it does you have to drill out the rear rivets all over again. By bolting them on you can remove them, you won't get any variance with torqueing the wheel to the axle and you don't have to worry about them. It's your call, rebuilders won't typically do it saying it's not needed but it also adds to the labor and we all know time is money- unless you are doing it for yourself- as you have been doing. I will cover all this in detail, probably a couple of hours easy so I hope you can attend. Where else can you get this info and for free! Many have attended my Carlisle seminars and those were great but I was limited by time and being out of my shop I didn't have everything to show how to do the work. So these are actually better then Carlilse. If anyone else wants come then go to the NE section and respond. Yes, bring your arms bring them both they will add to my demo's as well.
I managed to get back into the garage yesterday for a little bit and disassembled then refinished the hub from the other side. I thought I should add a little bit of info in case someone actually reads my thread and does something similar. I should have mentioned in the first post about the hub is that I masked off the hub itself before blasting and then gave the entire piece a bath in hot, soapy water with a stiff bristle brush to make absolutely certain that there is no blast media left inside as even a single bit of it can wipe out a bearing pretty darn fast.
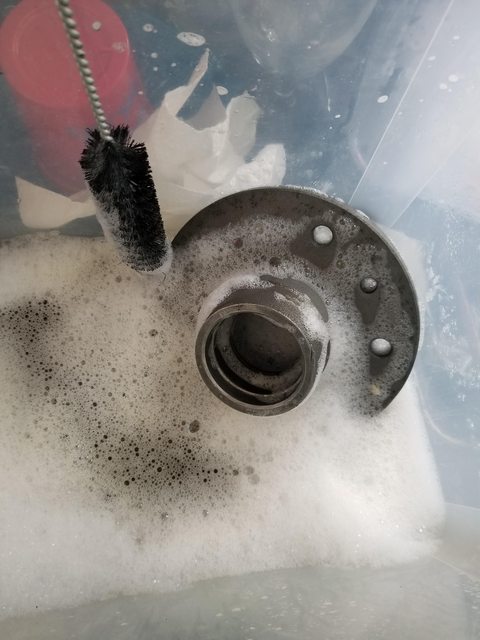
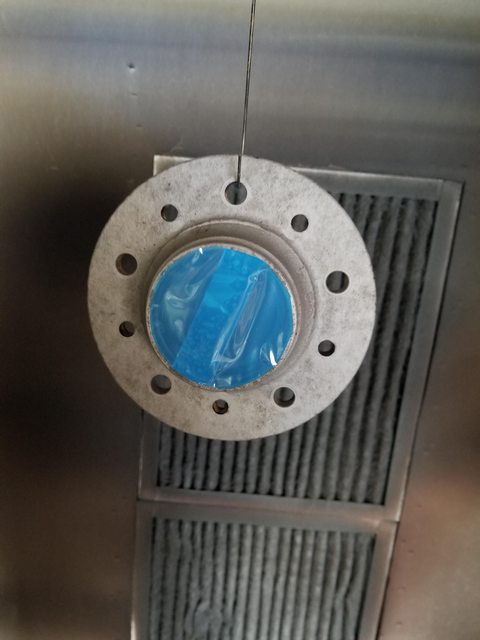
After that I used the high temperature tape to mask off the inside of the hub so we do not get any powder on the bearing surfaces followed by the phosphate treatment to prevent rust.
A little attention to detail and a few minutes of time in prep guarantees that the outcome will be superb every time.
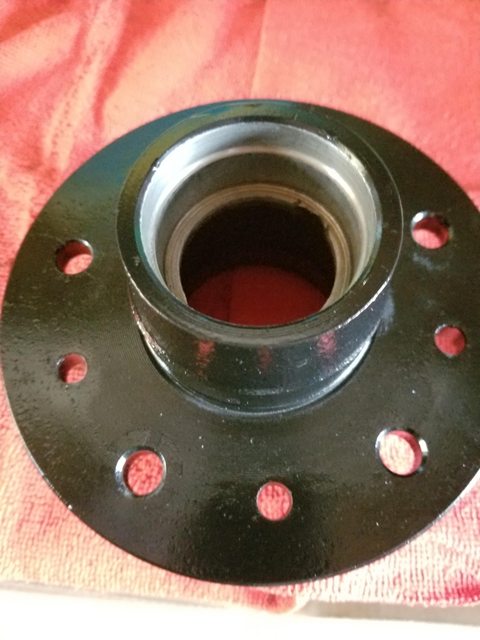
Today I will re-assemble that hub and then start on the rear brakes and suspension. I was going to leave the frame in a rollable condition for when I lift the body but it will be just as easy to use a rolling jack or two to get it done.
Last edited by PainfullySlow; 05-01-2019 at 10:36 AM.
05-01-2019, 11:06 AM
#603
Melting Slicks

Mike, I would take the powder coat off the surface for the disc to mount. It will compress and cause the wheel and brake disc to loosen over time with so much load against it. It will also throw off dialing in the calipers. I always prefer to have metal on metal in critical areas.
Mike
Mike
The following users liked this post:
bmans vette (05-12-2019)
05-01-2019, 12:52 PM
#604
Tech Contributor
V2 is absolutely correct, never paint or powder coat mating surfaces. I have had to clean off a few arm parts that came in coated and it was really on thick and uneven. Exposed parts is one thing, not mating.
The following 2 users liked this post by GTR1999:
Andy Tuttle (05-09-2020),
bmans vette (05-12-2019)
05-02-2019, 08:48 AM
#605
Burning Brakes
Thread Starter
Mike, I would take the powder coat off the surface for the disc to mount. It will compress and cause the wheel and brake disc to loosen over time with so much load against it. It will also throw off dialing in the calipers. I always prefer to have metal on metal in critical areas.
Mike
Mike
Hmm. I certainly defer to both of your expertise but I would like a little more information to satisfy my own curiosity. Powder is only a few mil thick, typically 0.006-0.012" and on mating surfaces where there is no friction there should never be any degradation of the coating. Furthermore with the amount of pressure that we are going to be applying between the two parts from bolting the rotor to the hub, or the lug nuts there is no way that there will be any significant compression of the coating. My thinking was that any rust that forms there would do more to alter the fitment than any powder film, hence my decision to coat the mating surface. FYI, the rotor has whatever coating came on it from the factory...it is definitely painted on the inside that mates to the hub. Would this not also present an issue in your scenario?
Again, looking to broaden my own knowledge base so please take these as simple questions and not antagonistic at all. I suck at writing and can sometimes come across unintentionally harsh.
05-02-2019, 12:22 PM
#606
Tech Contributor
Mike
I have received in differentials, boxes, and arms, all apart and powder coated. Nothing but a nightmare. First PC does chip as plenty came in and were beat up in shipping. Next the coating varied from thin to thick, not even at all. Parts that were supposed to fit together would not come close. If PC was on bearing surfaces it was much worse. As much as PC as a place I still favor cleaning, blasting, etching,flame drying, POR15 base coat and paint top coat. The parts are durable if the process is followed correctly, no special tools or ovens needed, easy to touch up if you do scratch it and it looks good.
I have received in differentials, boxes, and arms, all apart and powder coated. Nothing but a nightmare. First PC does chip as plenty came in and were beat up in shipping. Next the coating varied from thin to thick, not even at all. Parts that were supposed to fit together would not come close. If PC was on bearing surfaces it was much worse. As much as PC as a place I still favor cleaning, blasting, etching,flame drying, POR15 base coat and paint top coat. The parts are durable if the process is followed correctly, no special tools or ovens needed, easy to touch up if you do scratch it and it looks good.
05-03-2019, 04:13 PM
#607
Burning Brakes
Thread Starter
Mike
I have received in differentials, boxes, and arms, all apart and powder coated. Nothing but a nightmare. First PC does chip as plenty came in and were beat up in shipping. Next the coating varied from thin to thick, not even at all. Parts that were supposed to fit together would not come close. If PC was on bearing surfaces it was much worse. As much as PC as a place I still favor cleaning, blasting, etching,flame drying, POR15 base coat and paint top coat. The parts are durable if the process is followed correctly, no special tools or ovens needed, easy to touch up if you do scratch it and it looks good.
I have received in differentials, boxes, and arms, all apart and powder coated. Nothing but a nightmare. First PC does chip as plenty came in and were beat up in shipping. Next the coating varied from thin to thick, not even at all. Parts that were supposed to fit together would not come close. If PC was on bearing surfaces it was much worse. As much as PC as a place I still favor cleaning, blasting, etching,flame drying, POR15 base coat and paint top coat. The parts are durable if the process is followed correctly, no special tools or ovens needed, easy to touch up if you do scratch it and it looks good.
05-04-2019, 10:07 AM
#608
Old Pro Solo Guy

Preparation is everything, in painting or coating. GTR1999 experiences on dealing with parts that were hastily prep'd just gives me more incentive to follow painfully slow's example and do-it-your-self. Count me in as a convert to DIY PC ! Thanks for showing us how to set it up at home.
The following users liked this post:
PainfullySlow (05-04-2019)
05-04-2019, 10:45 AM
#609
Tech Contributor
I don't hate PC, it does have it's place but any mating surfaces should be clean metal and flat. There isn't as much a concern about corrosion at that area as there is having them bolt up flat. A good example are the bearing supports for arms. If they are masked off correctly and PC there is no issue, the last ones that came in wouldn't fit into the arm, shields didn't fit, and the arm stud holes closed up. All new arms are PC and the ID of the hole where the support fits always have to have the PC removed to fit the support.
05-04-2019, 02:42 PM
#610
Burning Brakes
Thread Starter
I don't hate PC, it does have it's place but any mating surfaces should be clean metal and flat. There isn't as much a concern about corrosion at that area as there is having them bolt up flat. A good example are the bearing supports for arms. If they are masked off correctly and PC there is no issue, the last ones that came in wouldn't fit into the arm, shields didn't fit, and the arm stud holes closed up. All new arms are PC and the ID of the hole where the support fits always have to have the PC removed to fit the support.
05-05-2019, 09:50 AM
#611
Burning Brakes
Thread Starter
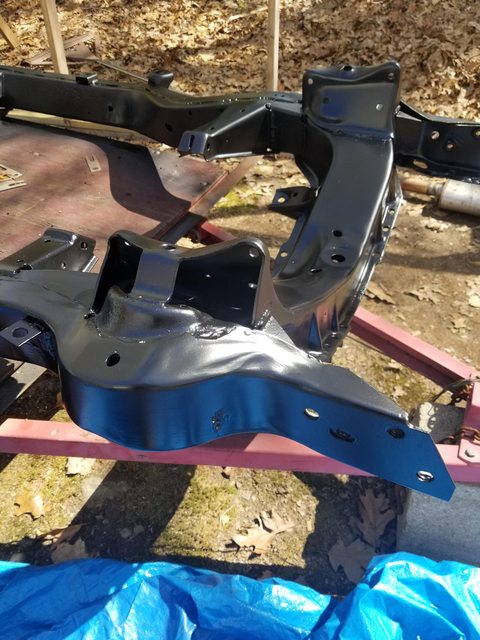
Bad wrist day so not a lot done, just the differential crossmember thingie (whatever you call it)
05-05-2019, 03:49 PM
#612
Nam Labrat


Member Since: Sep 2013
Location: New Orleans Loo-z-anna
Posts: 33,930
Received 4,195 Likes
on
2,753 Posts

It looks new to me 
05-05-2019, 11:37 PM
#613
Burning Brakes
Thread Starter
05-06-2019, 02:57 PM
#614
Burning Brakes
Thread Starter
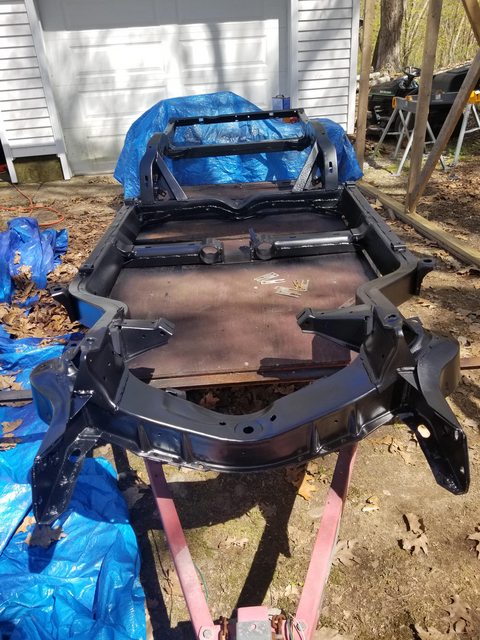
FINALLY had a day without rain! Because of weather and the limited amount of time I can actually work due to my wrists it took me over 6 weeks but I finally have a completed frame. It was a fun milestone in the project including welding in a patch section, blasting/wire brush/sanding, phosphate coating, POR15, and finally topped with Eastwoods Extreme Chassis Black.
I am glad to finally be done with this part of the build. Even though it is not entirely true, this now feels more like putting things together rather than taking them apart. Now the real work begins :-p
I am glad to finally be done with this part of the build. Even though it is not entirely true, this now feels more like putting things together rather than taking them apart. Now the real work begins :-p
05-06-2019, 03:19 PM
#615
Le Mans Master


FINALLY had a day without rain! Because of weather and the limited amount of time I can actually work due to my wrists it took me over 6 weeks but I finally have a completed frame. It was a fun milestone in the project including welding in a patch section, blasting/wire brush/sanding, phosphate coating, POR15, and finally topped with Eastwoods Extreme Chassis Black.
I am glad to finally be done with this part of the build. Even though it is not entirely true, this now feels more like putting things together rather than taking them apart. Now the real work begins :-p


I am glad to finally be done with this part of the build. Even though it is not entirely true, this now feels more like putting things together rather than taking them apart. Now the real work begins :-p
The following users liked this post:
AtkRWC (05-06-2019)
05-09-2019, 08:19 PM
#617
Burning Brakes
Thread Starter
Well, the weather has been great for the last couple of days so I ended up getting a few things done on the car, mostly random odds and ends while I wait for the tubular control arms to show up.
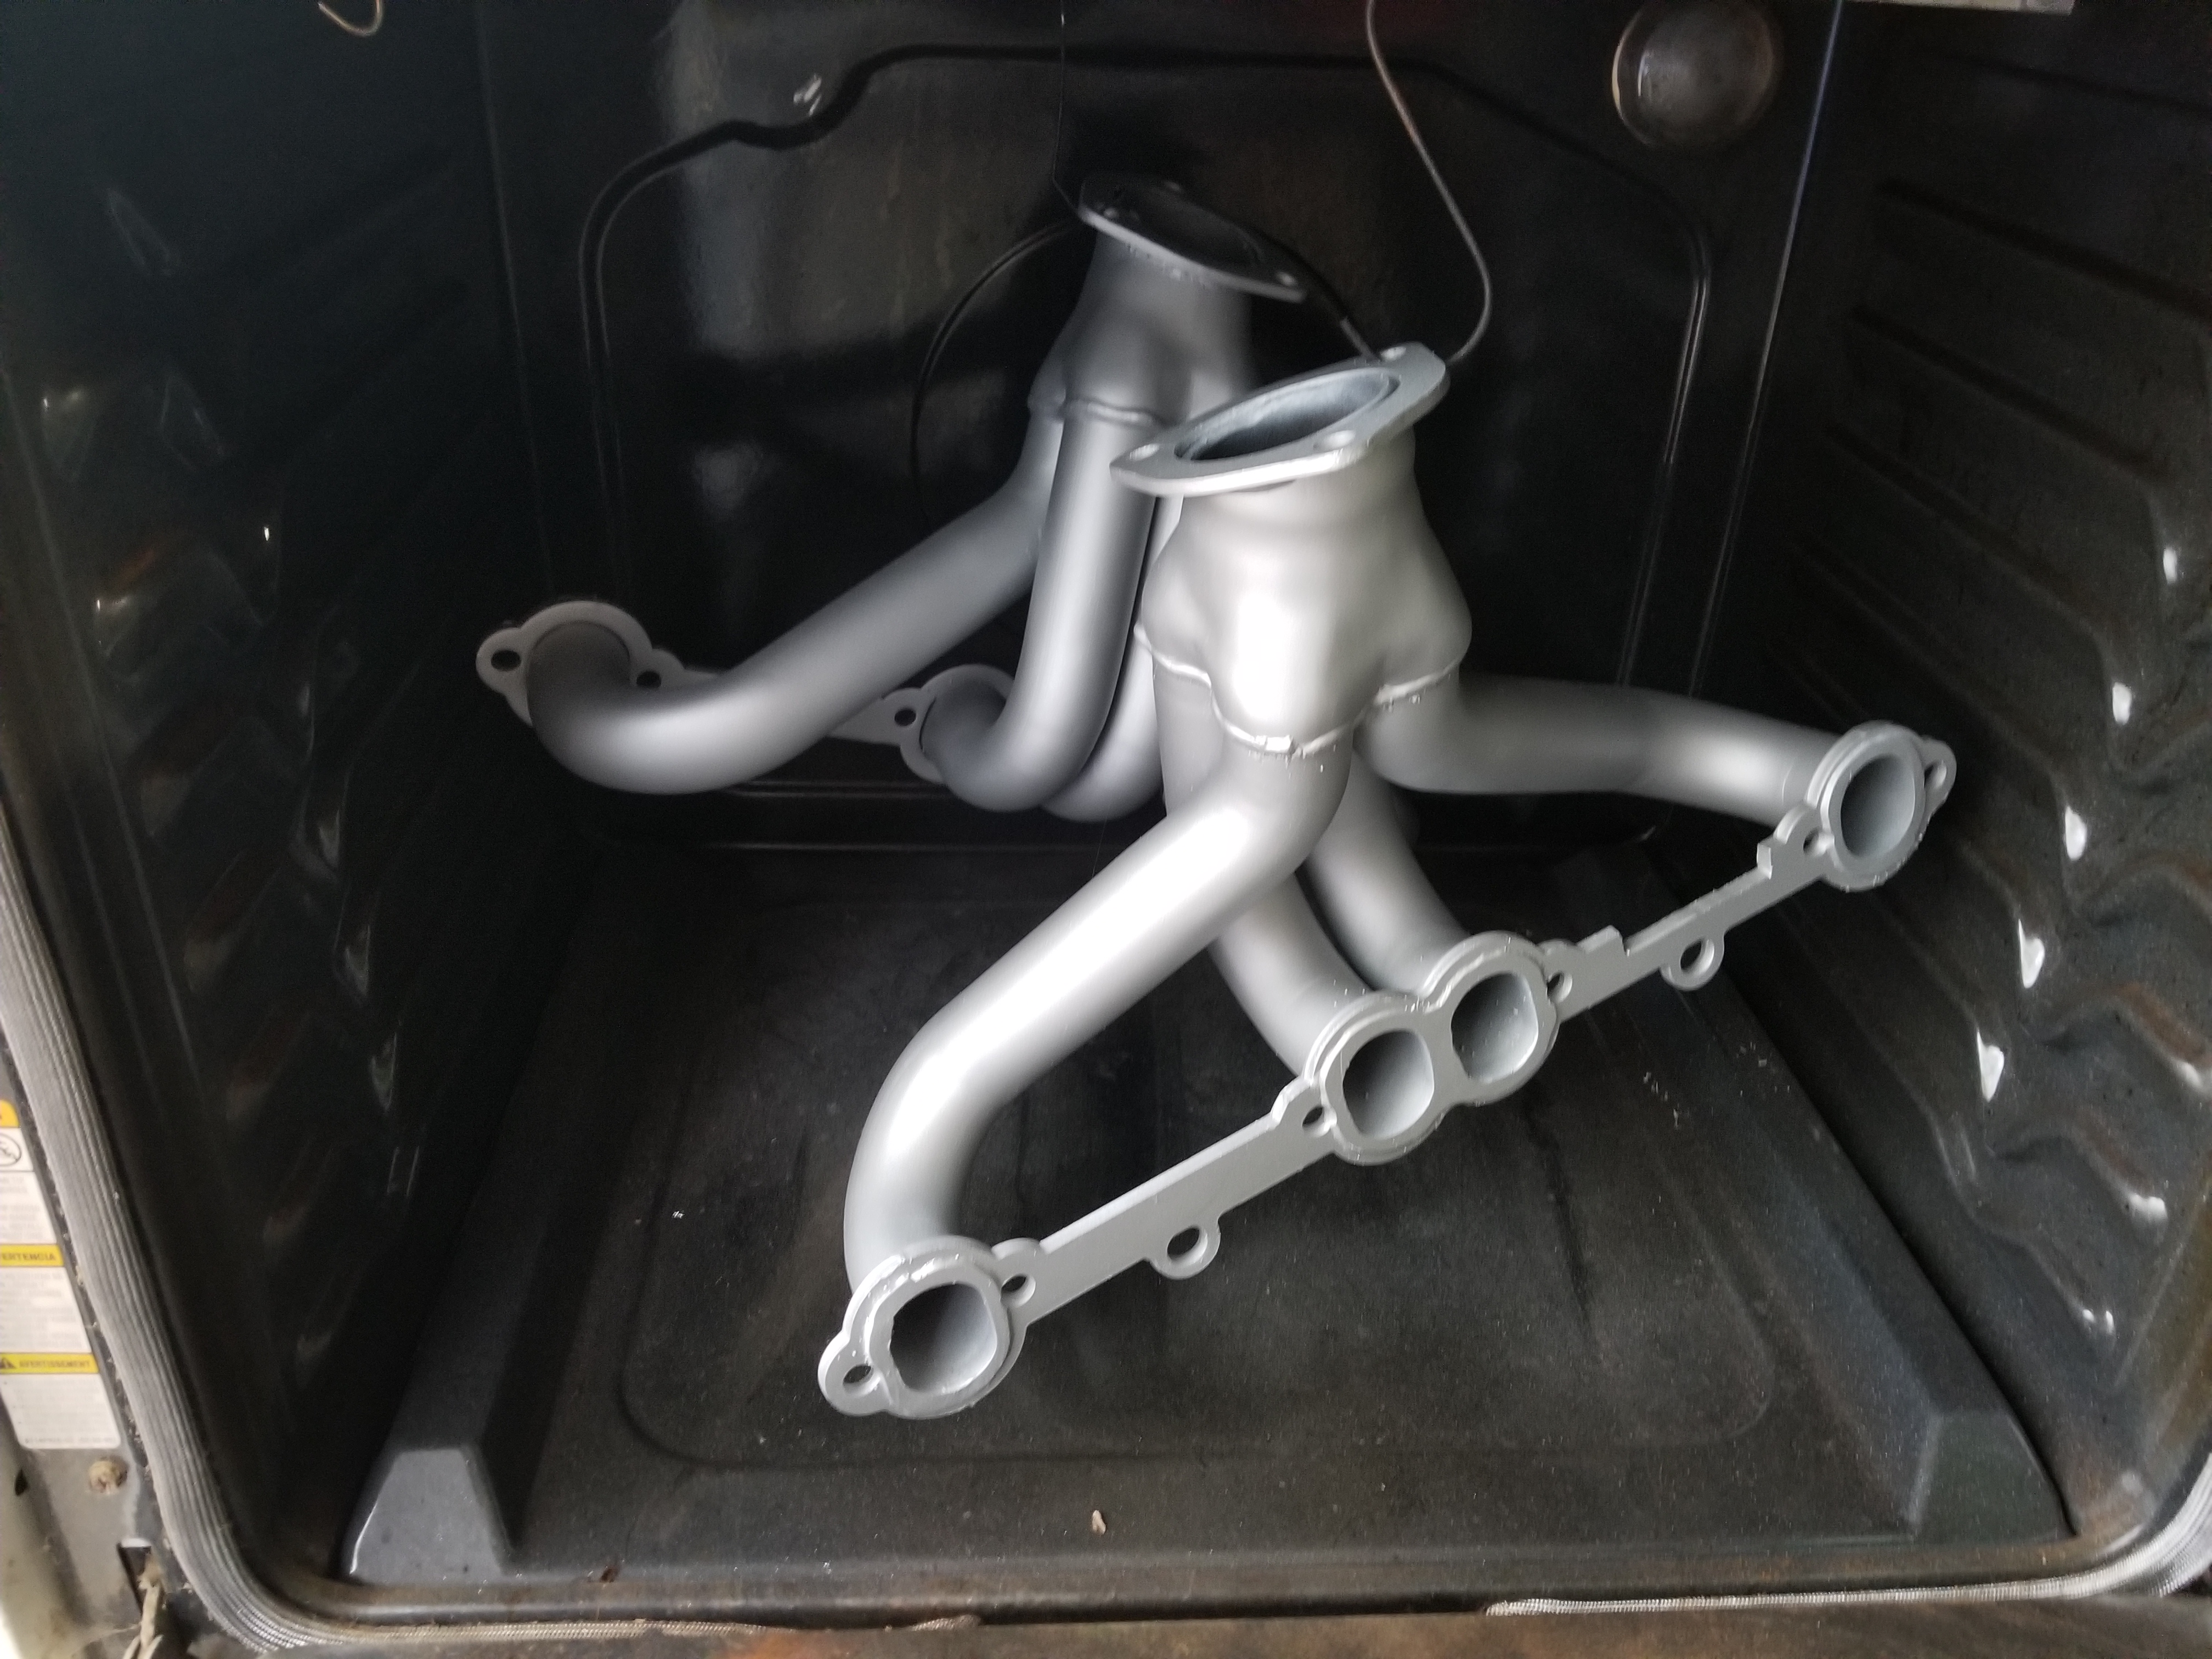
The Allens stainless exhaust that I bought from craigslist was new but i came with a set of headers/manifolds which were used. Not sure if I will end up using them or not but on the chance that i do, they needed a lot of love. No before pics but I basically glass beaded them, hit them with VHT primer, VHT satin silver, and then baked them @250 to start the curing process. They started out as a pretty rusty mess and ended up pretty darn nice if I do say so myself.
I also spent a bit of time going over the entire frame with a tap to chase out all of the various threads on it. There are quite a few and they were all rusty or filled with POR15 so I am glad that I took the time to do it. Now I expect everything to go together seamlessly when the time comes.
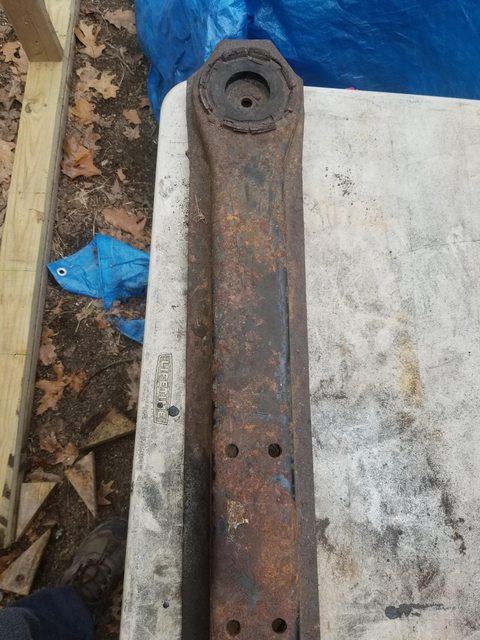
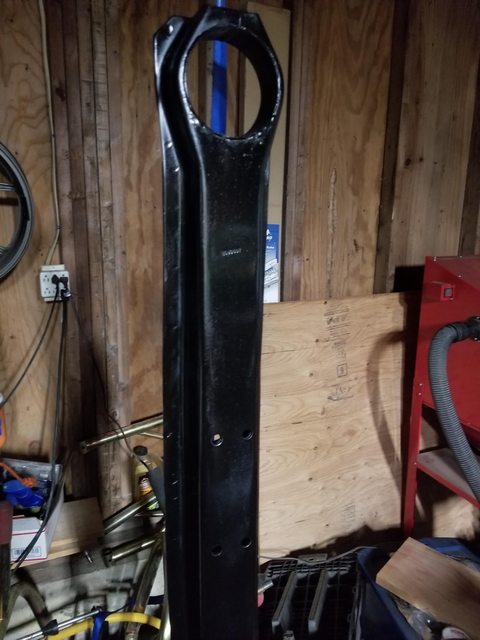
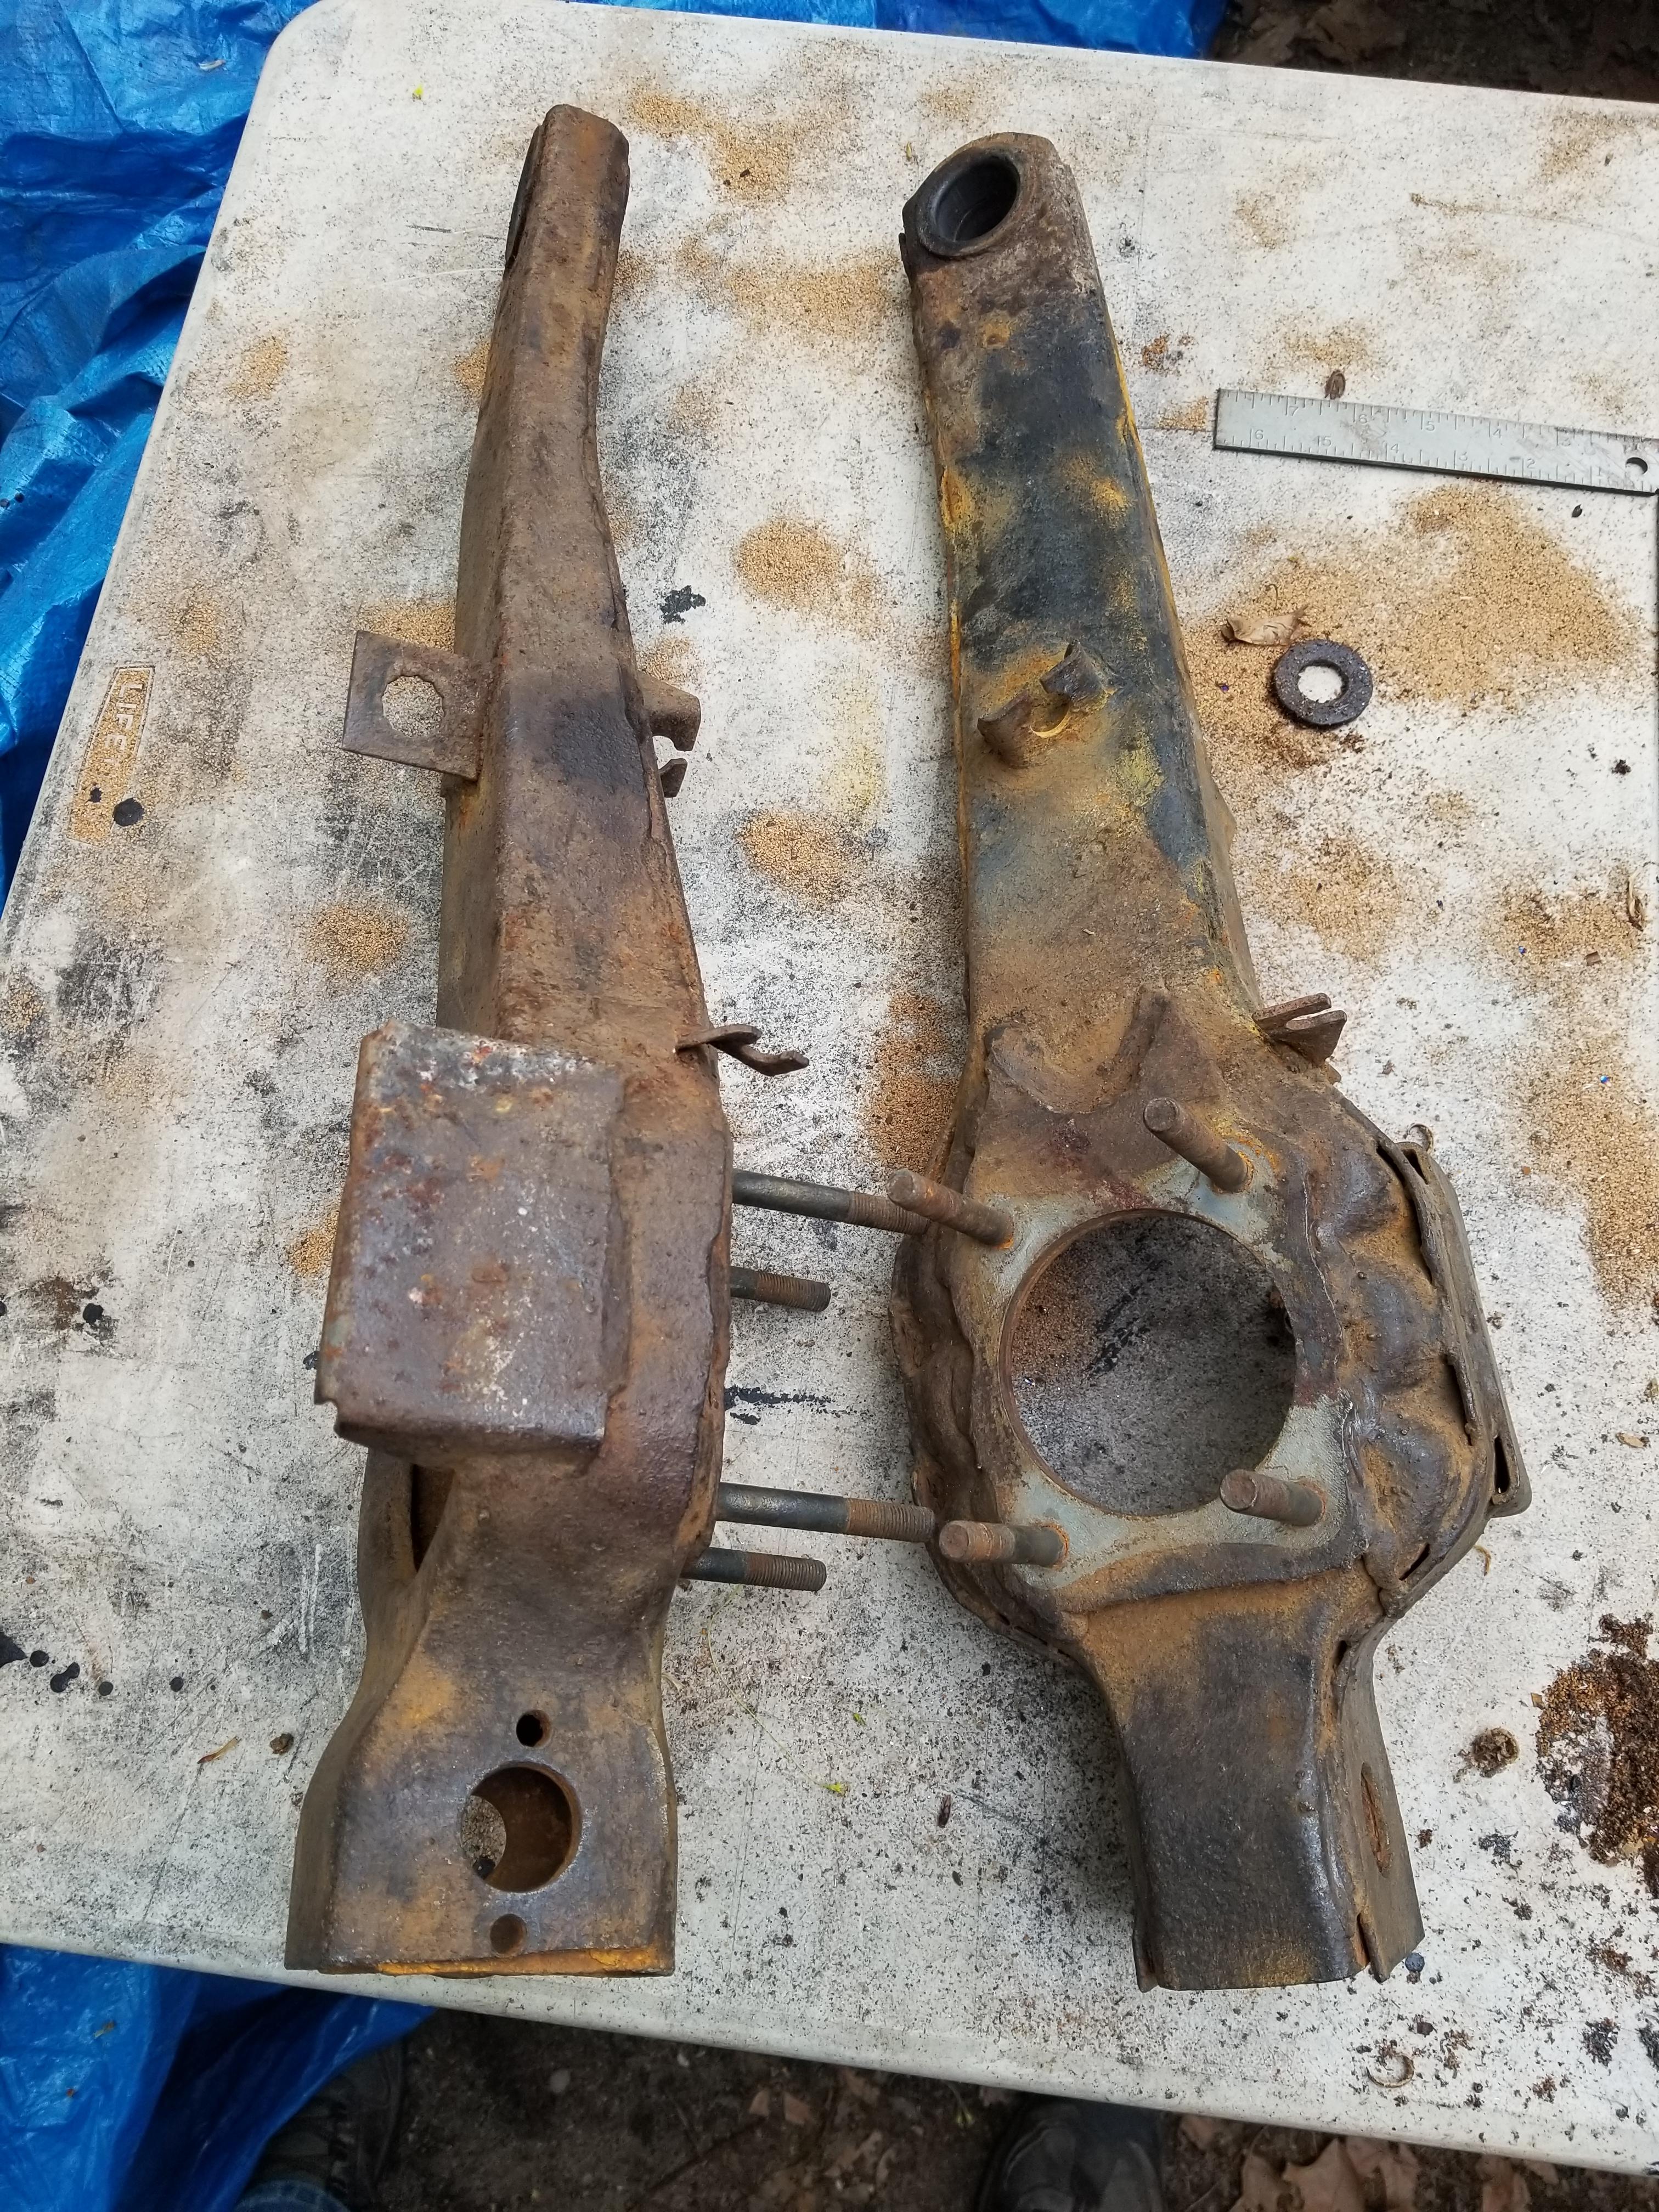
Finally, I started in on the reconditioning process of the trailing arms. They are solid but have a lot of surface rust.

I am using poly bushings from Energy Suspension on these and they require that the metal cups from the OEM bushings remain in place so there is a process where you use an 11/16" drill bit to remove the tip of the bushing sleeve and then press them out. I recently picked up a new shop press and was happy to get the chance to use it. The bushings came out pretty easily and they are now in the process of being media blasted to remove all the rust and scale.
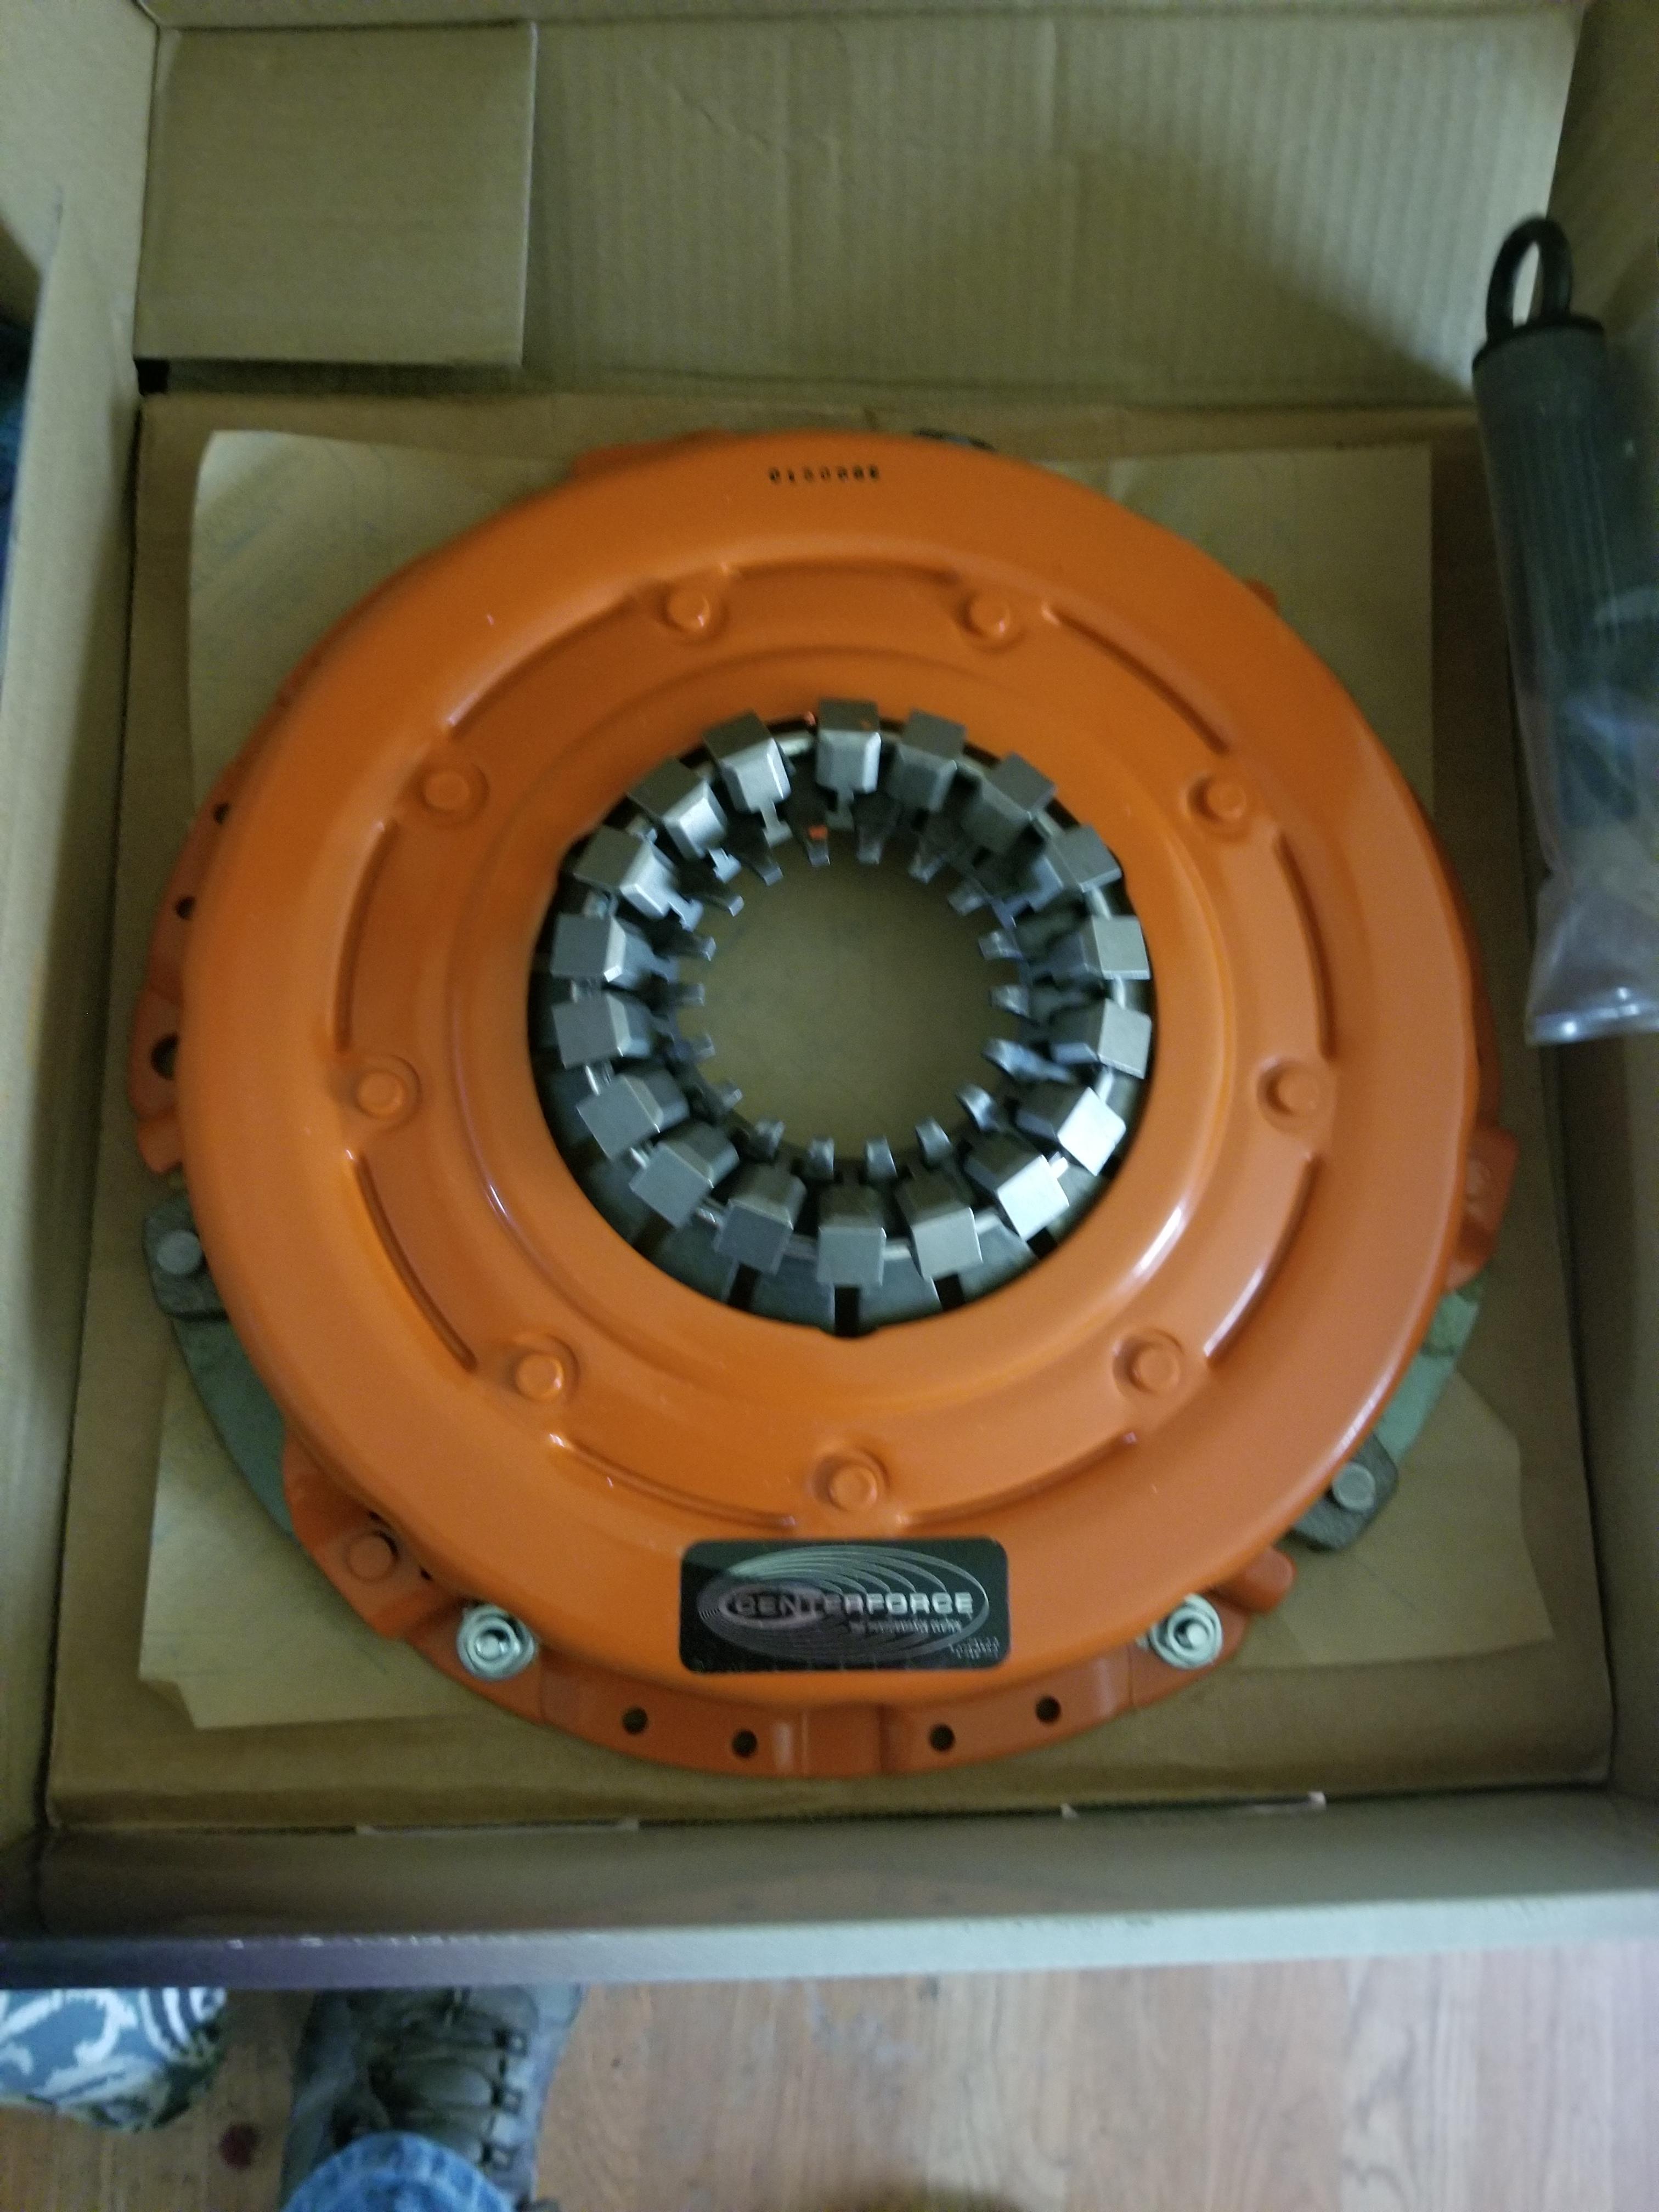
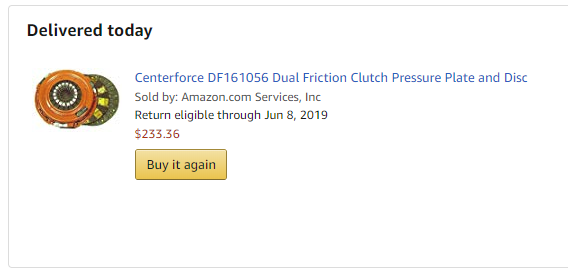
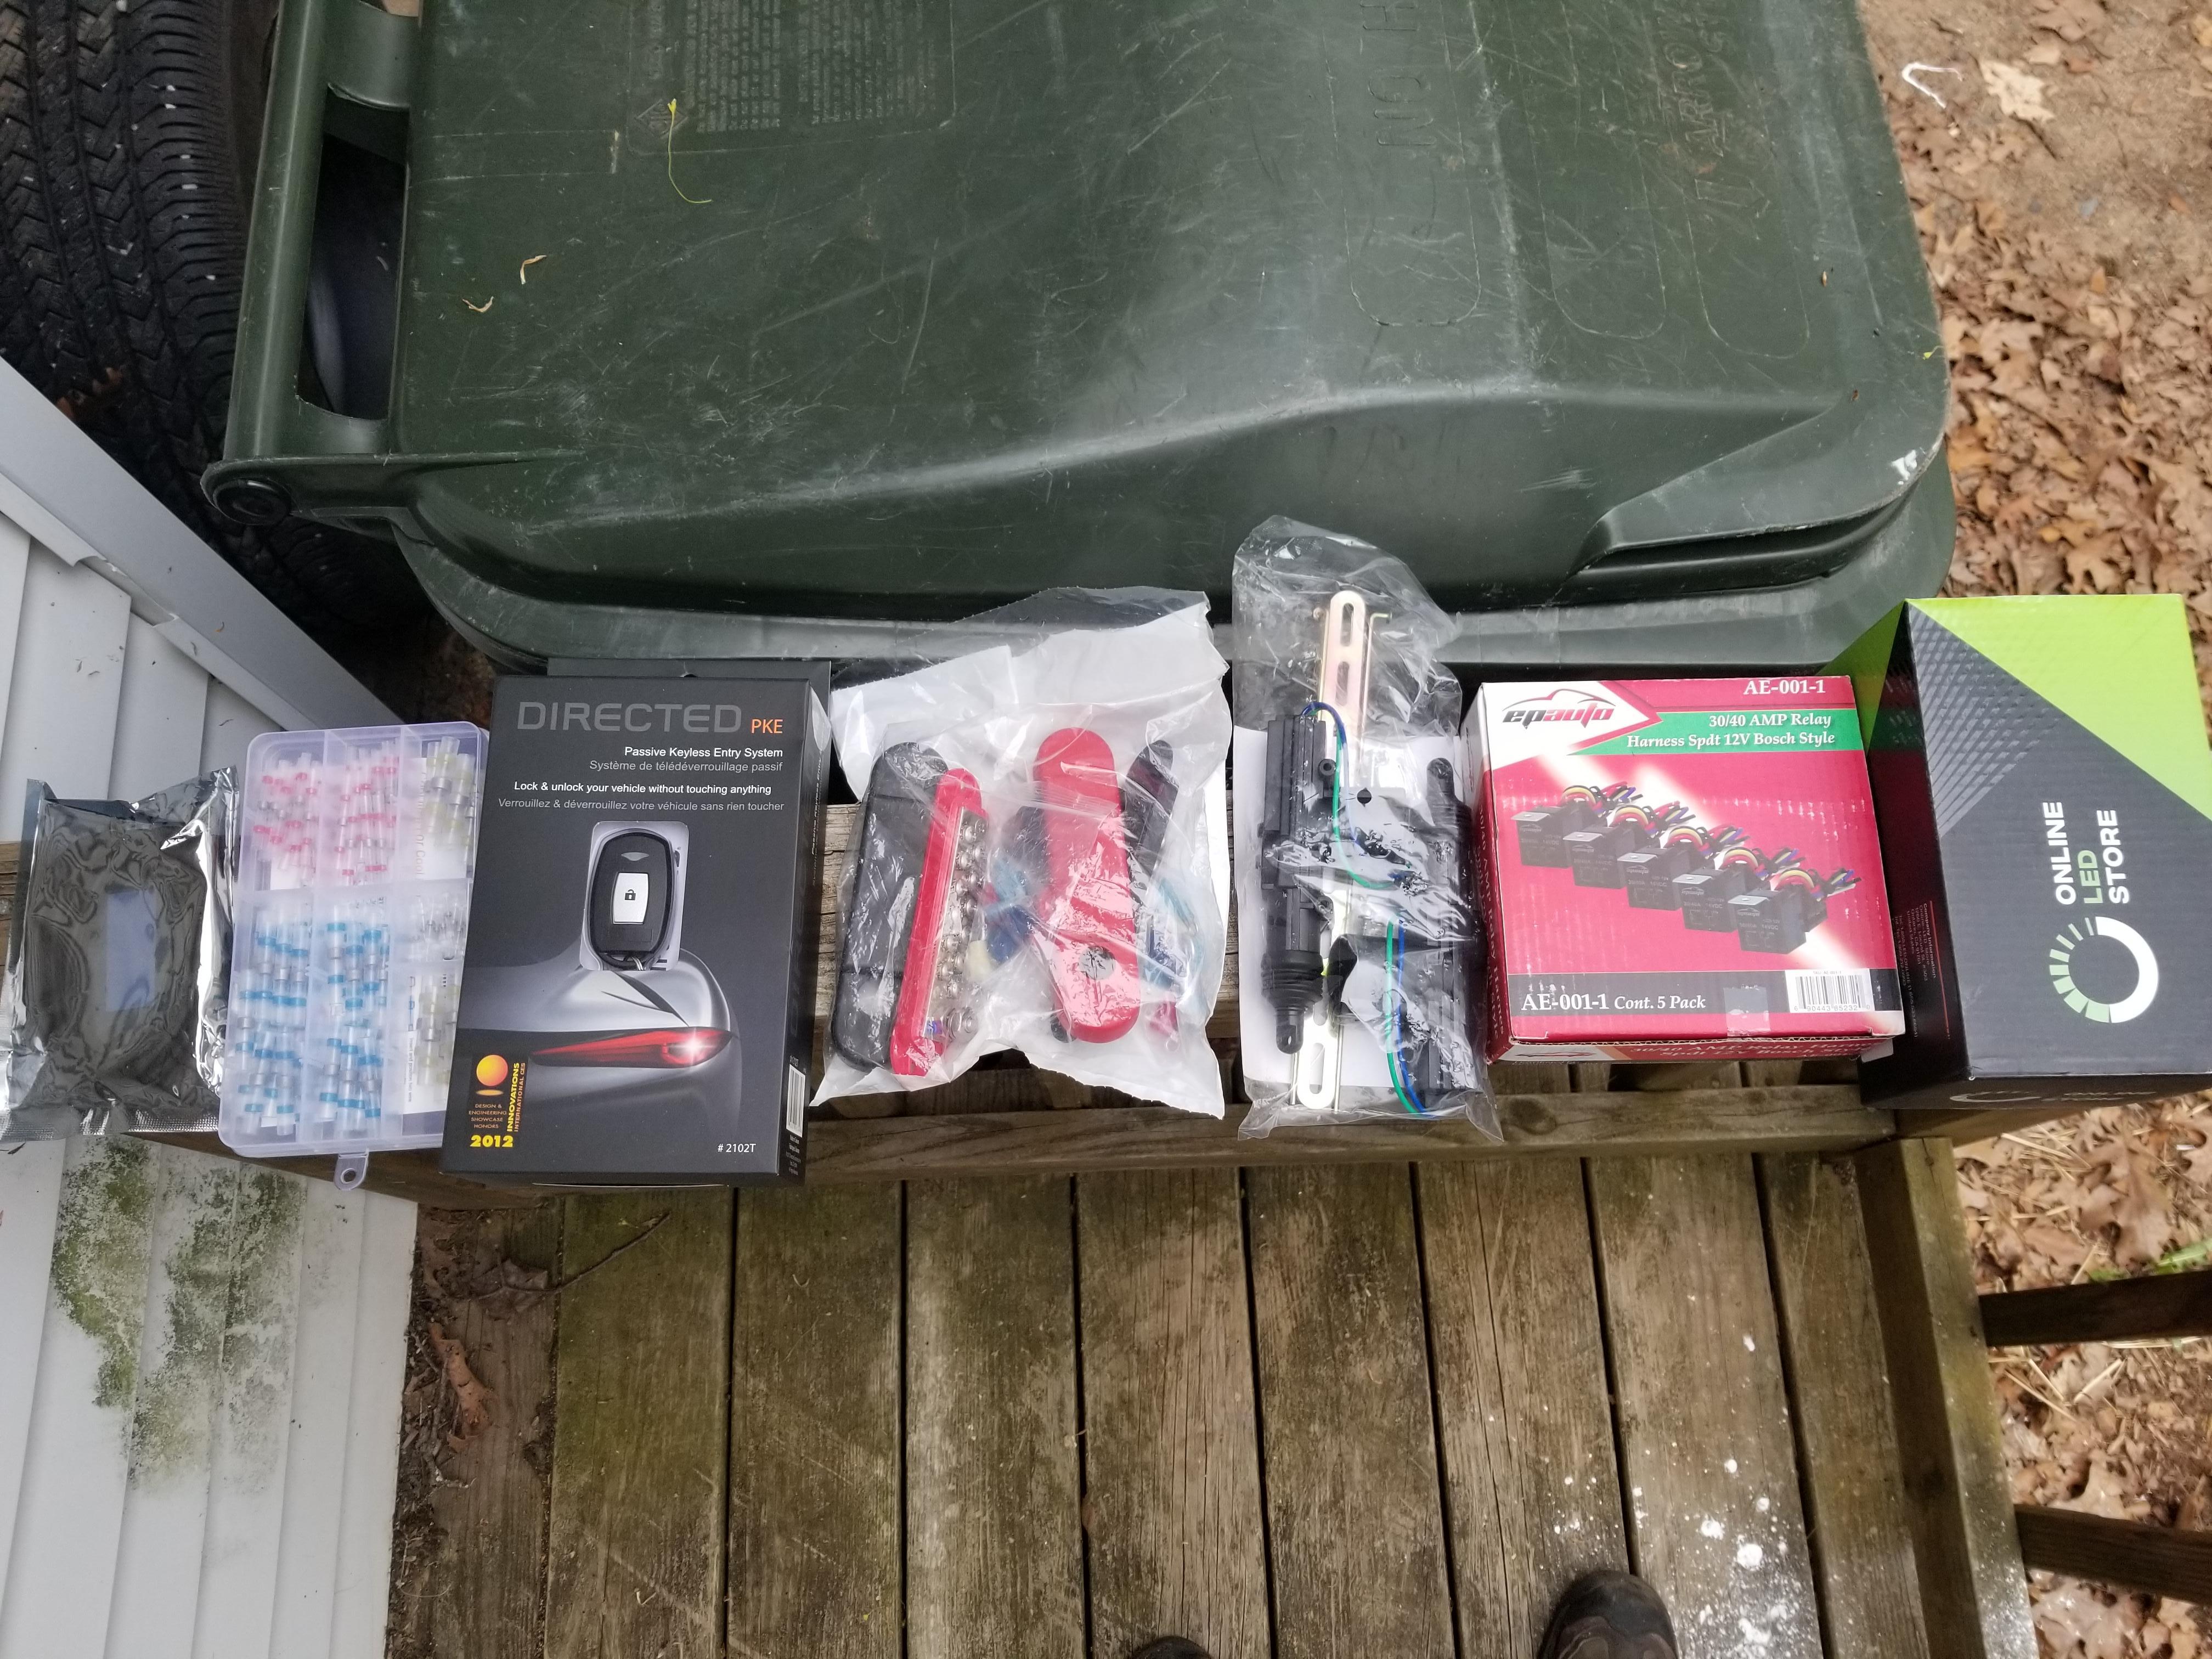
In other news, it was kind of like Christmas here as I received quite a few parts that I had recently ordered. First and foremost was this ridiculous deal that I scored on Amazon for a Centerforce dual friction clutch to mate up with the T56 that is going back in. I got it for almost half off the regular price!
A bunch of other toys showed up as well including a pilot bearing and some metal valve stems for the aluminum wheels that I will be using but the coolest part of this order is the setup to install power door locks and a complete, keyless entry system for the car so that it unlocks when I approach it and locks when I walk away. Also arriving is the waterproof fuse/relay center that I will be placing under the hood to support the various electrical upgrades that I am making to this car; halogen headlamps, electric headlight motors, an electric cooling fan, and some other fun stuff.
It is supposed to rain here (again) tomorrow so I will likely spend the day letting my wrists rest or if I get too bored, back to the blasting cabinet for the trailing arms.
The Allens stainless exhaust that I bought from craigslist was new but i came with a set of headers/manifolds which were used. Not sure if I will end up using them or not but on the chance that i do, they needed a lot of love. No before pics but I basically glass beaded them, hit them with VHT primer, VHT satin silver, and then baked them @250 to start the curing process. They started out as a pretty rusty mess and ended up pretty darn nice if I do say so myself.
I also spent a bit of time going over the entire frame with a tap to chase out all of the various threads on it. There are quite a few and they were all rusty or filled with POR15 so I am glad that I took the time to do it. Now I expect everything to go together seamlessly when the time comes.
Finally, I started in on the reconditioning process of the trailing arms. They are solid but have a lot of surface rust.
I am using poly bushings from Energy Suspension on these and they require that the metal cups from the OEM bushings remain in place so there is a process where you use an 11/16" drill bit to remove the tip of the bushing sleeve and then press them out. I recently picked up a new shop press and was happy to get the chance to use it. The bushings came out pretty easily and they are now in the process of being media blasted to remove all the rust and scale.
In other news, it was kind of like Christmas here as I received quite a few parts that I had recently ordered. First and foremost was this ridiculous deal that I scored on Amazon for a Centerforce dual friction clutch to mate up with the T56 that is going back in. I got it for almost half off the regular price!
A bunch of other toys showed up as well including a pilot bearing and some metal valve stems for the aluminum wheels that I will be using but the coolest part of this order is the setup to install power door locks and a complete, keyless entry system for the car so that it unlocks when I approach it and locks when I walk away. Also arriving is the waterproof fuse/relay center that I will be placing under the hood to support the various electrical upgrades that I am making to this car; halogen headlamps, electric headlight motors, an electric cooling fan, and some other fun stuff.
It is supposed to rain here (again) tomorrow so I will likely spend the day letting my wrists rest or if I get too bored, back to the blasting cabinet for the trailing arms.
05-10-2019, 12:13 AM
#618
Race Director


Member Since: Nov 2006
Location: Athens GA
Posts: 19,446
Received 351 Likes
on
304 Posts
St. Jude Donor '12-'13, '15- '16-'17-'18-'19, '21

Hey Michael.
Couple days ago, you answered my powdercoating questions in your other thread. Was filled with great detail and encouragement.
Struck a chord with me.
Then today (well yesterday now...LOL) I discovered this thread.
Simply amazing sir..........
I don't quite have your story and like others who have become walking wounded, I too retired 5 yrs ago when I ended up with 3 fused vertebrate in my neck and 3 surgeries on my right arm to try and fix ulnar nerve damage.
Thought I would finally have time and funds to get one of my 2 vette projects moving again. I had already removed the body and stripped it to the frame. Even started a thread about it along with a bunch of pics.
Had Gary (GTR1999) build me one of his renowned Super 10 4.11 rears.
But things don't always go as we like.
Had a minor heart attack twice several times in the past corrected by stents......but late last summer ended up with 3 major cardiac surgeries.
Doing better in that area now after 10 months. Just finished a 5 month house rehab job in the meantime (yeah Dr said take it easy too....lol)
AND itching to get back to my cars.
Just spent the last 2 hrs reading your very inspirational thread.
Wish you continued success and progress with your therapy project.
Thank you sir!
Definitely subscribed........
Dennis (Bman)
Last edited by bmans vette; 05-10-2019 at 12:15 AM.
05-10-2019, 04:16 AM
#619


Both of you are an inspiration to those who have been struck with health type road blocks. You both and others find a way to go around the blocked road and get back on it and continue. Me, at 71 just hope I can stay on the right side of the grass if you know what I mean.
Carry on!
RVZIO
Carry on!
RVZIO
The following users liked this post:
bmans vette (05-10-2019)
05-10-2019, 09:30 PM
#620
Burning Brakes
Thread Starter
Hey Michael.
Couple days ago, you answered my powdercoating questions in your other thread. Was filled with great detail and encouragement.
Struck a chord with me.
Then today (well yesterday now...LOL) I discovered this thread.
Simply amazing sir..........
I don't quite have your story and like others who have become walking wounded, I too retired 5 yrs ago when I ended up with 3 fused vertebrate in my neck and 3 surgeries on my right arm to try and fix ulnar nerve damage.
Thought I would finally have time and funds to get one of my 2 vette projects moving again. I had already removed the body and stripped it to the frame. Even started a thread about it along with a bunch of pics.
Had Gary (GTR1999) build me one of his renowned Super 10 4.11 rears.
But things don't always go as we like.
Had a minor heart attack twice several times in the past corrected by stents......but late last summer ended up with 3 major cardiac surgeries.
Doing better in that area now after 10 months. Just finished a 5 month house rehab job in the meantime (yeah Dr said take it easy too....lol)
AND itching to get back to my cars.
Just spent the last 2 hrs reading your very inspirational thread.
Wish you continued success and progress with your therapy project.
Thank you sir!
Definitely subscribed........
Dennis (Bman)
Couple days ago, you answered my powdercoating questions in your other thread. Was filled with great detail and encouragement.
Struck a chord with me.
Then today (well yesterday now...LOL) I discovered this thread.
Simply amazing sir..........
I don't quite have your story and like others who have become walking wounded, I too retired 5 yrs ago when I ended up with 3 fused vertebrate in my neck and 3 surgeries on my right arm to try and fix ulnar nerve damage.
Thought I would finally have time and funds to get one of my 2 vette projects moving again. I had already removed the body and stripped it to the frame. Even started a thread about it along with a bunch of pics.
Had Gary (GTR1999) build me one of his renowned Super 10 4.11 rears.
But things don't always go as we like.
Had a minor heart attack twice several times in the past corrected by stents......but late last summer ended up with 3 major cardiac surgeries.
Doing better in that area now after 10 months. Just finished a 5 month house rehab job in the meantime (yeah Dr said take it easy too....lol)
AND itching to get back to my cars.
Just spent the last 2 hrs reading your very inspirational thread.
Wish you continued success and progress with your therapy project.
Thank you sir!
Definitely subscribed........
Dennis (Bman)
I am also glad that you are getting something from the powdercoating thread...sometimes I think that I am writing all of this for my own amusement :-p If nothing else, it will serve as a roadmap that I can look back on since my memory is so poor.
I also would like to wish you continued returning health and hopes that you find the time to get back on your C3 project!
Michael
Both of you are an inspiration to those who have been struck with health type road blocks. You both and others find a way to go around the blocked road and get back on it and continue. Me, at 71 just hope I can stay on the right side of the grass if you know what I mean.
Carry on!
RVZIO
Carry on!
RVZIO
The following users liked this post:
bmans vette (05-10-2019)