REmovable rear window seal for 1976 conversion
#1
Safety Car


Thread Starter
Member Since: Oct 2016
Location: Way too effing close to the city.......NRA Life Member!
Posts: 3,606
Received 269 Likes
on
173 Posts
2022 C3 of the Year Finalist - Unmodified
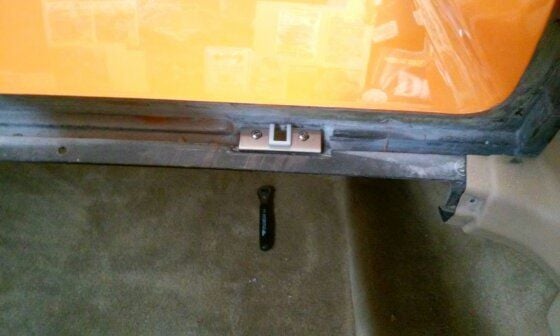
I have the fixed rear window removed from my 1976 C3 and am in the process of doing the conversion. to a removable rear window ala 68-72. I received a complete kit with the window, hardware and storage tray to do this and it contained a seal for the removable window. I thought it was new but looking at it closer, it appears to have been removed from the donor car. I believe the kit came from a 1971 so this seal could be that old.
It looks pretty nice but I'm thinking that since I hate leaks, I probably should consider a new one just to be safe. What say you all? Also, where to order the best replacement that fits and seals properly? Best vendor for the best seal possible? I did some searches and don't see this pop up on parts sites?
Thanks again,
OLE442
#2
Le Mans Master


Here ya go: https://www.zip-corvette.com/68-72-r...therstrip.html
For 38.00 I wouldn't mess around with the old one.
Besides, you want it nice and clean to start out with.
For 38.00 I wouldn't mess around with the old one.
Besides, you want it nice and clean to start out with.
The following users liked this post:
OLE442 (04-07-2019)
#4
Le Mans Master


I hear ya, they are never done.
If I remember correctly that seal is not only glued but screwed into place also.
Its a nice touch. Enjoy
If I remember correctly that seal is not only glued but screwed into place also.
Its a nice touch. Enjoy
#9
Advanced


Good luck my friend. I just did mine this past weekend . Was not easy ! And took longer than I thought . But did eventually come out very nice and no leaks . Take your time and walk away when needed .
#10
Safety Car


Thread Starter
Member Since: Oct 2016
Location: Way too effing close to the city.......NRA Life Member!
Posts: 3,606
Received 269 Likes
on
173 Posts
2022 C3 of the Year Finalist - Unmodified
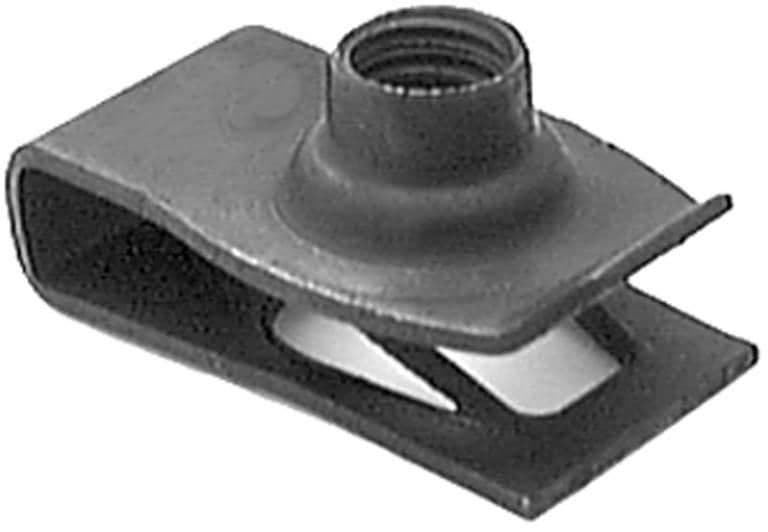
My biggest concern is drilling the holes to mount the plates and nylon holes for the bottom spikes to go in and the mounting holes for the upper latches. I've seen some put the bottom things in without the backing plates being riveted in behind them and without using the back up brackets for the upper latches (just using what I believe are called speed nuts). I would think that over time the pressures could crack the fiberglass panels?? At any rate I guess I'll just try to figure out the best logical spot for the mounting holes.
Last edited by OLE442; 04-09-2019 at 11:53 AM.
#11
Drifting


My biggest concern is drilling the holes to mount the plates and nylon holes for the bottom spikes to go in and the mounting holes for the upper latches. I've seen some put the bottom things in without the backing plates being riveted in behind them and without using the back up brackets for the upper latches (just using what I believe are called speed nuts). I would think that over time the pressures could crack the fiberglass panels?? At any rate I guess I'll just try to figure out the best logical spot for the mounting holes.


#12
Racer


Gary,
Got Your message, this is what I used on the latches. I didn't use any "backing" plates. Only trouble I had, was finding a nut with a deep "U".
Glue for the seal, I started at the bottom, putting the window in until set. Then working my way around to the top.
Good Luck, like I said "Messy"
#13
Safety Car


Thread Starter
Member Since: Oct 2016
Location: Way too effing close to the city.......NRA Life Member!
Posts: 3,606
Received 269 Likes
on
173 Posts
2022 C3 of the Year Finalist - Unmodified
Bill:
Thanks for the reply. Yes, that looks like the same "U" nut I used. One side went real nice and smooth.....the other side was a real PITA! Got them both done. Gasket in tomorrow. I really wanted to use the original backing plates but tried 10 different ways from H*ll to get them where they were supposed to be but they just wouldn't fit! maybe they left less room in the 76 Vettes for that area.
Thanks for the reply. Yes, that looks like the same "U" nut I used. One side went real nice and smooth.....the other side was a real PITA! Got them both done. Gasket in tomorrow. I really wanted to use the original backing plates but tried 10 different ways from H*ll to get them where they were supposed to be but they just wouldn't fit! maybe they left less room in the 76 Vettes for that area.
Last edited by OLE442; 04-14-2019 at 06:10 PM. Reason: clarification
#14
Safety Car


Thread Starter
Member Since: Oct 2016
Location: Way too effing close to the city.......NRA Life Member!
Posts: 3,606
Received 269 Likes
on
173 Posts
2022 C3 of the Year Finalist - Unmodified
WELL. I have the rear window gasket in!!
I have the bottom and both sides glued in up to the far RT & LT side of the latches and I loosened up the screws/bolts for the lower plates for the spikes and both latches and put the window in after I glued the bottom, the left side and the right side. It was a real PITA to get the top latches clamped down but I did it. I left the glass in for a half hour or so for each section.
In a bit, I'm going to go out and glue the top of the gasket from latch to latch and then put the window in overnight. I do have screws for the corners of the gasket but did not use them since my 76 didn't obviously have them with a fixed window.....BUT, I'm going to put them in before I put the trim back in. I do get nervous drilling holes in the car though for some reason.....LOL!
Then tomorrow, the trim panels go back in and the seats get re-installed! I hope the window doesn't leak......I hate leaks and I don't want to mess with that seal ever again!!
Next up, tranny rear seal and then the heater control valve in the passenger wheel well area (Looks like I can't get to it from the bottom with my 2 post so I'll attack it from the engine compartment if that is what it takes.) Can't wait.
Last edited by OLE442; 04-14-2019 at 06:29 PM. Reason: More thoughts
#15
Heel & Toe


Bill , where did you get those "U" nuts? they look much stronger than the ones I found, Mine is also a 76 I couldn't install the backing plates either , I haven't conquered the gasket yet
#16
Safety Car


Thread Starter
Member Since: Oct 2016
Location: Way too effing close to the city.......NRA Life Member!
Posts: 3,606
Received 269 Likes
on
173 Posts
2022 C3 of the Year Finalist - Unmodified
OLE442
Last edited by OLE442; 04-16-2019 at 03:52 PM. Reason: punctuation


