When you click on links to various merchants on this site and make a purchase, this can result in this site earning a commission. Affiliate programs and affiliations include, but are not limited to, the eBay Partner Network.
And hopefully your new key works! me, I have one key that is very, very worn that I still use.
And one original key I keep stored away. It is as new. But if I need to replace my worn one the plan is to make a copy off the original and then keep storing it away.
Wow I'm bad at this build thread thing. I'm also bad at remembering to take pictures. But the work has gone on!
Vintage Air!
Getting the firewall mods and blower unit in were things I wanted to get done before I put the body on the car.
I've been hearing about Vintage Air forever. I have to say... it doesn't live up to the hype. Wow am I not impressed with this kit. There is no reason for firewall modification if the tubes were bent differently. And even using the tubes supplied, and doing the recommended modifications, things are still "off" until you tweak them and fiddle and fuss. Even fitting their own parts to their own parts doesn't work quite right. The instructions aren't great either. I don't know if they were ever accurate, but I'll give them the benefit of the doubt and assume that they updated parts of the kit but neglected to go back and update the docs. You pay extra for bolt-on parts. So when you pay the money you want them to bolt on. Short of going full Project Binky, though, there isn't really any competition. So I guess this is what you get.
Anyway, it's in.
The firewall mod is the round bit carved out at the bottom right. As you can see the factory firewall hole is generous, and the tubes could have exited the existing hole. There is plenty of clearance in the blower unit construction for it too. Requiring the modification was completely unnecessary.
Last chance for insulation before this is all hidden forever.
The unassembled blower unit, evaporator, and heater core.
After the assembly. Attach Corvette specific brackets, extensions for the AC and heater lines, and whatever that plastic sheet is for.
The brackets can only go on one way. The screw holes line up. But the cutouts for the electrical and this other screw don't. To get everything to sit flush some filing of these holes was required.
The manual says the bracket lines up with existing holes. Only one lined up. This is a dry fit with just some clamps.
The cover for the vents (why isn't it a plug?) rubs. This would undoubtedly be an annoying rattle if left unaddressed. (I forgot to take a picture after modifying it.)
The recessed portion of the firewall hole cover got Amazon don't-call-it-dynamat as well
That's as far as the Vintage Air needs to go before interior time. In the meantime I'm goign to try to source some things to make the other components look better. The control unit, and the center AC vents, and especially the wiper switch look horrible and have Vintage Air ads all over them. I'd rather a more subtle, if not stock look.
Next up. Test fit the body and see how screwed I am.
You'd think I'd have done this before paint.
I already know the tunnel is going to need some modification. The measurements and planning say I should have at least 3/16" clearance from everywhere on the back of the engine to the firewall though. I'm sure it'll be fine.....
A plumb bob from the original shifter hole
I already knew this was going to be way off, but this is so I can know where to cut the new hole.
Slowly....... very slowly.....
The hood is going to fit!
But the tunnel is resting on the transmission.
You can fix anything with an angle grinder.
Sorry for the torture you're experiencing. The only time I ride with the ac on is when I have a passenger that insists upon it (guess who). When I'm solo and it's not cold weather I always cruise with windows and or top down and radio off. IMO part of the Corvette experience is enjoying listening to the sounds of a performance oriented vehicle.
The T56 shifter can't be sticking up where it is. There is console that goes there. It needs to be offset forward and left. Silver Sport sells a shifter that works for that, but the transmission came with a perfectly good shifter that just needs some adjustment. And I love an excuse to use the lathe.
It immediately became clear that Tremec didn't intend anybody to disassemble the shifter. It was designed to be assembled only.
I spent a while thinking about ways I might fully disassemble it, and decided it wasn't worth risking messing up the feel. So I just chucked it up partially assembled.
The idea here is to allow an offset handle to be bolted on. I need a center screw with a countersink, and some sort of key to keep it from rotating out of position when you're banging it around.
Holding the part in the mill for the key was a little bit of a challenge.
The car came with a bin that said "Front End". Anybody who has done this before would have realized that it was too small, and that something major was missing. This is my first time. I have all these parts but what do they attach to?! And why are they all new?!
I knew from all the bondo I removed doing the bodywork that this car had been hit in the front left. I didn't know that the bumper extension / vacuum tank was missing and likely destroyed. That's not the only problem though. I had checked out the frame horn on the front left because that's where it had been hit. It was missing a weld nut, but otherwise looked fine. I hadn't anticipated the problem was on the other side.
The frame dimensions say that distance is supposed to be 33". When the bumper extension sheared off the weld nut on the driver side, it acted like a big lever and tweaked the frame horn on the passenger side a full half inch. The previous owner must not have noticed either, because I doubt he would have sent the frame to be dipped and coated with it like that on purpose.
I already know the rest of the frame is straight because I measured extensively before modifying the crossmember. But I was pretty bummed by this. Spent a day worrying that I did all this work on a lemon. Spent longer trying to find somebody willing to put it on a frame machine, and how I would get it there and back and how much that would cost.... Then I thought a lot about how I might fix it myself.
I didn't think about taking any pictures.
I ended up bracing the frame into position and strategically applying leverage and torque to the frame horn until it was fixed. It's not perfect and it never will be. But all the mounting holes are in the right place. And I found a fully restored bumper extension/vacuum tank on eBay for way less than I would charge to do that work.
Somehow I convinced myself that making my own custom stainless exhaust was a good idea!
The cats are Flowmaster 220125
The mufflers are Magnaflow 11236
The pipe is DNA Motoring ZTL-25SS
The GenV LT1 stock manifolds have a weird flange that nothing else uses. These weldable flanges come from Motion Raceworks.
I took a week off Corvette work to lightly restore this horizontal bandsaw that had literally fallen off the back of a truck:
My welding still needs work, but it's servicable.
Before the catalytic converter got in the way, a little helper kindly filled up my transmission with oil.
Preparing to notch for the H-pipe. The template was generated by this excellent website that prints you a piece of paper to wrap around your pipe: https://www.blocklayer.com/pipe-notch
Rough cut, then I took it to the line with the finger sander
Tacked
Done!
That only took.... forever. It sounds FANTASTIC though. Nice and mellow, won't wake the neighbors unless you want it to, but not too quiet.
Great thread! I'm also doing similar things to my 76. Im about 3/4 done with my VA install. A couple of minor suggestions. I'll probably upgrade to a tkx eventually to get smoother shifts. I'm guessing I'll get the add on, Silversport shifter mod when I do so.
1. The clear plastic from the vintage air kit actually goes on top over the stepper motors. I need to remember to put mine on.
2. Re the tko shifter. I have an older version but it looks the same. I cut the shifter nub and fabbed up and welded (to the old nub) a 1/4" steel "L" with threaded bolts for the shifter handle. I had to control the heat but after raising the console about 1/2" it should work fine. Not installed yet though.
Last edited by Corvettedave02; Jan 10, 2023 at 01:46 PM.
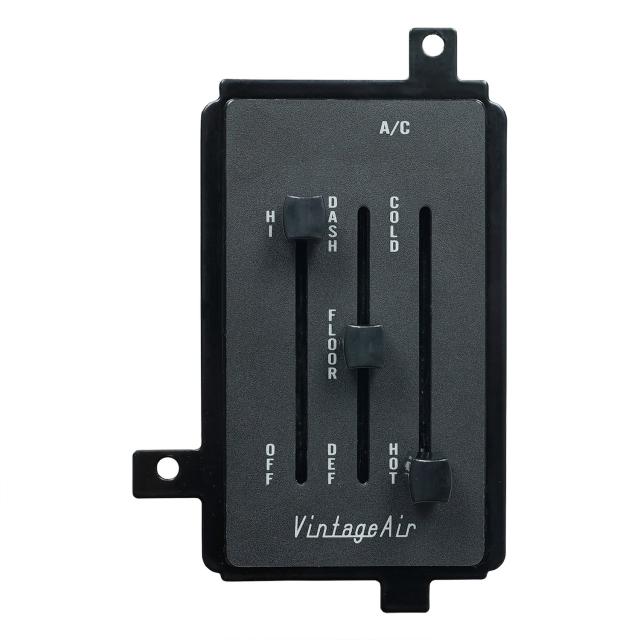
Nice console! Your vintage air controller looks completely different from mine. Mine looks like this:
Which is nice because it fits in the stock location. But that's really all it has going for it.
Though, frankly, the only thing I'm really bothered by is their logo. My current plan is to peel that black sticker off the front (and the one off the wiper control) and have a better one properly engraved by FrontPanelExpress.
I have some additional mods I've done to the heater control valve that will eventually be in a thread update. With an LS/LT you're not supposed to close off the heater loop completely, and I didn't want a constant bypass. So I replaced it with a pair of actuated valves and some relays. I've also got the oil exchanger in series in the heater loop. So now it will either flow just through the oil exchanger, or through both. With the variable control I was disappointed to learn that they used a toggle-style control valve instead of a variable one. Especially since Prius valves are so cheap. I might make a module to adapt the prius valve eventually since the packaging is nicer than the dual valves I have now. But at the moment my focus is on getting the car on the road come springtime.
Are you using the stock L82 hood? L82 badging? I like my stock hood but may eventually go with the L 88 hood I have. It will give me some intake volume when I add a spacer.
Interesting info regarding the VA controls. They only had the wheel conversion option or the restomod version I got when I purchased the kit 3 years ago. Mine was straight from VA for a 76 with original AC. Those look like 78 controls I think? I think they look good though.
Are you using the stock L82 hood? L82 badging? I like my stock hood but may eventually go with the L 88 hood I have. It will give me some intake volume when I add a spacer.
Yeah I'm going to use the stock hood. There was a question about whether it would fit after I built an intake. But I've got it on there now and it clears. I put a ton of work into stripping and refinishing it, so it would be a shame not to use it.
I'm not sure about the badging yet. I have the badges, but obviously I am not using the L-82 engine. And LT1 is a confusing badge too. So I'm not sure what I'll do yet. Maybe I'll get an L-82 style badge but one that says L-86.
Interesting info regarding the VA controls. They only had the wheel conversion option or the restomod version I got when I purchased the kit 3 years ago. Mine was straight from VA for a 76 with original AC. Those look like 78 controls I think? I think they look good though.
Did you paint your console? If so, what did you use?
Console is covered in vinyl. The grain isn't a perfect match but I think it turned out pretty well. The little cell phone rails need redone. I'll probably make a pocket. I didn't originally because I was going to try to put my ecu under the console but it wouldn't fit.
I'll keep my L82 badging for now because the paint isn't bad. When I repaint I'll put my L88 food on and add 427 badges since the car has a 427. I also might add the L88 flairs but I'm a bit on the fence because I originally planned to make this a loose tribute to the only 1974 Motion Vette made. No flairs on that car.
km sure it was much easier for me but to get everything to fit under the stock L82 hood wasn't easy. Drop base air filter, planed the Motown efi intake 5/8", cut Dow the wing nut on the top and moved the hood up about 1/8". I have 1/4" clearance, lol. I didn't like loosing the intake volume and I'm sure I lost some Hp. Ill buy a spacer and possibly a dominator throttle body and intake with the L88 hood.
Last edited by Corvettedave02; Jan 27, 2023 at 01:37 PM.
I’m removing all the badging from mine.
I like the clean look on all my cars.
My wife thought it was funny on the day we brought home our new Silverado truck and travel trailer.
I was outside all day removing badges and stickers.
OCD gets me every time!