When you click on links to various merchants on this site and make a purchase, this can result in this site earning a commission. Affiliate programs and affiliations include, but are not limited to, the eBay Partner Network.
So, one week of vacation… 7 days invested in my Vette cause I needed to put her back in one piece. Just want to share with you what has been done, and can be done by oneself and some elbow grease. Some stuff was done prior but I want to put it all in one post.
I’ve decided original carpets with half world shipping is too expensive, almost doubling the price of parts. And this is how it started:
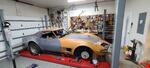
First I’ve removed all of the interior trim and parts
Found something interestig though… Didn’t know Americans need this
Just imagine the smell, yuck
It was time for dynamat and upholstery insulation
then I had to refurbish seats, door trim, armrests and chrome parts, tighten everything and adjust the windows. There are some befor and after pics here
Then it was time to do the hardest part. Create and mould my own carpets.
And then I put everything together and back inside the car.
And now the exterior… jeeez
Procedure was quite simple and well know
-two bucket method wash
-chemical decontamination
-wash
-clay bar
-wash
-three step polishing with DA
-SiO2 seal
-wax
now… motherf… I still have sore muscles and I’m unable to raise myself from the toilette but man it was worth it.
Look at this clay bar
Check the difference in paint during polishing
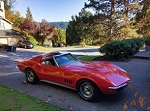
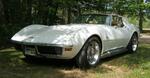
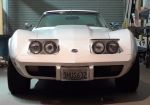
and the final product is here.
the last picture is now promoted to my wallpaper.
So I hope you’ve enjoyed this thread as much as I’ve enjoyed doing the work.
All comments are welcomed as well as constructive criticism and advices.
C ya
Last edited by CubeBrick; Apr 25, 2023 at 05:29 AM.
Hello, you really put alot of work into it and it shows! I would'nt change a thing!. IMHO, original is good! You should be proud, Sharp Car! Regards, LowSporty
P.S. Have you done the engine bay?
Last edited by LowSporty; Apr 25, 2023 at 11:06 AM.
Hello, you really put alot of work into it and it shows! I would'nt change a thing!. IMHO, original is good! You should be proud, Sharp Car! Regards, LowSporty
P.S. Have you done the engine bay?
I’ve done all the mechanical stuff with the exception of headlights conversion kit. Regarding making it shine, no. Currently driving season is starting so for the spring/summer/fall I’ll enjoy it. For the october and onward I plan to strip some parts down and replace or refurbish them while car is hybernating during the winter. I need to rebuild steering with new pump, rag joint, redo the brake fluid container etc. Then I’ll probably change all the hoses and polish the valve covers. I need to remove some of the bubba wiring which connects basically nothing with nowhere.
I also have to redo the rear wheel bearings, shocks and those cushions for the leaf springs (no idea what its called in english).
For now I’ll just enjoy my childhood dream cruising with my vette around some of our 1400 islands.
Here’s another from today. I totally forgot I have ordered the refurbish kit way back in January. So before I spend yet another 300 bucks on electric ones, I decided to try and salvage these. Now they are holding vacuum, tested with pluging the inlets and trying to pull the lever. Decided to paint them just to keep the rust away plus it works with the car being black and all. Will see if it’ll work on the car though. Stay tuned and keep the fingers crossed. I’m happy how it turned out.
Last edited by CubeBrick; May 6, 2023 at 05:59 AM.
Here’s another from today. I totally forgot I have ordered the refurbish kit way back in January. So before I spend yet another 300 bucks on electric ones, I decided to try and salvage these. Now they are holding vacuum, tested with pluging the inlets and trying to pull the lever. Decided to paint them just to keep the rust away plus it works with the car being black and all. Will see if it’ll work on the car though. Stay tuned and keep the fingers crossed. I’m happy how it turned out.
Tested today, both lamps open but only driver’s side closes…. And it takes good 30 second for both of them to fully open. Vacuum is to weak by my subjective opinion. I tried sucking 😂 through the hose and it closes normaly. Now I have to try and trace any vacuum leaks. I can hear an air noise from the front air vacuum reservoir area so I’ll try and trim all the hoses and reinserting them in place just to be sure.
EDIT - tested, it’s not the reservoir. Wheezing sound is coming from both vacuum relays, I guess they aren’t holding as they supposed to. Now I need the advice. Risk 100 bucks and replace those with possibility of it not working or invest 300$ and go electric?
Last edited by CubeBrick; May 7, 2023 at 06:26 AM.
My actuators had a "pinch-Ring" holding the two metal halves together...I used a dremel to cut a notch in the ring without cutting into the metal halves so I could separate the canister....
No wonder it didn't move the headlight.......
The rubber diaphram was dry-rotted from moisture leaking inside because of a cracked vacuum hose.......
I rebuilt the canister with a similar diaphram provided by another forum member.
See my thread on page 286-87 for details
My actuators had a "pinch-Ring" holding the two metal halves together...I used a dremel to cut a notch in the ring without cutting into the metal halves so I could separate the canister....
No wonder it didn't move the headlight.......
The rubber diaphram was dry-rotted from moisture leaking inside because of a cracked vacuum hose.......
I rebuilt the canister with a similar diaphram provided by another forum member.
See my thread on page 286-87 for details
I didn’t had problems with actuators, they are OK, my issue was with the relays, which I’ve rebuilt as well. All is well now with the universe.
Awesome work man, I would probably go the electric way finding mine were as bad as yours.
After I guess a decade or two time has come to stop the oil leaks from the valve covers. I know this takes some time but I really enjoyed the process.
Tools used:
- plastic scraper
- WD40 fast penetrant
- strong industrial degreaser
- kitchen soap
- sponge
- thermal paint satin black
- felpro perma dry plus gasket (it’s in the mail order)
- new gates pcv grommet
- new gates oil cap
Designer Imagines A Corvette That Looks More Like a Corvette Than the Corvette
Slideshow: A Jaguar designer's personal project imagines what a modern front-engined Corvette might look like if Chevrolet revisited the golden age of the Stingray.


























 Productive week