When you click on links to various merchants on this site and make a purchase, this can result in this site earning a commission. Affiliate programs and affiliations include, but are not limited to, the eBay Partner Network.
Greetings. I am in the process of painting my 78 Vette. I have decided to strip the paint off using the razor blade method. As this method could take me several months, do I need to treat the stripped fiberglass? I don't want to harm the bare part while I am finishing stripping the rest of the car. Also, I am finding some small gouges on the 'glass. What should I filll them in with? Thanks for your suggestions.
I guess the questions to be asked are....
1) How is it currently coming off with the razor blade so far? Several months sounds unacceptably slow to me.
2) How many coats of paint/primer are you seeing?
3) What are you seeing at the base (GM Black primer, gray primer??. Some pictures would be helpful.
4) Do you have access to a decent-sized air compressor that will run air tools?
Sometimes the razor blade method goes real easy, esp with original lacquer paint. Other times it's not and is very difficult process leaving nicks which create more work than a guy is saving.
My favorite way to strip a Corvette is by chemical stripper. Esp the old stripper, outside so the fumes are not as bad. A guy could strip a corvette in..figure a day by the time all the details were worked out. Esp b/c a C3 has so many curves and angles which can be tricky for a sander. But the new Non-MEK stripper isn't as volitile. Still I'd probably "try" a gallon of Aircraft stripper and see how that goes. Some paints it works better than others.
Or, if you have access to a good air compressor, I'd go buy a "Mud-hog" gear-drive DA sander
and go to work (my second favorite ). A couple days using good quality 3M sandpaper you could have it all ground off. That'll eat the paint off real quick. Wear a good Dust mask. But you need to be super-careful and use good common sense and stop before you sand too far down. And you want to go evenly. You do not want to sand into the fiberglass if you can avoid it. Stay away from sensitive areas like wheel arches and sharp edges with a sander ...do those by hand or razor blade or chemical stripper. then do final sanding with a DA and like 100 grit. It might be you need to use all methods depending on the location on the car. The front and rear nose represent another set of problems, esp if they have a lot of coats of paint.
As far as the gouges go, you can go a couple ways here. I would probably get the car stripped and then prime it with 2K primer. THEN fill the gouges with a daub of bondo over each. Then you can sand the nicks while you are doing the rest of your car sanding.
Methylene chloride strippers have long ago been banned by the EPA since March of 2019 so that option, unless you had a stash, is no longer available. Most currently available products aren’t very good.
The bare fiberglass does not necessarily need to be protected but do avoid exposure to oils and silicones as those will wreak havoc with fresh paint. Common sense will go a long way here.
Minor scratches from the razor blades can be filled with a high solids primer. My preference is a catalyzed polyester based product called Eliminator but a high quality 2 part epoxy is fine.
If it was me I would use a mudhog on the flat parts of the corvette (hood, tops and sides of fenders, doors, quarters, etc) and use either the razor method around the wheel openings and tight curves, or wetsand by hand using some durablocks....and course paper. Because it's going to be really difficult to do those areas with a gear-drive sander (mudhog). What grit to use depends how thick and type of paint is on it. Maybe start with 60 grit? I would get the 3M Green Corps paper. Terrible (cheap) sandpaper will make for more work.
When I go to strip the paint off a steel-bodied car/truck, there's really no quick way. Stripper (Yes I still have some old stripper left) takes time and you still have some sanding to do..it doesn't get it ALL off. A DA takes time. A mudhog takes time. A drum sander also takes time too, skips around ...and is heavy to hold on the sides. Bead blasting you gotta take it to the shop (that takes time ..and there's a lot of clean-up). Every method takes time. But fiberglass is tender so you want to be real careful if you use a mechanical sander.
Unlike a metal car you can strip off the paint and not have to worry about corrosion or harming the SMC and this allows you to take your time as needed. You can always strip paint one panel at a time and prime with a good two part or epoxy primer. These types of primers will fill minor gouges and scratches. If you are unsure about the fill properties being sufficient 3M makes some easy to use premium filler and glaze, Heavier body work such as larger cracks can be repaired with 3M 8115 two part which can also be used to bond loose or replacement body parts. The 3M panel bond 8115 should be top coated with either a filler or a glaze.
If you find yourself wanting to use glass fibers and resin make sure it is combatable with Sheet molded compound which is what you car is made of.
Stripping the paint off can be a task. Improper use of power tools can cause lots of problems due to the material the car is made of. If a razor blade will strip most of the paint off keep a large supply of fresh blades and change often. Always use a retractable blade holder for safety reasons. After most of the paint is off I would never recommend anything heavier than 120 grit sandpaper and 80 grit for any body work followed up by 120 grit or 230 grit.
Keep in mind that a power tool will round edges off or sand dips in flat panels from using the edge of the sanding disk. This is probably the MOST important thing to understand for a professional looking result.
There is a tool made by Merka which is available which an electric Dual action sander and different sanding blocks. This machine is a vacuum assist and makes much less of a mess when sanding paint or body work. The wife likes that part lol.
The Merka sanding pads will accept newer 3m sandpaper (hook/loop) The machine is a lot quitter than a conventional compressor and sander. A compressor and decent spray gun is recommend for the primer.
Most of the materials and primers should be available at auto paint stores. I recommend talking someone at the paint store and they can guide you with making the best choices for your project.
Greetings. I am in the process of painting my 78 Vette. I have decided to strip the paint off using the razor blade method. As this method could take me several months, do I need to treat the stripped fiberglass? I don't want to harm the bare part while I am finishing stripping the rest of the car. Also, I am finding some small gouges on the 'glass. What should I filll them in with? Thanks for your suggestions.
I used Back to Nature Aqua Strip Remover -- it's made for SMC/Fiberglass, you don't need to clean the body after using it, and it doesn't smell bad. In some places I decided to
Lots of good advice already given so I'll add my 2 cents. I used a combination of things to remove the paint from my 71 coupe and most likely you will have to figure out what works depending on what you have to work with. The nose of the car had at least 12, yes 12 coats of paint on it. I started with the razorblade because that took more than half of the brittle paint off very quickly, but make sure you wear some side-shield safety glasses. Those tiny chips of paint go everywhere and when one flies into your eye, it hurts. Next I used a DA with 80 grit to cut into the next few layers without hitting the fiberglass. To do this I sanded one spot all the way down to discover what colors are underneath. As soon as I saw them appearing I stopped using the DA and I stayed away from any body lines. Then I slathered the Aquastrip on and covered it with some painters plastic. After a few hours the paint softened to the point the razorblade removed it very easily. Yes, I got plenty of little digs in the fiberglass, but that did not bother me. After that I used more Aquastrip with some green scrub pads to remove the stubborn spots. I finished with lacquer thinner because it still had the original primer on it.
On the rest of the car I only needed to DA it to cut through the clear coat to help the Aquastrip work faster. Someone had stripped it in the past, put some heavy primer on it and covered it with BCCC. I finished this whole process by scrubbing the car with Dawn and rinsing it over and over with tons of water. My car was not going to be painted for many months so I had no worries about the fiberglass absorbing water, which can lead to a nightmare. I was left with bare fiberglass, nicks and digs, stray fiberglass strands standing up, and long scrape marks from the razor. After lightly blocking the car to reveal the bad spots I used Vette Panel Adhesive to fix those spots. Then Featherfill G2 and after hours of block work, the car was smooth and ready for paint.
I've never worked with fiberglass before so I was very cautious with sanding. The last thing I wanted to do was to make it paper thin or create waves in the body.
Good Luck and give yourself plenty of time. This is a lot of work.
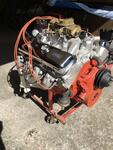
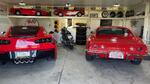
Mark Here it is after stripping the paint. Lot's of hours to get here, but in the end it was worth it. Here it is today.
when i painted my C3 , i used i think it was 400 grit sand paper sanded the whole car , then painted right over it , i figured the old paint was a good base!!
...when i painted my C3 , i used i think it was 400 grit sand paper sanded the whole car , then painted right over it , i figured the old paint was a good base!!
So you're THAT guy who's piling on more paint...on a C3! ...LOL
(just kidding) My car had something like 16 individual coats of paint on it before I stripped it all off.
The last thing I wanted to do was to make it paper thin or create waves in the body.
Good Luck and give yourself plenty of time. This is a lot of work.
Mark
Very nice work and something you can step back and say "I did that myself"
To your caution, I would - be very carerful not to cut into any creases or edges. You can never get that factory edge back. Best to tape them off for any machine work.
Trust me, it was not always that clean. And I did the bulk of the sanding and paint stripping outside. I also did most of the body work out on the driveway under a tent. The shot of the bare fiberglass was taken right after we bonded the front clip into place so things were rather tidy at that point.
Greetings. I am in the process of painting my 78 Vette. I have decided to strip the paint off using the razor blade method. As this method could take me several months, do I need to treat the stripped fiberglass? I don't want to harm the bare part while I am finishing stripping the rest of the car. Also, I am finding some small gouges on the 'glass. What should I filll them in with? Thanks for your suggestions.
You've been a member for a long time so you probably know there is. "Paint/Body" forum under "General Corvette Topics".







 Paint my C-3














 ) My car had something like 16 individual coats of paint on it before I stripped it all off.