When you click on links to various merchants on this site and make a purchase, this can result in this site earning a commission. Affiliate programs and affiliations include, but are not limited to, the eBay Partner Network.
Anyone change the interior color on a C3, (70)? SEM paint on plastic/vinyl or just replace whatever piece is avail in a diff color?? Wonder if it will look like sh*t painted?? Thx
If you use the entire SEM system, and make sure you get the painted surface really clean, you will likely have great results for anywhere that you don't touch every day.
I wouldn't try changing the seats, though. Just replace those.
If you use the entire SEM system, and make sure you get the painted surface really clean, you will likely have great results for anywhere that you don't touch every day.
I wouldn't try changing the seats, though. Just replace those.
Just freshened almost the entire interior including seats with SEM elastomeric interior dye, been using it for many years and as Bikespace says... most important use the system in full from cleaner to adeision promoter before dying,
granted my interior was mostly already blue but almost everything you see was coated.. your seats will likely wear through down the road
Just freshened almost the entire interior including seats with SEM elastomeric interior dye, been using it for many years and as Bikespace says... most important use the system in full from cleaner to adeision promoter before dying,
granted my interior was mostly already blue but almost everything you see was coated.. your seats will likely wear through down the road
I have read up on and watched many videos/write ups on color changes as many vendors versions of certain colors will vary due to the fact that they are sourcing from multiple makers. “The Driveway” in youtube even re-dyed brand spanking new black door panels as the black they came in from the vendors stood out against the rest of his black interior parts. I now believe that the best way to get everything to truly match is to go the SEM route. As stated, prep is key. At my age, I’ve learned that this pretty much applies to everything. Painting your house? Painting your car? Refinishing your rifle/pistol? Doing a color change or replacing parts of your interior? Prep is key if you want it to hold up, look uniform, etc. Just to ad to what others have said, buy more dye than you think you may need. From my experience, many light coats are needed for good uniformity. Those cans run out quick! More so if the part being dyed are of a different starting color (some parts may only be available in black). Slow, careful, methodical wins the day.
Other than the great success as shown by @Golfobsessed , I think forum member @Rescue Rogers also did a complete interior re-dye. Seek him out as I’ve seen multiple post on him doing so successfully. He may be able to give additional tips from experience,
Last edited by litevette; Nov 7, 2025 at 09:29 PM.
If you want all of the pieces to match, the SEM route is about guaranteed to do that. Using color molded parts may introduce variability, especially if you are mixing new with original.
2020 Corvette of the Year Finalist (performance mods)
2019 C3 of Year Winner (performance mods)
2016 C3 of Year Finalist
Originally Posted by litevette
I have read up on and watched many videos/write ups on color changes as many vendors versions of certain colors will vary due to the fact that they are sourcing from multiple makers. “The Driveway” in youtube even re-dyed brand spanking new black door panels as the black they came in from the vendors stood out against the rest of his black interior parts. I now believe that the best way to get everything to truly match is to go the SEM route. As stated, prep is key. At my age, I’ve learned that this pretty much applies to everything. Painting your house? Painting your car? Refinishing your rifle/pistol? Doing a color change or replacing parts of your interior? Prep is key if you want it to hold up, look uniform, etc. Just to ad to what others have said, buy more dye than you think you may need. From my experience, many light coats are needed for good uniformity. Those cans run out quick! More so if the part being dyed are of a different starting color (some parts may only be available in black). Slow, careful, methodical wins the day.
Other than the great success as shown by @Golfobsessed , I think forum member @Rescue Rogers also did a complete interior re-dye. Seek him out as I’ve seen multiple post on him doing so successfully. He may be able to give additional tips from experience,
I dyed the complete interior folllowing SEMs video using their cleaning and prep components and COrvette America Dye. Be aware that some dye colors will not match the original interior color so you may want to test an unseen area first. You may find that some colors arent even close and you will have to do everything. The original 68 bright blue doesnt exist anymore, my original pieces had a bit of greenish hue to it and the new dye didnt come close so I had to do the complete interior
I changed the interior of my 70 from black to red. I did use some interior repro panels. The problem is that some of the repro parts didn't fit well. My attempt to buy eBay used red interior was mostly a bust. Used interior parts can look fine in a photo, only to be unacceptable when you look at them after they arrive. . In desperation, I turned to re-dying my original black parts. Surprisingly this worked out very well. Black is a difficult color to "re-dye" but just be patient. The paint; i.e. dye, is very "thin" and many multiple layers are required. I had my seats done in red leather by Al Knoch.
.................
I bought a very good condition red steering wheel on eBay. I think all the Corvettes had black steering wheels. I think this wheel came off a Camaro, but it looks just like the original black wheel. The 70 dash board had larger perforated areas for under dash loud speakers. These perforated areas a prone to deteriorating and tearing. I bought a 69 dash for the car since it doesn't have these perforated areas.




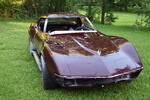



 Interior color change