











"Painless" Wiring Harness Install- progress report!
Thread Starter
Pro

Joined: Feb 2004
Posts: 564
Likes: 0
From: Pittsburgh PA
 "Painless" Wiring Harness Install- progress report!
Hello, all...
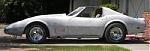
For those of you who don't remember, I've been working on a '74 coupe, installing a 427BBC with a GMC 6-71 blower, backed by a 4-speed and factory 3.70 gears... It was ratty to begin with, more than 1/8" of paint to peel off with a razor-blade (over eight months to finish getting to bare glass)...
For those of you who haven't seen it, there's some pics at:
http://pg.photos.yahoo.com/ph/breath...xNitCBVWCJV7ZC
Anyway, I went to fire the engine for the first time last week, and I heard a WHUMP, followed by a mushroom-cloud that smelled like burnt wiring... To say the least, the engine did NOT start... So, in disgust (and with a beer in my hand, at 10:30 PM, all p!ssed off), I called Summit Racing, and ordered the 18-circuit, universal muscle-car harness from Painless Wiring.
Painless??? Hardly.
It looked good in the box, and I spent a few days going over the instructions, before I started to dig in.
I ripped out every scrap of wire from the car, from (fiberglass) bumper to bumper. Of course, to get to the dash wiring, I had to take apart the dash, instrumentation, console and doors... Discovered that the interior was as thrashed as I'd feared- the only things I'll be able to re-use will be the dash pad, the passenger-side lower dash, the steering wheel and the seat-frames. Pretty much everything else (including instrumentation) is garbage. Of course, for the moment, I'll have to cobble the old console back together, just so I can monitor the engine when I fire it up... This took an entire day, and I was quite unhappy with the carnage the previous Bubbas had left me (some of the harness was held in place with bungee-cords). In all, I was looking at about 30 pounds worth of wires, busted plugs and relays. It's a mess.
So, now I dig out the new harness, lay it out to mimic how it'll go in the car. First problem shows up immediately: the individual wire-groups are wire-tied together, i.e., the tail-lamp harness, the engine-compartment harness, the front-lighting harness, etc. But there are a million of those wire-ties, and some of the wires are bundled into the wrong harness. Much of the instrumentation harness was wired to go up through the firewall (since when did a GM muscle-car have the gas-gauge under the hood???)... Trying to re-route the wires so that the wire bundles would go to the correct place (without travelling twice through the firewall) turned into a disaster. Those millions of wire-ties made the job a total cluster-____.
Ok, after fighting with this for several hours, I finally had the wire bundles actually bundled like they were SUPPOSED to be... Now, I get ready to route the engine-compartment and front-lighting harnesses through the firewall, and install the fuse panel.
Next problem: there is no way to properly seal the firewall with the hardware provided. They supply a template that matches the original fuse-block bolt-up holes, and you're supposed to route the harnesses through a rubber grommet, which fits into the plate they provide. BUT, the plate has a long slot in it, so it's shaped in a "U", with the rubber grommet fitting at the bottom of the "U" (or in my case, top, since I rotated the plate 180 degrees). The open part of the slot has no way to be sealed after the grommet is installed.
VERY stupid design...
So, after six hours of cursing and busted knuckles, I finally got the fuse-block in, and solidly mounted. Of course, I'll have to go in from underneath, and put glass on the bottom of the plate, to hopefully keep moisture (and noise) from getting through that hole...
I finally start routing the engine wiring, and it went smoothly. Every wire is not only marked with a number, but also a complete description of where it comes from, and what it should hook up to. They supply (no surprise, here) LOTS of small wire-ties, so that you can make the install look pretty until you get the black flex-tubing (shielding stuff, I forget what they call it) on the wires.
Some cool things that Painless DID do, in their kit:
1. Plenty of extra wires, so that you'll have no problem powering AC, Cruise-control, power windows or locks, or even a power antenna at the back of your car. VERY COOL.
2. The turn-signal and ignition-switch were an absolute BREEZE to do. It took me all of 15 minutes to complete these sections, which (as you will know, if you've ever had the misfortune of having to work on these) can take several hours. New plugs were included, a drawing of where each wire connects, and specific notes for the GM column were included. In this ONE area, the job was, indeed, painless.
3. Clear marking on every wire, so there is little guess-work involved. I mentioned it already, but it bears repeating. With the clear labels on the wires, you rarely have to pick up the instruction book (good thing, since there are no useful schematics).
A summary of the stupid aspects of the "Painless" harness.
1. ****-poor design for through-firewall routing- it can't be sealed off.
2. Bad bundling of sub-harnesses.
3. NO schematics!!!
I already have the front-lighting harness routed, and so all I need to do tomorrow is terminate the wires at the lamps, double-check my grounds, and then it's on to the tail harness.... Lastly, will be the instrument panel and guages.
A few notes here, for anyone considering this job:
1. Do NOT do this, if you aren't very familiar with electrical work. I am an electrician by trade, so it's not a real challenge for me, except for installing the fuse-block. If you do NOT have lots of electrical experience, get a buddy to help, bribe him with copious amounts of beer, and expect your car to be down about a week (IF you want to take the proper time to route the wires correctly).
2. There are no schematics supplied with this kit, so you must be very careful to take stock of what is and is not supplied at various sub-harnesses, and make certain that the wires are routed properly.
3. Take your time. If you rush this job, thinking (on a Thursday night) that you'll be ready in time to cruise Saturday night, you'll not only be disappointed that you didn't make it, you'll also be p!ssed off that you wasted all that money, and have to redo the job again...
Sorry for being long-winded, but I figured that if I was to give a progress-report (as well as objective summary) of the Painless kit, I should be detailed.
I will post more, as I continue on the kit... It would seem that the worst of the problems (at least with wiring) are now behind me... We'll see.
For those of you who don't remember, I've been working on a '74 coupe, installing a 427BBC with a GMC 6-71 blower, backed by a 4-speed and factory 3.70 gears... It was ratty to begin with, more than 1/8" of paint to peel off with a razor-blade (over eight months to finish getting to bare glass)...
For those of you who haven't seen it, there's some pics at:
http://pg.photos.yahoo.com/ph/breath...xNitCBVWCJV7ZC
Anyway, I went to fire the engine for the first time last week, and I heard a WHUMP, followed by a mushroom-cloud that smelled like burnt wiring... To say the least, the engine did NOT start... So, in disgust (and with a beer in my hand, at 10:30 PM, all p!ssed off), I called Summit Racing, and ordered the 18-circuit, universal muscle-car harness from Painless Wiring.
Painless??? Hardly.
It looked good in the box, and I spent a few days going over the instructions, before I started to dig in.
I ripped out every scrap of wire from the car, from (fiberglass) bumper to bumper. Of course, to get to the dash wiring, I had to take apart the dash, instrumentation, console and doors... Discovered that the interior was as thrashed as I'd feared- the only things I'll be able to re-use will be the dash pad, the passenger-side lower dash, the steering wheel and the seat-frames. Pretty much everything else (including instrumentation) is garbage. Of course, for the moment, I'll have to cobble the old console back together, just so I can monitor the engine when I fire it up... This took an entire day, and I was quite unhappy with the carnage the previous Bubbas had left me (some of the harness was held in place with bungee-cords).
In all, I was looking at about 30 pounds worth of wires, busted plugs and relays. It's a mess. So, now I dig out the new harness, lay it out to mimic how it'll go in the car. First problem shows up immediately: the individual wire-groups are wire-tied together, i.e., the tail-lamp harness, the engine-compartment harness, the front-lighting harness, etc. But there are a million of those wire-ties, and some of the wires are bundled into the wrong harness. Much of the instrumentation harness was wired to go up through the firewall (since when did a GM muscle-car have the gas-gauge under the hood???)... Trying to re-route the wires so that the wire bundles would go to the correct place (without travelling twice through the firewall) turned into a disaster. Those millions of wire-ties made the job a total cluster-____.
Ok, after fighting with this for several hours, I finally had the wire bundles actually bundled like they were SUPPOSED to be... Now, I get ready to route the engine-compartment and front-lighting harnesses through the firewall, and install the fuse panel.
Next problem: there is no way to properly seal the firewall with the hardware provided.
They supply a template that matches the original fuse-block bolt-up holes, and you're supposed to route the harnesses through a rubber grommet, which fits into the plate they provide. BUT, the plate has a long slot in it, so it's shaped in a "U", with the rubber grommet fitting at the bottom of the "U" (or in my case, top, since I rotated the plate 180 degrees). The open part of the slot has no way to be sealed after the grommet is installed. VERY stupid design...
So, after six hours of cursing and busted knuckles, I finally got the fuse-block in, and solidly mounted. Of course, I'll have to go in from underneath, and put glass on the bottom of the plate, to hopefully keep moisture (and noise) from getting through that hole...
I finally start routing the engine wiring, and it went smoothly. Every wire is not only marked with a number, but also a complete description of where it comes from, and what it should hook up to. They supply (no surprise, here) LOTS of small wire-ties, so that you can make the install look pretty until you get the black flex-tubing (shielding stuff, I forget what they call it) on the wires.
Some cool things that Painless DID do, in their kit:
1. Plenty of extra wires, so that you'll have no problem powering AC, Cruise-control, power windows or locks, or even a power antenna at the back of your car. VERY COOL.
2. The turn-signal and ignition-switch were an absolute BREEZE to do. It took me all of 15 minutes to complete these sections, which (as you will know, if you've ever had the misfortune of having to work on these) can take several hours. New plugs were included, a drawing of where each wire connects, and specific notes for the GM column were included. In this ONE area, the job was, indeed, painless.
3. Clear marking on every wire, so there is little guess-work involved. I mentioned it already, but it bears repeating. With the clear labels on the wires, you rarely have to pick up the instruction book (good thing, since there are no useful schematics).
A summary of the stupid aspects of the "Painless" harness.
1. ****-poor design for through-firewall routing- it can't be sealed off.
2. Bad bundling of sub-harnesses.
3. NO schematics!!!
I already have the front-lighting harness routed, and so all I need to do tomorrow is terminate the wires at the lamps, double-check my grounds, and then it's on to the tail harness.... Lastly, will be the instrument panel and guages.
A few notes here, for anyone considering this job:
1. Do NOT do this, if you aren't very familiar with electrical work. I am an electrician by trade, so it's not a real challenge for me, except for installing the fuse-block. If you do NOT have lots of electrical experience, get a buddy to help, bribe him with copious amounts of beer, and expect your car to be down about a week (IF you want to take the proper time to route the wires correctly).
2. There are no schematics supplied with this kit, so you must be very careful to take stock of what is and is not supplied at various sub-harnesses, and make certain that the wires are routed properly.
3. Take your time. If you rush this job, thinking (on a Thursday night) that you'll be ready in time to cruise Saturday night, you'll not only be disappointed that you didn't make it, you'll also be p!ssed off that you wasted all that money, and have to redo the job again...
Sorry for being long-winded, but I figured that if I was to give a progress-report (as well as objective summary) of the Painless kit, I should be detailed.
I will post more, as I continue on the kit... It would seem that the worst of the problems (at least with wiring) are now behind me... We'll see.
Last edited by breathial; Mar 27, 2005 at 06:10 AM.

Melting Slicks

Joined: Aug 2004
Posts: 2,063
Likes: 1
From: Beverly Massachusetts
well i was gonna go the same route as you an even being an electronic technician i figured that i would try out the painless harness so i ordered the same kit that you ordered but as soon as i got it i could see a major problem with the bulkhead connection on the fuse block so i decided to just send it back and ordered all new stock harnesses from M&H for $1014 less the rear lamp harness which after inspection i know i didnt need sense this was the only harness on the car that was still in really really really good shape and i can tell you that the quality of the M&H harness is absolutily awsome compared to the painless and well worth buying it sense it comes with all new oem conections allready installed and all the wires are correct in length and color. in my case i just sent the painless harness back and waited a few months while i saved up the money and ordered the OEM style harness. anyways good luck with your project and update us with pictures of the harness installed and thanks for the write up on what you found sense i know that this subject has been brought up several times. 
Thread Starter
Pro
Joined: Feb 2004
Posts: 564
Likes: 0
From: Pittsburgh PA
Thinking about the firewall issue, I would say that the only major change that would need to be made for it to be a properly sealed bulkhead fitting would be to take the supplied plate, and go to a sheetmetal shop, have another cut from about 1/8" aluminum plate...
BUT...
Get rid of the slot, and make it a simple hole that is ~1/4" smaller in diameter (to get a snug fitting on the grommet). Then, where you have the two bolt-holes in the plate on opposite corners, I would make them symetrical (sp?), so that you would now have 4 bolts holding it in place...
The supplied bolts (I forgot to mention) were 2 3/4" long X 1/4-20 screws... Exactly 1/2" too SHORT!!! I had to make a special trip to Home Depot to pick up two longer screws ($1.17 with tax, ~$2 in gas, priceless in anger...).
Anyway, the new plate would now be able to be tightly sealed to the firewall, would be FAR stronger than stock, and end the problems I encountered...
In retrospect (and at this current point) I would recommend the harness kit, especially if, like me, you are doing something far from stock, and don't want the extra relays, spaghetti-wires and general mess that the factory harness is... But, to save yourself a lot of grief, make an updated plate to preclude the problems I encountered.
On the scale of one to five stars...? I'd give it maybe a three....
Good night for now,
Eric
BUT...
Get rid of the slot, and make it a simple hole that is ~1/4" smaller in diameter (to get a snug fitting on the grommet). Then, where you have the two bolt-holes in the plate on opposite corners, I would make them symetrical (sp?), so that you would now have 4 bolts holding it in place...
The supplied bolts (I forgot to mention) were 2 3/4" long X 1/4-20 screws... Exactly 1/2" too SHORT!!!
I had to make a special trip to Home Depot to pick up two longer screws ($1.17 with tax, ~$2 in gas, priceless in anger...). Anyway, the new plate would now be able to be tightly sealed to the firewall, would be FAR stronger than stock, and end the problems I encountered...
In retrospect (and at this current point) I would recommend the harness kit, especially if, like me, you are doing something far from stock, and don't want the extra relays, spaghetti-wires and general mess that the factory harness is... But, to save yourself a lot of grief, make an updated plate to preclude the problems I encountered.
On the scale of one to five stars...? I'd give it maybe a three....
Good night for now,
Eric

Burning Brakes

Joined: Oct 2004
Posts: 1,132
Likes: 0
Originally Posted by LIQUIDDRAGON
well i was gonna go the same route as you an even being an electronic technician i figured that i would try out the painless harness so i ordered the same kit that you ordered but as soon as i got it i could see a major problem with the bulkhead connection on the fuse block so i decided to just send it back and ordered all new stock harnesses from M&H for $1014 less the rear lamp harness which after inspection i know i didnt need sense this was the only harness on the car that was still in really really really good shape and i can tell you that the quality of the M&H harness is absolutily awsome compared to the painless and well worth buying it sense it comes with all new oem conections allready installed and all the wires are correct in length and color. in my case i just sent the painless harness back and waited a few months while i saved up the money and ordered the OEM style harness. anyways good luck with your project and update us with pictures of the harness installed and thanks for the write up on what you found sense i know that this subject has been brought up several times.
Corvette Stories
The Best of Corvette for Corvette Enthusiasts

10 Reasons the C6 Z06 is Still A Performance Benchmark After 20 Years
Joe Kucinski
How Much Horsepower Every Corvette Engine "LOST" in 1972
Joe Kucinski
Top 10 DOs and DON'Ts for Protecting Your Convertible Top!
Michael S. Palmer
Top 10 Most Explosive Corvettes Ever Made: Power-to-Weight Ratio Ranked!
Joe Kucinski
150 hp to 1,250 hp: Every Corvette Generation Compared by the Specs That Matter
Joe Kucinski
8 Coolest Corvette Pace Cars (and Replicas) of All Time
Verdad Gallardo
Top 10 Corvette Engines RANKED by Peak Torque (70+ Years of Muscle!)
Joe Kucinski
Corvette ZR1X Will Be Pacing the Indy 500, And Could Probably Race, Too!
Verdad Gallardo
Top 10 Corvettes Coming to Mecum Indy 2026!
Brett Foote
Thread Starter
Pro
Joined: Feb 2004
Posts: 564
Likes: 0
From: Pittsburgh PA
Originally Posted by 70 LS1
Good write up. What is the part number of the harness you got?
Originally Posted by DRL502
good post breathial, thanks for the tips
just ordered the 18- cir Painless Saturday.
just ordered the 18- cir Painless Saturday.
As it currently stands, the center console, and drivers' lower dash are SO far gone as to be unusable, so I'm going to order new ones, and then put in some cheap aftermarket (Sunpro) gauges, until I can get to the interior and the custom console... It'll look kinda' tacky, but it should be functional until I can do justice to the interior... I've got bodywork to finish first, so this is relatively low on the priority list...
Melting Slicks
Joined: Aug 2004
Posts: 2,063
Likes: 1
From: Beverly Massachusetts
Originally Posted by breathial
In retrospect (and at this current point) I would recommend the harness kit, especially if, like me, you are doing something far from stock, and don't want the extra relays, spaghetti-wires and general mess that the factory harness is... But, to save yourself a lot of grief, make an updated plate to preclude the problems I encountered.
Eric

Team Owner


Joined: Jul 1999
Posts: 65,492
Likes: 230
From: Orange Park Florida
Of course being an old ET with soldering skill helps, but I find it SO much easier to do my own harness wiring, and use the wire from the old harnesses, or new wire from parts houses....
eliminates much crap not necessary, like everything Ralph Nader ever put into a car....
GENE
eliminates much crap not necessary, like everything Ralph Nader ever put into a car....
GENE


Race Director


Joined: Dec 1999
Posts: 16,945
Likes: 9
I'd redoing mine from scratch just to get rid of the stock wiring mess (82 CFI, it's worse than all other years combined) and I'm relocating the fuse box to the shifter console, a little access plate in front of the shifter, no more crawling under the dash like a contortionist for me.
Thread Starter
Pro
Joined: Feb 2004
Posts: 564
Likes: 0
From: Pittsburgh PA
Originally Posted by LIQUIDDRAGON
i had the painless harness and i now have the factory OEM style harness from M&H and the painless was the spaghetti harness and the M&H is an exact reproduction of my original harness in length, wire size and color and correct connectors for use on original electronics.... .......just my .02
In my case, I make no pretensions to originality (and frankly speaking, restoring a car back to exactly original bores me...
).I have come to the conclusion, as well, that the interior design sucks almost as bad as the original wiring harness... And since the car is NOT original, and the entire interior is going into the garbage can...? It means I have a completely clean slate to start with, with regard to building an interior... Of course, I am NOT into velour, dingle-***** hanging from the windshield or tuck-and-roll... I like elegance... (which means some changes will be in the works for the engine- hood scoop, and other minor things). Since I'm the best fiberglass man I know, it's not really a big deal.... Just time, and prepping for a MESS...

Originally Posted by Twin_Turbo
I'm relocating the fuse box to the shifter console, a little access plate in front of the shifter, no more crawling under the dash like a contortionist for me.

