




1968 Body Panel sag

Thread Starter
Intermediate

Joined: Sep 2005
Posts: 29
Likes: 0
 1968 Body Panel sag
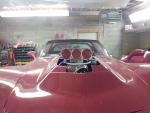
HELP!!!!!! I have got two panels on my convertible that are not lining up right. The front clip was missing brackets inside the nos epice and the hood and surround was not ligning up. On the back the top storage door and rear and not ligning up. Anyone have any suggestions.
Burning Brakes


Joined: Oct 2003
Posts: 836
Likes: 26
From: Harrisburg Pa
I restored a 68 a few years back so here is my thoughts. The front surround is supported by a piece of steel that gores behind the headlights to the front lip of the hood seam. This steel piece is BONDED to the the fiberglass and comes loose offen as the factory bond was not to good on a 68. Use Vette panel bond as I did to repair this. A support is needed to hold the new bond and to take out the sag til it drys. The rear problem can be a cracked inner support panel that cam unbonded. Most that I have seen a on the Quarters in or near the wheel well. Also check the rear body mounts for missing mounts or shims or even smashed or broken fiberglass where the mount sets.

Le Mans Master

Joined: Jul 2005
Posts: 5,752
Likes: 4
From: Austin Texas
The front header is a weak point on the '68. The remedy came out in '69-up with the addition of end support brackets that attach to each inner fender-well and support the header bar. You can get these parts from any 'Vette parts catalog. The rear view of your 'Vette shows to have been hit. The peak at the spoiler center is too pronounced. That is evidence of a collision. I would look for a bent frame and/or body-work issues..G/L

Thread Starter
Intermediate
Joined: Sep 2005
Posts: 29
Likes: 0
yes I have the brackets in place in the front nose, those that are pictured. i am wondering if there is a way to adjust them to brind the driver side a little higher. As for the back, frame is straight, but i think the passenger side may be missing some sort of a body mount making it sag similar to the front. Anyways thanks for the info so far.

Race Director


Joined: Apr 1999
Posts: 10,866
Likes: 717
From: Beverly Hills/Pine Ridge Florida
Originally Posted by 1968vertcop
in the second pic I am trying to get the passenger side of the "trunk" lid to sit farther down, that may not be a good picture to demonstrate with.
By doing this, you're "cocking" the hinge, which should allow the hinge to come down a bit more, which will allow the rear of the decklid to come down more.
It doesn't make sense, ADDING a shim or two, but it works.

Same trick works for aligning a hood, but your pic looks like you have other issues, as others have said.
Chuck

Melting Slicks

Joined: May 2001
Posts: 2,131
Likes: 4
From: May help you? You can sure as hell try!
Another adjustment that may be of interest for the nose sag is an L shaped bracket that attaches near the very point of the the nose to the steel support that attaches to the very front of the surround. This bracket is slotted and attaches to a bracket welded to the "horseshoe" that is bolted to the bolt-on crossmember at the front frame horns. This bracket can be moved up and down to raise the nose slightly and the bolt retightened. I don't think this bracket was used on late '68's or subsequent years. A support rod was used in its place later in production that attached to the center of the radiator support near the bottom.
Big G and Chuck G also have offered good advice too, as I have used both of these tricks when restoring my '68.
Big G and Chuck G also have offered good advice too, as I have used both of these tricks when restoring my '68.
Corvette Stories
The Best of Corvette for Corvette Enthusiasts

Top 10 Most Explosive Corvettes Ever Made: Power-to-Weight Ratio Ranked!
Joe Kucinski
150 hp to 1,250 hp: Every Corvette Generation Compared by the Specs That Matter
Joe Kucinski
8 Coolest Corvette Pace Cars (and Replicas) of All Time
Verdad Gallardo
Top 10 Corvette Engines RANKED by Peak Torque (70+ Years of Muscle!)
Joe Kucinski
Corvette ZR1X Will Be Pacing the Indy 500, And Could Probably Race, Too!
Verdad Gallardo
Top 10 Corvettes Coming to Mecum Indy 2026!
Brett Foote
Top 10 C9 Corvette MUST-HAVES to Fix These C8 Generation Flaws!
Michael S. Palmer
10 Revolutionary 'Corvette Firsts' Most People Don't Know
Joe Kucinski
5 Reasons to Upgrade to an LS6-Powered Corvette; 5 Reasons to Stay LT2
Michael S. Palmer
Team Owner


Joined: Jun 2000
Posts: 38,923
Likes: 1,481
From: Southbound
Cruise-In II Veteran
Originally Posted by big_G
...The remedy came out in '69-up with the addition of end support brackets that attach to each inner fender-well and support the header bar....

I added the '69 pieces (L & R) to my '68 and it stiffened things up considerably. On the deck lid, check to see if you have an unnecessary shim on the spring on the passenger's side.
Thread Starter
Intermediate
Joined: Sep 2005
Posts: 29
Likes: 0
Thank you for all your help. A sepcial thanks to the guy that told me to add a washer on the front bolt of the deck lid. Worked wonders, don't really understand how, but it worked. I do have one question on the front. I have the brackets pictured already in place. Is there supposed to be a bolt in the top of them? It looks like there is a place for it, even in the picture, but they are not in place. I need to make an adjustment to them, either by adding a shim, or adjusting bolts, but there is no bolts. You can see in the pic that someone posted there are bolts shown on the side but not on the top. Just curious if that is how it is supposed to be. It kinda makes since because if you have a long bolt it would go right through the front nose clip. Thanks again
Race Director
Joined: Apr 1999
Posts: 10,866
Likes: 717
From: Beverly Hills/Pine Ridge Florida
Originally Posted by 1968vertcop
A sepcial thanks to the guy that told me to add a washer on the front bolt of the deck lid. Worked wonders, don't really understand how, but it worked. Thanks again
That's an "old indian trick". Works on hoods too if the hood is too high in the front in relationship to the body. Chuck
Le Mans Master
Joined: Jul 2005
Posts: 5,752
Likes: 4
From: Austin Texas
Originally Posted by 1968vertcop
Thank you for all your help. A sepcial thanks to the guy that told me to add a washer on the front bolt of the deck lid. Worked wonders, don't really understand how, but it worked. I do have one question on the front. I have the brackets pictured already in place. Is there supposed to be a bolt in the top of them? It looks like there is a place for it, even in the picture, but they are not in place. I need to make an adjustment to them, either by adding a shim, or adjusting bolts, but there is no bolts. You can see in the pic that someone posted there are bolts shown on the side but not on the top. Just curious if that is how it is supposed to be. It kinda makes since because if you have a long bolt it would go right through the front nose clip. Thanks again

