



differential side yolk replacement procedure

Thread Starter
Drifting

Joined: Sep 2004
Posts: 1,532
Likes: 4
From: Fairview Heights Illinois, near Saint Louis MO, STL C3 Shark
 differential side yolk replacement procedure
Im going to be replacing my differential side yolk on my passenger side whenever it gets here from Ecklers.
Any tricks to doing this. I know I need to remove rear spring, remove the half shaft, support diff, remove rear cover and frame mounts etc. But after that, I'd just have to see what It looks like inside.
Any tricks to doing this. I know I need to remove rear spring, remove the half shaft, support diff, remove rear cover and frame mounts etc. But after that, I'd just have to see what It looks like inside.
Advanced

Joined: Nov 2005
Posts: 83
Likes: 0
You just unclip the C-clip and they come right out... when I replaced my differential, I had to use my old yokes. The C-clips were covered in fluid, so I had no idea how to get the yokes out. I just went beating away 


Thread Starter
Drifting
Joined: Sep 2004
Posts: 1,532
Likes: 4
From: Fairview Heights Illinois, near Saint Louis MO, STL C3 Shark
Originally Posted by gtr1999
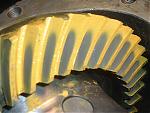
How's this, also you'll have the posi springs and plates in there.
Gary

Gary
Tech Contributor


Joined: Aug 1999
Posts: 15,164
Likes: 3,966
From: Connecticut, USA
you'll need a GOOD pair of 90* snap ring pliers. I used the get a cheap looking pr of pliers from my bearing supplier 25 years ago that was the best I ever used. I don't know if they're still made- probably not, but they were the best. I still use them. Sears had a good industrial set a couple of years ago but I never used them for this job.
Check the yoke seal OD too, some are .010 oversize and they are a bear to install without distortion. NAPA sells the yoke seals#13562 and they are made by CR seal.
Gary
Check the yoke seal OD too, some are .010 oversize and they are a bear to install without distortion. NAPA sells the yoke seals#13562 and they are made by CR seal.
Gary
Corvette Stories
The Best of Corvette for Corvette Enthusiasts

How Much Horsepower Every Corvette Engine "LOST" in 1972
Joe Kucinski
Top 10 DOs and DON'Ts for Protecting Your Convertible Top!
Michael S. Palmer
Top 10 Most Explosive Corvettes Ever Made: Power-to-Weight Ratio Ranked!
Joe Kucinski
150 hp to 1,250 hp: Every Corvette Generation Compared by the Specs That Matter
Joe Kucinski
8 Coolest Corvette Pace Cars (and Replicas) of All Time
Verdad Gallardo
Top 10 Corvette Engines RANKED by Peak Torque (70+ Years of Muscle!)
Joe Kucinski
Corvette ZR1X Will Be Pacing the Indy 500, And Could Probably Race, Too!
Verdad Gallardo
Top 10 Corvettes Coming to Mecum Indy 2026!
Brett Foote
Top 10 C9 Corvette MUST-HAVES to Fix These C8 Generation Flaws!
Michael S. Palmer
Thread Starter
Drifting
Joined: Sep 2004
Posts: 1,532
Likes: 4
From: Fairview Heights Illinois, near Saint Louis MO, STL C3 Shark
Thanks guys. I appreciate everyone's replies. I like to know what to expect before I tear into it. Too bad the yoke is on backorder or I'd get into it b/n Christmas (yes I said Chrismas) and New Years since I'm on vacation that week.
Thanks again!!
Thanks again!!



Thread Starter
Drifting
Joined: Sep 2004
Posts: 1,532
Likes: 4
From: Fairview Heights Illinois, near Saint Louis MO, STL C3 Shark
Originally Posted by Van Steel
You should of gotten them from me.  I have them in stock. SB or BB.
I have them in stock. SB or BB. DOH!!! how much for a SB side yoke. Maybe it isn't too late to cancel!!!
Thread Starter
Drifting
Joined: Sep 2004
Posts: 1,532
Likes: 4
From: Fairview Heights Illinois, near Saint Louis MO, STL C3 Shark
In one of the pictures above it looks like the yokes are sitting against that middle section, (sorry, don't know the terminology) Is that where the wear takes place, on the end of the old yokes?
Jeremy
Jeremy

Racer

Joined: Apr 2005
Posts: 402
Likes: 4
From: Nassau
The wear takes place on the edge of the yoke that rubs on the outside of the dif case. The end of the yoke that has the C clip on it will hit into the rod you see in the pic that runs down the middle and will cause the end to mushroom. One of mine was mushroomed pretty bad to the point there was no way it was going to pull out. I used a chisel and went round the end mashing everything down enough to be able to hammer out the yoke.
Thread Starter
Drifting
Joined: Sep 2004
Posts: 1,532
Likes: 4
From: Fairview Heights Illinois, near Saint Louis MO, STL C3 Shark
Yep, that was it, it was worn almost to the grove for the clip. The other side DIDN"T HAVE THE CLIP in place !!!!!! The clip was wedged into one of the posi springs. Glad I took it apart to replace the one yoke, now I've got it all squared away and ready to go back in.

Instructor
Joined: Jun 2004
Posts: 220
Likes: 0
Did the same job recently with Forum and a local club members help. It went pretty smoothly. I did find that the rear spring to diff bolts were only engaged by two threads. I replaced them with longer gr 8's but not too long so they would bottom out in the forward diff holes. I did not see any mention of it in my GM overhaul manual but my 69 AIM says this " Bolt (rear spring to diff) must be torqued with spring compressed to design height " I interpreted this to mean bolts should be torqued with weight on wheels. I hope I did it right! If not some one let me know.

Safety Car

Joined: May 2005
Posts: 4,176
Likes: 7
From: Jennings LA
I did mine yesterday. I removed the center pin to make it a little easier.
be careful because one of my spider gear thrust washer came out. that was fun to put back. I changed both shafts and seals and replaced the front seal also. but my differential is out of the car already, so it was easy
be careful because one of my spider gear thrust washer came out. that was fun to put back. I changed both shafts and seals and replaced the front seal also. but my differential is out of the car already, so it was easy
