


700r4 install begins.
Thread Starter
Melting Slicks


Joined: Mar 2006
Posts: 2,465
Likes: 0
From: Orange Park Fl
I got my Bowtie Overdrives 700r4 a couple of weeks ago, but have been too busy with work to put it in. Well after working this morning, my friend and I met in my driveway at noon to begin the installation. We put the car up on blocks and jack stands, pulled the starter, exhaust, diveshaft, crossmember and the old th350c. Probably the worst of it was the hour or so excursion to find a 1/4" 12 point socket to remove the drive shaft. Almost nobody sells 12 point sockets! I ended up going to Sears. Ironically, I had just been there the night before picking up a motorcycle/ ATV jack that was on sale for $70 to use as a transmission jack (I also own a Harley). It all went pretty smoothly and we got the new tranny bolted in, but nothing really hooked up yet. Most of the rest I will be doing by myself, hopefully this week (I hate not driving my car). If all goes well, I'll be doing the testing and set-up next Saturday and be back on the road. I had planned to take and post pictures of the install, but I've misplaced my camera I'll update as things progress. God bless, Sensei
I'll update as things progress. God bless, Sensei
Team Owner


Joined: Jul 1999
Posts: 65,492
Likes: 230
From: Orange Park Florida
Eh, you managed to get it in there without going crazy cutting up tranny tunnels, etc?? wonder why my muncie '72 here needed all that mods?? interesting....
so did you change the cross support?? and did you get a shifter mod kit or stay with the stock shifter??
love to drive it sometime to see what the comparo is to my old install...
BTW, my car is finally working well....the computer is sorted out, and just put in the VBP upper A arm strut, and a dual spal setup from Dewitts....the airflow really sux now...regular hurry caine...

Racer

Joined: Sep 2005
Posts: 453
Likes: 1
From: Austin TX
The hardest part of my 700r4 swap was bending the lines and connecting them to the transmission. I had hell and nearly stripped a couple of fittings up in that tight section.
As far as cutting up tunnels, I took a small piece of the tunnel out of my 78 cause the yoke was tapping on it when I'd gas it or hit a bump. I glassed it over.
As far as cutting up tunnels, I took a small piece of the tunnel out of my 78 cause the yoke was tapping on it when I'd gas it or hit a bump. I glassed it over.

Instructor
Joined: Apr 2006
Posts: 212
Likes: 0
From: Woodland Park Colorado
Sounds like its all going together pretty well for you. Im doing the same thing on my 79 with the 2004r trans. I have it bolted in and all hooked up. I also did a 7 qt kick out oil pan while I was under the car had a oil leak so pan had to come off anyway so upgraded the pan and seal to felpro nice gasket. Im also putting the jet hot side pipes on while im at it. I did get the tv system , shifter kit, and cross member from bowtie nice setup. I hope to have mine running sunday if all goes well.
I have the gears for the speedo still to do and the driveshaft to put on with new u-joints cant wait till I can drive it. Havent had it on the road since November due to snow and now we got another 3 inches of snow again tonight. Still have to order the spiral mufflers so it might be a bit loud I have to say I enjoy how everything is going together and I must have dropped a few pounds of the car from the crossmember and exhaust system removal the car even look like it sits higher.
Well good luck to you and keep us updated.
Best Regards
I have the gears for the speedo still to do and the driveshaft to put on with new u-joints cant wait till I can drive it. Havent had it on the road since November due to snow and now we got another 3 inches of snow again tonight. Still have to order the spiral mufflers so it might be a bit loud
I have to say I enjoy how everything is going together and I must have dropped a few pounds of the car from the crossmember and exhaust system removal the car even look like it sits higher. Well good luck to you and keep us updated.
Best Regards
Pro


Joined: Dec 2005
Posts: 699
Likes: 0
From: Vettemod.com For the C3 People
St. Jude Donor '06
Before you slide in place, go ahead and make test connection for pressure gauge. Driver side, 1/8 " NPT. It is a PITA to get your hand in there later  .
.
Read their instructions on TV cable, then read again, then again, then test.
May be worth reading this thread.
http://forums.corvetteforum.com/show....php?t=1633583
tt
.Read their instructions on TV cable, then read again, then again, then test.
May be worth reading this thread.
http://forums.corvetteforum.com/show....php?t=1633583
tt
Thread Starter
Melting Slicks
Joined: Mar 2006
Posts: 2,465
Likes: 0
From: Orange Park Fl
Eh, you managed to get it in there without going crazy cutting up tranny tunnels, etc??
so did you change the cross support?? and did you get a shifter mod kit or stay with the stock shifter??
love to drive it sometime to see what the comparo is to my old install...
BTW, my car is finally working well....
so did you change the cross support?? and did you get a shifter mod kit or stay with the stock shifter??
love to drive it sometime to see what the comparo is to my old install...
BTW, my car is finally working well....
Thanks everybody, I'll keep you updated. God bless, Sensei
Team Owner

Joined: Apr 1999
Posts: 21,953
Likes: 1,445
From: Reno Nevada
2024 C3 of the Year Finalist- Modified
I think the major work was the custom changes to the cross member. The 700 pan is larger. So I modified mine for a pass under the crossmember exhaust.
I also had to tie the P-brake cable over to the side for drive line clearance.
I also had to tie the P-brake cable over to the side for drive line clearance.
Corvette Stories
The Best of Corvette for Corvette Enthusiasts

Top 10 Most Explosive Corvettes Ever Made: Power-to-Weight Ratio Ranked!
Joe Kucinski
150 hp to 1,250 hp: Every Corvette Generation Compared by the Specs That Matter
Joe Kucinski
8 Coolest Corvette Pace Cars (and Replicas) of All Time
Verdad Gallardo
Top 10 Corvette Engines RANKED by Peak Torque (70+ Years of Muscle!)
Joe Kucinski
Corvette ZR1X Will Be Pacing the Indy 500, And Could Probably Race, Too!
Verdad Gallardo
Top 10 Corvettes Coming to Mecum Indy 2026!
Brett Foote
Top 10 C9 Corvette MUST-HAVES to Fix These C8 Generation Flaws!
Michael S. Palmer
10 Revolutionary 'Corvette Firsts' Most People Don't Know
Joe Kucinski
5 Reasons to Upgrade to an LS6-Powered Corvette; 5 Reasons to Stay LT2
Michael S. PalmerRace Director


Joined: Sep 2004
Posts: 11,874
Likes: 263
From: Arlington Va Current ride 04 vert, previous vettes: 69 vert, 77 resto mod
the easiest way to adjust the TV cable is to drop the pan and then at WOT make sure the plunger is depressed the correct amount.....its fool proof then put the pan back on and fill with fluid.........and you can switch the shift detent fromthe side just by removing the side panel onthe trans console
Racer
Joined: Oct 2005
Posts: 457
Likes: 1
From: Royal Oak Michigan
Sounds like its all going together pretty well for you. Im doing the same thing on my 79 with the 2004r trans. I have it bolted in and all hooked up. I also did a 7 qt kick out oil pan while I was under the car had a oil leak so pan had to come off anyway so upgraded the pan and seal to felpro nice gasket. Im also putting the jet hot side pipes on while im at it. I did get the tv system , shifter kit, and cross member from bowtie nice setup. I hope to have mine running sunday if all goes well.
I have the gears for the speedo still to do and the driveshaft to put on with new u-joints cant wait till I can drive it. Havent had it on the road since November due to snow and now we got another 3 inches of snow again tonight. Still have to order the spiral mufflers so it might be a bit loud I have to say I enjoy how everything is going together and I must have dropped a few pounds of the car from the crossmember and exhaust system removal the car even look like it sits higher.
Well good luck to you and keep us updated.
Best Regards
I have the gears for the speedo still to do and the driveshaft to put on with new u-joints cant wait till I can drive it. Havent had it on the road since November due to snow and now we got another 3 inches of snow again tonight. Still have to order the spiral mufflers so it might be a bit loud
I have to say I enjoy how everything is going together and I must have dropped a few pounds of the car from the crossmember and exhaust system removal the car even look like it sits higher. Well good luck to you and keep us updated.
Best Regards
I orderd my 200R4 last week- any cautions I need to know?
Darrel1
Team Owner
Joined: Jul 1999
Posts: 65,492
Likes: 230
From: Orange Park Florida
A 200 4r is a snap, compared to a 700, no driveshaft length mods to worry over, the 350 turbo yoke is the same, even the shifter could be used as is, unless you really really want 1st gear to show up....
just renumber the indicator....
MY '72 here was a Muncie car, so the tunnel maybe was narrower than for auto cars....have no idea, I just know I had to cut/move the tunnel to clear the 700 on the pass side, and fiddle with the p brake cable also....to clear the yoke...none of that necessary for the 200 4r...
too boot the 200 is supposed to be 50 lbs lighter,....
Thread Starter
Melting Slicks
Joined: Mar 2006
Posts: 2,465
Likes: 0
From: Orange Park Fl
Well I got to do a little work today. Hooked up the TV cable at the carb. Used the stock kickdown bracket instead of the BTO adapter plate so I did not have to remove the carb, but I did have to cut out the peice on the carb linkage that the stock cable attached to in order to instal the TV made easy linkage (so much for bolt on and go). I measured for the drive shaft and took it in to be shortened. Having new solid u-joints installed while it is there. Installed the pressure gauge, routed it through the emergency latch release hole into the windshield wiper tray. Started on the shifter linkage but ran out of time. Removing the console is a pain! It looks like the shifter cable bracket may not bolt up to the pan correctly. It seems to run into the spot where the pan curves out. Anyone have this happen? God bless, Sensei

 .....Good luck...Jerrylee///
Drifting

Joined: Jun 2005
Posts: 1,725
Likes: 0
From: Hanover Maryland
Well I got to do a little work today. Hooked up the TV cable at the carb. Used the stock kickdown bracket instead of the BTO adapter plate so I did not have to remove the carb, but I did have to cut out the peice on the carb linkage that the stock cable attached to in order to instal the TV made easy linkage (so much for bolt on and go). I measured for the drive shaft and took it in to be shortened. Having new solid u-joints installed while it is there. Installed the pressure gauge, routed it through the emergency latch release hole into the windshield wiper tray. Started on the shifter linkage but ran out of time. Removing the console is a pain! It looks like the shifter cable bracket may not bolt up to the pan correctly. It seems to run into the spot where the pan curves out. Anyone have this happen? God bless, Sensei
Safety Car

Joined: Oct 2004
Posts: 3,725
Likes: 5
From: Minnesota
Yup. That thing is a PITA. It requires some fabrication to make the original bracket work. I did mine but it doesn't function properly anyway. If I recall correctly I can start it in drive anyway. If I had to do it over again I'm not sure I'd even bother with the interlock switch.

Former Vendor
Joined: Jan 2000
Posts: 5,593
Likes: 631
From: Brighton
Bowtie makes good stuff but one note of caution. They used to mandate the use of a internal (radiator) transmission cooler but when the owner (Steve Holmes SR.) passed away, so did the rule. He told me years ago that the best way to plumb the tranny lines was to run them out front to an air type cooler, then back thru the radiator to actually heat it up again. This way the trans fluid was the same temperature all the time, regardless of what the ambient temp was. He also said that since he started using this rule his warrany claim virtually went away.
Race Director
Joined: Sep 2004
Posts: 11,874
Likes: 263
From: Arlington Va Current ride 04 vert, previous vettes: 69 vert, 77 resto mod
[IMG]
 [/IMG]
[IMG]
 [/IMG]
[IMG]
[/IMG]
[IMG]
 [/IMG]
[IMG]
 [/IMG]
[IMG]
 [/IMG]
Last edited by bobs77vet; Mar 12, 2007 at 08:52 PM.
Race Director
Joined: Sep 2004
Posts: 11,874
Likes: 263
From: Arlington Va Current ride 04 vert, previous vettes: 69 vert, 77 resto mod
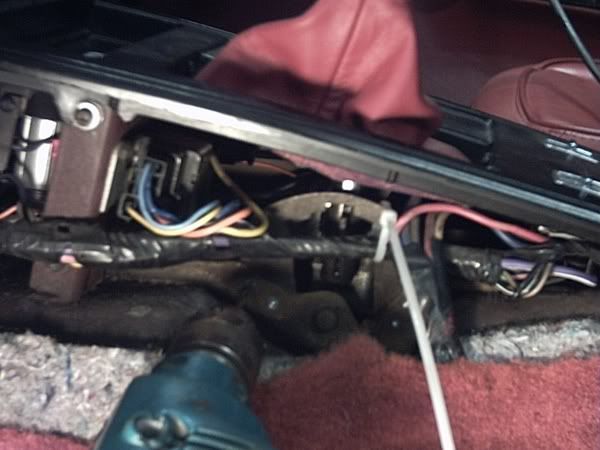
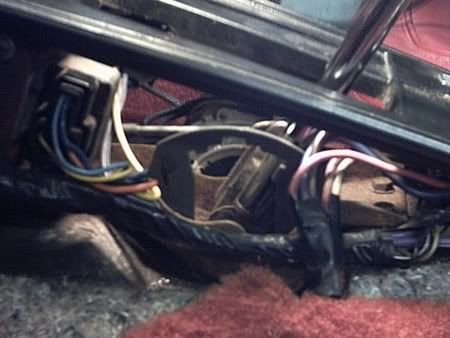
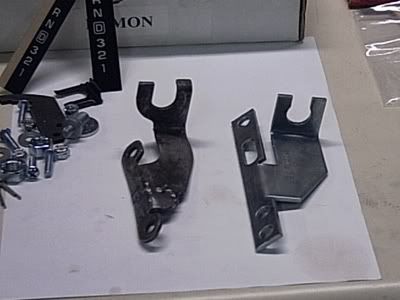
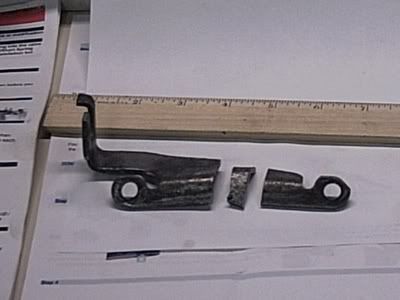
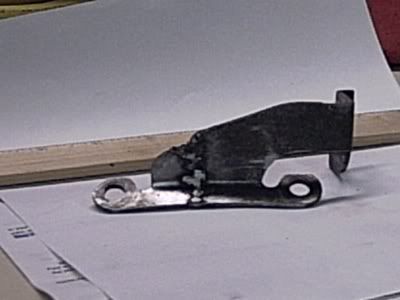
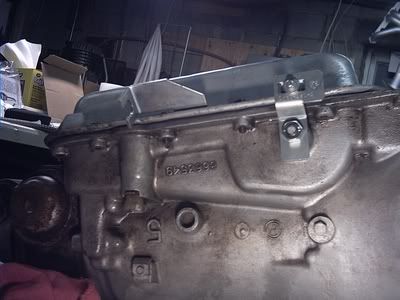
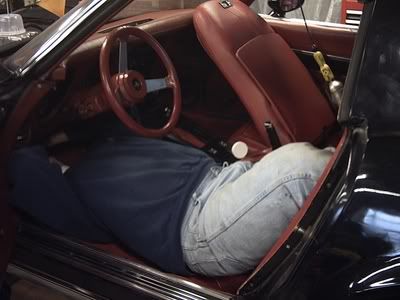
actually it was really easy. i didn't even take the seats out...the four spot welded areas drilled right out and they matched up perfectly with the holes for the new detente...then i went in from the pass side and was able to put the nut on the bolts that came in through the drivers side...maybe 1 1/2 hours worth of work
[IMG]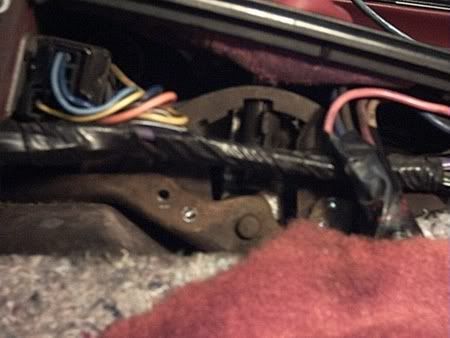 [/IMG]
[IMG]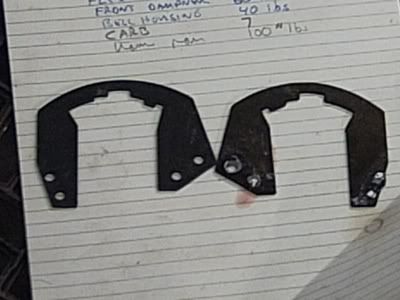 [/IMG]
[IMG]
[/IMG][IMG]
[/IMG]
Last edited by bobs77vet; Mar 12, 2007 at 10:14 PM.
 [/IMG]