
Exhaust system picture thread. Post your X-pipes, duels, mufflers, h-pips//pictures!!
 03-23-2012, 03:22 PM
#1
Race Director


Thread Starter

Ok.... I am finally going to do it.... putting in the new TKO so I figure its a good time to redo the whole exhaust system.....now for me I have decided to put in a 3" with X-pipe.... Would very much like to see everyones picture of what you did, how you routed it, how and where did you put the hangers, what size pip did you use, did you do X, H,or just true duels...or did you keep the Y cat and modify that..PICTURES PICTURES PICTURES...... any noticeable performance gains? custom or ordered pre made....
O, and don't forget the PICTURES!!!!1

O, and if interested, the thread below was a debate over what was best.... this is where i made my desision for the 3" with X..... http://forums.corvetteforum.com/c3-t...nd-x-pipe.html
it is a very good read
O, and don't forget the PICTURES!!!!1
O, and if interested, the thread below was a debate over what was best.... this is where i made my desision for the 3" with X..... http://forums.corvetteforum.com/c3-t...nd-x-pipe.html
it is a very good read
Last edited by pauldana; 03-23-2012 at 03:28 PM.
 03-23-2012, 04:45 PM
#2
Drifting

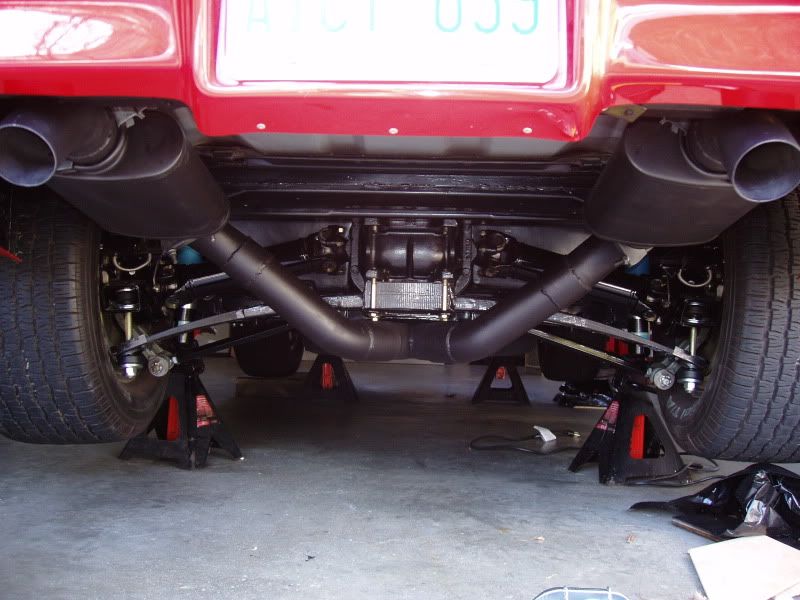
Super Comp 2 1/8" in to 3" stainless with 'X' pipe and glass/ceramic/stainless wool packed absorbsion tube mufflers. Header collector was lowest point on system (even with flange changed for 'slip-ring') - so little purpose in feeding though holes in cross-member. Apologies for oil all over pipes - it was just back from fabricators - and heat shield under floor!


03-23-2012, 09:46 PM
#3
Race Director
Thread Starter
Super Comp 2 1/8" in to 3" stainless with 'X' pipe and glass/ceramic/stainless wool packed absorbsion tube mufflers. Header collector was lowest point on system (even with flange changed for 'slip-ring') - so little purpose in feeding though holes in cross-member. Apologies for oil all over pipes - it was just back from fabricators - and heat shield under floor!
BeeJay..... I think he's got an X and H pipe if i remember correctly...
Last edited by pauldana; 03-23-2012 at 11:44 PM.

 03-23-2012, 11:41 PM
#5
Race Director
Thread Starter
Wow...very nice....but.........where is your crossmember? more pics there plz
And do you have 2? a silver and a black setup???
Last edited by pauldana; 03-23-2012 at 11:44 PM.
03-24-2012, 12:06 AM
#6
I only have one exhaust setup, the silver was prior to paint.
You can see the crossmember better in this pic.
 03-24-2012, 01:07 AM
#7
Burning Brakes

Hi Paul,
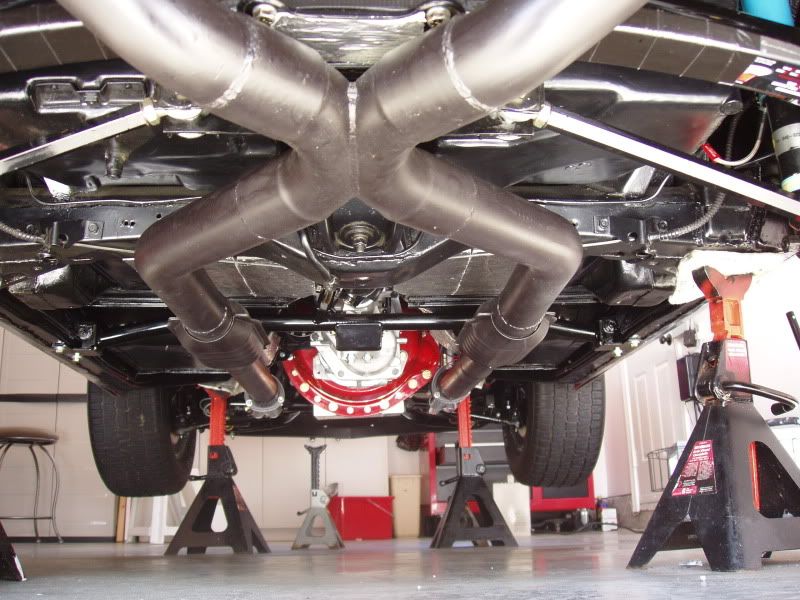
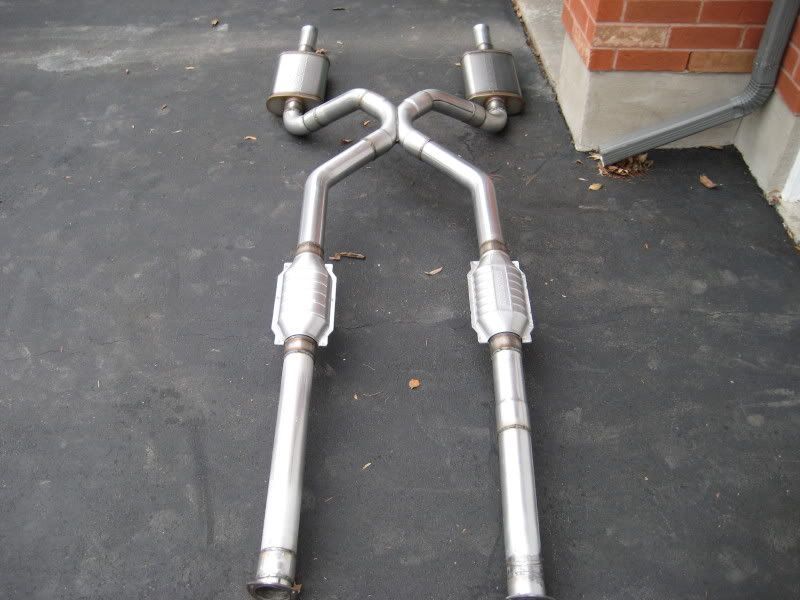
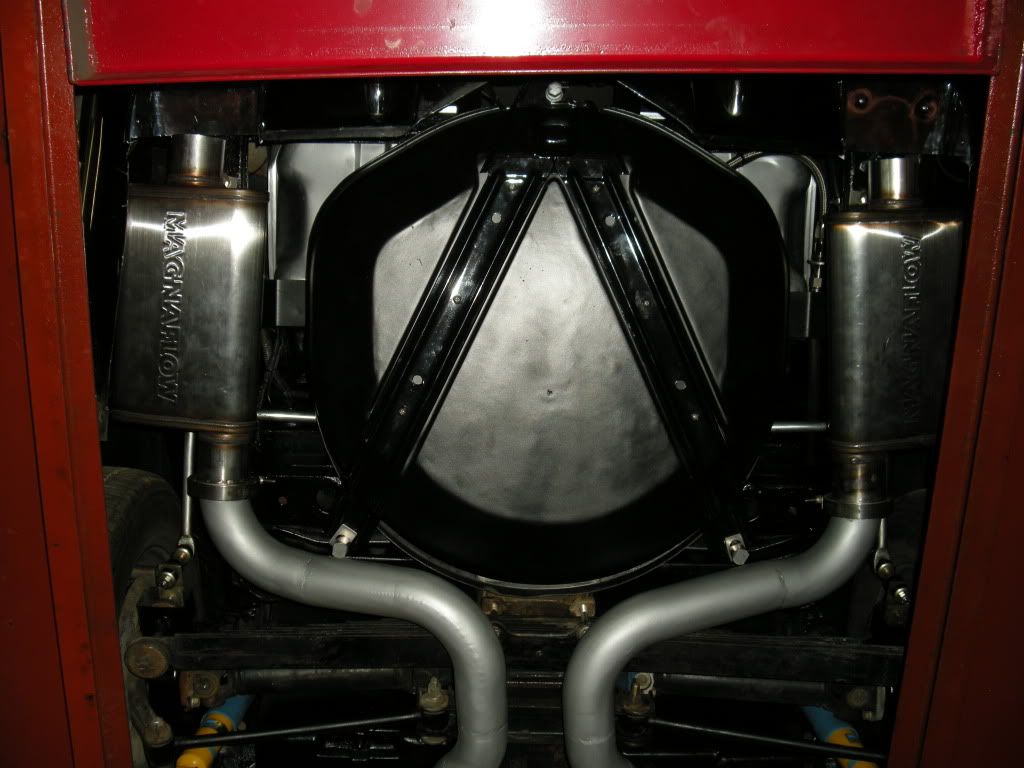
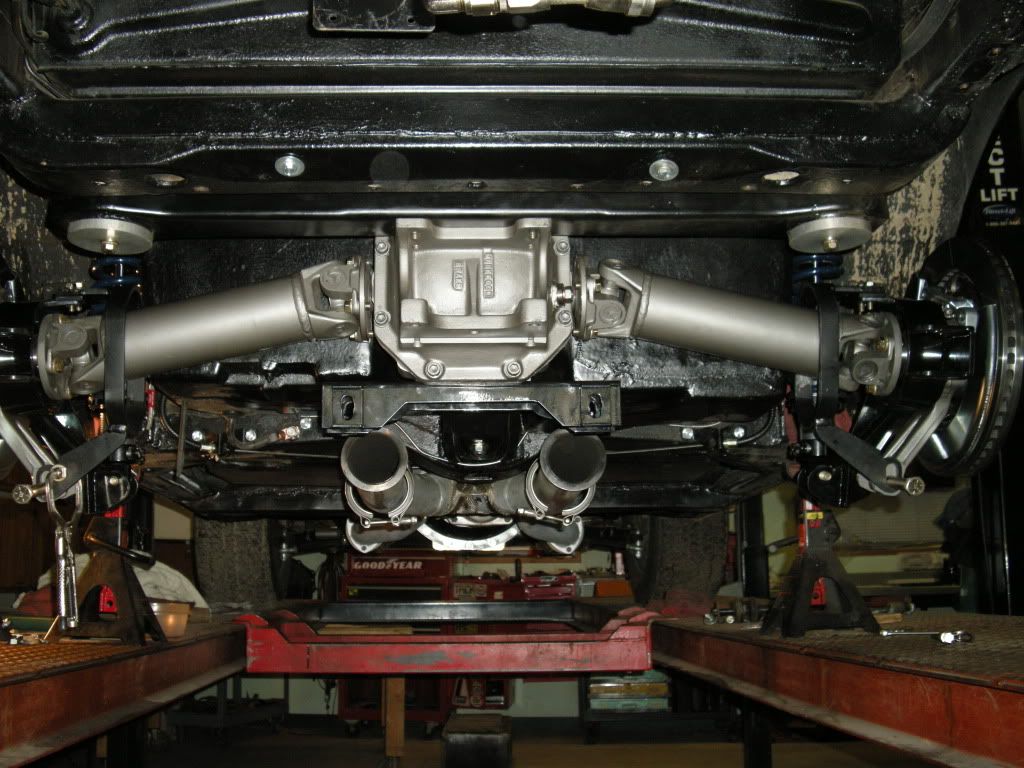
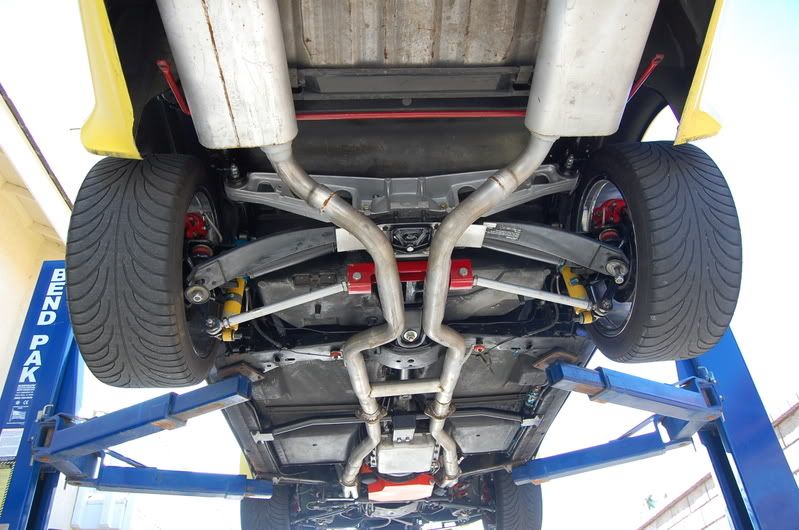
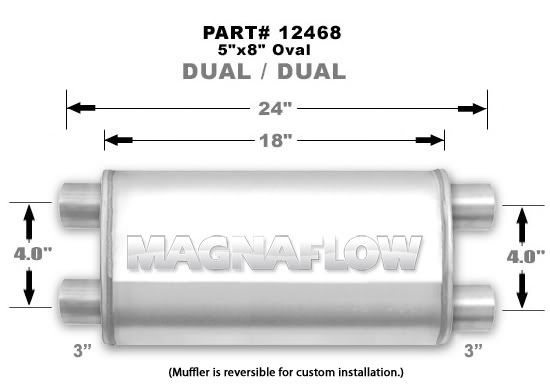
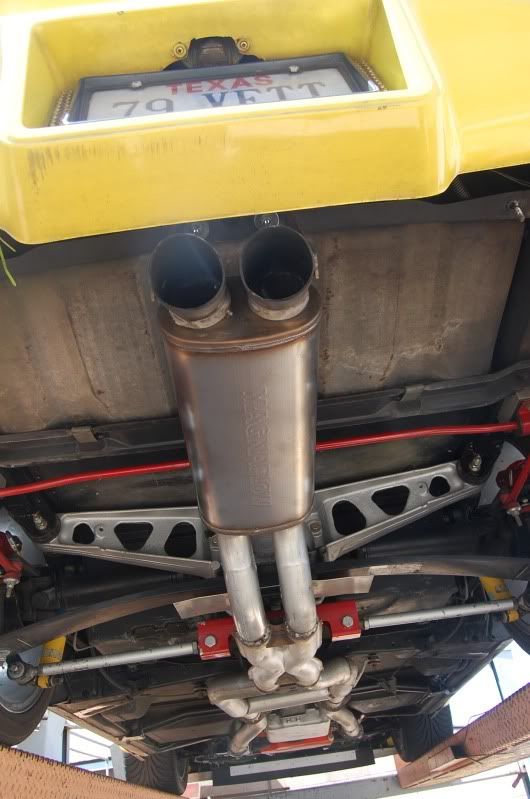
You may have already seen posts of my setup before, but if not here is my 3" system. Hooker Super Comp headers w/ Jet Hot ceramic coating feeding 3", 14 guage stainless steel pipe (mandrel bent) with a Magnaflow X pipe (3" x 13.2") and 3" Magnaflow mufflers (14"L x 9"W x 4"H). Assembly is accomplished with a mix of butt to butt band clamps and V-band clamps to make removal quick & simple. Stock exhaust tips were modified to accept the 3" pipe and a custom brace was fabricated to support the pipes where they pass thru the frame cross-member.
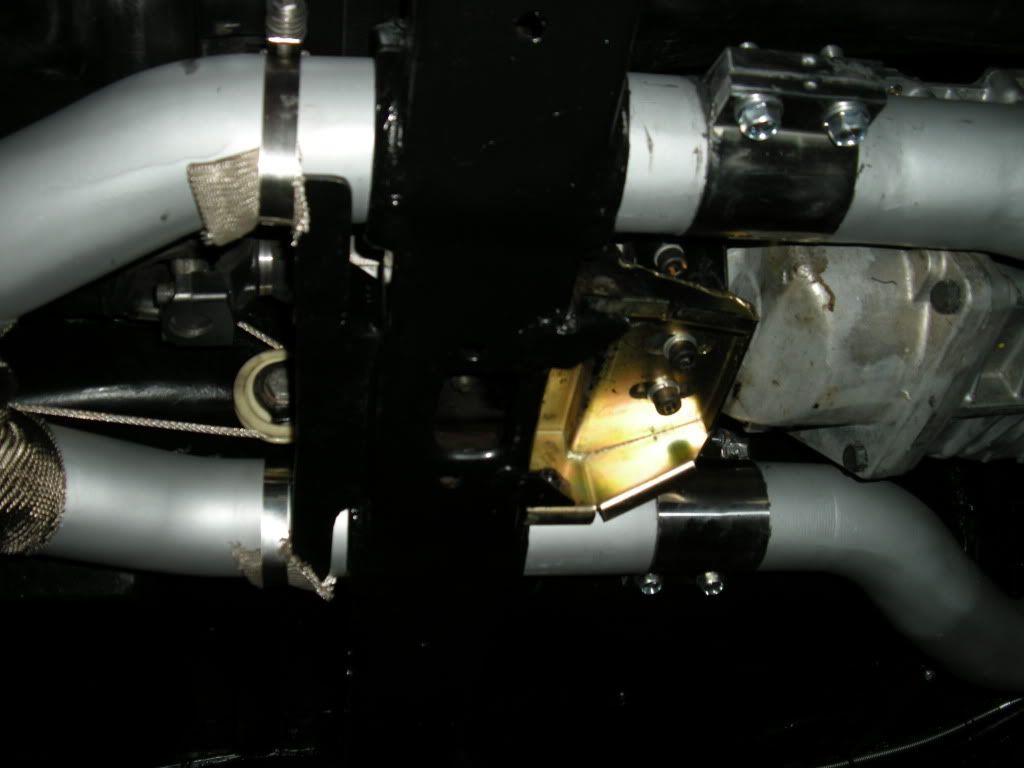
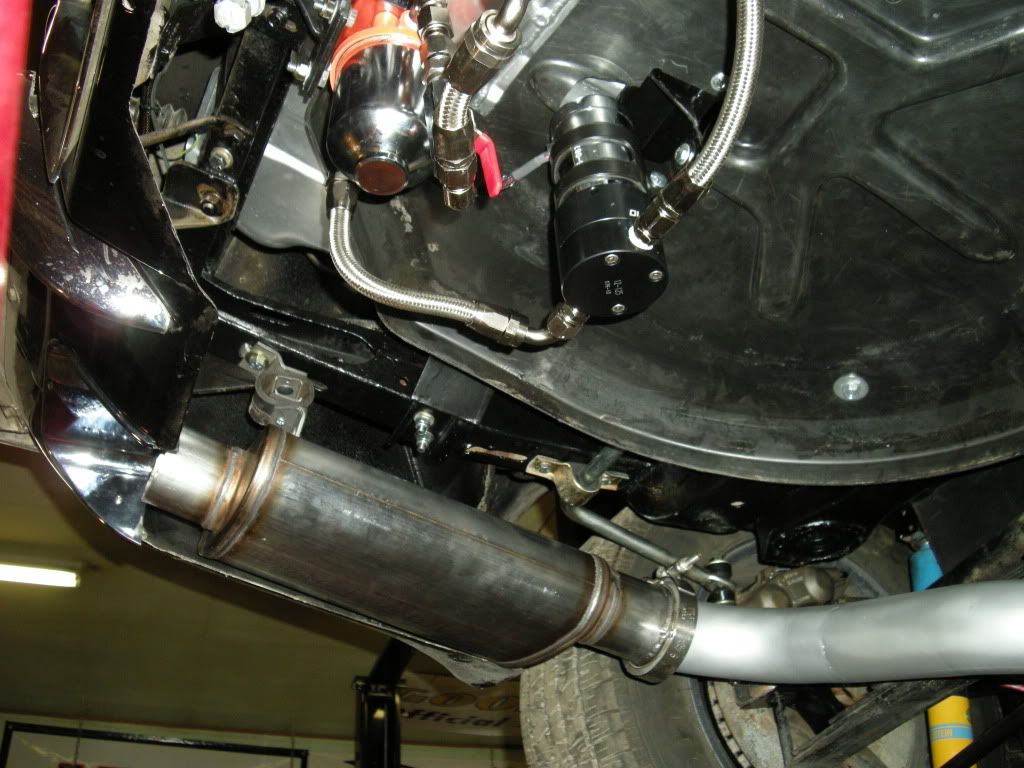
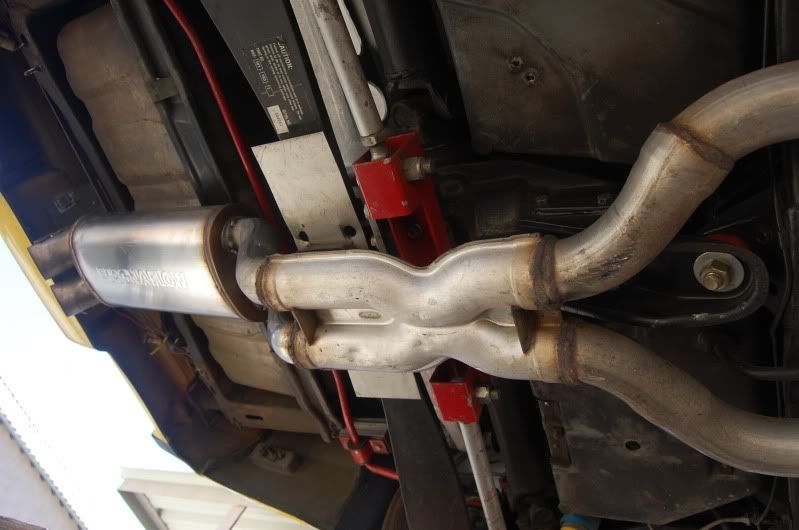
This pic shows how the system can be easily disconnected and removed:
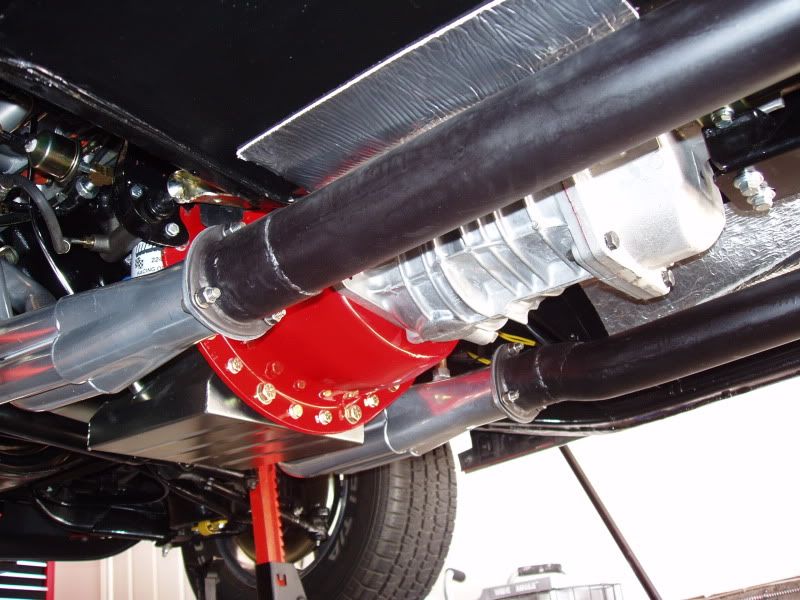
Originally I used some spark plug boot heat wrap for the brace pad but I've since replaced that with a couple of small pieces of silicone pad which is a lot cleaner. Also have removed the wrap from around the X-pipe.
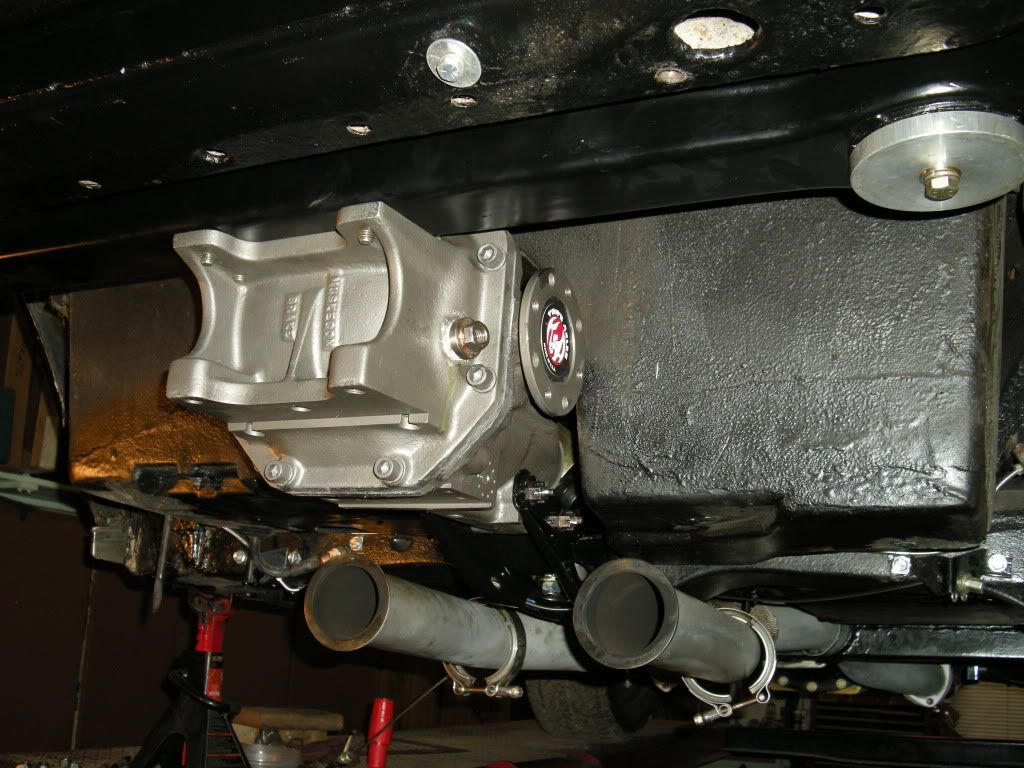
Also since this photo was taken I replaced the original leaf spring suspension with a Van Steel QA1 Coil Over system and off set T/As:
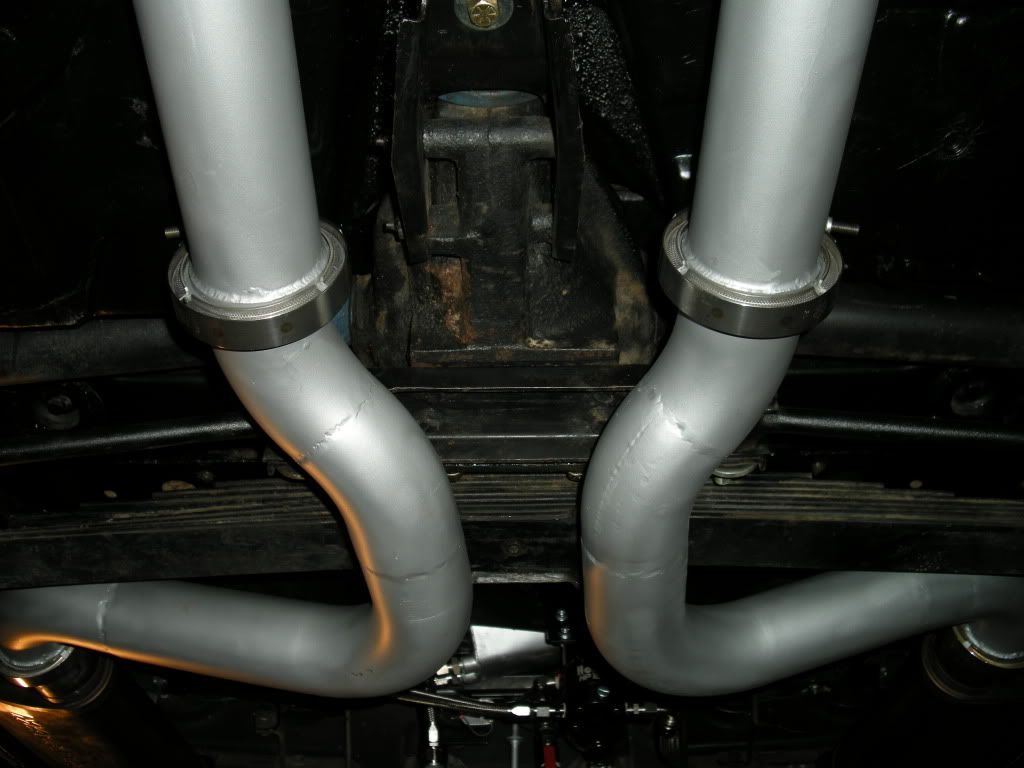
You may have already seen posts of my setup before, but if not here is my 3" system. Hooker Super Comp headers w/ Jet Hot ceramic coating feeding 3", 14 guage stainless steel pipe (mandrel bent) with a Magnaflow X pipe (3" x 13.2") and 3" Magnaflow mufflers (14"L x 9"W x 4"H). Assembly is accomplished with a mix of butt to butt band clamps and V-band clamps to make removal quick & simple. Stock exhaust tips were modified to accept the 3" pipe and a custom brace was fabricated to support the pipes where they pass thru the frame cross-member.
This pic shows how the system can be easily disconnected and removed:
Originally I used some spark plug boot heat wrap for the brace pad but I've since replaced that with a couple of small pieces of silicone pad which is a lot cleaner. Also have removed the wrap from around the X-pipe.
Also since this photo was taken I replaced the original leaf spring suspension with a Van Steel QA1 Coil Over system and off set T/As:
03-24-2012, 01:35 AM
#8
Race Director
Thread Starter
Hi Paul,
You may have already seen posts of my setup before, but if not here is my 3" system. Hooker Super Comp headers w/ Jet Hot ceramic coating feeding 3", 14 guage stainless steel pipe (mandrel bent) with a Magnaflow X pipe (3" x 13.2") and 3" Magnaflow mufflers (14"L x 9"W x 4"H). Assembly is accomplished with a mix of butt to butt band clamps and V-band clamps to make removal quick & simple. Stock exhaust tips were modified to accept the 3" pipe and a custom brace was fabricated to support the pipes where they pass thru the frame cross-member.
You may have already seen posts of my setup before, but if not here is my 3" system. Hooker Super Comp headers w/ Jet Hot ceramic coating feeding 3", 14 guage stainless steel pipe (mandrel bent) with a Magnaflow X pipe (3" x 13.2") and 3" Magnaflow mufflers (14"L x 9"W x 4"H). Assembly is accomplished with a mix of butt to butt band clamps and V-band clamps to make removal quick & simple. Stock exhaust tips were modified to accept the 3" pipe and a custom brace was fabricated to support the pipes where they pass thru the frame cross-member.
Do you have problems with the pipes hitting the frame through the crossmember? if not how? new pic plz...thx
03-24-2012, 01:10 PM
#9
Burning Brakes
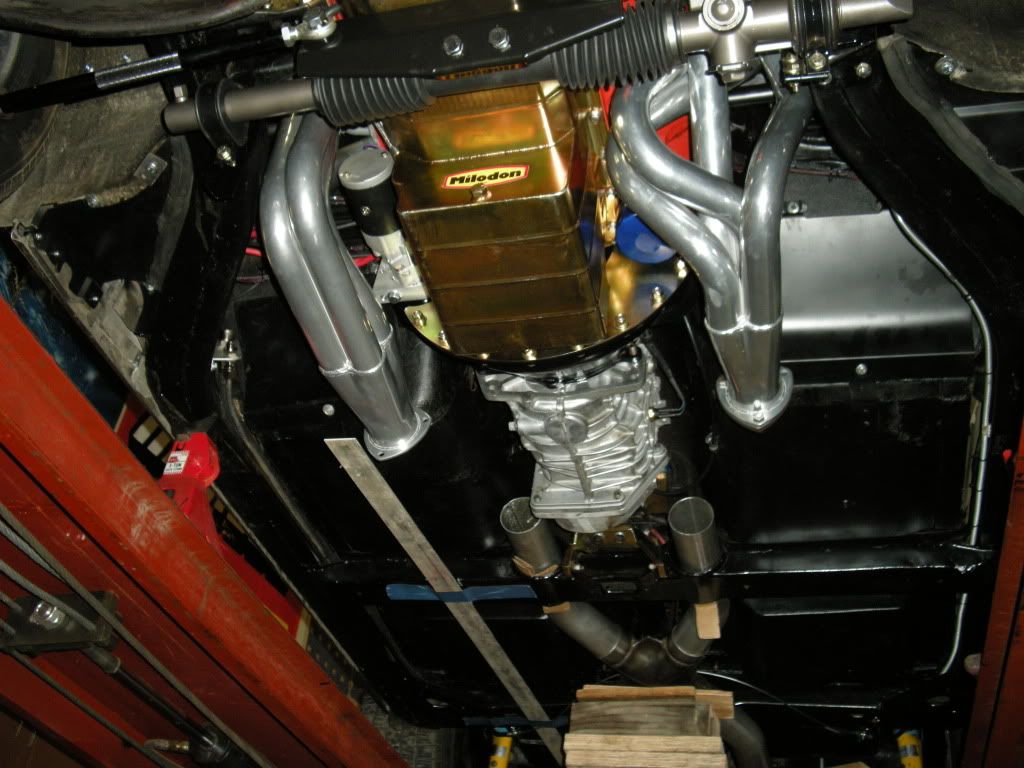
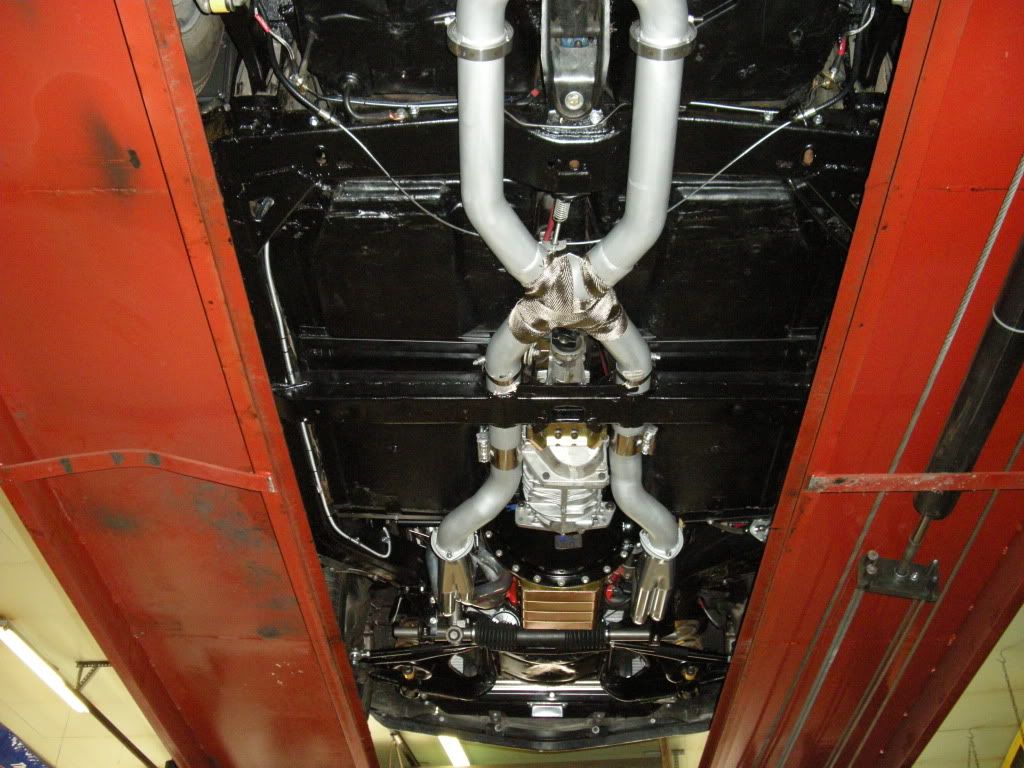
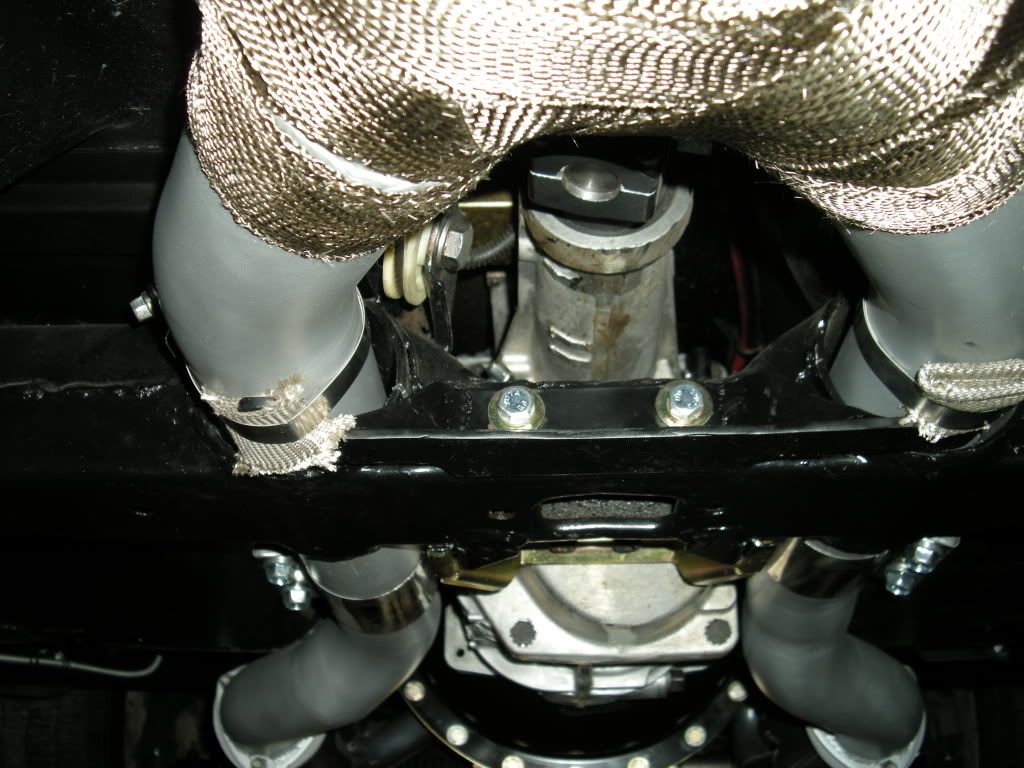
No problems with hitting at the pass throughs. Unfortunately I didn't snap a picture of the brace you see in photos 4-6 (in original post) before installing it and with the fresh frame paint it makes it very difficult to see the details.
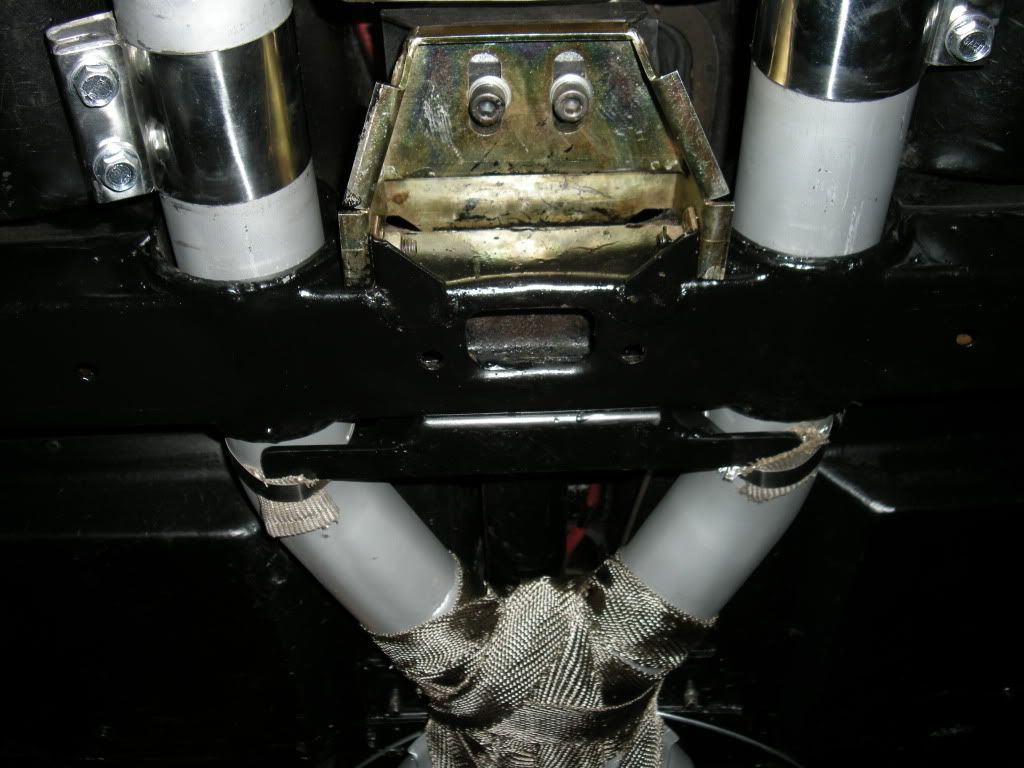
In pic 1 (of original post) you can see the rear was built first and placed thru the frame holes. This allows you to shim with wood or something to get the centering alignment you want while fabricating and welding up the collector connection. Plan for torque rotation/lift of the engine, so you want to be LOW of center on the driver side and HIGH of center on the passenger side in the pass throughs. The brace seen in pic 4 (of original post) is the rear view of the tabs that firmly hold the pipes in place. As I noted above I changed the "cushion" material to a piece of flat silicone pad the is about 1/8" thick that sits between the pipe and brace tab. Spring loaded clamps go around the tab & pipe to allow flex while keeping it in place. The brace is a simple plate with a 90 bend that bolts to the crossmember that has extended tabs for the clamps.
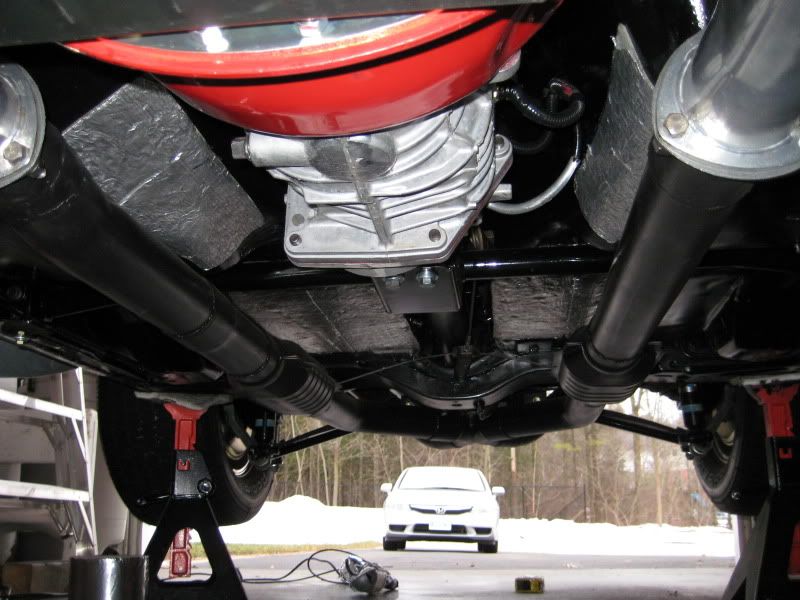
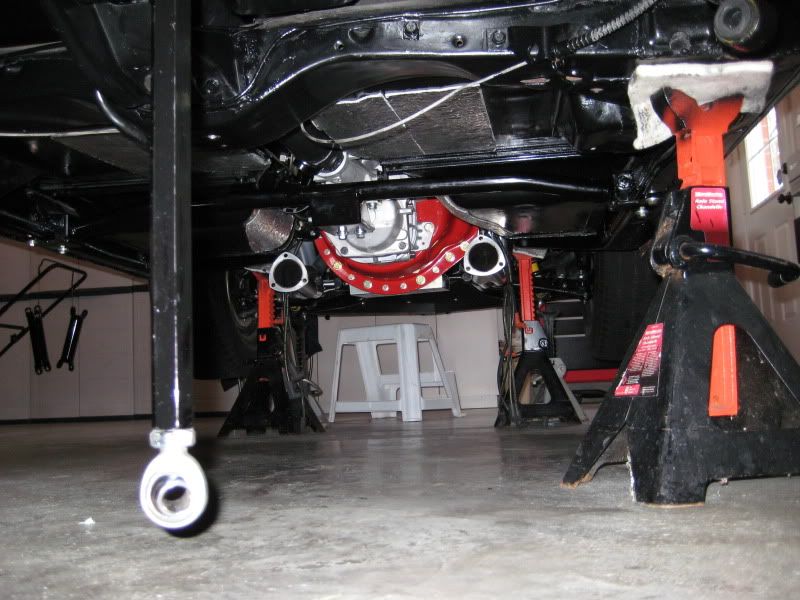
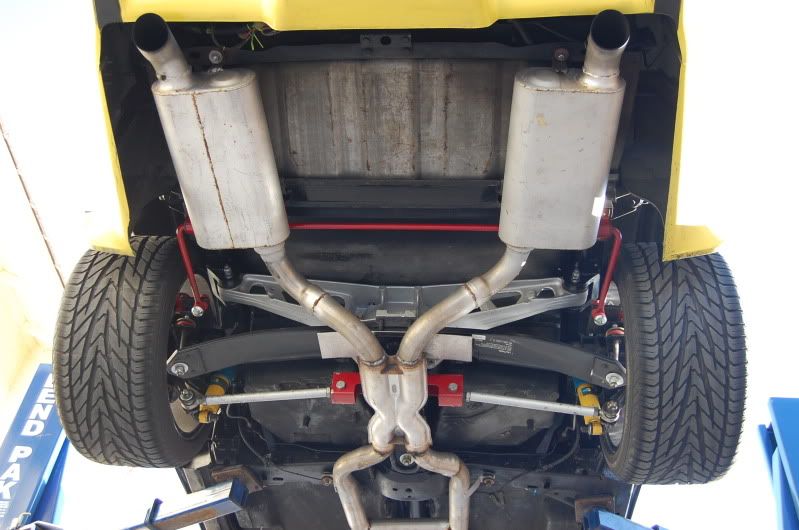
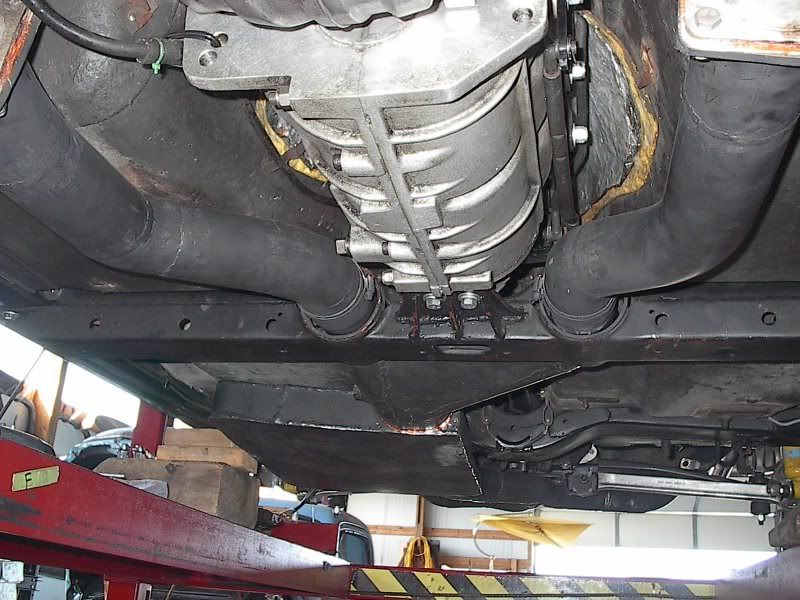
Rear of exhaust/mufflers are hung with factory hardware/locations. This photo was before the Coil Over upgrade:
Next 2 pics are during the Coil Over & 12 Bolt conversion. Note exhaust split make for easy access:
[IMG]
 [/IMG]
Hope this helps & good luck with your project!!
03-25-2012, 10:42 PM
#11
Burning Brakes
03-25-2012, 11:36 PM
#12
Safety Car

Member Since: Nov 2005
Location: Lompoc, CA. Santa Barbara County
Posts: 3,932
Received 543 Likes
on
198 Posts

I had a dual exhaust system with 3" flowmasters and crossover pipe. It was way to loud. I added an x-pipe and that mellowed it really good. Now I have a much lighter dual exhaust system with x-pipe, but only one Magnaflow 2in 2out muffler. Here is the link:
http://forums.corvetteforum.com/c3-t...w-exhaust.html
Bee Jay
http://forums.corvetteforum.com/c3-t...w-exhaust.html
Bee Jay
Last edited by Bee Jay; 03-25-2012 at 11:50 PM.
03-26-2012, 10:35 AM
#13
Tech Contributor
Member Since: Jun 2004
Location: I tend to be leery of any guy who doesn't own a chainsaw or a handgun.
Posts: 18,363
Received 771 Likes
on
553 Posts
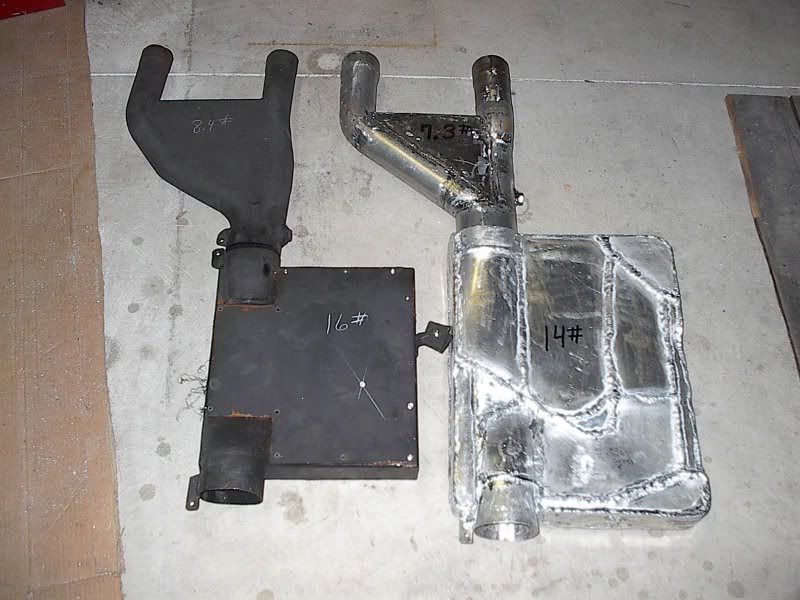
Been taking more weight out of the exhaust system the last few years. A long time ago I went to a single 3 1/2 inch pipe for much of the system as one big pipe is lighter than two small pipes. A couple years ago I welded up a muffler to fit under the passenger area to get more of the exhaust system weight to the right side of the car, and also contain this weight within the wheelbase (lower vehicle moment of inertia). Was very happy with the setup, and over the winter I took a few more pounds out of the system welding up a slightly larger volume aluminum muffler. The current system is 3" from the headers into a Y pipe expansion volume (with 4" outlet) going into the muffler. The muffler outlet is 3.5" into a Y feeding 2.5" pipes up to the 3" SS tips.
I know it's an odd system, and not for most people, but it works for my purpose. I like doing track days whenever I can, and I'm trying to minimize the vehicle weight, and move around the weight that I'm stuck with.
I know it's an odd system, and not for most people, but it works for my purpose. I like doing track days whenever I can, and I'm trying to minimize the vehicle weight, and move around the weight that I'm stuck with.
03-28-2012, 11:32 AM
#14
Race Director
Thread Starter
Been taking more weight out of the exhaust system the last few years. A long time ago I went to a single 3 1/2 inch pipe for much of the system as one big pipe is lighter than two small pipes. A couple years ago I welded up a muffler to fit under the passenger area to get more of the exhaust system weight to the right side of the car, and also contain this weight within the wheelbase (lower vehicle moment of inertia). Was very happy with the setup, and over the winter I took a few more pounds out of the system welding up a slightly larger volume aluminum muffler. The current system is 3" from the headers into a Y pipe expansion volume (with 4" outlet) going into the muffler. The muffler outlet is 3.5" into a Y feeding 2.5" pipes up to the 3" SS tips.
I know it's an odd system, and not for most people, but it works for my purpose. I like doing track days whenever I can, and I'm trying to minimize the vehicle weight, and move around the weight that I'm stuck with.
I know it's an odd system, and not for most people, but it works for my purpose. I like doing track days whenever I can, and I'm trying to minimize the vehicle weight, and move around the weight that I'm stuck with.
03-28-2012, 12:25 PM
#16
Race Director
Thread Starter
seeing these guys fit the 3" through the cross beam with like 1/4" around... i am very worried about hearing the 3" pipe hitting the fram constantly... which makes for a bad sounding run...
Last edited by pauldana; 03-28-2012 at 12:27 PM.
03-28-2012, 03:02 PM
#17
Tech Contributor
Member Since: Jun 2004
Location: I tend to be leery of any guy who doesn't own a chainsaw or a handgun.
Posts: 18,363
Received 771 Likes
on
553 Posts
I don't have any sound clips at the moment, but the 2.5" system had a slight 5.0/Flowmaster sound at idle. I got rid of some of that "personality" by installing fiberglass stranding in some of the peripheral chambers. Regarding WOT, I always had a helmet on then so I don't know how to describe the sound.
The present system sounds a little less tinny at idle (I've got more chambers in this version). I haven't had the car out of the garage yet this season (I need to get plates for the car after the move north last year) so I'm interested in what the sound quality and amplitude is at WOT.


 03-10-2014, 04:40 PM
#19
Tech Contributor
Member Since: Jun 2004
Location: I tend to be leery of any guy who doesn't own a chainsaw or a handgun.
Posts: 18,363
Received 771 Likes
on
553 Posts
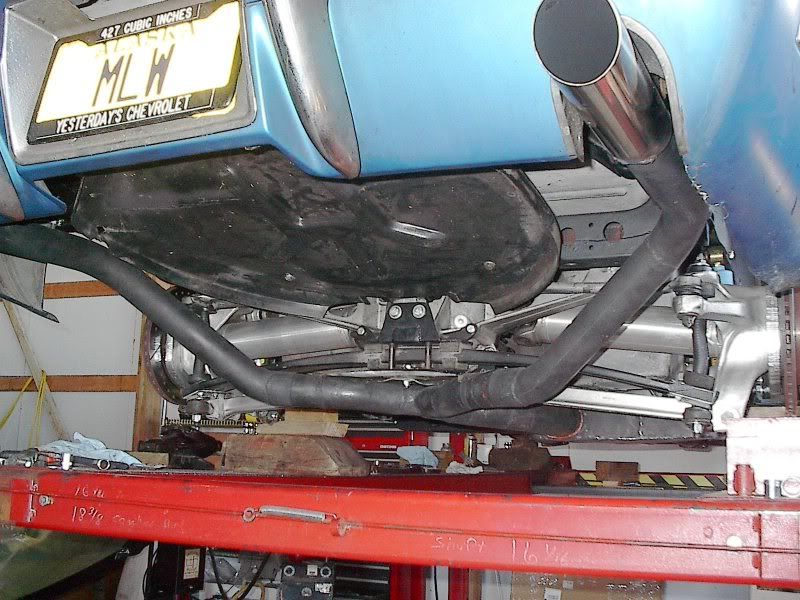
Had to redo the exhaust to fit the partial bellypan, so here's some recent pictures.
H-pipe at the header reducers (3" pipes).

The exhaust pulse termination box.
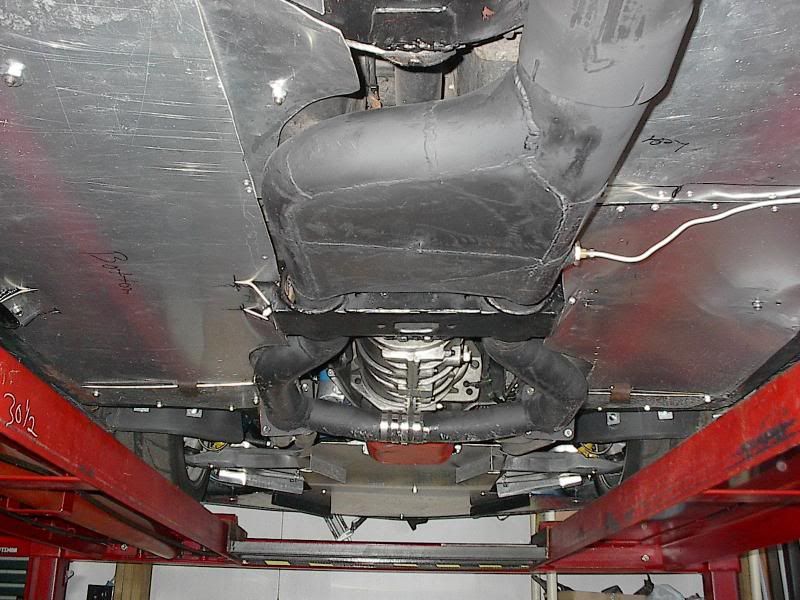
Single exhaust outlet to the Y-pipe under the rear spring (one big pipe is lighter than two small pipes).
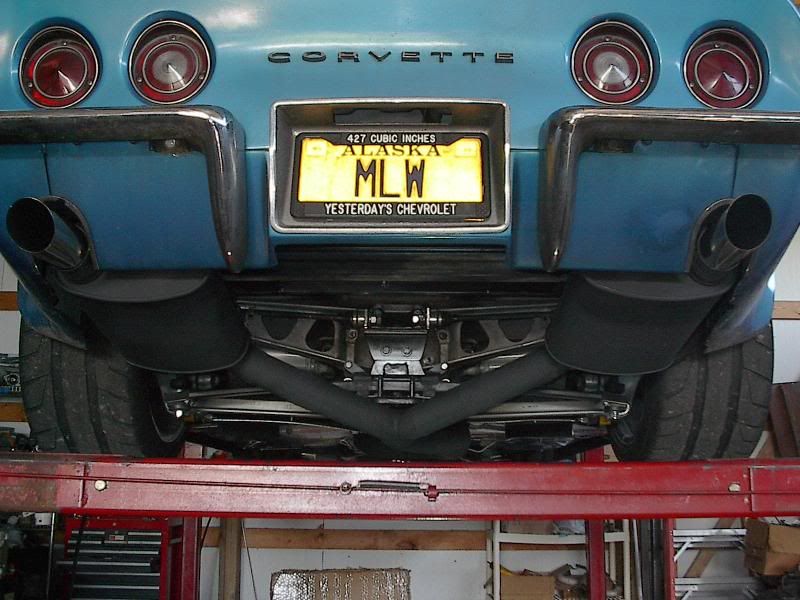
And the Dynomax mufflers w/3" tips. Quiet and good flowing.
H-pipe at the header reducers (3" pipes).

The exhaust pulse termination box.

Single exhaust outlet to the Y-pipe under the rear spring (one big pipe is lighter than two small pipes).
And the Dynomax mufflers w/3" tips. Quiet and good flowing.
 03-10-2014, 04:56 PM
#20
Melting Slicks

Member Since: Feb 2009
Location: Dallas Georgia
Posts: 2,787
Received 594 Likes
on
408 Posts
2020 Corvette of the Year Finalist (track prepared)
C3 of Year Winner (track prepared) 2019
Interesting that you guys are putting the X at or around the rear diff. I guess there isn't much room between the crossmember and the differential/spring anyway but I would never have thought to put it that far back.