


Brake Booster Removal Made Easy

Thread Starter
Advanced

Joined: Oct 2012
Posts: 81
Likes: 6
From: Montgomery Alabama
Discovered that my brake booster had a vacuum leak inside. I figured it out because when adjusting my carb per Lars techniques, I could not get the idle below 1000 rpm. Short note to Lars and he made it simple: "you either have a vacuum leak or your throttles are not actually closed." I started checking hoses and discovered that when I took off the brake booster hose and plugged it with my finger, rpm came way down. Hooked up to booster again, rpm went up to 1000. So, now I get to the point of this post.
I searched the forum and read several horror stories about removing the 4 nuts from under the dash that hold on the booster. All kinds of suggestions from removing the dash to pulling a ton of parts off to get to the nuts. I pulled off the simple black plastic vent tube (and nothing else) and had all four nuts off in 10 minutes!
Here is how:
First, I did remove the seat because I am over 220 pounds and getting on the floor is not easy. You might not even need to do that if you are smaller. Anyway, the seat comes out with four easy access bolts...no problem. Here is what you need...an 18" extension for your 3/8 drive (I used a 12 plus a 6), a knuckle joint, and a deep 9/16 socket. Put some masking tape around the knuckle so it does not move around as much. Then USE A 3/8 AIR SOCKET WRENCH! I laid on my back, pulled off the black section of the plastic air vent, put the socket up onto the nut (fit nicely), and then attached the air ratchet to the extension and pressed the button. Nuts just spin right off. The key to this whole thing is the tape on the knuckle and the air ratchet. Trying to turn a normal socket wrench upside down with a knuckle on the end is a mess. The air ratchet just spins those things right off. After you have the four nuts off (10 minutes tops), remove the pen that holds the booster lever to the pedal. Now go unbolt the Master Cylinder and carefully set it aside being sure you do not mess up the brake lines (it set real nice against the manifold). I had the entire booster off and on my bench in 15 minutes...boxed up and in the mail to Dewey for full resto...took longer to box it than remove it.
BTW, he completely restores everything to original (rubber, seals, washers), tests it, bead blasts it, primers it and paints it in original satin black. Takes four days and he ships it back all for $140 (including shipping)!
Hope this helps someone. Let me know if you have any questions
Burning Brakes


Joined: Jan 2006
Posts: 1,019
Likes: 18
From: St. Louis MO
Look forward to hearing how easy it goes back on.... Please make sure you post that. Lots of times people don't finish the story... Especially the part where you put some grease in the socket to hold the nut in the socket and put it all back together....
Safety Car

Joined: Sep 2012
Posts: 4,688
Likes: 41
From: Palm Harbor, Florida
 i was proud of myself for teaching my son the masking tape between the nut and socket trick with getting a bolt back on his car this last weekend

Racer
Joined: Sep 2012
Posts: 366
Likes: 0
From: washington
If I could add ....... on my 69
I had to pull the colum because i couldn't reach that clip on the brake pedal to rod
and that upper outer bolt was tough to get
(the seat is a betweener)
.
.

.
.
.
.
.
.

.
.
.
.
.
.
.
.
I had to pull the colum because i couldn't reach that clip on the brake pedal to rod
and that upper outer bolt was tough to get
(the seat is a betweener)
.
.
.
.
.
.
.
.
.
.
.
.
.
.
.
.
Last edited by L71Ragtop; Nov 19, 2012 at 11:01 PM.
Burning Brakes


Joined: Feb 2002
Posts: 752
Likes: 31
From: Melbourne Australia
Hi L71Ragtop,
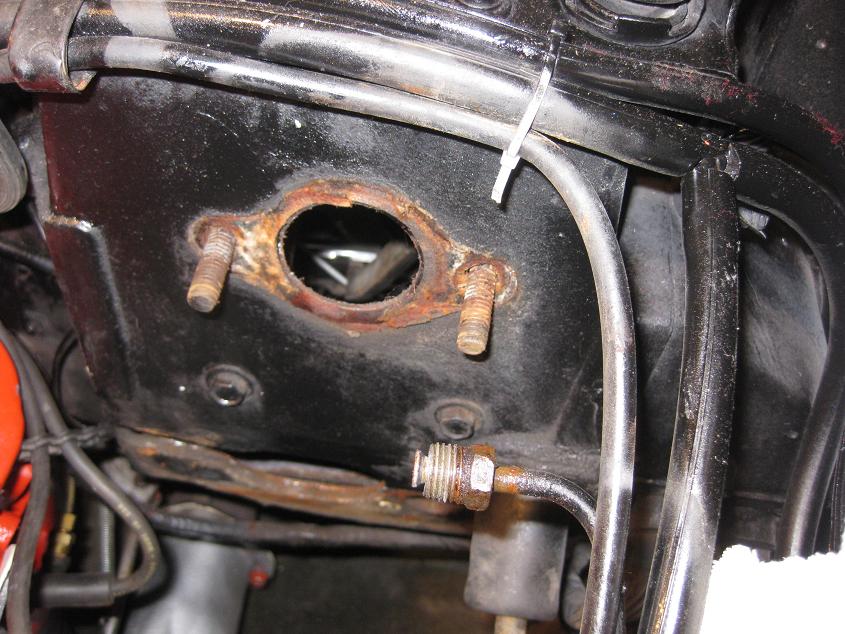
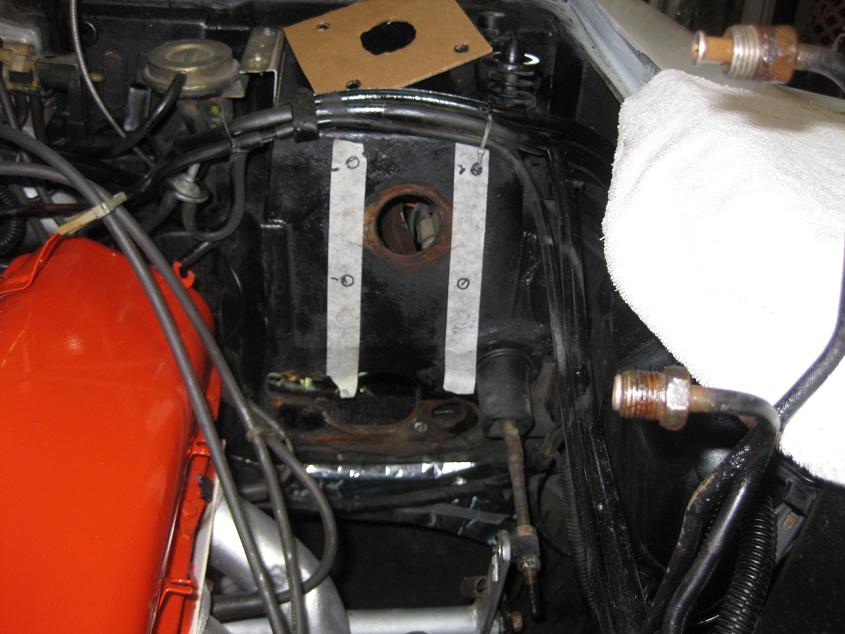
Something looks wrong to me in your installation.... it appears you have centered the booster on the original hole for the master cylinder based on the location of your marking tapes.
IIRC, the booster sits lower on the firewall and the firewall hole has to be enlarged downwards to allow that. The lower two booster studs may actually pass through the two lower weld nuts in the pedal box (drilled out to suit). The upper booster bolt holes will need to be drilled to suit.
This enables the booster push rod and clevis to mate with the lower hole in the brake pedal.
I hope others will chime in on this.
No doubt your installation is working ok...but may not give you the correct power assist or master cylinder piston travel.
I'm no expert, but interested to understand the correct way of doing this conversion.

Joe
Something looks wrong to me in your installation.... it appears you have centered the booster on the original hole for the master cylinder based on the location of your marking tapes.
IIRC, the booster sits lower on the firewall and the firewall hole has to be enlarged downwards to allow that. The lower two booster studs may actually pass through the two lower weld nuts in the pedal box (drilled out to suit). The upper booster bolt holes will need to be drilled to suit.
This enables the booster push rod and clevis to mate with the lower hole in the brake pedal.
I hope others will chime in on this.
No doubt your installation is working ok...but may not give you the correct power assist or master cylinder piston travel.
I'm no expert, but interested to understand the correct way of doing this conversion.
Joe

Burning Brakes


Joined: Oct 2010
Posts: 1,160
Likes: 23
From: Prescott AZ
Discovered that my brake booster had a vacuum leak inside. I figured it out because when adjusting my carb per Lars techniques, I could not get the idle below 1000 rpm. Short note to Lars and he made it simple: "you either have a vacuum leak or your throttles are not actually closed." I started checking hoses and discovered that when I took off the brake booster hose and plugged it with my finger, rpm came way down. Hooked up to booster again, rpm went up to 1000. So, now I get to the point of this post.
I searched the forum and read several horror stories about removing the 4 nuts from under the dash that hold on the booster. All kinds of suggestions from removing the dash to pulling a ton of parts off to get to the nuts. I pulled off the simple black plastic vent tube (and nothing else) and had all four nuts off in 10 minutes!
Here is how:
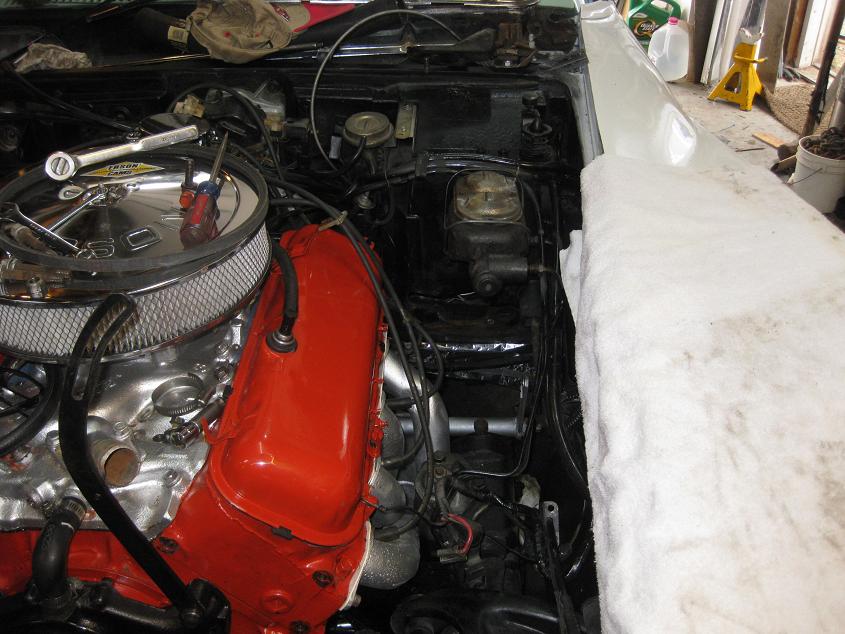
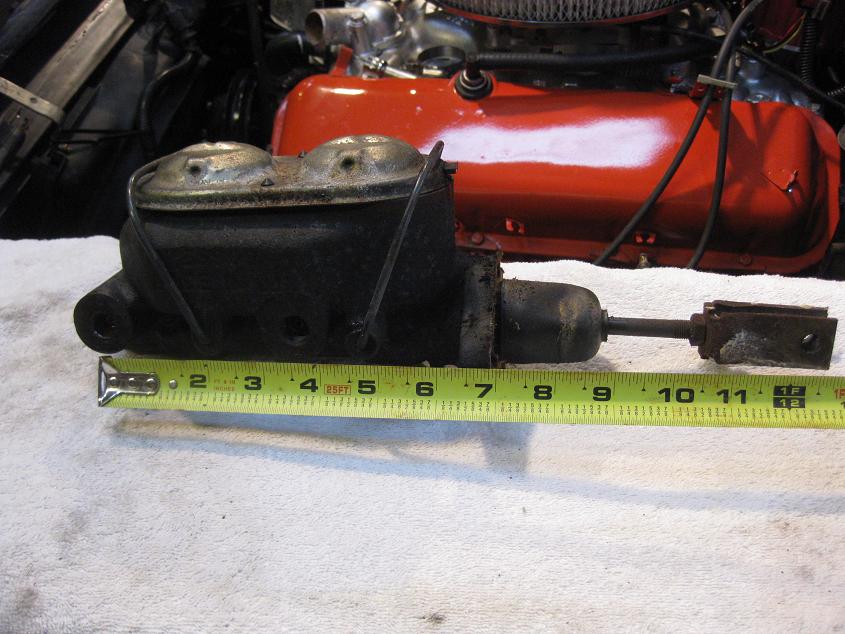
First, I did remove the seat because I am over 220 pounds and getting on the floor is not easy. You might not even need to do that if you are smaller. Anyway, the seat comes out with four easy access bolts...no problem. Here is what you need...an 18" extension for your 3/8 drive (I used a 12 plus a 6), a knuckle joint, and a deep 9/16 socket. Put some masking tape around the knuckle so it does not move around as much. Then USE A 3/8 AIR SOCKET WRENCH! I laid on my back, pulled off the black section of the plastic air vent, put the socket up onto the nut (fit nicely), and then attached the air ratchet to the extension and pressed the button. Nuts just spin right off. The key to this whole thing is the tape on the knuckle and the air ratchet. Trying to turn a normal socket wrench upside down with a knuckle on the end is a mess. The air ratchet just spins those things right off. After you have the four nuts off (10 minutes tops), remove the pen that holds the booster lever to the pedal. Now go unbolt the Master Cylinder and carefully set it aside being sure you do not mess up the brake lines (it set real nice against the manifold). I had the entire booster off and on my bench in 15 minutes...boxed up and in the mail to Dewey for full resto...took longer to box it than remove it.
BTW, he completely restores everything to original (rubber, seals, washers), tests it, bead blasts it, primers it and paints it in original satin black. Takes four days and he ships it back all for $140 (including shipping)!
Hope this helps someone. Let me know if you have any questions
I searched the forum and read several horror stories about removing the 4 nuts from under the dash that hold on the booster. All kinds of suggestions from removing the dash to pulling a ton of parts off to get to the nuts. I pulled off the simple black plastic vent tube (and nothing else) and had all four nuts off in 10 minutes!
Here is how:
First, I did remove the seat because I am over 220 pounds and getting on the floor is not easy. You might not even need to do that if you are smaller. Anyway, the seat comes out with four easy access bolts...no problem. Here is what you need...an 18" extension for your 3/8 drive (I used a 12 plus a 6), a knuckle joint, and a deep 9/16 socket. Put some masking tape around the knuckle so it does not move around as much. Then USE A 3/8 AIR SOCKET WRENCH! I laid on my back, pulled off the black section of the plastic air vent, put the socket up onto the nut (fit nicely), and then attached the air ratchet to the extension and pressed the button. Nuts just spin right off. The key to this whole thing is the tape on the knuckle and the air ratchet. Trying to turn a normal socket wrench upside down with a knuckle on the end is a mess. The air ratchet just spins those things right off. After you have the four nuts off (10 minutes tops), remove the pen that holds the booster lever to the pedal. Now go unbolt the Master Cylinder and carefully set it aside being sure you do not mess up the brake lines (it set real nice against the manifold). I had the entire booster off and on my bench in 15 minutes...boxed up and in the mail to Dewey for full resto...took longer to box it than remove it.
BTW, he completely restores everything to original (rubber, seals, washers), tests it, bead blasts it, primers it and paints it in original satin black. Takes four days and he ships it back all for $140 (including shipping)!
Hope this helps someone. Let me know if you have any questions
Le Mans Master

Joined: Dec 2007
Posts: 6,422
Likes: 591
From: McHenry Illinois
Hi L71Ragtop,
Something looks wrong to me in your installation.... it appears you have centered the booster on the original hole for the master cylinder based on the location of your marking tapes.
IIRC, the booster sits lower on the firewall and the firewall hole has to be enlarged downwards to allow that. The lower two booster studs may actually pass through the two lower weld nuts in the pedal box (drilled out to suit). The upper booster bolt holes will need to be drilled to suit.
This enables the booster push rod and clevis to mate with the lower hole in the brake pedal.
I hope others will chime in on this.
No doubt your installation is working ok...but may not give you the correct power assist or master cylinder piston travel.
I'm no expert, but interested to understand the correct way of doing this conversion.
Joe


Racer
Joined: Jun 2011
Posts: 383
Likes: 21
From: Greenville Ohio
This was my thought exactly while I was reading his post.
Corvette Stories
The Best of Corvette for Corvette Enthusiasts

Every 2027 Corvette Engine Explained
Joe Kucinski
Designer Imagines A Corvette That Looks More Like a Corvette Than the Corvette
Verdad Gallardo
10 Ugly Corvettes That We Still Kinda Love
Joe Kucinski
Top 10 Most Expensive Corvettes Ever Sold on Bring A Trailer
Brett Foote
10 Things Every Corvette Owner Needs (2026 Edition)
Michael S. Palmer
8 Most "Only Corvette Owners Understand" Quirks and Problems
Pouria Savadkouei
10 Reasons the C6 Z06 is Still A Performance Benchmark After 20 Years
Joe Kucinski
How Much Horsepower Every Corvette Engine "LOST" in 1972
Joe Kucinski
Top 10 DOs and DON'Ts for Protecting Your Convertible Top!
Michael S. Palmer

Thread Starter
Advanced
Joined: Oct 2012
Posts: 81
Likes: 6
From: Montgomery Alabama
OK, a after reading several folks who gave me the impression that putting it back on would be harder, thought I would provide an update.
Recieved the booster back from Dewey at Power Brake. It took about 3 days to ship it to him, he had it complete and back in the mail to me within 2 days. I received it via ups 4 days later. So total time off the vehicle was about 2 weeks with the weekends.
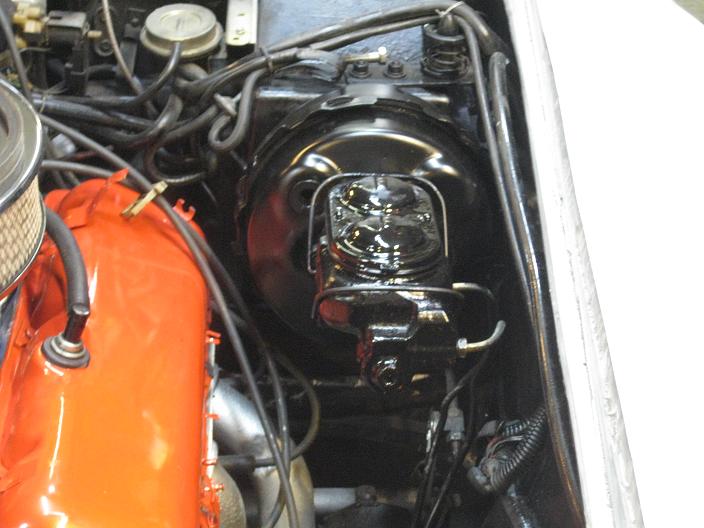
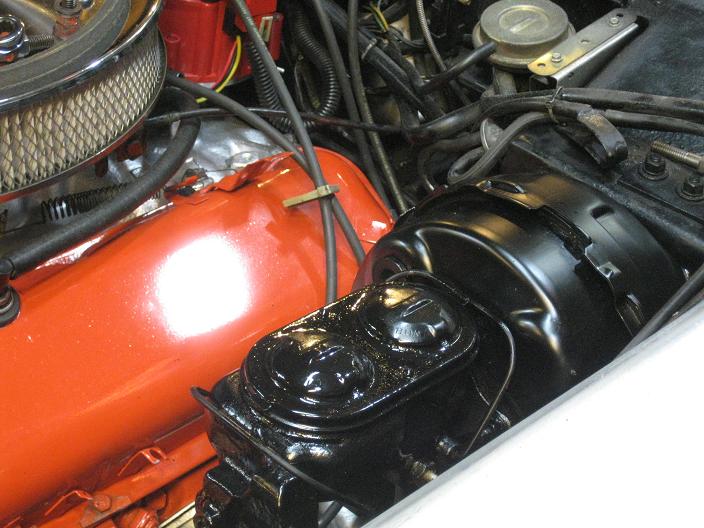
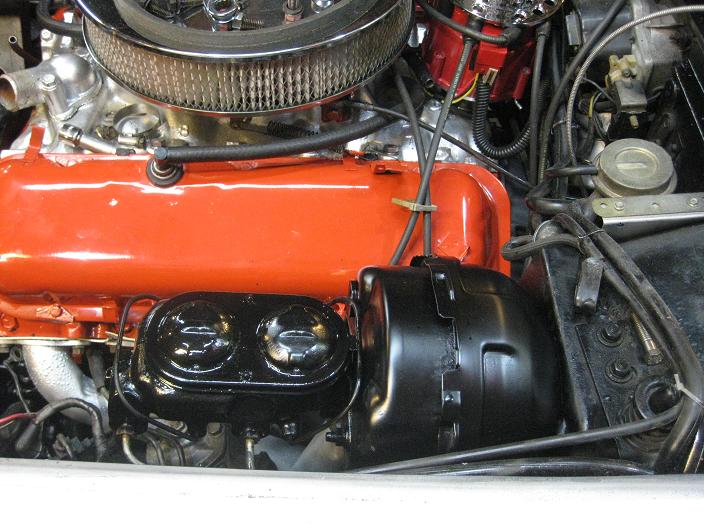
Booster looked great. I put it into place back on the firewall and used a bungee cord to keep it snug and in place. Still had the seat out of the car. This time I used a regular standard length socket to get the nuts started. Still used about 18" extension and a knuckle with tape on it. I hade all four nuts started in 5 minutes. Switched over to the deep socket(same knuckle and extension) and used the air ratchet. All four tight in 3 minutes. It took. About 2 minutes to get the pedal hooked up with the pin and clip. Putting back the plastic vent pipe took me 10 minutes...longest part of the job.
Bolted up the MC, hooked up the vac line. Cranked it up...perfect brakes, very stiff and no vac leak. So, based on my experience, I believe that if you take out your seat, remove the plastic air vent pipe and then use the process I did with the extension, taped knuckle, and air wrench, this is a simple 30 minute job.
Recieved the booster back from Dewey at Power Brake. It took about 3 days to ship it to him, he had it complete and back in the mail to me within 2 days. I received it via ups 4 days later. So total time off the vehicle was about 2 weeks with the weekends.
Booster looked great. I put it into place back on the firewall and used a bungee cord to keep it snug and in place. Still had the seat out of the car. This time I used a regular standard length socket to get the nuts started. Still used about 18" extension and a knuckle with tape on it. I hade all four nuts started in 5 minutes. Switched over to the deep socket(same knuckle and extension) and used the air ratchet. All four tight in 3 minutes. It took. About 2 minutes to get the pedal hooked up with the pin and clip. Putting back the plastic vent pipe took me 10 minutes...longest part of the job.
Bolted up the MC, hooked up the vac line. Cranked it up...perfect brakes, very stiff and no vac leak. So, based on my experience, I believe that if you take out your seat, remove the plastic air vent pipe and then use the process I did with the extension, taped knuckle, and air wrench, this is a simple 30 minute job.

Melting Slicks

Joined: May 2001
Posts: 2,131
Likes: 4
From: May help you? You can sure as hell try!
Yep! Pulling the seat out makes it so much easier to work under the dash of these cars (in fact any car) and it's a 10 minute job, tops -- as long as the seat track bolts aren't rusty and stuck.
Safety Car
Joined: Sep 2012
Posts: 4,688
Likes: 41
From: Palm Harbor, Florida

Intermediate
Joined: Oct 2013
Posts: 27
Likes: 0
Discovered that my brake booster had a vacuum leak inside. I figured it out because when adjusting my carb per Lars techniques, I could not get the idle below 1000 rpm. Short note to Lars and he made it simple: "you either have a vacuum leak or your throttles are not actually closed." I started checking hoses and discovered that when I took off the brake booster hose and plugged it with my finger, rpm came way down. Hooked up to booster again, rpm went up to 1000. So, now I get to the point of this post.
I searched the forum and read several horror stories about removing the 4 nuts from under the dash that hold on the booster. All kinds of suggestions from removing the dash to pulling a ton of parts off to get to the nuts. I pulled off the simple black plastic vent tube (and nothing else) and had all four nuts off in 10 minutes!
Here is how:
First, I did remove the seat because I am over 220 pounds and getting on the floor is not easy. You might not even need to do that if you are smaller. Anyway, the seat comes out with four easy access bolts...no problem. Here is what you need...an 18" extension for your 3/8 drive (I used a 12 plus a 6), a knuckle joint, and a deep 9/16 socket. Put some masking tape around the knuckle so it does not move around as much. Then USE A 3/8 AIR SOCKET WRENCH! I laid on my back, pulled off the black section of the plastic air vent, put the socket up onto the nut (fit nicely), and then attached the air ratchet to the extension and pressed the button. Nuts just spin right off. The key to this whole thing is the tape on the knuckle and the air ratchet. Trying to turn a normal socket wrench upside down with a knuckle on the end is a mess. The air ratchet just spins those things right off. After you have the four nuts off (10 minutes tops), remove the pen that holds the booster lever to the pedal. Now go unbolt the Master Cylinder and carefully set it aside being sure you do not mess up the brake lines (it set real nice against the manifold). I had the entire booster off and on my bench in 15 minutes...boxed up and in the mail to Dewey for full resto...took longer to box it than remove it.
BTW, he completely restores everything to original (rubber, seals, washers), tests it, bead blasts it, primers it and paints it in original satin black. Takes four days and he ships it back all for $140 (including shipping)!
Hope this helps someone. Let me know if you have any questions

Safety Car
Joined: Mar 2007
Posts: 3,518
Likes: 37
I recently changed mine out. I didn't remove the seat. Removed the plastic A/C vent at the bottom of the dash. I could see 3 of the 4 nuts, driver top one I could feel to guide the socket on.
9/16 deep socket, swivel attachment, Two 12 inch extensions, and the ratchet wrench.
I think the long extension was the key thing because once I was able to get the socket on I could have the wrench down outside the bottom of the dash.
For going back on the new nuts went on easy reaching up and starting them as far as I could. Then the socket to tighten.
It was not difficult to do.
Instructor
Joined: Mar 2013
Posts: 180
Likes: 21
From: Chesterfield Mo
I recently changed mine out. I didn't remove the seat. Removed the plastic A/C vent at the bottom of the dash. I could see 3 of the 4 nuts, driver top one I could feel to guide the socket on.
9/16 deep socket, swivel attachment, Two 12 inch extensions, and the ratchet wrench.
I think the long extension was the key thing because once I was able to get the socket on I could have the wrench down outside the bottom of the dash.
For going back on the new nuts went on easy reaching up and starting them as far as I could. Then the socket to tighten.
It was not difficult to do.
9/16 deep socket, swivel attachment, Two 12 inch extensions, and the ratchet wrench.
I think the long extension was the key thing because once I was able to get the socket on I could have the wrench down outside the bottom of the dash.
For going back on the new nuts went on easy reaching up and starting them as far as I could. Then the socket to tighten.
It was not difficult to do.
I suspect those of you that have an easier experience have automatic cars. The addition of a clutch pedal complicates the job. I do think using an air wrench will help. Mine is out now waiting for installation after some other jobs are finished.
I used Booster Dewey for booster rebuild. They were fast but they did not fill or smooth rust pits in the booster. If your booster is smooth I am sure it would look fine, but if not, see the finished product here. This is a 75 booster. I had to sand the paint fill the pits and repaint. Looks good now but a lot of unnecessary work on my part.
Drifting

Joined: Sep 2006
Posts: 1,986
Likes: 21
From: Columbus MN
I recently changed mine out. I didn't remove the seat. Removed the plastic A/C vent at the bottom of the dash. I could see 3 of the 4 nuts, driver top one I could feel to guide the socket on.
9/16 deep socket, swivel attachment, Two 12 inch extensions, and the ratchet wrench.
I think the long extension was the key thing because once I was able to get the socket on I could have the wrench down outside the bottom of the dash.
For going back on the new nuts went on easy reaching up and starting them as far as I could. Then the socket to tighten.
It was not difficult to do.
9/16 deep socket, swivel attachment, Two 12 inch extensions, and the ratchet wrench.
I think the long extension was the key thing because once I was able to get the socket on I could have the wrench down outside the bottom of the dash.
For going back on the new nuts went on easy reaching up and starting them as far as I could. Then the socket to tighten.
It was not difficult to do.

Brake booster removal wrench
Le Mans Master


Joined: Jan 2006
Posts: 6,506
Likes: 139
From: Butler Pa
I used Booster Dewey for booster rebuild. They were fast but they did not fill or smooth rust pits in the booster. If your booster is smooth I am sure it would look fine, but if not, see the finished product here. This is a 75 booster. I had to sand the paint fill the pits and repaint. Looks good now but a lot of unnecessary work on my part.
Tech Contributor
Joined: Jun 2004
Posts: 20,931
Likes: 962
From: I tend to be leery of any guy who doesn't own a chainsaw or a handgun.
I suspect those of you that have an easier experience have automatic cars. The addition of a clutch pedal complicates the job. I do think using an air wrench will help. Mine is out now waiting for installation after some other jobs are finished.
I used Booster Dewey for booster rebuild. They were fast but they did not fill or smooth rust pits in the booster. If your booster is smooth I am sure it would look fine, but if not, see the finished product here. This is a 75 booster. I had to sand the paint fill the pits and repaint. Looks good now but a lot of unnecessary work on my part.
I used Booster Dewey for booster rebuild. They were fast but they did not fill or smooth rust pits in the booster. If your booster is smooth I am sure it would look fine, but if not, see the finished product here. This is a 75 booster. I had to sand the paint fill the pits and repaint. Looks good now but a lot of unnecessary work on my part.
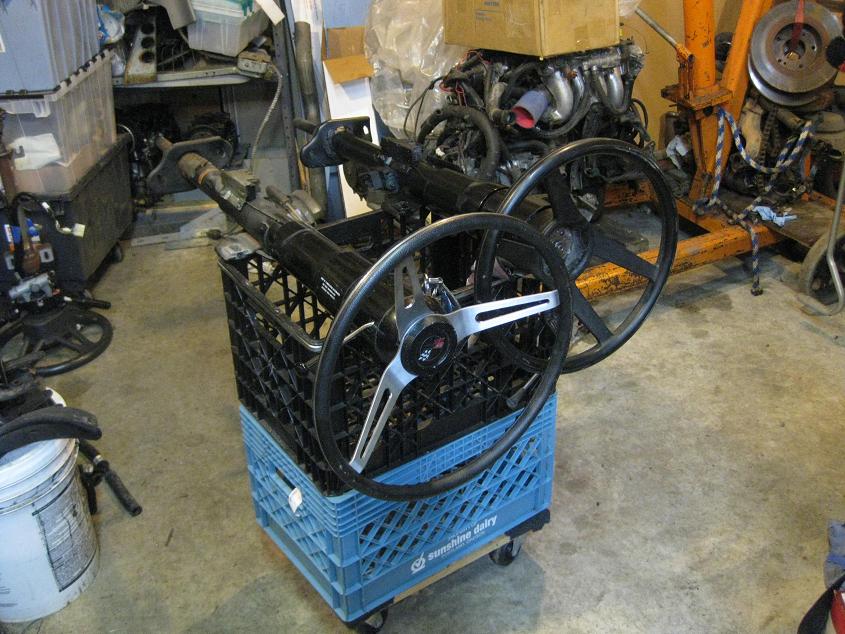
I'm working on mine right now. Major PITA. I pulled the steering column out to get a bit more room to maneuver around under there, but the clutch pedal and the starter interlock switch make it damn tight in there.

Team Owner

Joined: Jul 2004
Posts: 40,420
Likes: 792
From: Redondo Beach, California
Yes...did the booster removal wrench thing. Still difficult for me. Ended up just removing the entire steering column...so easy. I took advantage of the access to rebuild the clutch shaft ...new clutch cross shaft and new nylon bushings. .