When you click on links to various merchants on this site and make a purchase, this can result in this site earning a commission. Affiliate programs and affiliations include, but are not limited to, the eBay Partner Network.
OK, so I figured I'd start my own auto to manual swap thread and share my experience for any others that might benefit. First, some background. My skill level is medium, never pulled an engine or tranny so this was pretty daunting for me. I never would have attempted it without reading all of the other threads on this swap from other people. Thanks for them!
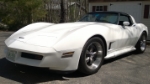
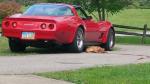
My car: 1981 with 350 crate engine installed by previous owner. Tranny is stock with TH350 and gears are stock (2.87). Engine is around 300 HP, so a nice mill.
When I bought the car (2011) I was glad it was an auto and my wife liked that too because she could drive it, so that helped with the purchase. Now it's time to get that right, haha and put a manual in it. My budget is low, I can't really afford this but I'm doing it anyways, so I'm going as low cost as possible. I found a 4 speed tranny out of a junkyard in Iowa and it was from a 1981 - how cool. They finally took my offer of $700 and another $100 for the shifter and $200 for shipping so $1000 and I had my tranny. I'm started and there's no turning back. Oh, yeah and the tranny came with the bell housing but no clutch or flywheel.
Next was pedals. I got them from a forum member for $385 and they are literally beautiful. Look like they just came off the assembly line. He also sent the Z bar and fork.
Since I didn't have any good info on the condition of the transmission, I was taking a gamble. I think (hope) I lucked out, it looks pretty good inside. Mileage from the donor car said 35,000 miles but the odometer was broken, so who knows.
I also didn't know anything about bell housings, clutches, flywheels or any of that stuff. I figured that since it came from an 81 that it would fit, even though I had a newer crate engine.
Oh, and another thing about the tranny - it had a 2.88 first gear. This was important to me because of my rear gears (2.87 stock). I needed a gearbox with a low first gear to offset the gears and give me adequate take off from the line. My car is just for cruising and having fun, not a race car but I want it to be fun. It's a Corvette! I plan on swapping out the gears next year to 3.36 or 3.55. But for now I will live with the 2.87.
So now the fun begins. Swapping out the pedals. From what I read, this is the worst part. And after doing it, I would probably agree, although I didn't have any big problems.
Remove the steering column. Holy cow this was pretty major for me. But it came out pretty easy. Lay it over in the passenger side. Oh yeah - remove the seats. Easy. Take off the console sides and console.
Remove the brake pedal. This was a little tricky as there are a lot of bolts that hold it in. I was stumped for a while until I realized that the remaining four bolts were in the wiper area! And covered in undercoating. Loosen these and the bracket was free. Yaaay -milestone done.
Installing the new pedals is pretty easy by itself. They just go up in there and you bolt it in. All of the bolts are pretty easy to get to EXCEPT the one in the upper left against the firewall. This one was crazy hard to reach and I can't believe I did it. Had to use like four extensions, a couple swivels and some tape. haha. Whatever, I had some luck.
I was lucky enough to borrow a motorcycle jack, which actually worked quite well to jack up the transmission. First I removed the shift cable and vacuum line, then the trans cooler lines. Then jacked up the trans a little to take the weight off the support. Unbolted the support, then unbolted the cross member and took that out. The tranny was now supported by the bell housing and the jack. Oh yeah, I also unbolted the torque converter from the flex plate (somewhere it said to do that and I'm glad I did).
The bell housing bolts were not too bad. And actually a couple of them were not very tight so they all came out easy. Now the tranny was loose! Yikes - I didn't know what to expect at this point. So I wiggled it and IT CAME RIGHT OUT! wow.
Lower it down and slid it out. Tranny is out. Time for a beer.
OK, so now it's time to look at the shifter. This came with the tranny and looked like it was in pretty good shape. A little dirty but okay. So I figured I'd take it apart and clean it. I bought some parts cleaner and took the thing apart. WHOA... there are like five plates in there that look like jigsaw puzzle pieces. Gonna have to remember how these went together. Take pictures. Got it all cleaned up and greased up and put back together, only took a couple tries.
Then I had to mount it to the cross member to see if/how it worked. Pretty cool to see this working.
condition of the shifter when I got it
a close up of the linkages
YIKES! parts everywhere
back together again and mounted to the cross member.
and with the tranny hooked up
And check out the cross member. It looks like it just came from the factory. Well it had about a pound and a half of dirt and grease on it - but no rust! Speaking of the cross member, it doesn't match the on in the picture from my shop manual. I wonder what gives?
Next up was installing the Z bar. This came with the pedals (from RedVetRacer) and was in very good condition. I ordered all of the little crap from CorvetteCentral.com. Springs, plastic washers, *****, and what not. The Z bar even had the pivot ball to frame in it.
I have read where the replacement Z bar bracket is very weak. So I thought about strengthening it but honestly didn't want to take the time out to do that now. I can always pull it later and do it. The 81 had the 'holes' already drilled so it was just a matter of finding them! Using a mirror from below and brushing off the crap, I eventually found them. Getting bolts in there was a trick. I think I used a 5/16x1.5" long tapping screw (two of them) to bold it down. Note - you are screwing into mild steel, so don't torque it down too much. That was a pain and I can't believe those went in either. Screwed the engine ball into the side of the engine. Screwed a grease fitting on the Z bar shaft and put some grease on the ends. Then installed the Z bar. Went in nice. Yaaaay, another milestone.
Hooked up the clutch pedal. Yaaay another milestone. It's cool to see that working.
Z bar from above
Z bar from below
Oh yeah, and if you're ever doing a frame off - PUT THE Z BAR BRACKET IN THEN!
So that's where I'm at now. Next up is the flywheel and clutch. I need to order those and I have them in my cart on summit. Just have to wait a couple days till my credit card takes a breather... haha.
I didn't know anything about this stuff so I had to do a lot of research. Mine is 168 tooth from the flex plate, so that is what size flywheel I will get. I have settled on:
As I mentioned in another thread, when I removed the flex plate, there was a pilot bushing already in there, so that was cool. Except that I already made arrangements from another forum member for him to send me his extra... ugh oh well. Now I don't know which one to use.
OK, so to continue.. Yesterday I was greeted with this nice package from Summit. The flywheel and clutch kit I ordered.
Cleaned up the mating faces and did a test fit and fit nice. So bolted it up there. I used ARP bolts. They're expensive but probably worth it. I used Loctite (Permatex brand) blue on the threads and the ARP lubricant under the heads. Snugged them down then torqued them to 85 ft-lb per the directions on the package. Degreased the surface where the clutch plate mates. Put the alignment tool in there and hung the clutch disk, then fit up and bolted the clutch pressure plate. I used ARP bolts here are well. They did not come with lubricant but had washers so I just loctite'd them. Torqued them to 60 ft-lb. LOOKS COOL!
Next is the bell housing. I cleaned up the pivot stud and examined it. It looked fine so I am reusing it, just dabbed a little grease on it. The fork I had purchased/used was loose on the fork so I tested the existing one and that one was better. The spring on the fork is key to fitting snugly to the stud and the throwout bearing. Cleaned that up and attached it to the stud. Fit the fork boot on. I hit a snag fitting up the bell housing because the starter was in the way. After I realized that it went on with a couple light taps from a mallet. Bell housing is on! That was all for last night... in the garage till 10 o'clock.
Don't grease the pilot bushing or input shaft and don't forget to put oil in the gearbox! Not insulting your intelligence, But I have seen it happen. Great job so far.. Nothing like banging some gears!!
Don't grease the pilot bushing or input shaft and don't forget to put oil in the gearbox! Not insulting your intelligence, But I have seen it happen. Great job so far.. Nothing like banging some gears!!
Not insulting at all. I was actually wondering about what type of grease to put on the input shaft where it contacts the throwout bearing. I have heard graphite grease.
OK, well I got the transmission installed over the weekend. After attaching the flywheel and clutch I was ready for the tranny to go in. Again the motorcycle jack I had borrowed came in very handy for this. When we slid the tranny in, it didn't go all the way, stopped about 1/4" from mating up - wouldn't go. So after several attempts, I decided to remove the bell housing, attach it to the trans and then attempt to bolt that up as one unit. That worked. Tranny is in!
Next is the cross member. I removed the shifter that I had previously attached so I could install and did a test fit. I left the shifter bracket on and that hit the top of the tunnel where the hole needed to be cut. Then I began cutting the hole. That was messy. I decided to use a drill and sawzall combo because I didn't want to use a cutoff wheel and make a ton of dust in the car. A cutoff wheel would be easier. So the hole looks like hell. Oh well. I also didn't know what size to make the hole so just guessed by looking at a picture of the inner boot. It remains to be seen if it is the right size or not.
Installed the cross member. Oh, but first I welded a couple small reinforcements to it where the bracket was cracked.
So that is where we are at now. I need to fit up the shifter and attach the linkage and then finish the console.
Ok, so on to the shifter. I had previously cut a ragged hole in the floor to where I thought the shifter would go and I was close but not big enough on the drivers side. I have a picture of the shifter coming up through the hole so you can see where it is and needs to be. It probably would have helped if I had the inner boot to use as a template. That would have made sense... oh well.
Got the shifter installed and bolted to the cross member bracket. Cool! I can shift!!! When connecting the shift linkage bars to the tranny, the pivots were very loose on the shift levers. So I installed three washers in there to take up the slack. Now they are nice and snug - but not tight. I also ran out of the little G clips so I used cotter pins. I don't know why a cotter pin wouldn't work. It was really cool to 'fake' shift through the gears. Reverse is a little hard to get into but it goes.
That's all I got done last night. I need to put the console back together and make sure the clutch is adjusted correctly. One thing that does seem a little odd is the orientation of the Z bar. It seems like the levers are too far over center and not at right angles to the direction they're pushing. I'll need to check that. I also need to somehow check the air gap when the pedal is pushed in. I don't know how to do that yet. Hopefully that's possible with the tranny in...
No mention of a Clutch Starter Safety Switch. Its impossible to install after the Peddles and Dash are all back together. Its one of those things that gets overlooked and will forever bother You latter on.
No mention of a Clutch Starter Safety Switch. Its impossible to install after the Peddles and Dash are all back together. Its one of those things that gets overlooked and will forever bother You latter on.
ugh... yeah, I have to get to that. Hopefully it's doable with the pedals in there already...
Correction - the switch is on, it's just not wired. The pedals I bought (thankfully) had the switch with them.
So now I'm to some of the nagging things like electrical stuff...
Need to wire up the backup lights and the clutch safety switch. When converting from an automatic, both of these switches are wired to the automatic gear selector. In a manual, they are both in different places. The backup switch is on the tranny and the 'park/neutral' safety switch is now on the clutch. The idea is that the clutch has to be pushed in to start the car. At first I had no idea how or where to wire these switches so I took a look at the auto gear selector I had taken out and did some resistance testing. I found which wires were for the backup lights and which were for neutral safety. That was pretty cool. An electrical tester is an awesome tool. So I just connected these wires to their switches. Except I had to cut off the connectors. But... when I got to the clutch switch, I tried to connect the small 'harness' to the clutch switch and there was NO WAY I was going to get that thing on. Ugh - wish I had done that before I bolted the pedals in. So I made an executive decision. No clutch safety switch. I'm used to pushing the pedal in for starting anyways. So I just jumpered these wires (as shown in pictures). I also tested the backup switch in and out of reverse to make sure it was closing and opening the circuit.
Pics:
the automatic gear selector after testing and marking the wires








 My 81 auto-to-manual conversion thread













 When connecting the shift linkage bars to the tranny, the pivots were very loose on the shift levers. So I installed three washers in there to take up the slack. Now they are nice and snug - but not tight. I also ran out of the little G clips so I used cotter pins. I don't know why a cotter pin wouldn't work. It was really cool to 'fake' shift through the gears. Reverse is a little hard to get into but it goes.