C3 Tech/Performance V8 Technical Info, Internal Engine, External Engine, Basic Tech and Maintenance for the C3 Corvette
Sponsored by:
Sponsored by:

custom gauges

Thread Tools
 
Search this Thread
 
Old 03-13-2017, 11:32 AM
  #1  
hyprr1
Heel & Toe
Thread Starter
 
hyprr1's Avatar
 
Member Since: Feb 2017
Location: Toronto Ontario
Posts: 23
Received 2 Likes on 2 Posts
Default custom gauges

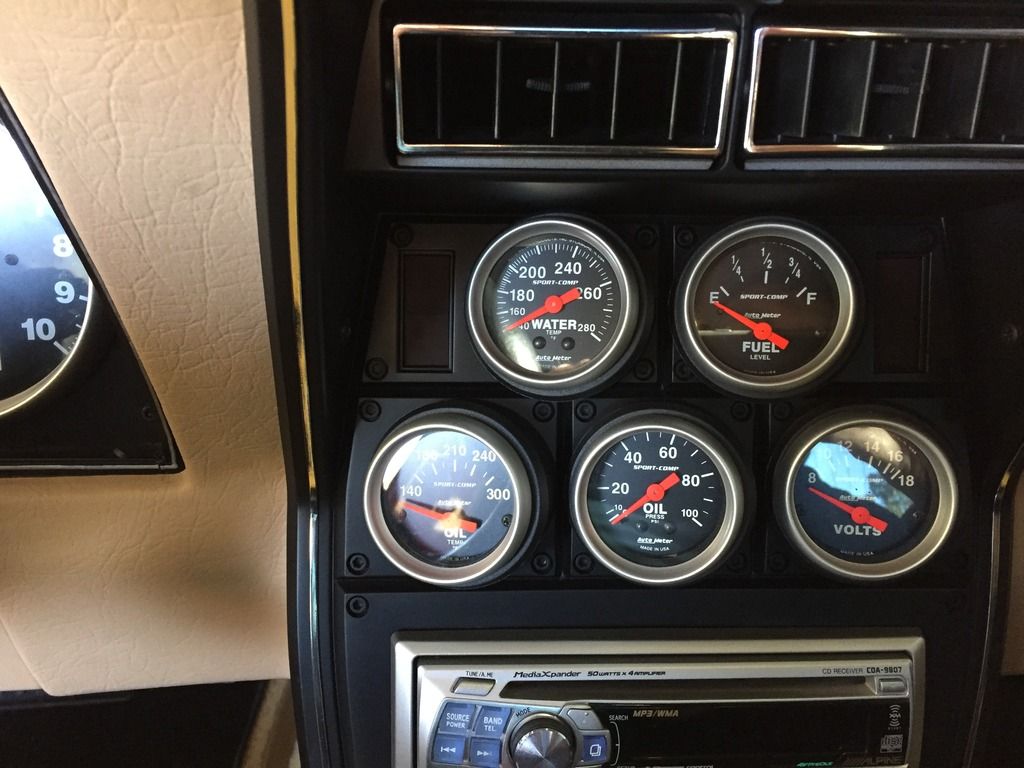
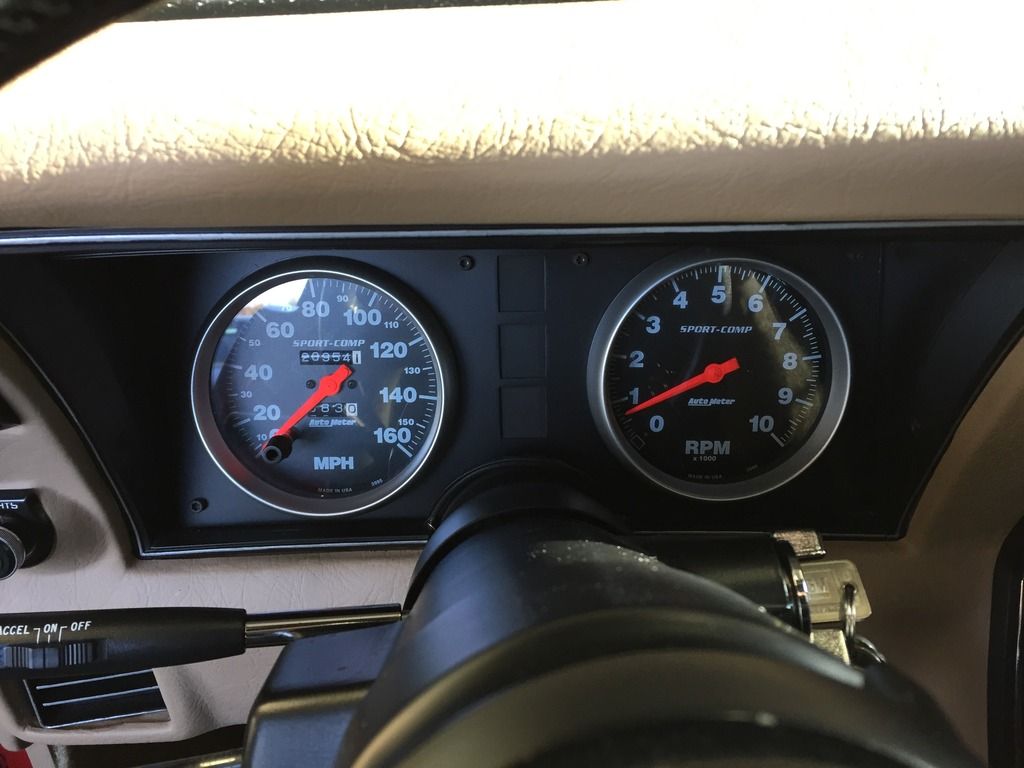
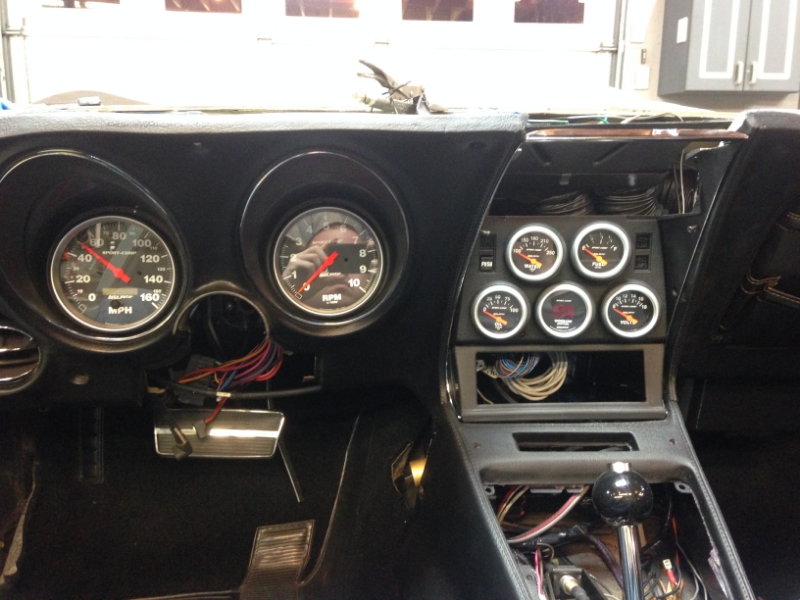
Hey guys, thinking about customizing a center bezel with
4 aftermarket gauges (oil press, volts, water, fuel level) and
eliminating the warning lights in the top two corners?
Do these warning lights (gen) need to be working so the car will function
properly?
I'll probably be using the existing wiring harness (splice into it)
I want to do something like this...
Attached Images  

Last edited by hyprr1; 03-13-2017 at 11:33 AM.
hyprr1 is offline  
Old 03-13-2017, 12:23 PM
  #2  
71 Vert LS1
Melting Slicks

 
71 Vert LS1's Avatar
 
Member Since: Sep 2010
Posts: 2,009
Received 394 Likes on 299 Posts

Default

I don't know about the warning lights but I try to match the color of the pointers all the way around.

I used Autometer Sport Comp gauges for all the gauges including tach and speedo.

Looks like in the pic the speedo has a white pointer.
71 Vert LS1 is offline  
Old 03-13-2017, 12:28 PM
  #3  
The Punisher
Melting Slicks
 
The Punisher's Avatar
 
Member Since: Oct 2006
Location: hebron IL
Posts: 2,920
Received 167 Likes on 141 Posts
C3 of Year Finalist (appearance mods) 2019

Default

When I put in new gauges and lost the warning lights I left them wired in and just pulled the light bulbs. I don't think you will have a problem with disconnecting them
The Punisher is offline  
The following users liked this post:
hyprr1 (03-13-2017)
Old 03-13-2017, 02:12 PM
  #4  
havesometo
Drifting
 
havesometo's Avatar
 
Member Since: Dec 2012
Location: Meldrim Georgia
Posts: 1,360
Received 59 Likes on 58 Posts
Default

Originally Posted by 71 Vert LS1
I don't know about the warning lights but I try to match the color of the pointers all the way around.

I used Autometer Sport Comp gauges for all the gauges including tach and speedo.

Looks like in the pic the speedo has a white pointer.
In the picture that is not a speedometer. It is a tachometer and it is factory.
havesometo is offline  
Old 03-16-2017, 10:31 AM
  #5  
jetmech
Racer
 
jetmech's Avatar
 
Member Since: Oct 2001
Location: tuttle ok
Posts: 417
Received 10 Likes on 10 Posts

Default

Originally Posted by havesometo
In the picture that is not a speedometer. It is a tachometer and it is factory.
I was able to keep the warning lights. I cut out the back to allow for the auto meter gauges . I can see about getting you a pic if you would like.
jetmech is offline  
The following users liked this post:
hyprr1 (03-17-2017)
Old 03-17-2017, 11:59 AM
  #6  
hyprr1
Heel & Toe
Thread Starter
 
hyprr1's Avatar
 
Member Since: Feb 2017
Location: Toronto Ontario
Posts: 23
Received 2 Likes on 2 Posts
Default

Originally Posted by jetmech
I was able to keep the warning lights. I cut out the back to allow for the auto meter gauges . I can see about getting you a pic if you would like.
Yea, I was thinking about doing that too...?
I kinda want the warning lights.
Spiros
hyprr1 is offline  
Old 03-20-2017, 09:54 PM
  #7  
jetmech
Racer
 
jetmech's Avatar
 
Member Since: Oct 2001
Location: tuttle ok
Posts: 417
Received 10 Likes on 10 Posts

Default

Originally Posted by hyprr1
Yea, I was thinking about doing that too...?
I kinda want the warning lights.
Spiros


Here are a couple of pics. Not a great pic of the center stack but they have angled bezels under them. I got them from Autometer.
jetmech is offline  
The following users liked this post:
hyprr1 (03-21-2017)
Old 03-21-2017, 08:36 AM
  #8  
hyprr1
Heel & Toe
Thread Starter
 
hyprr1's Avatar
 
Member Since: Feb 2017
Location: Toronto Ontario
Posts: 23
Received 2 Likes on 2 Posts
Default

Originally Posted by jetmech


Here are a couple of pics. Not a great pic of the center stack but they have angled bezels under them. I got them from Autometer.
That looks so good......
great job...
hyprr1 is offline  
Old 03-21-2017, 08:38 AM
  #9  
hyprr1
Heel & Toe
Thread Starter
 
hyprr1's Avatar
 
Member Since: Feb 2017
Location: Toronto Ontario
Posts: 23
Received 2 Likes on 2 Posts
Default

Originally Posted by hyprr1
That looks so good......
great job...


Are your center gauges 2 5/8"?

mine are 2"
hyprr1 is offline  
Old 03-21-2017, 03:01 PM
  #10  
fleming23
Melting Slicks
 
fleming23's Avatar
 
Member Since: Feb 2009
Location: Dallas Georgia
Posts: 2,787
Received 594 Likes on 408 Posts
2020 Corvette of the Year Finalist (track prepared)
C3 of Year Winner (track prepared) 2019

Default

Another example of the Autometer Sport Comps.


fleming23 is offline  
Old 03-21-2017, 04:38 PM
  #11  
jetmech
Racer
 
jetmech's Avatar
 
Member Since: Oct 2001
Location: tuttle ok
Posts: 417
Received 10 Likes on 10 Posts

Default

Originally Posted by hyprr1
Are your center gauges 2 5/8"?

mine are 2"
Wow it has been a long time but I believe they are 2".
jetmech is offline  
Old 03-21-2017, 04:39 PM
  #12  
jetmech
Racer
 
jetmech's Avatar
 
Member Since: Oct 2001
Location: tuttle ok
Posts: 417
Received 10 Likes on 10 Posts

Default

Originally Posted by fleming23
Another example of the Autometer Sport Comps.


http://www.youtube.com/watch?v=T0lAz86NRTY
Nice job!
jetmech is offline  
Old 03-29-2017, 12:53 PM
  #13  
hyprr1
Heel & Toe
Thread Starter
 
hyprr1's Avatar
 
Member Since: Feb 2017
Location: Toronto Ontario
Posts: 23
Received 2 Likes on 2 Posts
Default

Originally Posted by jetmech


Here are a couple of pics. Not a great pic of the center stack but they have angled bezels under them. I got them from Autometer.
Just waiting for the clock to come in.

What do you think?
I copied you...lol

Not having the gen light & low fuel light is ok?
Will it alter anything if I don't have these now??

Thanks again "jetmech"
Spiros
Attached Images  

Last edited by hyprr1; 03-29-2017 at 12:56 PM.
hyprr1 is offline  
Old 05-08-2017, 08:44 AM
  #14  
hyprr1
Heel & Toe
Thread Starter
 
hyprr1's Avatar
 
Member Since: Feb 2017
Location: Toronto Ontario
Posts: 23
Received 2 Likes on 2 Posts
Default

This is the end result & I'm very happy on how it looks.
Thanks to everyone's feedback.


Thanks again "jetmech".................
Attached Images  

Last edited by hyprr1; 05-08-2017 at 08:45 AM.
hyprr1 is offline  
Old 05-08-2017, 06:08 PM
  #15  
havesometo
Drifting
 
havesometo's Avatar
 
Member Since: Dec 2012
Location: Meldrim Georgia
Posts: 1,360
Received 59 Likes on 58 Posts
Default

Originally Posted by hyprr1
This is the end result & I'm very happy on how it looks.
Thanks to everyone's feedback.


Thanks again "jetmech".................
That looks good man. What did you put behind the gauges to hold them off and at an angle? Can you take a picture looking straight at it?

Last edited by havesometo; 05-08-2017 at 06:10 PM.
havesometo is offline  
The following users liked this post:
hyprr1 (05-09-2017)
Old 05-09-2017, 12:09 AM
  #16  
hyprr1
Heel & Toe
Thread Starter
 
hyprr1's Avatar
 
Member Since: Feb 2017
Location: Toronto Ontario
Posts: 23
Received 2 Likes on 2 Posts
Default

Originally Posted by havesometo
That looks good man. What did you put behind the gauges to hold them off and at an angle? Can you take a picture looking straight at it?
I used these angled bezels from autometer!
Attached Images    
hyprr1 is offline  
Old 05-09-2017, 12:28 AM
  #17  
havesometo
Drifting
 
havesometo's Avatar
 
Member Since: Dec 2012
Location: Meldrim Georgia
Posts: 1,360
Received 59 Likes on 58 Posts
Default

Originally Posted by hyprr1
I used these angled bezels from autometer!
Thanks a lot. That's exactly what I'm looking to do to mine.
havesometo is offline  

Get notified of new replies

To custom gauges

Old 05-09-2017, 02:29 PM
  #18  
hyprr1
Heel & Toe
Thread Starter
 
hyprr1's Avatar
 
Member Since: Feb 2017
Location: Toronto Ontario
Posts: 23
Received 2 Likes on 2 Posts
Default

You'll have to dremel the bottom of each hole a bit.
I'll get you some pics
hyprr1 is offline  
Old 05-09-2017, 02:33 PM
  #19  
hyprr1
Heel & Toe
Thread Starter
 
hyprr1's Avatar
 
Member Since: Feb 2017
Location: Toronto Ontario
Posts: 23
Received 2 Likes on 2 Posts
Default

Dremel a bit off from the bottom according to the size of your gauges.
Mine were 2" "equus" brand


autometer rings:

https://www.summitracing.com/int/parts/atm-2234
Attached Images   

Last edited by hyprr1; 05-09-2017 at 02:36 PM.
hyprr1 is offline  
Old 01-17-2021, 10:01 AM
  #20  
gjjcvette
Advanced
 
gjjcvette's Avatar
 
Member Since: Mar 2015
Location: winter fl
Posts: 79
Received 3 Likes on 3 Posts
Default

I know this is an old thread, but...wow! Looks great. 1) What size are they? 2) Is the lighting really bright at night? 3) Was the wiring difficult? Did the sending units just plug & play?

Anyone tried the similarly looking Equus brand?
Thanks

Last edited by gjjcvette; 01-17-2021 at 10:06 AM. Reason: typo
gjjcvette is offline  


Quick Reply: custom gauges


All times are GMT -4. The time now is 06:36 AM.