
How to remove A-Arms without removing Radiator
 08-30-2017, 01:56 PM
#1
Racer

Thread Starter
Just wanted to share my recent experience removing my 1981 C3 front suspension without removing the radiator or many other peripherals.
This past weekend I started removing and breaking down the front suspension to clean up and prepare for all new parts. After researching on the forum and online I read some real issues people had removing the A-Arms without removing a lot of other parts.
- Start by removing tires
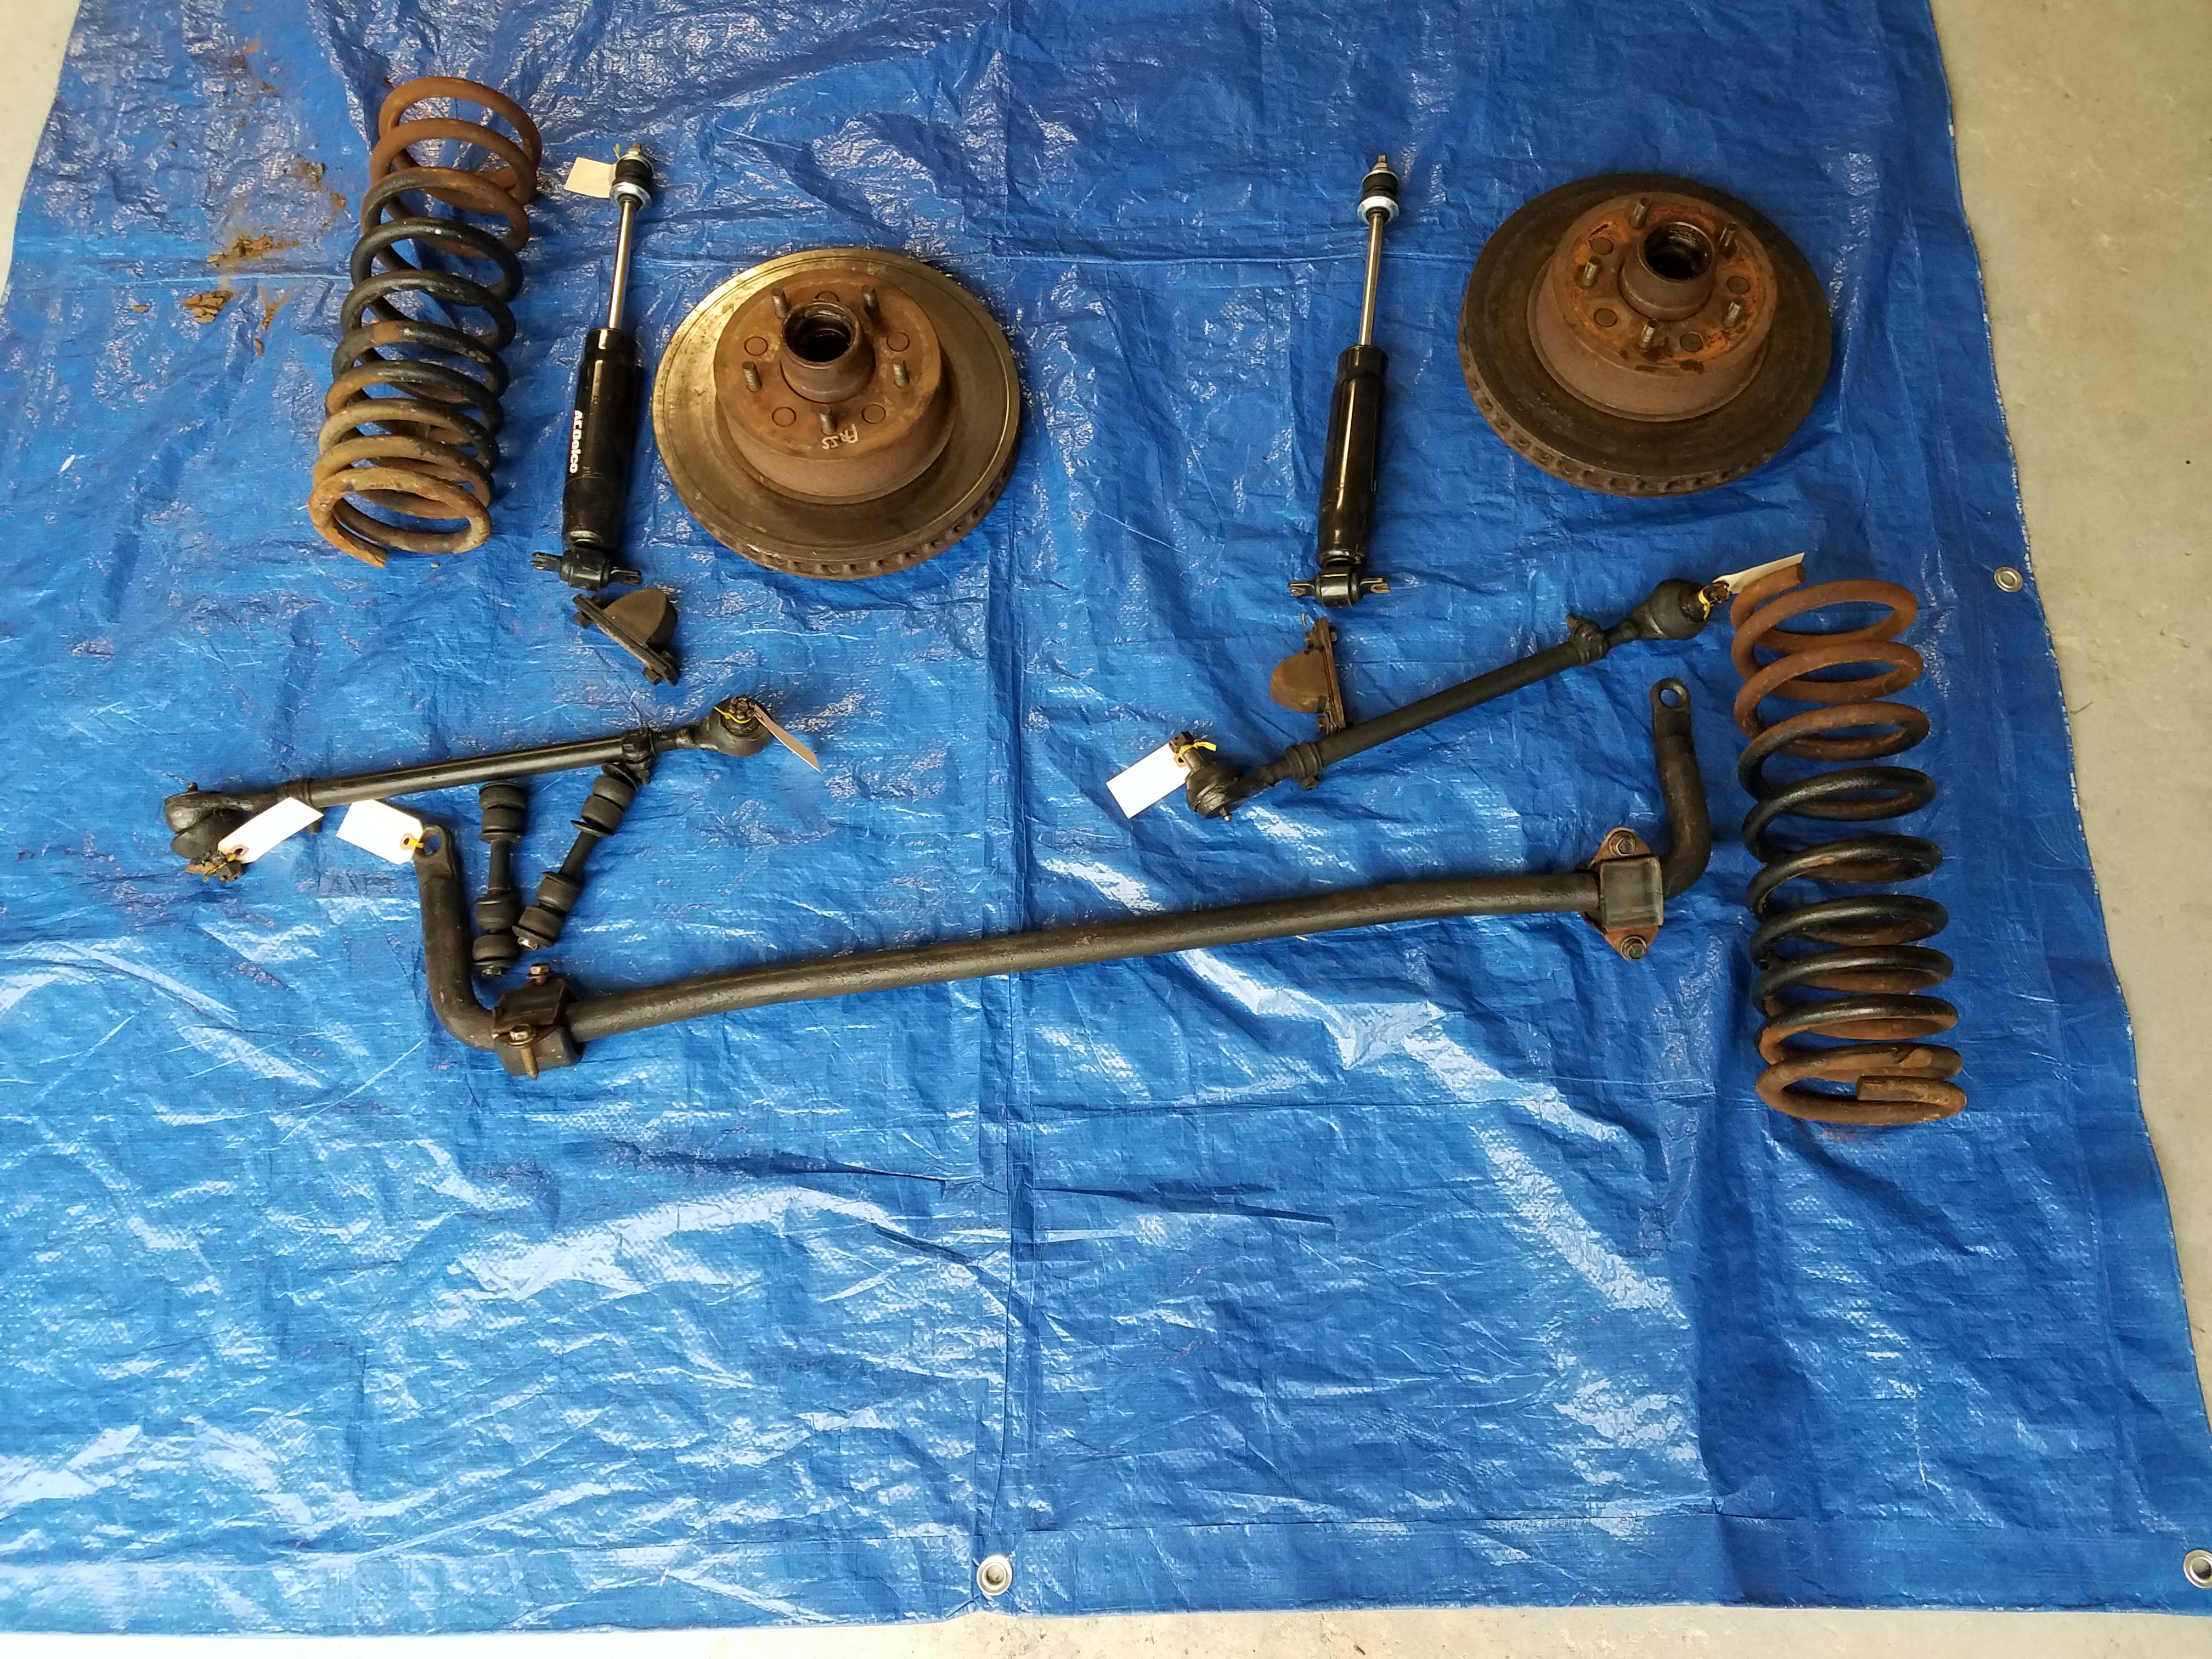
- remove stabilizer bar links and stabilizer brackets
- rotors, hubs, tie rod ends (leave the tie rod ends and sleeves together to allow installing the new parts as close to the existing alignment)
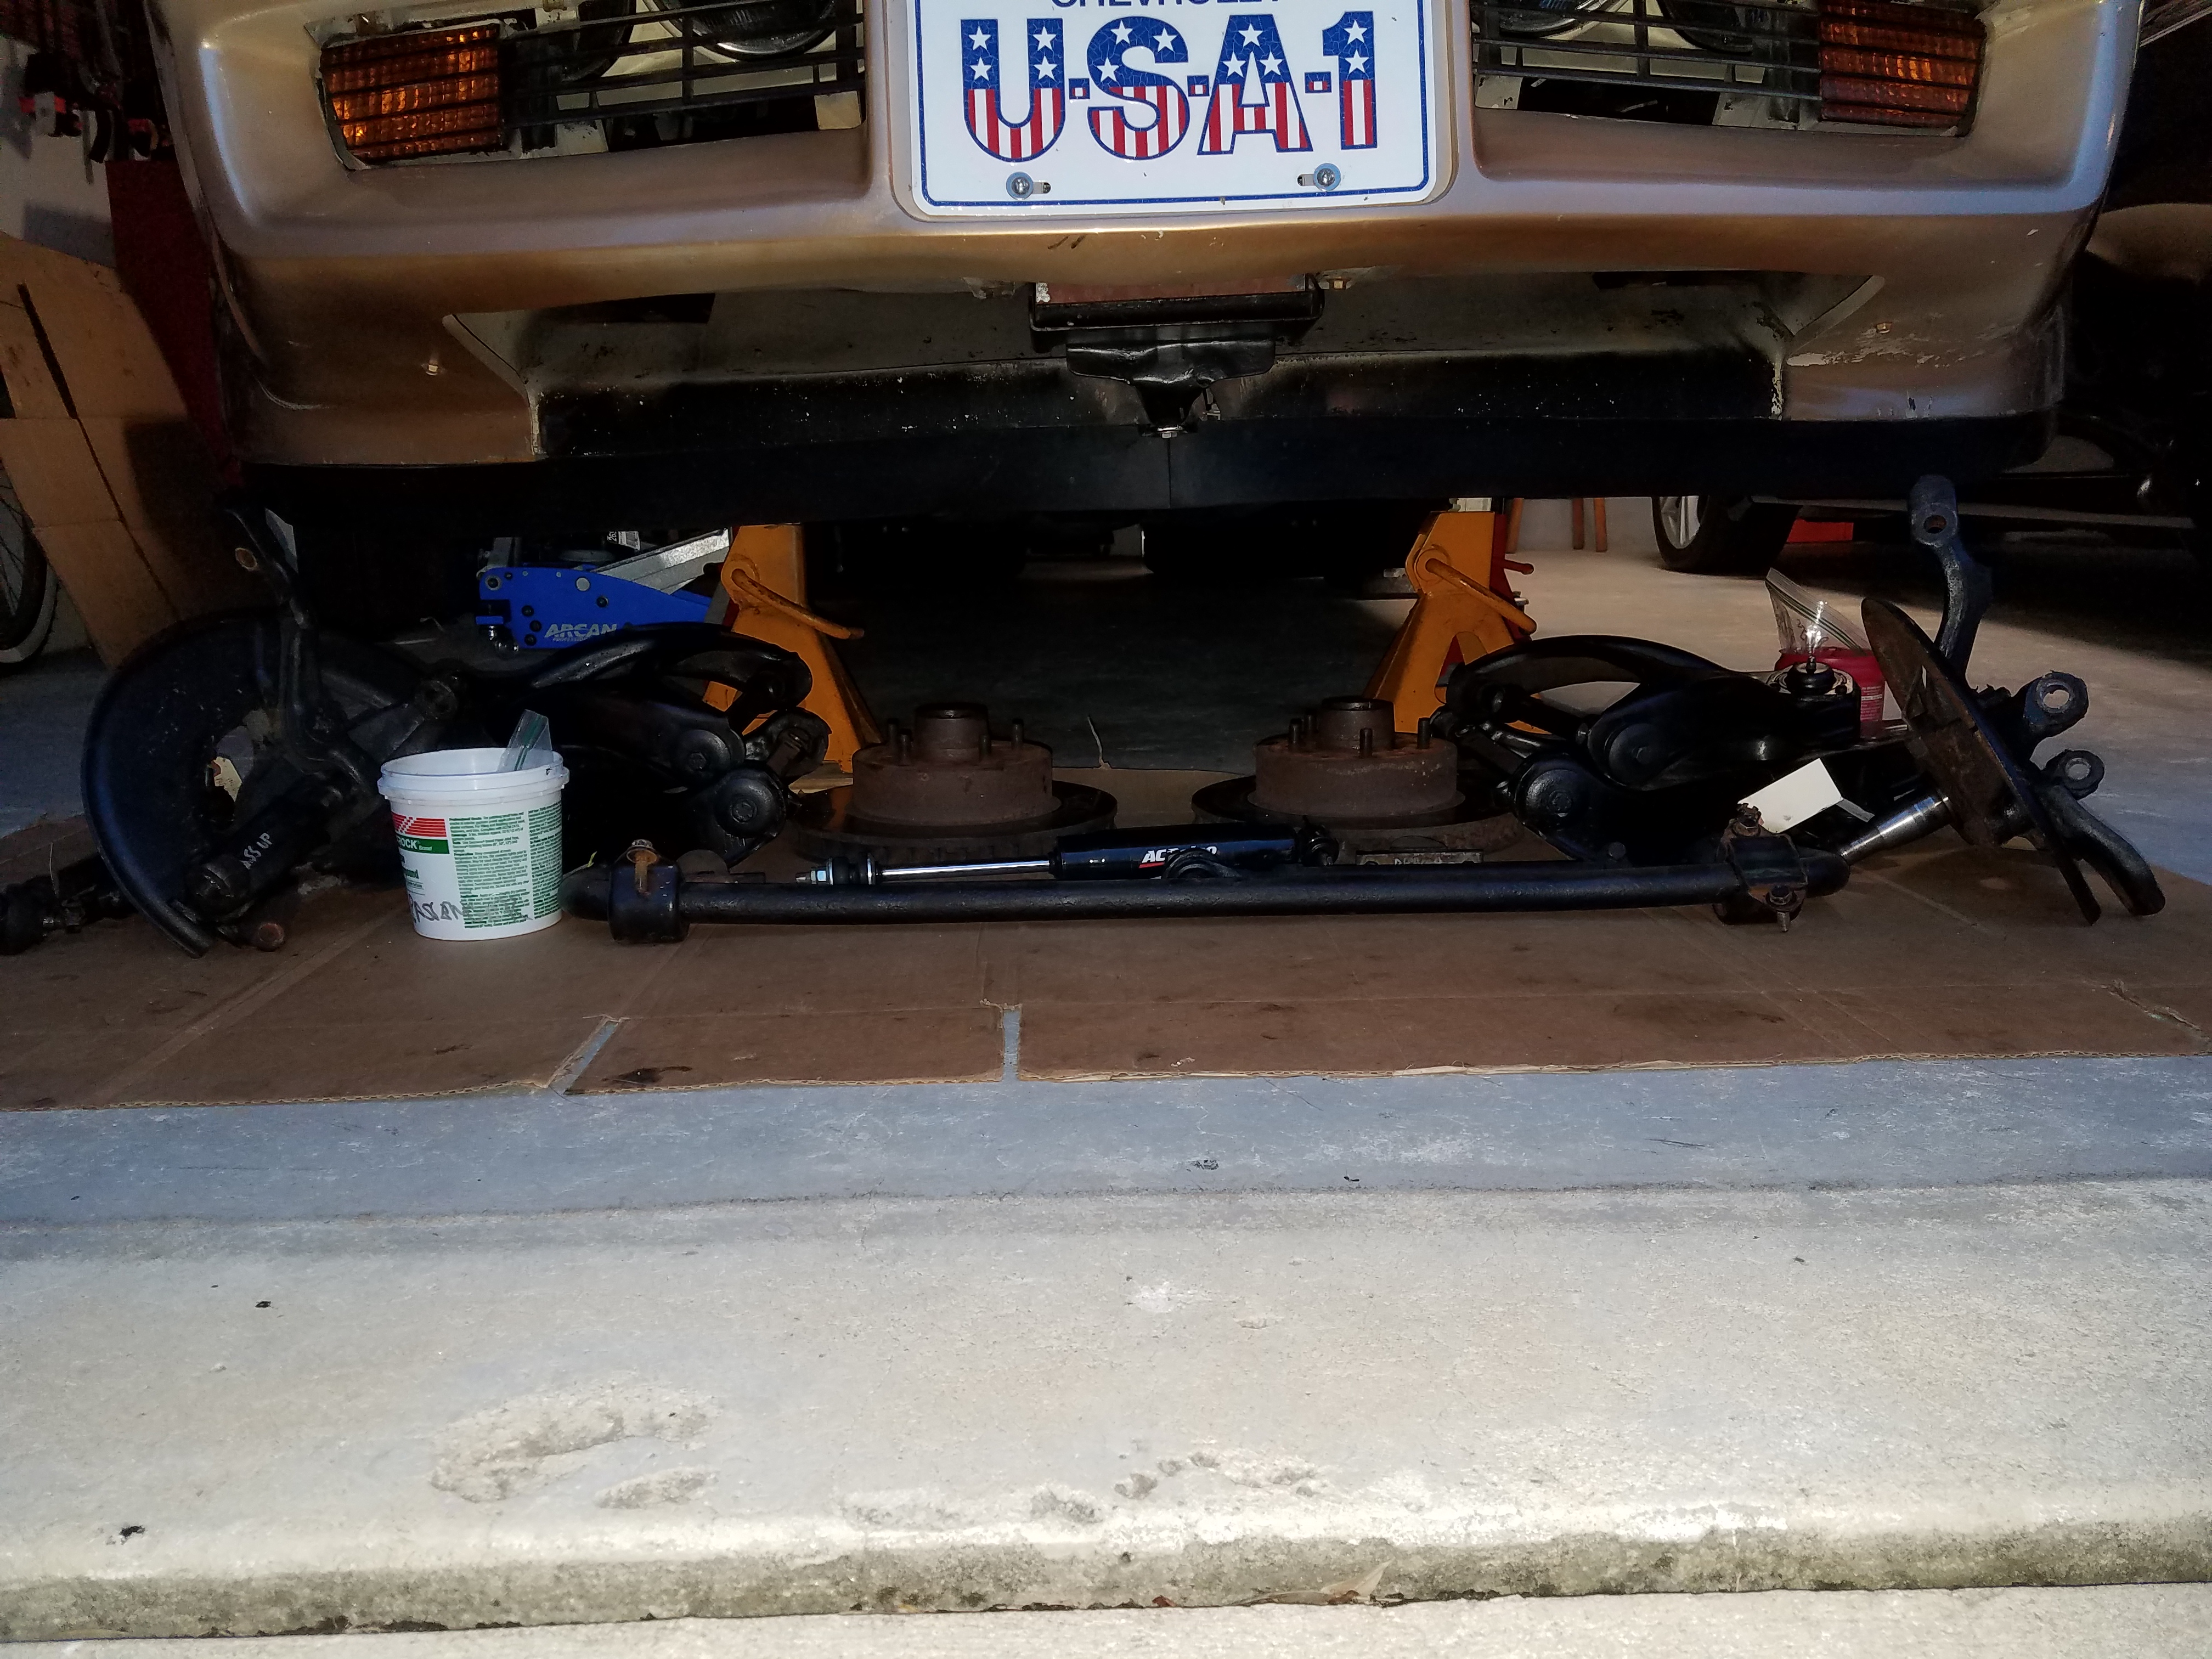
- remove idler arm and support the steering linkage. It is unnecessary to remove the power ram unless you are also replacing
- loosen the ball joint nuts, break loose the upper ball joint from the steering knuckle. A hammer works sometimes by banging on the steering knuckle connection, but it is best to have a pickle fork on hand for all joints
- place a floor jack under the lower A-Arm to support for spring removal
- rent a spring compressor (Orielly's has the one made for the C3 springs, see link below)
- after compressing the spring remove the nut from upper ball joint and lower floor jack slowly (BE CAREFUL!)
- remove spring and remove spring compressor to use on next spring
- remove lower A-Arms
- Now the tricky part but hopefully this helps someone enjoy an easier experience as I did. Be patient and take your time. Loosen and remove the 2 nuts holding the upper A-Arm shaft onto the frame. Use a C-Clamp that fits over the end of the bolt and a socket that is just a bit larger than the head to the bolt that is pressed into the frame. Pick up a set of 4 new bolts and nuts for replacement. The knurls on the bolts sometimes wear out. Compress the C-Clamp, only a few turns are required, the bolts only have approximately 3/16 of an inch to press out. On the driver side this step can be accomplished without removing any other parts.
- Now onto the passenger side upper A-Arm. Again, be patient. follow the same steps as you did on the drivers side except, loosen the fan shroud by removing the 2 upper bolts, remove the AC Compressor bottom brace from motor to AC Compressor bracket, remove the 2 bolts that hold the AC compressor onto the bracket. These steps are necessary to allow room for the C-Clamp procedure above.
- After the bolts are pressed out it is possible to wiggle the driver side upper A-Arm through the side of the fender. On the passenger side lift the AC up out of the bracket with one hand and with the other hand remove the A-Arm up past the AC Compressor and fender. If you have a helper, it is a little easier, but can be completed on your own.
That's it, you have now removed the front end suspension and your C3 parts are ready for cleanup, painting and installing the new parts.
Good Luck with your project!
https://www.oreillyauto.com/detail/r...rolet/corvette)
This past weekend I started removing and breaking down the front suspension to clean up and prepare for all new parts. After researching on the forum and online I read some real issues people had removing the A-Arms without removing a lot of other parts.
- Start by removing tires
- remove stabilizer bar links and stabilizer brackets
- rotors, hubs, tie rod ends (leave the tie rod ends and sleeves together to allow installing the new parts as close to the existing alignment)
- remove idler arm and support the steering linkage. It is unnecessary to remove the power ram unless you are also replacing
- loosen the ball joint nuts, break loose the upper ball joint from the steering knuckle. A hammer works sometimes by banging on the steering knuckle connection, but it is best to have a pickle fork on hand for all joints
- place a floor jack under the lower A-Arm to support for spring removal
- rent a spring compressor (Orielly's has the one made for the C3 springs, see link below)
- after compressing the spring remove the nut from upper ball joint and lower floor jack slowly (BE CAREFUL!)
- remove spring and remove spring compressor to use on next spring
- remove lower A-Arms
- Now the tricky part but hopefully this helps someone enjoy an easier experience as I did. Be patient and take your time. Loosen and remove the 2 nuts holding the upper A-Arm shaft onto the frame. Use a C-Clamp that fits over the end of the bolt and a socket that is just a bit larger than the head to the bolt that is pressed into the frame. Pick up a set of 4 new bolts and nuts for replacement. The knurls on the bolts sometimes wear out. Compress the C-Clamp, only a few turns are required, the bolts only have approximately 3/16 of an inch to press out. On the driver side this step can be accomplished without removing any other parts.
- Now onto the passenger side upper A-Arm. Again, be patient. follow the same steps as you did on the drivers side except, loosen the fan shroud by removing the 2 upper bolts, remove the AC Compressor bottom brace from motor to AC Compressor bracket, remove the 2 bolts that hold the AC compressor onto the bracket. These steps are necessary to allow room for the C-Clamp procedure above.
- After the bolts are pressed out it is possible to wiggle the driver side upper A-Arm through the side of the fender. On the passenger side lift the AC up out of the bracket with one hand and with the other hand remove the A-Arm up past the AC Compressor and fender. If you have a helper, it is a little easier, but can be completed on your own.
That's it, you have now removed the front end suspension and your C3 parts are ready for cleanup, painting and installing the new parts.
Good Luck with your project!
https://www.oreillyauto.com/detail/r...rolet/corvette)
Last edited by Reaper19; 08-30-2017 at 02:44 PM.

The following users liked this post:
Primoz (08-30-2017)

 08-30-2017, 02:51 PM
#3
Racer
Thread Starter
I have been putting this off until the fall in Florida, but my Master Cylinder developed a leak so I figured since it was up on stands and I would be replacing the rotors, calipers, pads and brake lines, I may as well tear into everything now.
I have learned many things on this forum and appreciate everyone sharing lessons learned. There may be other write ups on this same subject, I figured it would be best to write it up while still fresh on my mind and before too many brain cells are gone from the cold ones drank in between the projects.

Randy
08-30-2017, 03:55 PM
#4
Former Vendor
Member Since: Aug 2006
Location: Jeffersonville Indiana 812-288-7103
Posts: 76,656
Received 1,813 Likes
on
1,458 Posts
St. Jude Donor '08-'09-'10-'11-'12-'13-'14-'15

Great write up...
If your removing the upper arms and you have new studs you can just use a long extension and hammer the studs out, no compressor is needed, a couple of good whacks and the come right out. Then when you go to install the upper arm just place the stud in the housing with the arm in place and hammer it back in place.
On a big block car this required because there is no way to remove the A arm without doing this (with the fan shroud in place). I did a picture of this on our tech page a few years back, I've posted it below.
The following users liked this post:
Reaper19 (09-23-2017)