



Steering Box Refurb Questions
Thread Starter
Burning Brakes


Joined: Dec 2005
Posts: 1,164
Likes: 224
From: Pawleys Island, SC
 Steering Box Refurb Questions
I know there are already multiple threads dealing with the rebuilding of steering boxes but now that I've taken mine apart to replace seals and grease I've got some specific questions and concerns. Hoping some of the folks here that have some experience with these things can help me out.
First of all, I only took it apart because it was leaking badly. The car drove fine. After disassembly I cleaned it all up and gave all the parts a good look over. Saw no appreciable wear that concerned me.
I put it back together, replacing the seals and grease. No real issues with the reassembly but my concerns are with the final adjustment. The worm gear adjustment went ok. I turned the adjuster nut in until it stopped and backed it out a little. I then tightened it until I measured around 5 in-lbs to turn the worm gear. Locked it in place.
I then installed the pitman shaft, installed the side cover and adjustment bolt, and shimmed the bolt to the shaft to get the required <.002" clearance. My doubts began when tightening the lash adjuster bolt. I tightened the bolt down until it stopped. At this point I expected to be able to lock the gears so they wouldn't move before backing it off. In actuality, the bolt seemed to stop well short of that. With the bolt snugged down good, I could only get the required 10 to 15 in-lb resistance to turning the worm gear. I thought that was unusual. I couldn't tighten it more to increase resistance at all. The other thing that concerns me is that I wasn't getting the 10 to 15 in-lb resistance at the center position. There seems to be quite a bit of play at the center position with little resistance. I can turn the worm gear back and forth over about a 60 degree arc with no resulting motion at the pitman shaft.
Again, sorry for the length of this question. Should I be concerned with any of this? Is the free play I'm seeing normal? I sure wish I'd noted if I had this condition before. I know the position of the worm adjuster and the lash adjustment bolt are tighter now than they were. Could I have installed the ball nut the wrong way on the worm gear, and still be able to get the pitman shaft in? I'd appreciate any advice.
First of all, I only took it apart because it was leaking badly. The car drove fine. After disassembly I cleaned it all up and gave all the parts a good look over. Saw no appreciable wear that concerned me.
I put it back together, replacing the seals and grease. No real issues with the reassembly but my concerns are with the final adjustment. The worm gear adjustment went ok. I turned the adjuster nut in until it stopped and backed it out a little. I then tightened it until I measured around 5 in-lbs to turn the worm gear. Locked it in place.
I then installed the pitman shaft, installed the side cover and adjustment bolt, and shimmed the bolt to the shaft to get the required <.002" clearance. My doubts began when tightening the lash adjuster bolt. I tightened the bolt down until it stopped. At this point I expected to be able to lock the gears so they wouldn't move before backing it off. In actuality, the bolt seemed to stop well short of that. With the bolt snugged down good, I could only get the required 10 to 15 in-lb resistance to turning the worm gear. I thought that was unusual. I couldn't tighten it more to increase resistance at all. The other thing that concerns me is that I wasn't getting the 10 to 15 in-lb resistance at the center position. There seems to be quite a bit of play at the center position with little resistance. I can turn the worm gear back and forth over about a 60 degree arc with no resulting motion at the pitman shaft.
Again, sorry for the length of this question. Should I be concerned with any of this? Is the free play I'm seeing normal? I sure wish I'd noted if I had this condition before. I know the position of the worm adjuster and the lash adjustment bolt are tighter now than they were. Could I have installed the ball nut the wrong way on the worm gear, and still be able to get the pitman shaft in? I'd appreciate any advice.
Last edited by revitup; Nov 15, 2017 at 07:35 PM.

Le Mans Master


Joined: Oct 2007
Posts: 7,470
Likes: 985
From: RI, Now Franklin/Nashville TN
The expert rebuilder blueprinter on this forum is Gary, GTR 1999, and he did my box for me in 2010....The box was NEVER as good as it is now after Gary's magic...zero play...I would ping GTR1999 if he does not chime in or bring it to him...He LIVES IN CT where you live according to your stats!!!!!
Tech Contributor

Joined: Aug 1999
Posts: 15,205
Likes: 4,034
From: Connecticut, USA
The expert rebuilder blueprinter on this forum is Gary, GTR 1999, and he did my box for me in 2010....The box was NEVER as good as it is now after Gary's magic...zero play...I would ping GTR1999 if he does not chime in or bring it to him...He LIVES IN CT where you live according to your stats!!!!!
Tech Contributor
Joined: Aug 1999
Posts: 15,205
Likes: 4,034
From: Connecticut, USA
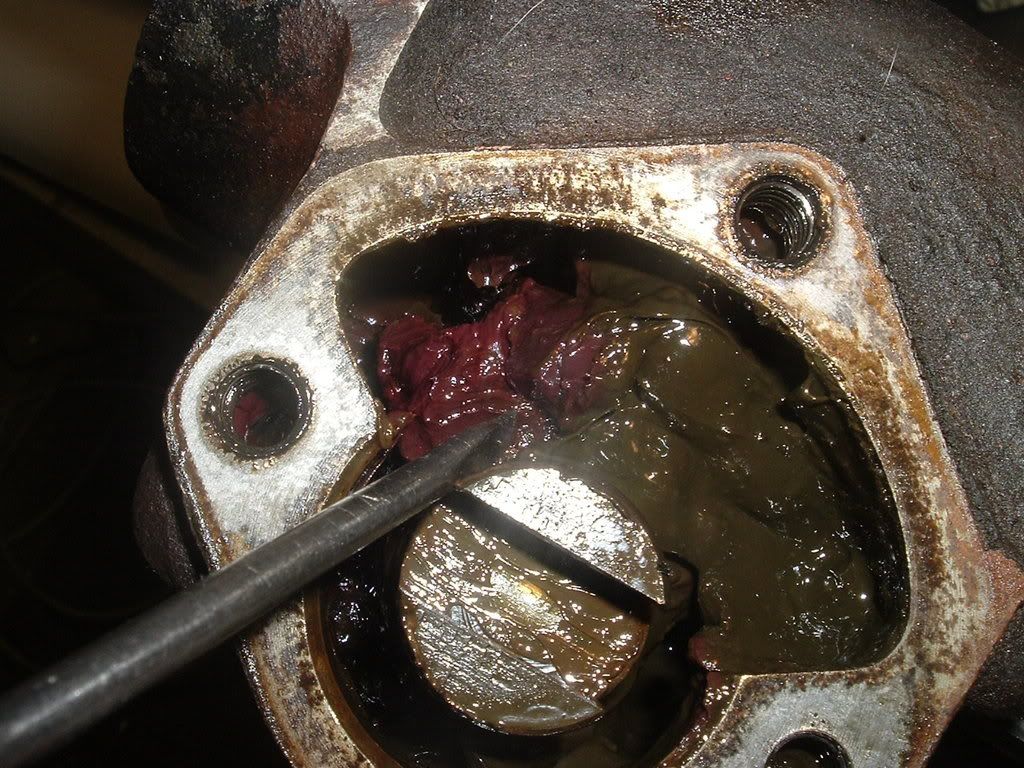
ok so exactly what did you take apart? Did you replace just the seals or did you use a common kit and go through the box? Did you use a 0-30 in/lb Dial TW or another method? When you dialed in the bearing preload where was the needle on the TW, was it steady or did it jump around? What the grease in the box a sludge mix?
Thread Starter
Burning Brakes
Joined: Dec 2005
Posts: 1,164
Likes: 224
From: Pawleys Island, SC
ok so exactly what did you take apart? Did you replace just the seals or did you use a common kit and go through the box? Did you use a 0-30 in/lb Dial TW or another method? When you dialed in the bearing preload where was the needle on the TW, was it steady or did it jump around? What the grease in the box a sludge mix?
Used a 0 – 25 in-lb beam-type torque wrench for the adjustments.
The reading on the TW when setting the preload on the worm gear was a pretty steady 5 to 8 in-lbs turning it through the entire almost 3 turns.
When setting the lash preload on the shaft gear I could only get about a 5 in-lb reading through 60 degree arc at the center position. That is with the lash adjuster bolt socked right down. There was no motion of the pitman shaft through that 60 degree arc. The TW reading would vary around 10 to 15 in-lbs otherwise, and it did move around within that range. I kind of expected that I’d be able to bind the gears right up by overtightening the lash adjuster but that did not happen, could not increase the resistance beyond what I just described. That approx. 60 degree arc in the center where there is no movement of the pitman shaft is what’s really concerning me.
The grease in the box wasn’t too bad. Some was caked up but there was some fresh grease also, I had added some in the past. It did not look like it was lacking lubrication.
Last edited by revitup; Nov 16, 2017 at 08:17 AM.

Racer


Joined: Aug 2013
Posts: 363
Likes: 24
From: Brigantine NJ USA
I put it back together, replacing the seals and grease. No real issues with the reassembly but my concerns are with the final adjustment. The worm gear adjustment went ok. I turned the adjuster nut in until it stopped and backed it out a little. I then tightened it until I measured around 5 in-lbs to turn the worm gear. Locked it in place.
I then installed the pitman shaft, installed the side cover and adjustment bolt, and shimmed the bolt to the shaft to get the required <.002" clearance.
I then installed the pitman shaft, installed the side cover and adjustment bolt, and shimmed the bolt to the shaft to get the required <.002" clearance.
I too recently rebuilt my box (and did so with some help from Gary's online docs), I had good results but I am just learning too.
Rick
Last edited by RickDett; Nov 16, 2017 at 07:31 AM.
Thread Starter
Burning Brakes
Joined: Dec 2005
Posts: 1,164
Likes: 224
From: Pawleys Island, SC
I made the adjustments as I was installing the guts. Installed the worm shaft/gear & bearings and adjusted that preload and then installed the pitman shaft/gear and adjusted lash/preload.
Did you wind up with any 'freeplay' at the center position or did your pitman shaft move immediately with worm gear movement?
Racer
Joined: Aug 2013
Posts: 363
Likes: 24
From: Brigantine NJ USA
revitup, I am concerned about your rebuild method I believe you should rebuild the entire unit then make all adjustments, but let’s wait for Gary to respond.
I did have immediate movement of the sector shaft. My own personal concern was that my readings (combined 14 lb-inch) peaked out higher while at 60 degrees off center rather than at center.
Rick
I did have immediate movement of the sector shaft. My own personal concern was that my readings (combined 14 lb-inch) peaked out higher while at 60 degrees off center rather than at center.
Rick
Corvette Stories
The Best of Corvette for Corvette Enthusiasts

5 Best & 5 Worst Corvette Daily Drivers
Joe Kucinski
The Headlights of Every Corvette Generation Explained
Joe Kucinski
5 Best & 5 Most Overrated Corvette Track Packages of All Time!
Joe Kucinski
Every 2027 Corvette Engine Explained
Joe Kucinski
Designer Imagines A Corvette That Looks More Like a Corvette Than the Corvette
Verdad Gallardo
10 Ugly Corvettes That We Still Kinda Love
Joe Kucinski
Top 10 Most Expensive Corvettes Ever Sold on Bring A Trailer
Brett Foote
10 Things Every Corvette Owner Needs (2026 Edition)
Michael S. Palmer
8 Most "Only Corvette Owners Understand" Quirks and Problems
Pouria Savadkouei
Thread Starter
Burning Brakes
Joined: Dec 2005
Posts: 1,164
Likes: 224
From: Pawleys Island, SC
You could be right but at least one of the instructions I saw said to set the worm gear preload, add the sector shaft preload and that the two should equal around 15 in-lbs. Don't see how to comply with that without setting them separately.
It's pretty frustrating that I can't get this right, it's not rocket science.
Tech Contributor
Joined: Aug 1999
Posts: 15,205
Likes: 4,034
From: Connecticut, USA
Ok so my next question is, since you had the worm apart, did you assemble it in the correct orientation? Looking at the teeth they should taper down, the wide part at the top. If you assembled it backwards or upside down you will have to take it apart and redo it. 27 bearing ***** per circuit. You can reuse the seals if you like but I wouldn't. I don't like pushing shafts through lips seals more then once. You will need a new gasket as well.
Beam TW is good but not good enough for this job- not if you want to build it the best way possible- same for the bushings, I used to machine them but now have them made to my spec and I final fit them to the shafts.
You can get a decent box with a common kit, it just won't be like Jeff has I will guarantee you that.
BTW, if the worm nut is upside down, don't worry about it you can fix it. There are well known rebuilders out there that do that purposely because they are too cheap to buy new gears when the box needs them and ship out junk- but that's a whole 'nother story I won't get into. As I said in another thread today I am getting too old to try and change mindsets out there anymore. You can do it the right way or the get by way but you're the guy who controls it.
Good luck. If you need more pictures I can still post them.... for now until my PB account expires.
Beam TW is good but not good enough for this job- not if you want to build it the best way possible- same for the bushings, I used to machine them but now have them made to my spec and I final fit them to the shafts.
You can get a decent box with a common kit, it just won't be like Jeff has I will guarantee you that.
BTW, if the worm nut is upside down, don't worry about it you can fix it. There are well known rebuilders out there that do that purposely because they are too cheap to buy new gears when the box needs them and ship out junk- but that's a whole 'nother story I won't get into. As I said in another thread today I am getting too old to try and change mindsets out there anymore. You can do it the right way or the get by way but you're the guy who controls it.
Good luck. If you need more pictures I can still post them.... for now until my PB account expires.
Thread Starter
Burning Brakes
Joined: Dec 2005
Posts: 1,164
Likes: 224
From: Pawleys Island, SC
Ok so my next question is, since you had the worm apart, did you assemble it in the correct orientation? Looking at the teeth they should taper down, the wide part at the top. If you assembled it backwards or upside down you will have to take it apart and redo it. 27 bearing ***** per circuit. You can reuse the seals if you like but I wouldn't. I don't like pushing shafts through lips seals more then once. You will need a new gasket as well.
Beam TW is good but not good enough for this job- not if you want to build it the best way possible- same for the bushings, I used to machine them but now have them made to my spec and I final fit them to the shafts.
You can get a decent box with a common kit, it just won't be like Jeff has I will guarantee you that.
BTW, if the worm nut is upside down, don't worry about it you can fix it. There are well known rebuilders out there that do that purposely because they are too cheap to buy new gears when the box needs them and ship out junk- but that's a whole 'nother story I won't get into. As I said in another thread today I am getting too old to try and change mindsets out there anymore. You can do it the right way or the get by way but you're the guy who controls it.
Good luck. If you need more pictures I can still post them.... for now until my PB account expires.
Beam TW is good but not good enough for this job- not if you want to build it the best way possible- same for the bushings, I used to machine them but now have them made to my spec and I final fit them to the shafts.
You can get a decent box with a common kit, it just won't be like Jeff has I will guarantee you that.
BTW, if the worm nut is upside down, don't worry about it you can fix it. There are well known rebuilders out there that do that purposely because they are too cheap to buy new gears when the box needs them and ship out junk- but that's a whole 'nother story I won't get into. As I said in another thread today I am getting too old to try and change mindsets out there anymore. You can do it the right way or the get by way but you're the guy who controls it.
Good luck. If you need more pictures I can still post them.... for now until my PB account expires.
Racer
Joined: Aug 2013
Posts: 363
Likes: 24
From: Brigantine NJ USA
Revitup,
Loosen up both the lash adjuster screw then the worm adjuster. Then readjust both while the whole unit is assembled. You are taking all torque measurement from the Worm Gear shaft, which is what is connected to the steering wheel column. First tighten the worm adjuster until you achieve 4-7 pound inches. I set mine to about 5 to 6. Then I tighten the sector lash screw another 8-9 to have a combined total torque of about 14 pound-inch (not more than 14) while going over the on center high point. That will get you well into the ballpark.
Here a link to my post https://www.corvetteforum.com/forums...nd-adjust.html
My box was recently rebuilt by a local Corvette place they just didn’t adjust it properly. So with that said I reused the seals and gasket and do not have any leaks.
BTW as you said you “The car drove fine” so your box like mine may not be totally worn and ready for a complete over haul.
But as Gary said make sure that your ball nut rack orientation is correct. Maybe he will post a picture.
Rick
Loosen up both the lash adjuster screw then the worm adjuster. Then readjust both while the whole unit is assembled. You are taking all torque measurement from the Worm Gear shaft, which is what is connected to the steering wheel column. First tighten the worm adjuster until you achieve 4-7 pound inches. I set mine to about 5 to 6. Then I tighten the sector lash screw another 8-9 to have a combined total torque of about 14 pound-inch (not more than 14) while going over the on center high point. That will get you well into the ballpark.
Here a link to my post https://www.corvetteforum.com/forums...nd-adjust.html
My box was recently rebuilt by a local Corvette place they just didn’t adjust it properly. So with that said I reused the seals and gasket and do not have any leaks.
BTW as you said you “The car drove fine” so your box like mine may not be totally worn and ready for a complete over haul.
But as Gary said make sure that your ball nut rack orientation is correct. Maybe he will post a picture.
Rick
Last edited by RickDett; Nov 16, 2017 at 05:24 PM. Reason: Meant to say Worm Gear Shaft NOT the sector shaft (pitman shaft)
Tech Contributor
Joined: Aug 1999
Posts: 15,205
Likes: 4,034
From: Connecticut, USA
Rick 14 in/lb is on the high side for total lash.
Here is a worm assembly. Look and you will see the input side is to the left, the teeth taper down to get tighter.

I recommend you remove the gears and look at them again to make sure this is correct. Then the next question is did you separate 27 ***** per circuit, it might be possible to add one more but certainly possible to have less. You can't move forward until you get the worm correct.
With a beam TW you will not see the way the preload sets up on the bearings. These bearing are not high precision bearings, they never were but correctly setup the preload drag will be smooth. I have read plenty on threads on forums where the advice was that it was acceptable to have 2-3 in/lb "chop" in the drag. I think that is up to the rebuilder, I would never accept that reading but plenty do. Over time the radius on the ball screw where the bearings ride changes from acidic grease. The old grease absorbs moisture and over time will attack the gears. One of the first things to check is the preload on the bearings and I always use new bearings. It should be dead smooth at 5 in/lb locked. 1-3, 3-5, or whatever is not what I would use.
Once you have the worm correct install it and lock in the preload at 5in/lb. Center the worm and install the sector (pitman shaft), assemble the cover, no seals anywhere, and see where your lash is. You start on one end at 5 in/lb, on center adjust it to 12-12.5 in/lb and it should drop off again off center. If it's tight on center you have too much lash, back it off. One NOTE: I have read here over the year advice on adjusting these boxes. That advice of tightening up and backing it off a 1/4 turn is incorrect and you will not get the correct adjustment on it. It defeats what you want to do. Bring the lash up to the 12.5 on center and lock it. check it again to see if it's the same. For road racing up to 14 is ok but puts more wear on the center sector tooth. For street use stay at 12.5 in/lb. This will bring the box back to very good dial-in but unless you fit bushings it is not going reach the max potential for the box. If it's tight on end and loose on center your gears are shot. If the lash screw is deep in the cover, say 1 thread or less, the gears are near bottoming out.
As you noted this isn't rocket science but there is a huge difference between ok and the best. That should cover you getting this box back into shape. There should be NO PLAY on center when done and no lost motion in the box on center.
Good luck
Here is a worm assembly. Look and you will see the input side is to the left, the teeth taper down to get tighter.
I recommend you remove the gears and look at them again to make sure this is correct. Then the next question is did you separate 27 ***** per circuit, it might be possible to add one more but certainly possible to have less. You can't move forward until you get the worm correct.
With a beam TW you will not see the way the preload sets up on the bearings. These bearing are not high precision bearings, they never were but correctly setup the preload drag will be smooth. I have read plenty on threads on forums where the advice was that it was acceptable to have 2-3 in/lb "chop" in the drag. I think that is up to the rebuilder, I would never accept that reading but plenty do. Over time the radius on the ball screw where the bearings ride changes from acidic grease. The old grease absorbs moisture and over time will attack the gears. One of the first things to check is the preload on the bearings and I always use new bearings. It should be dead smooth at 5 in/lb locked. 1-3, 3-5, or whatever is not what I would use.
Once you have the worm correct install it and lock in the preload at 5in/lb. Center the worm and install the sector (pitman shaft), assemble the cover, no seals anywhere, and see where your lash is. You start on one end at 5 in/lb, on center adjust it to 12-12.5 in/lb and it should drop off again off center. If it's tight on center you have too much lash, back it off. One NOTE: I have read here over the year advice on adjusting these boxes. That advice of tightening up and backing it off a 1/4 turn is incorrect and you will not get the correct adjustment on it. It defeats what you want to do. Bring the lash up to the 12.5 on center and lock it. check it again to see if it's the same. For road racing up to 14 is ok but puts more wear on the center sector tooth. For street use stay at 12.5 in/lb. This will bring the box back to very good dial-in but unless you fit bushings it is not going reach the max potential for the box. If it's tight on end and loose on center your gears are shot. If the lash screw is deep in the cover, say 1 thread or less, the gears are near bottoming out.
As you noted this isn't rocket science but there is a huge difference between ok and the best. That should cover you getting this box back into shape. There should be NO PLAY on center when done and no lost motion in the box on center.
Good luck

Thread Starter
Burning Brakes
Joined: Dec 2005
Posts: 1,164
Likes: 224
From: Pawleys Island, SC
Revitup,
Loosen up both the lash adjuster screw then the worm adjuster. Then readjust both while the whole unit is assembled. You are taking all torque measurement from the sector shaft (pitman shaft), which is what is connected to the steering wheel column. First tighten the worm adjuster until you achieve 4-7 pound inches. I set mine to about 5 to 6. Then I tighten the sector lash screw another 8-9 to have a combined total torque of about 14 pound-inch (not more than 14) while going over the on center high point. That will get you well into the ballpark.
Here a link to my post https://www.corvetteforum.com/forums...nd-adjust.html
My box was recently rebuilt by a local Corvette place they just didn’t adjust it properly. So with that said I reused the seals and gasket and do not have any leaks.
BTW as you said you “The car drove fine” so your box like mine may not be totally worn and ready for a complete over haul.
But as Gary said make sure that your ball nut rack orientation is correct. Maybe he will post a picture.
Rick
Loosen up both the lash adjuster screw then the worm adjuster. Then readjust both while the whole unit is assembled. You are taking all torque measurement from the sector shaft (pitman shaft), which is what is connected to the steering wheel column. First tighten the worm adjuster until you achieve 4-7 pound inches. I set mine to about 5 to 6. Then I tighten the sector lash screw another 8-9 to have a combined total torque of about 14 pound-inch (not more than 14) while going over the on center high point. That will get you well into the ballpark.
Here a link to my post https://www.corvetteforum.com/forums...nd-adjust.html
My box was recently rebuilt by a local Corvette place they just didn’t adjust it properly. So with that said I reused the seals and gasket and do not have any leaks.
BTW as you said you “The car drove fine” so your box like mine may not be totally worn and ready for a complete over haul.
But as Gary said make sure that your ball nut rack orientation is correct. Maybe he will post a picture.
Rick
One thing that really has me confused now is your direction to measure drag at the end of the sector shaft. Everything else I've read says take the TW readings on the worm gear shaft, using a 11/16" socket on it.
Thread Starter
Burning Brakes
Joined: Dec 2005
Posts: 1,164
Likes: 224
From: Pawleys Island, SC
Rick 14 in/lb is on the high side for total lash.
Here is a worm assembly. Look and you will see the input side is to the left, the teeth taper down to get tighter.
I recommend you remove the gears and look at them again to make sure this is correct. Then the next question is did you separate 27 ***** per circuit, it might be possible to add one more but certainly possible to have less. You can't move forward until you get the worm correct.
With a beam TW you will not see the way the preload sets up on the bearings. These bearing are not high precision bearings, they never were but correctly setup the preload drag will be smooth. I have read plenty on threads on forums where the advice was that it was acceptable to have 2-3 in/lb "chop" in the drag. I think that is up to the rebuilder, I would never accept that reading but plenty do. Over time the radius on the ball screw where the bearings ride changes from acidic grease. The old grease absorbs moisture and over time will attack the gears. One of the first things to check is the preload on the bearings and I always use new bearings. It should be dead smooth at 5 in/lb locked. 1-3, 3-5, or whatever is not what I would use.
Once you have the worm correct install it and lock in the preload at 5in/lb. Center the worm and install the sector (pitman shaft), assemble the cover, no seals anywhere, and see where your lash is. You start on one end at 5 in/lb, on center adjust it to 12-12.5 in/lb and it should drop off again off center. If it's tight on center you have too much lash, back it off. One NOTE: I have read here over the year advice on adjusting these boxes. That advice of tightening up and backing it off a 1/4 turn is incorrect and you will not get the correct adjustment on it. It defeats what you want to do. Bring the lash up to the 12.5 on center and lock it. check it again to see if it's the same. For road racing up to 14 is ok but puts more wear on the center sector tooth. For street use stay at 12.5 in/lb. This will bring the box back to very good dial-in but unless you fit bushings it is not going reach the max potential for the box. If it's tight on end and loose on center your gears are shot. If the lash screw is deep in the cover, say 1 thread or less, the gears are near bottoming out.
As you noted this isn't rocket science but there is a huge difference between ok and the best. That should cover you getting this box back into shape. There should be NO PLAY on center when done and no lost motion in the box on center.
Good luck
Here is a worm assembly. Look and you will see the input side is to the left, the teeth taper down to get tighter.
I recommend you remove the gears and look at them again to make sure this is correct. Then the next question is did you separate 27 ***** per circuit, it might be possible to add one more but certainly possible to have less. You can't move forward until you get the worm correct.
With a beam TW you will not see the way the preload sets up on the bearings. These bearing are not high precision bearings, they never were but correctly setup the preload drag will be smooth. I have read plenty on threads on forums where the advice was that it was acceptable to have 2-3 in/lb "chop" in the drag. I think that is up to the rebuilder, I would never accept that reading but plenty do. Over time the radius on the ball screw where the bearings ride changes from acidic grease. The old grease absorbs moisture and over time will attack the gears. One of the first things to check is the preload on the bearings and I always use new bearings. It should be dead smooth at 5 in/lb locked. 1-3, 3-5, or whatever is not what I would use.
Once you have the worm correct install it and lock in the preload at 5in/lb. Center the worm and install the sector (pitman shaft), assemble the cover, no seals anywhere, and see where your lash is. You start on one end at 5 in/lb, on center adjust it to 12-12.5 in/lb and it should drop off again off center. If it's tight on center you have too much lash, back it off. One NOTE: I have read here over the year advice on adjusting these boxes. That advice of tightening up and backing it off a 1/4 turn is incorrect and you will not get the correct adjustment on it. It defeats what you want to do. Bring the lash up to the 12.5 on center and lock it. check it again to see if it's the same. For road racing up to 14 is ok but puts more wear on the center sector tooth. For street use stay at 12.5 in/lb. This will bring the box back to very good dial-in but unless you fit bushings it is not going reach the max potential for the box. If it's tight on end and loose on center your gears are shot. If the lash screw is deep in the cover, say 1 thread or less, the gears are near bottoming out.
As you noted this isn't rocket science but there is a huge difference between ok and the best. That should cover you getting this box back into shape. There should be NO PLAY on center when done and no lost motion in the box on center.
Good luck
Tech Contributor
Joined: Aug 1999
Posts: 15,205
Likes: 4,034
From: Connecticut, USA
Yes they will but as soon as you rotate them it will feel like a box of rocks. The first time I saw this I thought the rebuilder just made a mistake but once I correctly setup the worm and tested it found out the gears were junk and this attempt was just a cheap, stupid attempt to sell a box, many times over I might add as I have seen it a lot. Then there are the guys who welded worn out, grooved teeth and shipped them out, yet another welded a rag to the input. See my point here?
When you are done, the box should be smooth, no binding, no lost motion, no loose center and no BS. Make sure the rag joint is good, the ball stud to arm is tight, alignment and suspension parts good, all will contribute to loose steering and false accusations these boxes were no good.
When you are done, the box should be smooth, no binding, no lost motion, no loose center and no BS. Make sure the rag joint is good, the ball stud to arm is tight, alignment and suspension parts good, all will contribute to loose steering and false accusations these boxes were no good.
Racer
Joined: Aug 2013
Posts: 363
Likes: 24
From: Brigantine NJ USA
You are taking all torque measurement from the Worm Gear Shaft, which is what is connected to the steering wheel column. And yes using a 11/16" socket on it.
Rick

Last edited by RickDett; Nov 16, 2017 at 05:40 PM.
Tech Contributor
Joined: Aug 1999
Posts: 15,205
Likes: 4,034
From: Connecticut, USA
That is the correct TW type to use. Look at your lash screw, it has no threads showing so the gears are lower in the box and probably near the end. Now there is an exception to this, that being some castings setup lower. That is a whole different check and setup procedure but one I am not going into.

