When you click on links to various merchants on this site and make a purchase, this can result in this site earning a commission. Affiliate programs and affiliations include, but are not limited to, the eBay Partner Network.
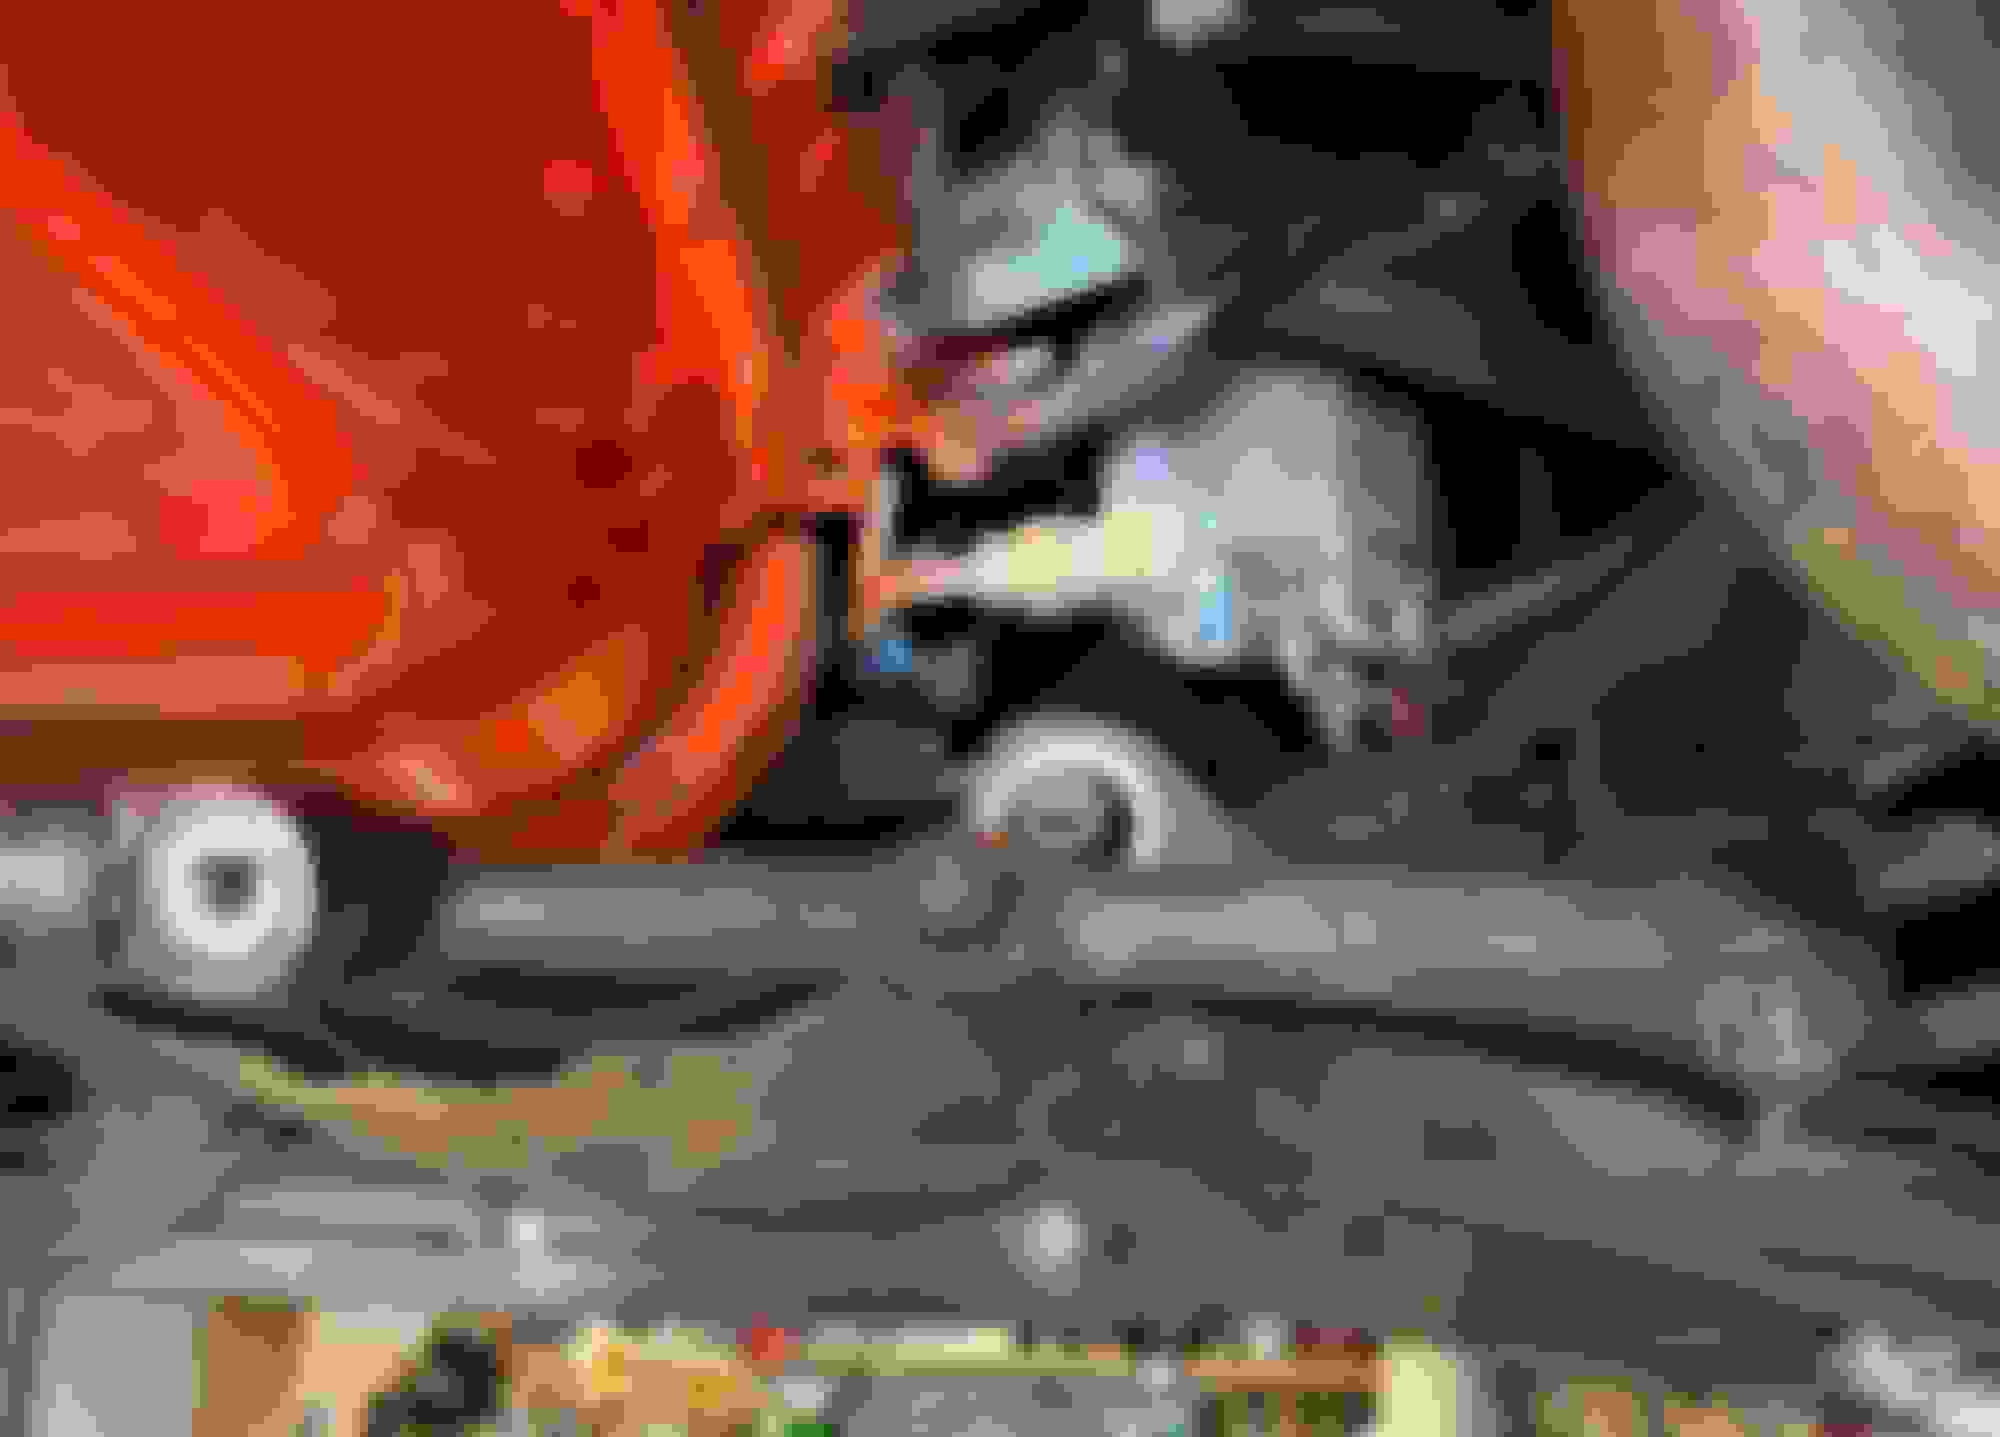
Hmmm something’s missing, can’t quite put my finger on it…
Seriously, has anyone ever tried to slip a new one in there without removing the lower arm? I was thinking to use a spring compressor to take the tension off and allow the arm to re-center.
What do you suppose made it back itself off in the first place?
Car still drove fine, a very slight pull to the right, and I had been noticing a rubbing feel in the wheel when turning left. I thought it might have been something in the column but now I see where the lower arm shifted backwards and the tie rod adjusting bolt was rubbing on the A-arm. I found this whole thing when I had the car on my lift changing oil and inspecting.
I don’t think the rubber disintegrated in my case; it was in good shape last time I looked at it. I think the bolt somehow came off and the bushing worked it’s way out.
Both the inner and outer shell of the bushing are still there. Rubber is attached to those, that's how they work. But yet the rubber is gone.
Easiest thing to do would be to slide a poly bushing in there, it needs the existing shells. But you would still have to clean them up and make them smooth.
Not sure how you would do that with the shaft still in there, much less still on the car.
The rubber only has a certain amount of flex before it tears. It is just barely enough to handle the 2-3" of normal suspension movement. So the rubber must have ZERO torque on it at ride height.
Solution #1: Is to torque a rubber bushing at ride height
Solution #2: Confirm that the inner sleeve can rotate on the shaft when installed, during installation, with no lock bolt. The inner shell must NOT be a press fit. Many of these fit on the shaft too tightly these days with age, corrosion, import parts, etc. If it cannot rotate with the bolt loose, it will already have some twist on it at ride height, and it will fail. There are a couple of instances of this online where the rubber bushing "tore" itself loose from the shells. This is the most likely reason for rubber / metal separation failure. Like doorgunner, I too ran into this shell too tight on the a-arm shafts situation, on the front suspension.
I also just recently assembled my Trailing arms and did the alignment at ride height, (D-height=2.5") but with the car up in the air. No wheels, no shocks, no spring. I torqued the bushing tight. The trailing arms are pretty heavy (35#?) and without support and under it's own weight, it would droop, but just barely droop, to full shock extension height, and the rubber bushing would not twist any farther, and would not let the T/A drop any further, even when I pressed down on it, it did not make much difference in how far down it wanted to go. It was at the bushing deflection limit. A lot more force would have be required to push it down farther, and it would have torn the bushings. If it had been some kind of bearing, it could have dropped at least another inch until the T/A hit the frame pocket. I could still shove my finger under the T/A in the frame shim pocket. So it would droop 3.5" and not go any farther.
Last edited by leigh1322; Sep 28, 2023 at 02:25 PM.
and a thorough inspection of the others.. as above maybe they were tightened in the air.. ripping.. or maybe time to change them all.. it is amazing what fresh bushing do for ride.. time for new springs while there ? ball joints , idler arm ..
Had the same thing happen to a lower control arm bushing, I could never push a new rubber membrane in there, could not figure out how to get the thing to center. ran with a bolt and washer for quite a while with no problem, straight down the road, not unusually tire wear. Then, I found out the upper control are bushing what sticking an inch out! how does it work its way out I don't know. Had all bushings replaced with new finally. Now, for the camber. It's always something, as Rosanne Rosanna Danna used to say........
Just wanted to follow up: thanks to 1860army’s inspiration, I went after it and fixed it with the control arm still in the car.
With the rubber part gone, I was able to drive out the outer shell from the other side. The inner shell was more quirky; it wasn’t frozen on the shaft because I could spin it freely, yet I couldn’t pull it off the shaft. I was able to get it by again, driving it off from the other side.
Cleaned the shaft as best I could and applied some anti-seize to it.
Then, with Ann assortment of straps and turnbuckles, I was able to re-center the bushing hole on the shaft.
The bushing went in the freezer overnight. I was able to drive it home in the control arm with a large socket and a 5lb hammer.
new bolt, lock washer, cup washer and torqued everything in the ground, all is good. I torqued the driver’s side as well, as they needed a few turns to reach torque.
Back in the road for around $30. ( had to buy complete sets of bushings and hardware, else it would have been even less $)
Drives quite nice, right pull is gone as well as rubbing during turns.
Drive safe, all!









 What’s wrong in this picture?














 ball joints , idler arm ..