When you click on links to various merchants on this site and make a purchase, this can result in this site earning a commission. Affiliate programs and affiliations include, but are not limited to, the eBay Partner Network.
This guy GETS IT! And you're right; the Fox bod is a hoot, and so is the early Viper. Fantastic car!
To the rest of you guys who gave props, thanks! I can't wait to move forward but likely the most I'll get done any time soon is drilling the arms, spring and making load spreading plates. I'm heading to Germany on Friday for a week, so...
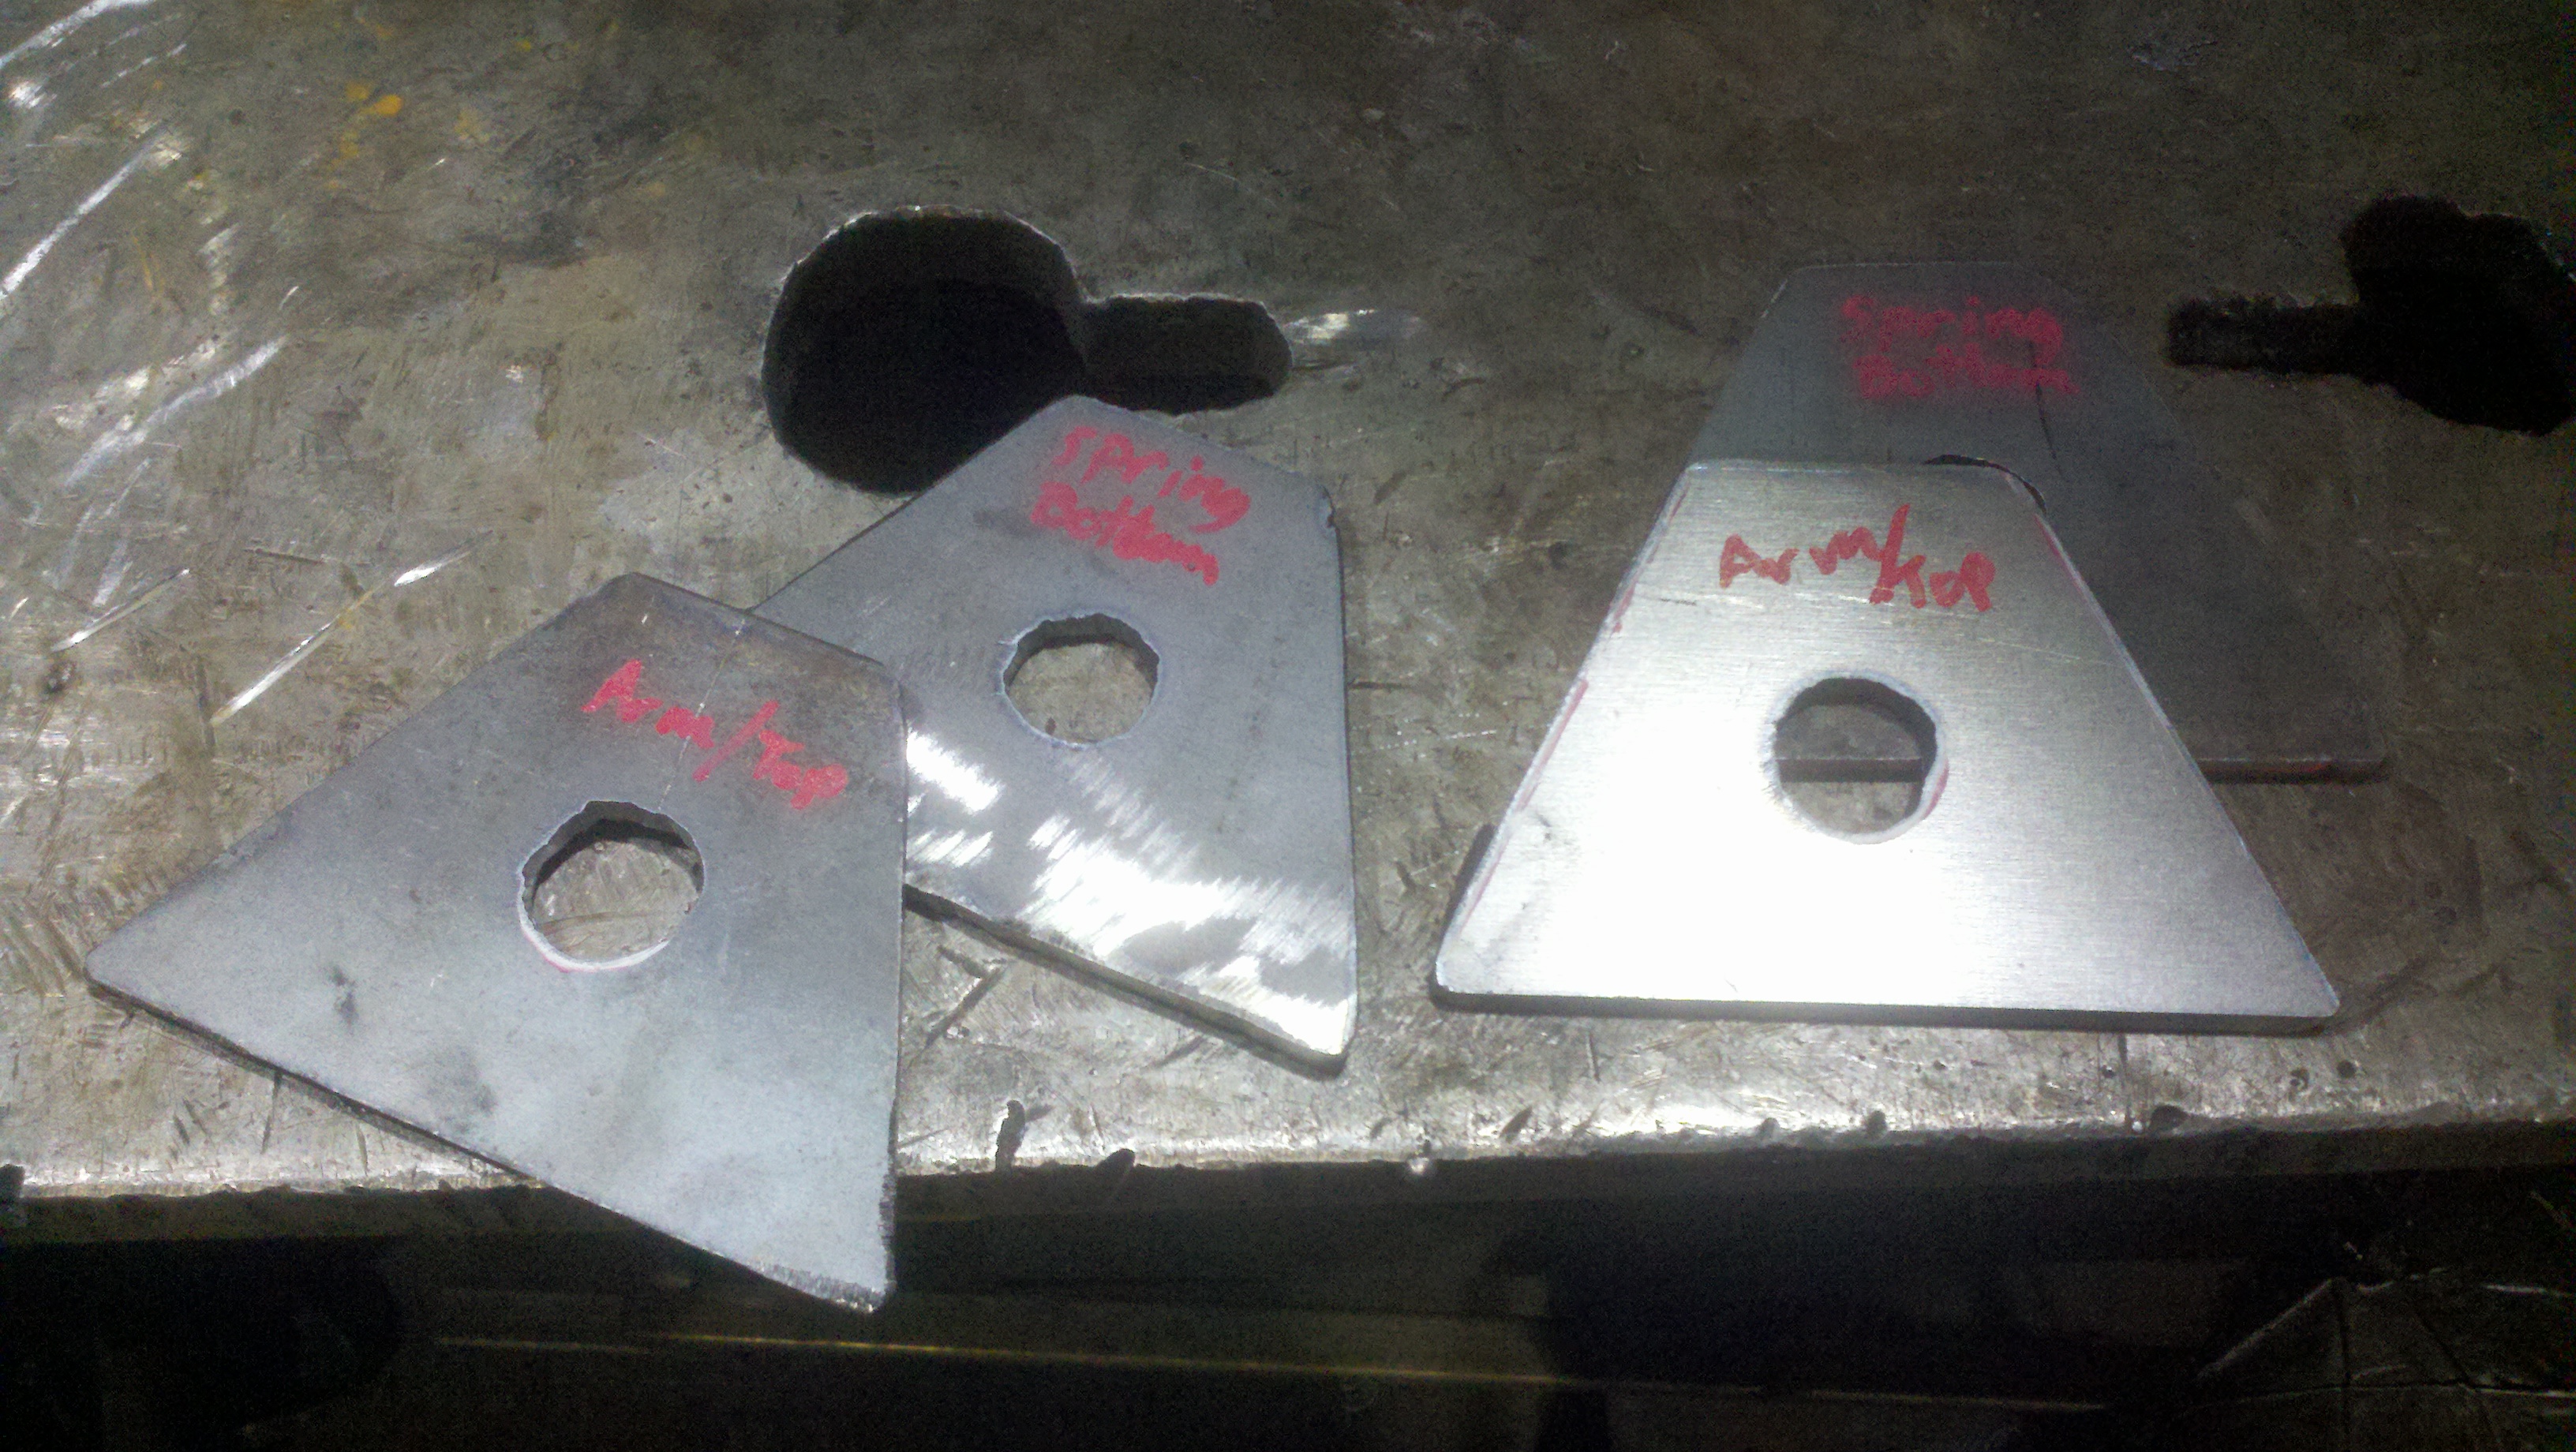
Stayed late at work tonight and got some more done. Tonight my goal was to get all the fab work done required for the "inverted mono leaf suspension". To accomplish this, I needed to:
Drill the control arms
Drill the spring
Cut out plates for load distribution (big "washers")
Cut out rubber cushions
Size hardware
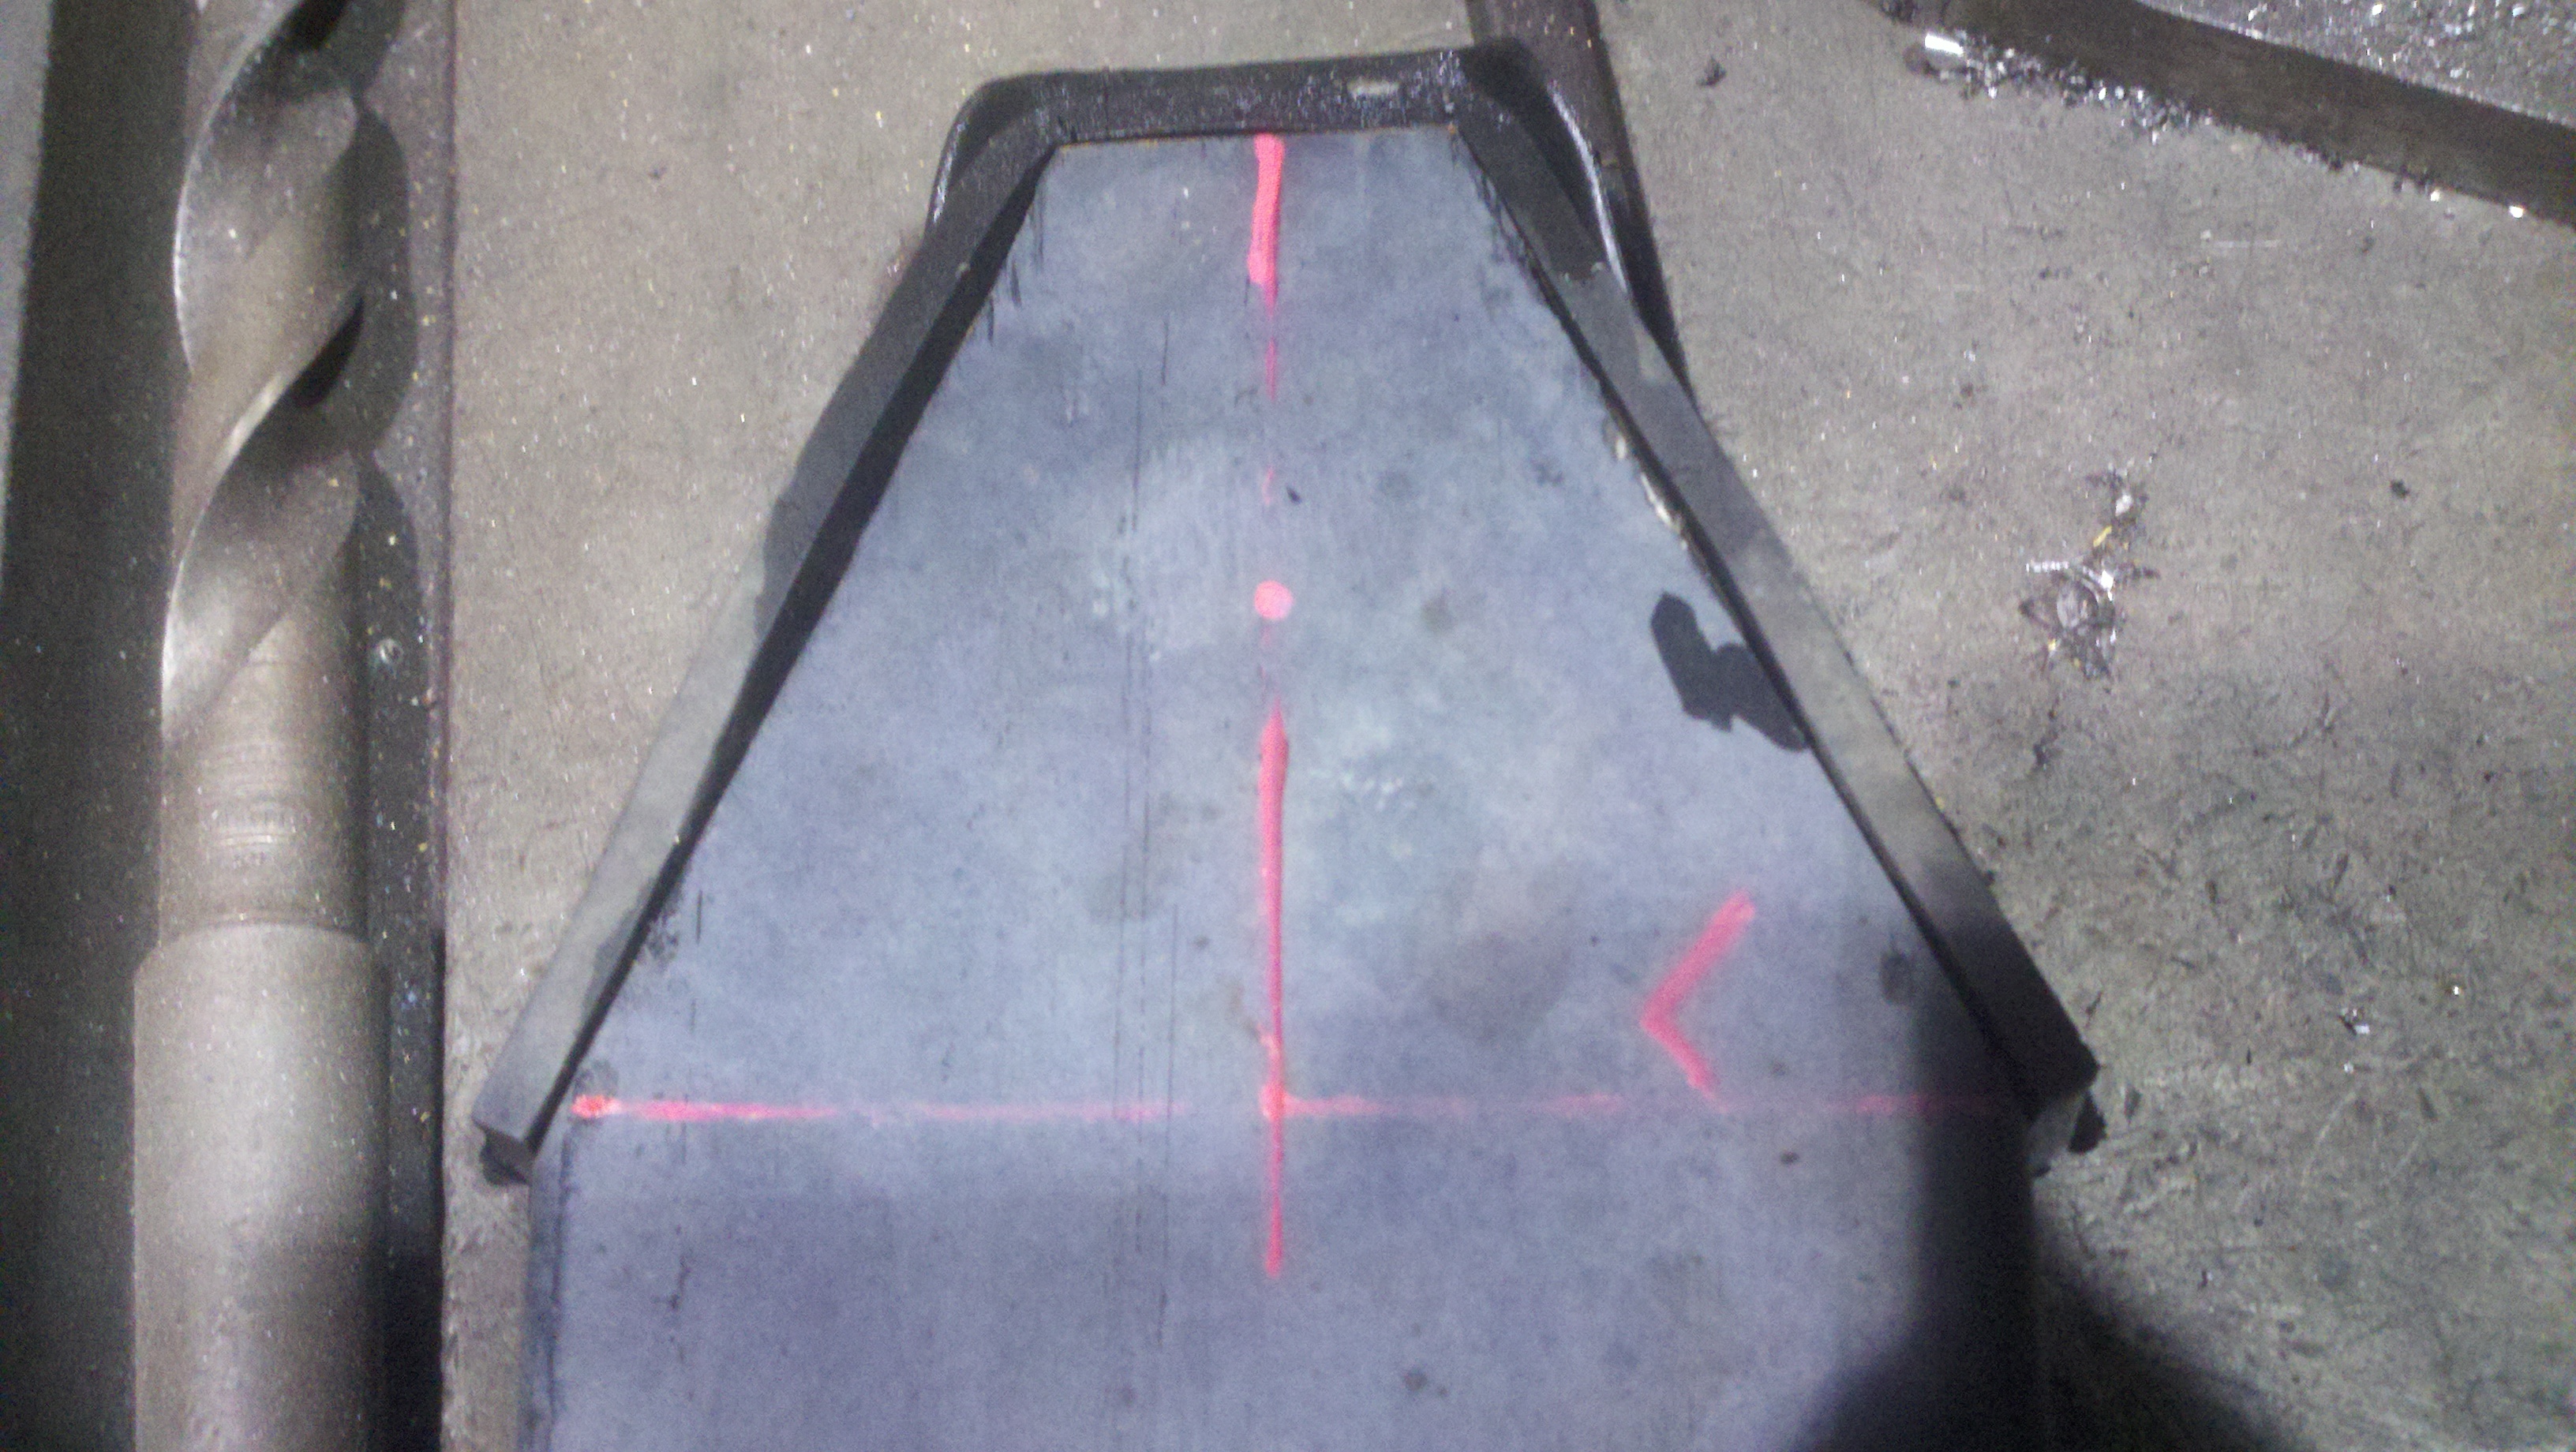
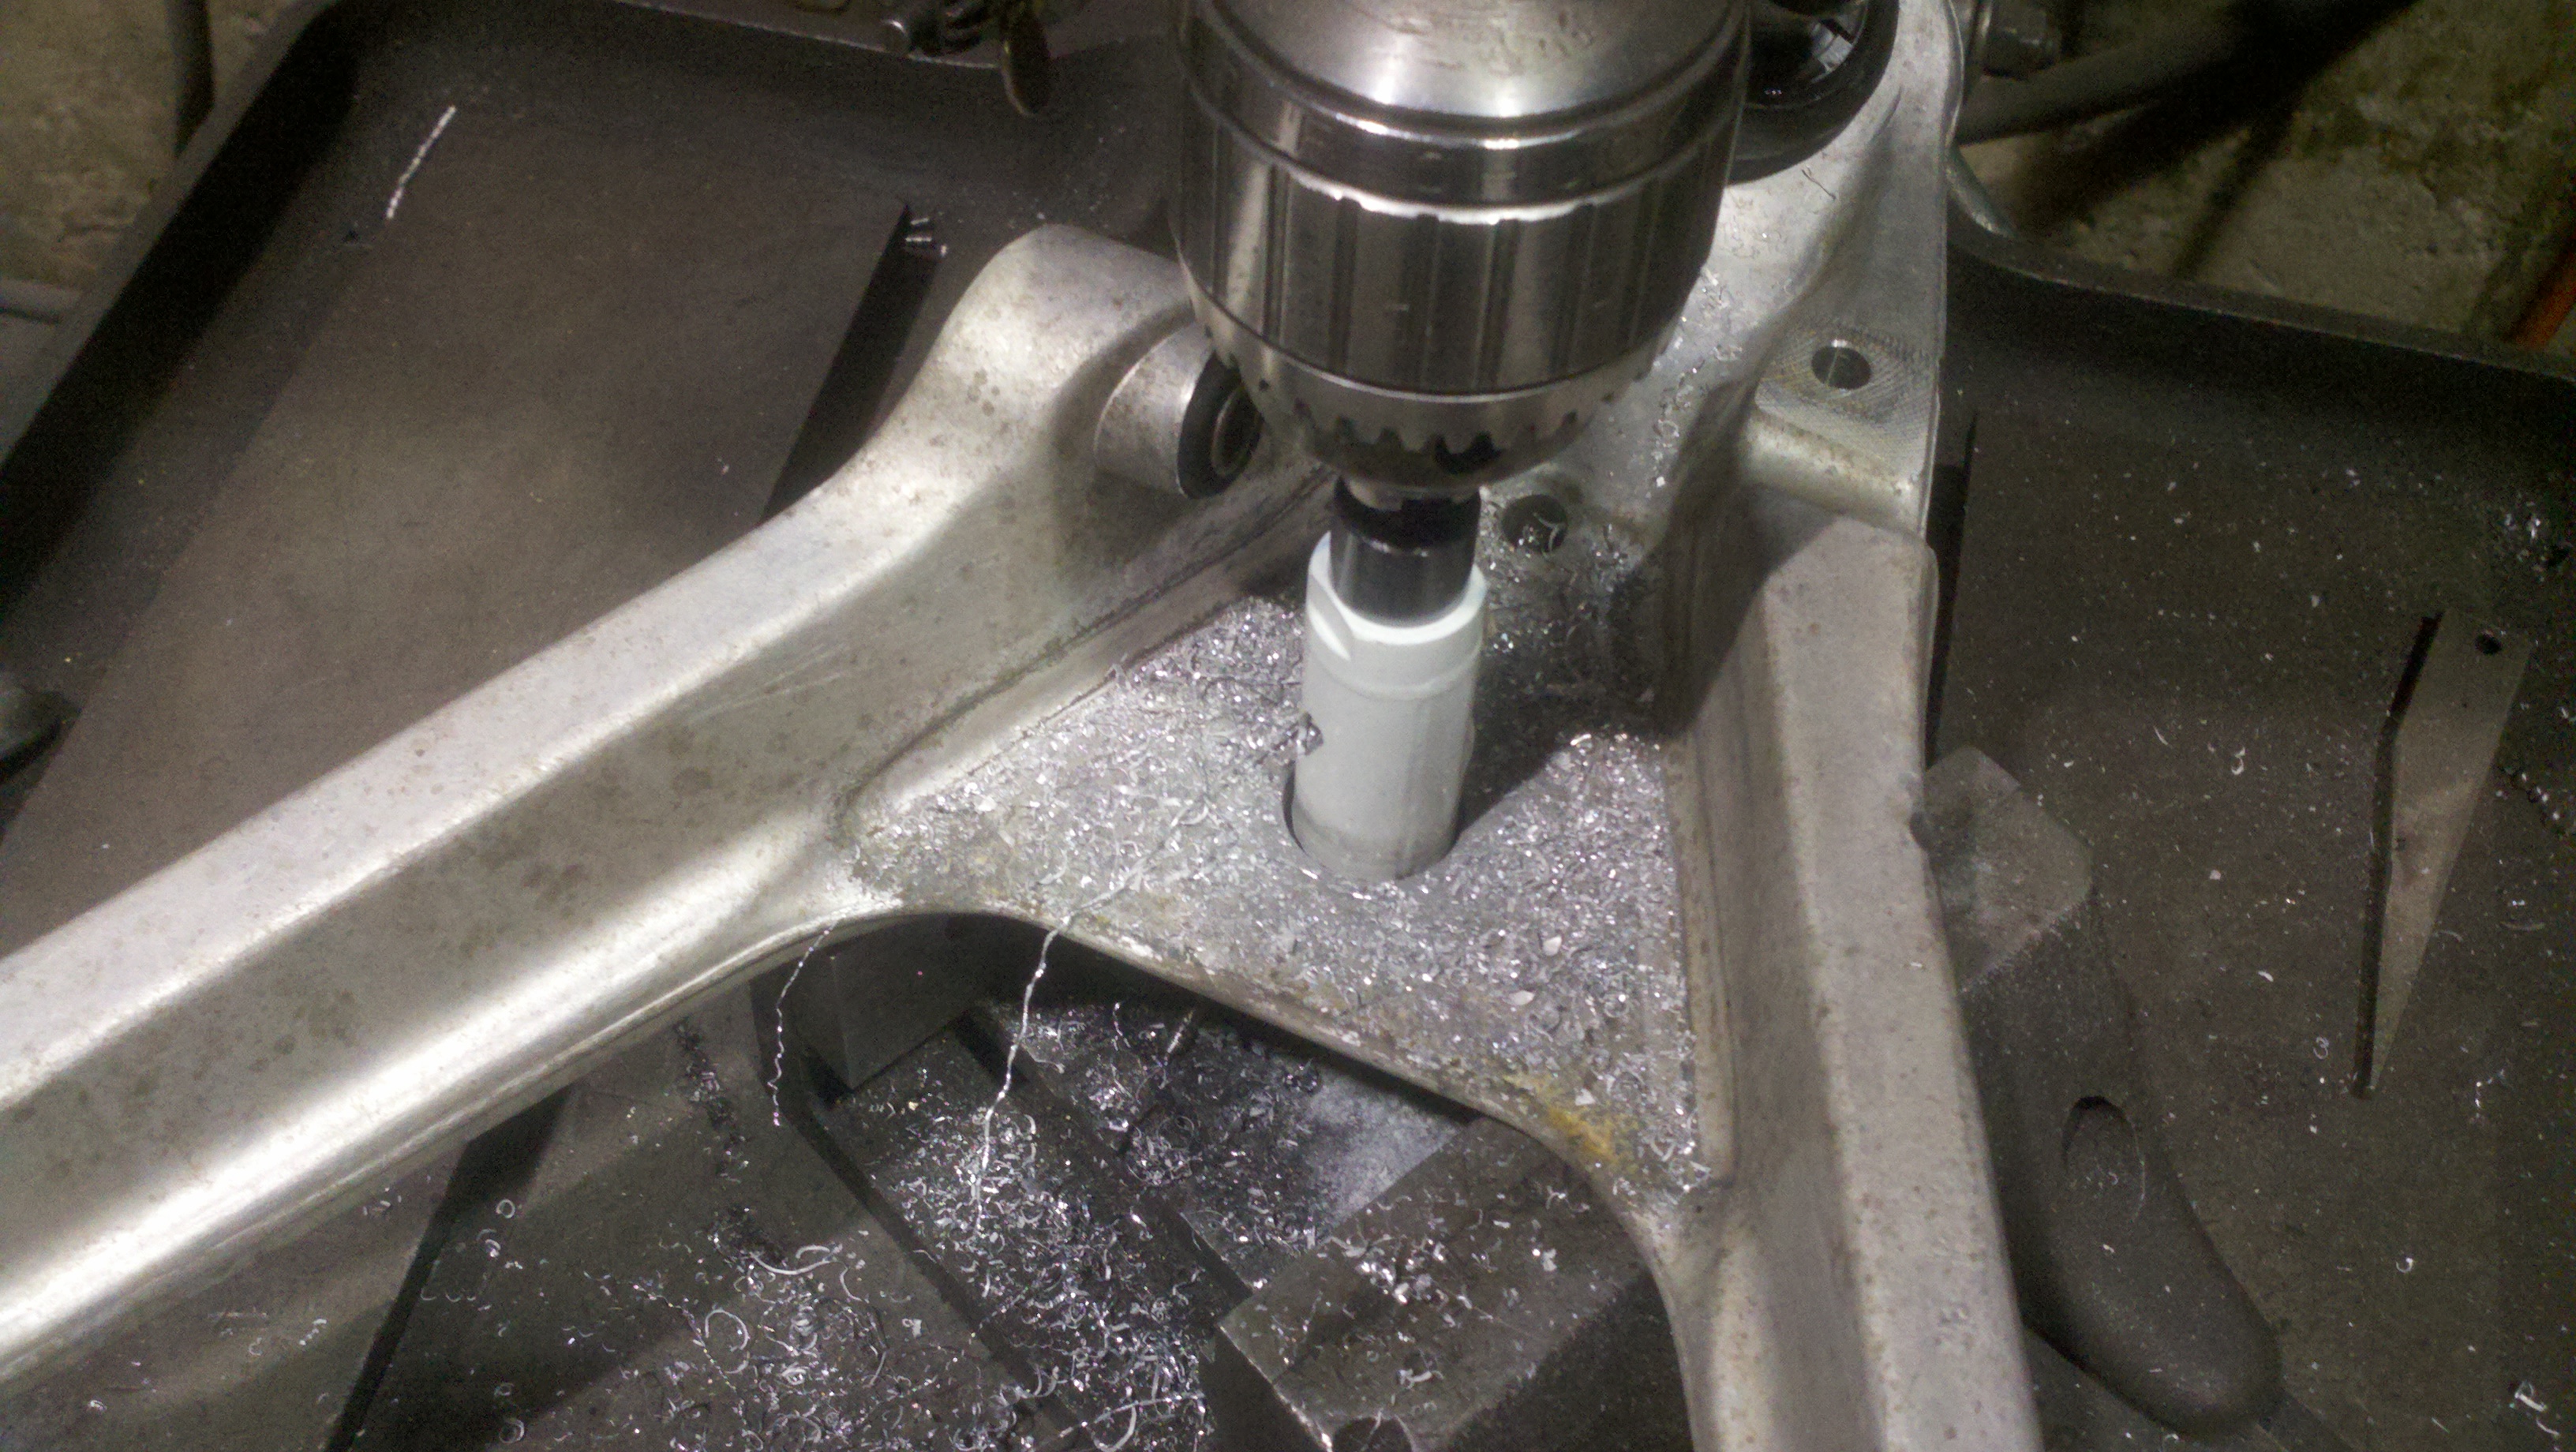
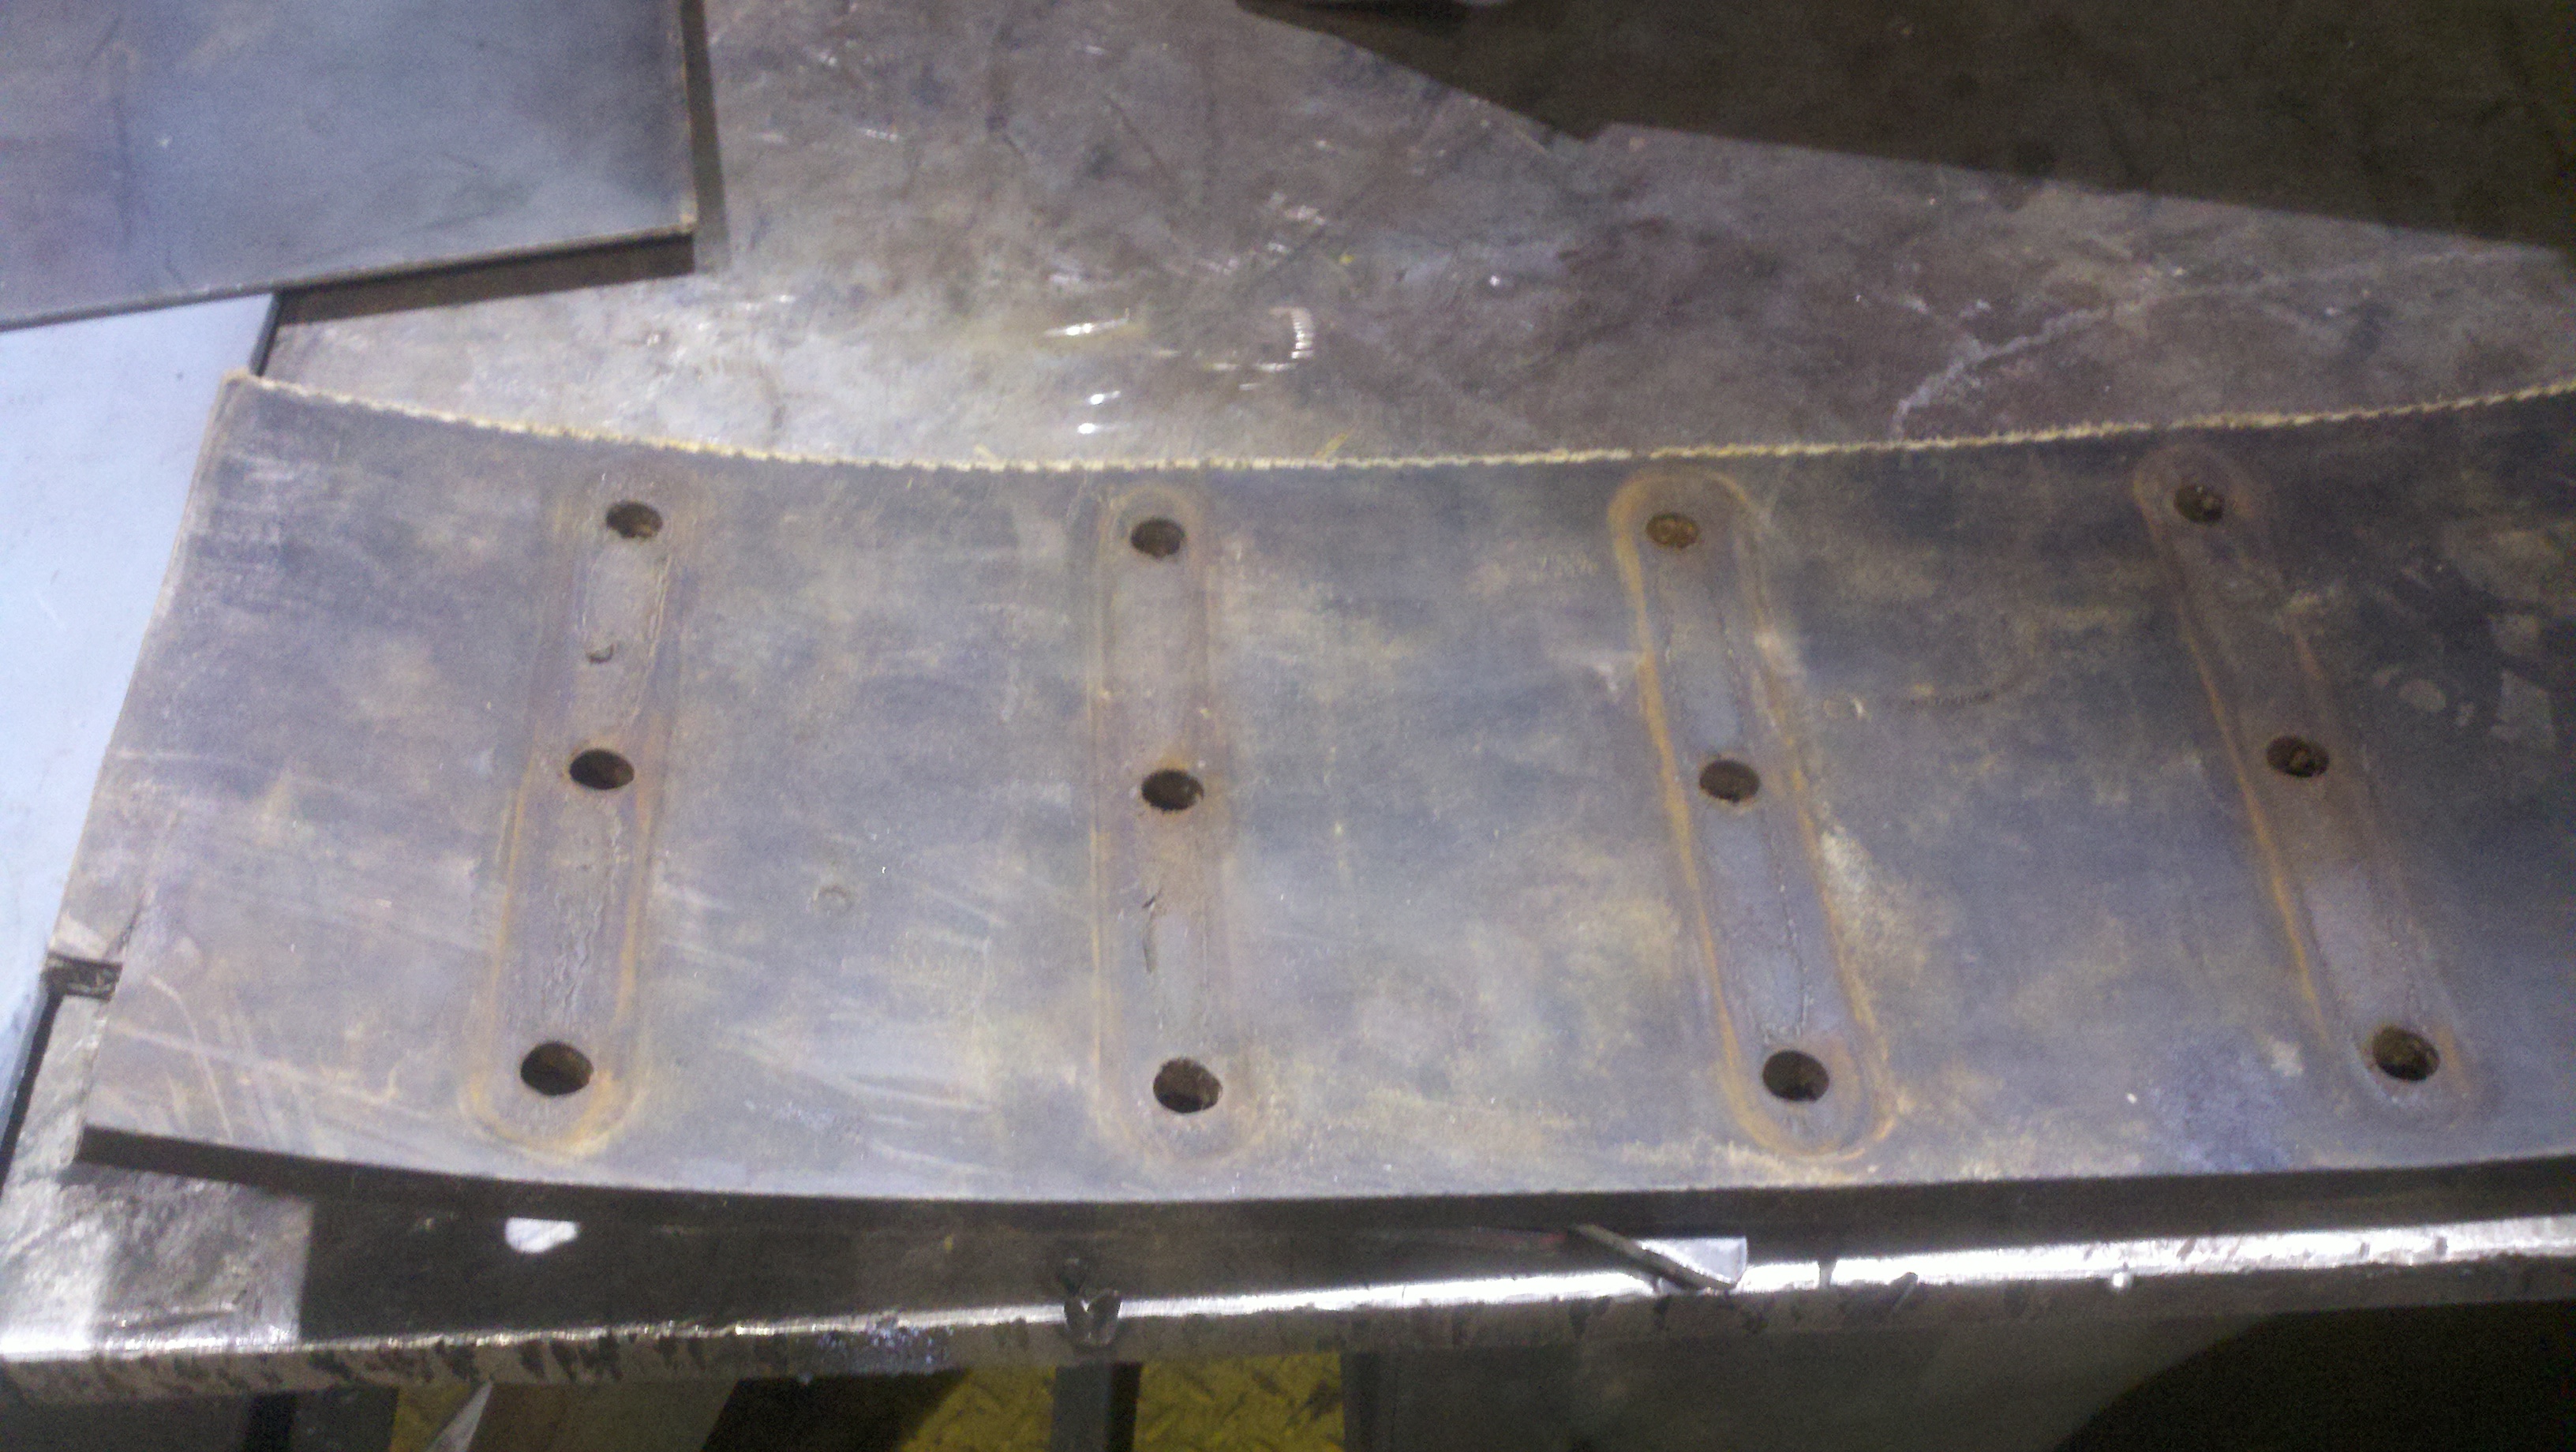
I started with the spring. I figured I should put the hole in the most optimal looking spot on the spring...then align the other holes (in the arms and washers) accordingly. First, I located "center" on the end of the spring.
Then I started drilling...wondering how it would work or turn out...
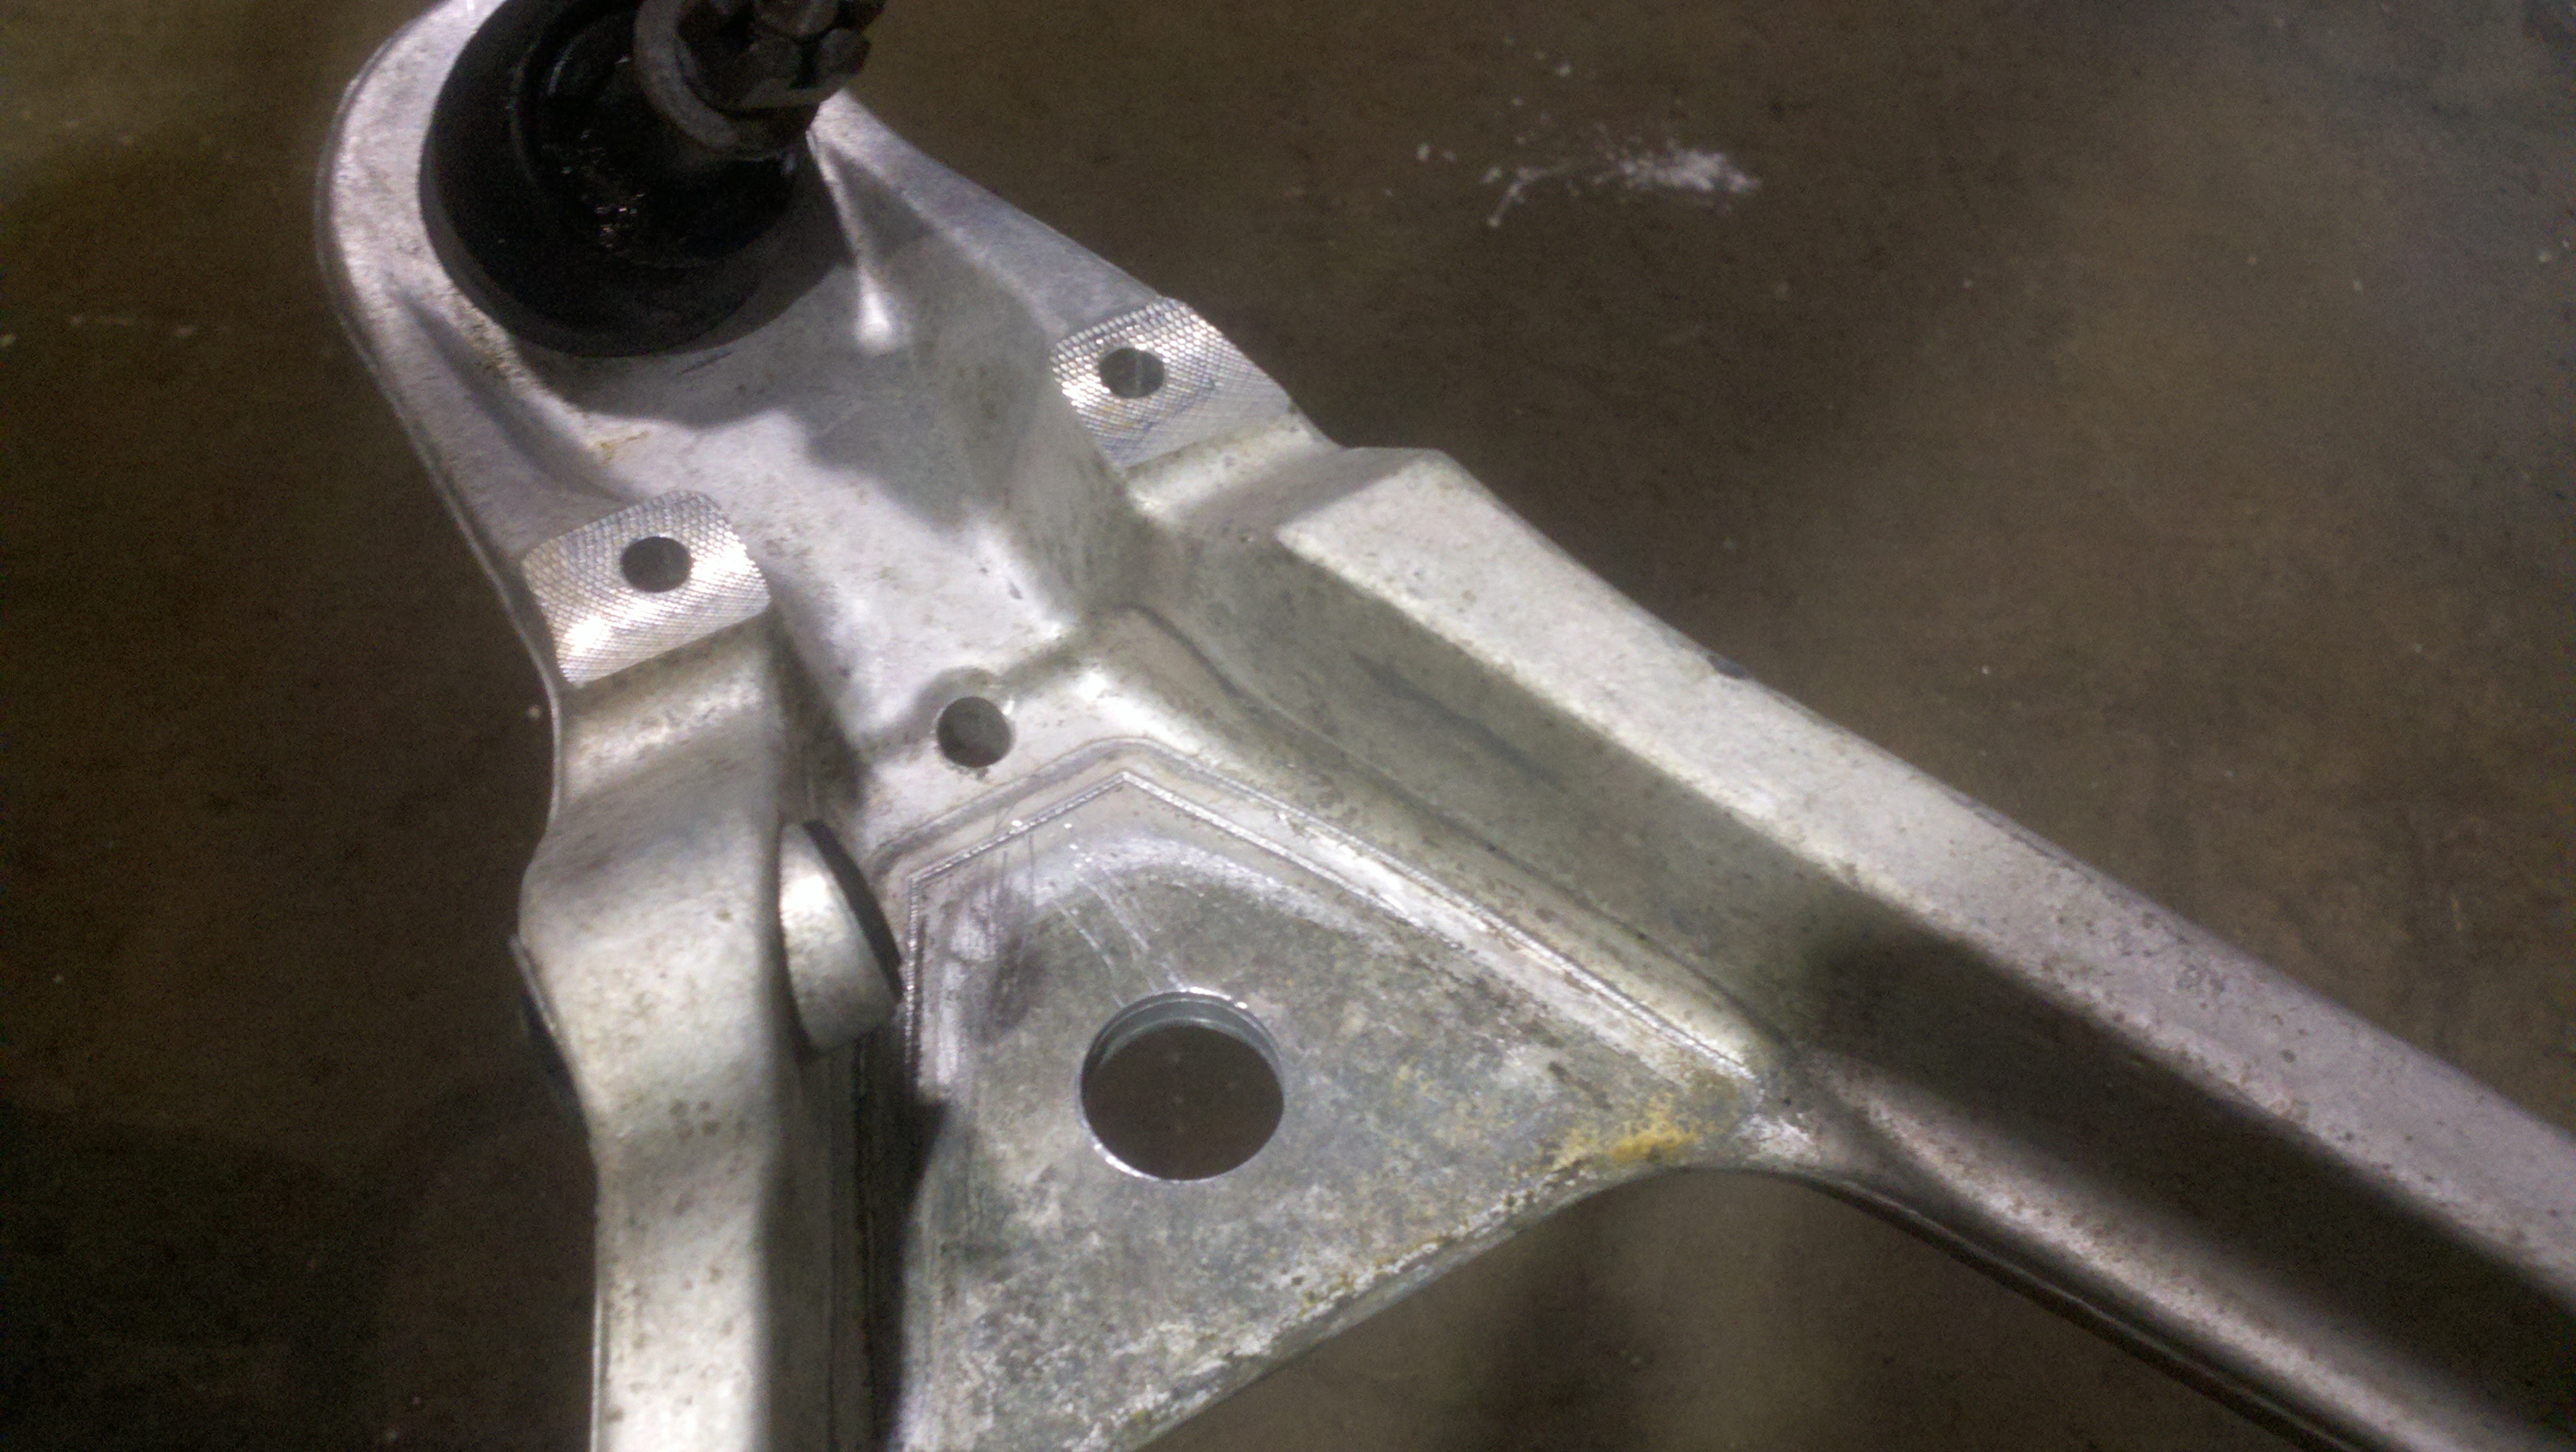
In fact it turned out really well! The Hole saw did an awesome job drilling the spring; left a very nice finish that I'm not worried about cracking, but I'll coat with resin anyway.
Here is the view from the bottom, where the hole saw cut through the rubber pad too.
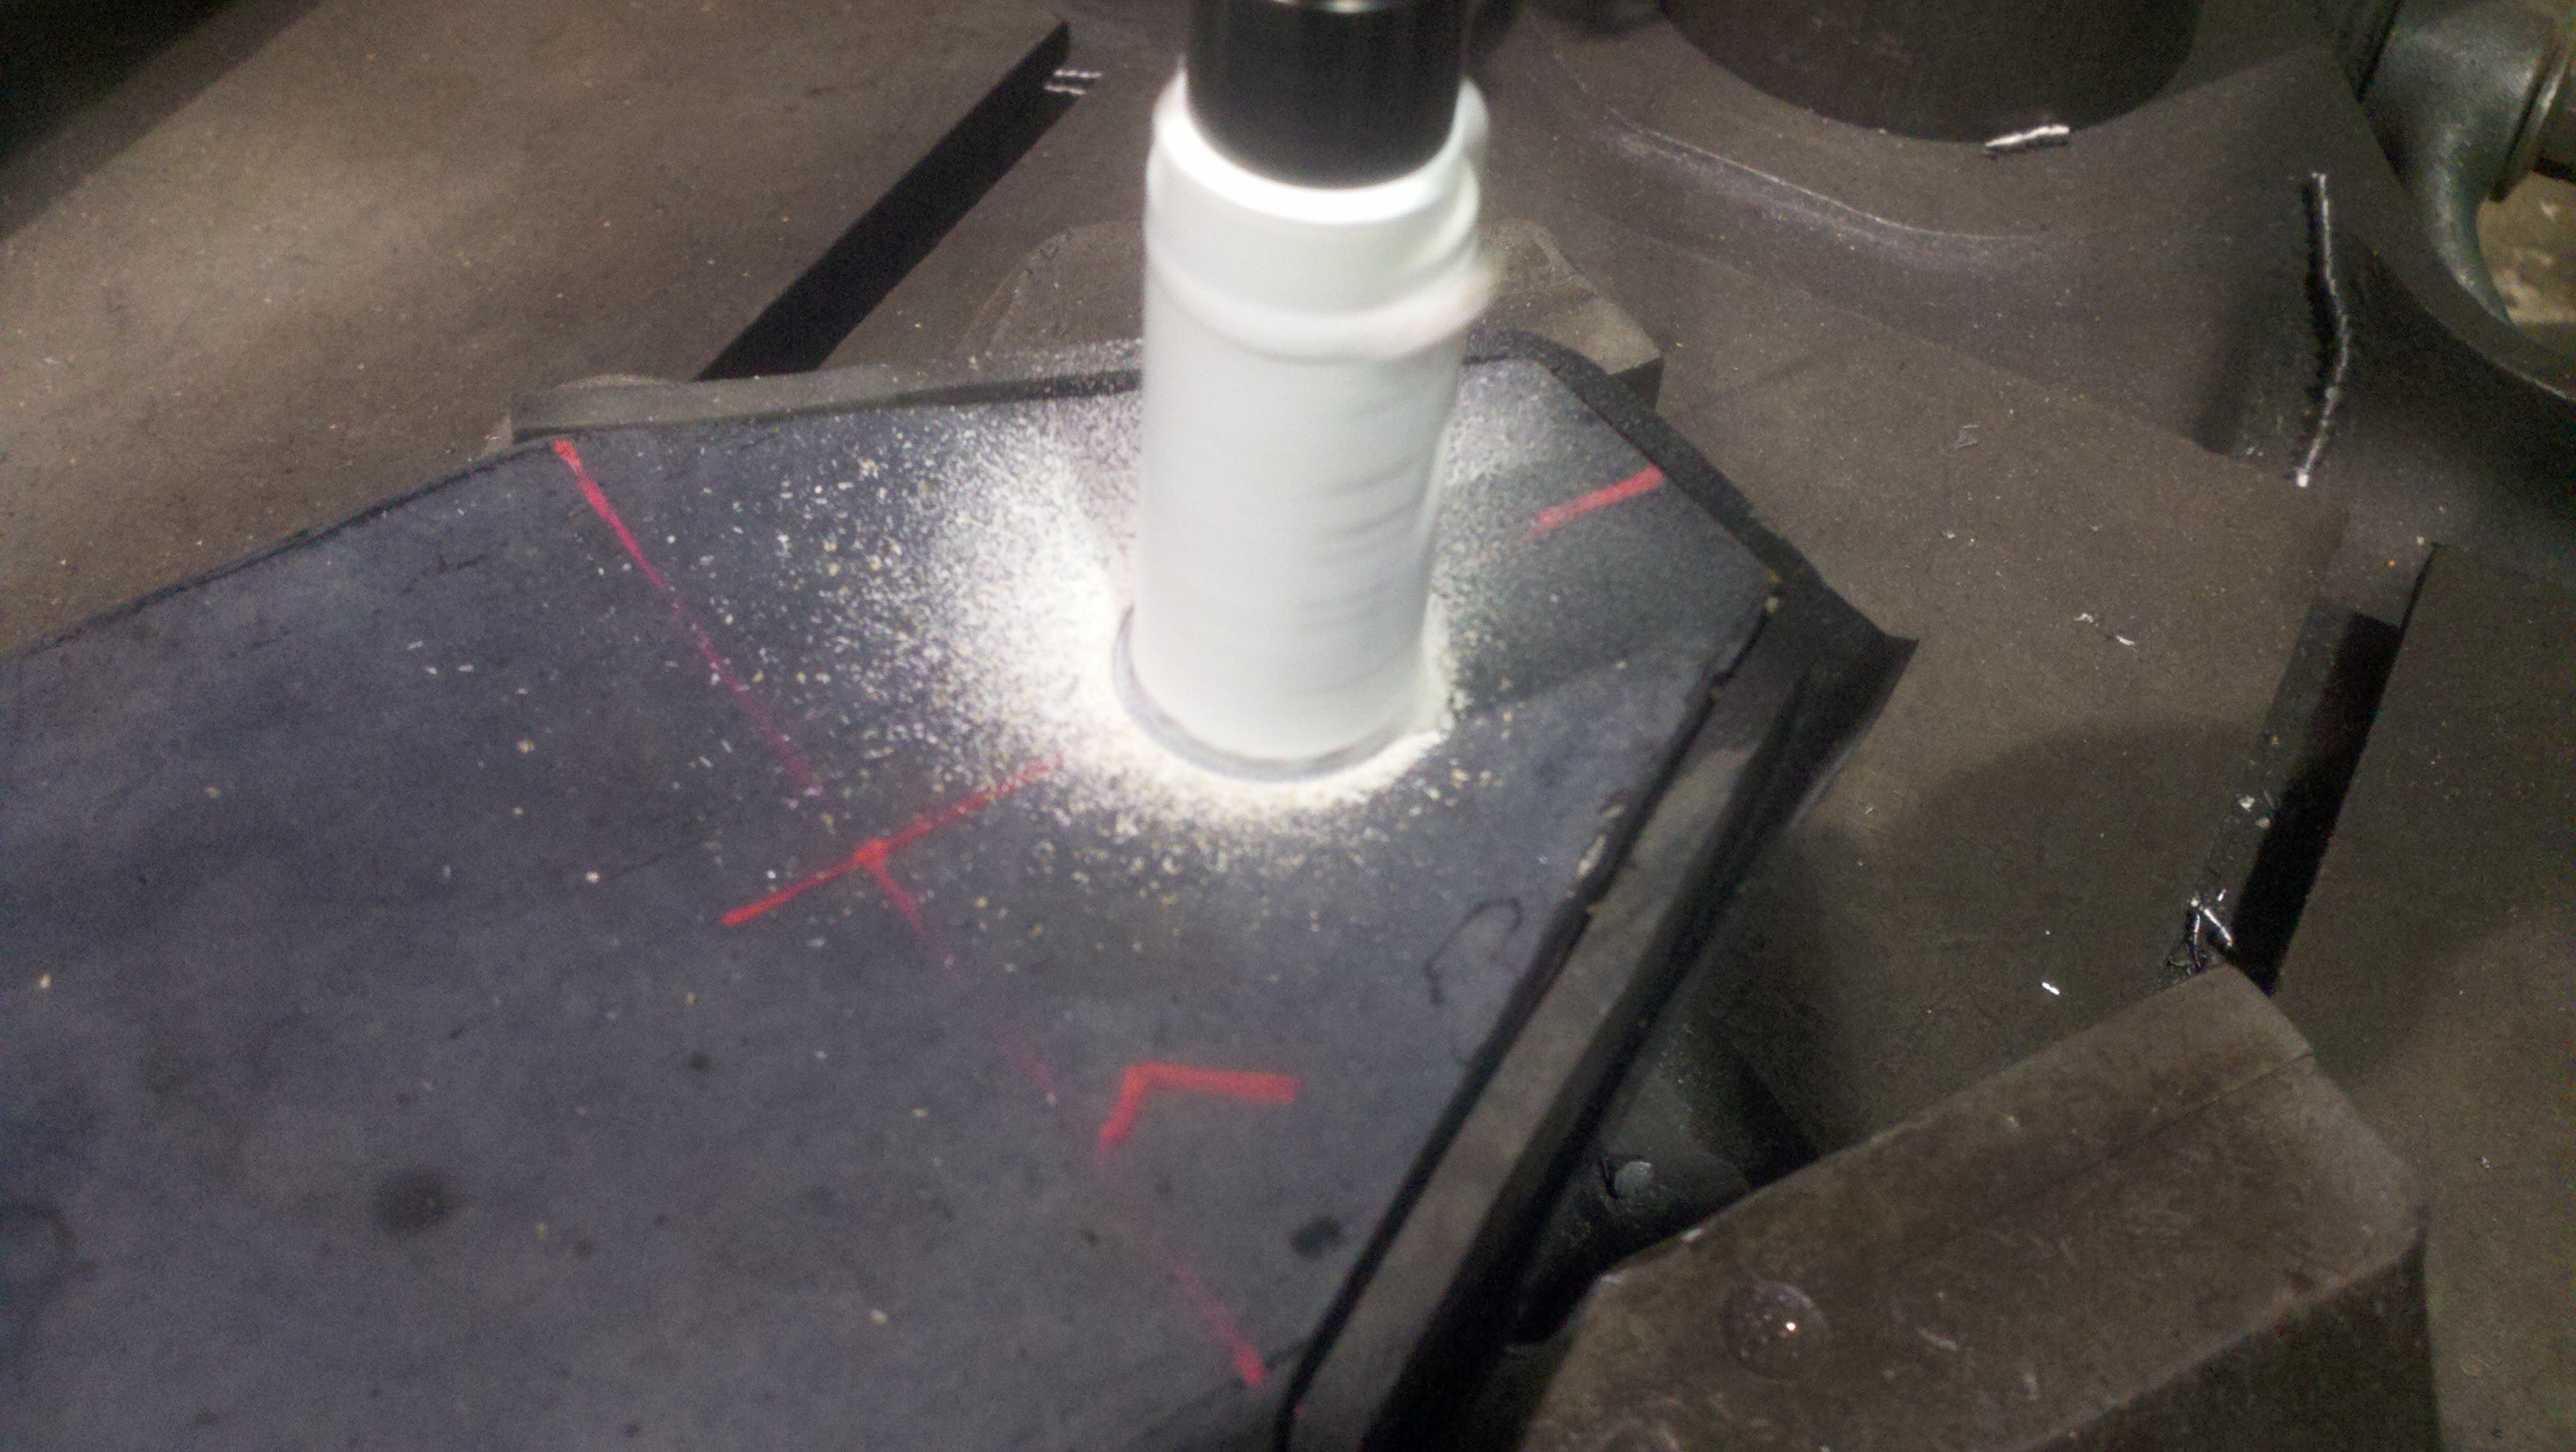
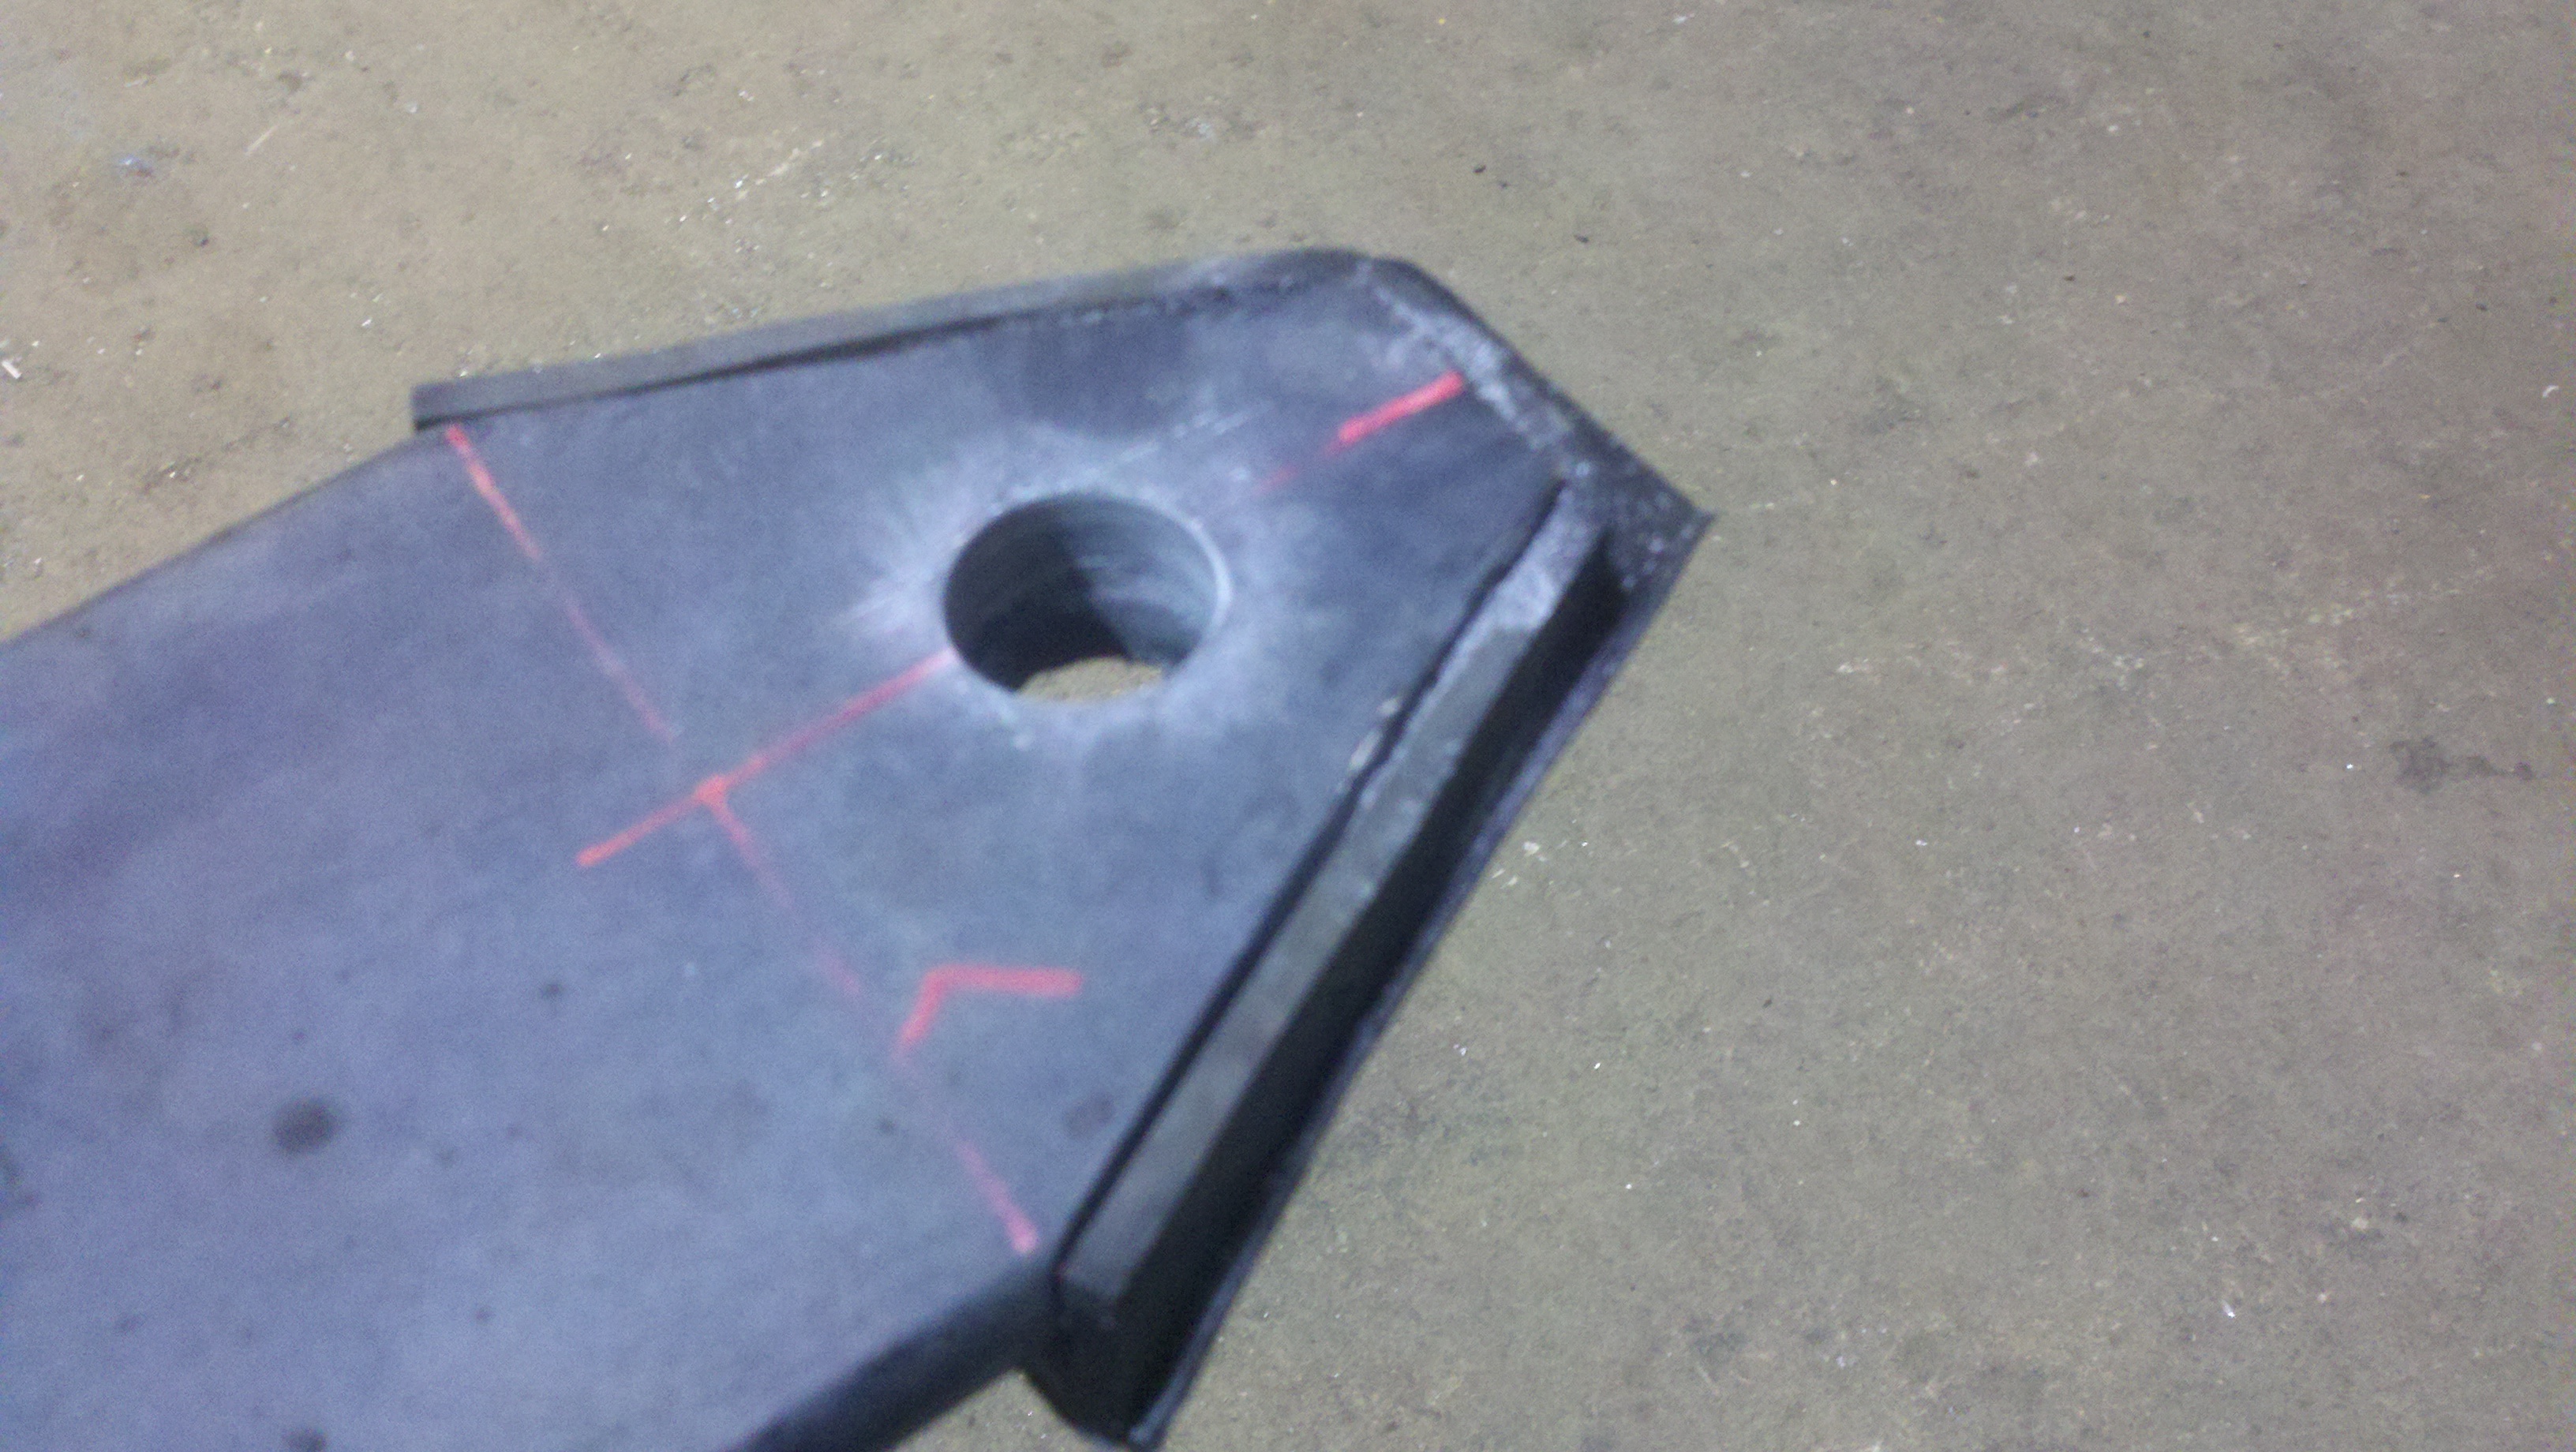
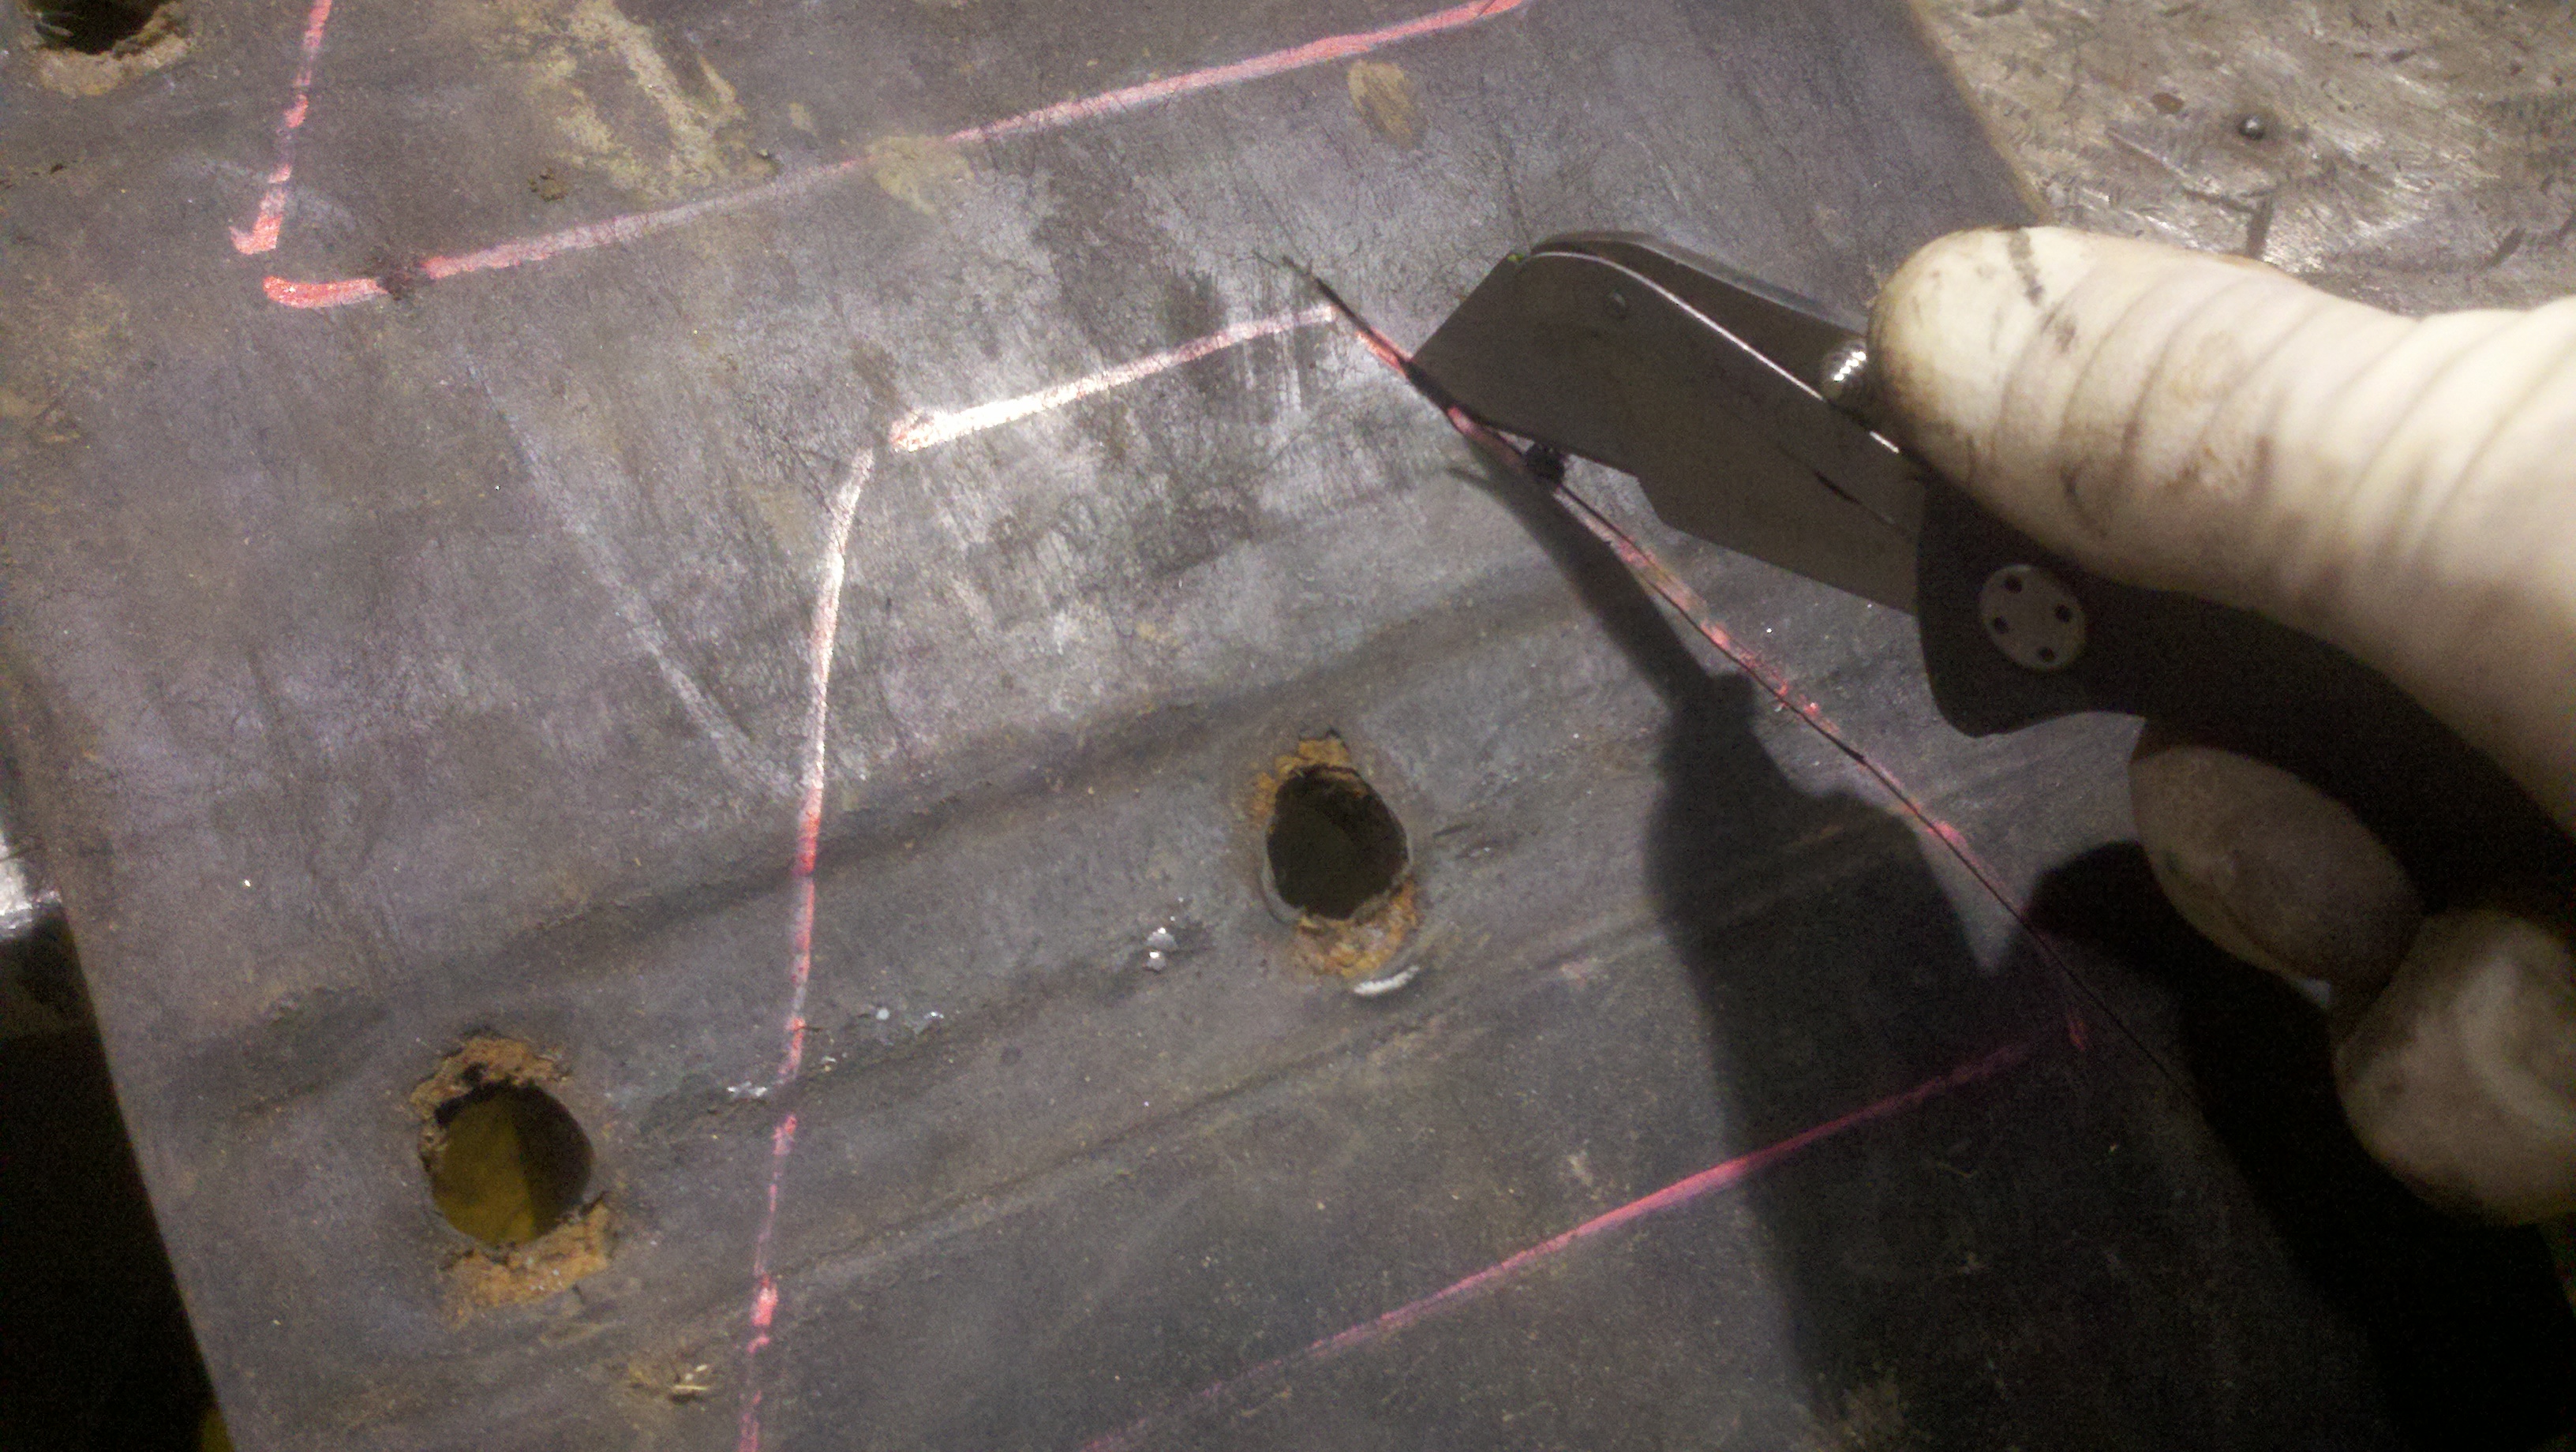
Then I started with the arm. I used the spring, with it's hole, to mark my drilling point on the arm, and then got after it.
That worked pretty well to...with the hole saw.
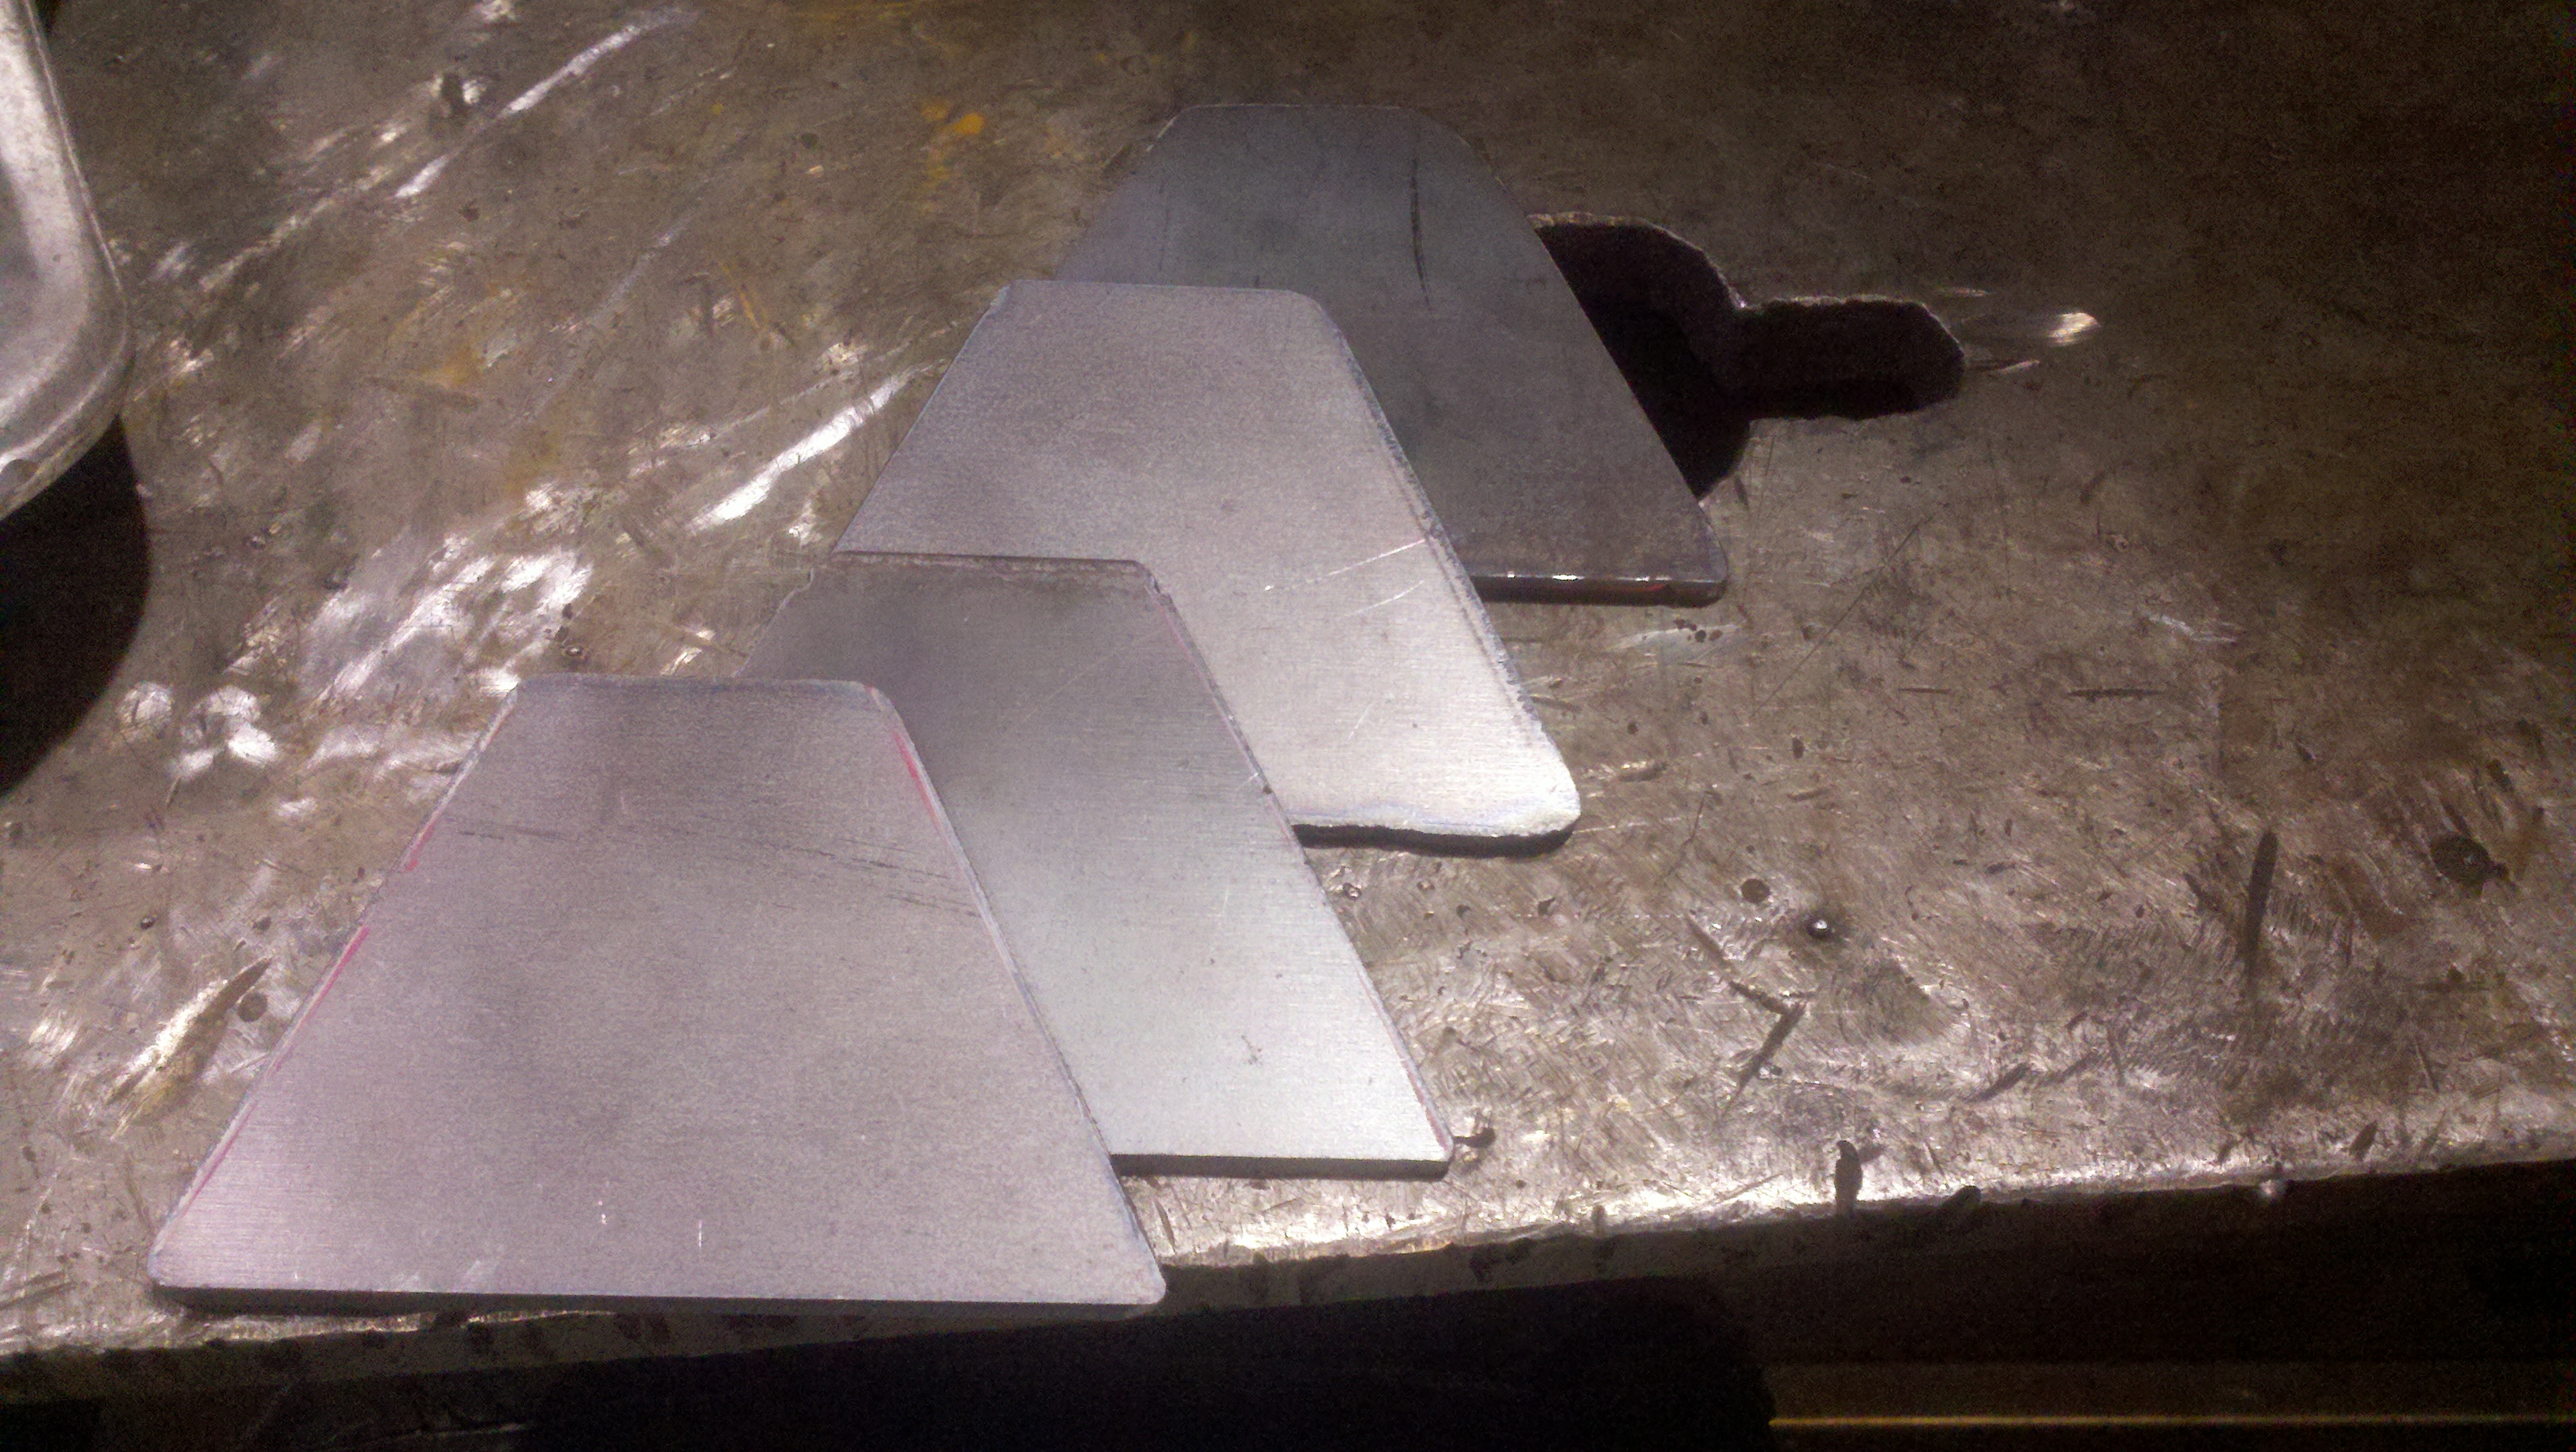
Next, I started on the "washers". I traced the size/shape out on steel sheet using the spring end as my template, then, because I'm not very good at free hand, I used the piece of aluminum angle as a straight edge to make nice, straight cuts.
Here is how they came out:
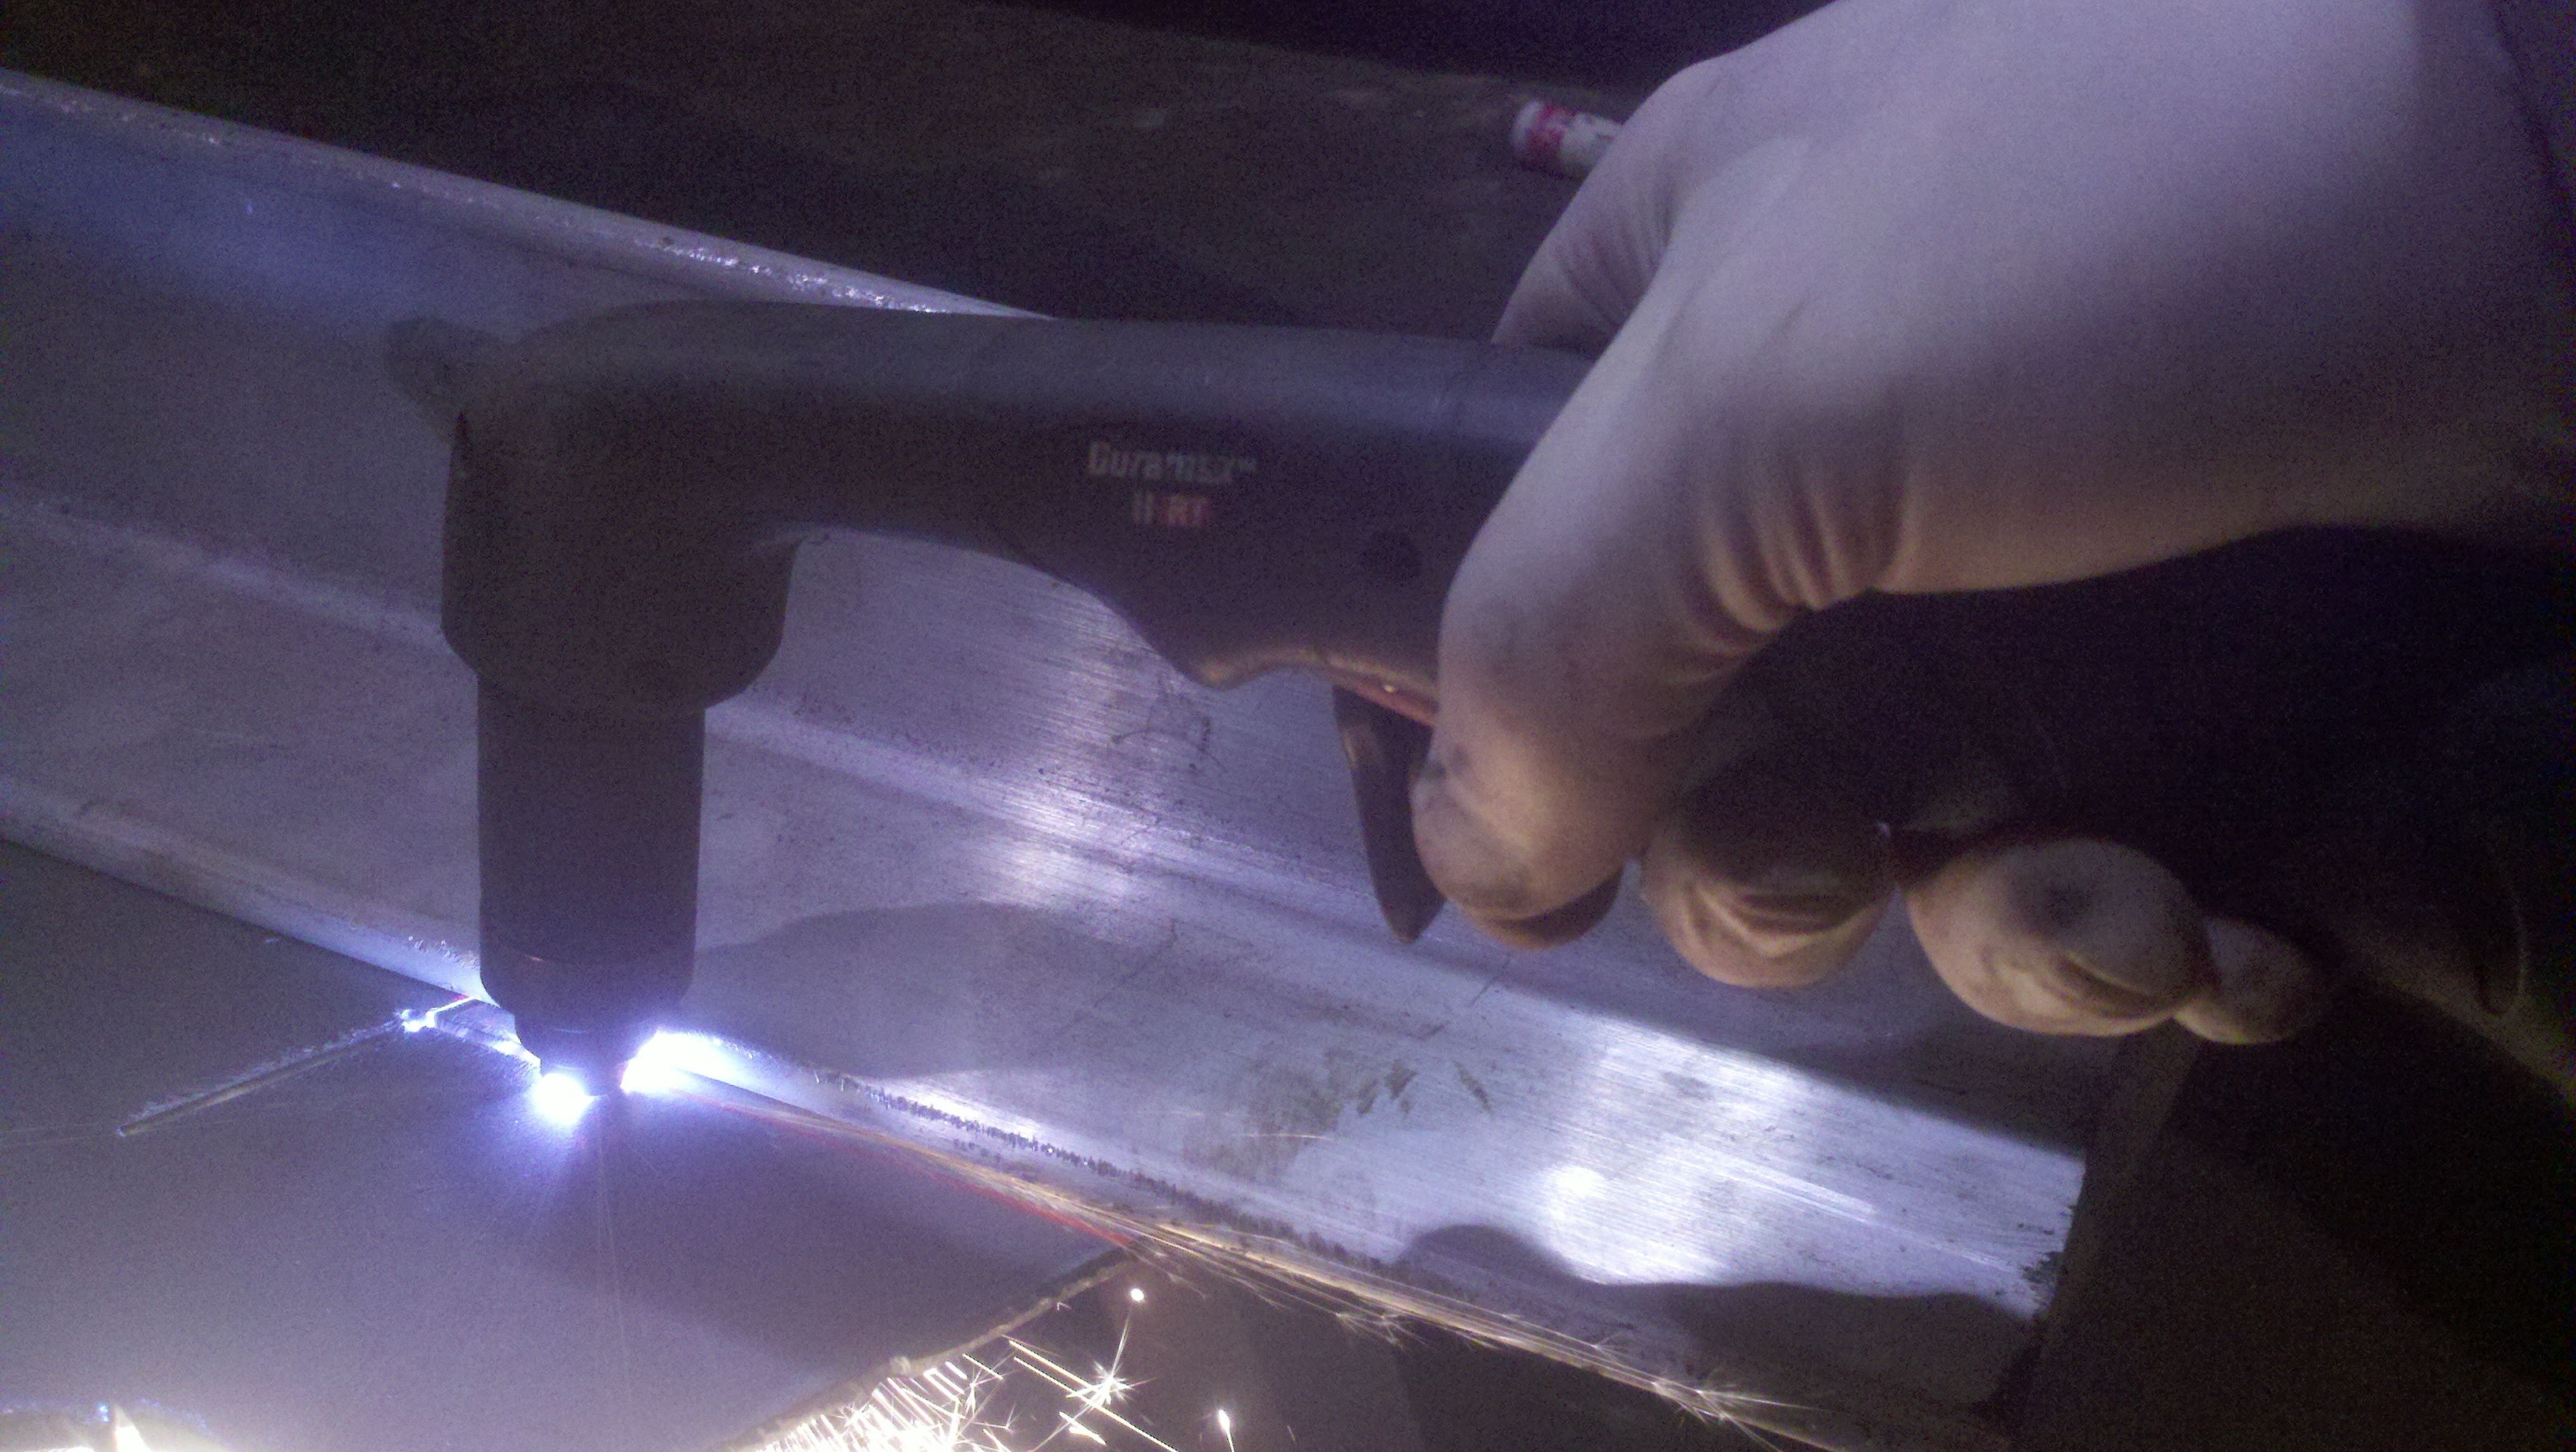
Then I blew some holes in 'em for the bolts to pass through...remember what I said about my free hand? Not too good!
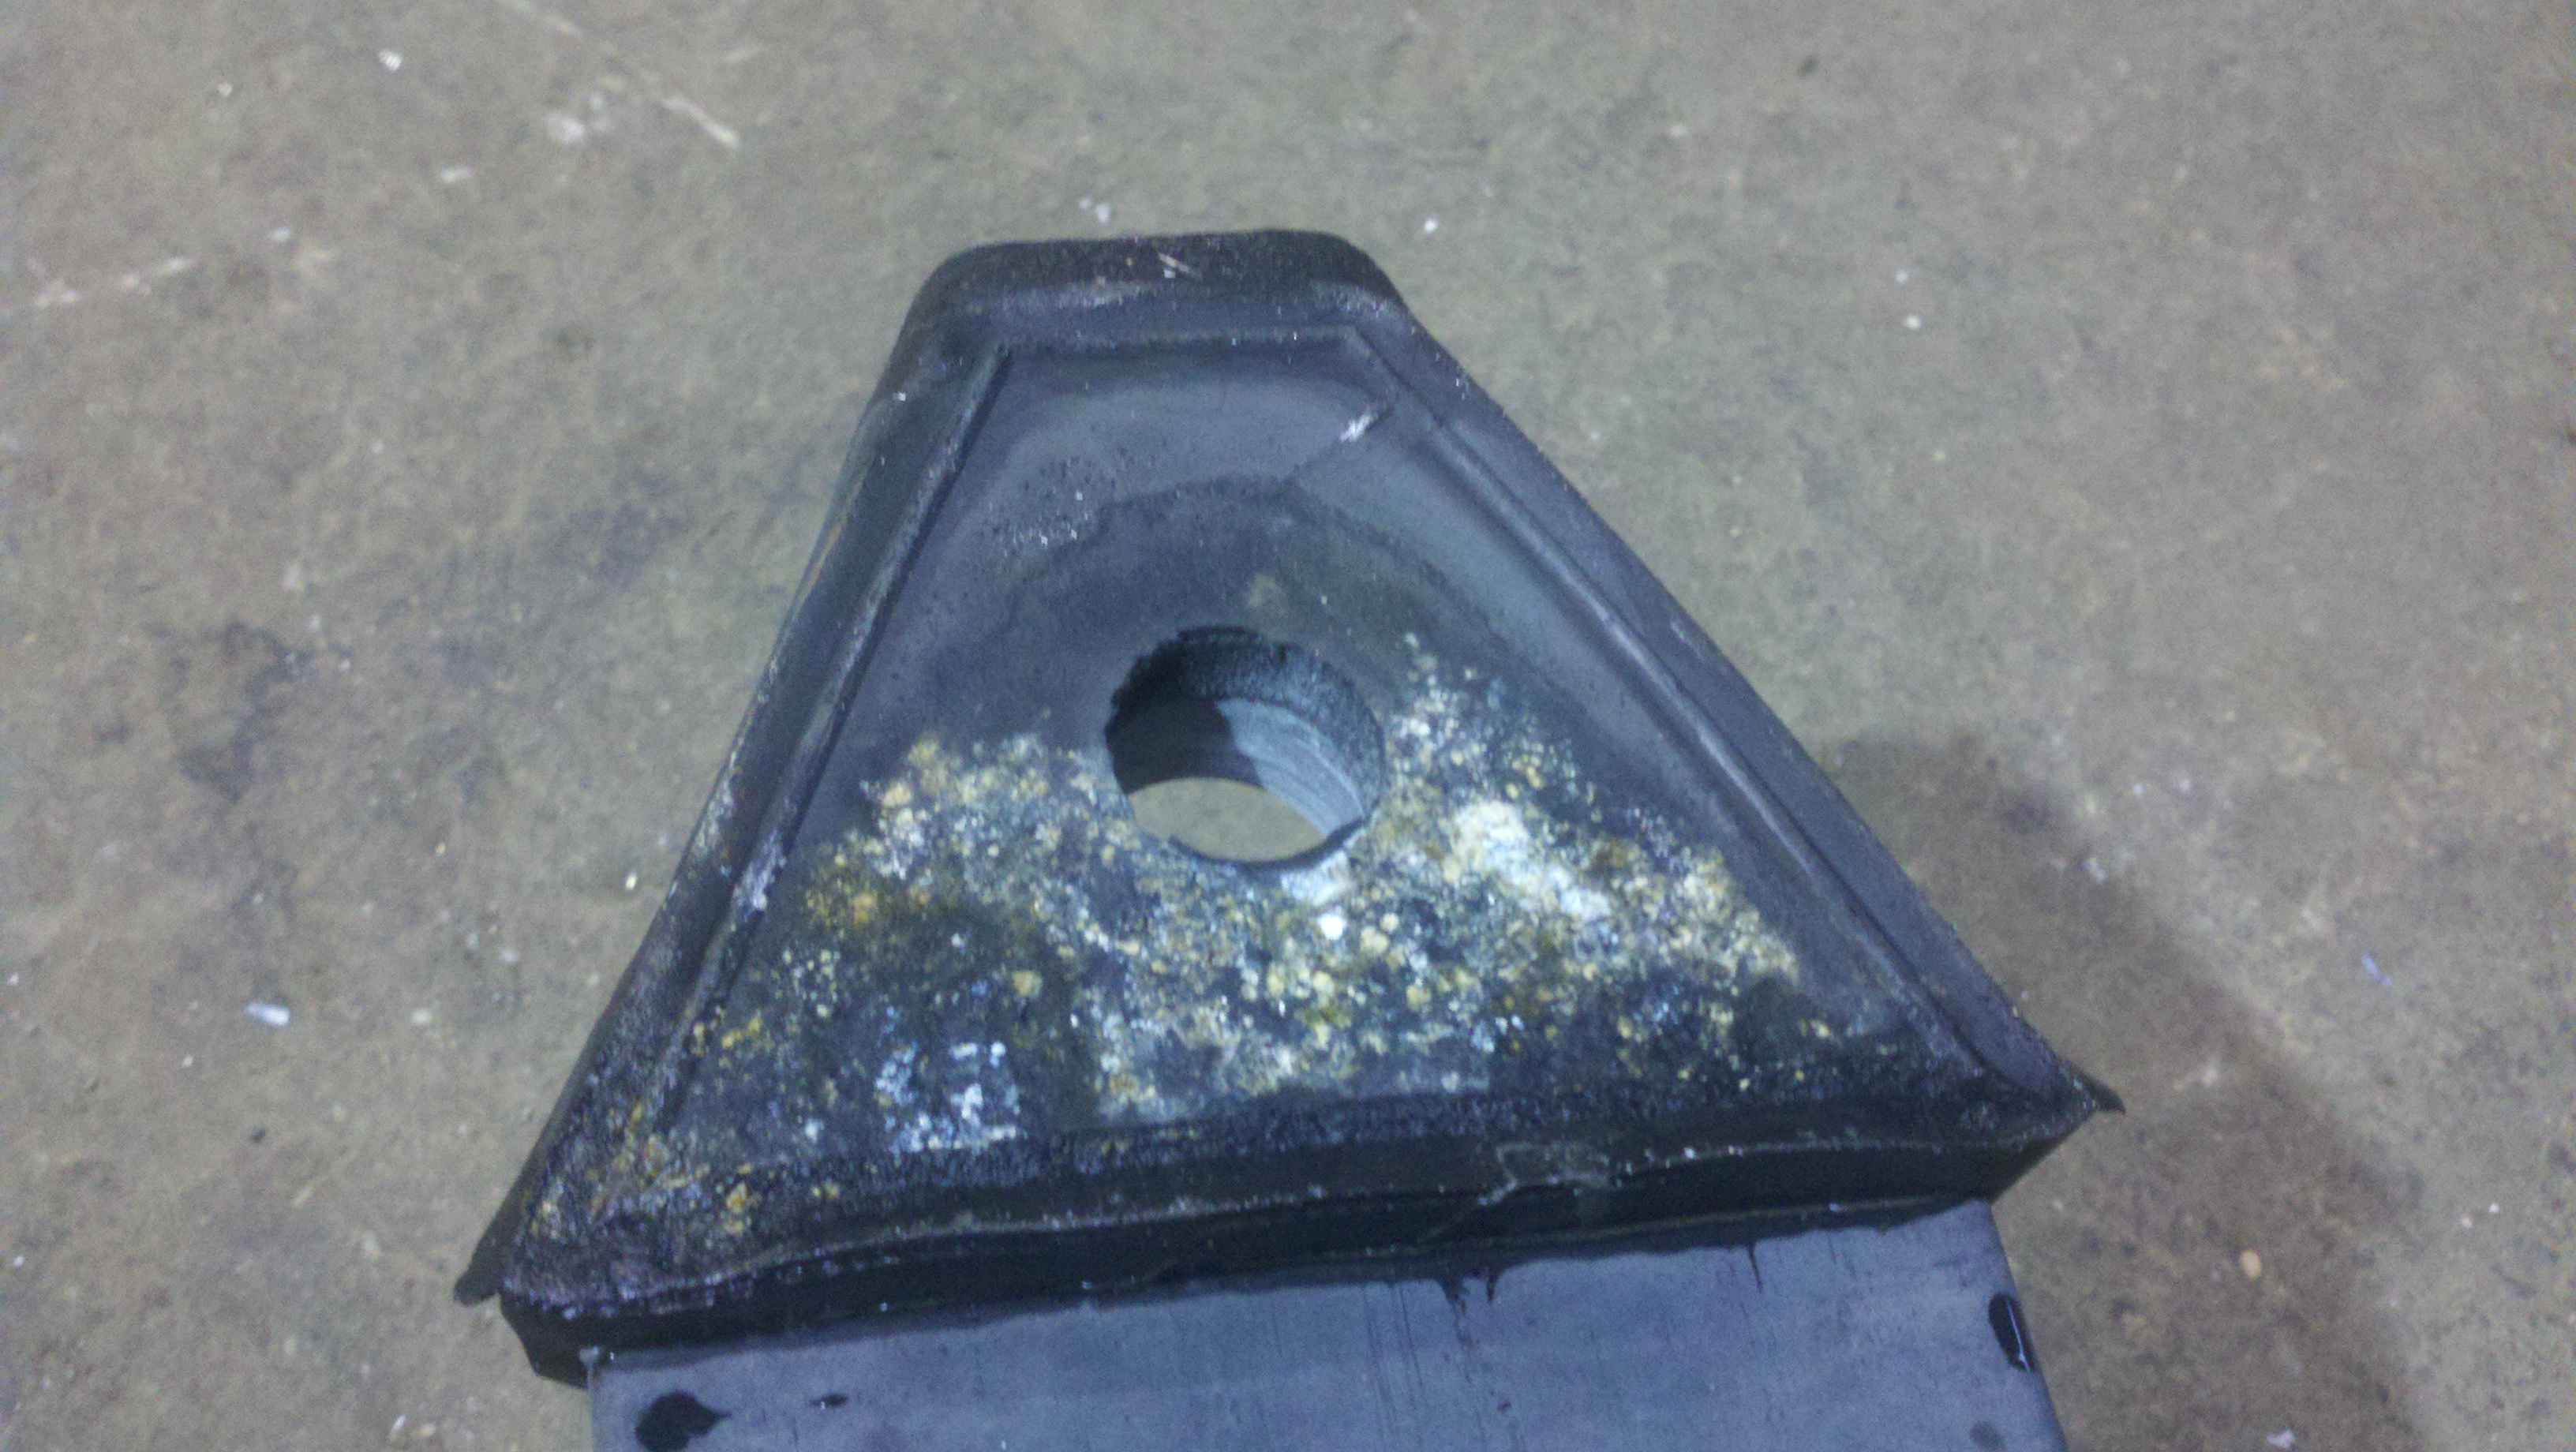
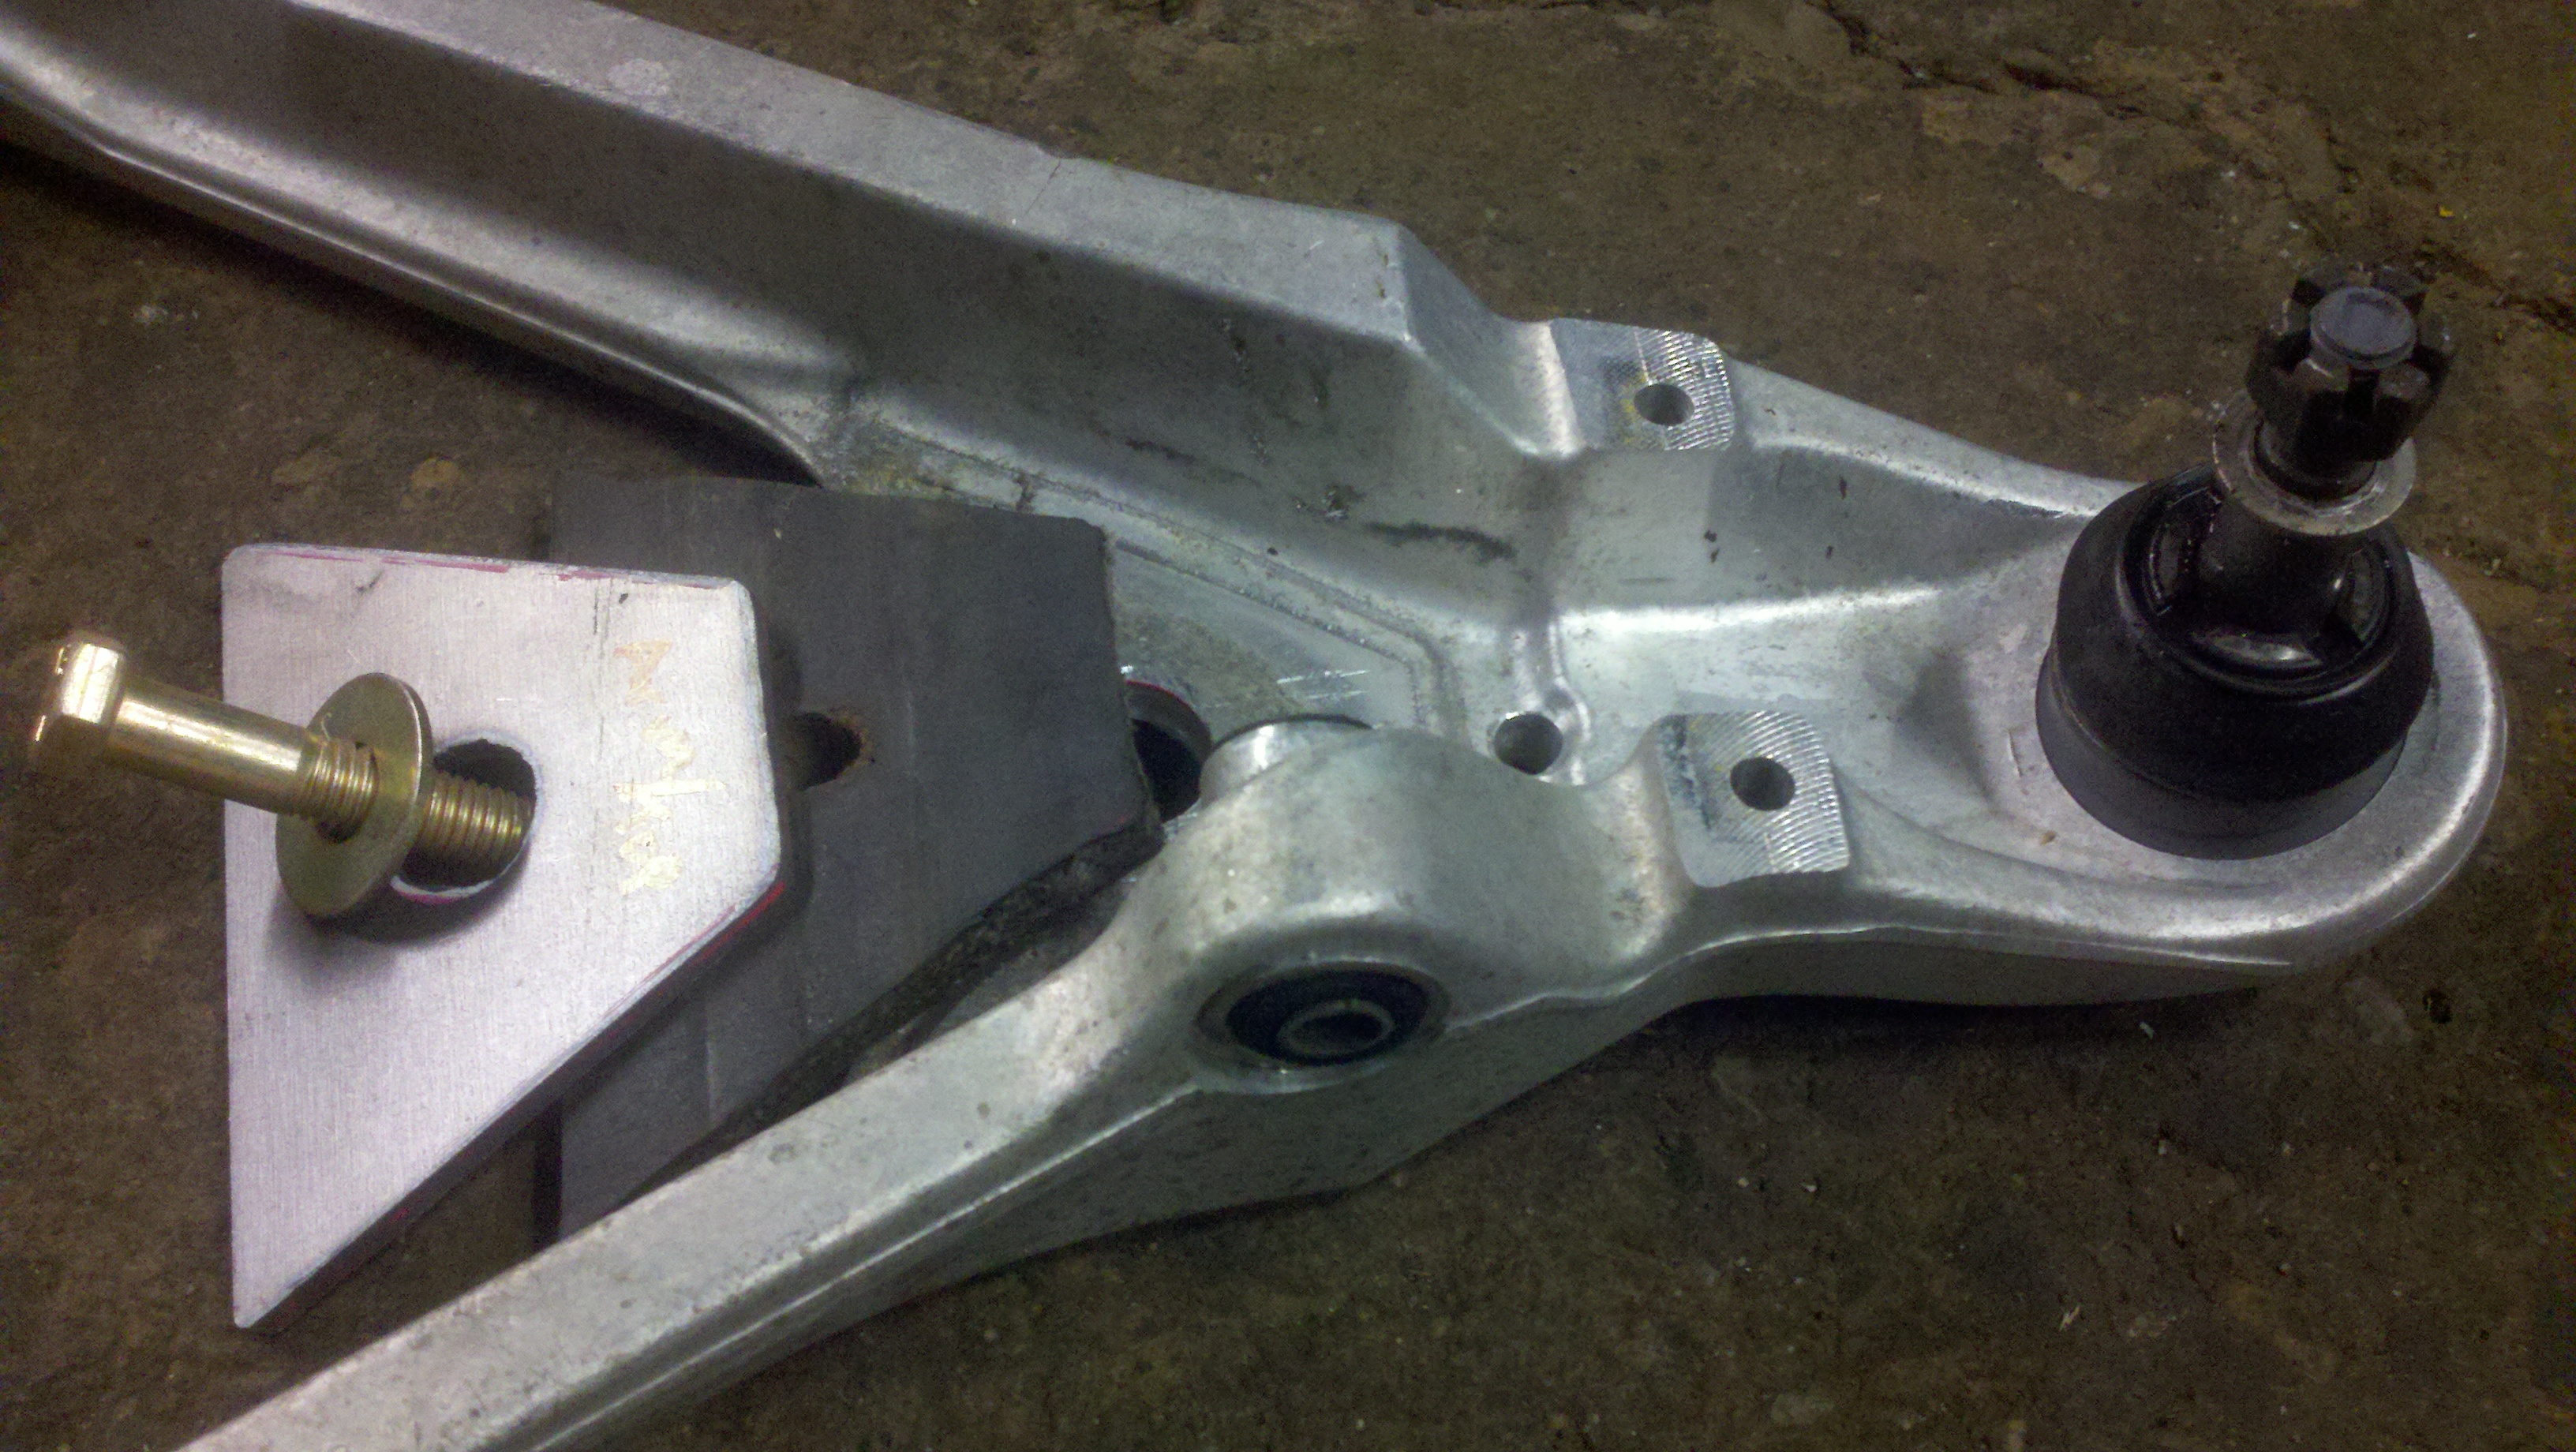
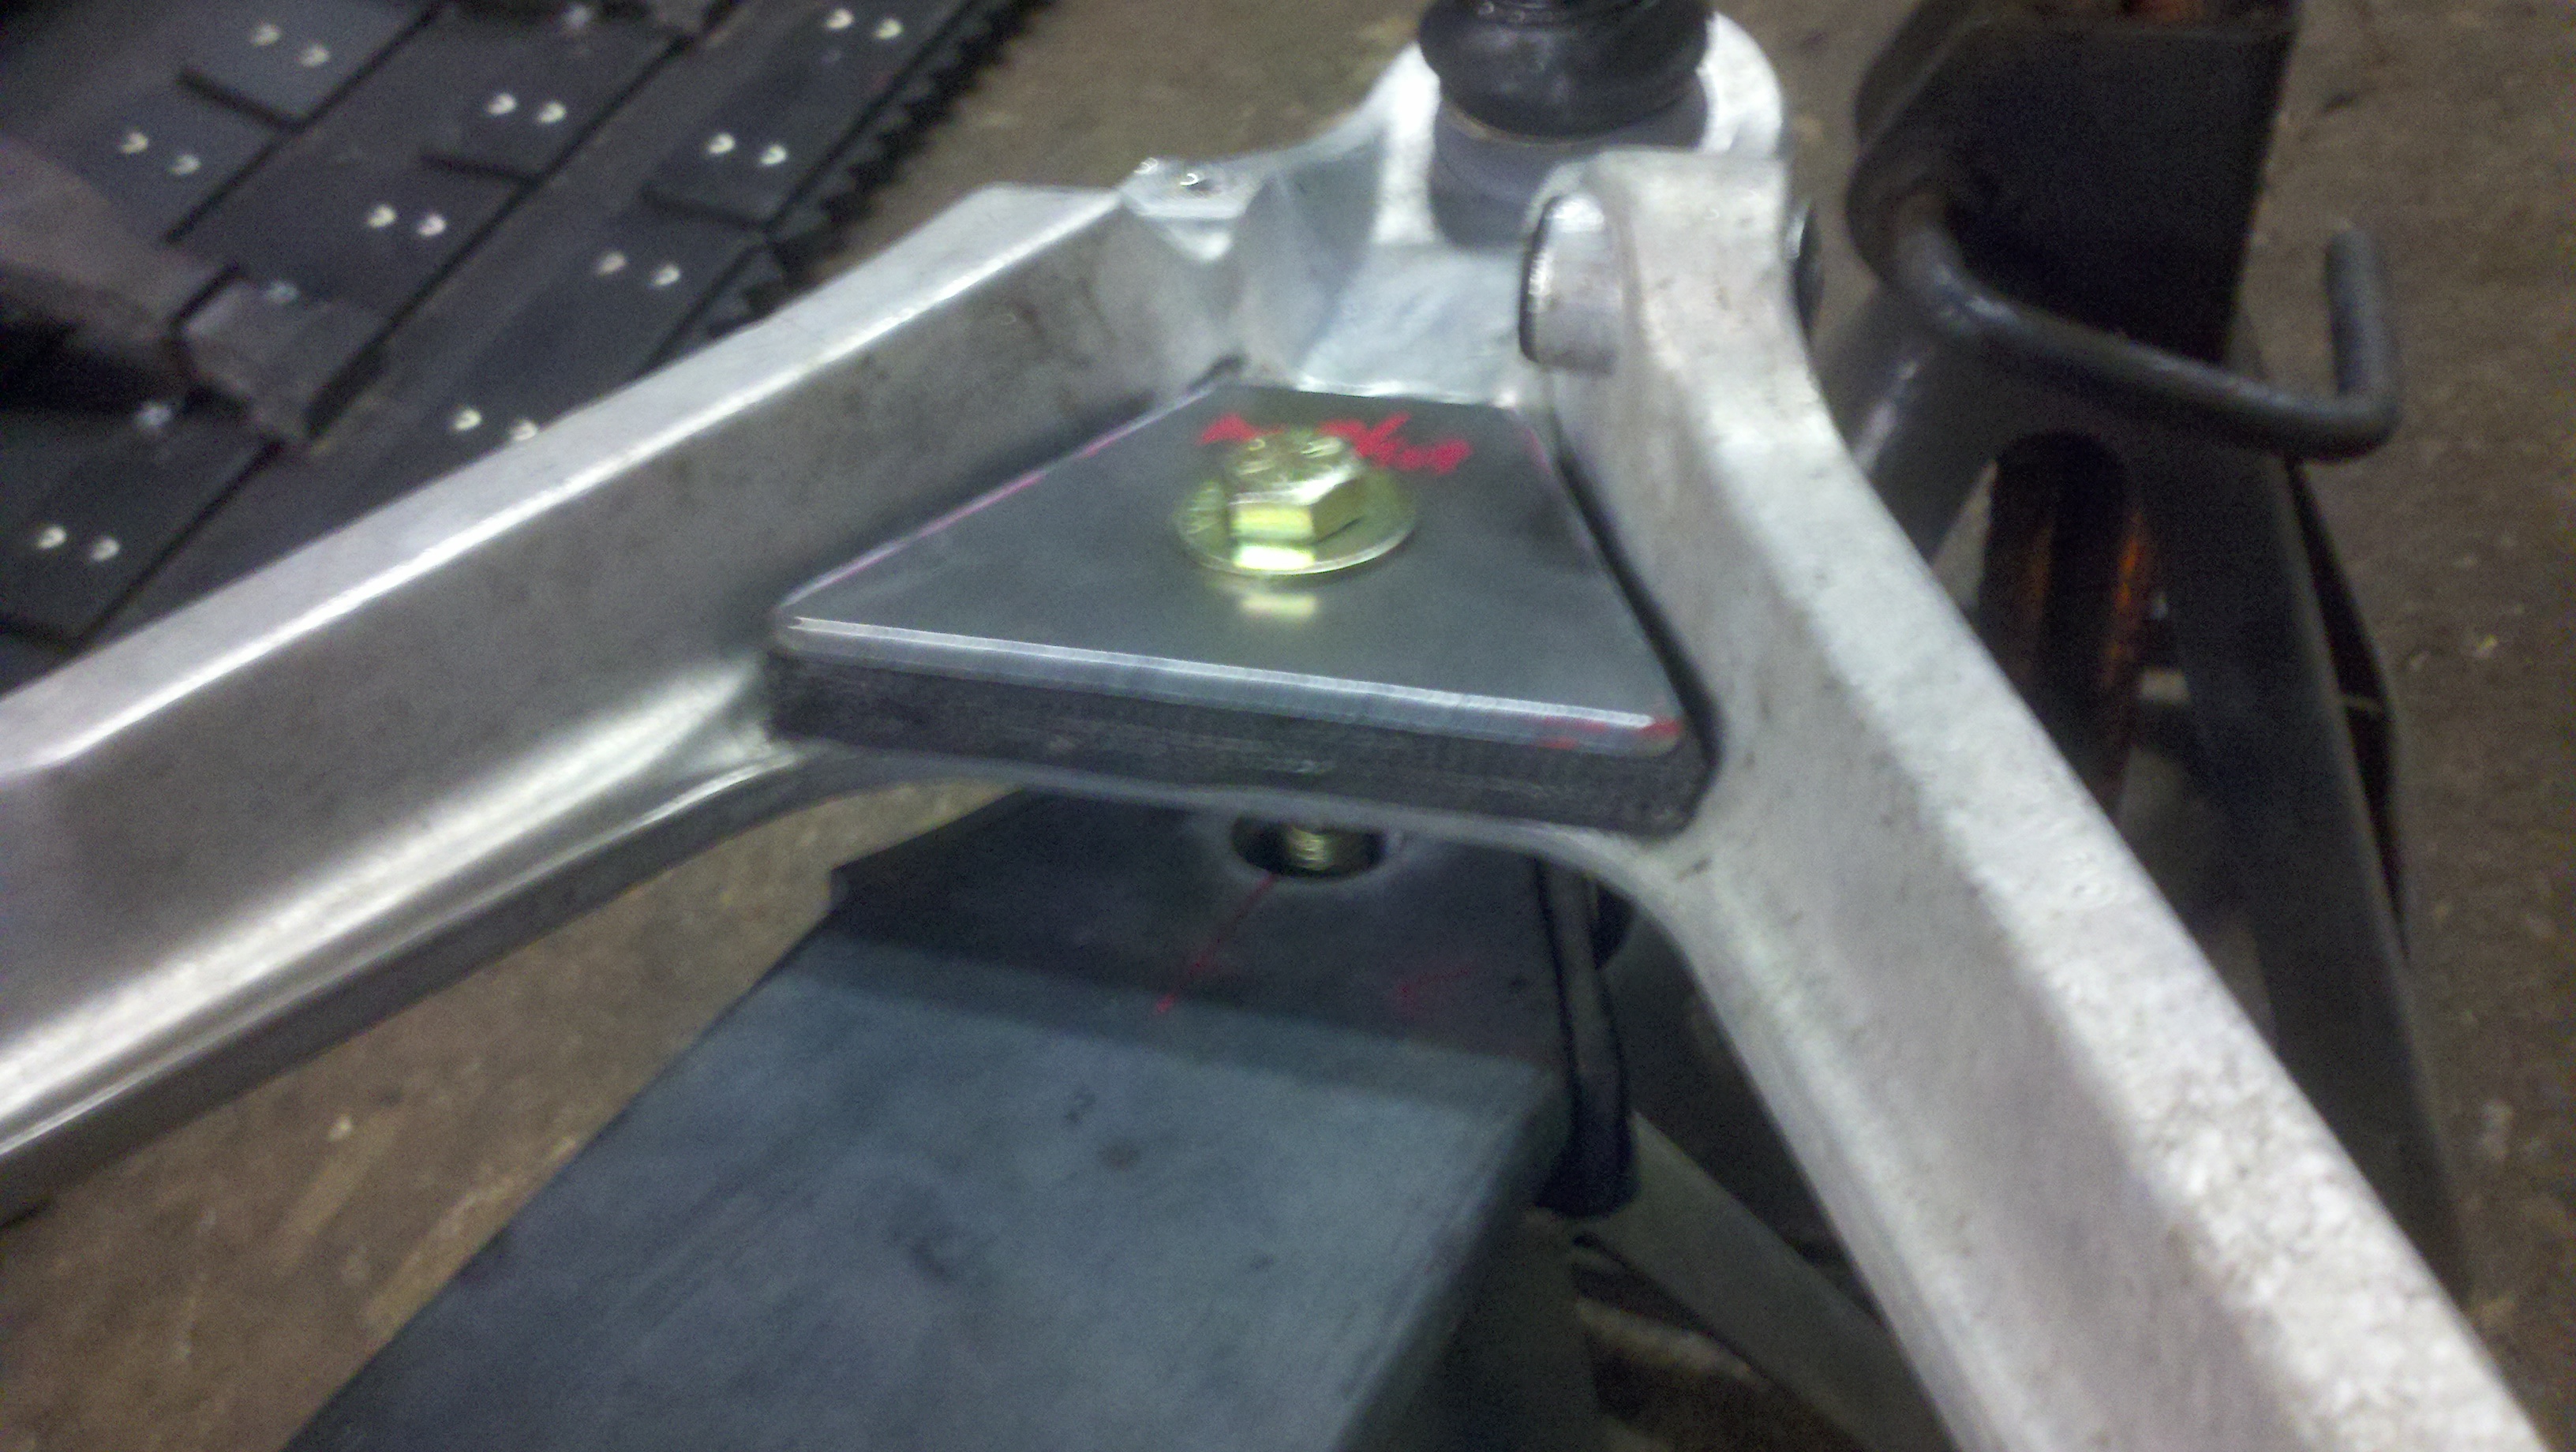
Next, I had to make rubber pads that would sit on top of the control arm, in the same place, doing the same job as the original rubber pad that goes between the spring and the arm. In the "inverted" configuration, the rubber pad would sit between the arm, and one my my big "washers".
I chose a piece of snow cat track belting; it's available and free, it's 10mm thick and it's tough. It would be perfect for the job.
Using one of my washers, I traced out the shape for the rubber pads, using one of the existing bolt holes for the center/bolt hole; drilling bolt holes in track belting sucks, so I wanted to avoid that step. The belt cuts with medium effort and lots of "passes" with a utility knife.
Finally, this is the sum of the parts (minus the bottom "washer") arranged in a way where you can see how it will go together. In fact...it's very similar to how the rear is done, with it's bolts, bushings and washers.
Here it is mock assembled as it will be in the car. Again, just like the rear
AWESOME concept. I have been thinking about doing something like this to the front of my C5 to allow a bit more lowering using longer bolts, rather than invest in an expensive coilover setup to get that extra 1/2" of lowering.
Really interested to see the final result, you have a lot of great work tied up in this thing!
Thanks! Keep in mind that with a stock bodied car (full weight) it may not work. With the leaf spring, there is a range of ride height where you can't adjust and that is the range where the spring wants to intersect the A-arm. So on a stock bodied car, going under the arm may lower the car too much...IDK. I think that I'm OK on the Kart, because I've taken off so much weight, now the spring needs to go down so far -much further than shaving rubbers would get me.
Anyway, I'll try to get the spring installed tonight and take pics of where the spring ends up, relative to the arm to get the right ride height for the Kart...and you can asses how that relates to your car.
Note: I'm leaving for Germany tomorrow for a week so I may not get to it tonight. If I don't there won't be any updates for a week.
Originally Posted by Raidmagic
So you're not putting rubber between the spring and the control arm?
I wasn't planning on it; just like in the rear, there isn't rubber between the top of the spring and the knuckle. I don't believe that the spring will be touching the a-arm...BUT, if my ride height ends up being such that the spring wants to be touching the arm, then I'll pad it with something.
AWESOME concept. I have been thinking about doing something like this to the front of my C5 to allow a bit more lowering using longer bolts, rather than invest in an expensive coilover setup to get that extra 1/2" of lowering.
Really interested to see the final result
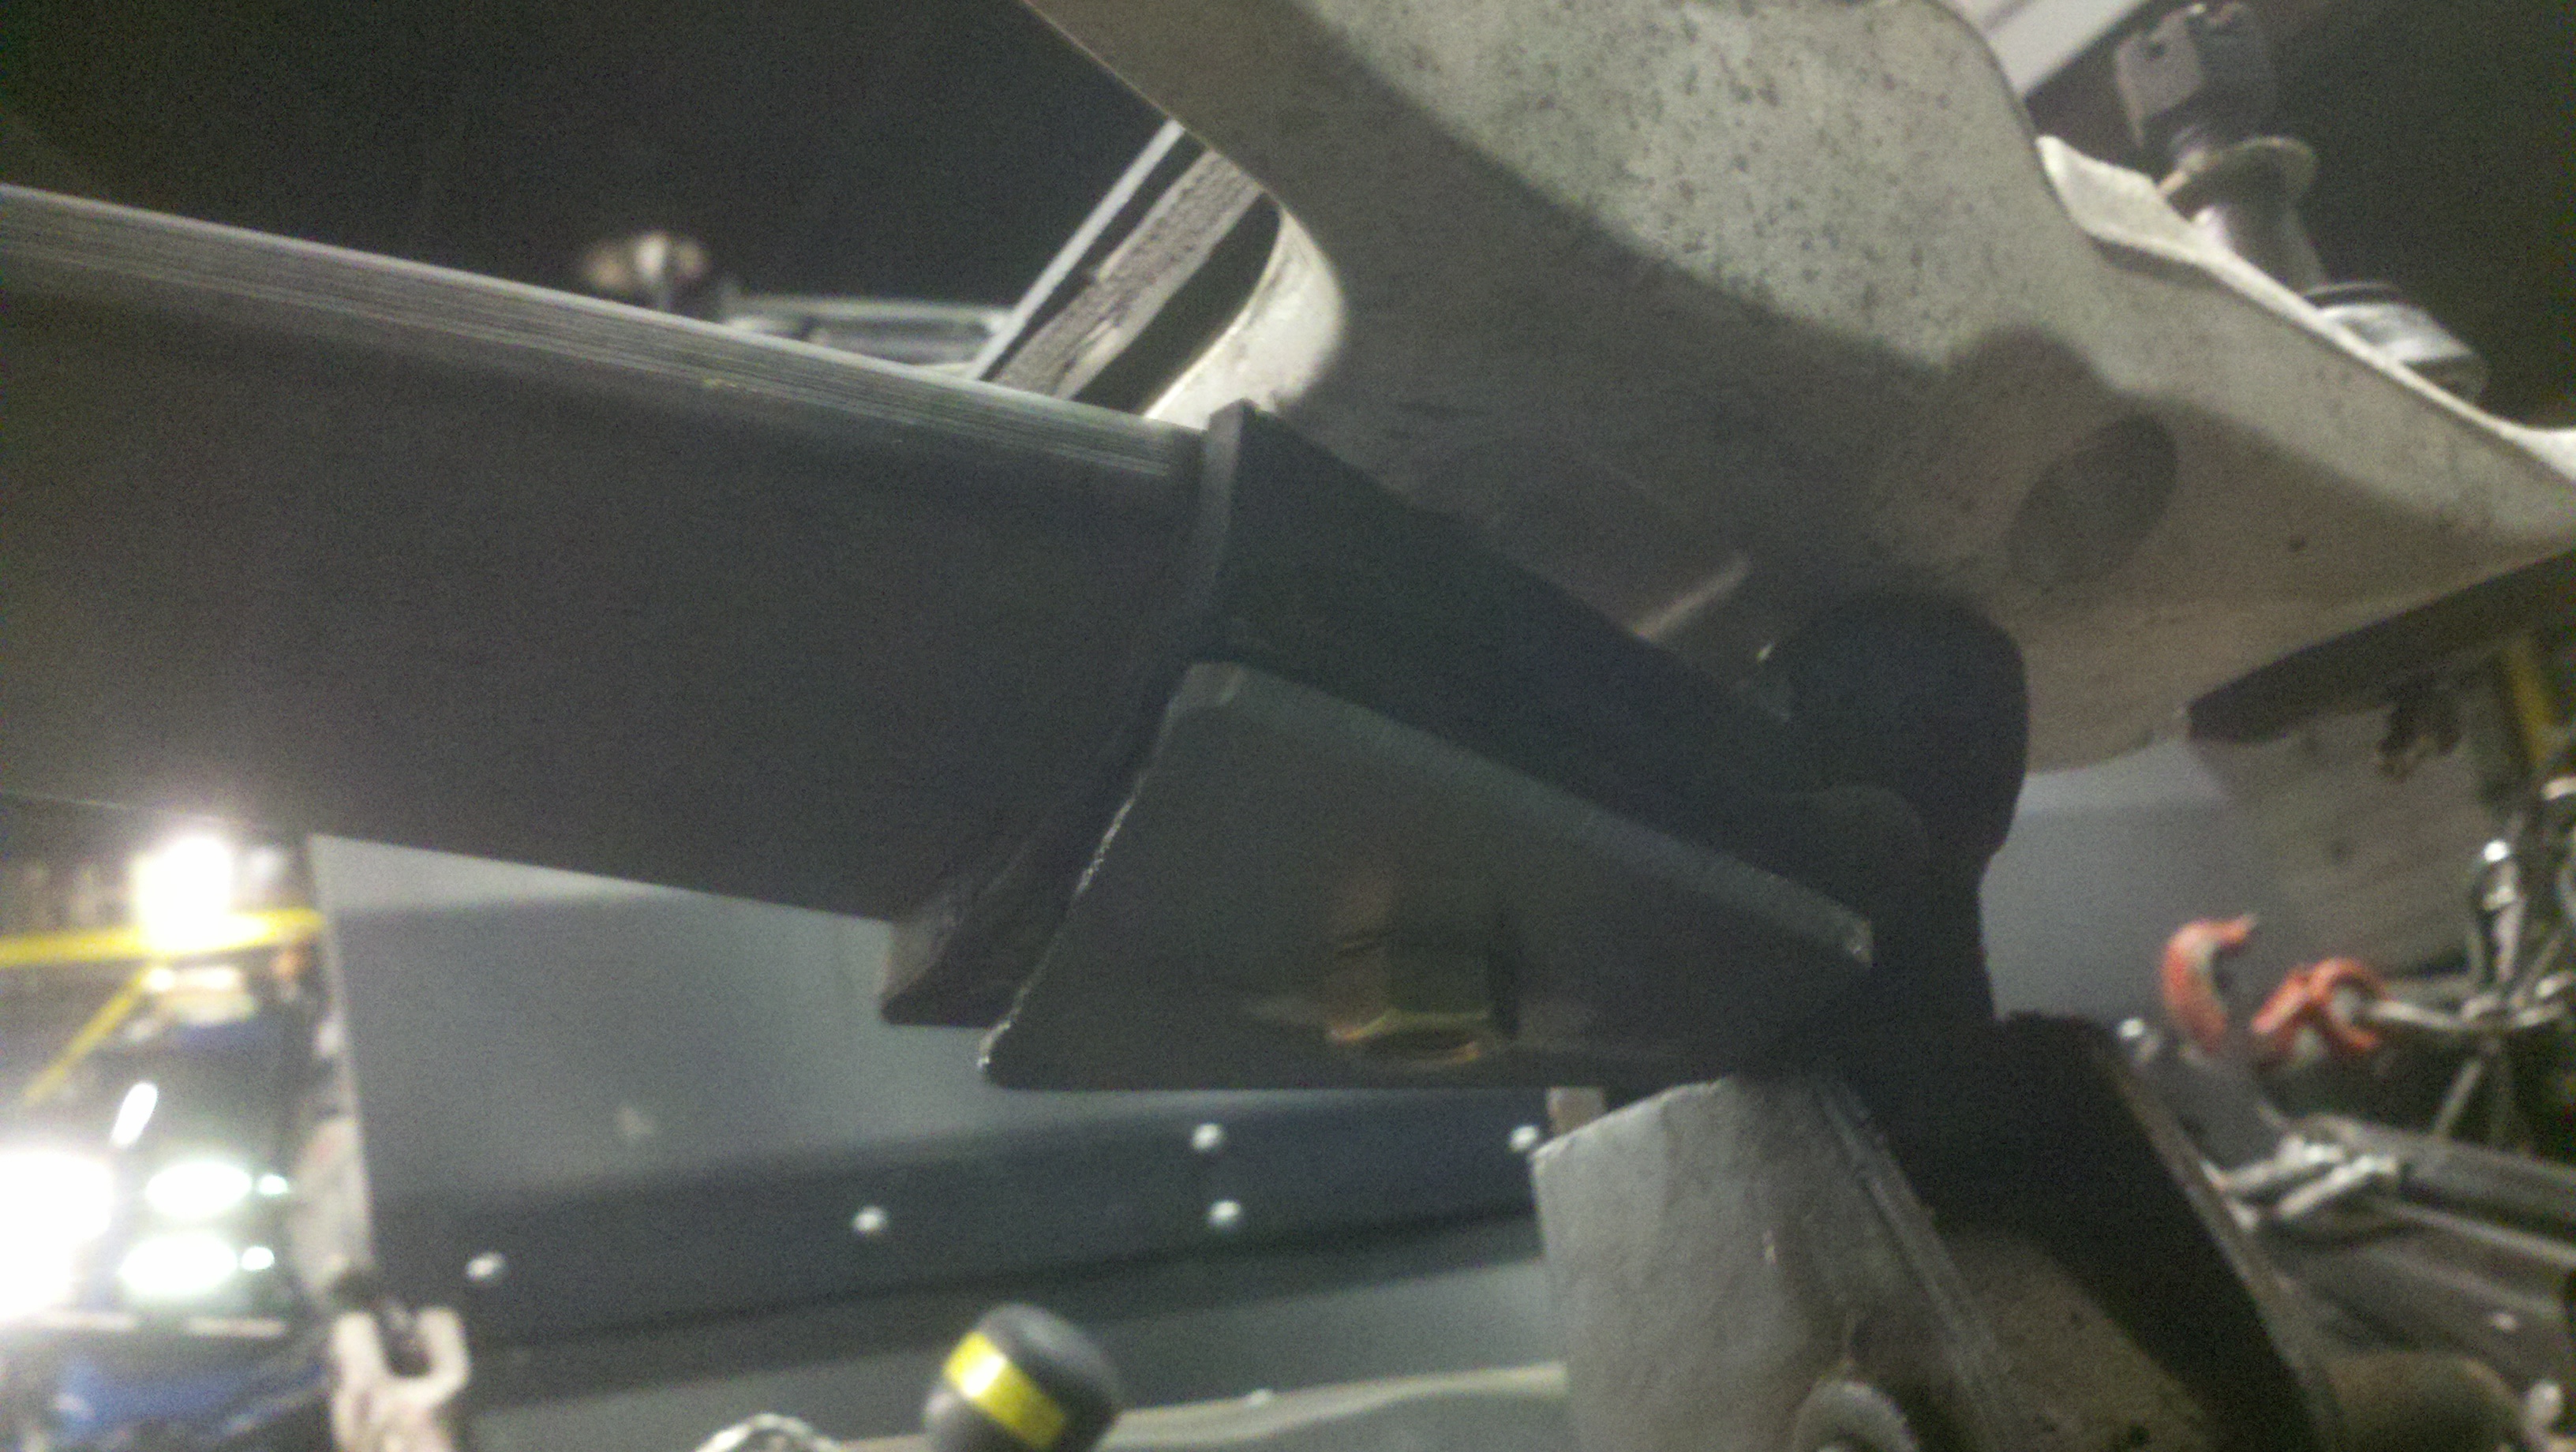
Just got home last night. I actually threw the car together Friday, the 15th. I got up, went to work, got things done there that had to be addressed, then hauled azz home, put the spring in, control arms on, lower ball joints, the spring bolts/pads etc. and dropped the car to the ground....then took pics. Didn't even have time to post them: As soon as I got the car down and moved so my wife could park her car in the garage while I was gone, I literally got in her car, drove to the airport and got on a plane for Germany. Bing, bang, boom.
Anyway, here are the pics of how the spring looks. I'll get some better ones soon. but you can see how with the less weight, the spring has more arc to it...but by putting the spring below control arm, I end up with the arm back to the stock ride height position.
I believe that the spring follows a very close arc the the control arm, so I don't believe that there will be much movement of the bolt, laterally from that. If there is some, that is O.K. b/c I made the holes in the spring in arm quite a bit larger than the bolt...just like GM did in the rear.
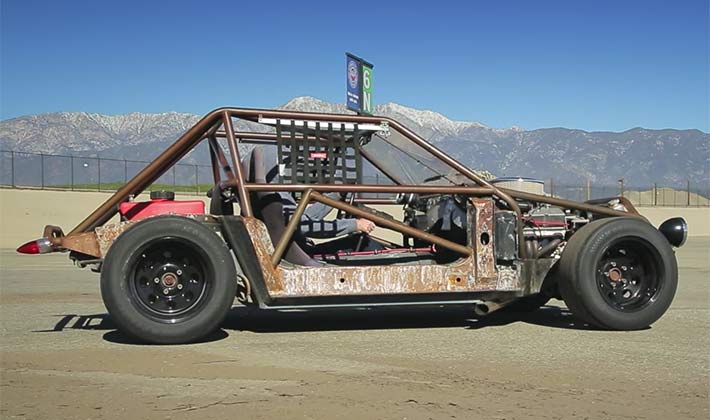
My next step toward making this car registrable was going to be mounting the headlights/tail lights. I took the car for a spin after I got back from Germany...when I pulled back in the garage, my wife was there -she wanted a ride. I took her around the neighborhood and she loved it...but when we got back, she complained (legitimately) about smelling like exhaust. The make-shift exhaust I had on there (stock Y pipe w/a big Magnaflow muff terminating at the "rear wall") just caught all kind of draft and brought exhaust into the cockpit. So that was motivating me to address the exhaust.
In addition, I just really wanted to try an experiment with the exhaust. Years ago when I had my C6, I hated the exhaust "character and quality". Also, from the factory it was way too quiet. Volume is easily fixable -get any aftermarket exhaust. But I wanted to fix more than volume, I wanted the car to sound GOOD, too. I tried Corsa. It was louder than stock, but lame. I tried GHL. It was even louder...but didn't change the quality really, at all. I tried dumps. Even louder...just annoying. Terrible quality sound. I tried fabricating a chamber. No diff. I tried "true Duals" (with no H pipe or X pipe at all)...no real diff. Finally, I gave up. I started a HUGE THREAD about it that went no where -there were no solutions gleaned from the thread.
The thing that really bugged me about the whole topic was this: the sound of an '06 C6, vs the sound of an '06 GTO; same engine...different sound. Why? Later, we bought a CTS-V...LS6 engine, but much better quality and character of the sound, compared to the LS2 'Vette. What's the diff?
Finally, I bought my C4 and although it has a better sound quality than the C6 did, it's no 5.0 and it never will be. Why?
I developed a theory that the difference between C4^ Y body exhaust sound vs 5.0's, F-bods, GTO's, CTS-V's etc, is the number of bends in the exhaust system. All those other cars have much "bendier" exhaust than the Y body car does; it's exhaust has a few bends, but most of it is very straight piping. MOre evidence of this is the Gen I Jeep Grand Cherokee SRT. Those things sound wicked and have a look at that "bendy" exhaust! HERE and HERE TOO.
SO....I want the Kart to sound awesome. The exhaust should be part of the experience and yeah, it should be LOUD...but it should also be AWESOME sounding! I wanted to build a system with a lot of bends, no crossover of any kind combined with side exit to provide the stereophonic "V8 sound".
On to the construction...
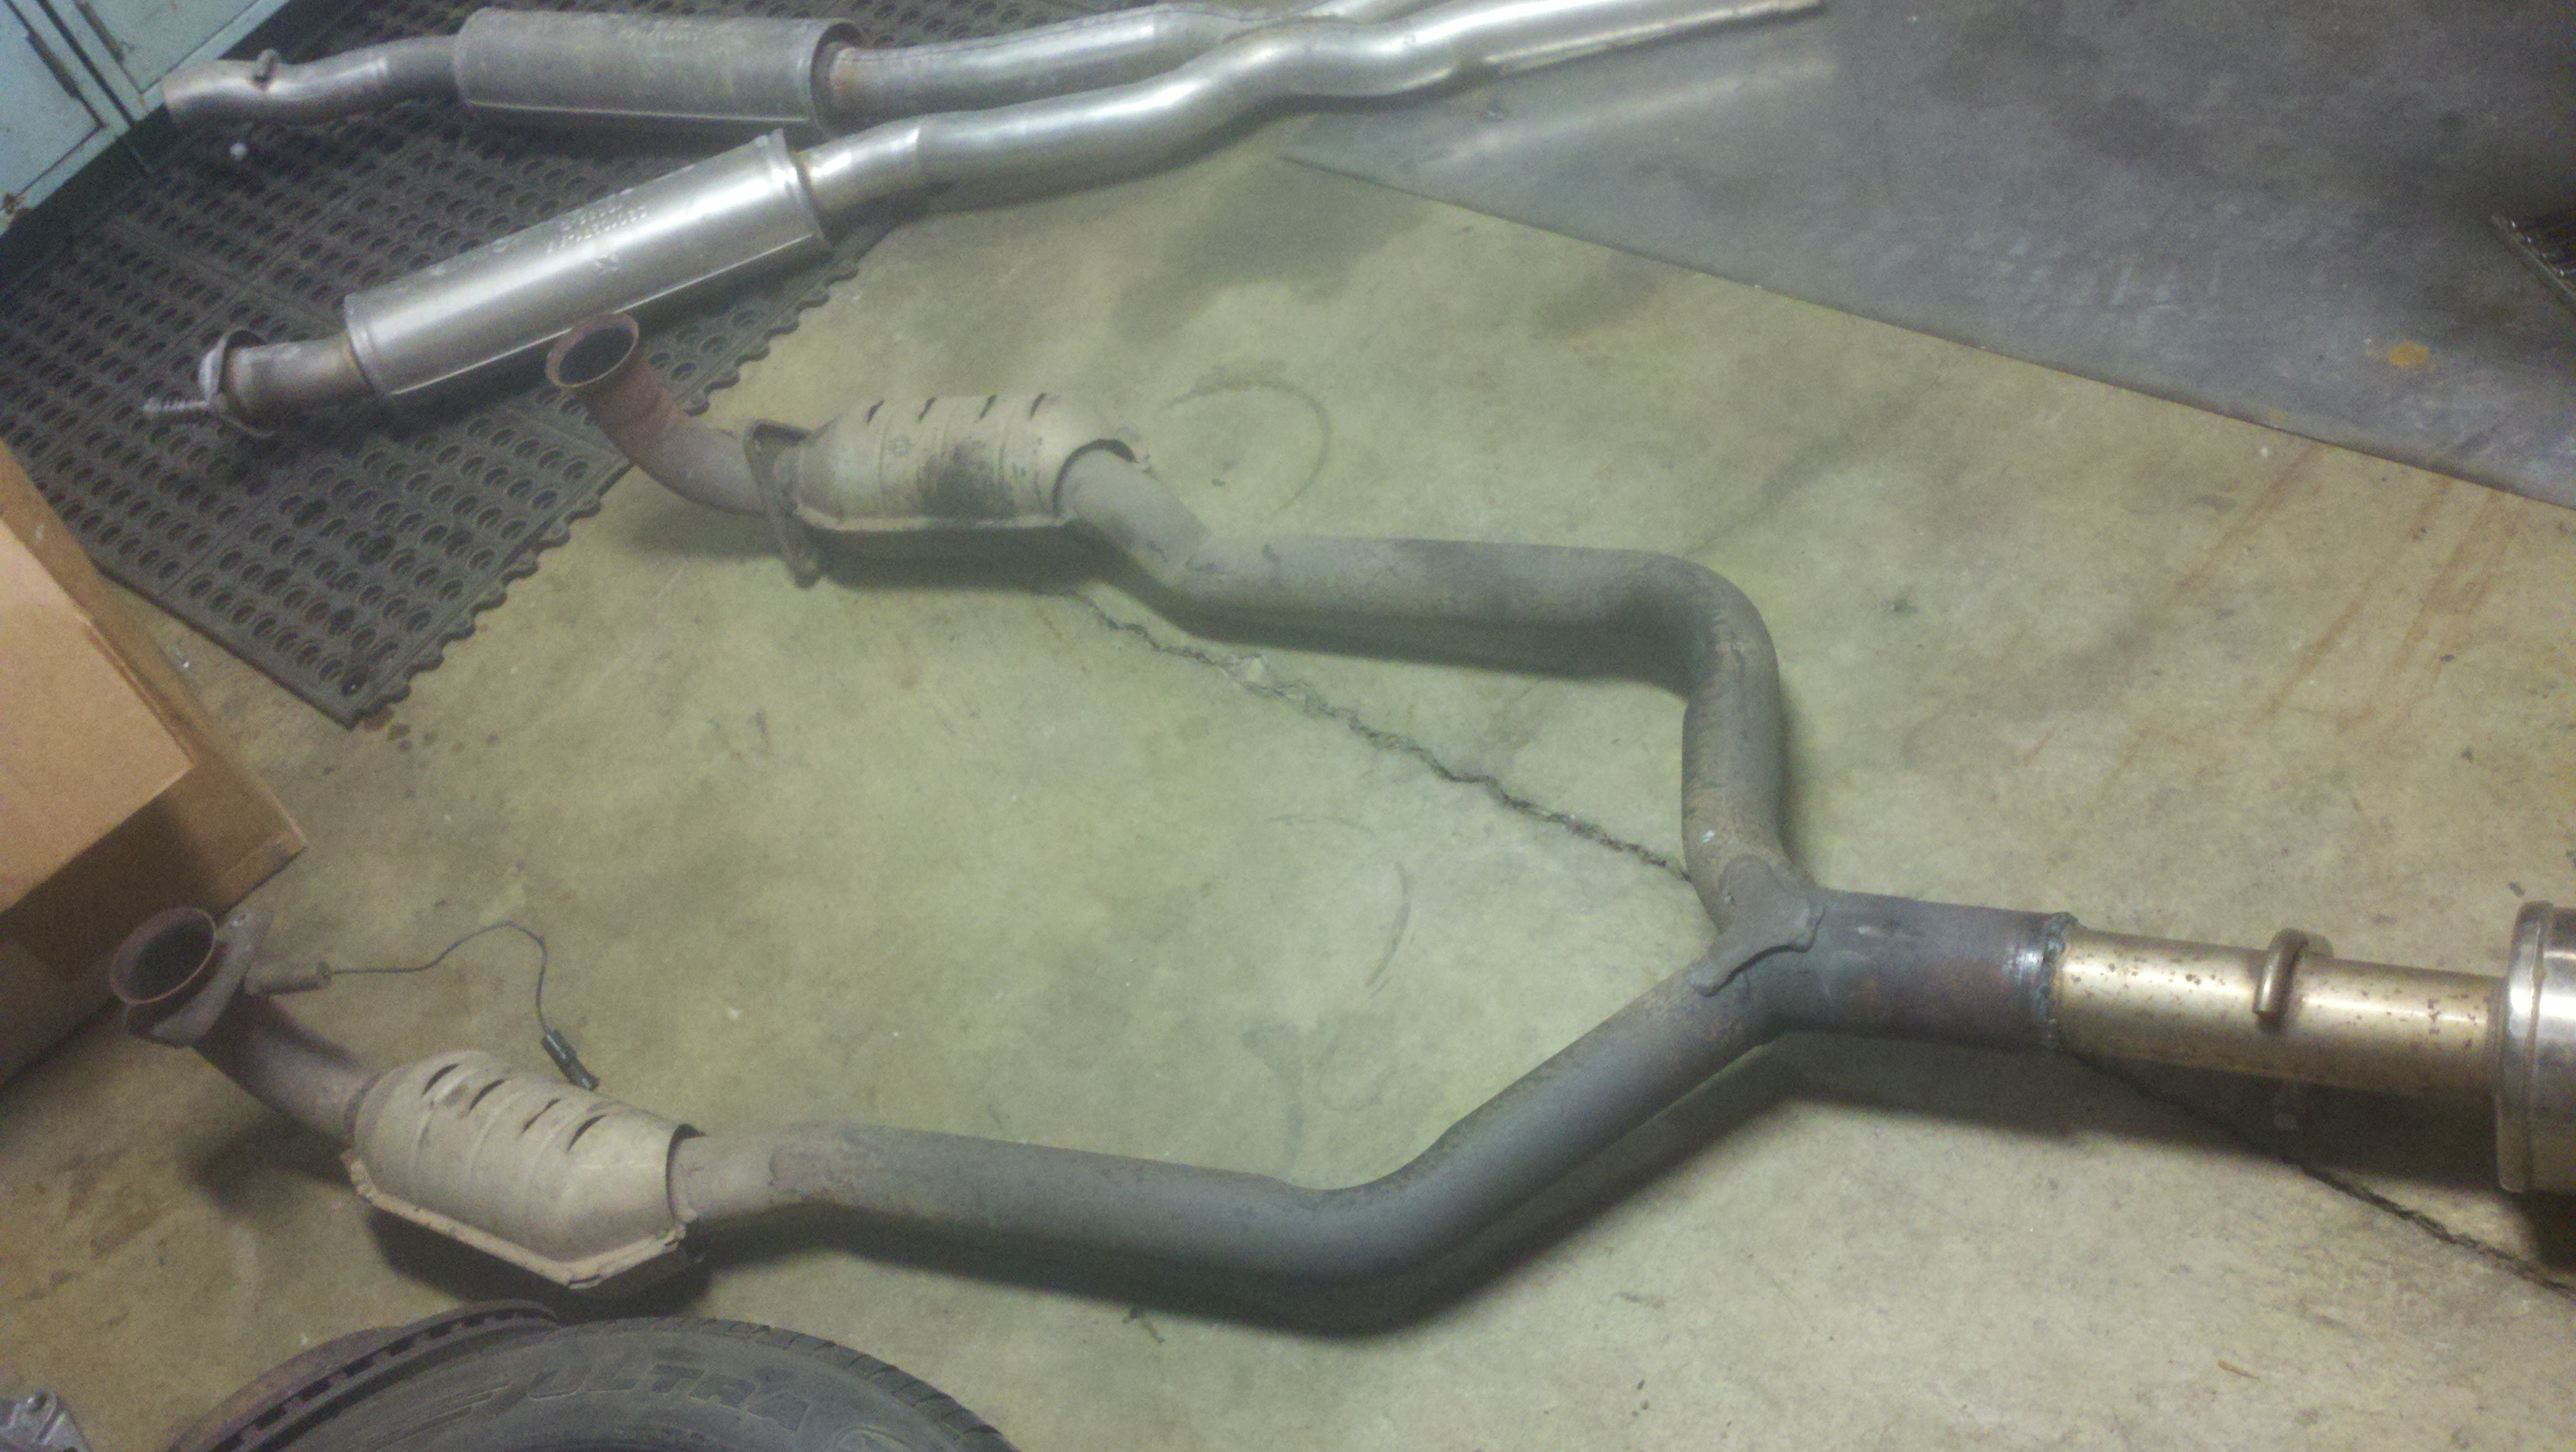
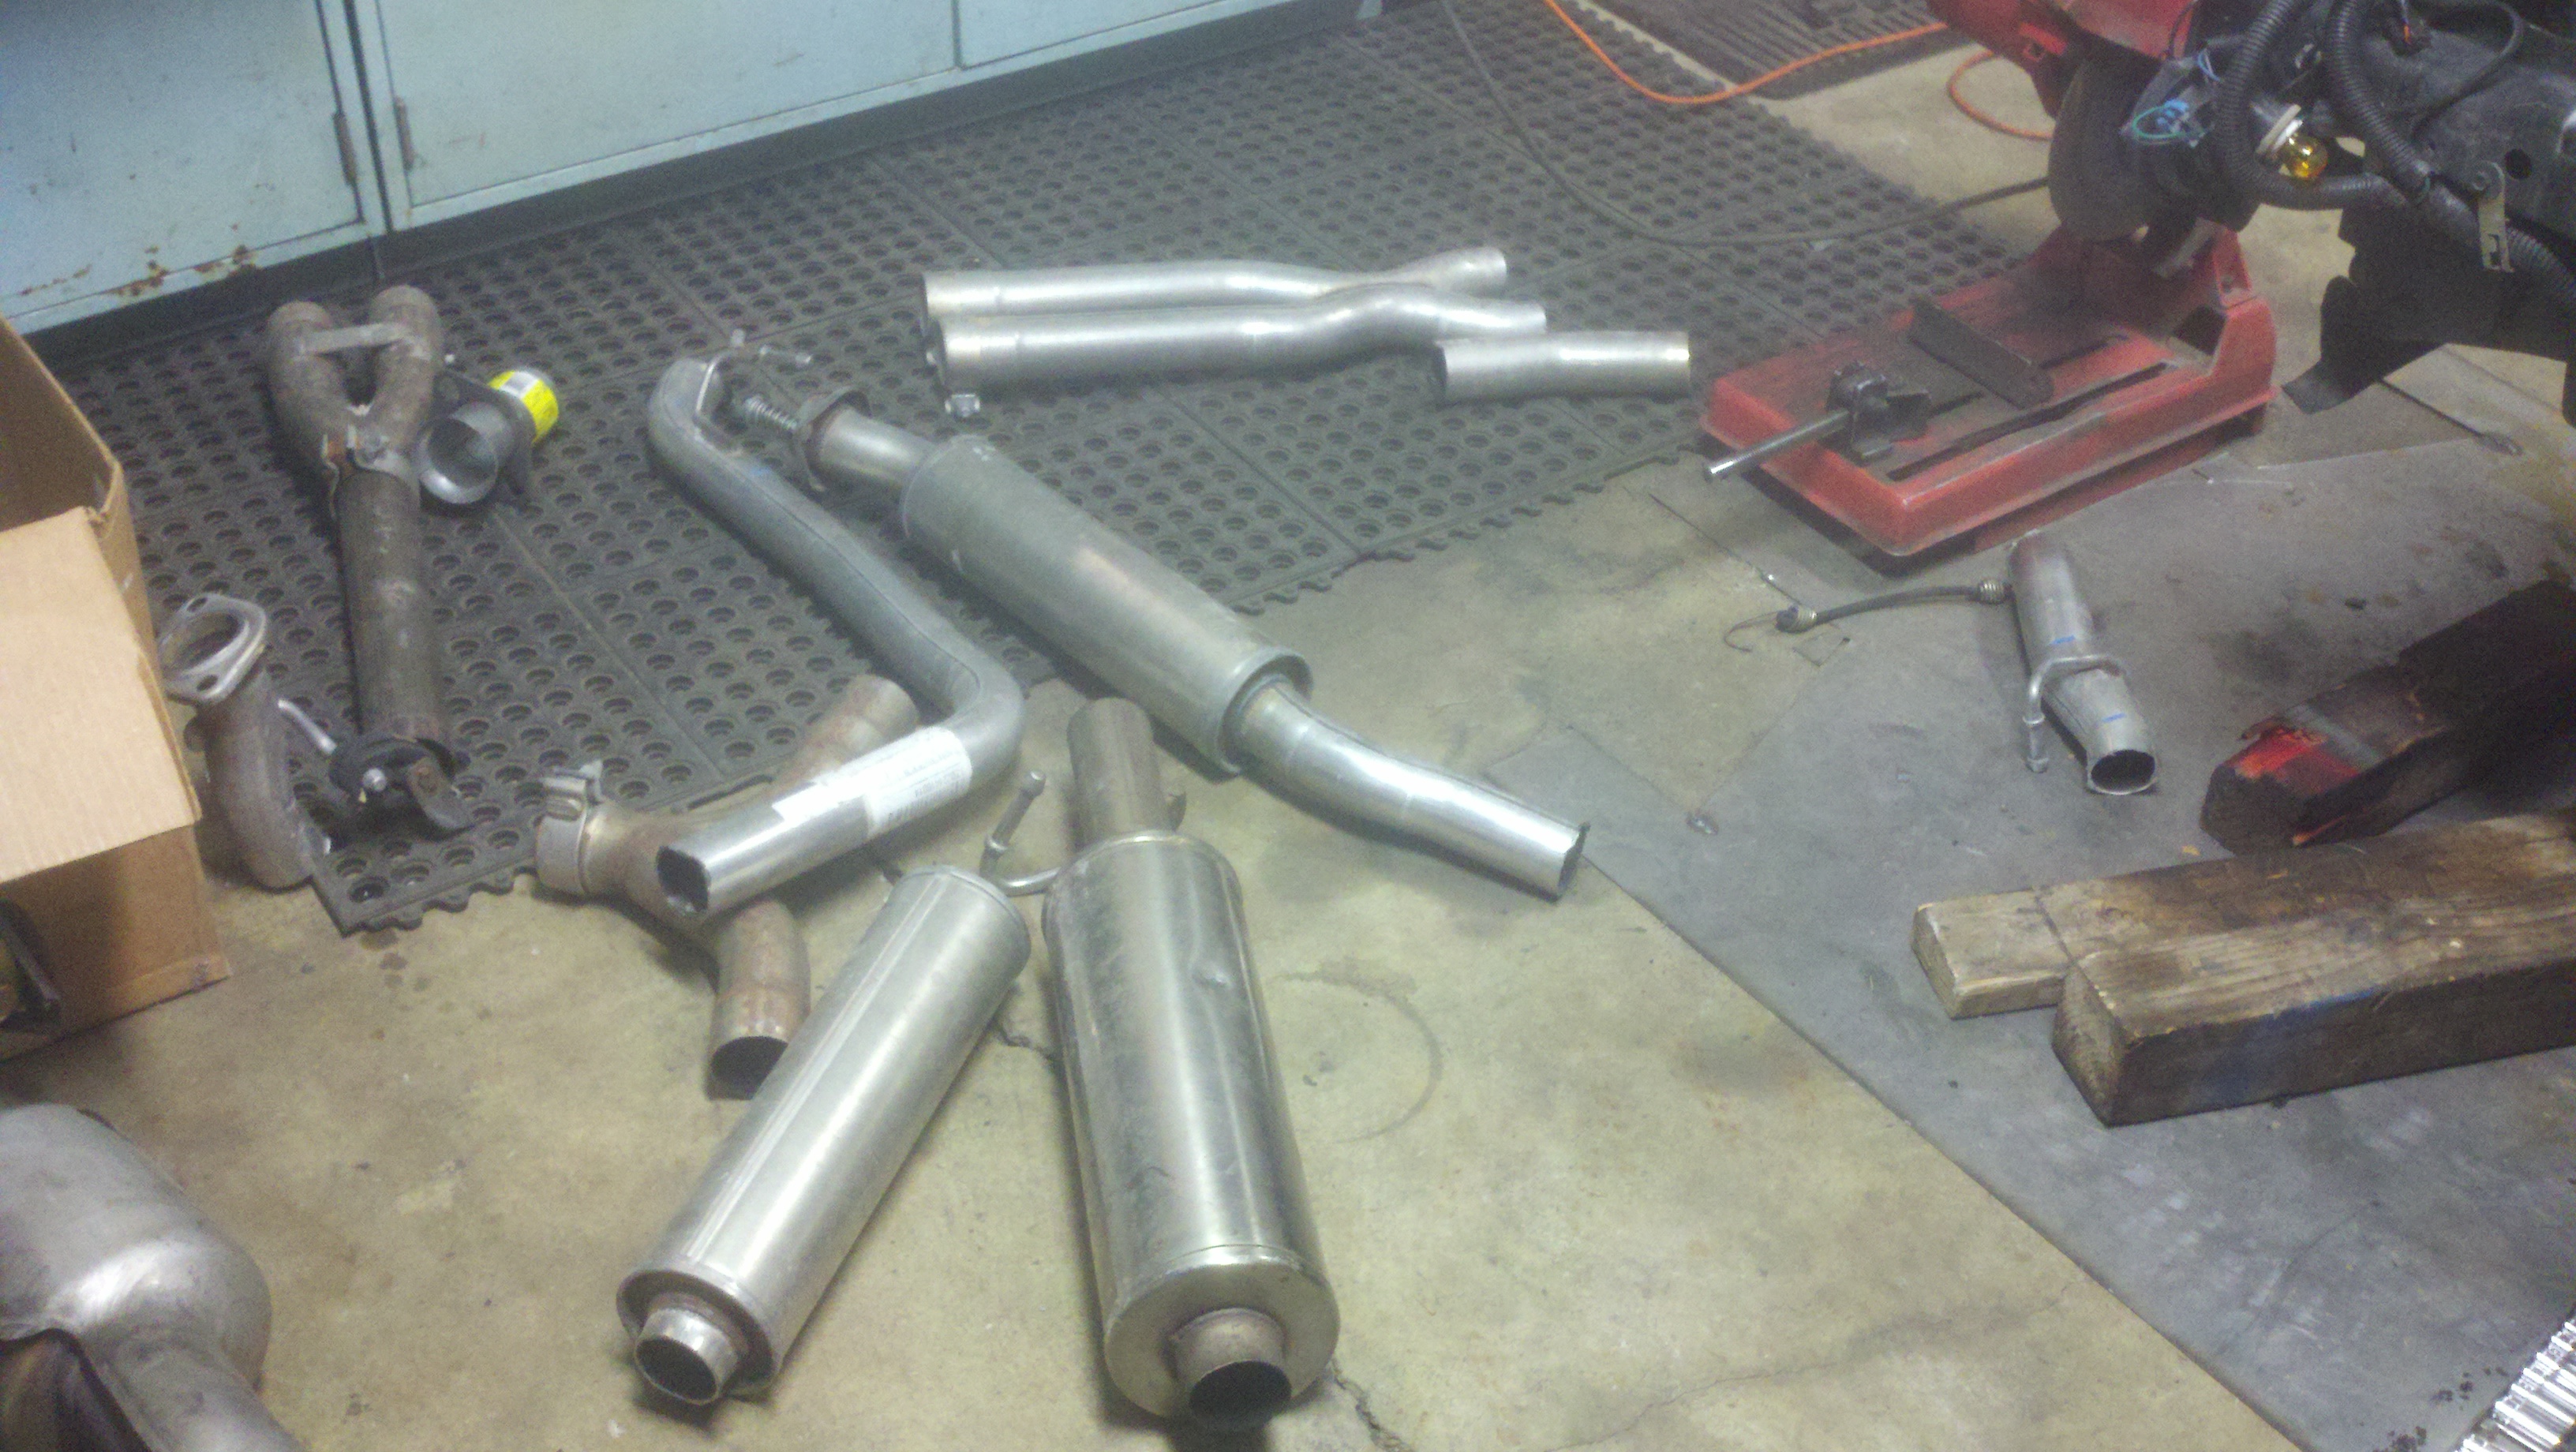
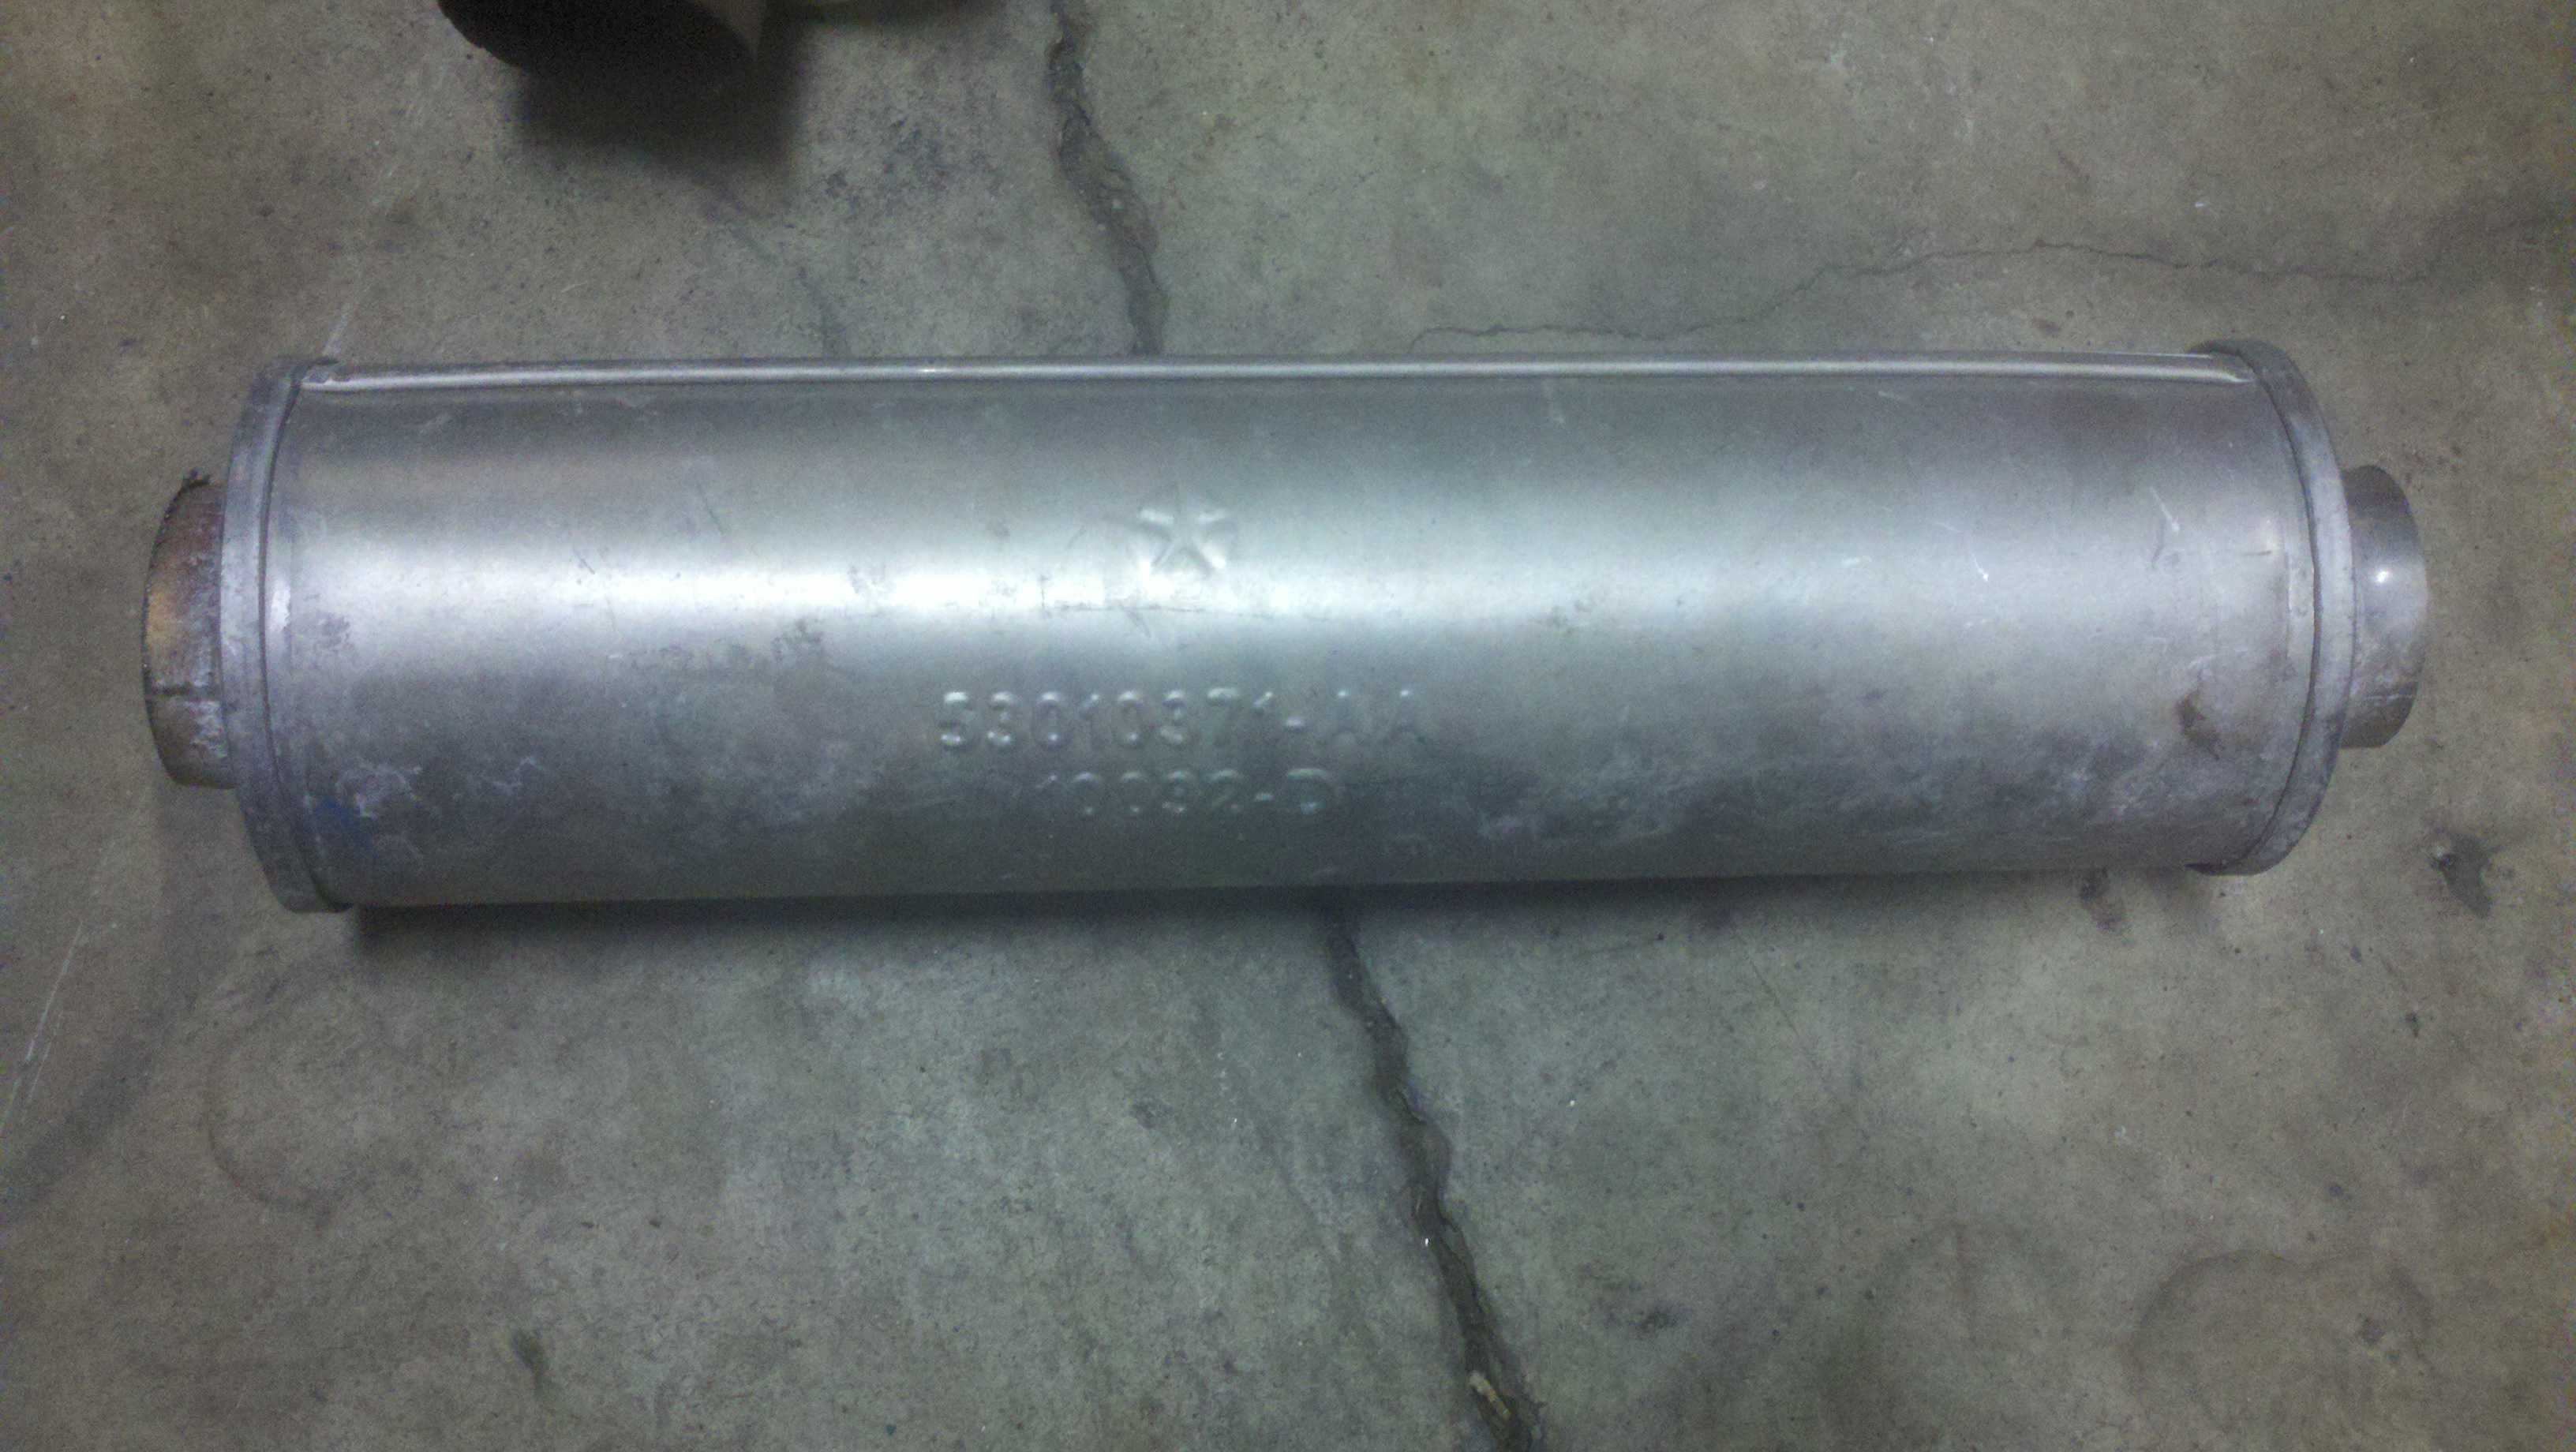
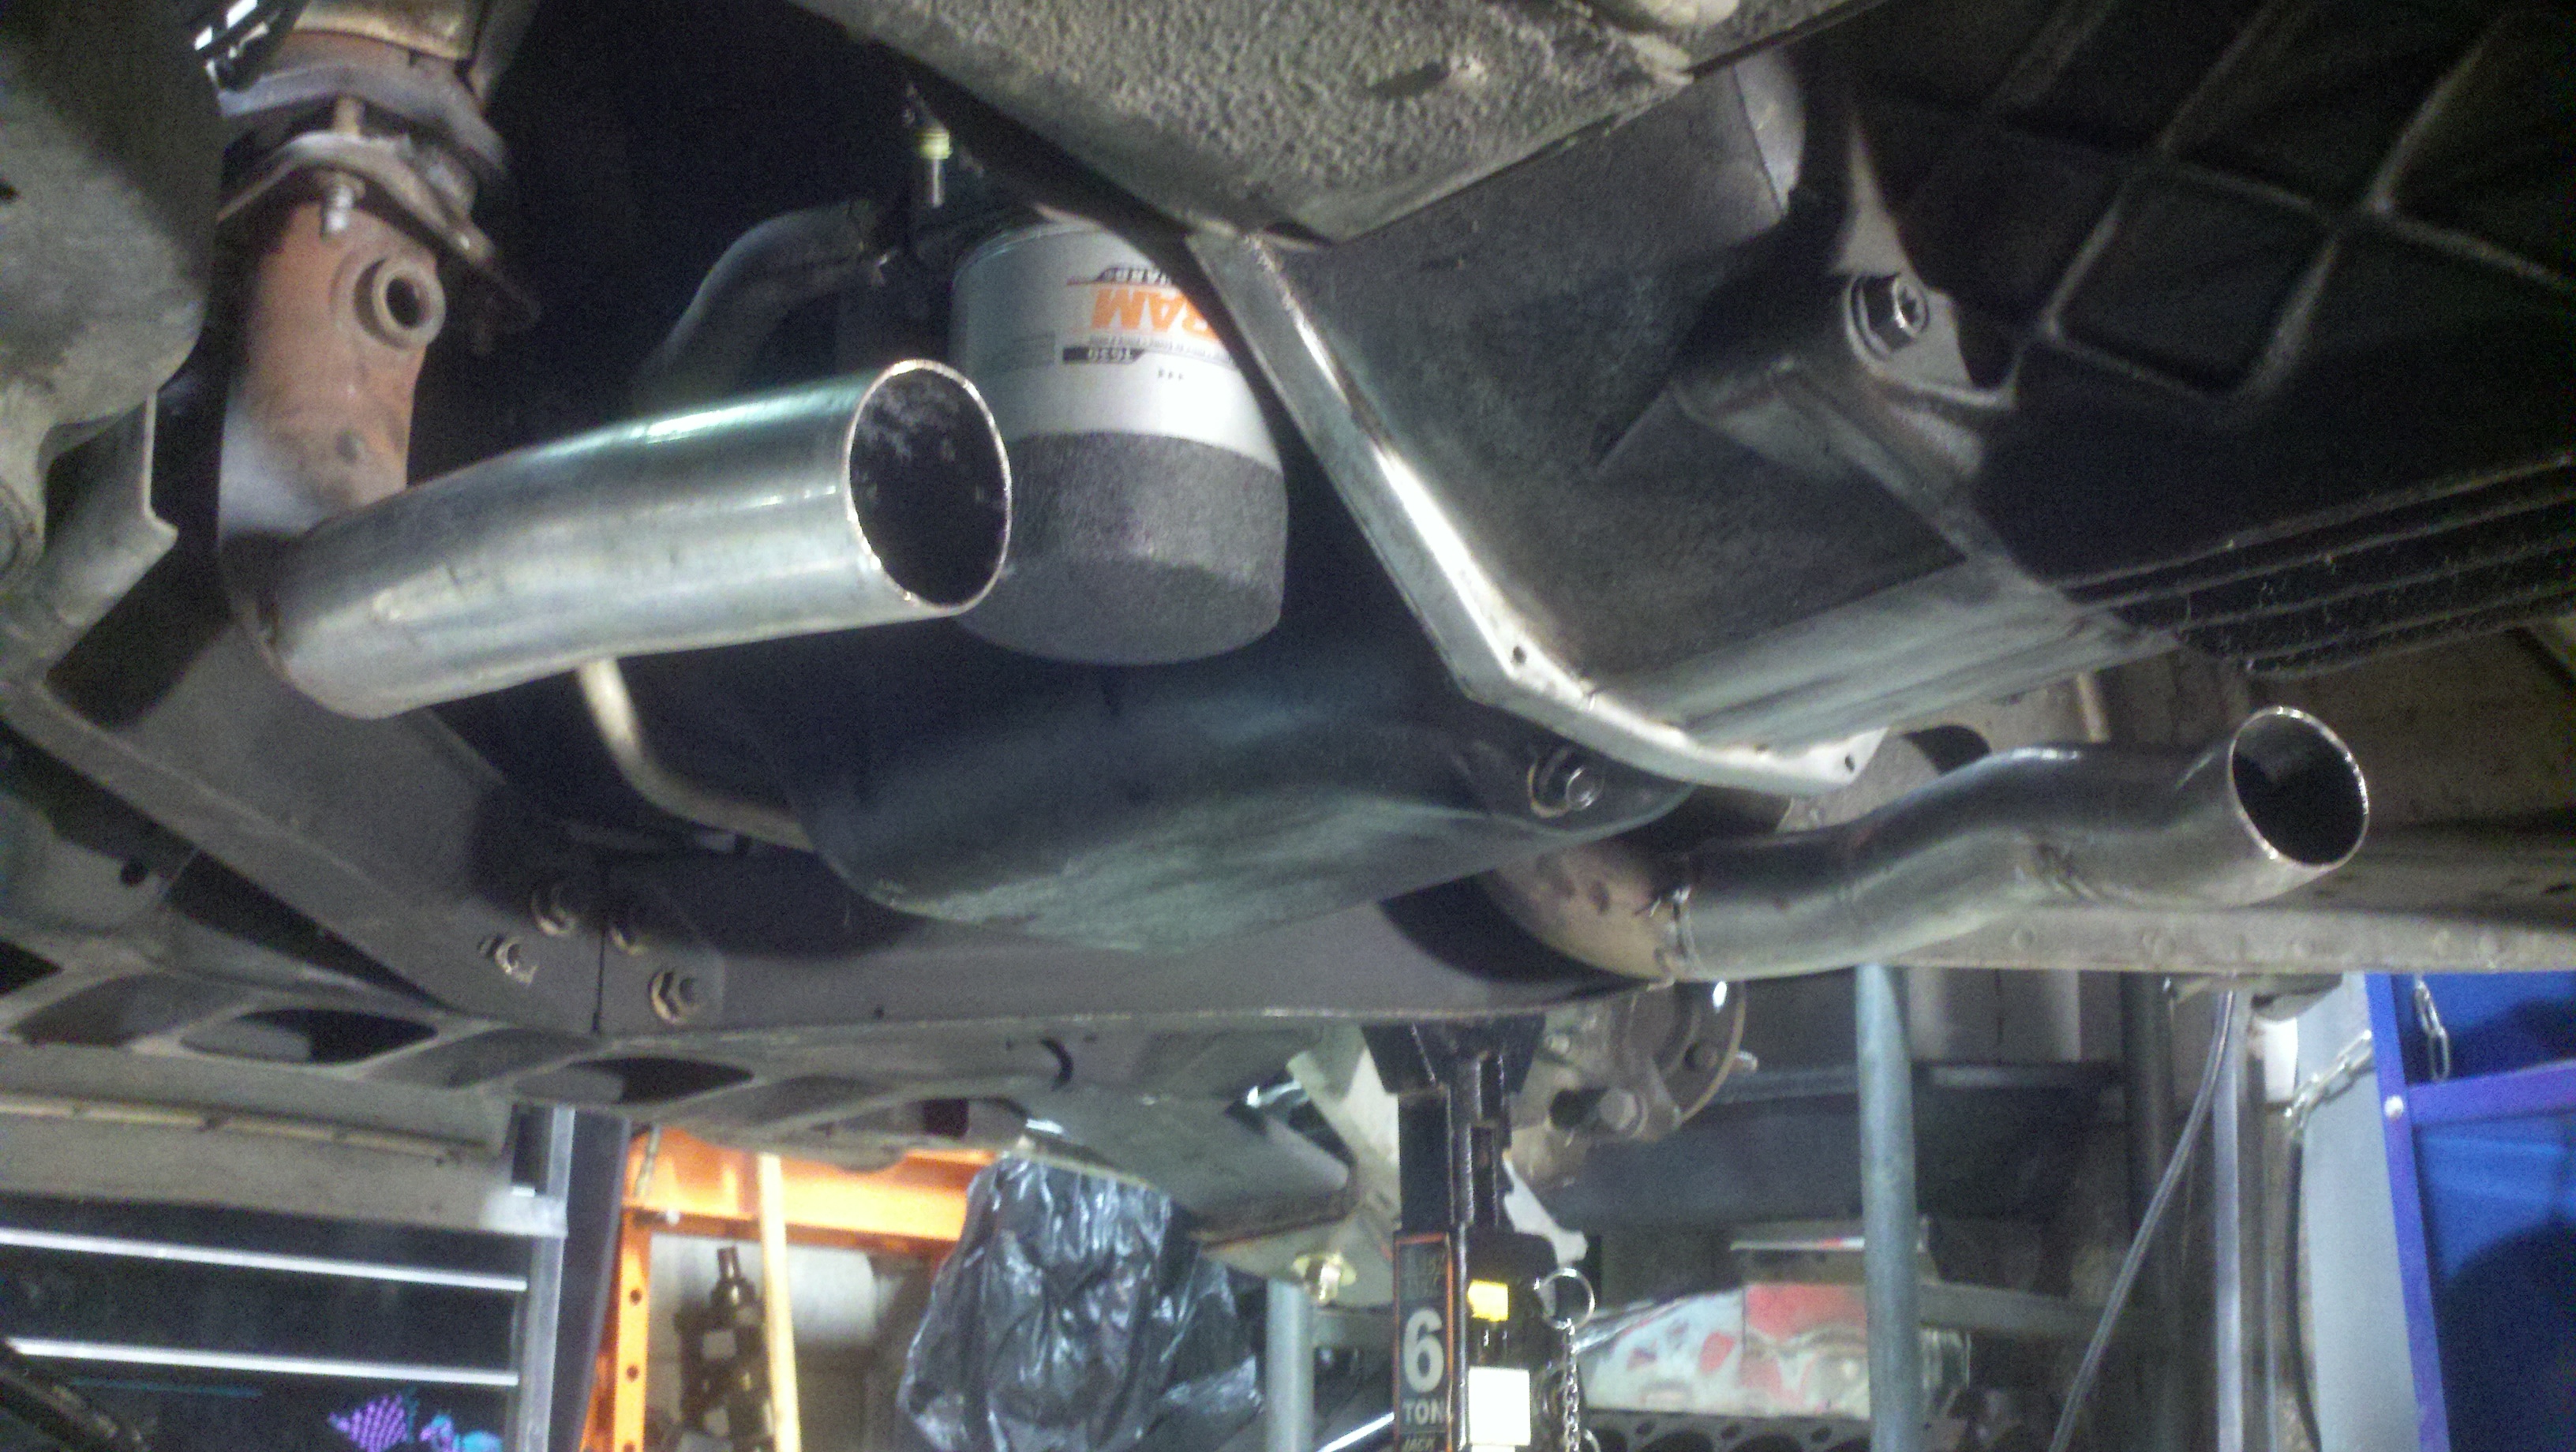
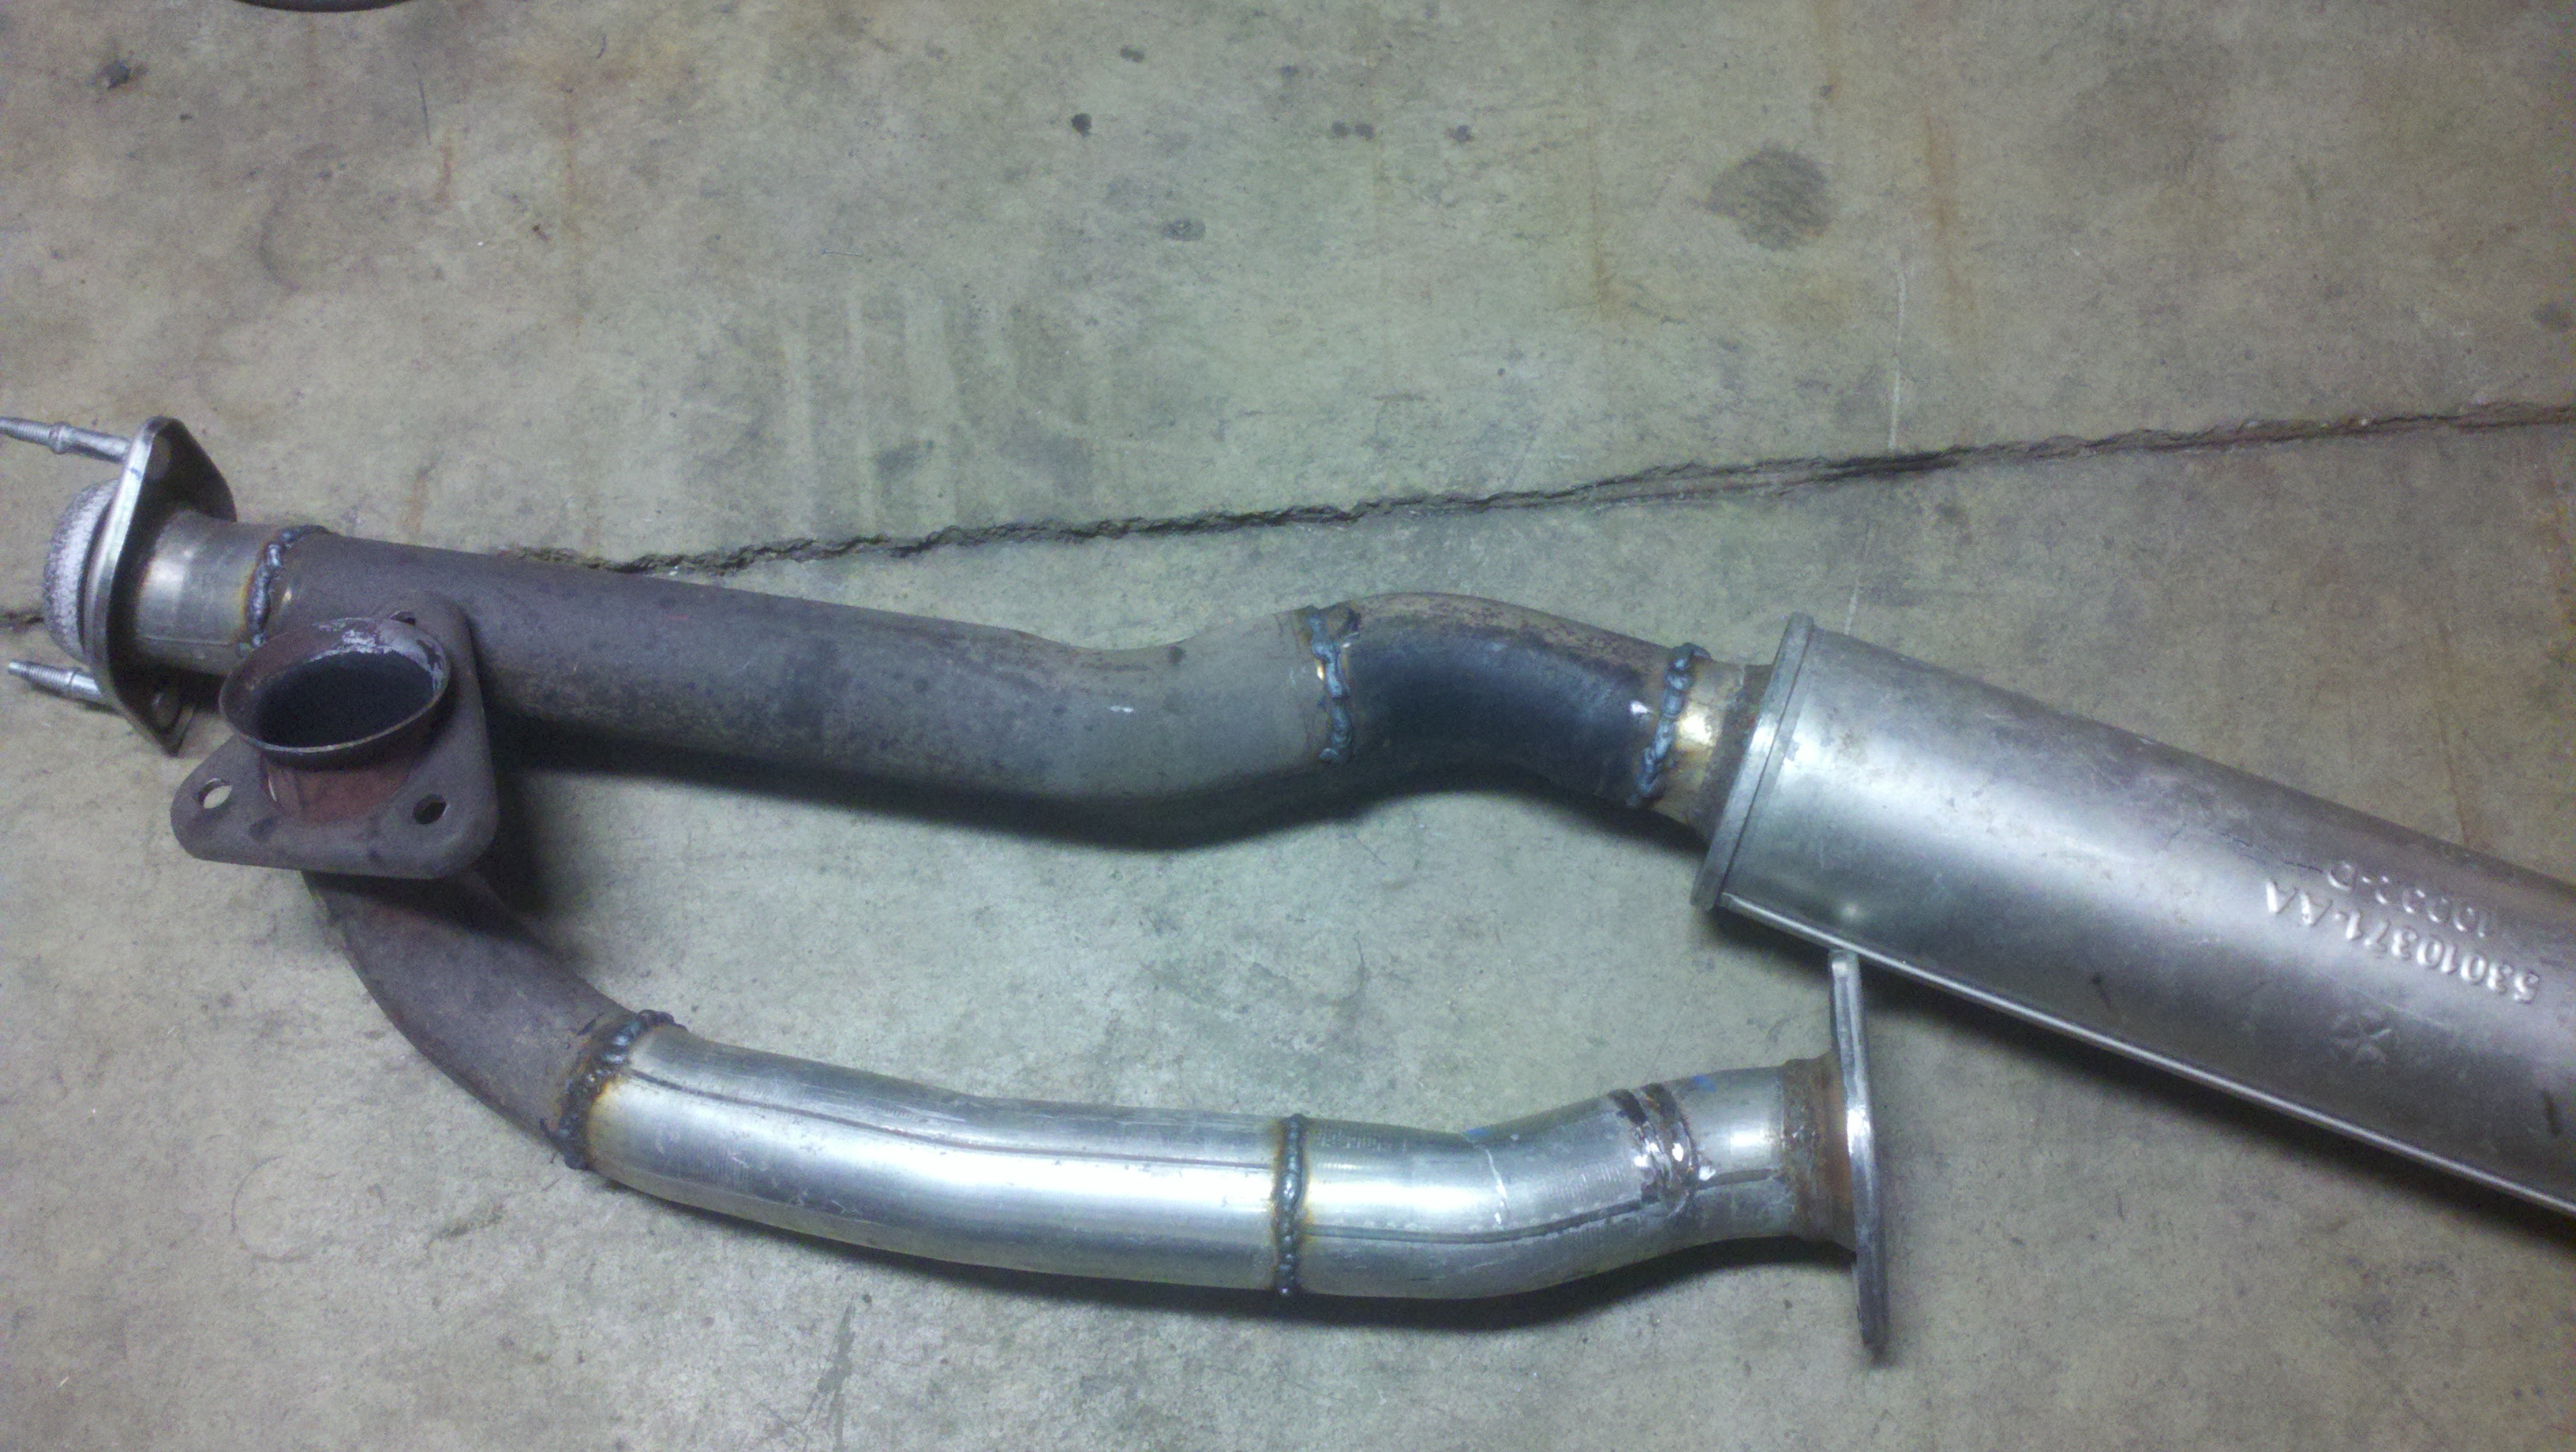
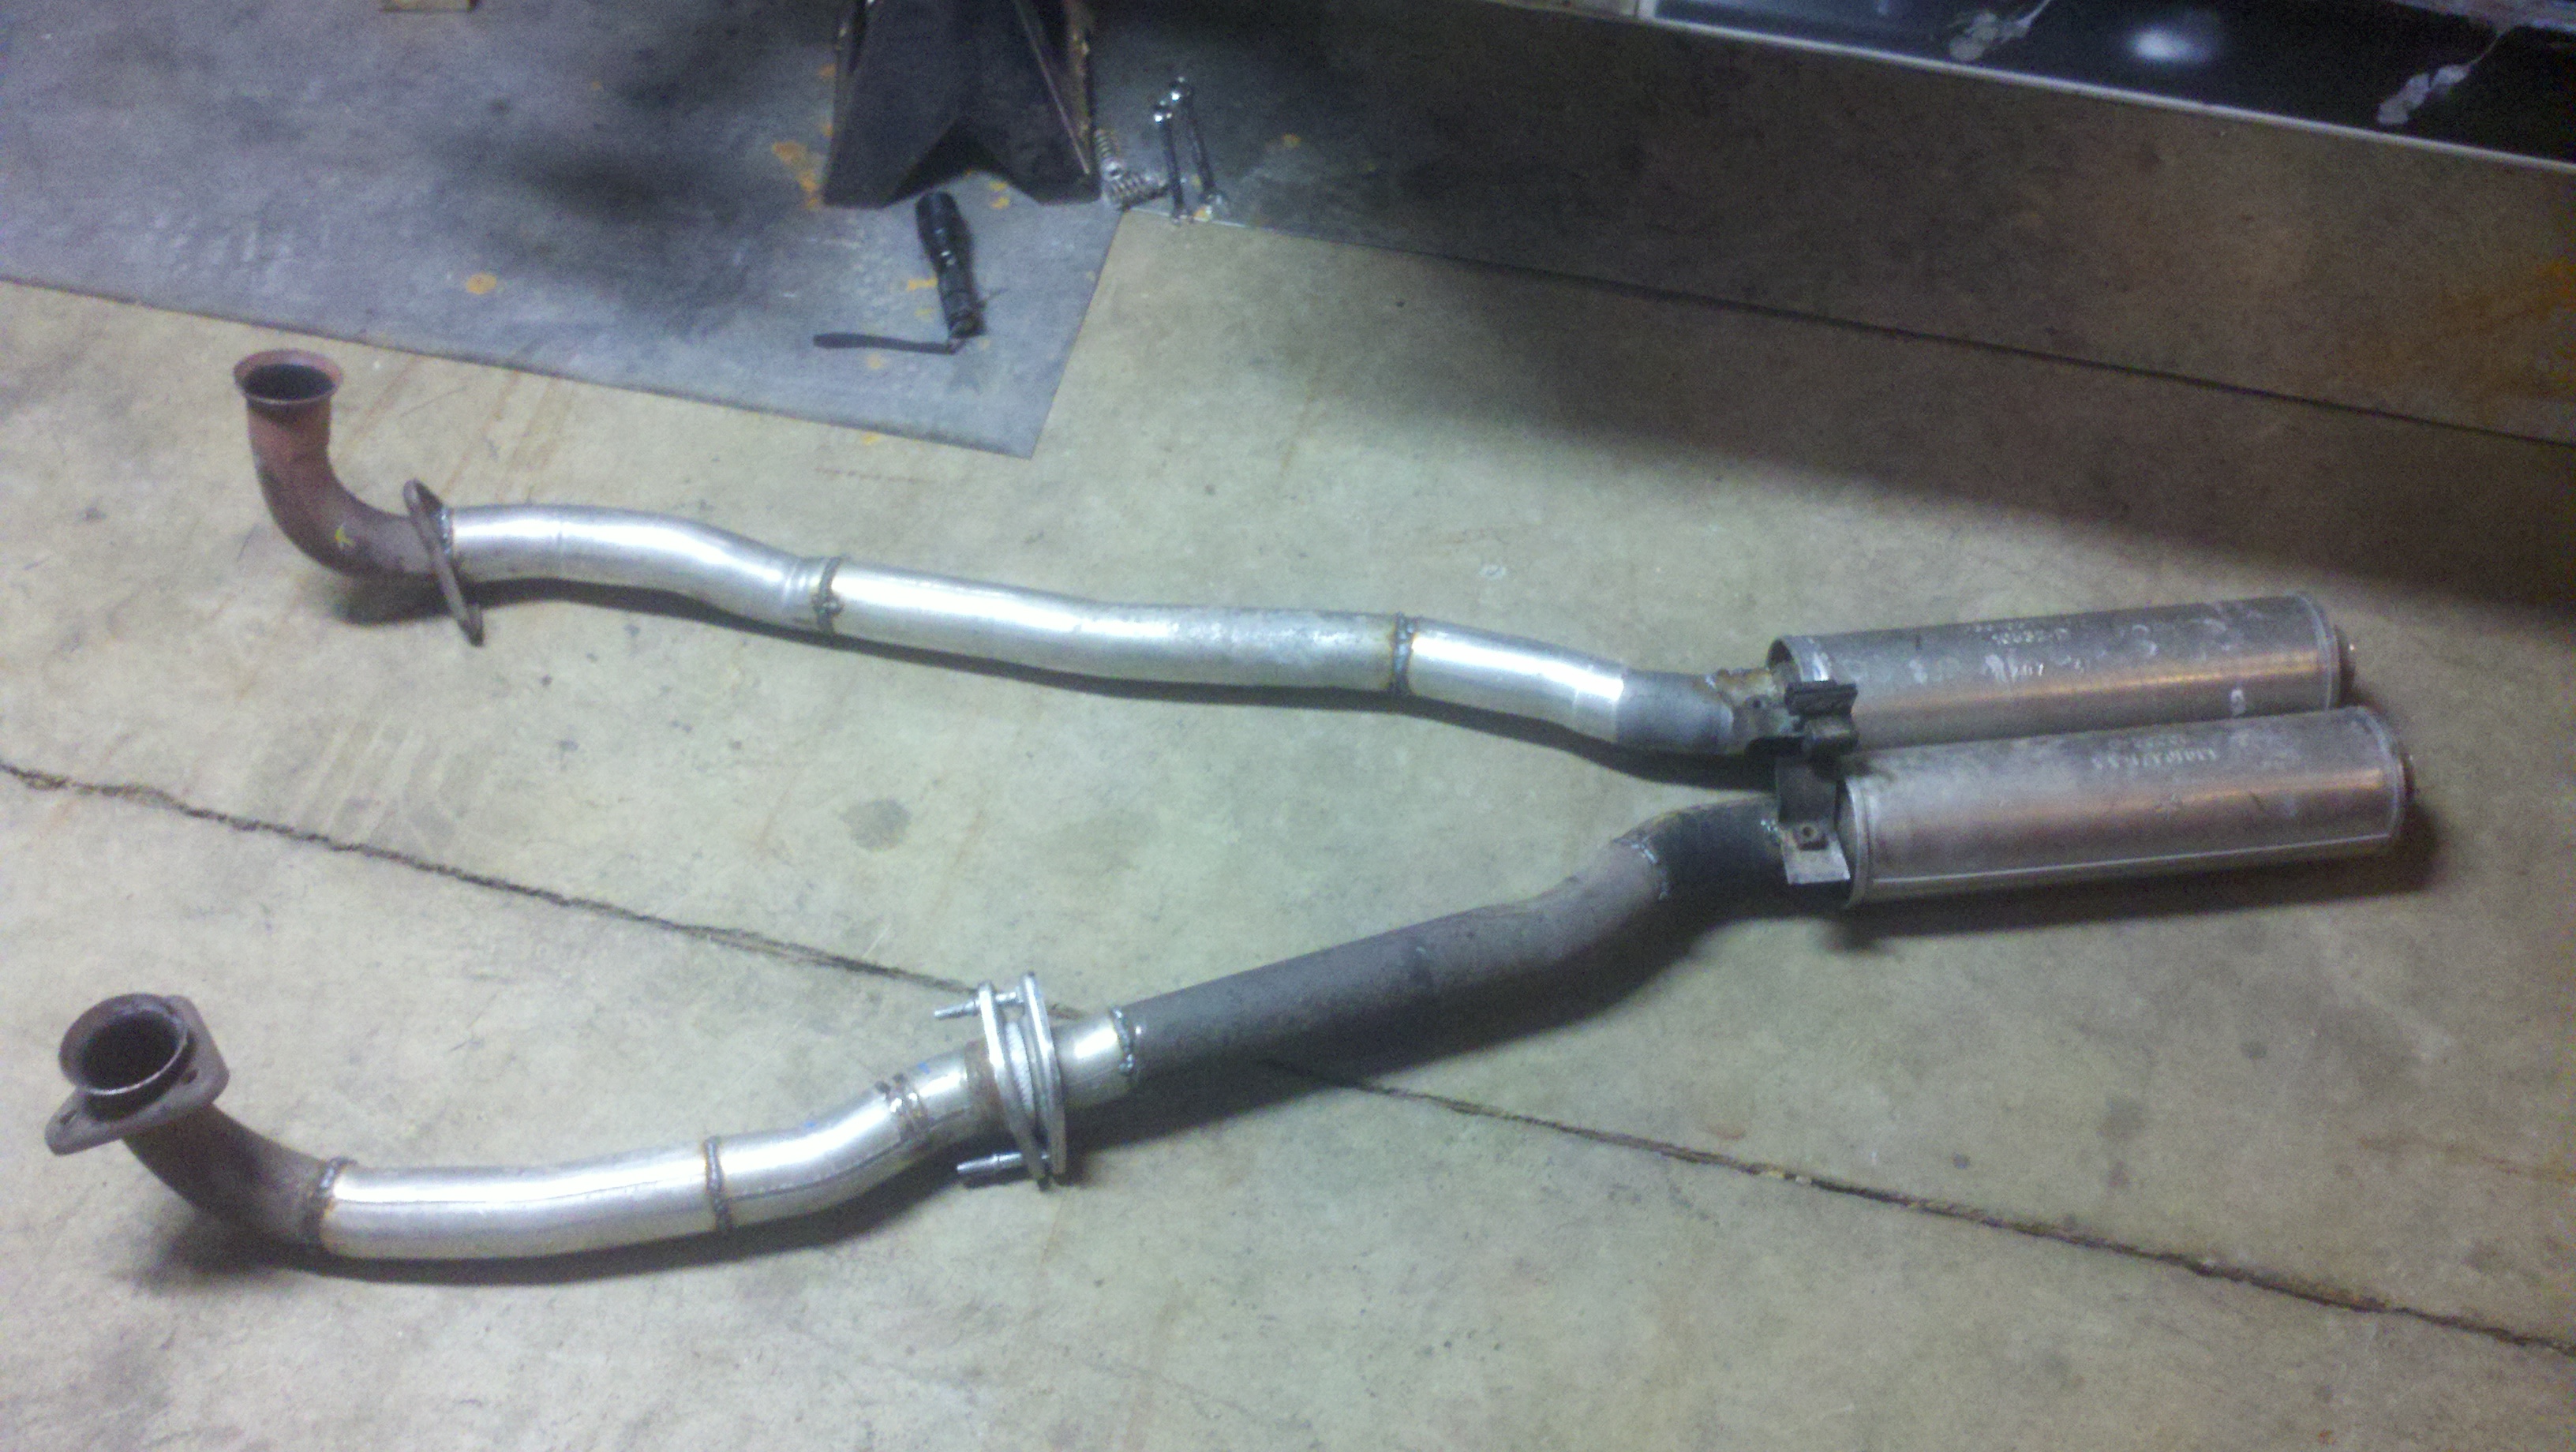
I bought a take off exhaust from a Chrysler 300 V6 for $35. It came with dual, 2.125" SS pipes (slightly larger than the original 'Vette Y piping), with an X pipe and two straight through, glass pack style mufflers. I used that plus the original Y pipe parts I took off the Kart to build the system.
So here is what I started with.....
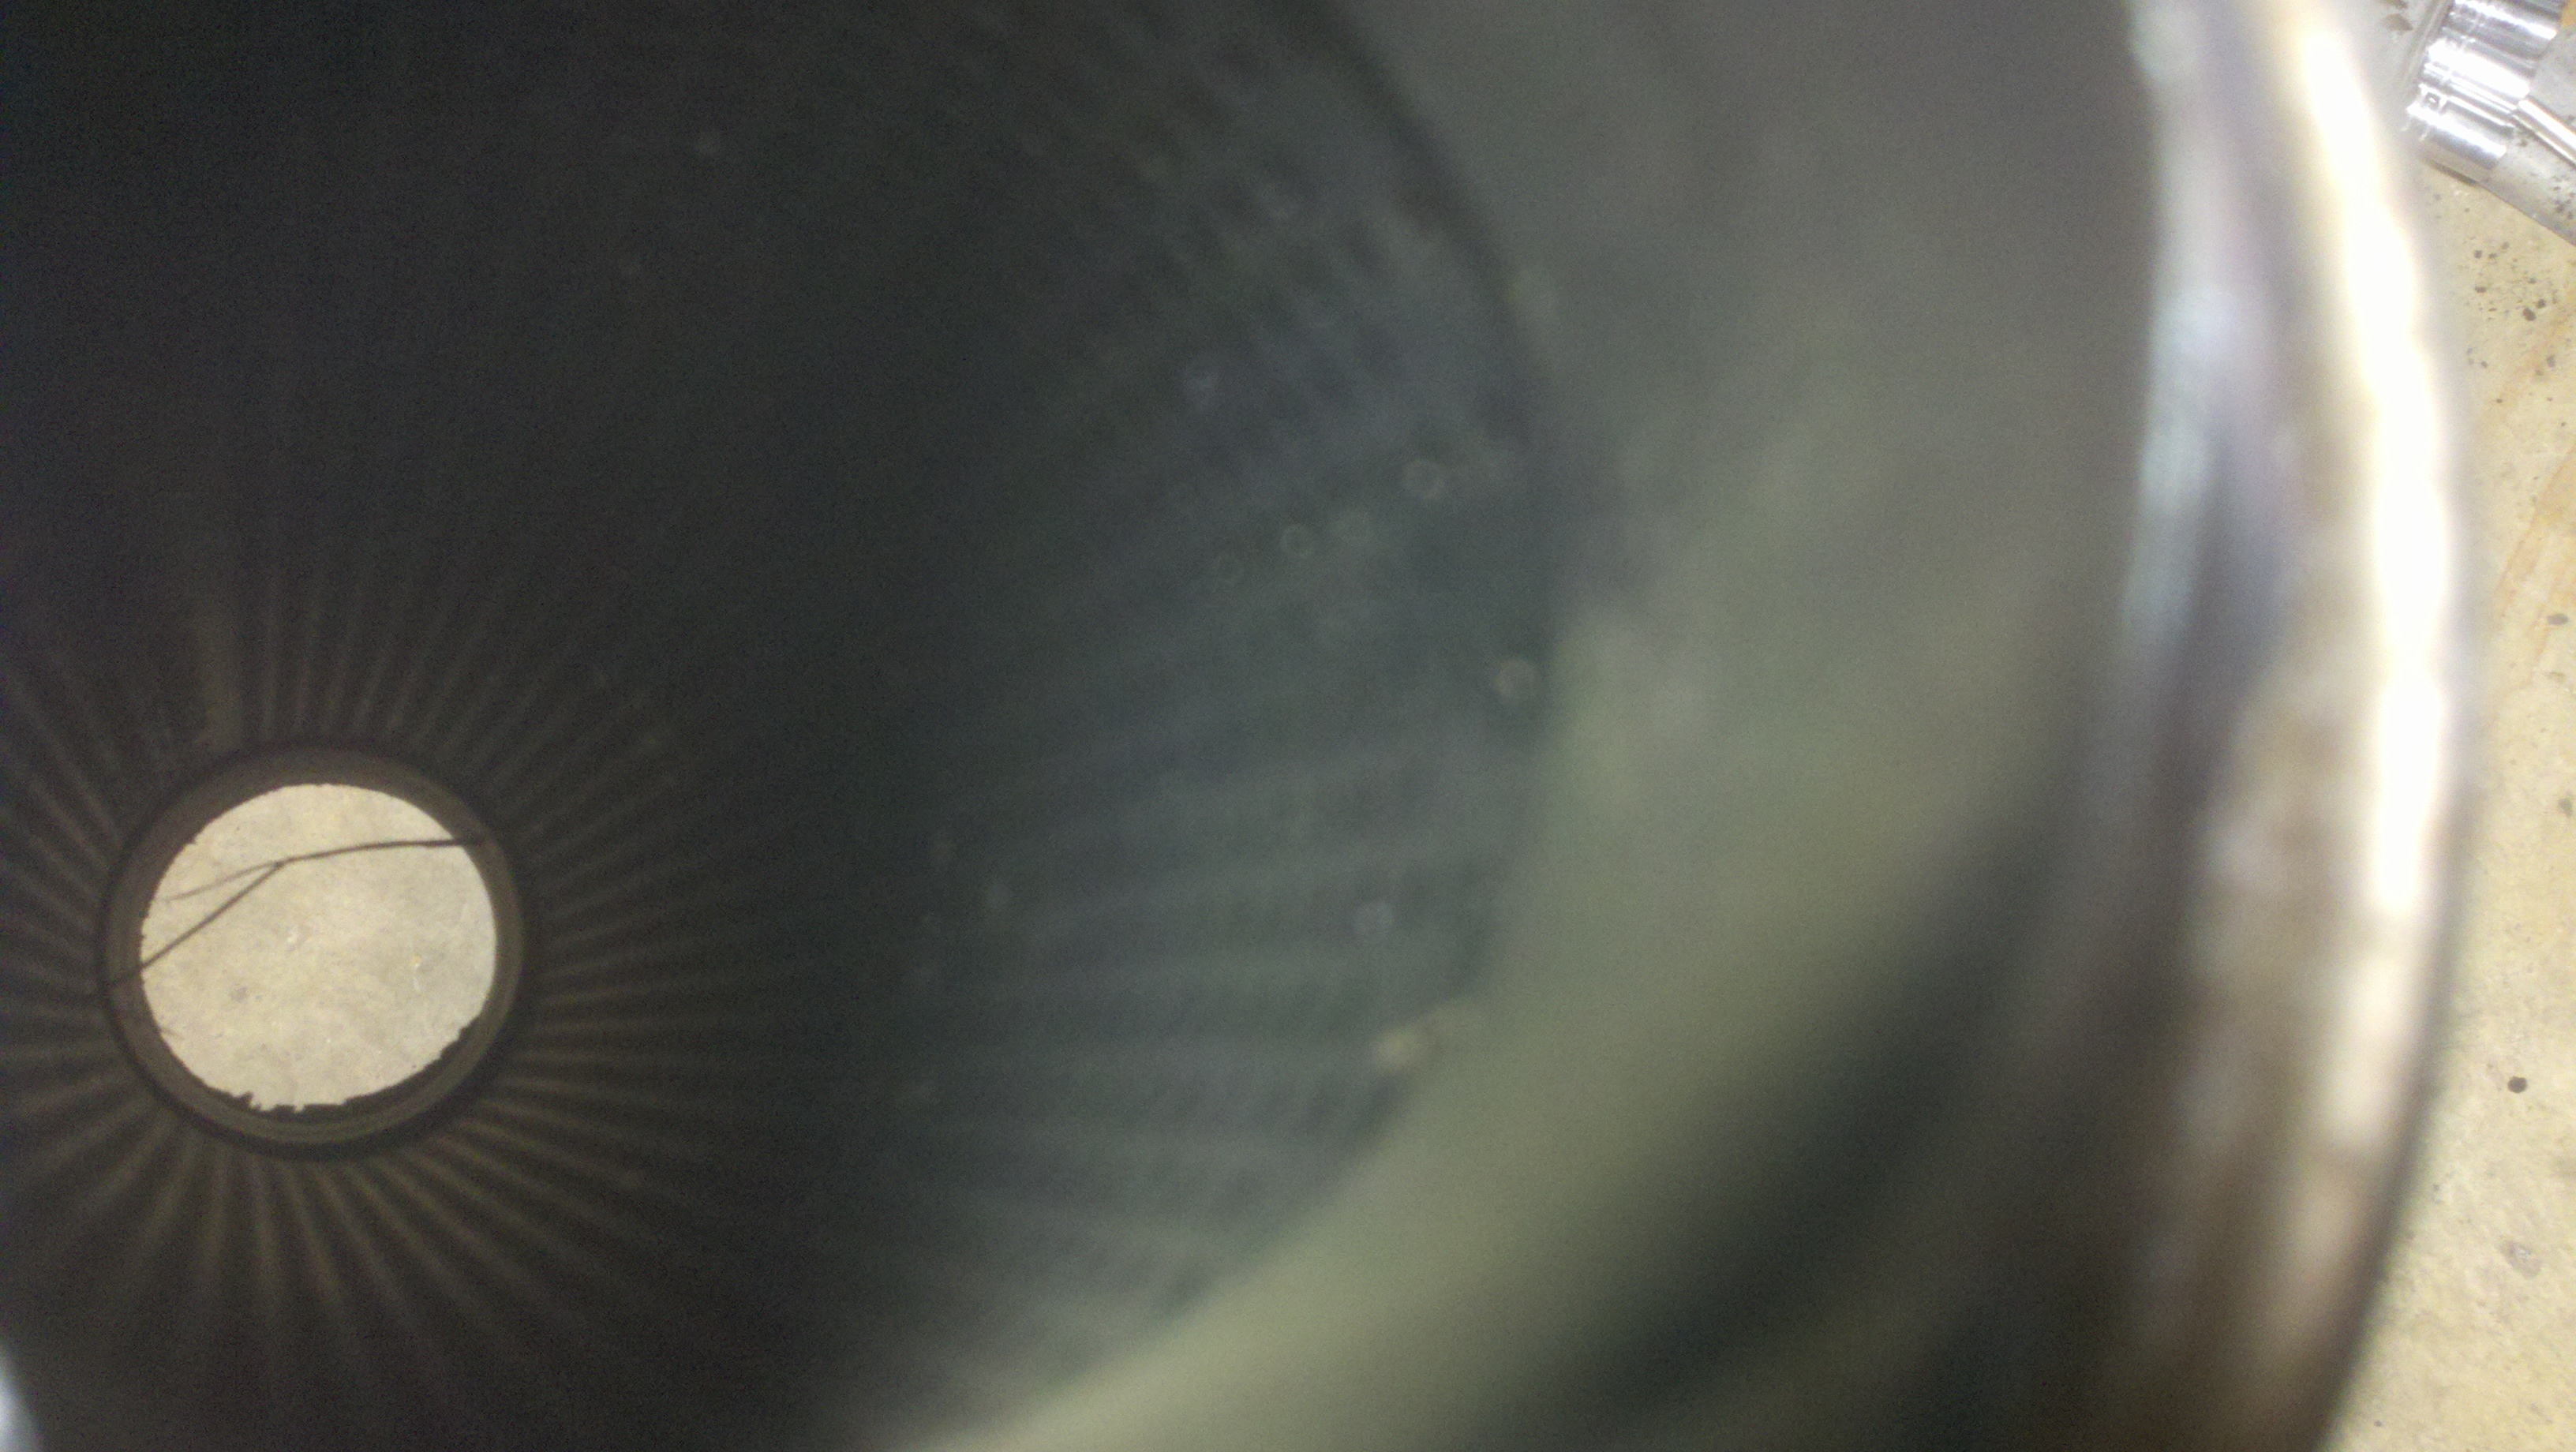
Here is the inside of that OEM Chrysler muffler. Pretty nice stuff for a stock V6, IMO
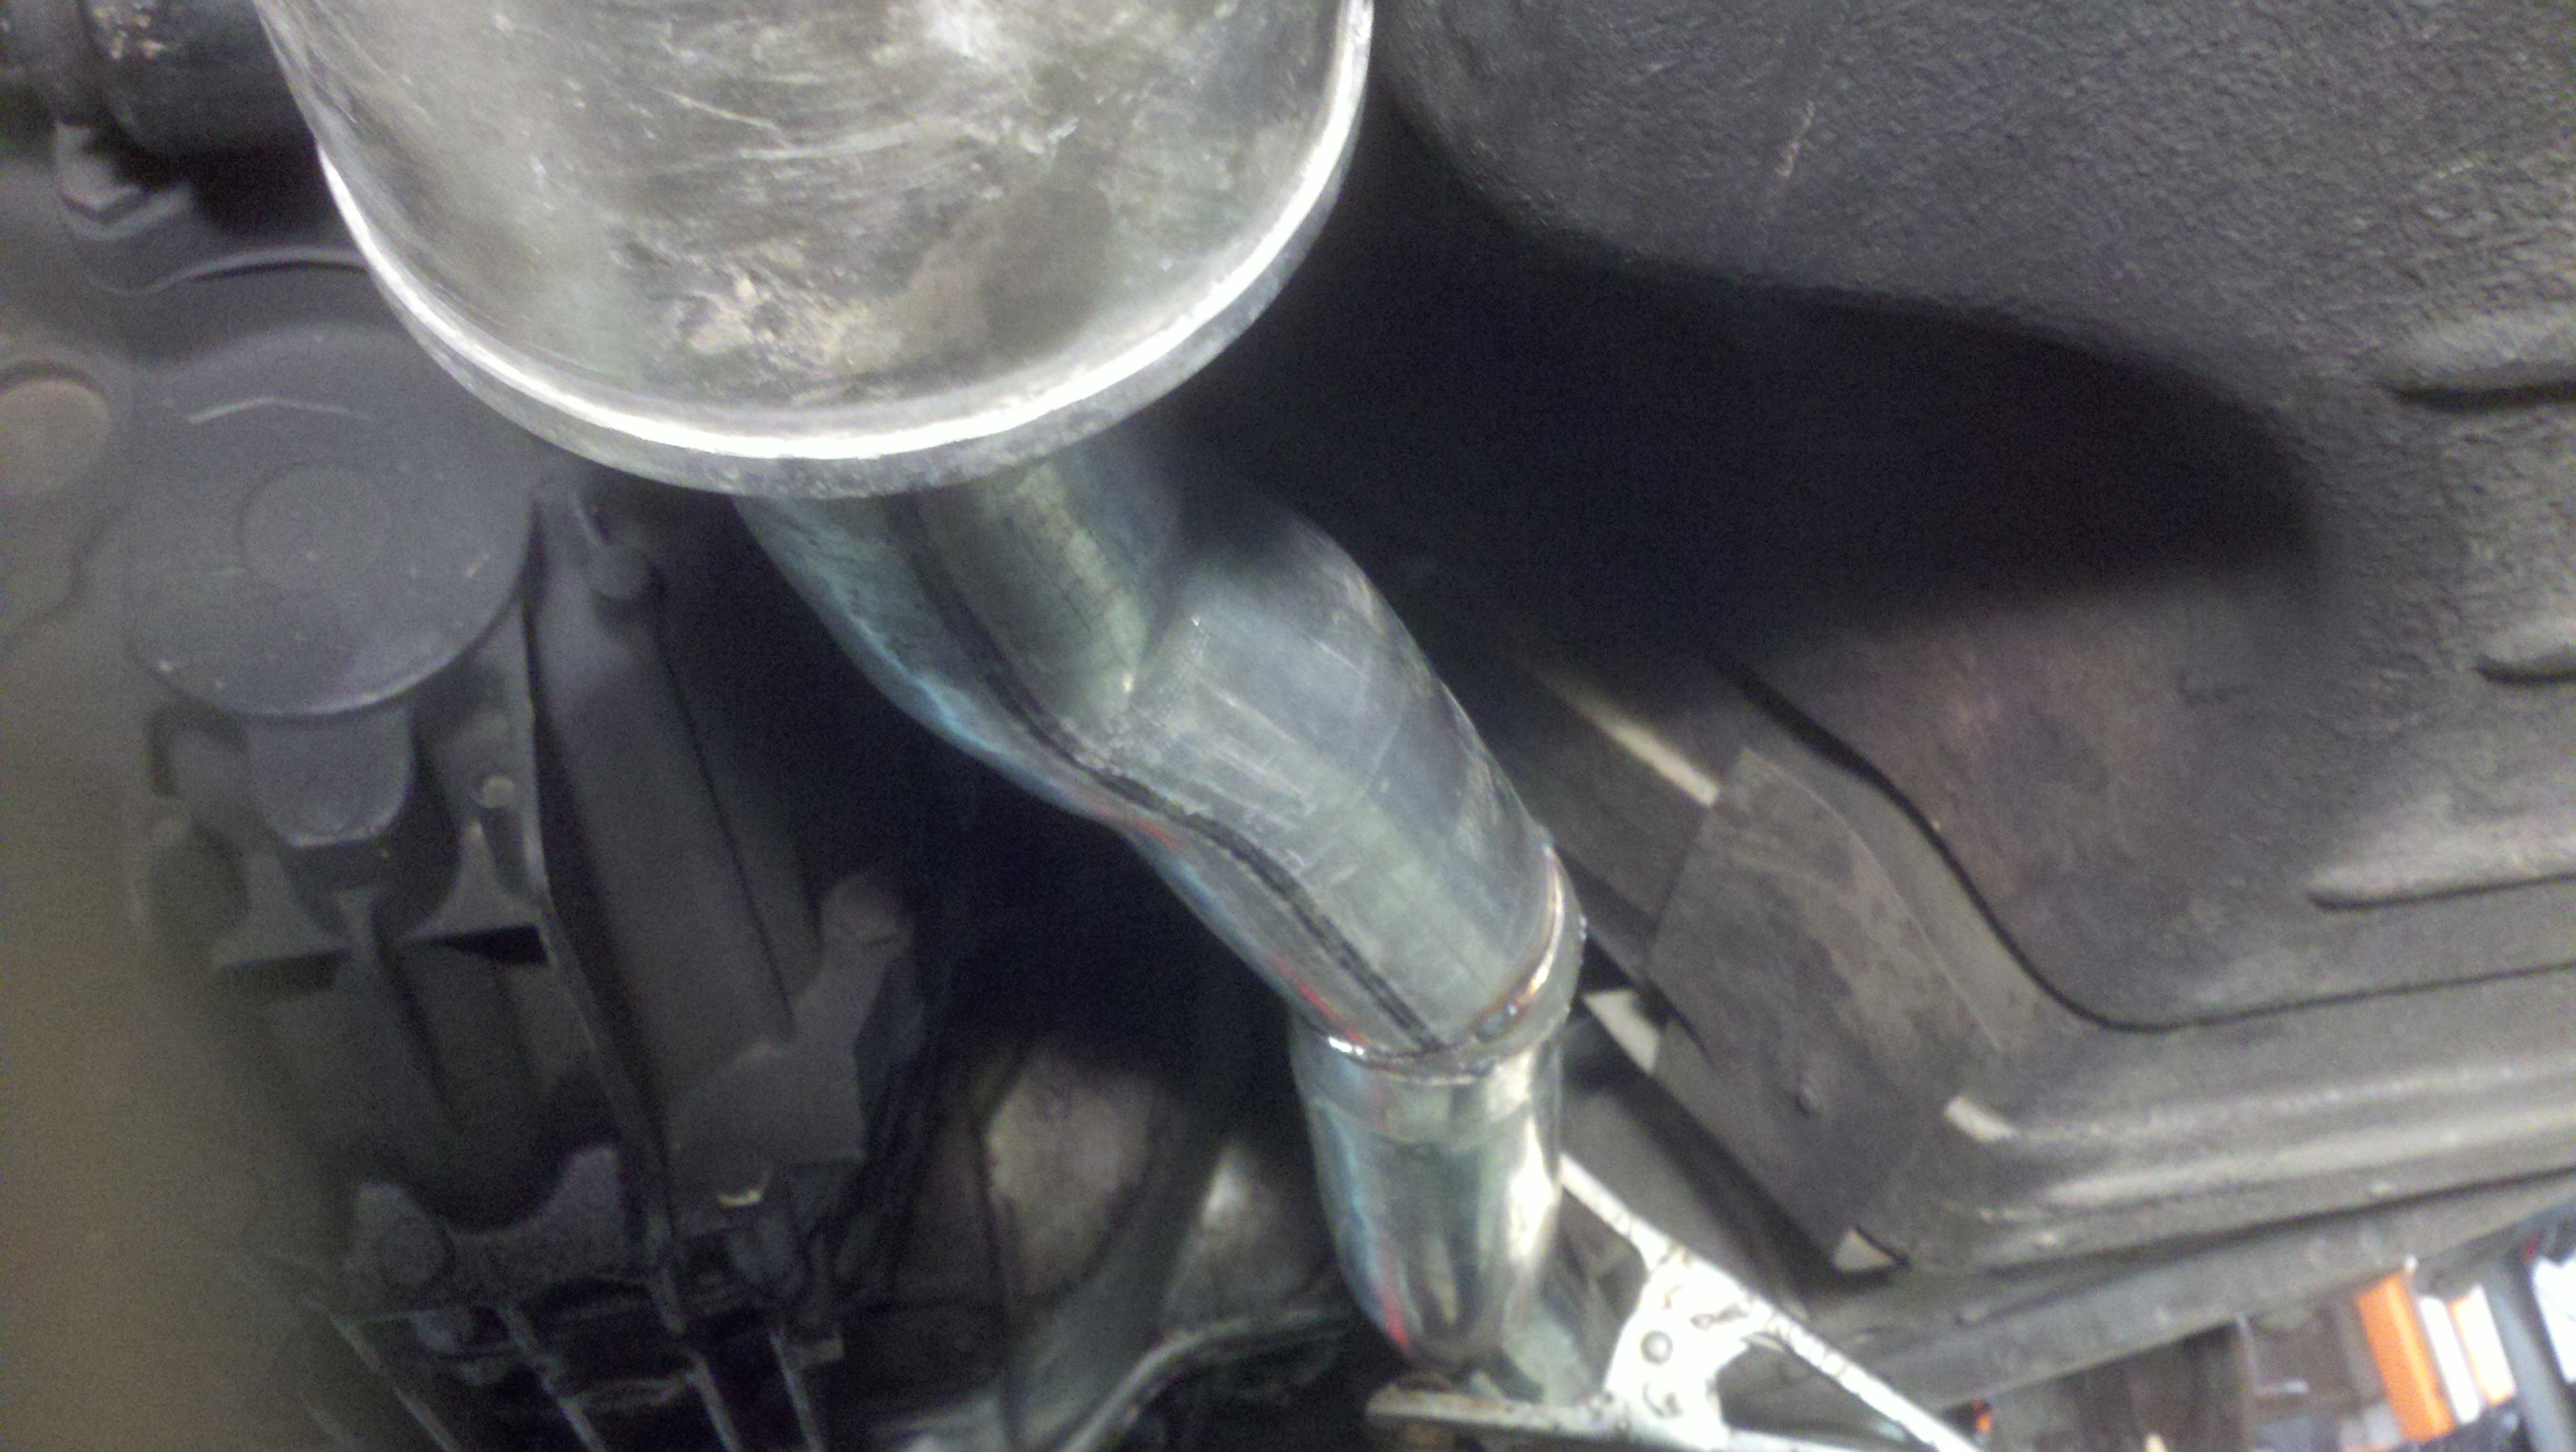
I chopped the "down pipes" off the front of the pre-cats as I was going to reuse those pipes.
I attached the OEM "down pipes" to the manifolds, then started adding "puzzle pieces" to the system from the junk I had, in a way that would get me where I wanted to go...while having lots of turns in it (even if many were only slight turns). I'd add a piece, then look at what I had left, consider what I'd need for both sides and cut/pick another section of exhaust to move on. First goal was getting the the driveshaft tunnel at the same elevation, same direction so I could stick those Chrysler muffs on.
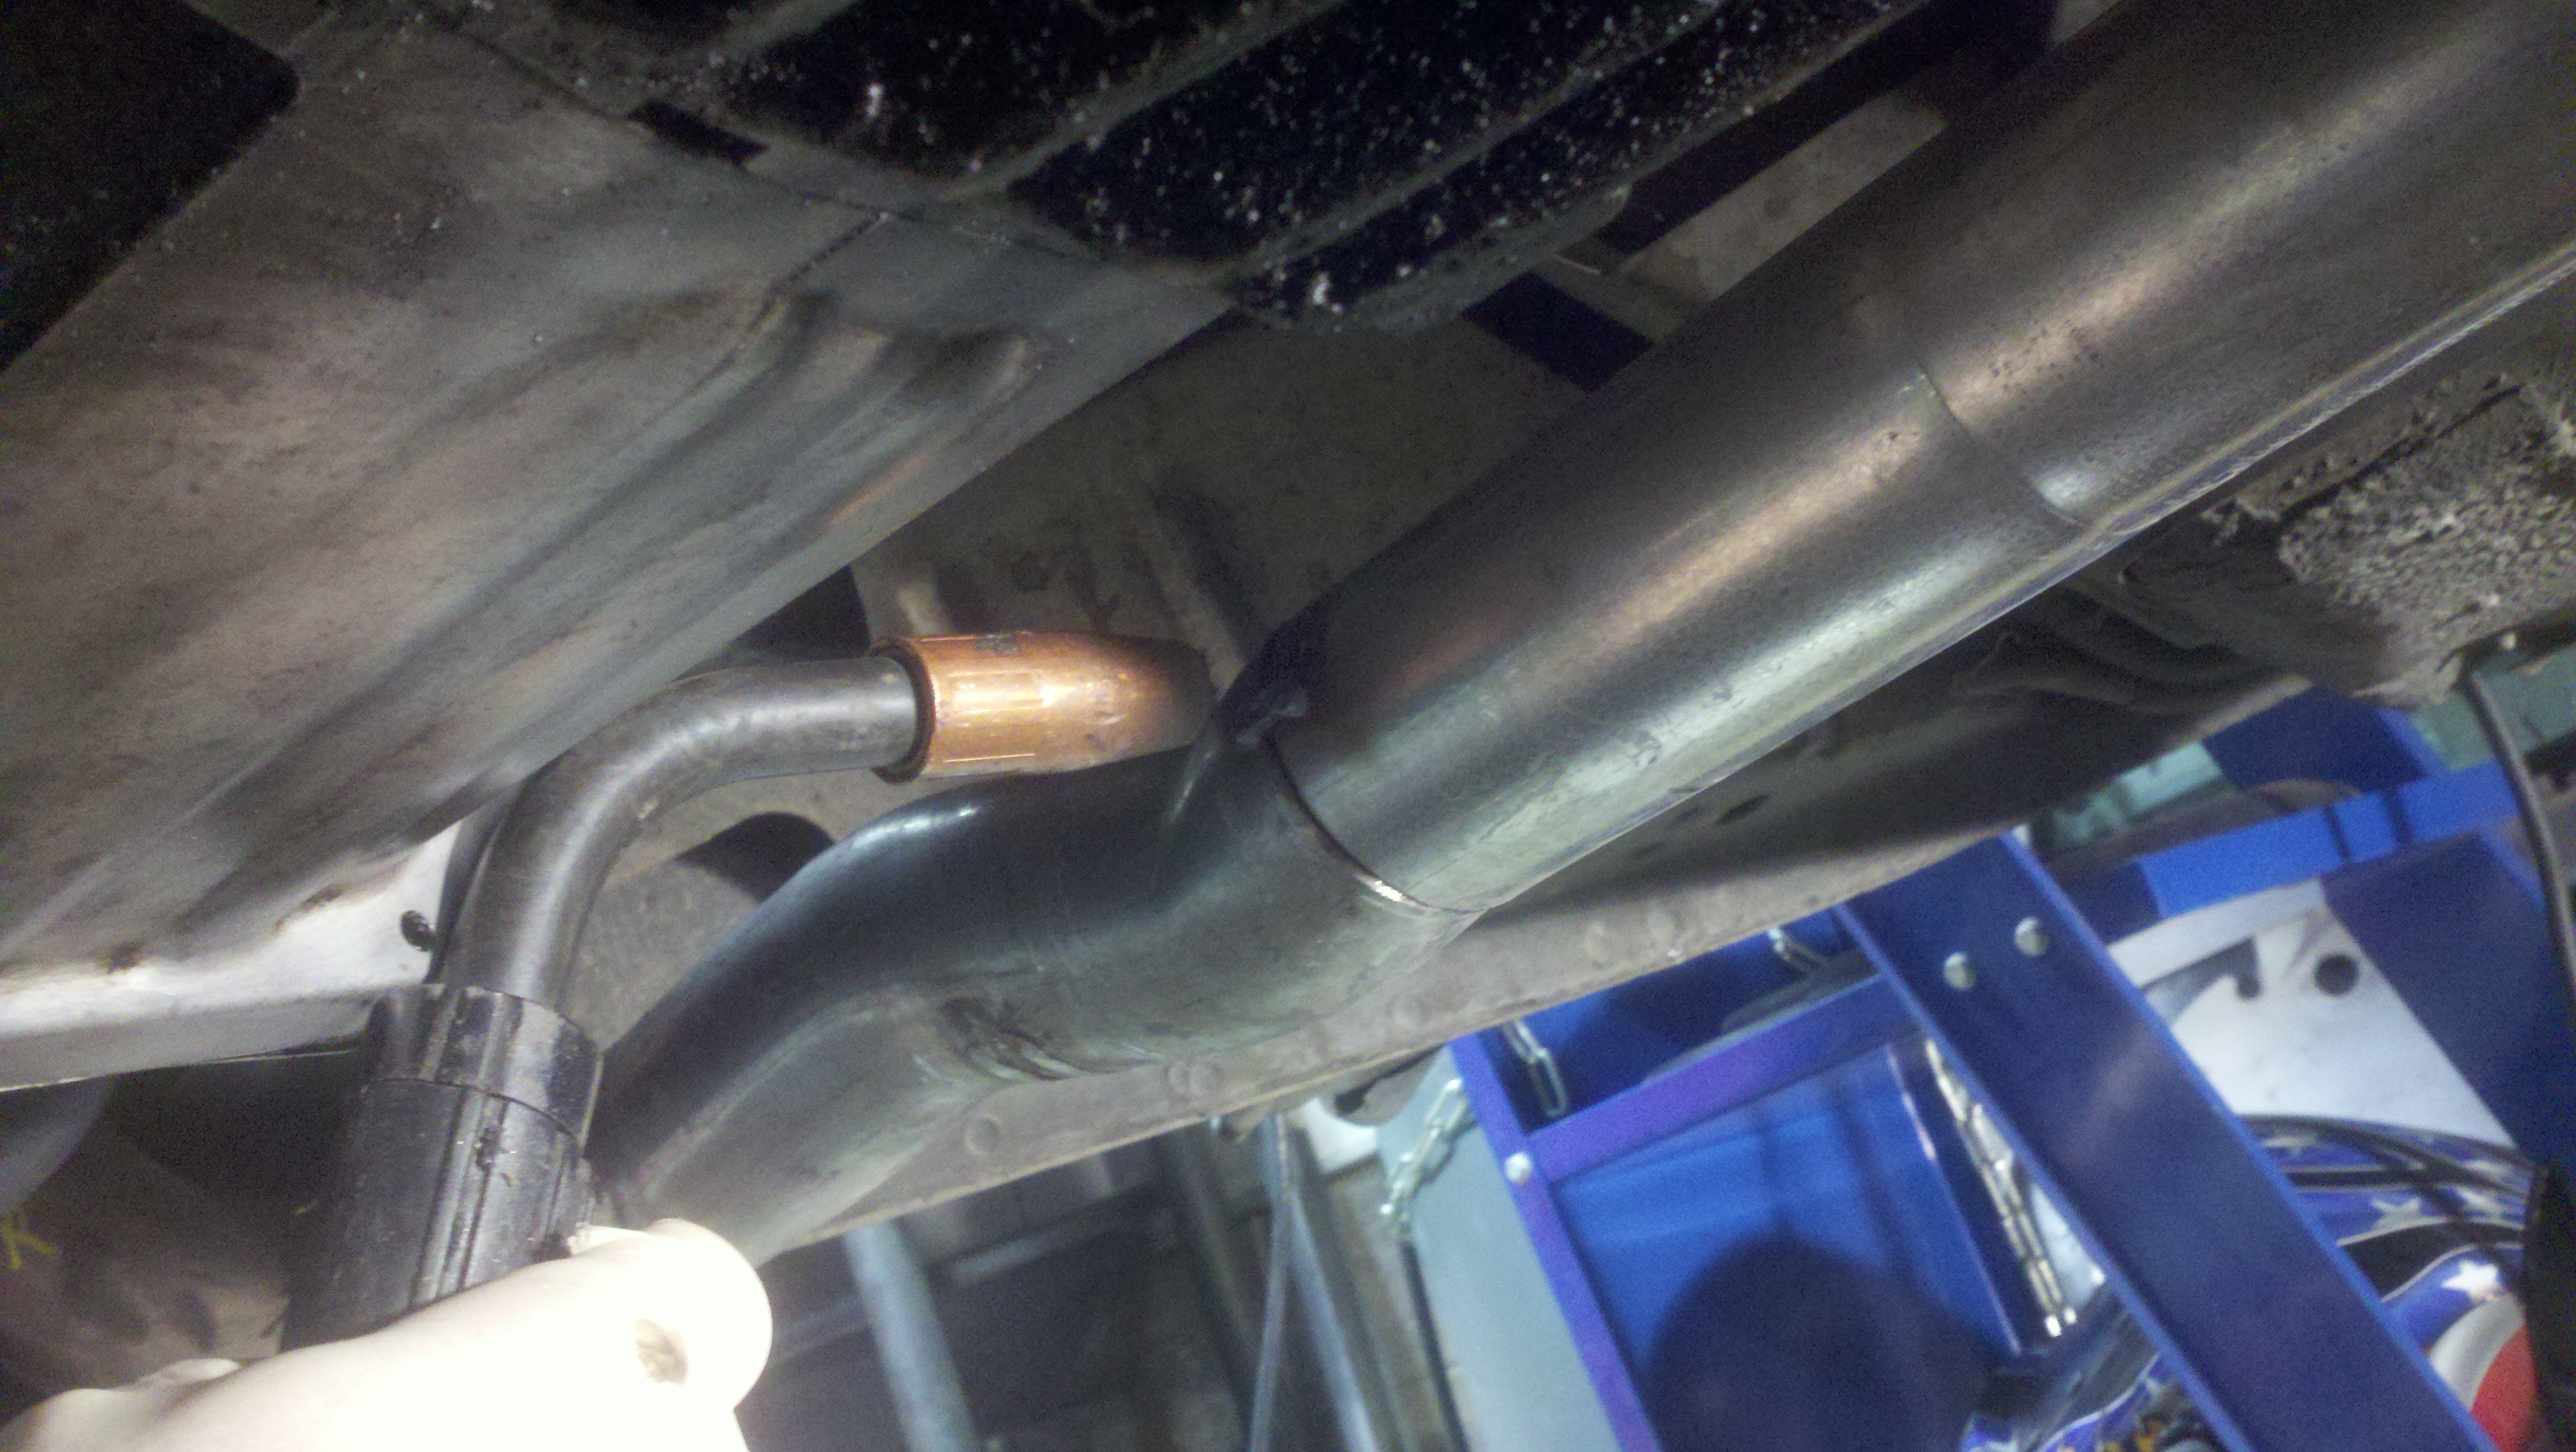
Testing the positioning and fitment of the next "puzzle piece".
Then tacking it into place...
This was one solution for a bend where I needed one.
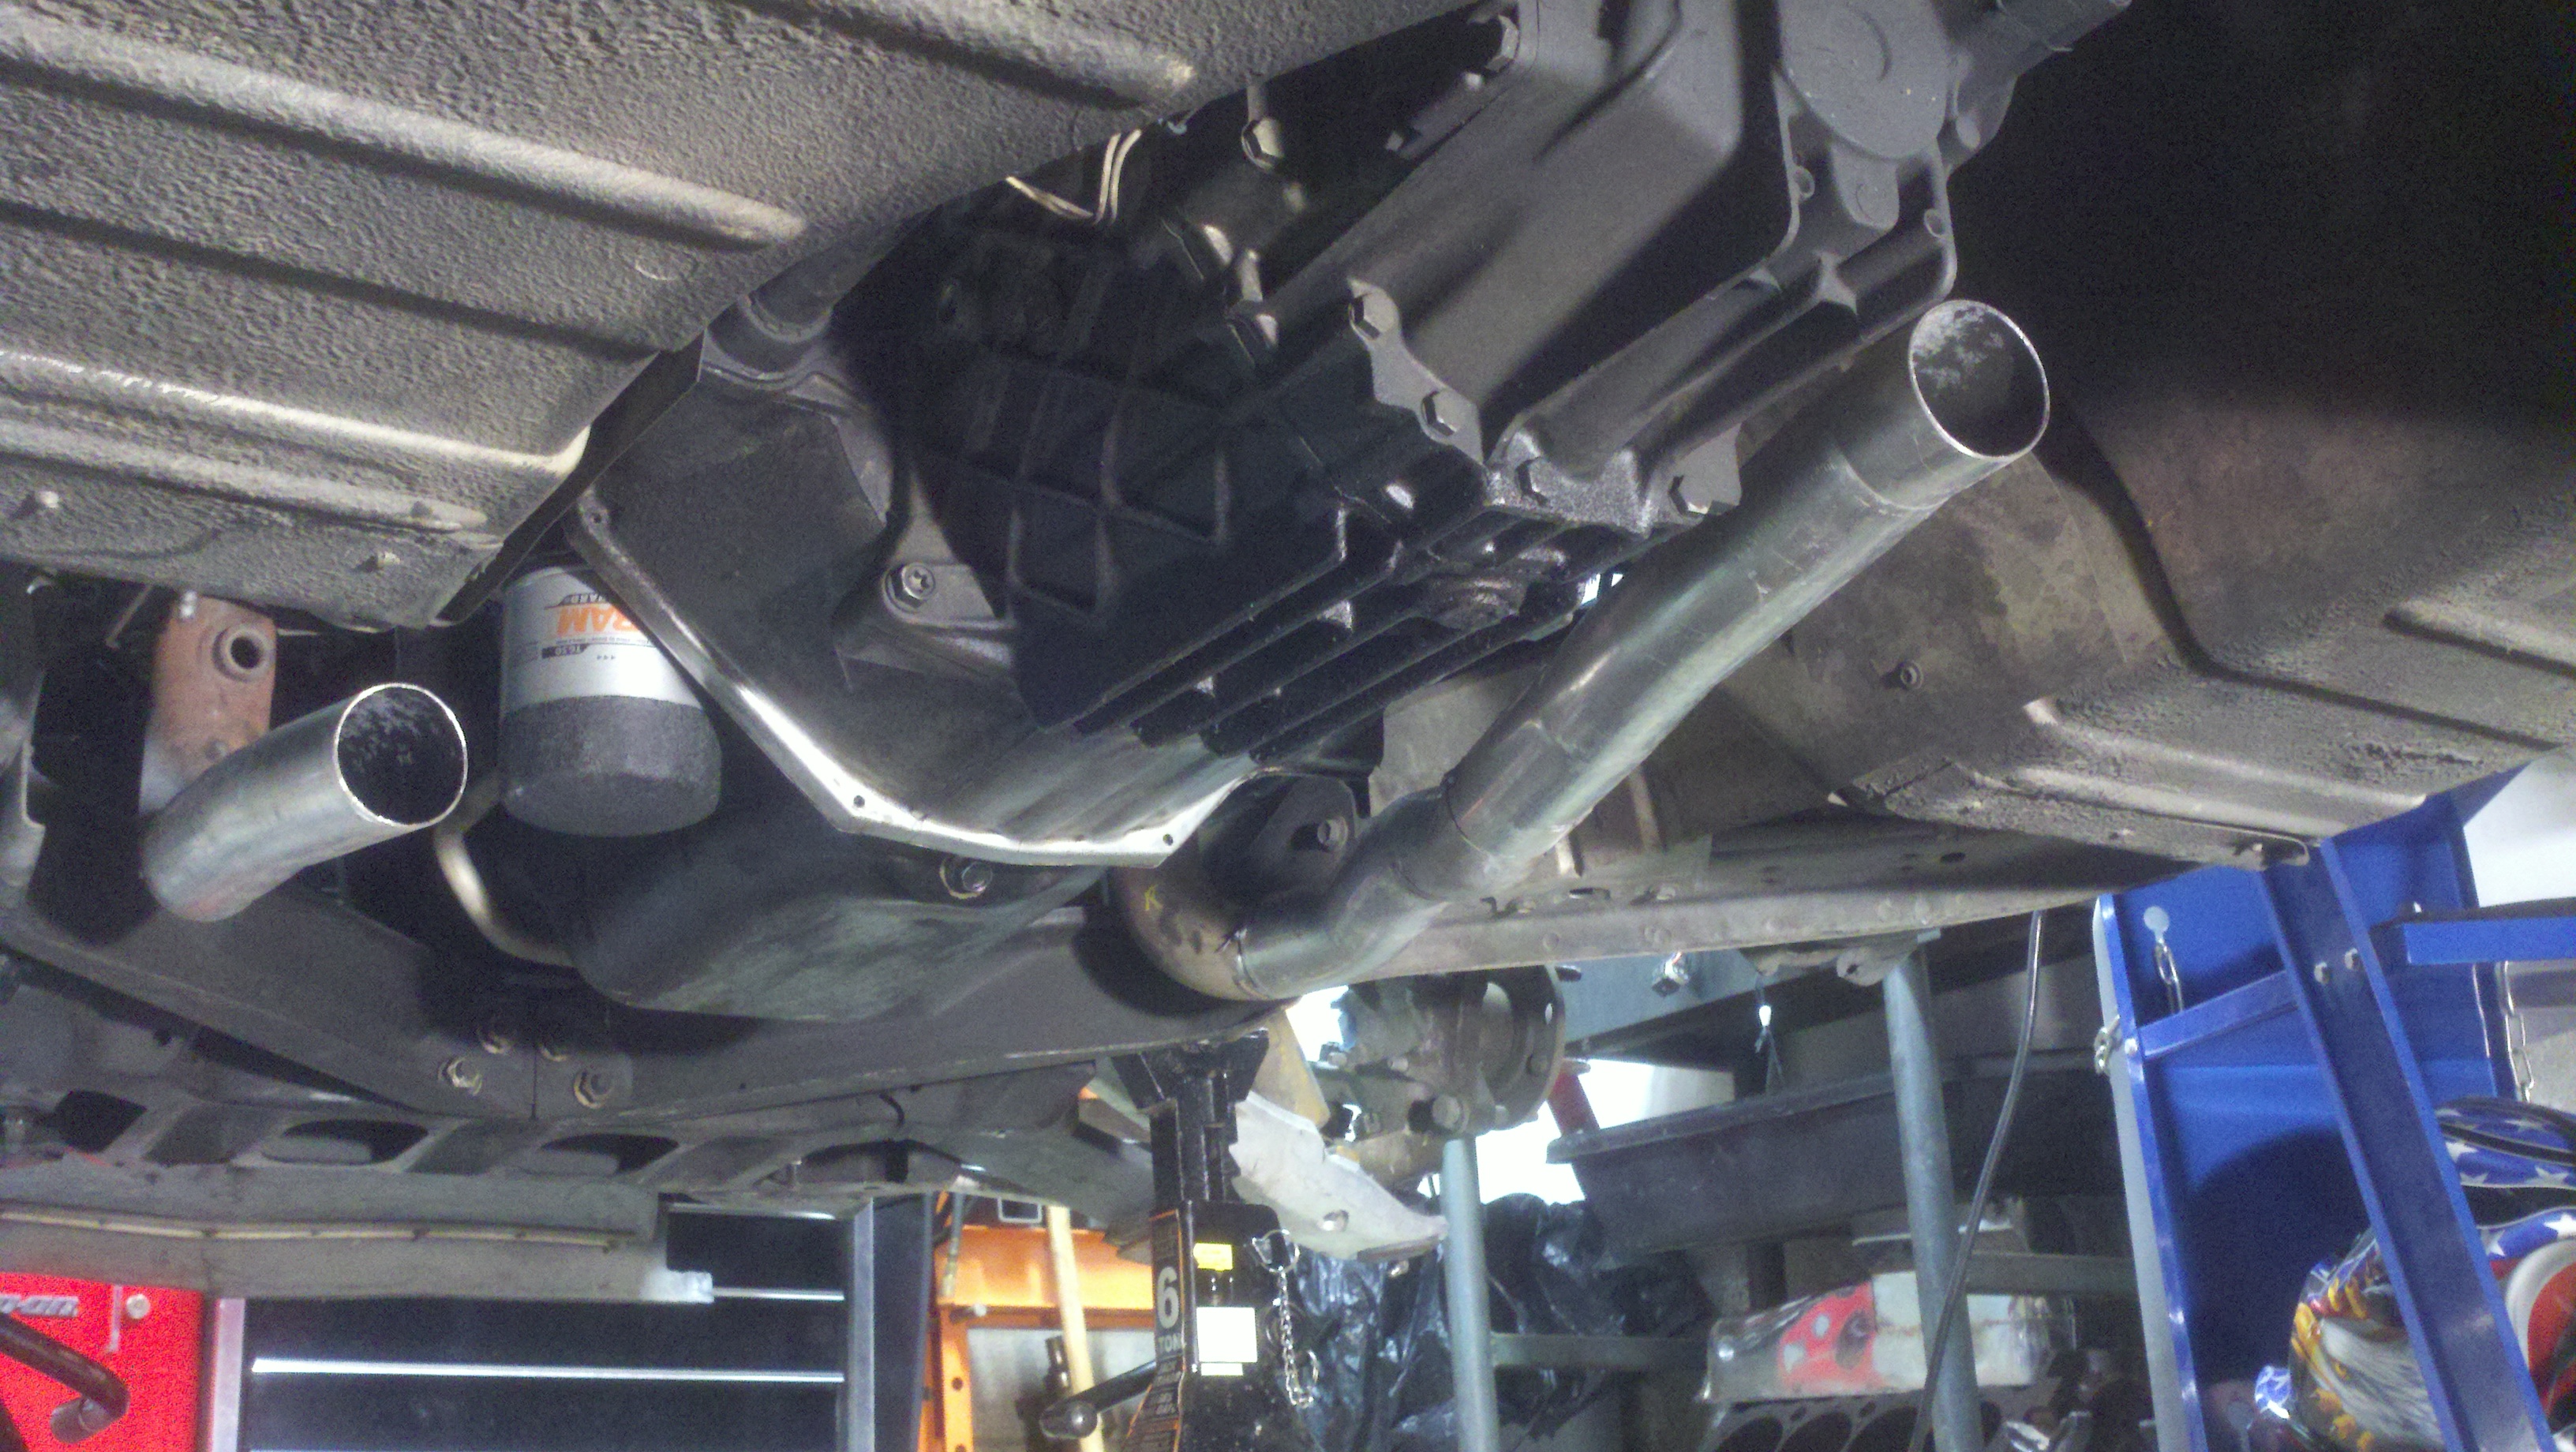
It's not the sexiest thing ever, but here is one side tacked together, back to the muffler...
Here is the other side. You can see that I scabbed in an old piece of the 'Vette Y-pipe...
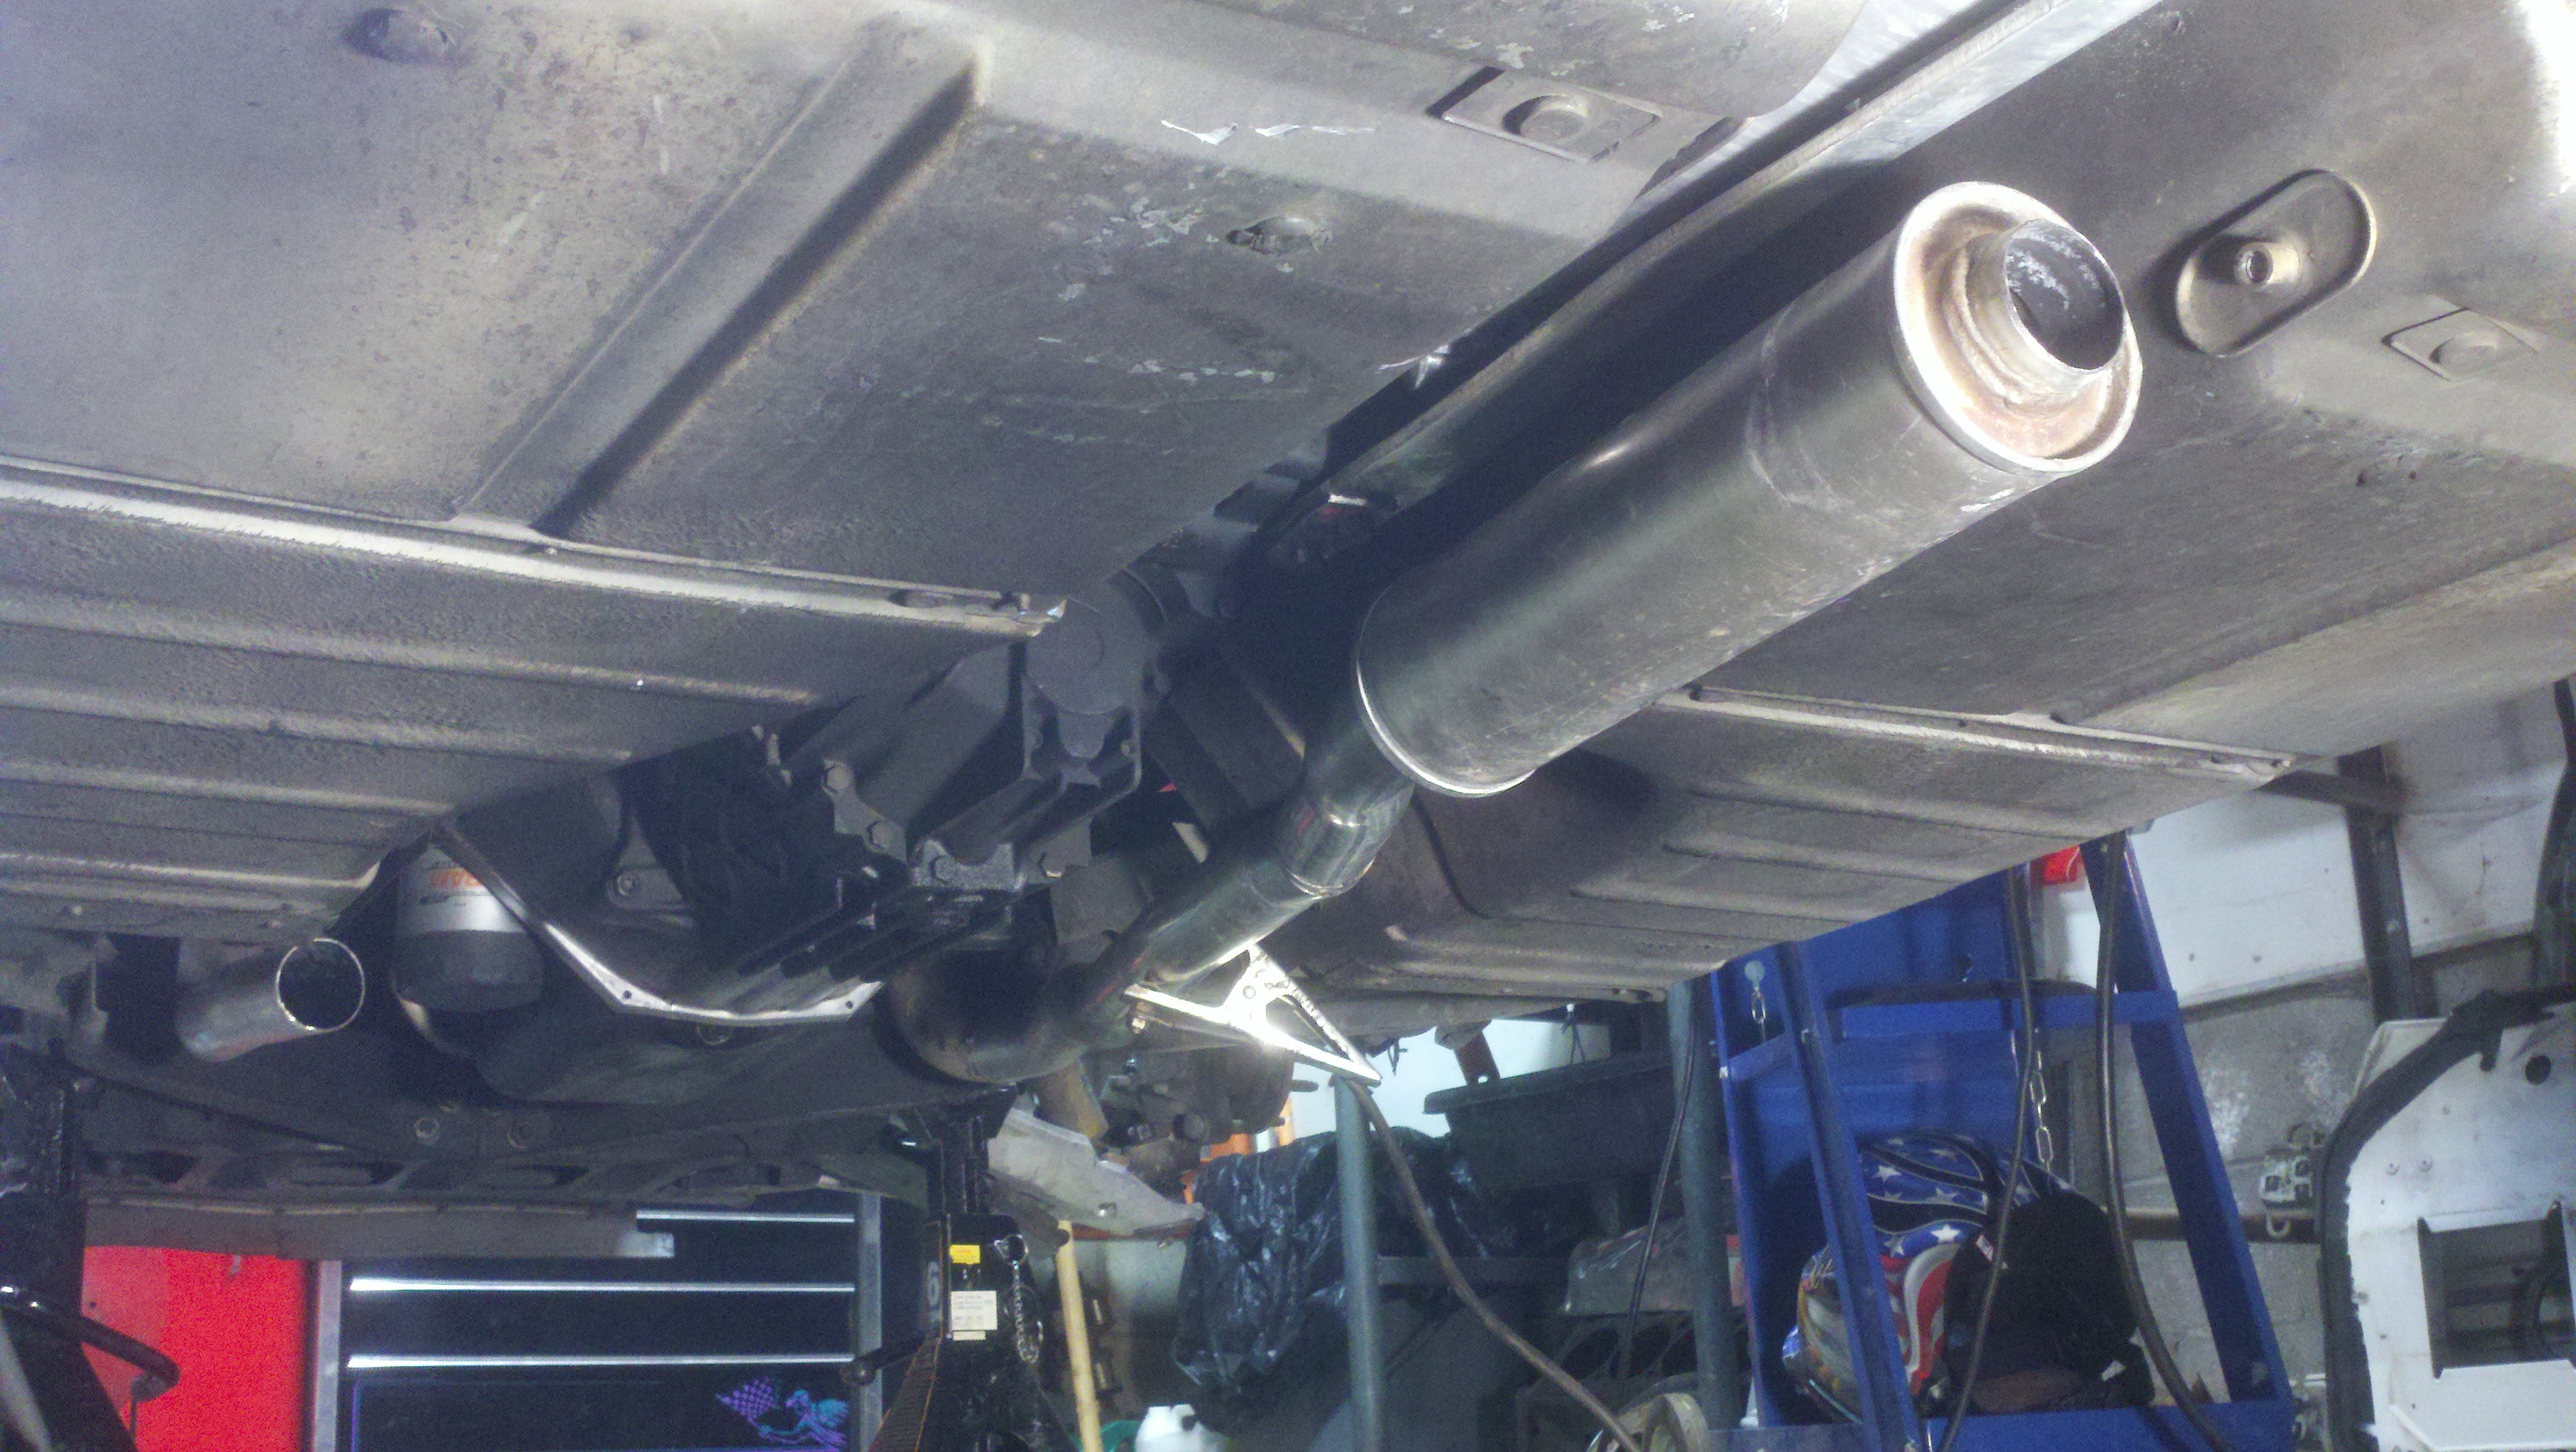
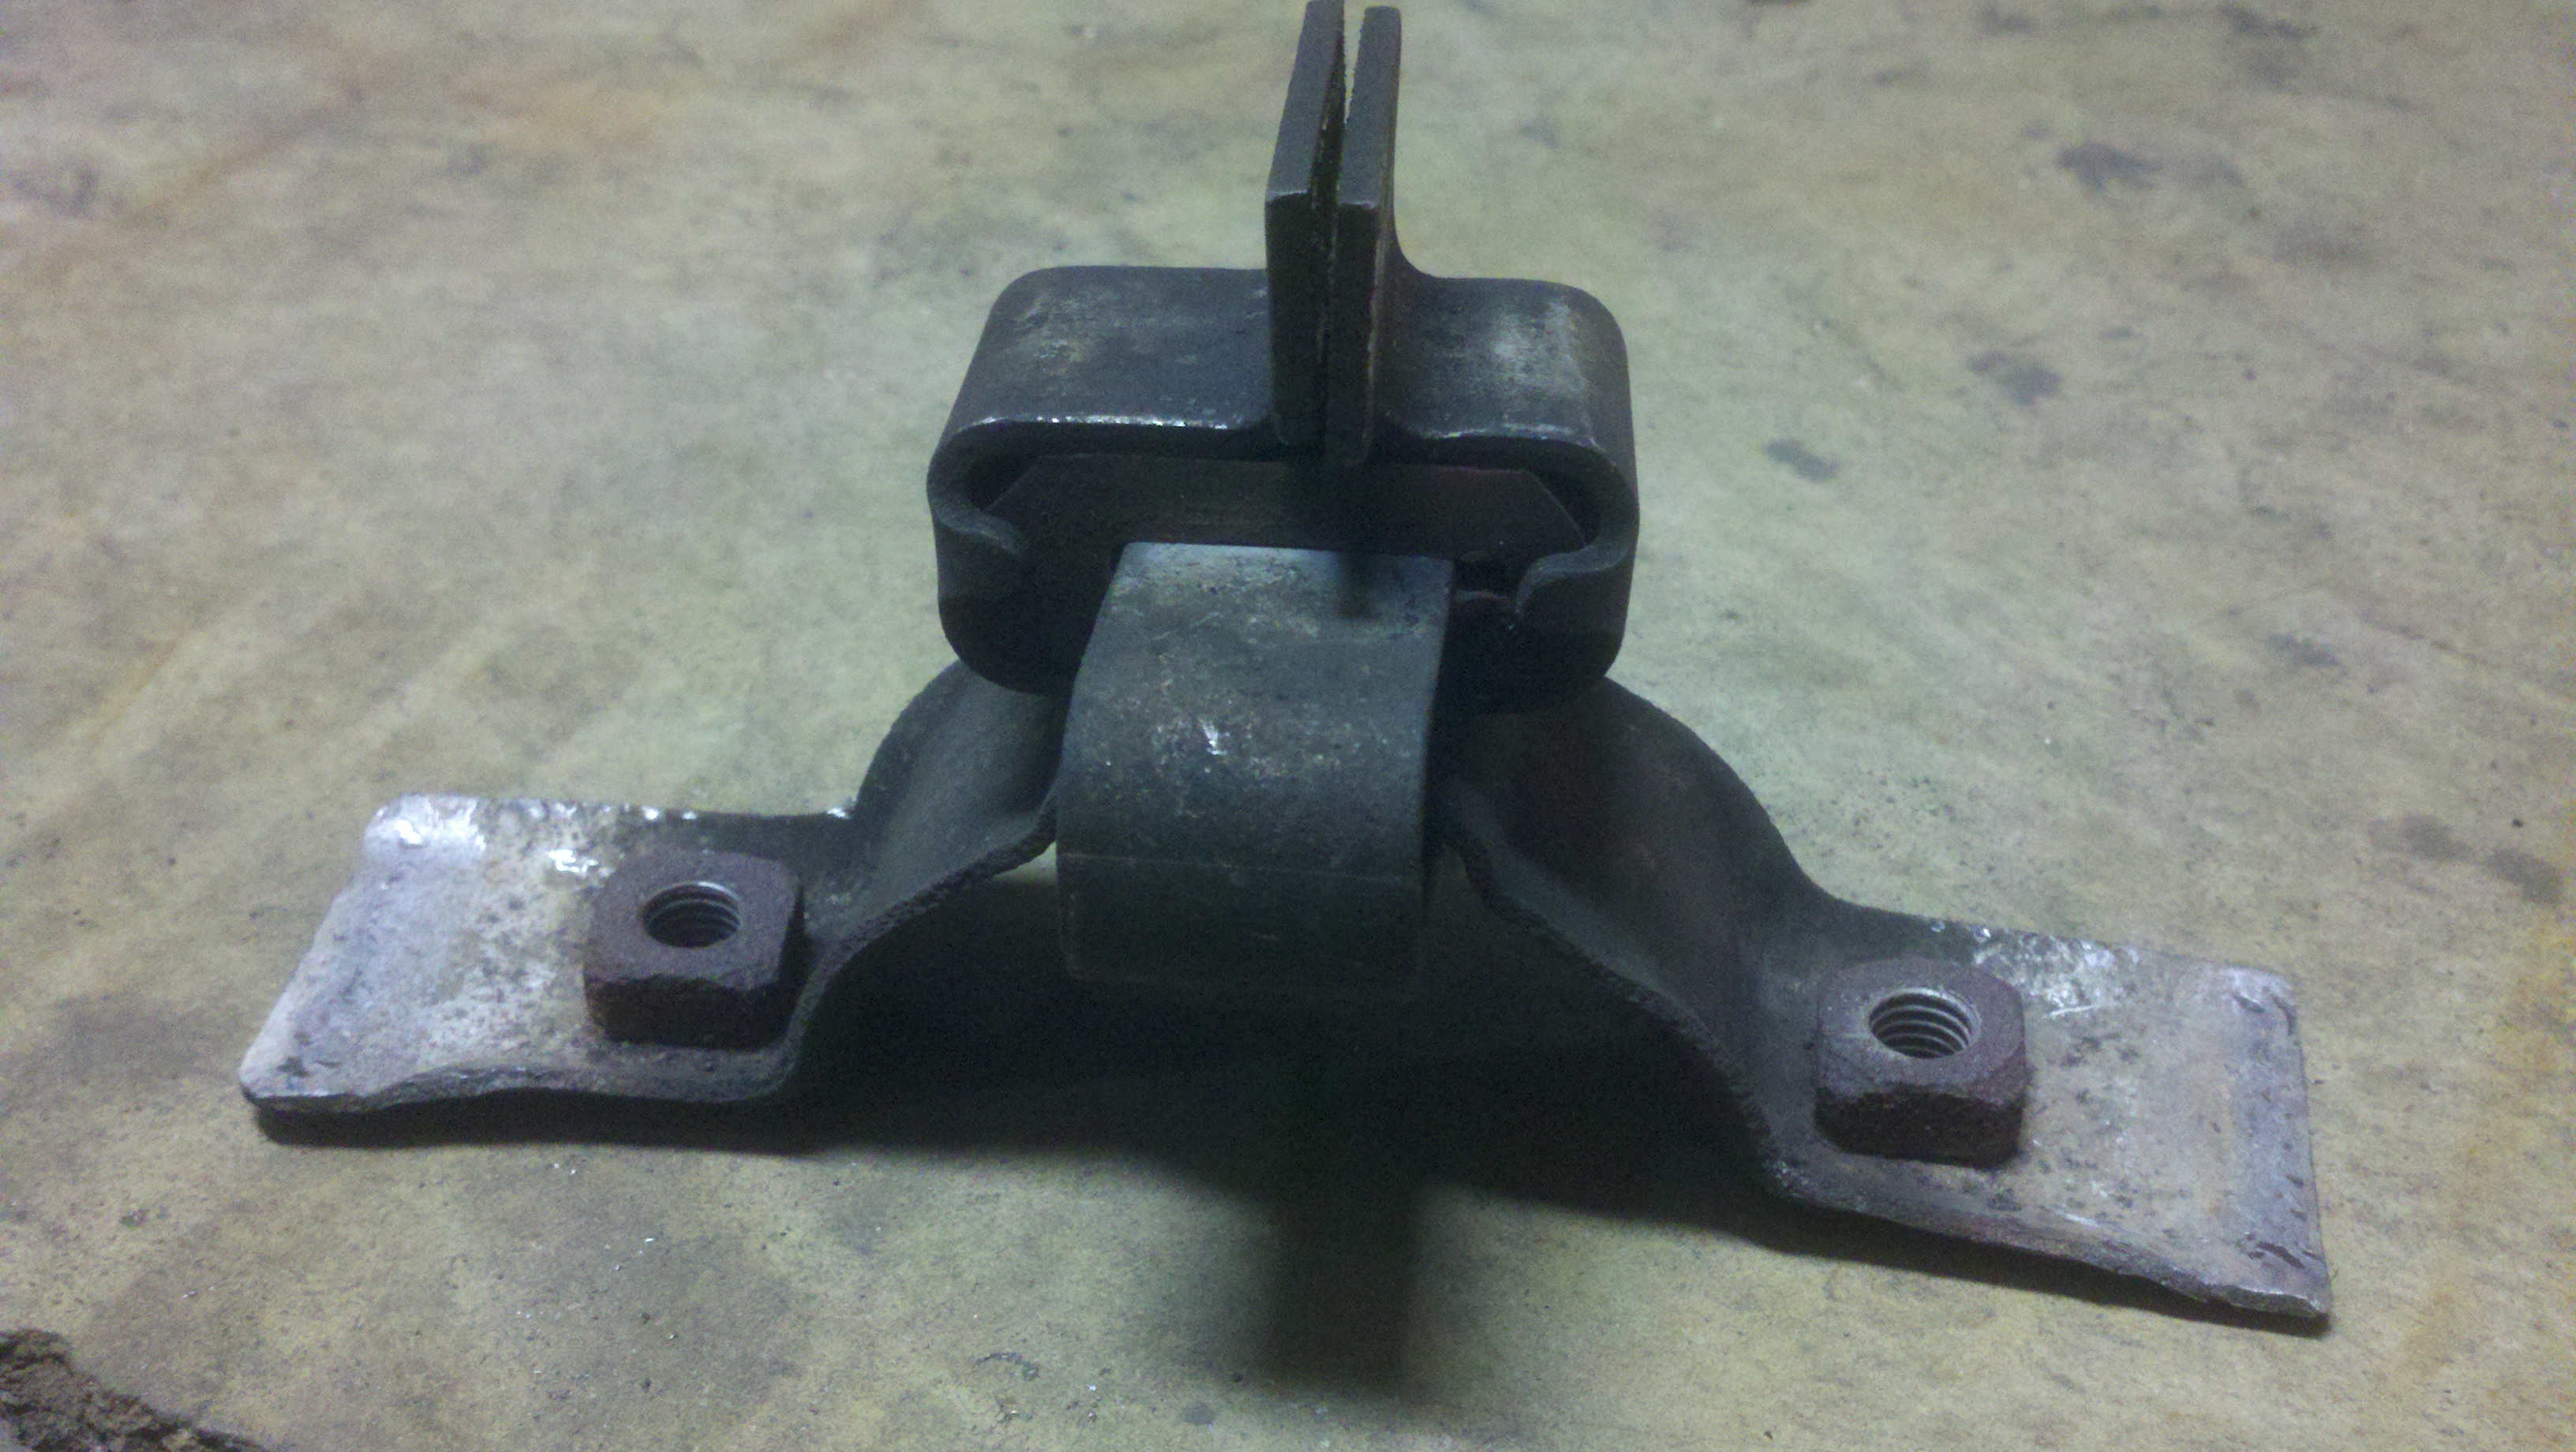
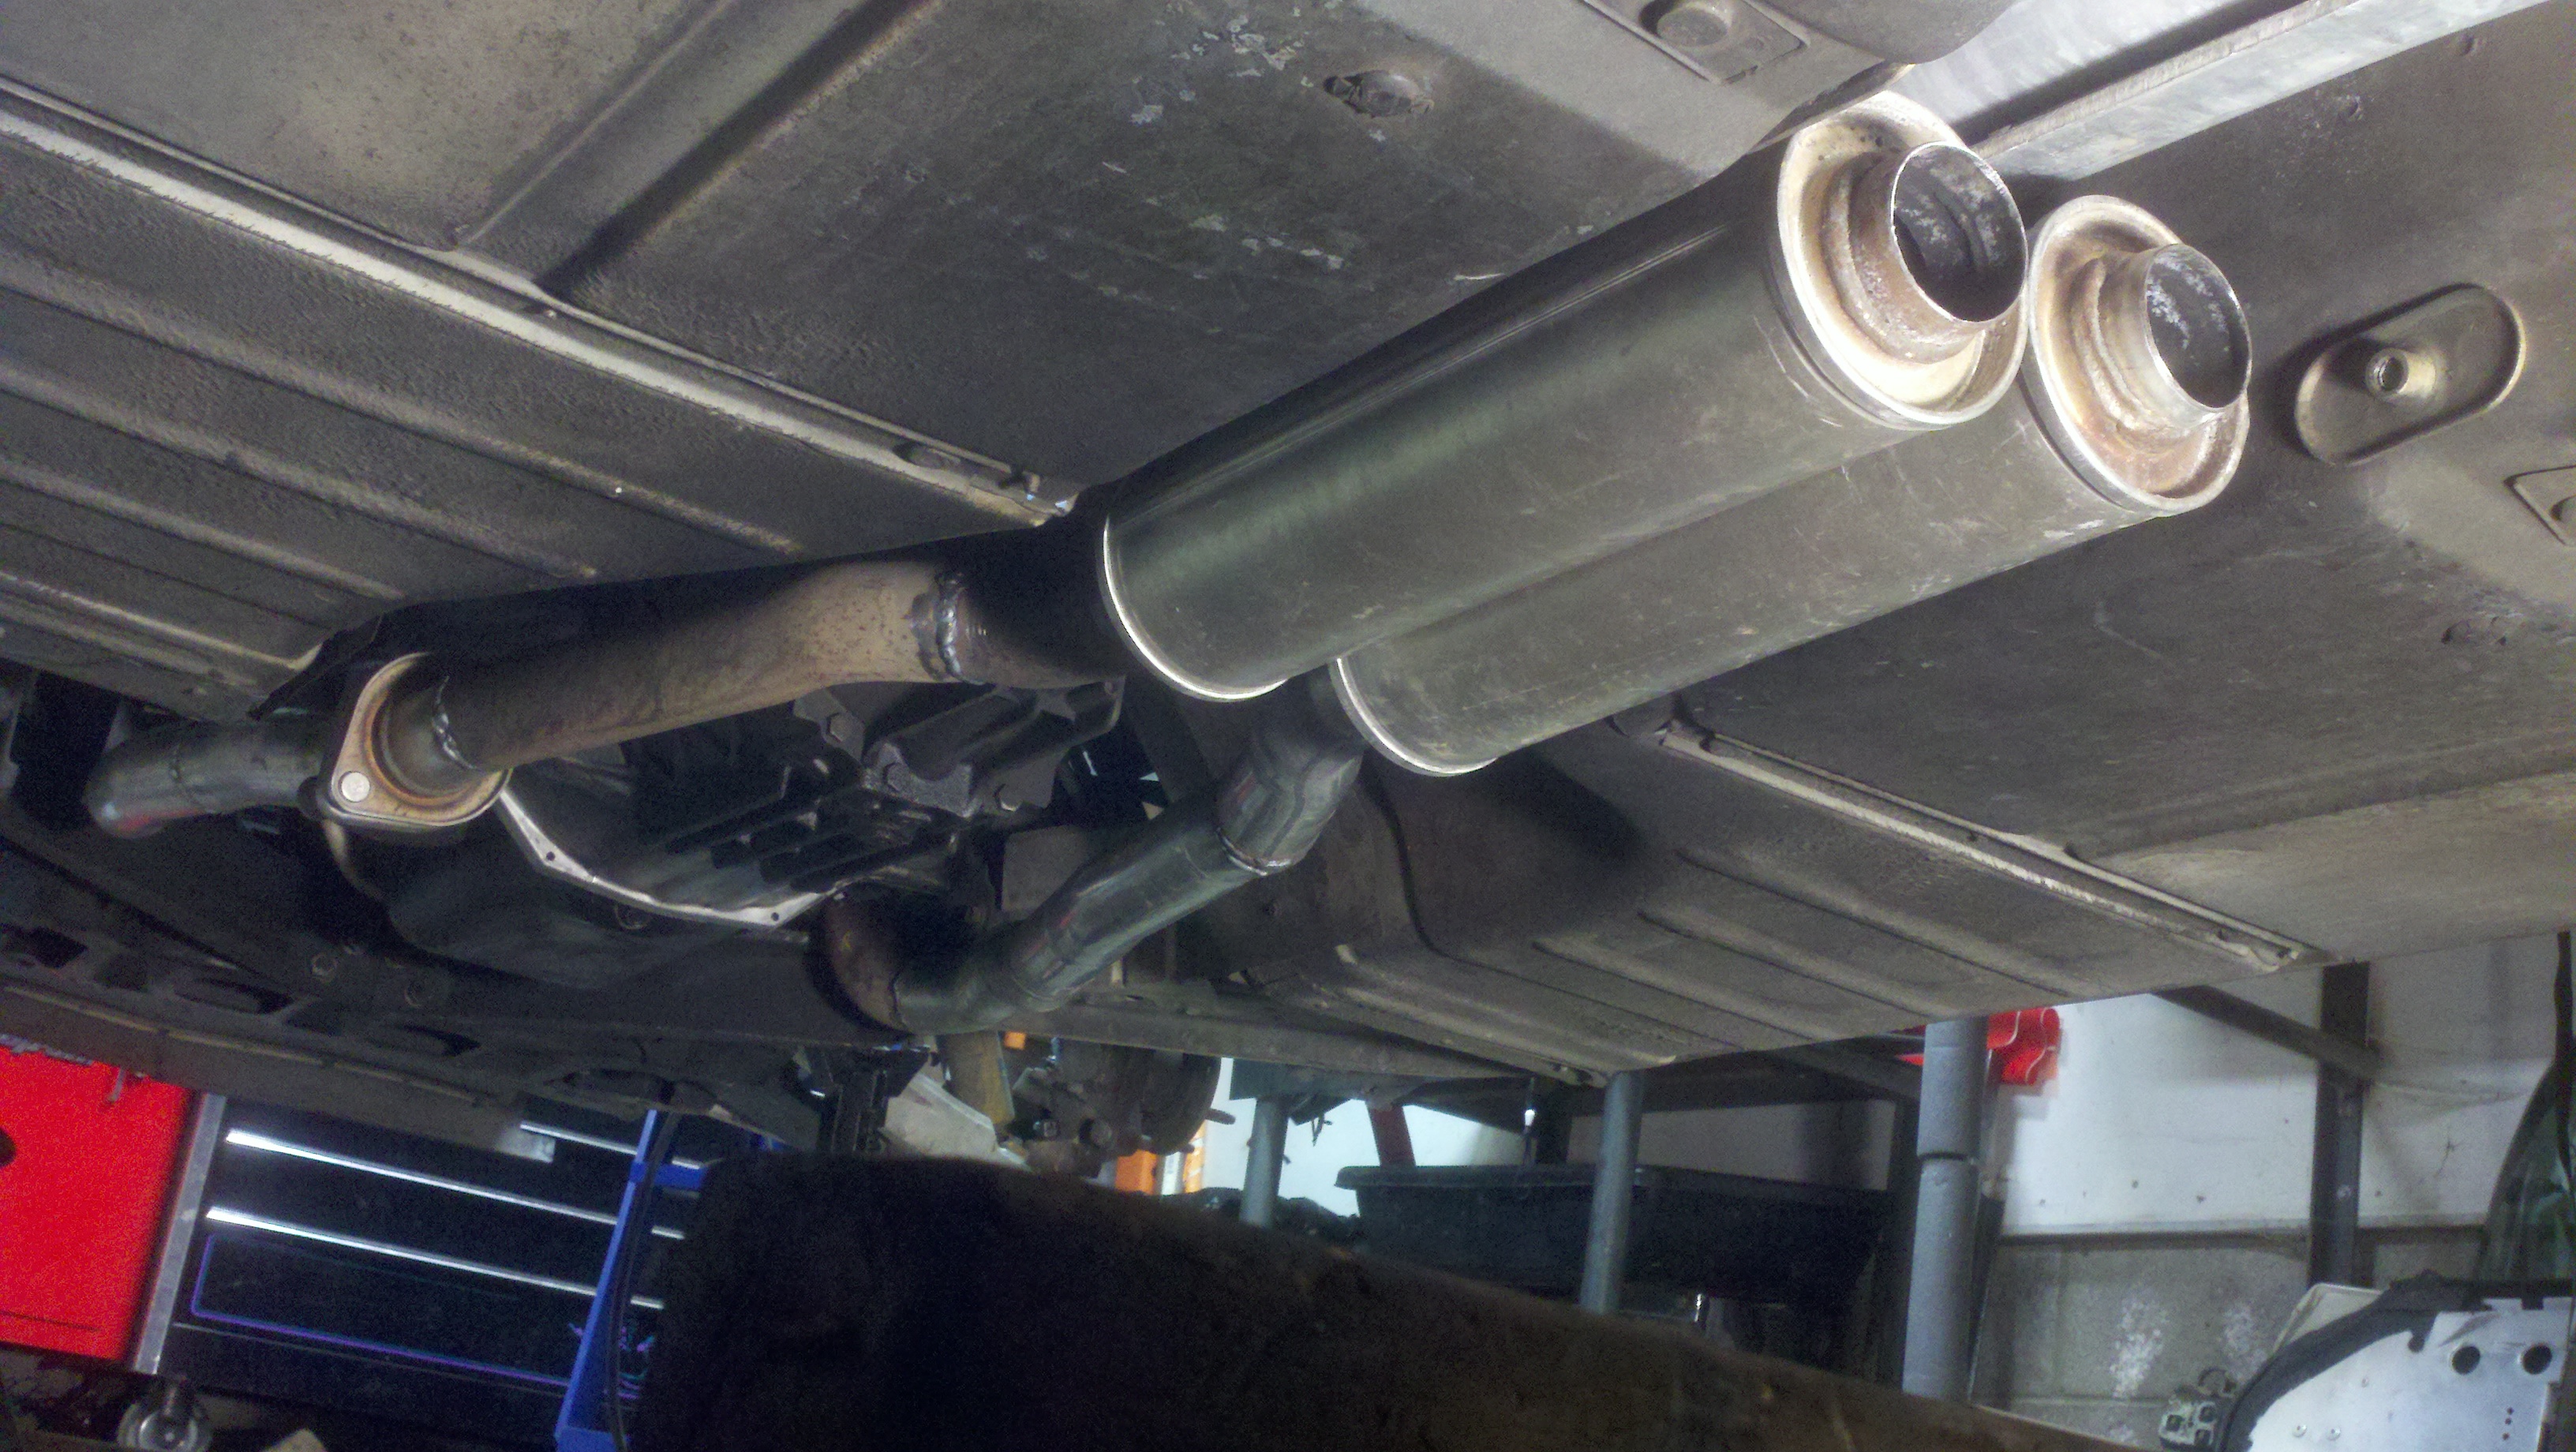
I modified the original exhaust hanger slightly to hang the new system from.
And here is the whole thing, with the hanger, back to the mufflers.
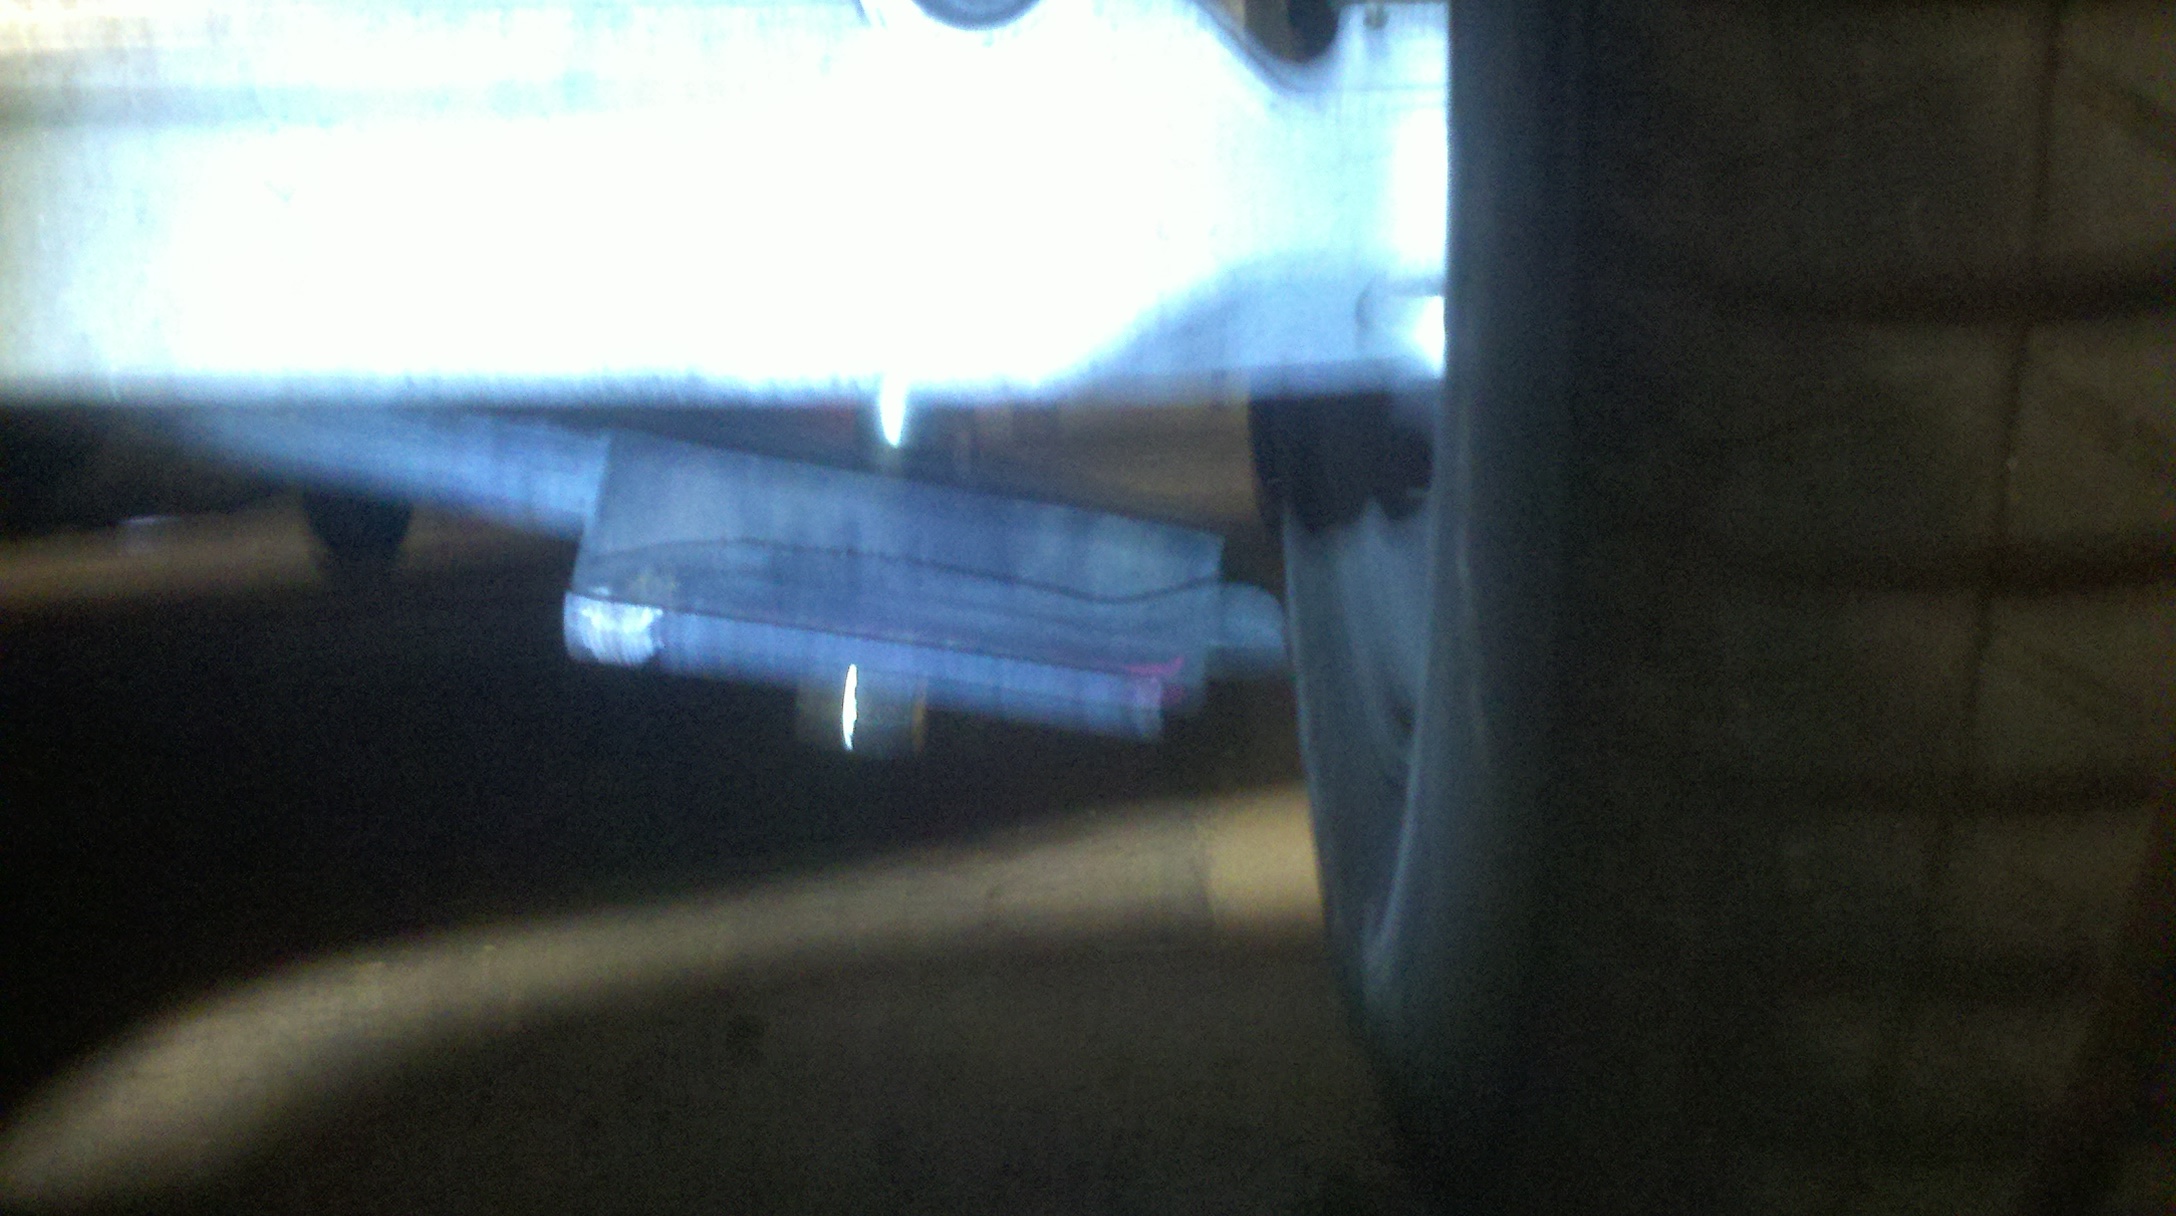
Up in the car for fitment check...
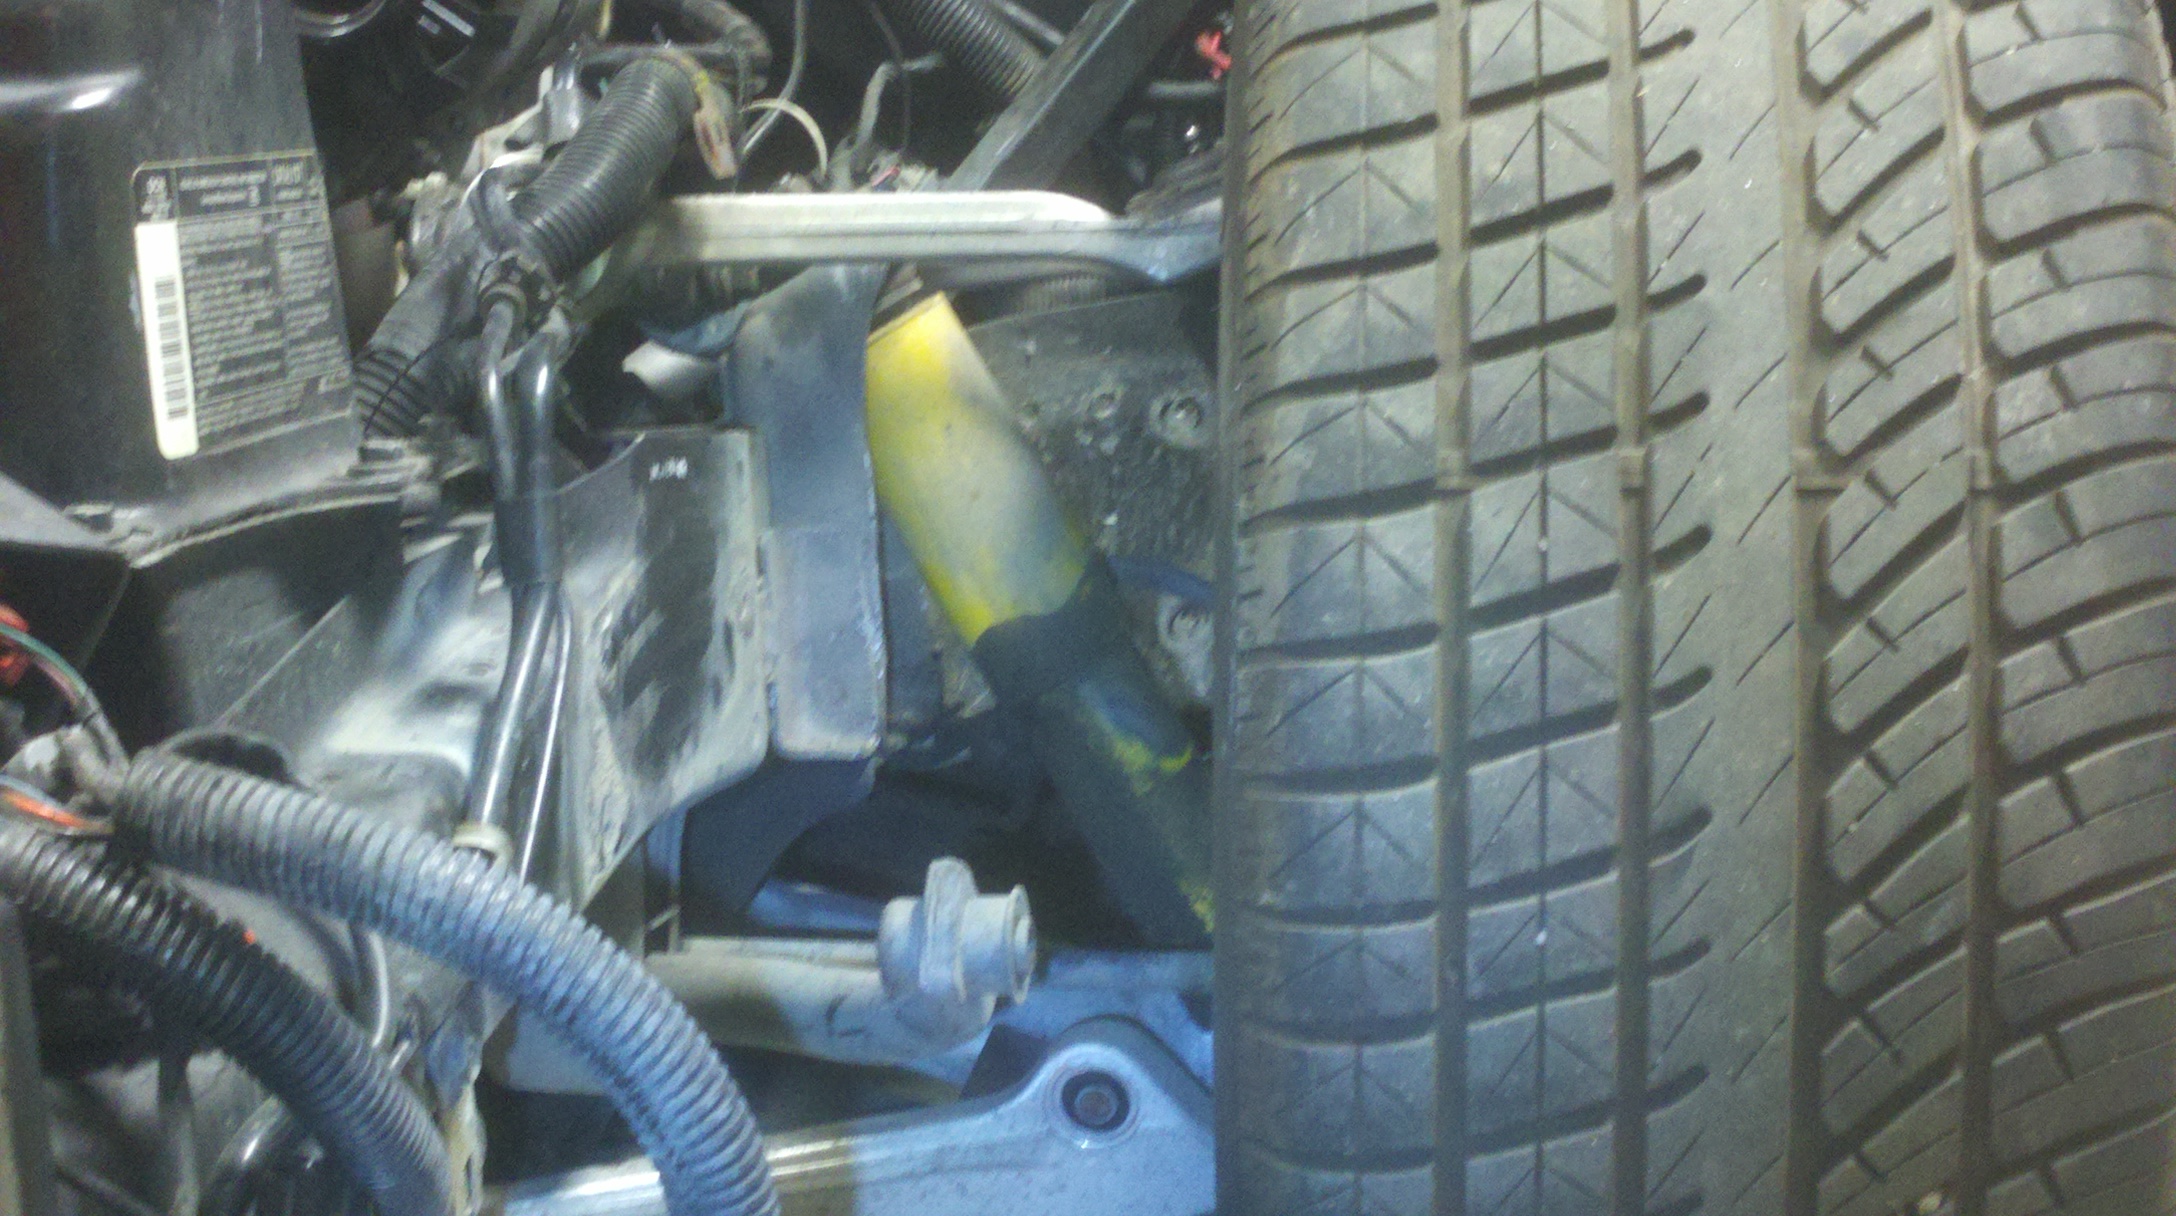
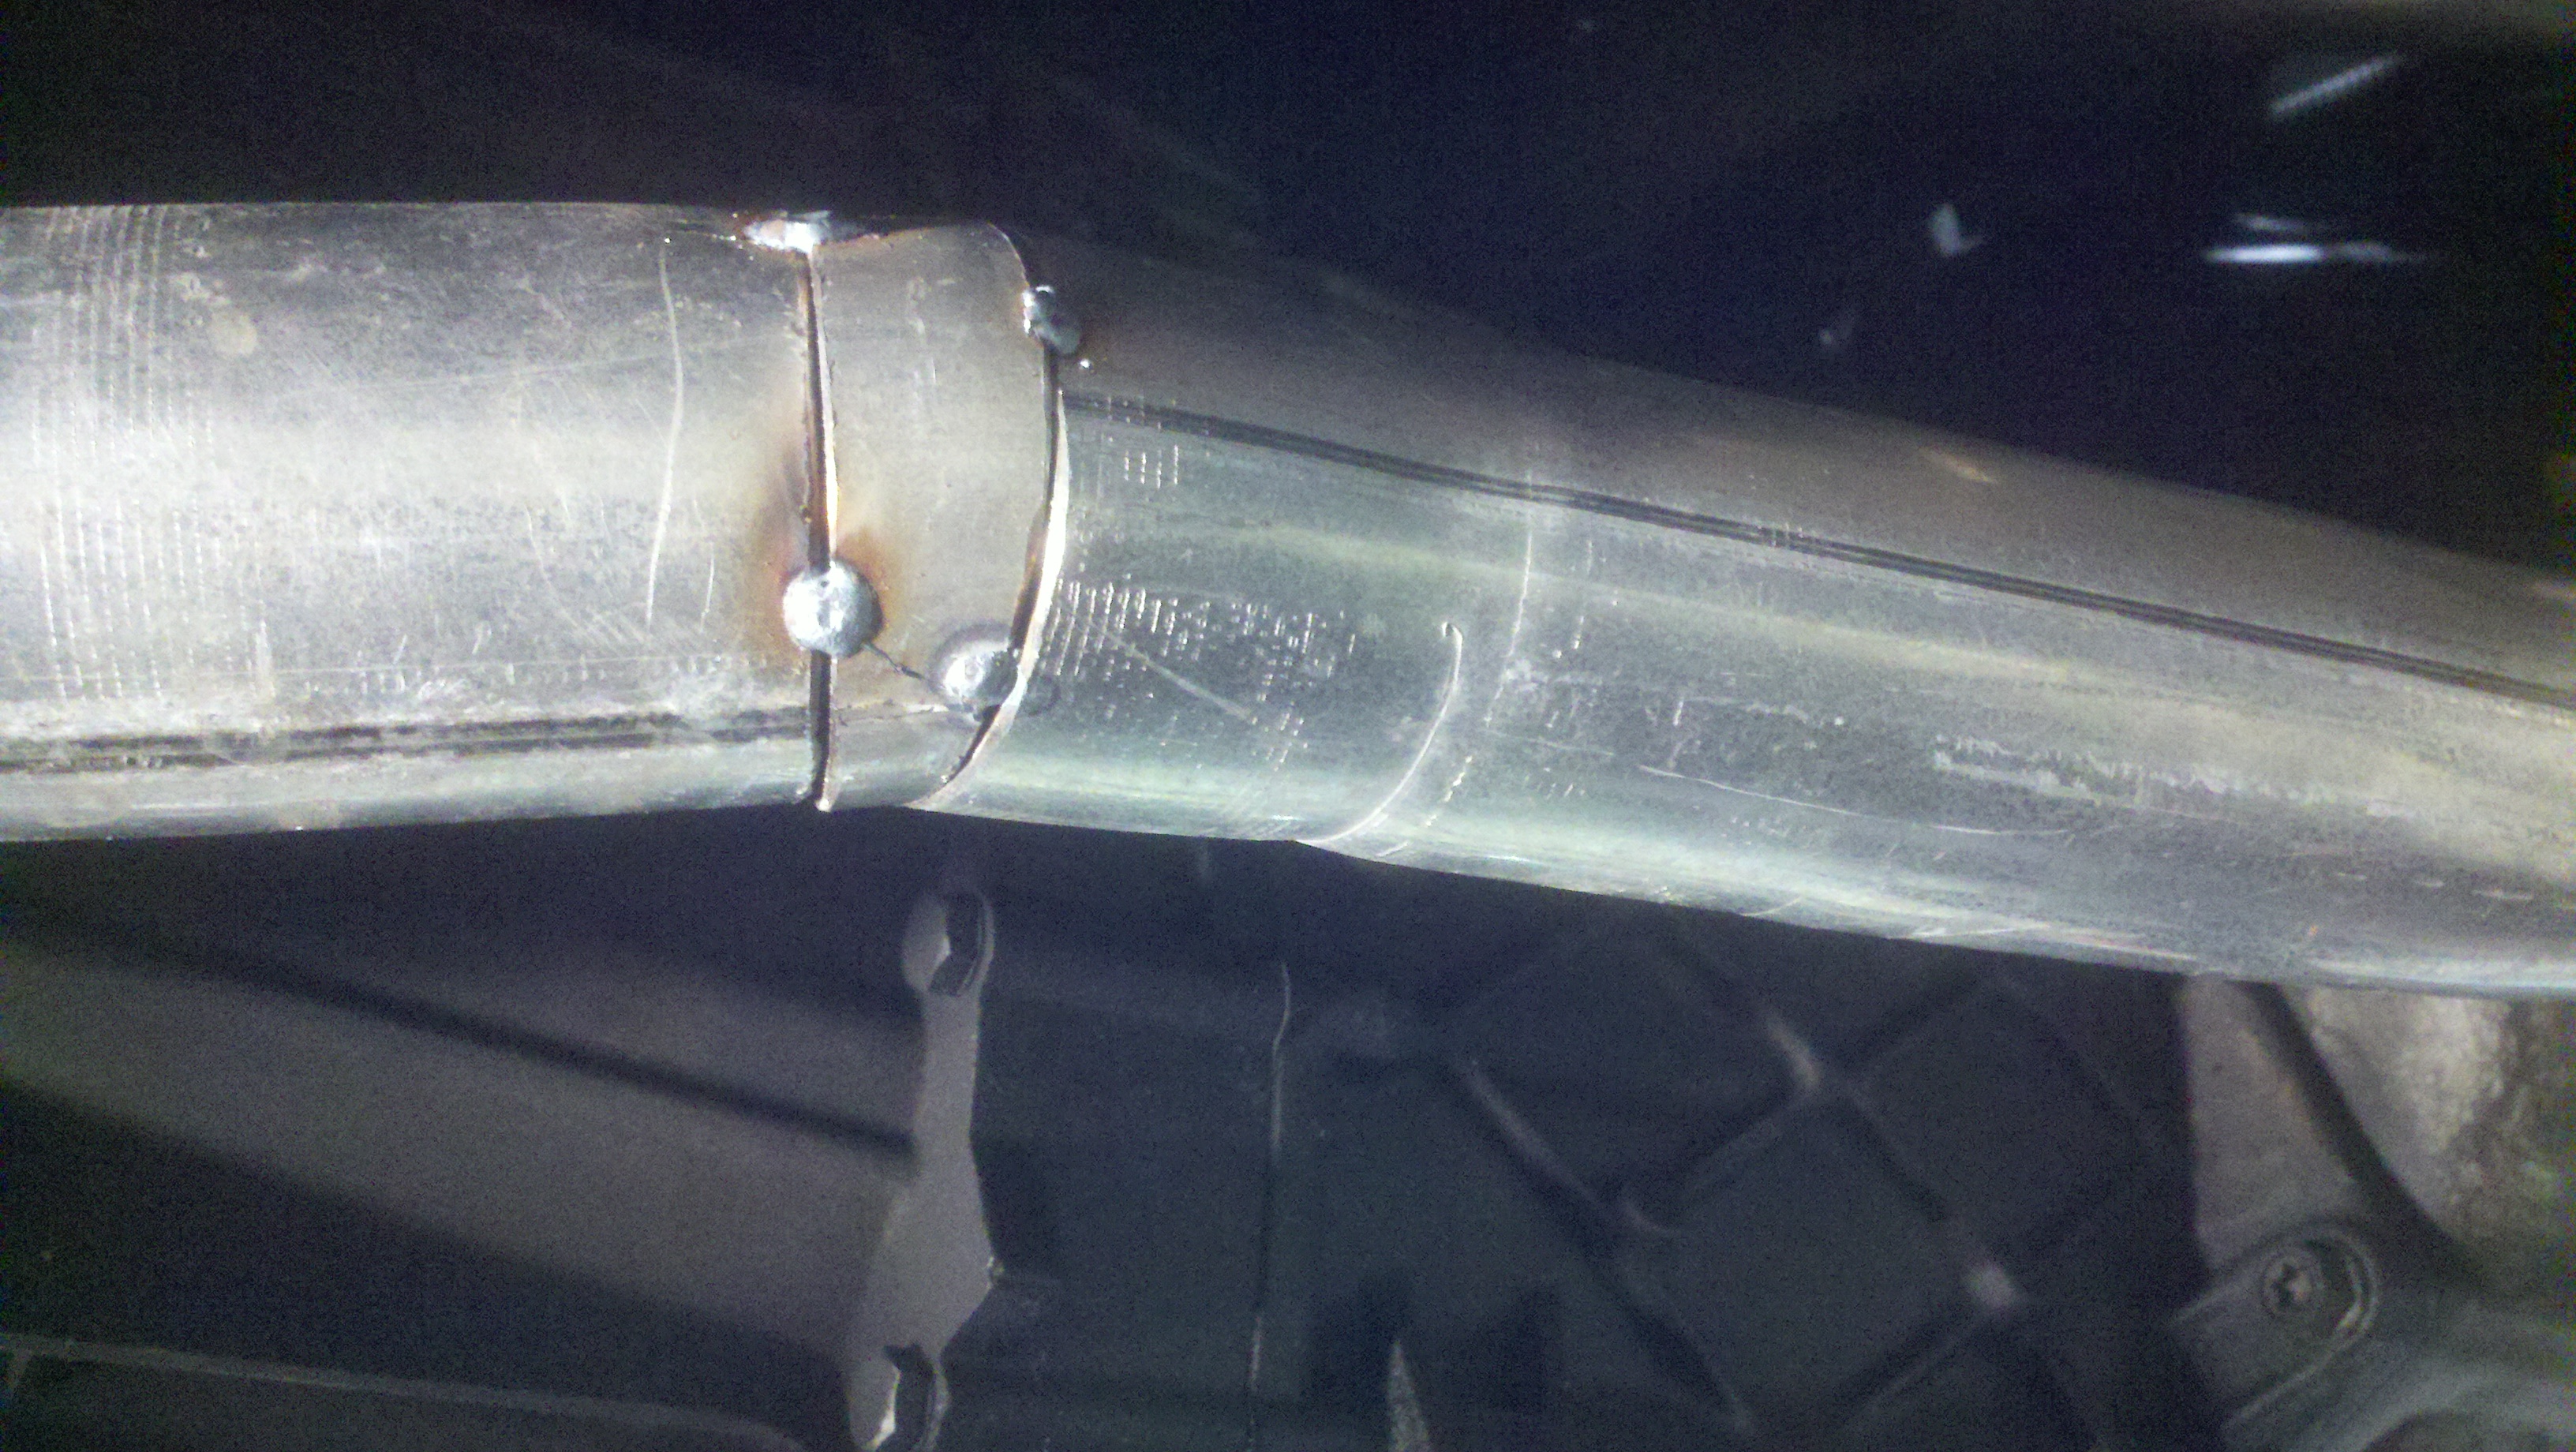
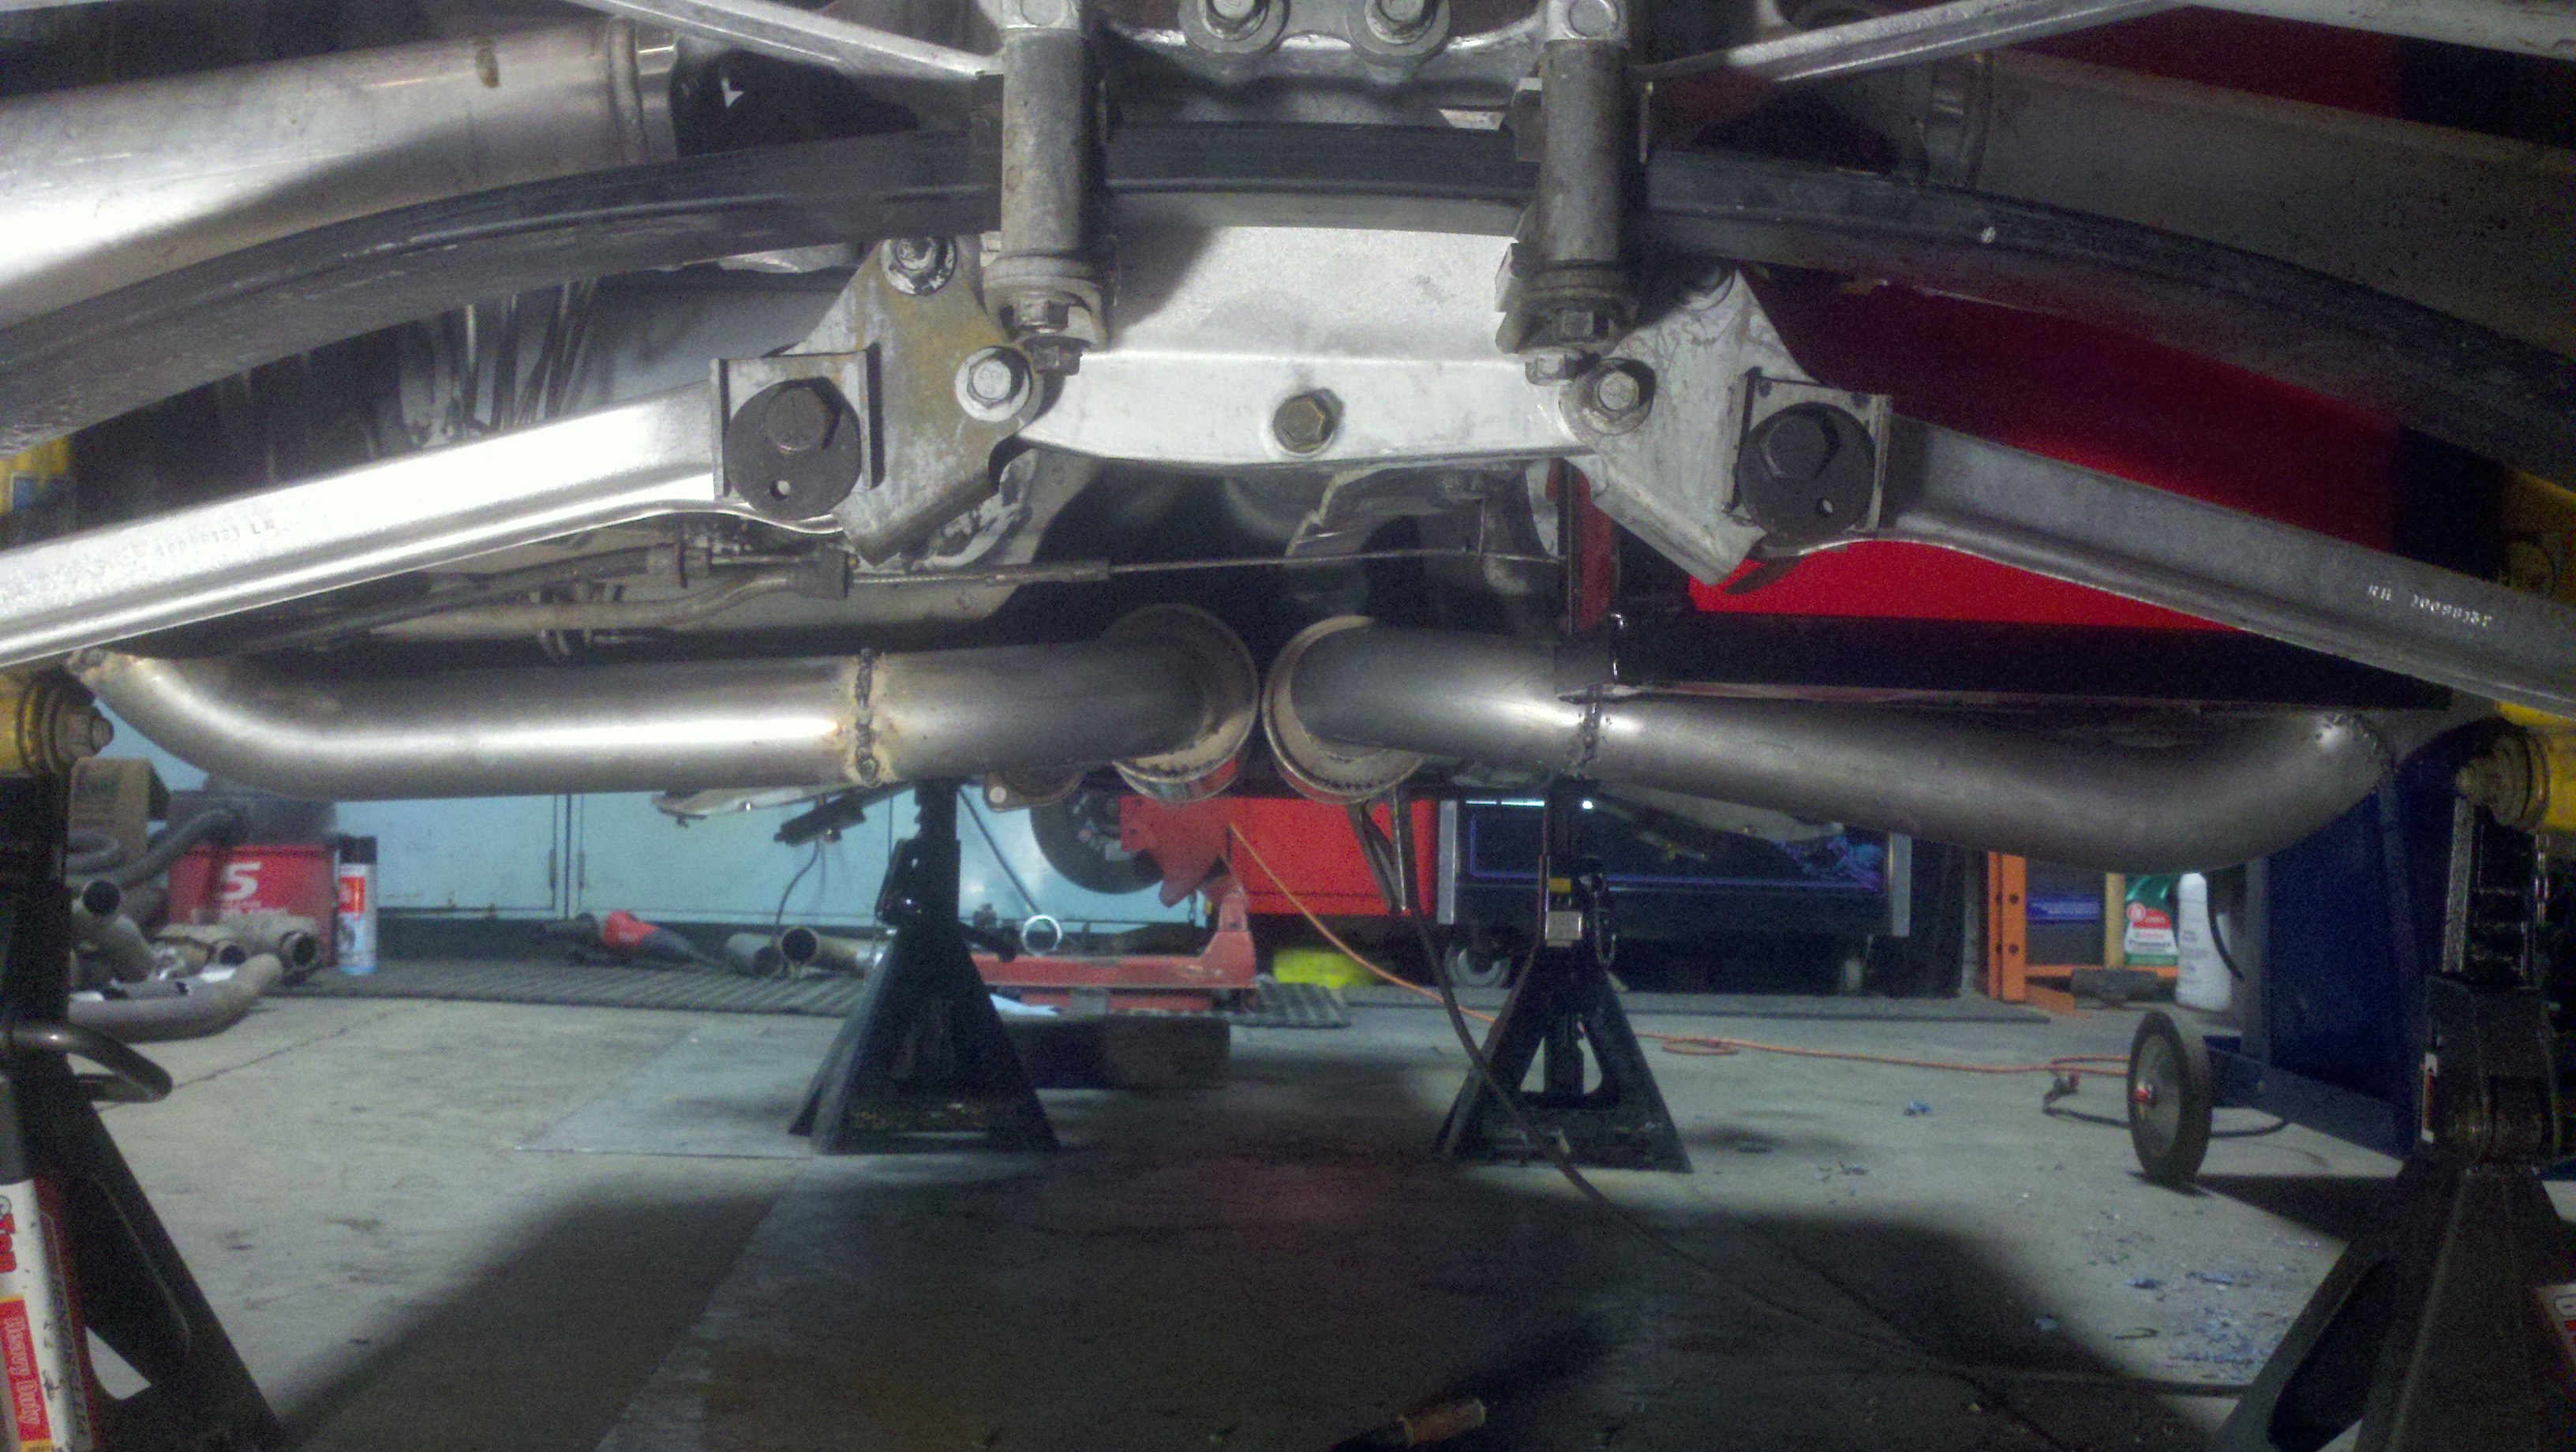
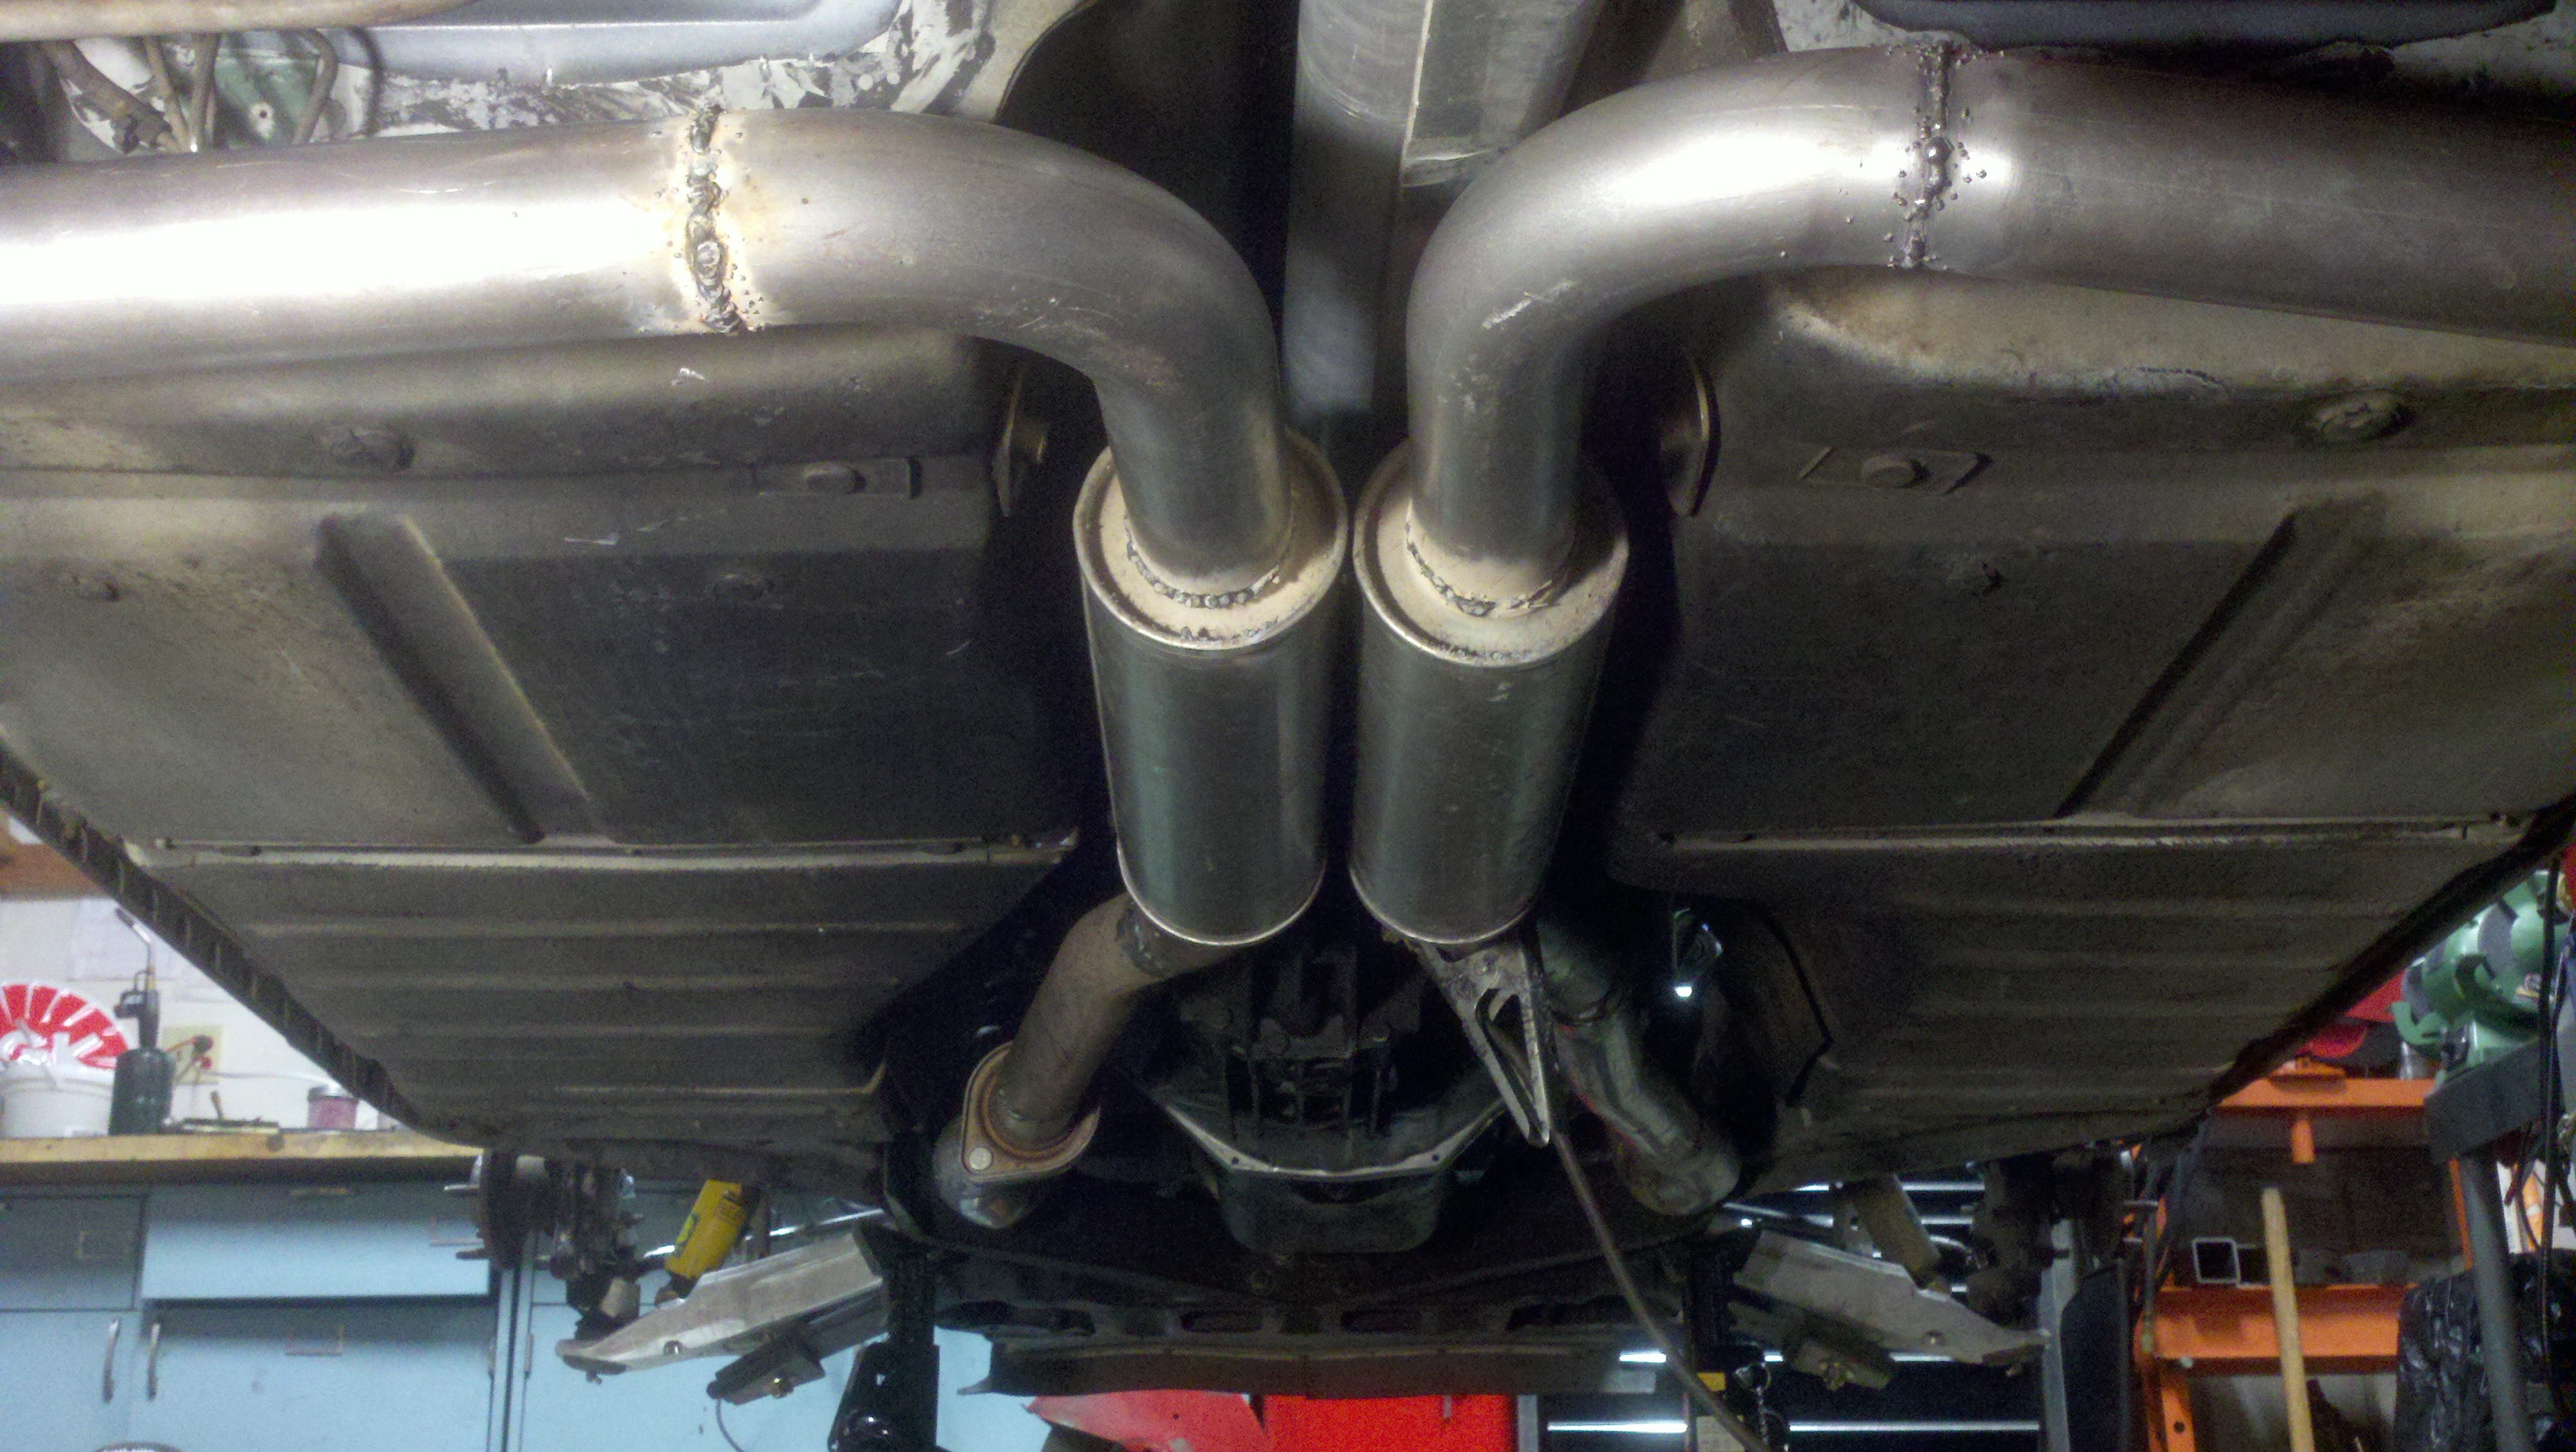
I continued to cut/add, in order to get out to in front of the rear tires. The system goes out, then curves up, then back to horizontal to get under the frame and come out at an elevation that doesn't look too low. On the left side, I had to snake my bends between the frame and the park brake cable. I hung the rear of the exhaust from the OEM rubber hangers and hooks from the Chrysler exhaust that I had cut off those pipes.
The pipes aren't symmetrical b/c of the way the each interface with different obstacles; the right, I had fuel lines to get under, the left, as I said, I had to "thread" the piping to avoid the frame and the park brake cable. In the end, the tips on both sides look the same.
I angle cut the ends of the pipes so that the trailing edge is about even w/the edge of the tire. I think it looks "O.K.". I'd like to come up w/a sexier tip at some point.
I have to agree with you on the more "bendy" exhaust,systems. But 5abivt's car and some cammed LT4 C4 on YouTube sound wicked! Nice work,man! Looking forward to hearing it
I captured a video today....but the audio totally sucks. I've ordered an external mic...I guess the standard mic on the GoPro isn't cut out for that kind of sound. IDK.
EDIT: FF to post 142 for the external mic recording. Better....but still not real ears. :-/
Tom, thanks for the info! I hope you can provide more good advice once I get into my search! Question for you ... would a 'vette that is for sale that has a salvage title due to flood damage make sense since the electrical system is generally completely redone to a minimum or would there be serious issues with the motor, tranny, and other components?
There are a lot of them advertised for sale from the recent hurricanes that look like they would be good candidates.
How difficult is it to remove all of the non-essential parts?? Any idea of the cost to do minimal tubing?
Thanks,
Mark
Originally Posted by Tom400CFI
Found and bought another C4 this weekend. It was located in Denver, and was CHEAP. 89, 6 speed car. Clean title, had been stolen, in an accident, and recovered. Owner wanted to fix it...tried to fix it, but it was beyond his abilities. Sat in his garage for 5 years until I took it home, Saturday.
Pretty much every body panel has damage...even the roof glass is broken. Hood has a blem, front bumper cover is torn, left door is punched in, left 1/4 is missing, left rocker is torn loose, rear bumper cover is torn off, windshield is broken. The interior is pretty ragged; driver's seat is toast, carpet is worn, stereo works but whines and 1 speaker is out.
Perfect car for a restoration? No way. This is one of those cars that needs $15k to be worth 9. It's virtues are in the mechanicals; Decent engine, Black Tag ZF6, D44 rear, late frame, late brakes and late suspension. This car has the mechanical goodies of the C4 gen...and cost less than a used snowmobile.
Anyway, I Drove from PC, UT to Denver Sat AM, got to the sellers house around 2, spent about an hour looking at it and loading it, then headed home. Here she is...
Problems: (aside from the body damage); When the car was in the accident, it slid into a curb w/the left rear wheel...that pushed the entire rear suspension assy to the right about 1". It did this by tweaking the rear frame rails. Not "bending" them laterally...but twisting each one CCW very slightly. This will be a challenge for me to rectify, but I'm sure I'll figure something out.
Also, the engine won't run. It has a fuel delivery problem; it will fire and run on ether, (so, spark) and the fuel pump runs and there is good pressure at the rails...but no injection. I believe that I've identified the issue but need to run one more test before confirming.
Today I tore into it and have the rear assy out of the car so I can get a better look at the frame rails and start working on a solution for that issue.
The ultimate goal? I'm sure many will cringe...but I want this:
....with some modifications to that execution. I want mine to be street legal. If it doesn't work out...there'll be some nice parts for sale.
 09-11-2017, 09:04 PM