When you click on links to various merchants on this site and make a purchase, this can result in this site earning a commission. Affiliate programs and affiliations include, but are not limited to, the eBay Partner Network.
Guys,
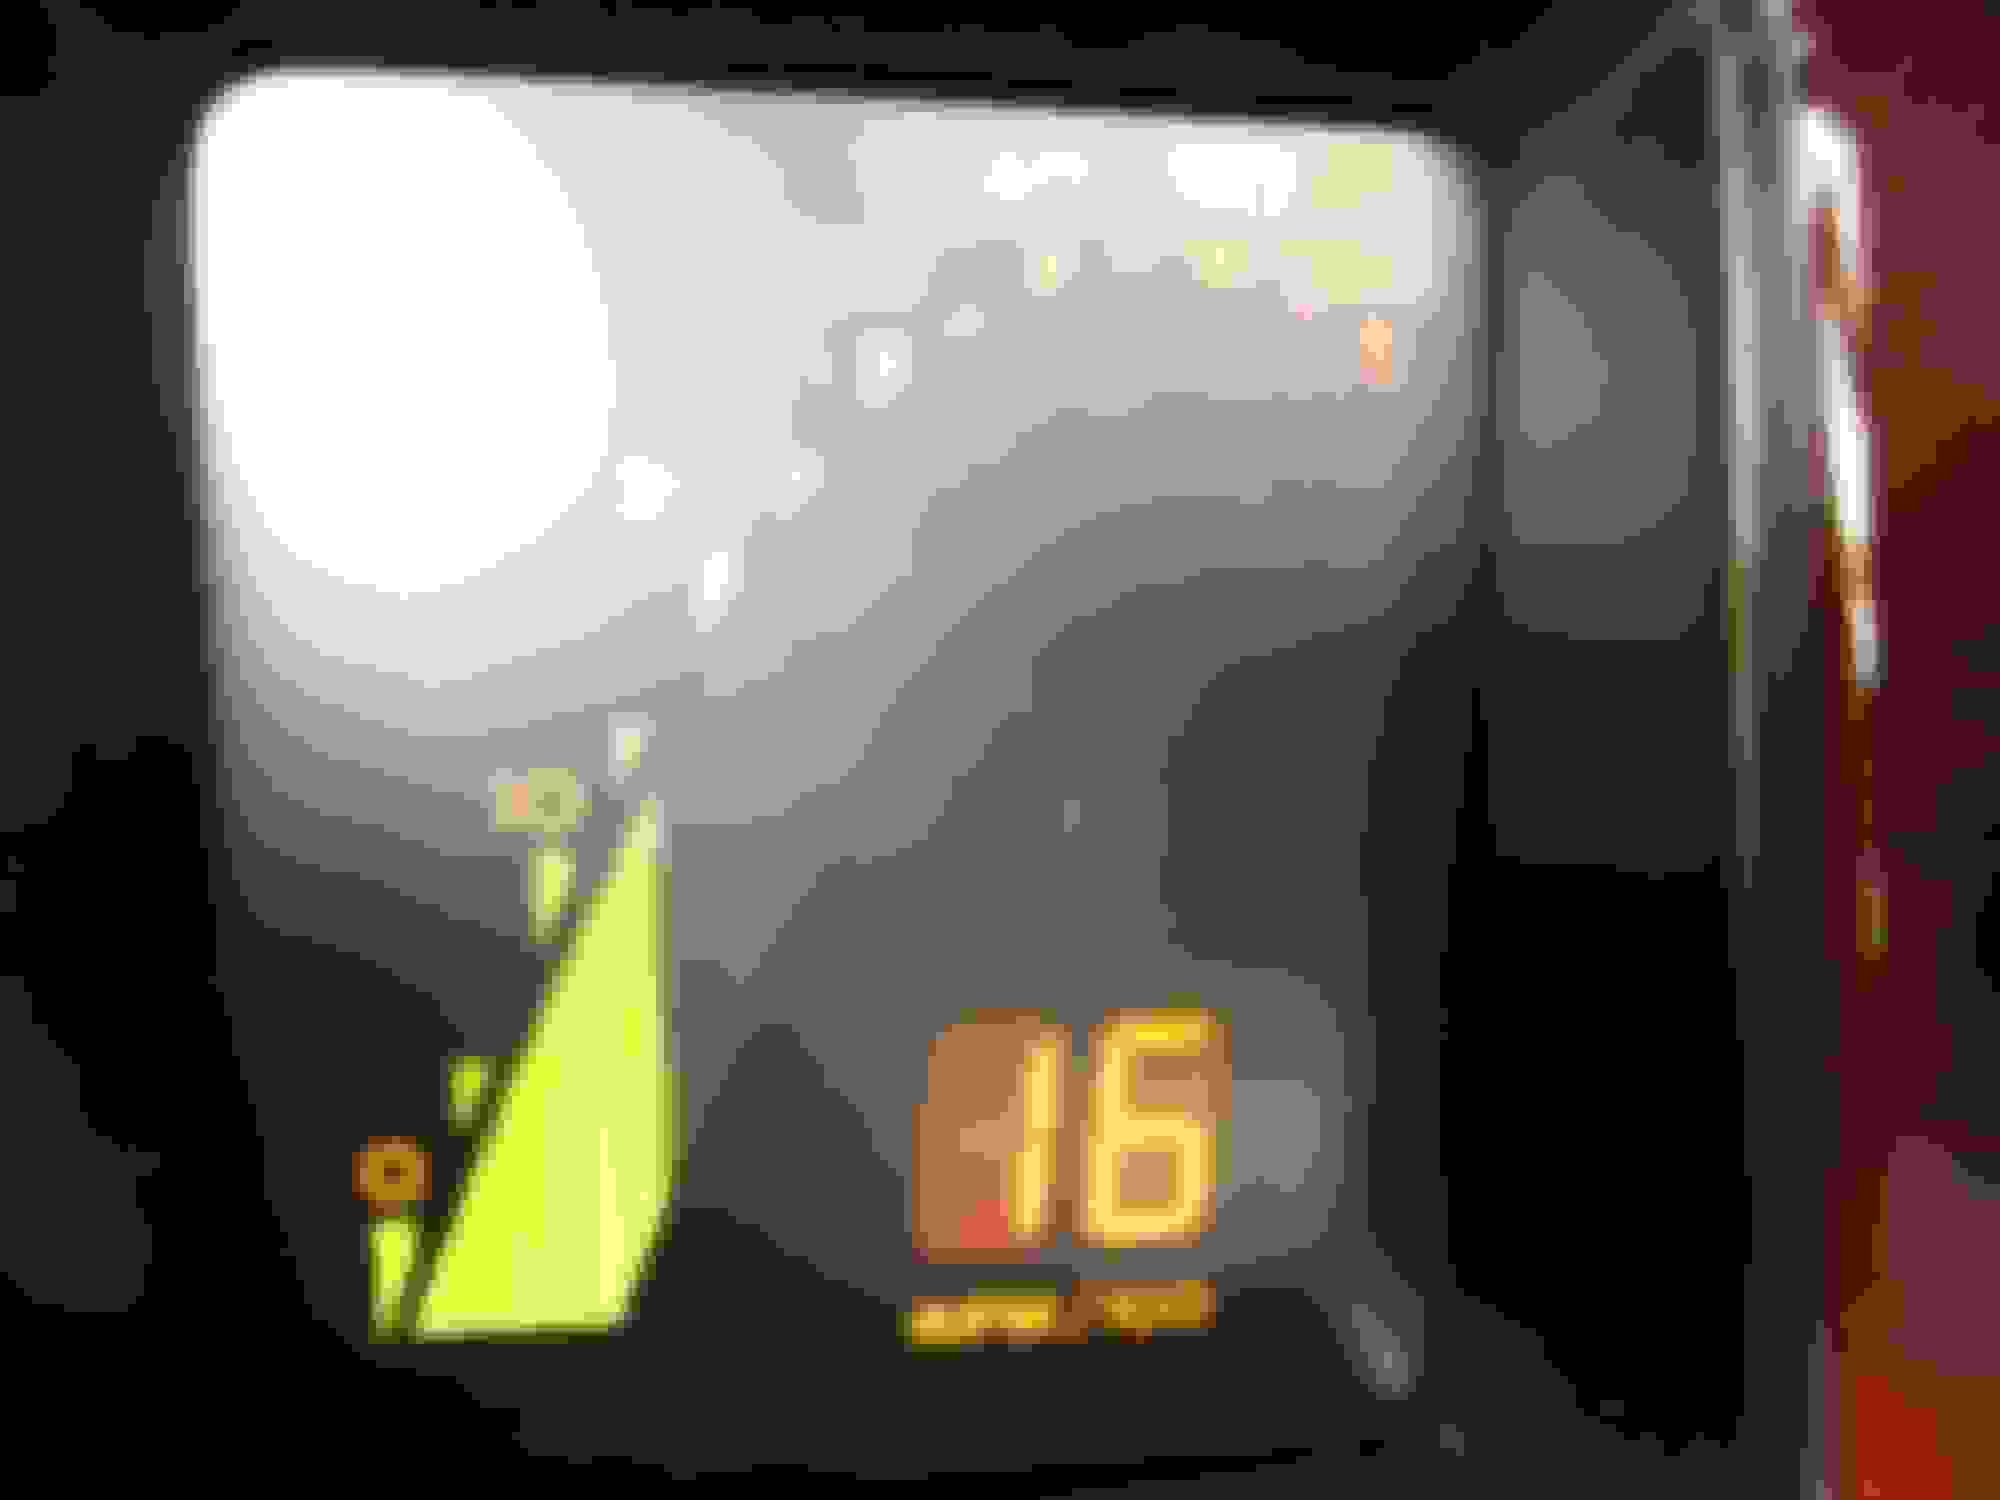
Just purchasing a new C4 and one part of the digital dash is dim. I just wanted to seek your input as to what is broken here and the best way to fix. It looks like maybe a bulb is gone, but maybe the whole piece needs to be refurbished
.
If the whole thing needs to be refurbished, who is a trusted source who can do this?
the LCD panels appear to be in decent shape, and most likely do not need the front polarizing film. most likely you only need bulbs. I suggest either a xexon or led upgrade. youtube "c4 corvette instrument cluster repair" and look for a series of videos or web search www.batee.com . Bryan is the go to guy for C4 repairs.
the LCD panels appear to be in decent shape, and most likely do not need the front polarizing film. most likely you only need bulbs. I suggest either a xexon or led upgrade. youtube "c4 corvette instrument cluster repair" and look for a series of videos or web search www.batee.com . Brian is the go to guy for C4 repairs.
Ah perfect - I like the idea of the LED/Xenon upgrade - got a link to a site that sell these, or is Bryan the man?
Ah perfect - I like the idea of the LED/Xenon upgrade - got a link to a site that sell these, or is Bryan the man?
I upgraded my 85 to xenons some 15 years ago - haven't had to replace bulbs since then. btw, just realized my typo - "bryan" - (brain not fully engaged). reference this thread - https://www.corvetteforum.com/forums...-corvette.html as far as purchasing bulbs - several places -- batee, ebay, or various on-line vendors. note: led's will cost more than xenons.
Bryan at Batee.com is definitely the man. He repaired my instrument cluster a few years back and did the bulb upgrade at the same time.
Good work, fair price, can't complain.
Check his website. There plenty of info and parts available. If you pull the bezel off the dash, you'll see some metal caps on the front of your cluster, it could just be one of these bulbs are burnt out. They can be changed from the front though it's a little harder if they're the bi-pin type bulbs.
... If you pull the bezel off the dash, you'll see some metal caps on the front of your cluster, it could just be one of these bulbs are burnt out. They can be changed from the front though it's a little harder if they're the bi-pin type bulbs....
I had put together something for another member a while back based on forum information and my experience in doing it several times. I used the stock halogens for a quick easy fix, but if you want LCD then the whole cluster needs to come out.
I just looked and found an old package of lights. They are #882 bulbs. They are little 5 watt halogen bulbs. I think they are about $30 each at the dealer, but I got them at Advance Auto parts for about $8 each a couple years ago. I didn't shop around too much. They didn't have them in stock so I had to wait about 2 days. You may find them at various part stores.
The bulbs are halogens, so don't touch the bulb with your fingers. The bulbs may come with a twist-in socket base that twists into the back of the instrument cluster. To do that the instrument cluster has to come completely out.
The easier way is to pull the bulb out of the twist-in socket base from the front without taking out the whole cluster. The bulbs just pull straight out and push back in, so it is not breaking them or the socket base.
When you take the front trim plate off the instrument panel (just a few screws and then carefully manuver the plate out away from the panel) you can see there are some small snap-in covers over the place where the lights are. These covers are a bright metal and are under an inch diameter.
Once the covers are out, I use a small piece of electical shrink tubing. (Radio Shack sells a selection for a buck or two). I push the shrink tubing over the bulb. Take a small pliers like a needle nose and gently grip the outside the shrink tube on the bulb and pull the bulb out straight out without twisting. (don't grip very hard or you may break the bulb.)
Once the bulb is out, put some of the shrink tube over a new bulb and use the tubing to hold the bulb and guide the bulb into the existing twist-in socket base. The tubing will not hold the bulb well enough to push it all the way in by itself. You will need to only line it up and start it with the tubing and then push with your finger or the pliers (over the shrink tube so you don't touch it). Once it is in place, pull the tubing off. Replace the snap in cover. You can turn on the lights to make sure it lights.
Repeat the same procedure for the others. I think there are 4 bulbs.
Replace the front trim plate.
Done.
There are a lot of words, but the whole thing is only about 15 minutes and pretty easy. Just be cautious, take your time, and not break the bulbs. I have replaced 6 or 8 of them on 3 cars this way.
Good luck
my problem with halogens is the heat. then there's the life expectancy, and the cost. the best bang for the buck are xenons - about $10 for four bulbs, 5-10X the life expectancy, and they don't burn near as hot. if you've ever opened one of these instrument clusters, you'll see the circuit card around the halogen bulbs is fried to a crisp. halogens will run around $8 each, and only have an average life of 2000 hours, and then there's the extra care required in not touching the bulbs. LEDs are the latest and greatest, but still costly. GM went to xenons with the C5, and IMO, the only way to fly. -
If you want to change out the bulbs you can access from the front of the panel, here's a tool that can be very useful. It's listed on Ebay for use on pinball machines but it fits the holes to access the bulbs very nicely
my problem with halogens is the heat. then there's the life expectancy, and the cost. the best bang for the buck are xenons - about $10 for four bulbs, 5-10X the life expectancy, and they don't burn near as hot. if you've ever opened one of these instrument clusters, you'll see the circuit card around the halogen bulbs is fried to a crisp. halogens will run around $8 each, and only have an average life of 2000 hours, and then there's the extra care required in not touching the bulbs. LEDs are the latest and greatest, but still costly. GM went to xenons with the C5, and IMO, the only way to fly. -
Is there a particular xenon bulb number we can refer to when attempting this repair? I'd like to have the bulbs at hand before I take everything apart. Thanks.
Is there a particular xenon bulb number we can refer to when attempting this repair? I'd like to have the bulbs at hand before I take everything apart. Thanks.
Go to Bryan's website, he sells most everything for the Atari dashes as well as repairs them. Big thing to know is there are 2 basic type bulbs. One is pins while the other has conventional wrapped contacts. They will interchange but you have to swap out the sockets, meaning disassembly.
Is there a particular xenon bulb number we can refer to when attempting this repair? I'd like to have the bulbs at hand before I take everything apart. Thanks.
From looking at your dash and repairing my own, it looks like you only need the upper right hand bulb.
If you remove your panel you will remove the cap and replace. You can do all 4 with your style of bulb also.
But yyour backlight leds are all on it is just the main light.
Good luck
Just wanted to pile on for batee.com. I consistently get compliments on how my dash looks after sending to Bryan. I'm super happy with it!
EDIT: A lot of others are saying you just need a bulb-that's probably true, but I'd go ahead and have him do it anyway. The other bulbs could probably stand to be replaced at the same time, and might as well get the cooler xenon ones while you're at it. He'll also test your power supply and replace for you and make sure all your pins are well soldered. His service is worth it to know your dash is better than new.
Looks like just bulbs to me, Sylvania 882 is stock I believe, or you can do the Xenons.
They come out through the front so you don't need to take the dash unit out, just remove the trim bezel covering it.
Be warned this is harder than it sounds to get them out. I recommend taking the whole thing apart especially the first time to make sure everything looks ok. Also, get the Xenons-the originals actually get hot enough to destroy the circuit board.