Upgrading window regulator- a few questions
#1
Racer


Thread Starter
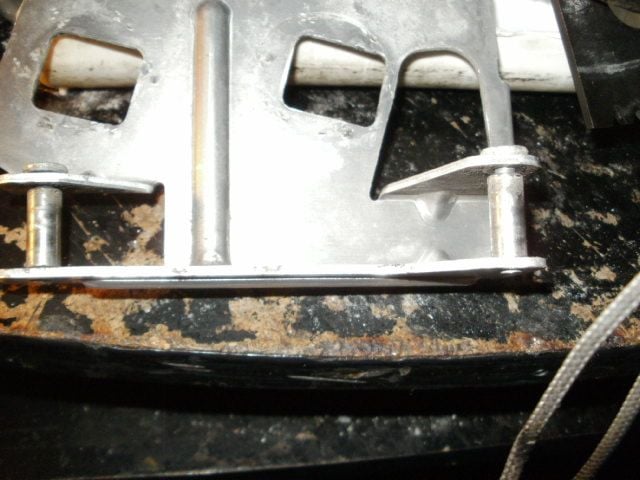
The two 1/4" holes drilled in the sill at the bottom------ do you press the pins out of the regulator and peen them over after installing, or what?
What would be a proper lubricant for all the movable parts on the regulator-----grease, white lithium, light oil?
Thanks,
Frank
What would be a proper lubricant for all the movable parts on the regulator-----grease, white lithium, light oil?
Thanks,
Frank
#2
The two 1/4" holes drilled in the sill at the bottom------ do you press the pins out of the regulator and peen them over after installing, or what?
What would be a proper lubricant for all the movable parts on the regulator-----grease, white lithium, light oil?
Thanks,
Frank
What would be a proper lubricant for all the movable parts on the regulator-----grease, white lithium, light oil?
Thanks,
Frank

Last edited by Joe C; 06-28-2018 at 01:53 PM.
#3
Racer


Thread Starter


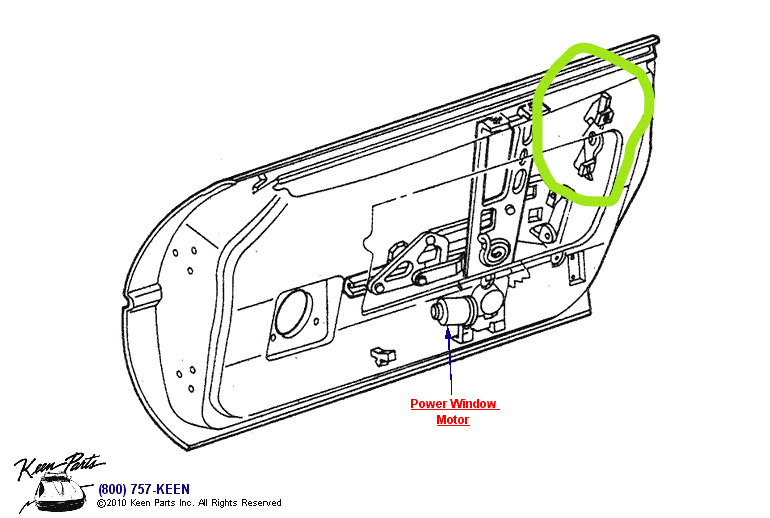
I converted my 85 over to the later power window assemblies, and I do remember drilling two holes in the bottom of the door. I don't remember any pins in the regulator and peening anything - it was a bolt in installation. i'm thinking I used a couple metric (i'm thinking m6-???) "sem" body mount bolts - I want to say around 20-25mm length. aside from drilling the two holes, and reverse wiring the window motor on the passenger's side, it was pretty much plug and play mod. as I recall, it was a fairly easy changeover. for the lube, I cleaned up my assemblies and used a synthetic grease on pivot points and moving parts. it's been about three years now - everything's still working w/o issues. I used the on-line retrofit instructions from Mid-America Corvette. 

This is what it looks like. I think I'll just grind the pins off, use the spacers and follow your instructions.
#4
Racer


Thread Starter
I'm sorry, I'm looking at it all wrong, this is the side of the reg. I've located the bottom with the threads in the holes and are at the 215/16 dim apart
#5

The following users liked this post:
stabac (06-28-2018)
#6
Drifting


Not trying to jack this thread but how truly difficult is this upgrade. I already have the OEM scissor regulators for my 85 - but I'm waiting for my interior guy to get me in. If it is much longer I may try it myself.
I'm tool / mechanical competent, my issue is that I'm disabled and don't want to get in over my head if it requires a ton of dexterity.
Suggestions?
I'm tool / mechanical competent, my issue is that I'm disabled and don't want to get in over my head if it requires a ton of dexterity.
Suggestions?
The following users liked this post:
BV85 (07-02-2018)
#7
Racer


Thread Starter
Not trying to jack this thread but how truly difficult is this upgrade. I already have the OEM scissor regulators for my 85 - but I'm waiting for my interior guy to get me in. If it is much longer I may try it myself.
I'm tool / mechanical competent, my issue is that I'm disabled and don't want to get in over my head if it requires a ton of dexterity.
Suggestions?
I'm tool / mechanical competent, my issue is that I'm disabled and don't want to get in over my head if it requires a ton of dexterity.
Suggestions?
The following users liked this post:
85 Stalker (06-28-2018)
#8
Not trying to jack this thread but how truly difficult is this upgrade. I already have the OEM scissor regulators for my 85 - but I'm waiting for my interior guy to get me in. If it is much longer I may try it myself.
I'm tool / mechanical competent, my issue is that I'm disabled and don't want to get in over my head if it requires a ton of dexterity.
Suggestions?
I'm tool / mechanical competent, my issue is that I'm disabled and don't want to get in over my head if it requires a ton of dexterity.
Suggestions?
The following users liked this post:
85 Stalker (06-28-2018)
#10
Racer


Thread Starter
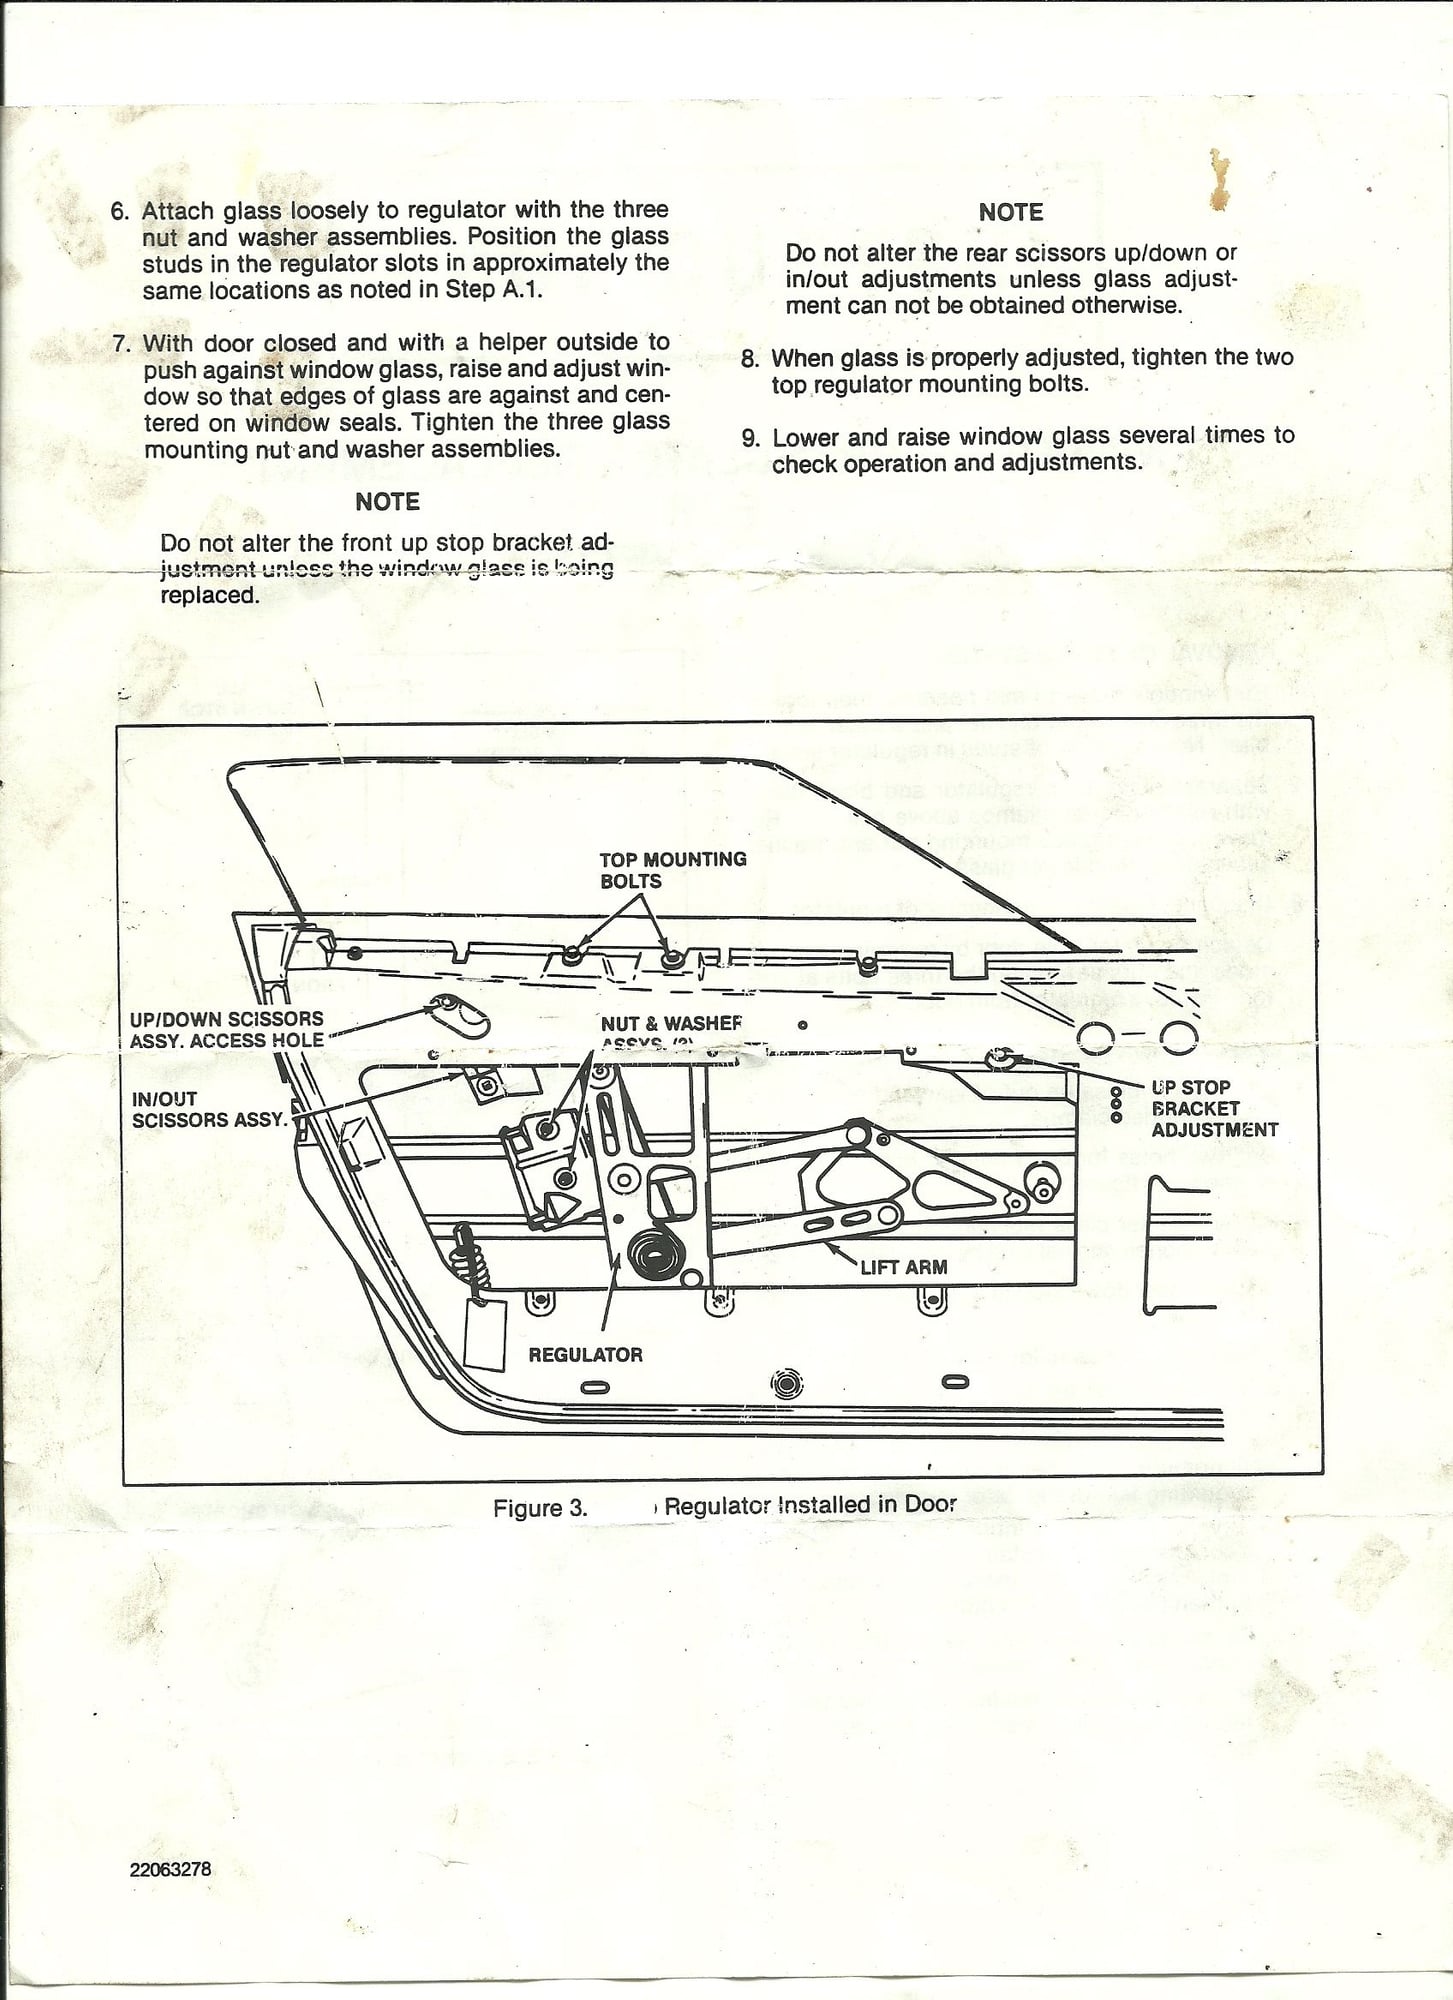
I've removed all the bolts holding the inner panel in place, the one that has the clear plastic attached to it, not the brace.
It still seems to be firmly attached, does it require some force to get it up and out, or have I missed a bolt or two (don't think I missed any)
EDIT: NEVER MIND, I FIGURED OUT MY ERROR.......THAT PANEL DOESN'T GET REMOVED
It still seems to be firmly attached, does it require some force to get it up and out, or have I missed a bolt or two (don't think I missed any)
EDIT: NEVER MIND, I FIGURED OUT MY ERROR.......THAT PANEL DOESN'T GET REMOVED
Last edited by stabac; 06-30-2018 at 10:33 PM. Reason: QUESTION ANSWERED
#12
Racer


Thread Starter
#13
The two 1/4" holes drilled in the sill at the bottom------ do you press the pins out of the regulator and peen them over after installing, or what?
What would be a proper lubricant for all the movable parts on the regulator-----grease, white lithium, light oil?
Thanks,
Frank
What would be a proper lubricant for all the movable parts on the regulator-----grease, white lithium, light oil?
Thanks,
Frank
GR
#14
Racer


Thread Starter
The reason I'm replacing with the the new regulator is the nylon belt broke on my OEM. I had to use my Dremel to cut the belt and remove the old regulator.
The end that goes forward, behind the Bose Speaker is stuck. I hate to remove the speaker to get to it and perhaps screw up the sound system.
How would I remove that end of the strip, or would it hurt to just leave it there?
The end that goes forward, behind the Bose Speaker is stuck. I hate to remove the speaker to get to it and perhaps screw up the sound system.
How would I remove that end of the strip, or would it hurt to just leave it there?
#15
The reason I'm replacing with the the new regulator is the nylon belt broke on my OEM. I had to use my Dremel to cut the belt and remove the old regulator.
The end that goes forward, behind the Bose Speaker is stuck. I hate to remove the speaker to get to it and perhaps screw up the sound system.
How would I remove that end of the strip, or would it hurt to just leave it there?
The end that goes forward, behind the Bose Speaker is stuck. I hate to remove the speaker to get to it and perhaps screw up the sound system.
How would I remove that end of the strip, or would it hurt to just leave it there?
It's likely stuck because you missed a bolt on the side. Look inside the door with a flashlight/headlamp and look to see it.
The speaker is easily removed, and the amplifier is below it (safely tucked inside a plastic shroud and covered in an epoxy for weatherproofing). Just label the speaker terminals with the color wire they go to (or take a picture). I just used sharpie.


