


Harmonic balancer removal

Team Owner

Joined: Aug 2005
Posts: 34,988
Likes: 515
From: Riverside County Southern California
Co-winner 2020 C4 of the Year - Modified
2018 Corvette of Year Finalist
2017 C4 of Year
2016 C7 of Year Finalist
St. Jude Donor '09 thru '20

I removed mine using a hammer and a 2X2 (wood). Tap it...slow, patience from underneath the engine. From left to right and it will drop.

Race Director


Joined: Jan 2002
Posts: 12,264
Likes: 88
From: O'Fallon Missouri
Originally Posted by PLRX787
I removed mine using a hammer and a 2X2 (wood). Tap it...slow, patience from underneath the engine. From left to right and it will drop.
 Remove the three bolts holding on the ring, and then tap it off from the rear of the balancer. I used the handle of a long screw driver and a hammer.
Tip: Before you reinstall the balancer coat the mating surface with anti seize, and the next time it will just pull off.
-Mike

Thread Starter
Pro


Joined: Aug 2005
Posts: 656
Likes: 0
From: Fort Worth TX
Harm puller wont work, too tight in there... So I got the damper off, now what about this hub???? Ive got it marked to match the timing chain cover but it wont budge. I can only get to one of the sides of it from the bottom? How does this come out?

Race Director

Joined: Jan 2005
Posts: 10,641
Likes: 13
From: Slidell Louisiana
Originally Posted by ian1992red
Harm puller wont work, too tight in there... So I got the damper off, now what about this hub???? Ive got it marked to match the timing chain cover but it wont budge. I can only get to one of the sides of it from the bottom? How does this come out?
Ian, there is a special Kent Moore puller that fits. From what I have read some have successfully used regular Harmonic Balancer pullers, while others have gotten stuck! My question is can you rotate the crank? If you can I would work it out from the back rotating the engine 120* at a time. However you would have to re-mark your damper hub.
Good luck! Mike
Thread Starter
Pro
Joined: Aug 2005
Posts: 656
Likes: 0
From: Fort Worth TX
Originally Posted by aboatguy
Ian, there is a special Kent Moore puller that fits. From what I have read some have successfully used regular Harmonic Balancer pullers, while others have gotten stuck! My question is can you rotate the crank? If you can I would work it out from the back rotating the engine 120* at a time. However you would have to re-mark your damper hub.
Good luck! Mike
Good luck! Mike
Yes I can move the crank. So move it back and forth 120, and work it out from the back? You mean moving to access each end of the tri angle.. How do I know how to remark the hub?
Corvette Stories
The Best of Corvette for Corvette Enthusiasts

5 Best & 5 Worst Corvette Daily Drivers
Joe Kucinski
The Headlights of Every Corvette Generation Explained
Joe Kucinski
5 Best & 5 Most Overrated Corvette Track Packages of All Time!
Joe Kucinski
Every 2027 Corvette Engine Explained
Joe Kucinski
Designer Imagines A Corvette That Looks More Like a Corvette Than the Corvette
Verdad Gallardo
10 Ugly Corvettes That We Still Kinda Love
Joe Kucinski
Top 10 Most Expensive Corvettes Ever Sold on Bring A Trailer
Brett Foote
10 Things Every Corvette Owner Needs (2026 Edition)
Michael S. Palmer
8 Most "Only Corvette Owners Understand" Quirks and Problems
Pouria Savadkouei
Le Mans Master

Joined: Jun 1999
Posts: 6,272
Likes: 2
From: Chino Valley AZ
Cruise-In I Veteran
Cruise-In II Veteran
Currently Corvette-less
Read step #12 below........
LT1_LT4 Balancer/Hub Removal
By following this procedure you will gain access and be able to change the three front timing cover seals (Water Pump, OptiSpark Drive, Front Crankshaft/Balancer)
Unlike its SBC predecessor, the LT1/LT4 Balancer is a two-piece assembly consisting of an (inner) hub, and (outer) balancer/pulley. Removal of the assembly can be frustrating if approached in the conventional way. By following the procedures below, you can safely and quickly remove the assembly with little or no problem.
You may want to consider using Rhino Ramps or jack stands to gain additional access space and elbow room underneath the front of the engine.
1. Drain the radiator by opening the drain valve on the lower right hand (passenger side)
2. Remove the serpentine belt
3. Remove the upper radiator hose
4. Remove the water pump. When removing the water pump, it is important to remember that the LT1/LT4 water pump is attached to the engine with 3 bolts on each side, vs. its predecessor, which only had 2 bolts on each side. The center bolt on the driver side is a challenge, but can be removed without removal of the power steering pump. When removing the water pump, take care to remove the pump drive coupler along with the pump and place it on the pump drive shaft for use when re-installing the pump.
5. Mark the coil wire and all plug wires at the OptiSpark cap for easy reference when re-installing the OptiSpark unit after balancer seal repairs have been completed.
6. NOTE: There is no need to separate the balancer pulley from the hub if you intend to pull the hub off anyway. The only time you need to separate the pulley from the hub is if you are simply changing the OptiSpark. There is a match mark that is cast into the balancer assembly that allows you to mate the two pieces together in the exact orientation that they come apart. If you intend to separate the balancer pulley from the hub, locate the marks and make note for re-assembly.
7. The balancer pulley is attached to the hub with three bolts. The bolts are 7/16” SAE standard, 14 threads per inch, ¾” length (not metric). Fully remove all three bolts, and if you intend to remove the unit as a complete assembly, jump to steps 9 thru 18. If you intend to separate the assembly, continue by rethreading one bolt by a couple of turns. It is now time to separate the pulley from the hub. Most pulleys have been found to be rusted in place and require considerable effort to separate from the hub. Spraying the inside of the pulley with penetrating oil helps. Do not strike the pulley with a hammer in your frustrated attempts to remove. The best method is to position yourself under the engine with a steel rod (or better yet a brass drift) and one healthy hammer. Position the rod/drift on the inside portion of the balancer when striking it with the hammer. This step requires more than a gentle tap. "Read step #12Try to position yourself so you can give a good solid hit a
t each rotation. Rotate the crankshaft 120 degrees after every couple of heavy hammer blows. Do not hit on the outer diameter of the pulley as damage can and will occur.
NOTE: It has been said that an easier way to separate the pulley from the hub is to loosen the 3 bolts by 1 turn each, then start the motor for a few seconds. I assume that this is with the serpentine belt still in place. It does make sense that the harmonics associated with this step will loosen the pulley. What have you got to lose by trying this step? I say go for it!
8. After successfully separating the pulley from the hub, it is now time to unbolt and remove the OptiSpark module. As with the water pump, a coupler drives the OptiSpark module and care should be taken to remove the drive shaft and place with the OptiSpark module for use when re-installing the unit. When the time comes to re-install the OptiSpark unit on the engine, you should pay close attention to the Notice below
Notice
Contrary to what all the books say, in some cases, the OptiSpark drive coupler can/will go on in more than one position. When the coupler is correctly installed, the OptiSpark unit will slide in place and rest firmly against the timing cover without forcing it into position. The drive spline in the rear of the OptiSpark is keyed. Pay close attention to the key, and match it up with the corresponding slot on the drive coupler.
9. Finally, it is now time to remove the hub. The center bolt that holds the hub on the crankshaft snout is 7/16” fine thread (not metric). I have found that I can generally break the center bolt loose by placing a 6 sided socket on the bolt, with a ½” breaker bar attached. By striking the breaker bar with that healthy hammer you just used in step #7, you can break the torque on the bolt.
10. Fully remove the bolt, remove the washer from the bolt, then re-install the bolt by 3 full turns.
11. Re-read step #10. If you skip this step, you are a screwed pooch.
12. The “General” was thinking when he installed the power steering rack hydraulic lines as he has installed a loop in the lines that allow the use of a balancer puller without interference of the puller jack screw. Check it out, you will be glad that he did this.
13. Use a standard balancer puller that requires the use of 3 puller bolts that fit into 3 slots on the crab portion. Make sure that you use a tip on the jack screw end that is a flat rotating plate, not a sharp point, because you will eventually place the jack screw end directly on the head of the center bolt of the hub and you don’t want to damage it.
14. Next, select three new (or used) 7/16” bolts that are of sufficient length to slip thru the puller and fully thread into the hub where you previously removed the 3 bolts in step #7. If you do not have 3 – 7/16” bolts that are the proper length, you can use bolts that are slightly smaller than the tapped holes so you can slip them completely thru the hub. Make sure that the bolts are of sufficient length so that you can insert them completely thru the puller assembly and the hub, with a flat washer on each end, and a nut on the backside.
15. Rotate the entire hub assembly until the (^) mark is at the 12:00 position before removing the hub. When re-installing the hub, make sure that you install it back in the same orientation. This is a balance mark, and although it really won’t make too much difference if you fail to do this, it is there for a purpose, so try to do the right thing here.
16. Position the puller onto the front of the hub, with the jack end of the jackscrew slid thru the power steering line loop, and attach as mentioned above.
17. You are now ready to slowly remove the hub from the crankshaft snout. The crank may start to turn as you apply force. Placing a 2x4 against the puller and left wheel "A" frame will stop the rotation. If you have access to a micrometer (click style) torque wrench you will find that it will take about 70 - 85 foot pounds of torque before you will see the hub start to move. As you continue to turn the jackscrew in a clockwise rotation, the hub will slide off the crankshaft. Keep doing this until you feel the hub come loose, or until you back it out against the shoulder of the center bolt. It may be beneficial to purchase a 3" x 7/16 grade 8 fine thread bolt and continued the removal with that. Without the 3" bolt you might not be able to get the hub all the way off.
Plan to use the 3” x 7/16” bolt when re-installing the hub back on the crankshaft after your repairs are complete. Just slide the washer over the bolt, start the bolt in the crankshaft, and mechanically pull the balancer back onto the crankshaft snout.
18. You have successfully removed the balancer hub. Now, time to R&R that front seal assembly.
19. I find it easiest to remove the front seal with a seal puller tool that you can buy at the auto parts store. It is designed to roll the seal out with leverage.
20. Prior to re-installing the new seal, I recommend placing a small bead of sealer around the outer circumference of the seal prior to tapping it in. I use a ball peen hammer to get it started, then a large socket over the crankshaft snout to drive it in. Don’t forget to check the hub shaft for excessive wear, and if so, buy a speedy sleeve to slip over it.
http://www2.vsm.skf.com/usa_english/node929.aspx
NOTE: I am looking for feedback from those who use this procedure in improving the steps above, and adding a section for re-installing the balancer hub. Please e-mail me at slmorton@cableone.net with your feedback.
 Purp
Purp
LT1_LT4 Balancer/Hub Removal
By following this procedure you will gain access and be able to change the three front timing cover seals (Water Pump, OptiSpark Drive, Front Crankshaft/Balancer)
Unlike its SBC predecessor, the LT1/LT4 Balancer is a two-piece assembly consisting of an (inner) hub, and (outer) balancer/pulley. Removal of the assembly can be frustrating if approached in the conventional way. By following the procedures below, you can safely and quickly remove the assembly with little or no problem.
You may want to consider using Rhino Ramps or jack stands to gain additional access space and elbow room underneath the front of the engine.
1. Drain the radiator by opening the drain valve on the lower right hand (passenger side)
2. Remove the serpentine belt
3. Remove the upper radiator hose
4. Remove the water pump. When removing the water pump, it is important to remember that the LT1/LT4 water pump is attached to the engine with 3 bolts on each side, vs. its predecessor, which only had 2 bolts on each side. The center bolt on the driver side is a challenge, but can be removed without removal of the power steering pump. When removing the water pump, take care to remove the pump drive coupler along with the pump and place it on the pump drive shaft for use when re-installing the pump.
5. Mark the coil wire and all plug wires at the OptiSpark cap for easy reference when re-installing the OptiSpark unit after balancer seal repairs have been completed.
6. NOTE: There is no need to separate the balancer pulley from the hub if you intend to pull the hub off anyway. The only time you need to separate the pulley from the hub is if you are simply changing the OptiSpark. There is a match mark that is cast into the balancer assembly that allows you to mate the two pieces together in the exact orientation that they come apart. If you intend to separate the balancer pulley from the hub, locate the marks and make note for re-assembly.
7. The balancer pulley is attached to the hub with three bolts. The bolts are 7/16” SAE standard, 14 threads per inch, ¾” length (not metric). Fully remove all three bolts, and if you intend to remove the unit as a complete assembly, jump to steps 9 thru 18. If you intend to separate the assembly, continue by rethreading one bolt by a couple of turns. It is now time to separate the pulley from the hub. Most pulleys have been found to be rusted in place and require considerable effort to separate from the hub. Spraying the inside of the pulley with penetrating oil helps. Do not strike the pulley with a hammer in your frustrated attempts to remove. The best method is to position yourself under the engine with a steel rod (or better yet a brass drift) and one healthy hammer. Position the rod/drift on the inside portion of the balancer when striking it with the hammer. This step requires more than a gentle tap. "Read step #12Try to position yourself so you can give a good solid hit a
t each rotation. Rotate the crankshaft 120 degrees after every couple of heavy hammer blows. Do not hit on the outer diameter of the pulley as damage can and will occur.
NOTE: It has been said that an easier way to separate the pulley from the hub is to loosen the 3 bolts by 1 turn each, then start the motor for a few seconds. I assume that this is with the serpentine belt still in place. It does make sense that the harmonics associated with this step will loosen the pulley. What have you got to lose by trying this step? I say go for it!
8. After successfully separating the pulley from the hub, it is now time to unbolt and remove the OptiSpark module. As with the water pump, a coupler drives the OptiSpark module and care should be taken to remove the drive shaft and place with the OptiSpark module for use when re-installing the unit. When the time comes to re-install the OptiSpark unit on the engine, you should pay close attention to the Notice below
Notice
Contrary to what all the books say, in some cases, the OptiSpark drive coupler can/will go on in more than one position. When the coupler is correctly installed, the OptiSpark unit will slide in place and rest firmly against the timing cover without forcing it into position. The drive spline in the rear of the OptiSpark is keyed. Pay close attention to the key, and match it up with the corresponding slot on the drive coupler.
9. Finally, it is now time to remove the hub. The center bolt that holds the hub on the crankshaft snout is 7/16” fine thread (not metric). I have found that I can generally break the center bolt loose by placing a 6 sided socket on the bolt, with a ½” breaker bar attached. By striking the breaker bar with that healthy hammer you just used in step #7, you can break the torque on the bolt.
10. Fully remove the bolt, remove the washer from the bolt, then re-install the bolt by 3 full turns.
11. Re-read step #10. If you skip this step, you are a screwed pooch.
12. The “General” was thinking when he installed the power steering rack hydraulic lines as he has installed a loop in the lines that allow the use of a balancer puller without interference of the puller jack screw. Check it out, you will be glad that he did this.
13. Use a standard balancer puller that requires the use of 3 puller bolts that fit into 3 slots on the crab portion. Make sure that you use a tip on the jack screw end that is a flat rotating plate, not a sharp point, because you will eventually place the jack screw end directly on the head of the center bolt of the hub and you don’t want to damage it.
14. Next, select three new (or used) 7/16” bolts that are of sufficient length to slip thru the puller and fully thread into the hub where you previously removed the 3 bolts in step #7. If you do not have 3 – 7/16” bolts that are the proper length, you can use bolts that are slightly smaller than the tapped holes so you can slip them completely thru the hub. Make sure that the bolts are of sufficient length so that you can insert them completely thru the puller assembly and the hub, with a flat washer on each end, and a nut on the backside.
15. Rotate the entire hub assembly until the (^) mark is at the 12:00 position before removing the hub. When re-installing the hub, make sure that you install it back in the same orientation. This is a balance mark, and although it really won’t make too much difference if you fail to do this, it is there for a purpose, so try to do the right thing here.
16. Position the puller onto the front of the hub, with the jack end of the jackscrew slid thru the power steering line loop, and attach as mentioned above.
17. You are now ready to slowly remove the hub from the crankshaft snout. The crank may start to turn as you apply force. Placing a 2x4 against the puller and left wheel "A" frame will stop the rotation. If you have access to a micrometer (click style) torque wrench you will find that it will take about 70 - 85 foot pounds of torque before you will see the hub start to move. As you continue to turn the jackscrew in a clockwise rotation, the hub will slide off the crankshaft. Keep doing this until you feel the hub come loose, or until you back it out against the shoulder of the center bolt. It may be beneficial to purchase a 3" x 7/16 grade 8 fine thread bolt and continued the removal with that. Without the 3" bolt you might not be able to get the hub all the way off.
Plan to use the 3” x 7/16” bolt when re-installing the hub back on the crankshaft after your repairs are complete. Just slide the washer over the bolt, start the bolt in the crankshaft, and mechanically pull the balancer back onto the crankshaft snout.
18. You have successfully removed the balancer hub. Now, time to R&R that front seal assembly.
19. I find it easiest to remove the front seal with a seal puller tool that you can buy at the auto parts store. It is designed to roll the seal out with leverage.
20. Prior to re-installing the new seal, I recommend placing a small bead of sealer around the outer circumference of the seal prior to tapping it in. I use a ball peen hammer to get it started, then a large socket over the crankshaft snout to drive it in. Don’t forget to check the hub shaft for excessive wear, and if so, buy a speedy sleeve to slip over it.
http://www2.vsm.skf.com/usa_english/node929.aspx
NOTE: I am looking for feedback from those who use this procedure in improving the steps above, and adding a section for re-installing the balancer hub. Please e-mail me at slmorton@cableone.net with your feedback.
Purp
Last edited by PurpleC4; Oct 2, 2005 at 07:02 PM. Reason: Additional Information
Thread Starter
Pro
Joined: Aug 2005
Posts: 656
Likes: 0
From: Fort Worth TX
OK, so I got it out about 1/2" and the retainer on the harm puller broke.  But it did move, so tomarrow its off to the parts store to get more needed parts and hopefully just a retainer, not another whole puller kit...
But it did move, so tomarrow its off to the parts store to get more needed parts and hopefully just a retainer, not another whole puller kit...
Race Director
Joined: Jan 2005
Posts: 10,641
Likes: 13
From: Slidell Louisiana
Originally Posted by ian1992red
OK, so I got it out about 1/2" and the retainer on the harm puller broke. But it did move, so tomarrow its off to the parts store to get more needed parts and hopefully just a retainer, not another whole puller kit...
But it did move, so tomarrow its off to the parts store to get more needed parts and hopefully just a retainer, not another whole puller kit... Your having any luck on this project!
I wish you better luck tomorrow.
Mike
Melting Slicks

Joined: May 2005
Posts: 2,730
Likes: 1
From: Atoka Oklahoma
St. Jude Donor 06
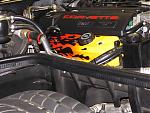
you don't have to beat on anything, check out "my corvette photos" you will see a tool that makes it an easy job and tool is cheap compared to gm tool. and it can all be done from top.
Melting Slicks
Joined: May 2005
Posts: 2,730
Likes: 1
From: Atoka Oklahoma
St. Jude Donor 06
notice in my picture that i have the hub puller turned around backwards. instructions show to use it the other way. when you start turning the jack screw most of the pressure is on the heads of the 3 bolts. the way i have it setup it puts the pressure squarely on the bolts and it keeps the bolts straight. it takes alittle time but it worked for me. lets us know
Race Director

Joined: Feb 2003
Posts: 11,672
Likes: 20
From: Lake Wylie SC
I've said this many times before, but I'll say it again as we do have new guys joining us all the time. If you are going to do major work on your Vette, buy the right tools. The tool you need is made by Kent-Moore and can be purchased through a good Chevy dealer's part's department. I haven't seen this kit on any of the parts trucks so you'll have to either go directly to Kent-Moore or the dealer. Buy the entire LT1/4 hub puller and installer. This kit makes your job simple and you won't break anything, not even your knuckles.