



Wiring nightmare

Thread Starter
Intermediate

Joined: Jul 2010
Posts: 26
Likes: 0
From: Norfolk Virginia
 Wiring nightmare
Im trying to figure out what goes to what and where. I have a Chilton and a Haynes and know my way around a 305 with TPI pretty well. Im just trying to figure out how to connect back the pieces. If someone lives around the Hampton Roads area and knows this stuff pretty well I will pay you handsomely for helping me out if you can.
#1
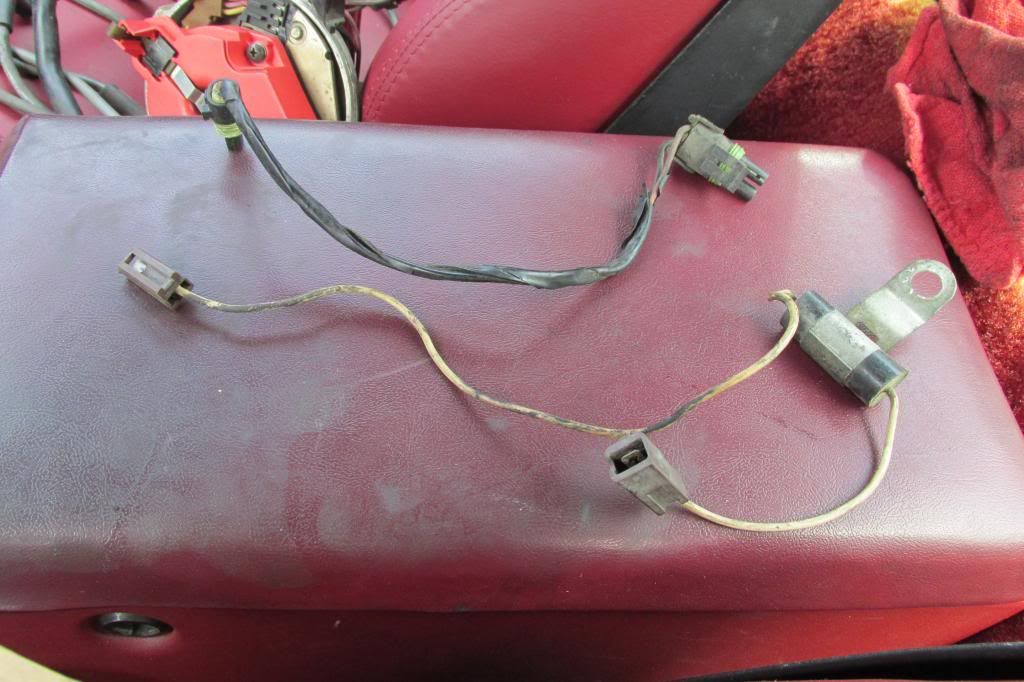
#2
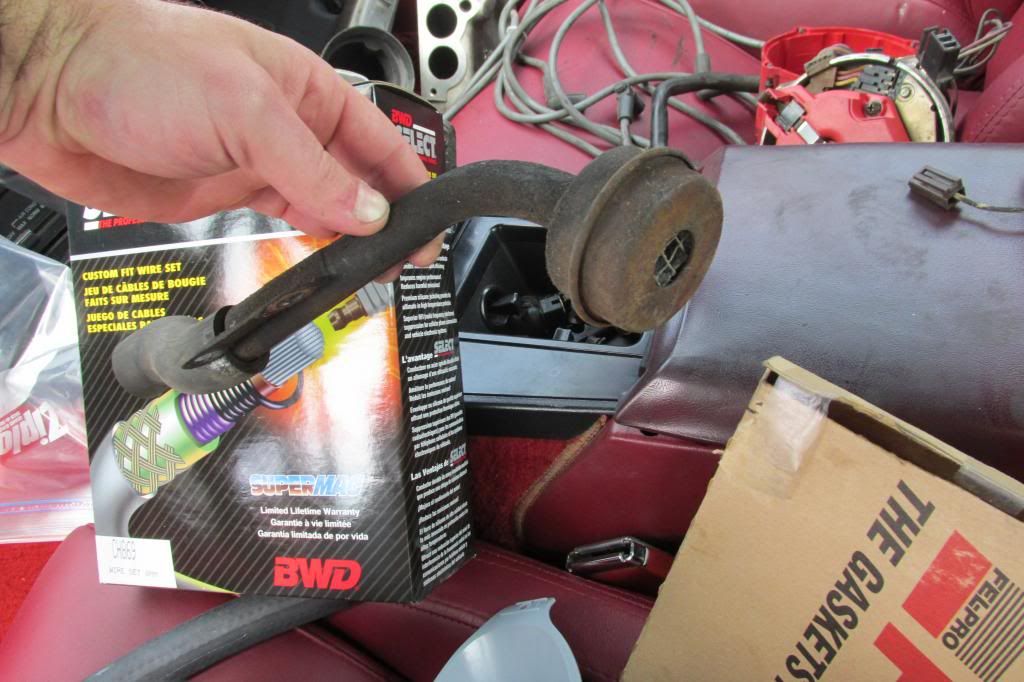
#3
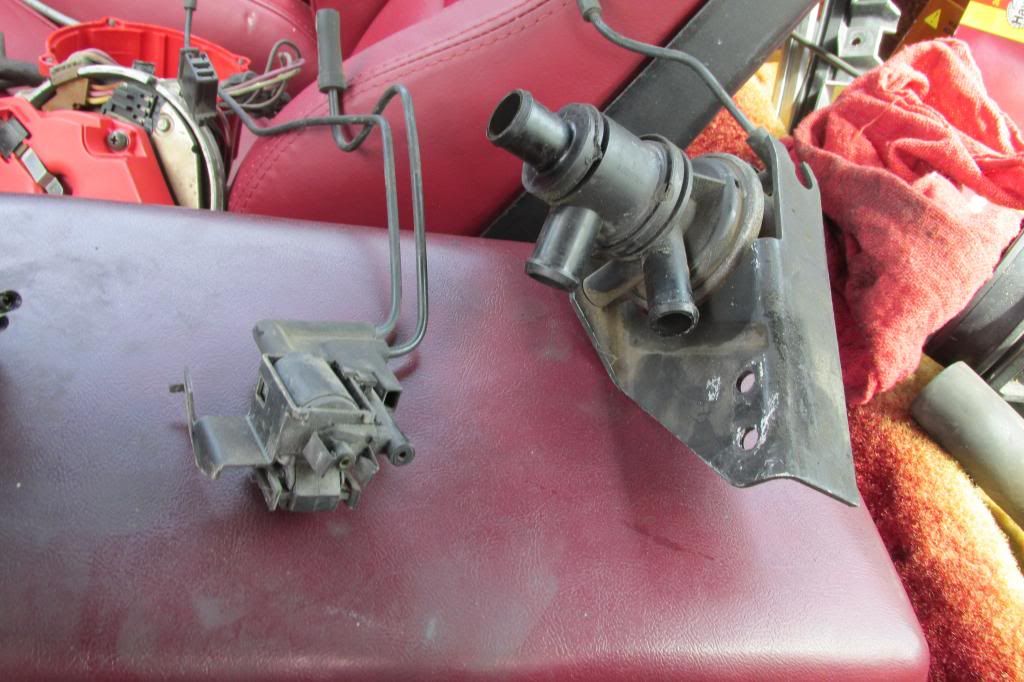
#4
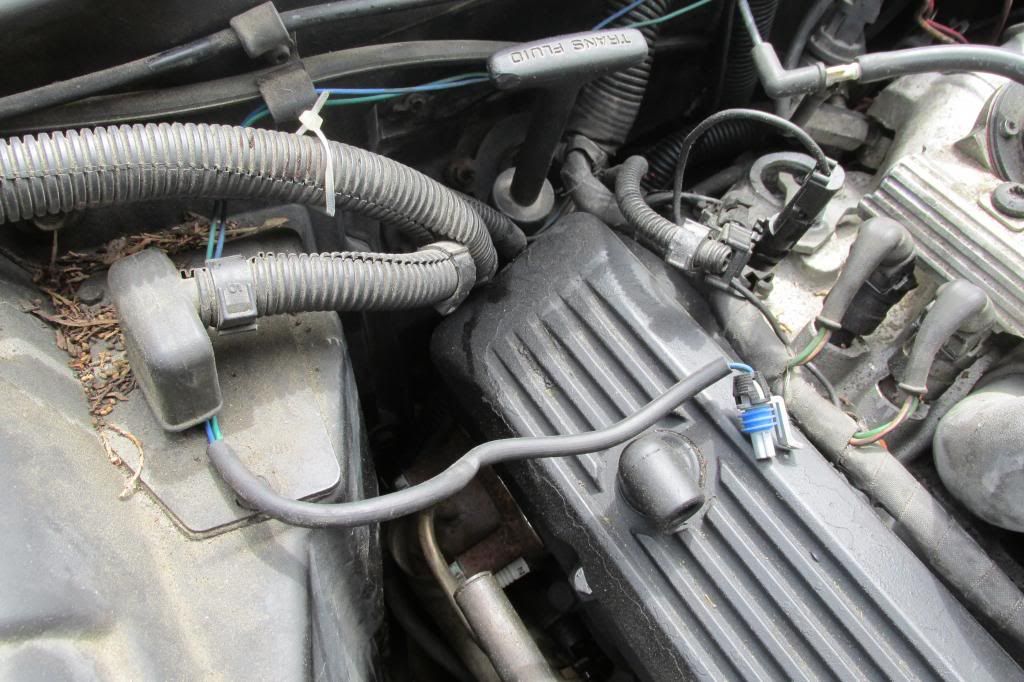
#5 I know the four prong connector is for the distributor the others are under the window wiper motor.
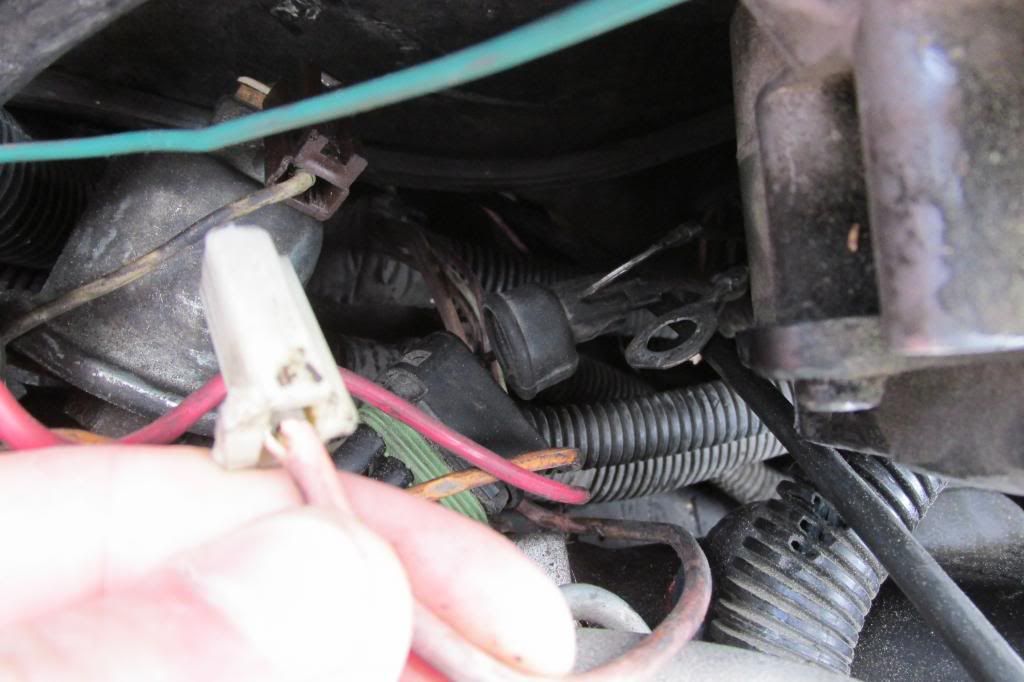
#6 This is coming out of the loom with the positive battery cables and alternator cables.
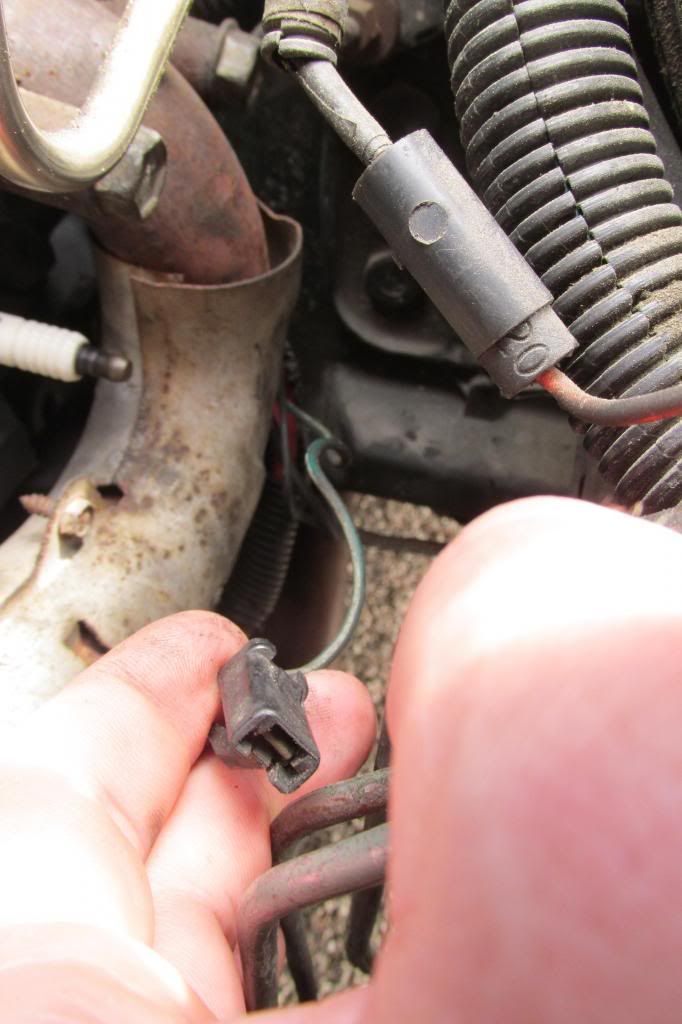
#1

#2

#3

#4

#5 I know the four prong connector is for the distributor the others are under the window wiper motor.

#6 This is coming out of the loom with the positive battery cables and alternator cables.


Drifting


Joined: Aug 2010
Posts: 1,704
Likes: 8
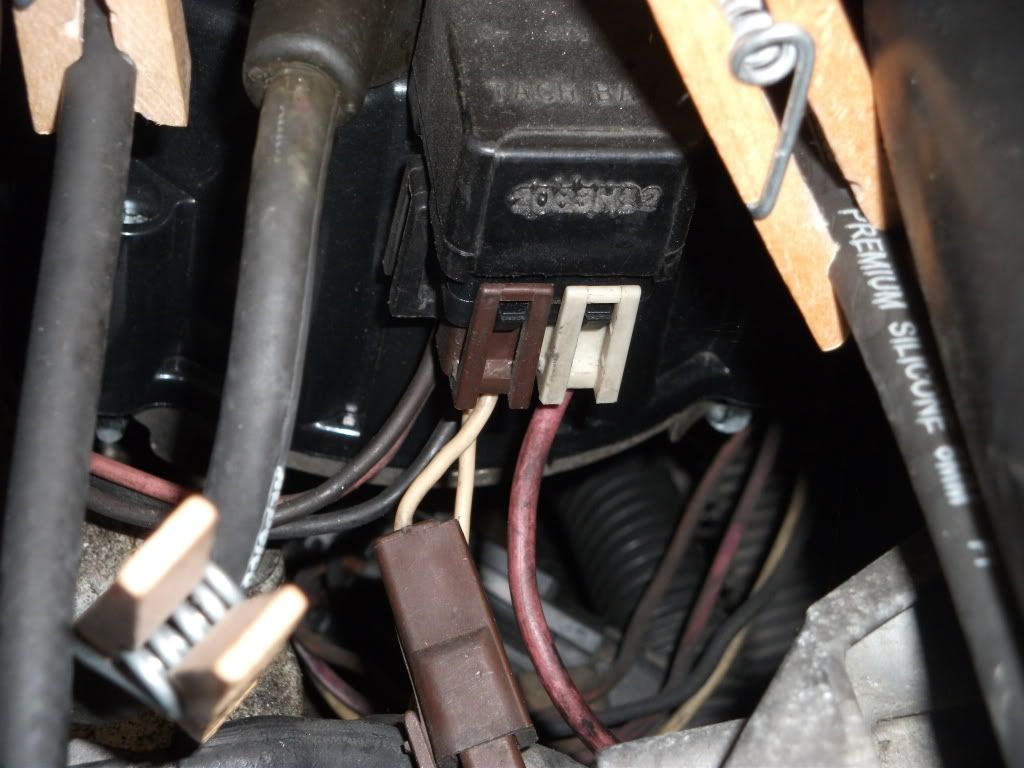
pic#1 tach filter and tach connector to tach imput on didtributor (there is a tach /batt mark on distributor male connectors, this is mounted behind drivers side rear heads on the braket that hold brake booster metal line from plenum.
pic #2part of air system tubing

pic#3 part of air system,mounted on front engine passenger side between throttle body and ac compressor,the device with vacuum lines is the diverter solenoid left of pic,the valve on the right is the diverter valve,there are hoses involved in this system,one comes from air pump over alernator braket to diverter valve,2 hoses go from diverter valve to converter line or to exaust port on exaust manifold
pics #5 batt connector to batt male connector on distributor
pic# 6 coolant temperature sensor for cluster coolant temperature gauge ,driver side heads ,
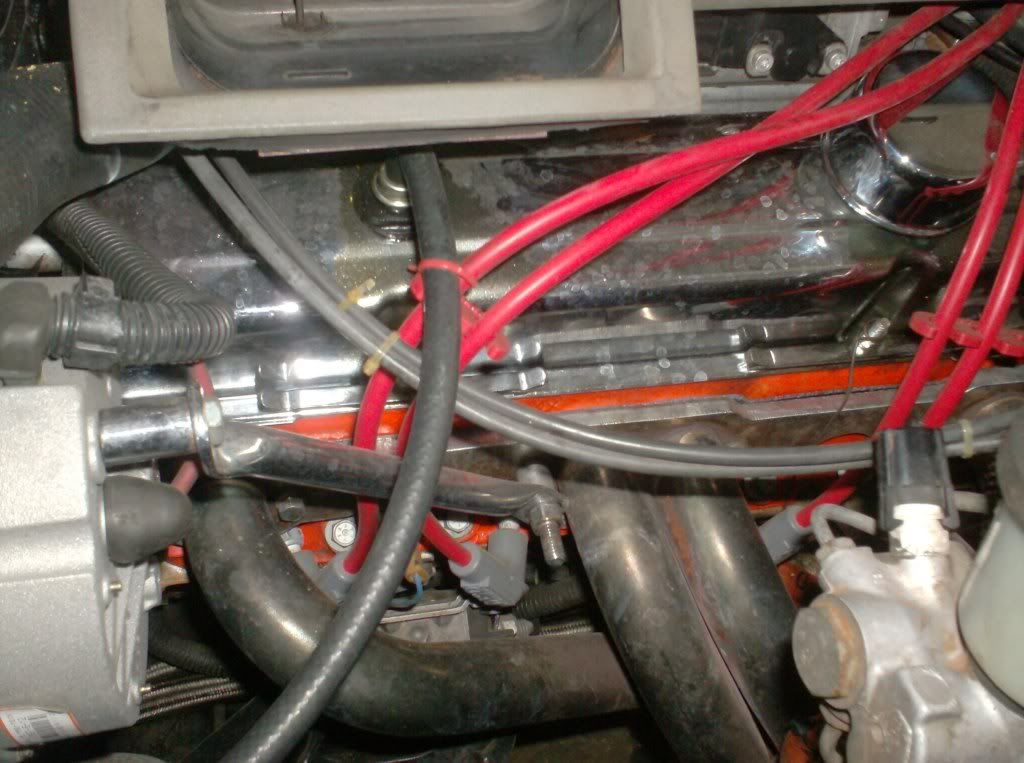
pic #2part of air system tubing
pic#3 part of air system,mounted on front engine passenger side between throttle body and ac compressor,the device with vacuum lines is the diverter solenoid left of pic,the valve on the right is the diverter valve,there are hoses involved in this system,one comes from air pump over alernator braket to diverter valve,2 hoses go from diverter valve to converter line or to exaust port on exaust manifold
pics #5 batt connector to batt male connector on distributor
pic# 6 coolant temperature sensor for cluster coolant temperature gauge ,driver side heads ,
Last edited by tunedport85inject; Apr 25, 2013 at 07:19 PM.

Drifting
Joined: Mar 2013
Posts: 1,952
Likes: 239
From: Venice Cali.
#3is the egr solenoid it goes right next to distributor on pass side It looks like the connector may be there still. It should have a place to bolt it down(1 screw).I know the z shaped hose connects to egr valve(very top hard to see nipple)think the other is longer and goes to the front of the engine to the air control valve. I believe the acv in the pic is the one farthest to the pass side as the other one(I replaced mine) is a little lower and connects to the pipe next to drivers valve cover. oth acv should have a connector .

Safety Car


Joined: Jan 2004
Posts: 3,556
Likes: 13
#1 Top harness in pic is the MAT /IAT extension harness that runs from a plug on the main harness by the dist to the MAT sensor under the plenum
#2 is the intake breather for the AIR pump ; goes down front of engine by the water pump
You don't state what year we are guessing about ( always helps because many changes over 12 years of C4's )
but if a 84/85 car then # 6 is the wire for the temp gauge ; sender is in the head between #1 and 3 plugs
#5 pink wire appears to be the Ign feed to the dist cap , goes on the HEI dist cap next to the white TACH wire mentioned above

You don't state what year we are guessing about ( always helps because many changes over 12 years of C4's )
but if a 84/85 car then # 6 is the wire for the temp gauge ; sender is in the head between #1 and 3 plugs
#2 is the intake breather for the AIR pump ; goes down front of engine by the water pump
You don't state what year we are guessing about ( always helps because many changes over 12 years of C4's )
but if a 84/85 car then # 6 is the wire for the temp gauge ; sender is in the head between #1 and 3 plugs
#5 pink wire appears to be the Ign feed to the dist cap , goes on the HEI dist cap next to the white TACH wire mentioned above

You don't state what year we are guessing about ( always helps because many changes over 12 years of C4's )
but if a 84/85 car then # 6 is the wire for the temp gauge ; sender is in the head between #1 and 3 plugs
Last edited by vetteoz; Apr 25, 2013 at 07:13 PM.

Suckin' gas, haulin' ass.

Joined: Apr 2010
Posts: 1,100
Likes: 8
From: Newport News Virginia
#1 1-wire with the "condenser" looking thing is the tach filter.
I live in Newport News and work in Portsmouth. I'm working some pretty crazy hours right now, and have a Viper Clutch and a race car motor transmission install to get done in the next 2 weeks, but if you need some help after that, I'd be more than happy to come over and help you put that puzzle back together.
I live in Newport News and work in Portsmouth. I'm working some pretty crazy hours right now, and have a Viper Clutch and a race car motor transmission install to get done in the next 2 weeks, but if you need some help after that, I'd be more than happy to come over and help you put that puzzle back together.
Thread Starter
Intermediate
Joined: Jul 2010
Posts: 26
Likes: 0
From: Norfolk Virginia
Ok so far.
I appreciate a lot of the help you guys are giving me. I have to read at home most of your posts and go back to the car to keep going. I got a bit of head way today with a few things but still kinda confused on a few things. I keep looking for pictures online but I'm sucking hard. So Im kinda placing some of the parts in the general area. You guys can say for example. Look on the other side down below the alternator front of the oil filter.
But any who this where I am at.
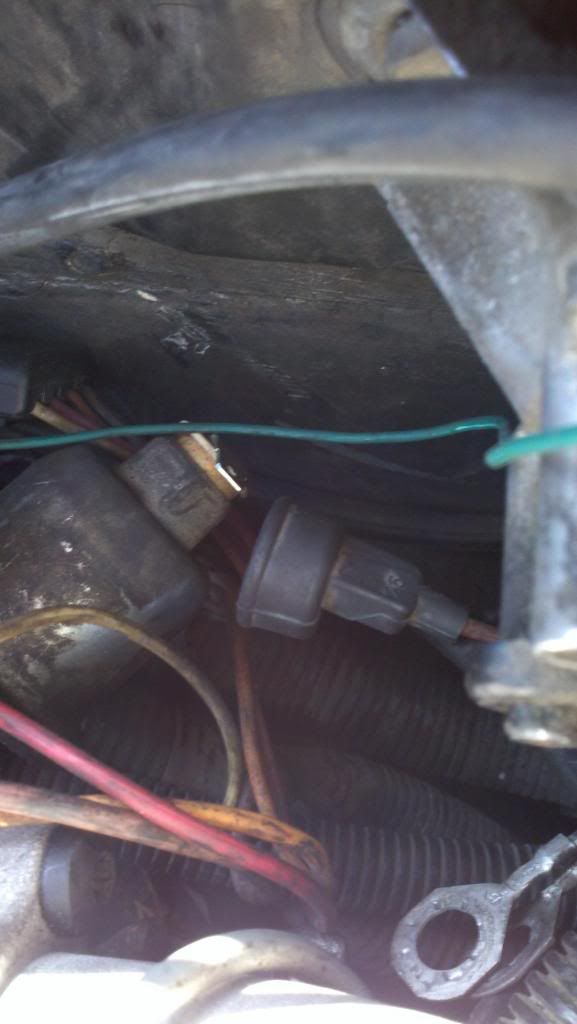
Driver side loom by distributor. I don't know where these two grounds go and I imagine this connector goes to that nearest connection but the wire feels like its short and I need to cut open the loom to get more out.
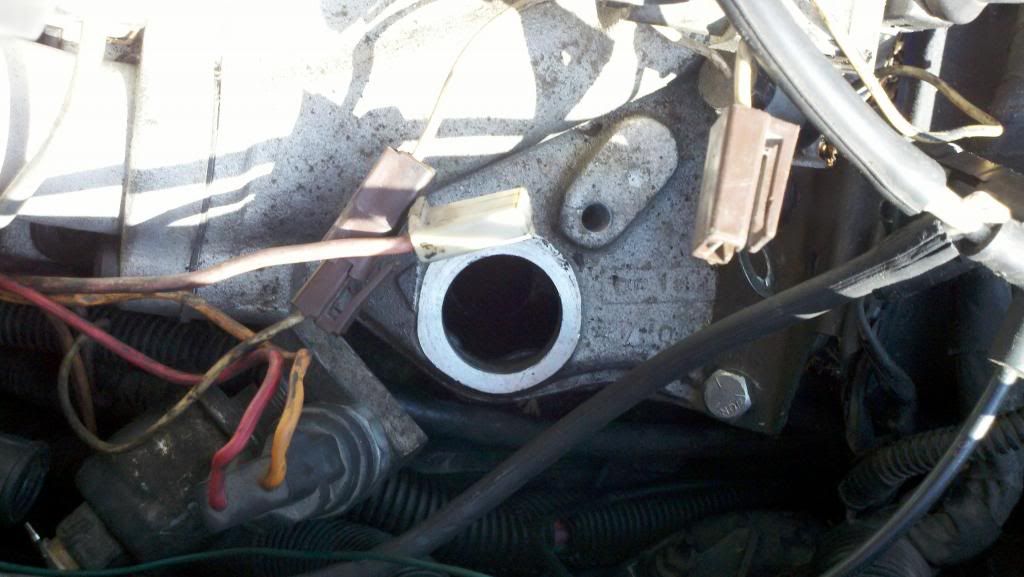
I placed the tach sensor bracket with the distributor bolt and figured that one line connects to the top end of the camp and the other end connects to the loom back there with the brown clip.
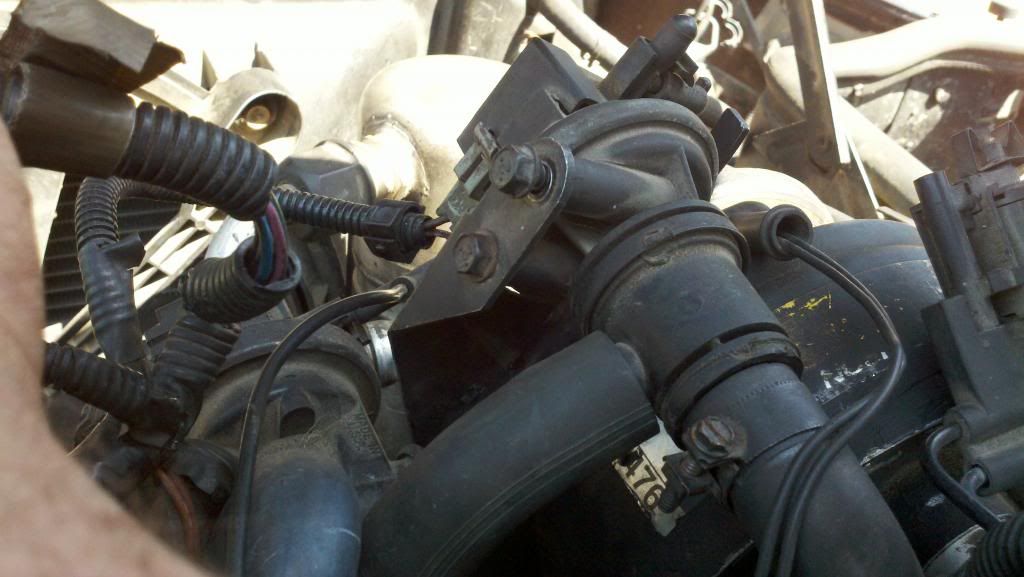
Ok front end. Found the two bolt wholes for this thing but. I noticed that it has a third open hole and the job next to it has an open hose end as well. Seem odd to me to jump from male end to male end cause it looks like it would rub a pully.
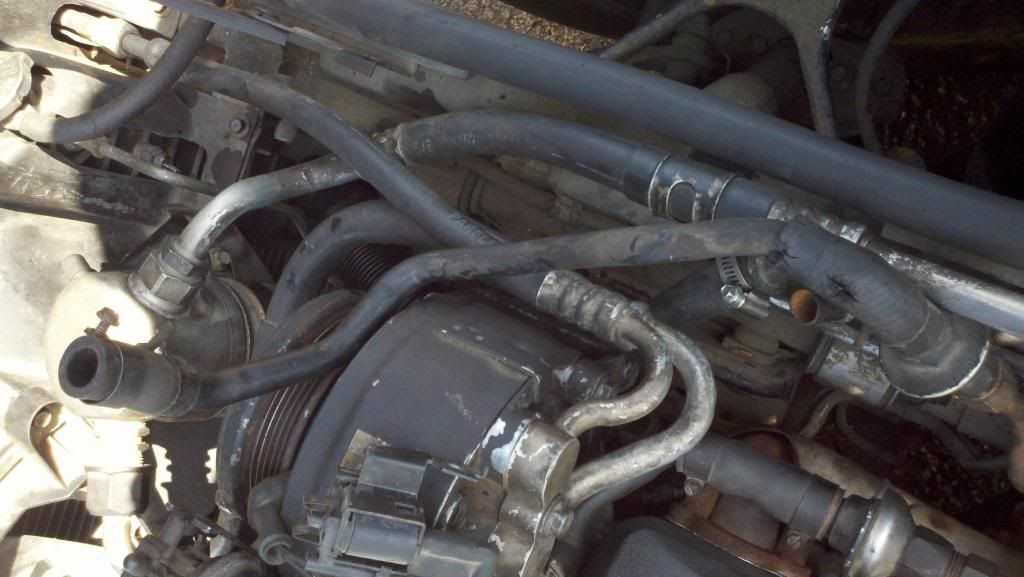
Though I was staring at this long enough I think it runs under the a/c compressor up to that first vaccum pump and I noticed I needed to replace that matting hose.
I believe these two lines connect to the intake plenum on its far back end.
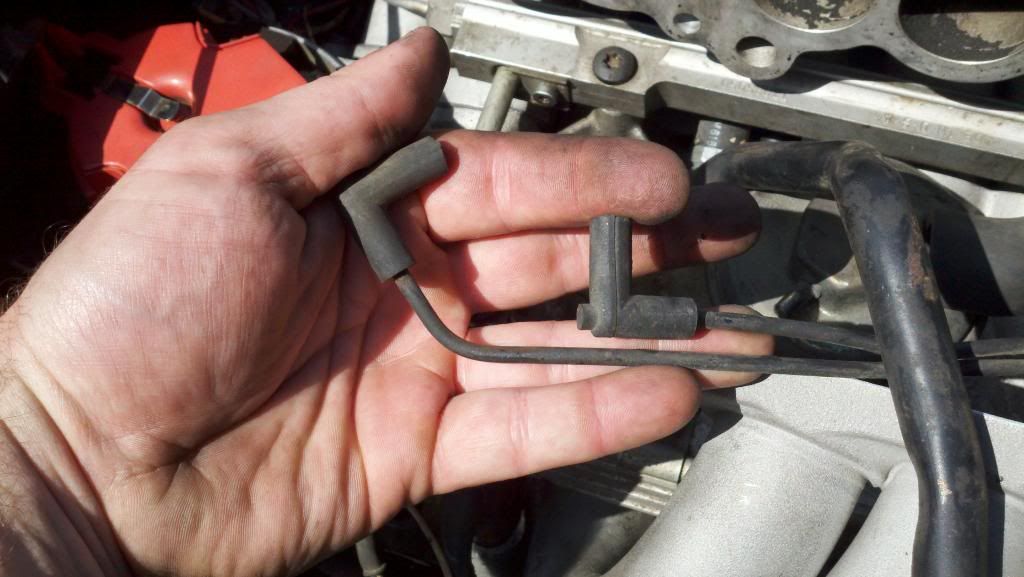
This odd job Im completely lost. I figured the short dual prong connector is suppost to connect into it but It wont for some reason.. Needless to say I have no idea where the other end of the vaccum lines run to. one has a T on it or where the wire connects to.
ok breather... Im suppost to be looking on the driver side for the connection and mount for the bolts? Would I recognize it better from under the car?
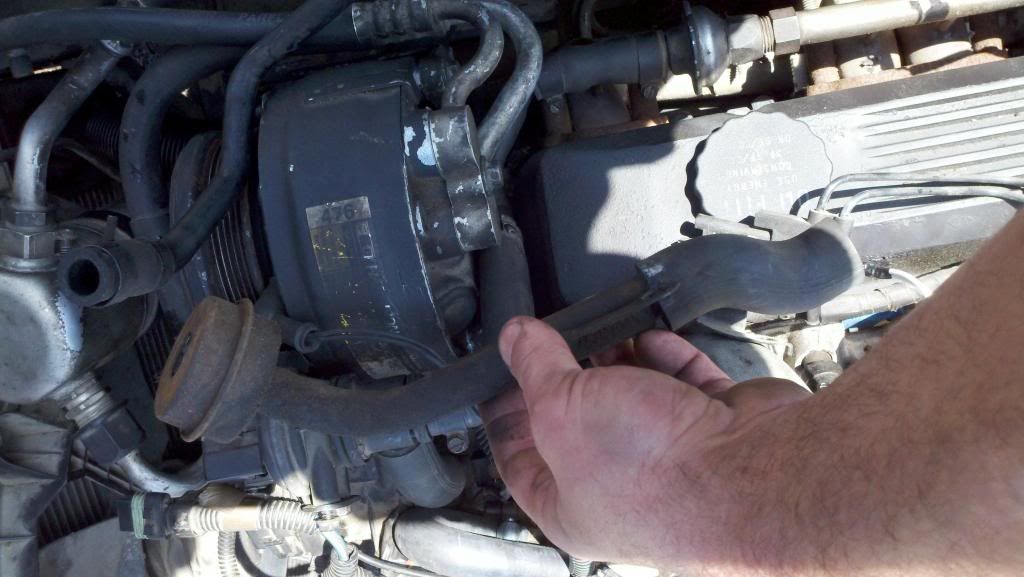
Oh and this joker I found up by the headlights just laying there so what and where once again.
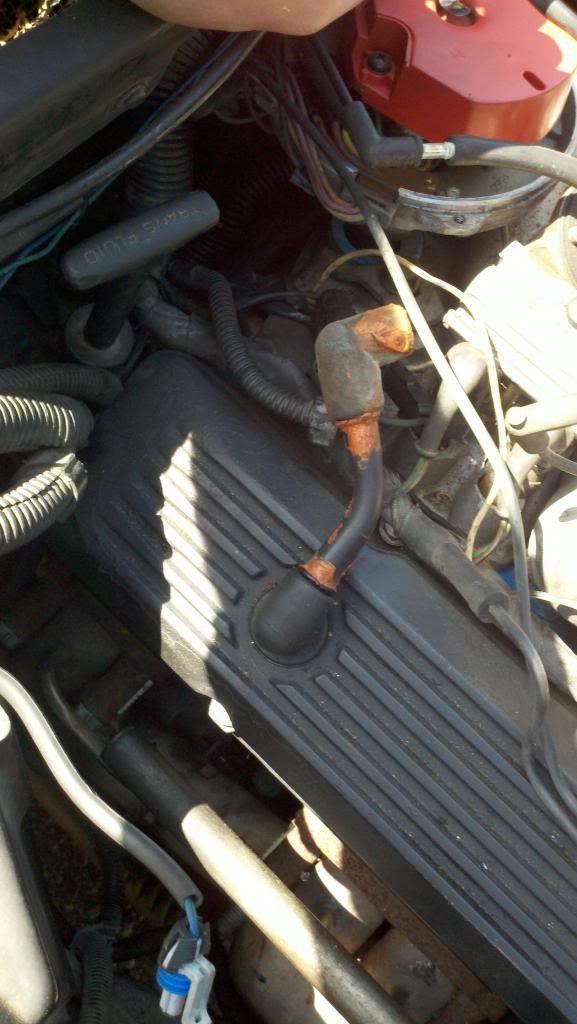
I want to say thanks to everyone so far. Im sure one or two things have probably been explained to me but with all the time I spend in the navy. Ive figured my way around a gas turbine more then engines. Kinda shameful at this point but I cant tell you all how much I truly appreciate your patients and guideness.
But any who this where I am at.
Driver side loom by distributor. I don't know where these two grounds go and I imagine this connector goes to that nearest connection but the wire feels like its short and I need to cut open the loom to get more out.

I placed the tach sensor bracket with the distributor bolt and figured that one line connects to the top end of the camp and the other end connects to the loom back there with the brown clip.

Ok front end. Found the two bolt wholes for this thing but. I noticed that it has a third open hole and the job next to it has an open hose end as well. Seem odd to me to jump from male end to male end cause it looks like it would rub a pully.

Though I was staring at this long enough I think it runs under the a/c compressor up to that first vaccum pump and I noticed I needed to replace that matting hose.

I believe these two lines connect to the intake plenum on its far back end.

This odd job Im completely lost. I figured the short dual prong connector is suppost to connect into it but It wont for some reason.. Needless to say I have no idea where the other end of the vaccum lines run to. one has a T on it or where the wire connects to.
ok breather... Im suppost to be looking on the driver side for the connection and mount for the bolts? Would I recognize it better from under the car?

Oh and this joker I found up by the headlights just laying there so what and where once again.

I want to say thanks to everyone so far. Im sure one or two things have probably been explained to me but with all the time I spend in the navy. Ive figured my way around a gas turbine more then engines. Kinda shameful at this point but I cant tell you all how much I truly appreciate your patients and guideness.

Race Director


Joined: Apr 2003
Posts: 17,699
Likes: 1,667
From: moraga ca
One thing that will really help you is a Factory Service Manual. If you can get one of those asap, you will be able to get that thing running quickly. Haynes and Chilton manuals are generic c4 manuals and show you how to torque lug nuts but not how to wire your car. Good luck. 
Corvette Stories
The Best of Corvette for Corvette Enthusiasts

Top 10 Most Explosive Corvettes Ever Made: Power-to-Weight Ratio Ranked!
Joe Kucinski
150 hp to 1,250 hp: Every Corvette Generation Compared by the Specs That Matter
Joe Kucinski
8 Coolest Corvette Pace Cars (and Replicas) of All Time
Verdad Gallardo
Top 10 Corvette Engines RANKED by Peak Torque (70+ Years of Muscle!)
Joe Kucinski
Corvette ZR1X Will Be Pacing the Indy 500, And Could Probably Race, Too!
Verdad Gallardo
Top 10 Corvettes Coming to Mecum Indy 2026!
Brett Foote
Top 10 C9 Corvette MUST-HAVES to Fix These C8 Generation Flaws!
Michael S. Palmer
10 Revolutionary 'Corvette Firsts' Most People Don't Know
Joe Kucinski
5 Reasons to Upgrade to an LS6-Powered Corvette; 5 Reasons to Stay LT2
Michael S. Palmer
Thread Starter
Intermediate
Joined: Jul 2010
Posts: 26
Likes: 0
From: Norfolk Virginia
One thing that will really help you is a Factory Service Manual. If you can get one of those asap, you will be able to get that thing running quickly. Haynes and Chilton manuals are generic c4 manuals and show you how to torque lug nuts but not how to wire your car. Good luck.
Drifting
Joined: Aug 2010
Posts: 1,704
Likes: 8
pic#1 oil pressure sender unit for cluster gauge, the connector goes there.
pic#2 install distributor and put brown connector on tach male imput and white connector on batt male imput on distributor
pic#4 metal line goes under the A/C compressor and to cat converter. your design is supposed to be a 85 design,86 is different
pic#6 diverter silencer part n#2 on schematics
some pics of air stuff stock look

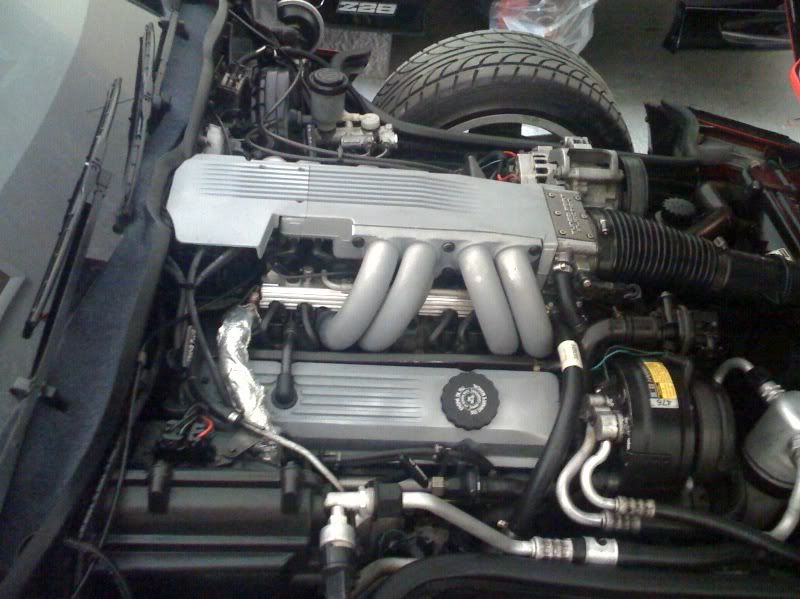

here some schematics from 85 corvette FSM
air switching valve
[IMG]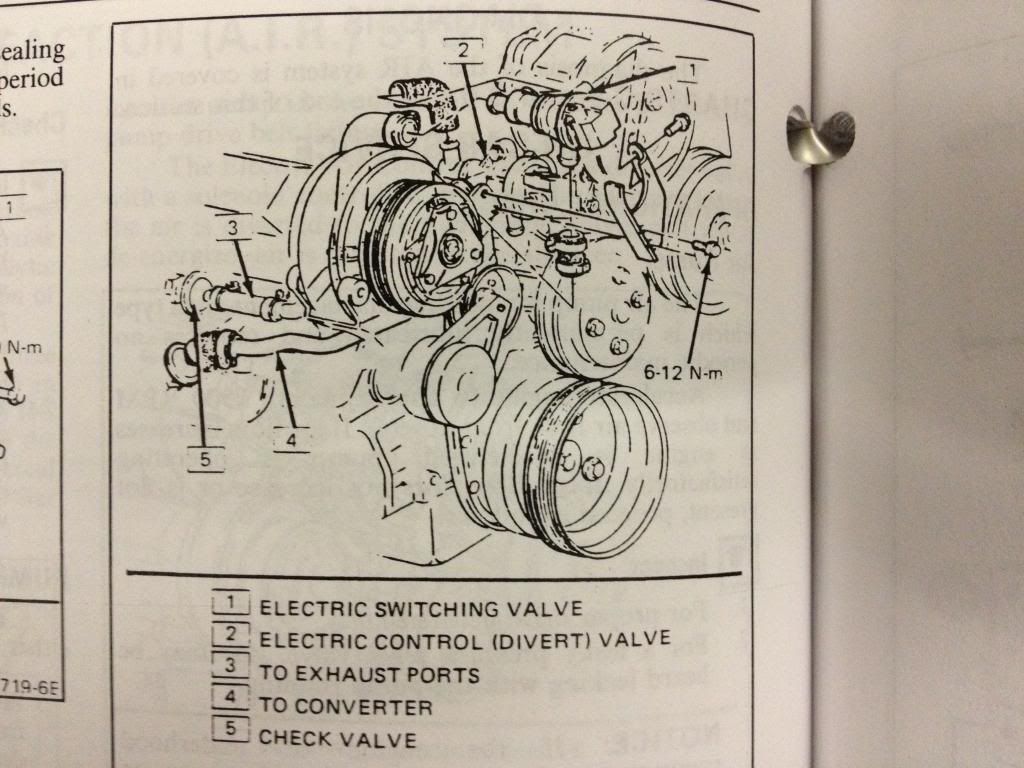 [/IMG]
air divert valve
[IMG]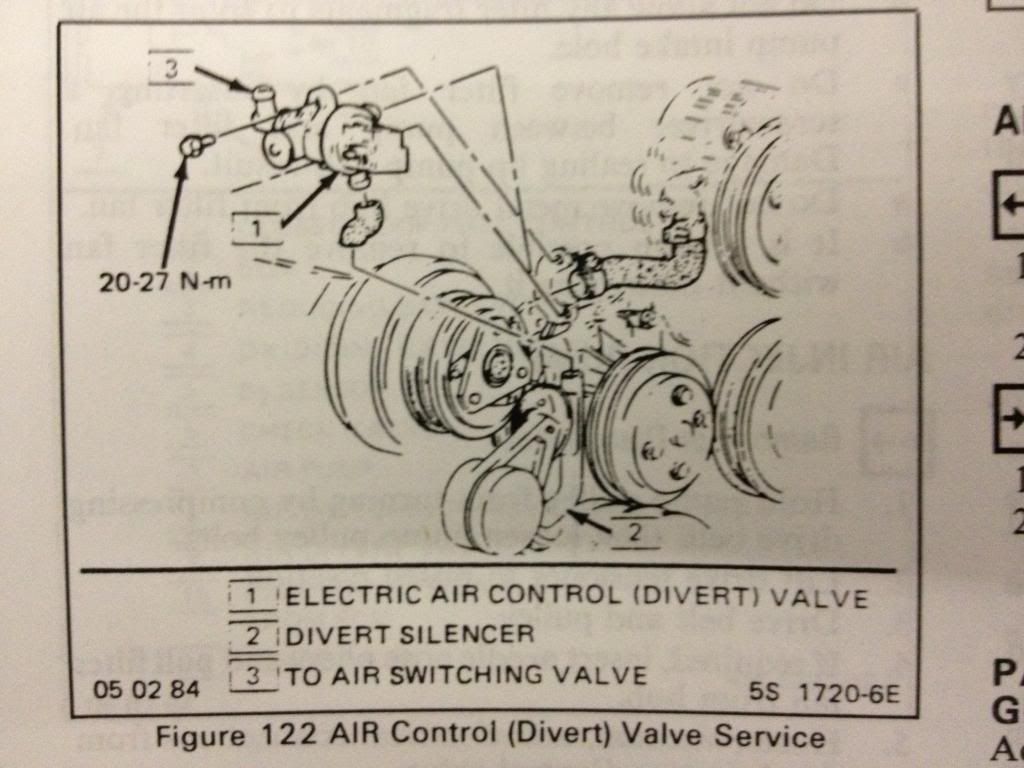 [/IMG]
pic#2 install distributor and put brown connector on tach male imput and white connector on batt male imput on distributor
pic#4 metal line goes under the A/C compressor and to cat converter. your design is supposed to be a 85 design,86 is different
pic#6 diverter silencer part n#2 on schematics
some pics of air stuff stock look
here some schematics from 85 corvette FSM
air switching valve
[IMG]
 [/IMG]
air divert valve
[IMG]
 [/IMG]
Last edited by tunedport85inject; Apr 28, 2013 at 02:25 PM.
Safety Car
Joined: Apr 2011
Posts: 3,660
Likes: 22
Used sets sell for $75 all day long on FleaBay

Bottom line, you'll end up wasting your time until you have drawings and directions in from of you. You have farrr too much "stuff" to try and figure out 1 piece at a time here. Like that a.i.r. system muffler...easy enough until you find out that a LOT of the left side of the block face has to come off to access that part...
Buy the books. If you are lucky they will even have some notes written in the margins.
Good Luck

Race Director

Joined: Apr 2002
Posts: 10,036
Likes: 346
From: Anaheim CA
In the picture below where it says, "ok breather...", that's the diverter output muffler. It's called "diverter silencer" in Figure 122 of post #10. It hangs down in front of the engine underneath the AC compressor.
The A.I.R. pump output goes to the "diverter" valve. The output of the diverter valve either goes to the "switch" valve or to the atmosphere through the diverter silencer.
The "switch" valve directs the air either to the exhaust manifolds or to the catalytic converter.
These two valve are controlled by the ECM with solenoids. There are two connectors that do this. The connectors are keyed and can't be switched. The black connector goes on the black solenoid and the gray connector goes on the gray solenoid. The valves are operated by vacuum. Here's a pic of how the vacuum lines attach:

The plastic vacuum line coming into the T on the left is one of the vacuum lines that you speculated goes on the back of the plenum. It also connects to the fuel pressure regulator. There is another vacuum line that connects to the vacuum check valve next to the distributor on the driver's side. The vacuum from the plenum comes in on the left. The output goes straight through and into the cabin through the wiring harness feedthrough through the firewall. It controls the vacuum valves in the HVAC system. There is another vacuum line coming out of the side of the vacuum check valve. It goes to the cruise control servo.

Here's what the vacuum connections on the rear of the plenum look like:

The front vacuum port goes to the A.I.R. valves and the other part of that vacuum line (GM calls it a "harness") goes to the fuel pressure regulator. The rear vacuum port goes down and around the front of the distributor to the vacuum check valve. You can see that to the left of the brass part of my fuel pressure gauge.
The A.I.R. pump output goes to the "diverter" valve. The output of the diverter valve either goes to the "switch" valve or to the atmosphere through the diverter silencer.
The "switch" valve directs the air either to the exhaust manifolds or to the catalytic converter.
These two valve are controlled by the ECM with solenoids. There are two connectors that do this. The connectors are keyed and can't be switched. The black connector goes on the black solenoid and the gray connector goes on the gray solenoid. The valves are operated by vacuum. Here's a pic of how the vacuum lines attach:
The plastic vacuum line coming into the T on the left is one of the vacuum lines that you speculated goes on the back of the plenum. It also connects to the fuel pressure regulator. There is another vacuum line that connects to the vacuum check valve next to the distributor on the driver's side. The vacuum from the plenum comes in on the left. The output goes straight through and into the cabin through the wiring harness feedthrough through the firewall. It controls the vacuum valves in the HVAC system. There is another vacuum line coming out of the side of the vacuum check valve. It goes to the cruise control servo.
Here's what the vacuum connections on the rear of the plenum look like:
The front vacuum port goes to the A.I.R. valves and the other part of that vacuum line (GM calls it a "harness") goes to the fuel pressure regulator. The rear vacuum port goes down and around the front of the distributor to the vacuum check valve. You can see that to the left of the brass part of my fuel pressure gauge.
Thread Starter
Intermediate
Joined: Jul 2010
Posts: 26
Likes: 0
From: Norfolk Virginia
I appreciate everyones help in this matter. I followed some of your guys advice. Well I post on here and my old lady reads your replys. So I came home today to a 1985 GM factory assembly manual. All parts you have all been naming off has helped me through this very detailed guide. When it stops raining around here Ill put up a video of the car finally started. Further more I am going to and take detailed photos from every angle of my vette for the future fella's trying to figure out how to put, the pieces all back together.
 best 100 bucks
Thread Starter
Intermediate
Joined: Jul 2010
Posts: 26
Likes: 0
From: Norfolk Virginia
Two of the Guys at O'rielys call mt corvette when I walk in. Some how my factory dipstick was miss placed when I had my 383 job done. So I bought a transdapt supposed direct fit from j.c. whitney. Needless to say Im pretty much at the point Im going to have to sand the tube. I went to put it in and I couldn't even drive it in with my full force. I get down under the passenger side and taaaadaaa.. more wiring fiasco. The temp sensor that is suppost to be on that side. Not even there. I found the green wire coming out of the starter wire loom. funny thing its melted.. as Im under there my knock sensor pigtail... is melt have to the sensor and just falls out. Then I go buy the stuff to make it all better... I decide to attack the A.I.R. I find where the silenser mounts but Im iffy on how close it is to the pullies.. I route one of the lines down and around the A/c Compressor and when I get to the connector for the long metal line coming off the exhaust. That line is 4 inches higher. So I get back under the car and follow it back to the catalytic convertor. That where I find the evidence of some one once hot ******* in the car and the line was melted right into the plastic back conner of the passenger floorboard. Ill post some pictures of that one here in a day or so. Spent more money today, got nowhere again.. Then for some reason the harness going from under the intake plenum sensor to the back A.I.R vacuum component wont connect back together again.
So does anyone thing if I hand sand the tube and seal it in there it will work out for me? Or should I keep endlessly searching for a new one. GM dealership carries a tube but its 45 dollars with no dipstick. What would you guys do?
So does anyone thing if I hand sand the tube and seal it in there it will work out for me? Or should I keep endlessly searching for a new one. GM dealership carries a tube but its 45 dollars with no dipstick. What would you guys do?
Race Director
Joined: Apr 2002
Posts: 10,036
Likes: 346
From: Anaheim CA
There are lots of used ones out there...