


rear lug stud removal (1987)
Thread Starter
Melting Slicks


Joined: Oct 2001
Posts: 2,315
Likes: 110
From: Brandon Fl
Anyone done this? I'm putting in longer studs for my new wheels and just holding the stud up there it doesn't look like they will fit in from the back even if I remove the E brake. Anyone done this? Tips?
Race Director

Joined: Jun 2004
Posts: 13,966
Likes: 709
From: WI
I change the wheel studs fairly often from using up bearings at track events. I have wanted to change the studs on the car before and they really don't fit. I was able to do it by using a file on the casting ridge to gain the needed clearance. I thought I had a picture but I can't find it. I've had them filed like that for a long time with no issues.
Thread Starter
Melting Slicks
Joined: Oct 2001
Posts: 2,315
Likes: 110
From: Brandon Fl
Your car is an 88 and is different. Aside from my e brake being there I wonder what other things are different. I'm going to remove the e brake tonight and see what I've got going on

Team Owner


Joined: Sep 2003
Posts: 25,406
Likes: 2,744
Not as dramatic as in this image but similar. You want to do a taper grind but only enough to allow the stud to clear. This is NOT my image - it's one I was able to source on Google. The head needs only a minor knick of the OD not anything required getting near the knurled surface.

Removing the e-brake may get you just what you need but if you still have issues this will get it done.
Last edited by WVZR-1; Oct 7, 2013 at 06:26 AM.
Safety Car


Joined: Apr 2011
Posts: 3,660
Likes: 22
instead of all that work AND the risk of a home made stud failing in some rather bad way....
why not just buy a set of adaptors that will bolt to the existing hub/studs and they will have longer studs that will carry the wheel just fine. You can order whatever stud you want in the adaptor.
I have these on all 4 corners...never a problem. Billet aluminum is as strong as the original hub mount,. search EZ-accessory. Should cost around $75 a pair...sometimes less on sale.
Team Owner
Joined: Sep 2003
Posts: 25,406
Likes: 2,744
instead of all that work AND the risk of a home made stud failing in some rather bad way....
why not just buy a set of adaptors that will bolt to the existing hub/studs and they will have longer studs that will carry the wheel just fine. You can order whatever stud you want in the adaptor.
I have these on all 4 corners...never a problem. Billet aluminum is as strong as the original hub mount,. search EZ-accessory. Should cost around $75 a pair...sometimes less on sale.
why not just buy a set of adaptors that will bolt to the existing hub/studs and they will have longer studs that will carry the wheel just fine. You can order whatever stud you want in the adaptor.
I have these on all 4 corners...never a problem. Billet aluminum is as strong as the original hub mount,. search EZ-accessory. Should cost around $75 a pair...sometimes less on sale.
I changed the image and it does NOT need ground in as "dramatic" modification as the image displays, only ground on an angle to allow clearance when inserting the stud beyond the obstructions of hub/brake etc. With the e-brake removed you might not even need to modify it at all. On a later 88+ car on the rear when ground in a less dramatic fashion the stud inserts easily clearing the knuckle at 11:00 and by just rotating the hub. An early car - I mentioned I had never done.
There's nothing "homemade" and there's no "risk of failure" - there's wheel studs that are actually manufactured and used in that fashion "by design". The HMMV (Hummer) run-flat actually uses a wheels stud that is "flat" on two sides opposite one another.
Team Owner
Joined: Sep 2003
Posts: 25,406
Likes: 2,744
Looking at an image of the rear brakes I believe I see the OP's concern. It's certainly nothing as simple as yours or my experience. Not being able to have a "hands on" it's difficult to tell what needs done. If a person has experience with the rear suspension and done it a few times it might be easier to just remove the hubs and do the studs off the car. After looking at the e-brake that might be what I'd consider having access to all the tools.
Last edited by WVZR-1; Oct 7, 2013 at 10:08 AM.
Corvette Stories
The Best of Corvette for Corvette Enthusiasts

Every 2027 Corvette Engine Explained
Joe Kucinski
Designer Imagines A Corvette That Looks More Like a Corvette Than the Corvette
Verdad Gallardo
10 Ugly Corvettes That We Still Kinda Love
Joe Kucinski
Top 10 Most Expensive Corvettes Ever Sold on Bring A Trailer
Brett Foote
10 Things Every Corvette Owner Needs (2026 Edition)
Michael S. Palmer
8 Most "Only Corvette Owners Understand" Quirks and Problems
Pouria Savadkouei
10 Reasons the C6 Z06 is Still A Performance Benchmark After 20 Years
Joe Kucinski
How Much Horsepower Every Corvette Engine "LOST" in 1972
Joe Kucinski
Top 10 DOs and DON'Ts for Protecting Your Convertible Top!
Michael S. Palmer
Thread Starter
Melting Slicks
Joined: Oct 2001
Posts: 2,315
Likes: 110
From: Brandon Fl
Great news for early car owners. No mods needed to put longer studs in. I took all of 5 minutes to do the studs on each side. Of course with the good you know there will be bad. Whoever designed this e brake needs to be found and killed!!! This is the craziest most annoying thing I've ever worked on.
New stud in

Here is a shot of it being put in

In this pic I found you can put 2 in at once with the top at 12ish and the other at the 9 oclock. pics a little off I was holding my tablet with my shoulder to get the pic.

On the other side I found I could do the whole thing with only partly removing the one shoe of the e brake. My thought was it would be easier to put back together and I was wrong. I still have to put the brakes back together but I need a second set of hands so hopefully I can get that done Wednesday.
Anyway here's a shot of that

New stud in
Here is a shot of it being put in
In this pic I found you can put 2 in at once with the top at 12ish and the other at the 9 oclock. pics a little off I was holding my tablet with my shoulder to get the pic.
On the other side I found I could do the whole thing with only partly removing the one shoe of the e brake. My thought was it would be easier to put back together and I was wrong. I still have to put the brakes back together but I need a second set of hands so hopefully I can get that done Wednesday.
Anyway here's a shot of that
Team Owner
Joined: Sep 2003
Posts: 25,406
Likes: 2,744
It's good to see it went well. When I suggested those studs I couldn't imagine you having issues but then you asked! The studs that I installed and the studs "Aardwolf" I believe installed were substantially longer than the ones I suggested for your install. Mine were to add an 18mm spacer to my rears and I imagine the "Aardwolf" install is probably to satisfy a sanctioning body's requirement of exposed threads. Don't know.
Racer


Joined: Apr 2003
Posts: 426
Likes: 0
From: Detroit MI
It's great to see this can be done without taking the hubs off.
I did a change to longer studs and took them off. Not a quick n easy job for sure.
What are the details that made it work ?
Stud part number ?
I did a change to longer studs and took them off. Not a quick n easy job for sure.
What are the details that made it work ?
Stud part number ?
Team Owner
Joined: Sep 2003
Posts: 25,406
Likes: 2,744
The stud I suggested is a Dorman 610-323 and it's a service stud for an H3 Hummer without the dog-point. It's the least expensive that offered a length that would likely correct the situation he had with a wheel install. There are other options for length but these looked to maybe to more readily available and as I mentioned "priced right". Most any auto parts store should be able to help. No need for the Internet purchases -
Thread Starter
Melting Slicks
Joined: Oct 2001
Posts: 2,315
Likes: 110
From: Brandon Fl
It's good to see it went well. When I suggested those studs I couldn't imagine you having issues but then you asked! The studs that I installed and the studs "Aardwolf" I believe installed were substantially longer than the ones I suggested for your install. Mine were to add an 18mm spacer to my rears and I imagine the "Aardwolf" install is probably to satisfy a sanctioning body's requirement of exposed threads. Don't know.

Team Owner
Joined: Sep 2003
Posts: 25,406
Likes: 2,744
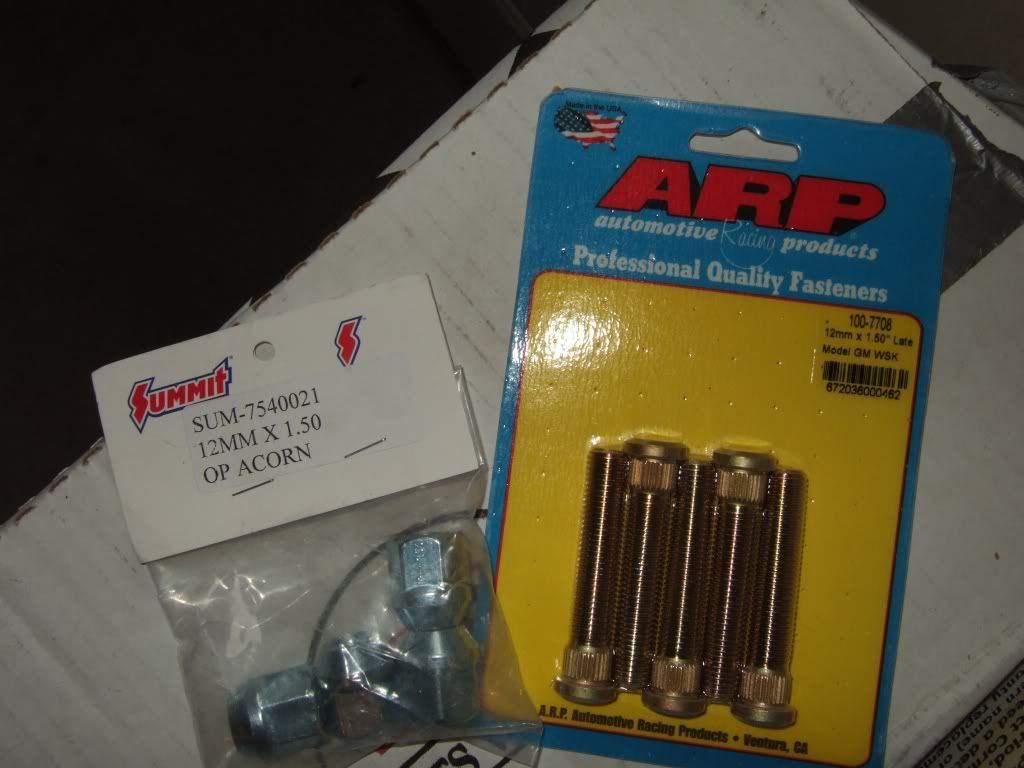
Your studs are 9mm longer than the ones I suggested that he use, he had no need for any more threads than what the one used provided. I've never used the ARP product but used instead a GM stud that was similar to the ARP maybe longer but was way less expensive than the ARP. That's not the case any longer so the ARP at some of the prices "posted" by I-net vendors is likely a good buy. The Dorman I suggested is a stud that can be either purchased from walk-in or ordered locally from the store with "no shipping". If there's a packaging problem when received it's settled "toe to toe" - a no nonsense buy!
Racer
Joined: Apr 2003
Posts: 426
Likes: 0
From: Detroit MI
Those ARP studs are what I used and I took the hub off to do it.
Guessing we did this for the same reason in the back.
If I knew the Dorman was that easy to get in there it would probably be on mine too !
Guessing we did this for the same reason in the back.
If I knew the Dorman was that easy to get in there it would probably be on mine too !

Suckin' gas, haulin' ass.

Joined: Apr 2010
Posts: 1,100
Likes: 8
From: Newport News Virginia