


nitrous install ....
Thread Starter
Racer


Joined: Sep 2006
Posts: 314
Likes: 0
Well after a lot of reading and lurking on the forms i finally took the plunge to install my Frankenstein nitrous kit that I've been piecing together for about a year. This is my first nitrous install and Iam not done with the install just thought i would start this thread so i can document my install and what not. So now for the good stuff... the kit is a brand X with a nano 4500 both i got from this forum some time ago, it will running through a nitrous outlet plate, Nitrous outlet switch panel, Brand x purge, fpss, msd window switch,Dual billet bottle holders, etc. etc. But during this install I do have some questions.
1. I have not removed the schrader valve and hooked up the attachment to the fuel solenoid will is affect driving at all or should i just go ahead and remove the schrader valve and hook up the lines?
well that's the only question i have for now. but any feed back would be greatly appreciated.
Now for the good stuff..
The noids
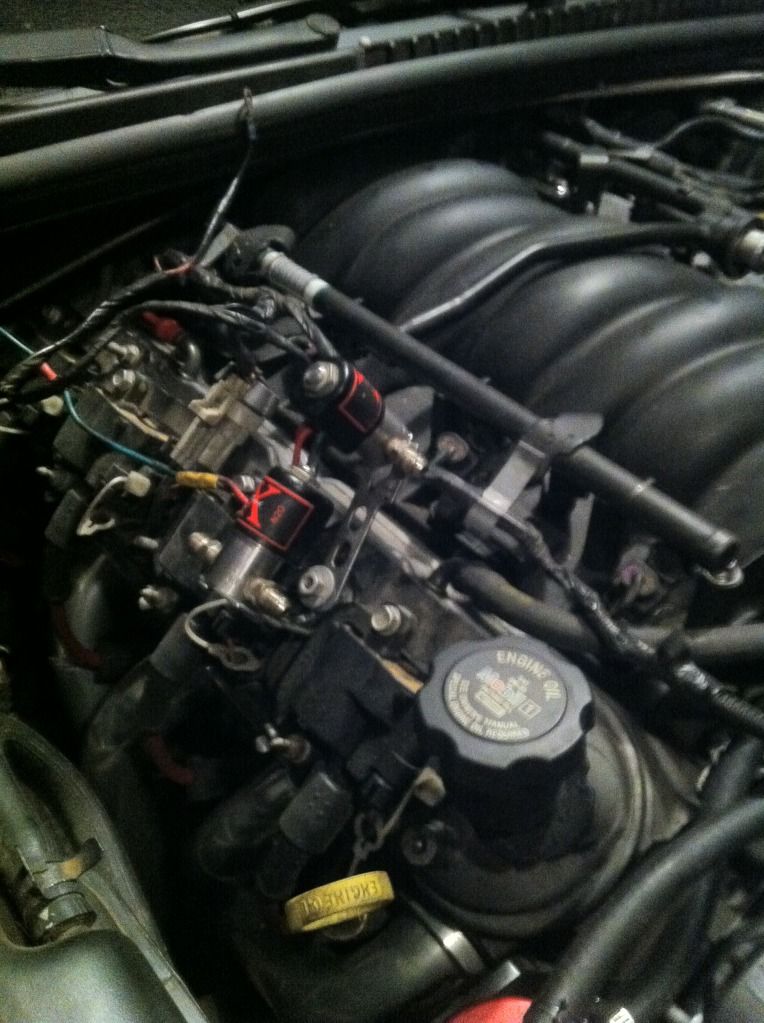
Another view

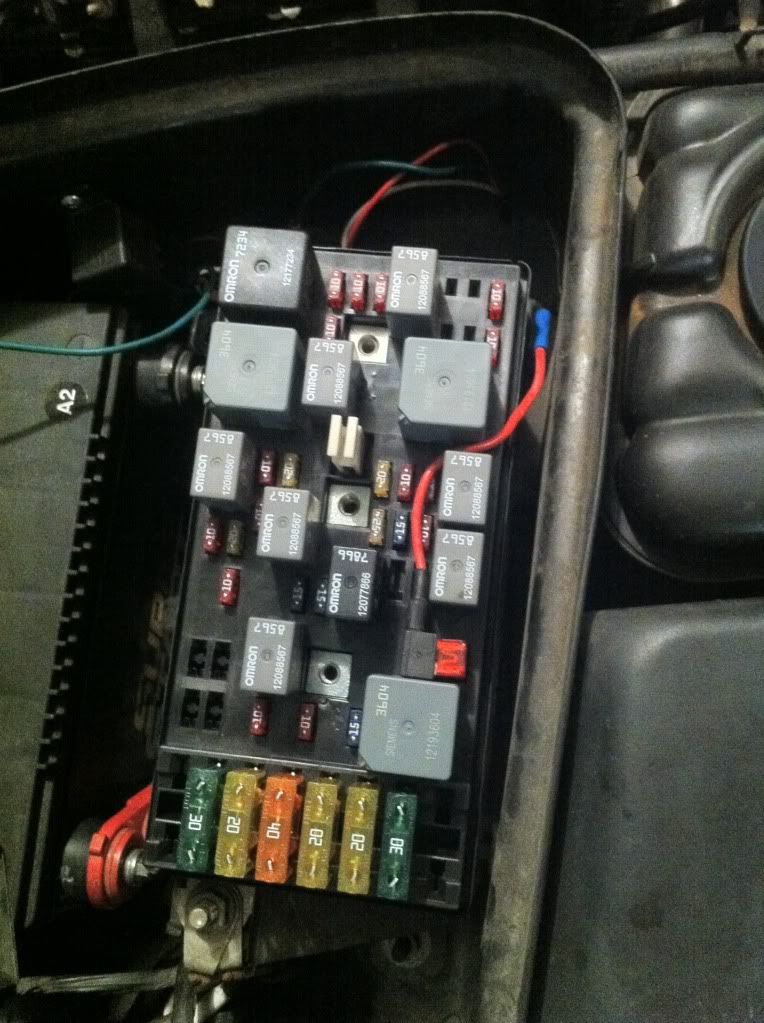
This is where i pulled the power from
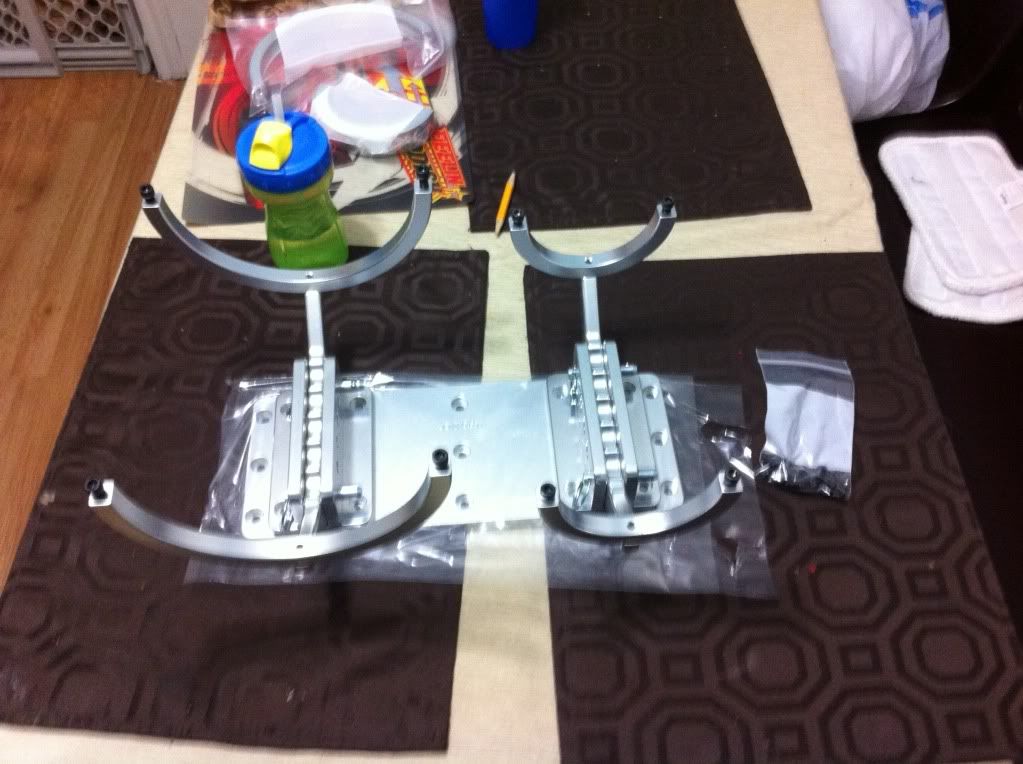
The bottle bracket dont mind the sippy cup lol
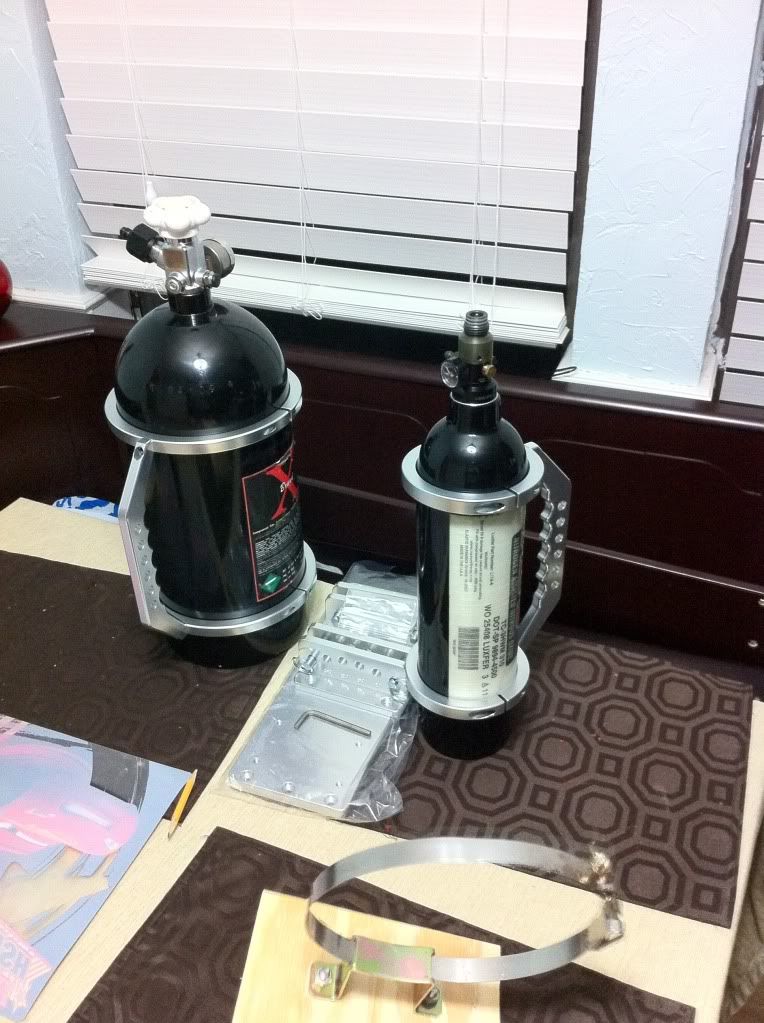
The bottles

Charles
1. I have not removed the schrader valve and hooked up the attachment to the fuel solenoid will is affect driving at all or should i just go ahead and remove the schrader valve and hook up the lines?
well that's the only question i have for now. but any feed back would be greatly appreciated.
Now for the good stuff..
The noids
Another view
This is where i pulled the power from
The bottle bracket dont mind the sippy cup lol
The bottles
Charles
Last edited by igtabg1; Oct 15, 2012 at 12:20 PM.
Thread Starter
Racer
Joined: Sep 2006
Posts: 314
Likes: 0
I believe so sir , I took that picture befor I got the attachments to hook up the nano lines.
Last edited by igtabg1; Oct 14, 2012 at 10:48 AM.
Thread Starter
Racer
Joined: Sep 2006
Posts: 314
Likes: 0
Hot wheels I have all that stuff ready to go and installed on the bottles, however I think we have the same blow down tube putting those fittings on those braided hose is a pita but it's a little easier since I got the khoul tool (ms?)
Beer I have that bottle opener however I got it used and it looks like the wires were just cut by the previous owner, are those connected by weather pack connecters or spade connectors ?
Thanks guys I'm going to get some more work in the car Friday night and I'll put up more pictures then.
Beer I have that bottle opener however I got it used and it looks like the wires were just cut by the previous owner, are those connected by weather pack connecters or spade connectors ?
Thanks guys I'm going to get some more work in the car Friday night and I'll put up more pictures then.
Corvette Stories
The Best of Corvette for Corvette Enthusiasts

Top 10 Most Expensive Corvettes Ever Sold on Bring A Trailer
Brett Foote
10 Things Every Corvette Owner Needs (2026 Edition)
Michael S. Palmer
8 Most "Only Corvette Owners Understand" Quirks and Problems
Pouria Savadkouei
10 Reasons the C6 Z06 is Still A Performance Benchmark After 20 Years
Joe Kucinski
How Much Horsepower Every Corvette Engine "LOST" in 1972
Joe Kucinski
Top 10 DOs and DON'Ts for Protecting Your Convertible Top!
Michael S. Palmer
Top 10 Most Explosive Corvettes Ever Made: Power-to-Weight Ratio Ranked!
Joe Kucinski
150 hp to 1,250 hp: Every Corvette Generation Compared by the Specs That Matter
Joe Kucinski
8 Coolest Corvette Pace Cars (and Replicas) of All Time
Verdad GallardoLe Mans Master


Joined: Mar 1999
Posts: 6,029
Likes: 85
From: Palm Coast, FL
Hot wheels I have all that stuff ready to go and installed on the bottles, however I think we have the same blow down tube putting those fittings on those braided hose is a pita but it's a little easier since I got the khoul tool (ms?)
Beer I have that bottle opener however I got it used and it looks like the wires were just cut by the previous owner, are those connected by weather pack connecters or spade connectors ?
Thanks guys I'm going to get some more work in the car Friday night and I'll put up more pictures then.
Beer I have that bottle opener however I got it used and it looks like the wires were just cut by the previous owner, are those connected by weather pack connecters or spade connectors ?
Thanks guys I'm going to get some more work in the car Friday night and I'll put up more pictures then.
Thread Starter
Racer
Joined: Sep 2006
Posts: 314
Likes: 0
My mechanic Tommy (Anger Management) did my braided hose, I had him change the angle on it for a better fit ... I didn't go with an auto bottle opener cause I'll only spray it at the track and with these brackets I can install the kit in probably about a minute - I run mid 10's N/A so spraying on the street would just be a waste of a good street tire, and besides that, I don't make it a practice to drive around with a colder plug. Good luck with your install and please put up some pic's
I've never worked with weather pack connecters, but i realyl like that idea of keeping everything clean, is there a special type of weather pack i need to look into?
Thread Starter
Racer
Joined: Sep 2006
Posts: 314
Likes: 0
also i forgot to post this picture of last time i was expermenting with installing the plate, its so close but still like half a inch off  while i push the bridge down....
I've talked to vararam and tried moving the maf to the bottom and using the longer coupler but that wasnt much help either, i just figured i'd save the plate install for last.
Charles
while i push the bridge down....I've talked to vararam and tried moving the maf to the bottom and using the longer coupler but that wasnt much help either, i just figured i'd save the plate install for last.
Charles
Last edited by igtabg1; Oct 15, 2012 at 03:09 PM.
Thread Starter
Racer
Joined: Sep 2006
Posts: 314
Likes: 0
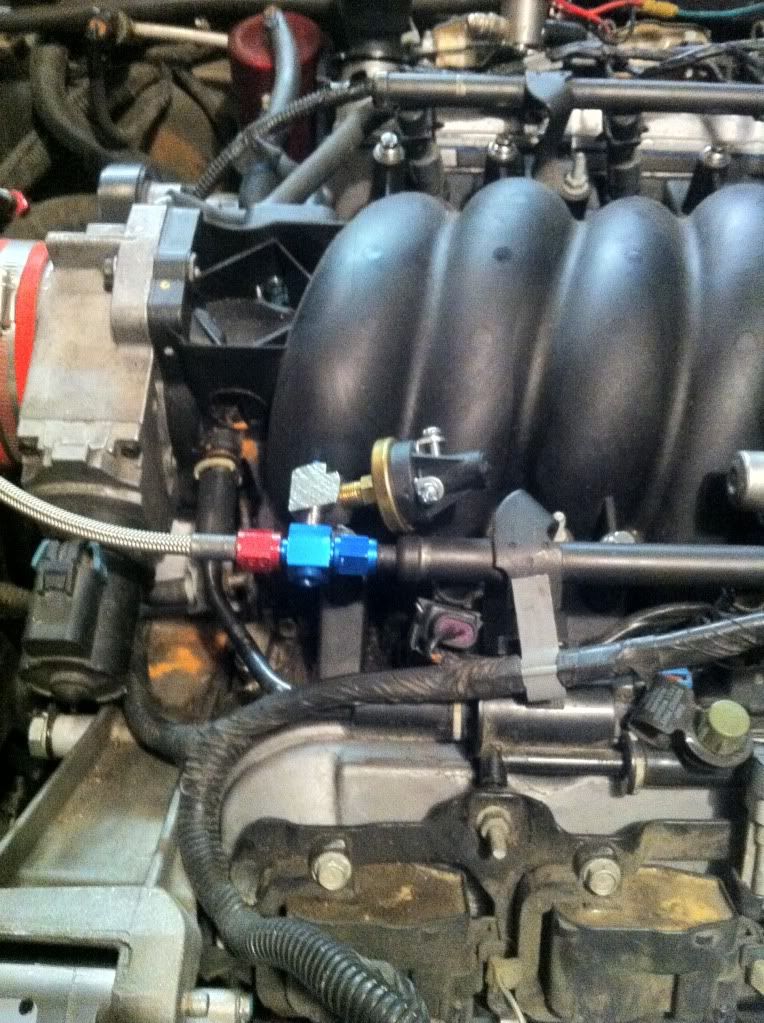
Got a little more done to the car last night, nothing major just ran the wires to the WOT switch, moved the noids closer to the front, and pulled the center console now for some pics...
WOT switch
the noids moved up (much easier to connect the fuel line)
Where i will be pulling power for the switch panel
will this work for the fpss placement? im going to use the other side of the swivel mount for a fuel pressure gauge.
Now the only question i have it what fuse can i tap for the switch panel, i remember reading on here about:
fuse 11 hot when acc or on
fuse 7 hot permanent
fuse 22 switched hot
If i had to chose one i'd go with 11 or 22 but can any confirm or deny this?
Also can i run one power (lets say for my arming switch, then piggy back the power off that to my purge & bottle opener? or do i need three separate power supplies ?)
Well that's all for last night i'm going to get a lot more done tonight hopefully i can complete all the wiring and mount my nitrous gauge as well.
Thanks again guys
P.S. I know i need to clean my engine bay is dirty i plan on cleaning up everything
Last edited by igtabg1; Oct 19, 2012 at 10:39 AM.
Thread Starter
Racer
Joined: Sep 2006
Posts: 314
Likes: 0
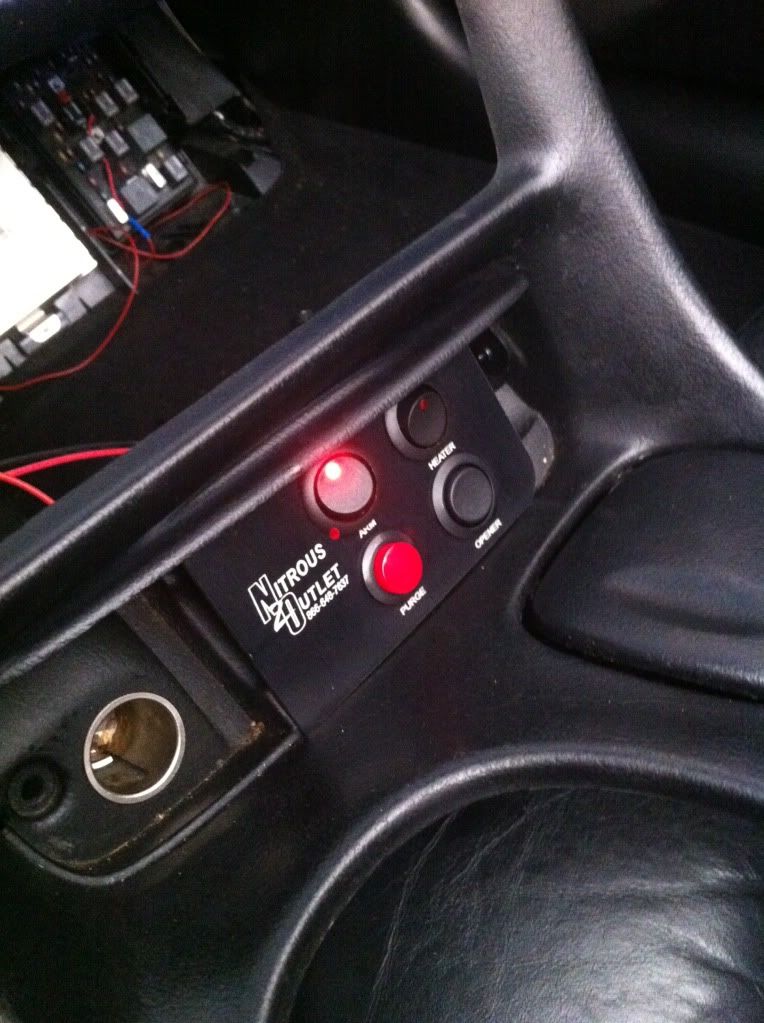
So I was able to get a little more work done last night I really wated to finish the switch panel wiring however looking at another members picture of how they Y off the power of the switch panel, it looks to be as if the spade connectors I have are not big enough to fit two wire through, however I was able to get the purge hooked up , run the wires for my remote bottle opener , and fix my hvac. So here are some pictures ... Enjoy
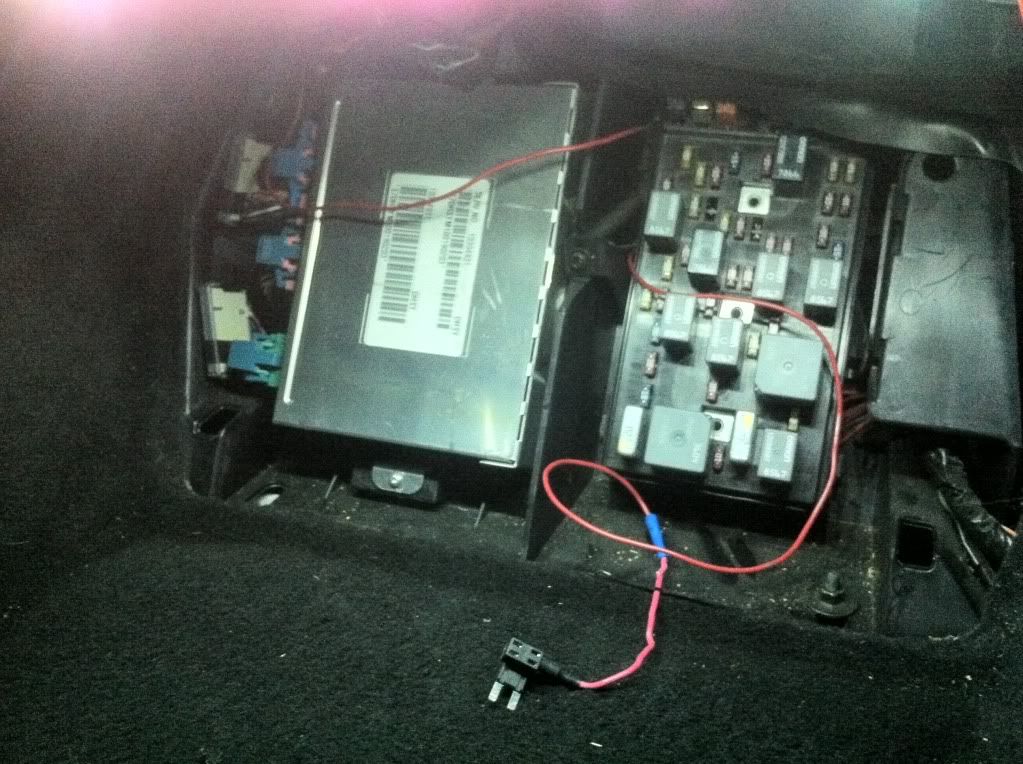
Got the purge hooked up
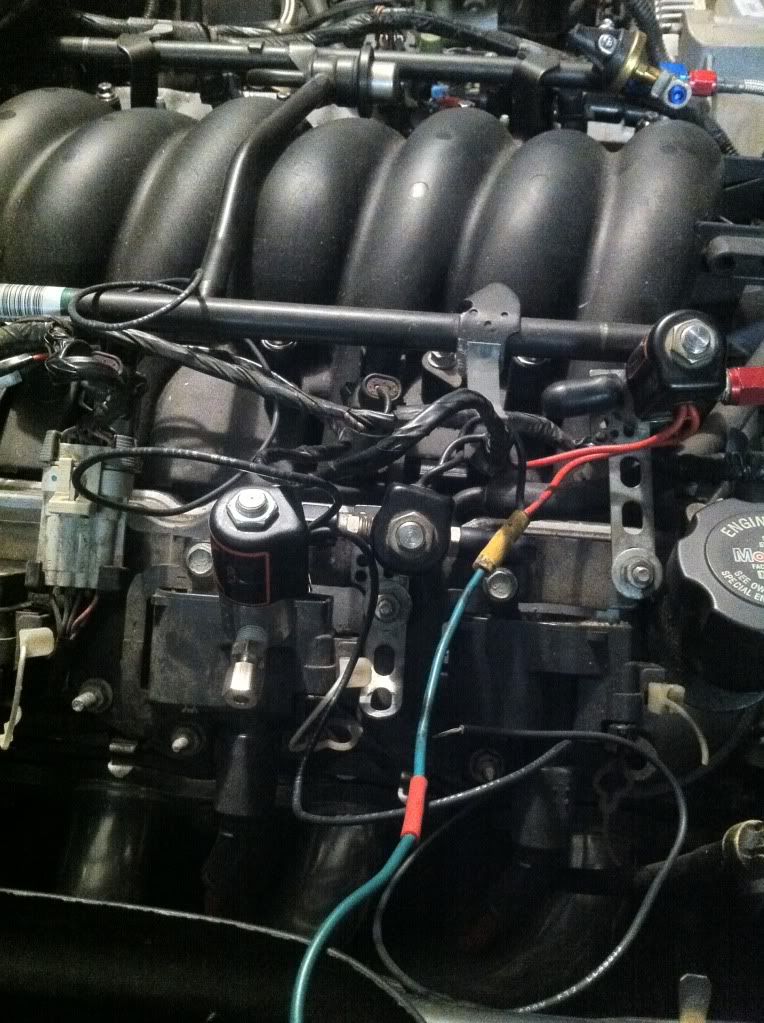
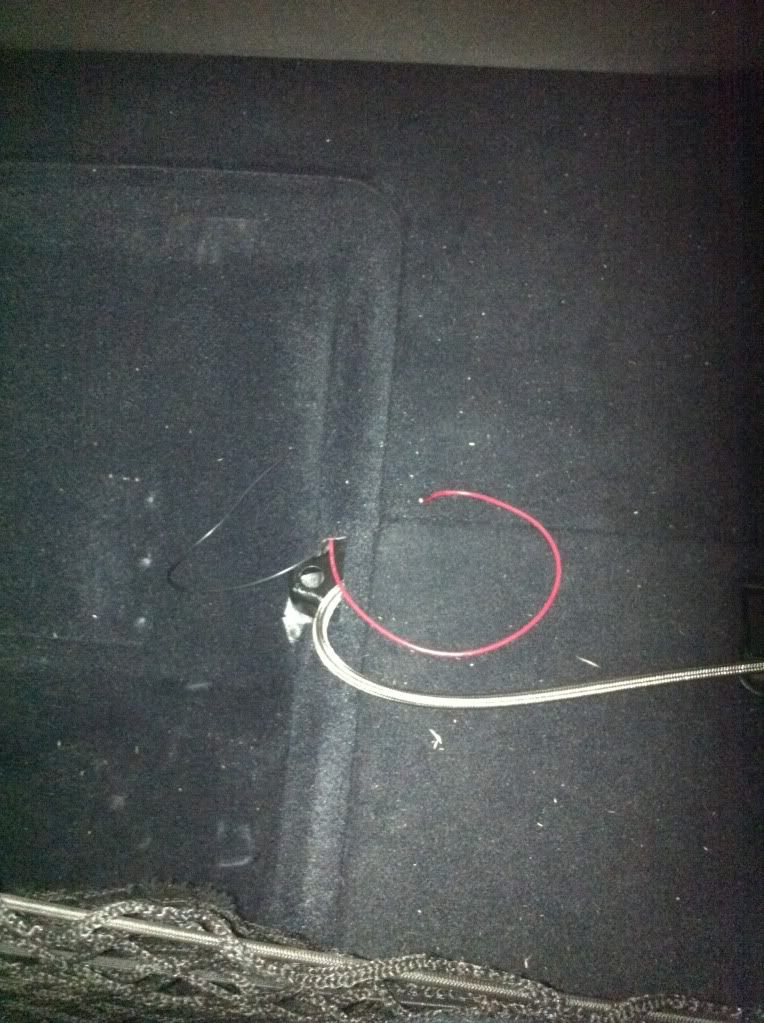
Ran the wires from the switch panel to the trunk for the remote bottle opener
Did some work on the hvac
Well that's all I have for now, also I went fuse number 22 for the power to switch panel, it's a spare and I figured if the radios guys use it why couldn't I? Also does any one know a good spot to put my ground wires near the radio ?
Got the purge hooked up
Ran the wires from the switch panel to the trunk for the remote bottle opener
Did some work on the hvac
Well that's all I have for now, also I went fuse number 22 for the power to switch panel, it's a spare and I figured if the radios guys use it why couldn't I? Also does any one know a good spot to put my ground wires near the radio ?

Thread Starter
Racer
Joined: Sep 2006
Posts: 314
Likes: 0
I figured I'd just run it to te cowl but I need to flare the tube to install it on the noid, I've never used a tubing bender so it will be fun. I plan on getting some more pictures up after I work on the car tonight.
Thread Starter
Racer
Joined: Sep 2006
Posts: 314
Likes: 0
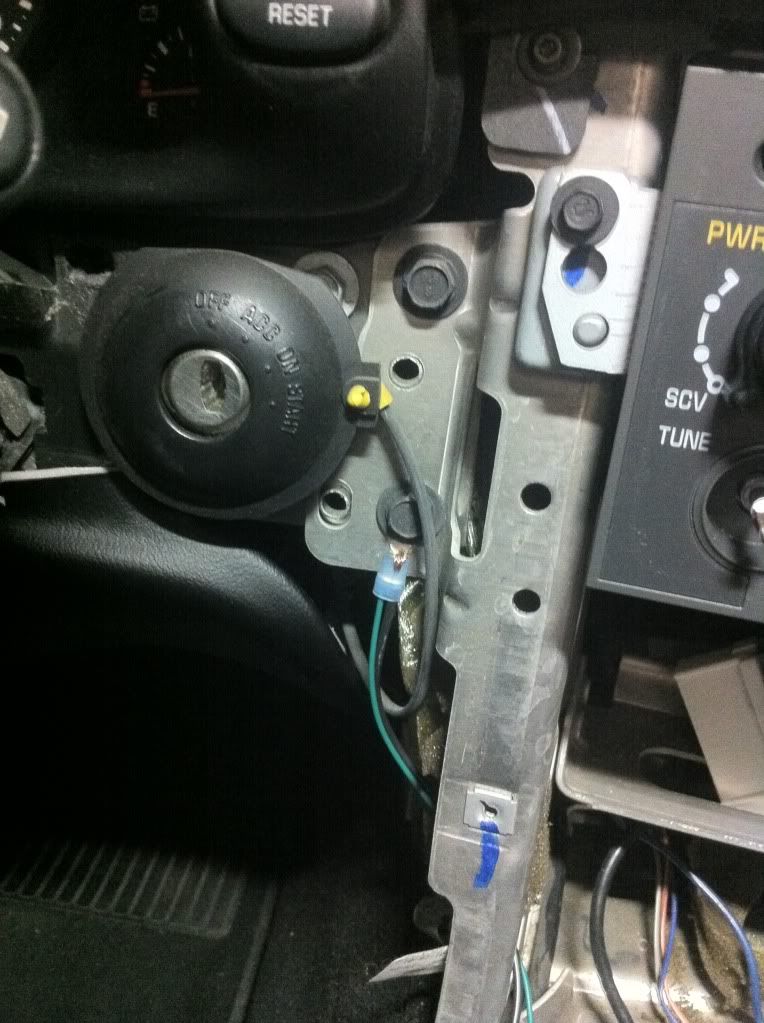
TTt... Can Any one tell me what they use to ground there switch panels I was thinking about using g202 on the passenger side foot panel but that a pretty tight squeeze and I can't even get my gear wrenches in there... Any suggestions ? Thanks
Never mind i found out that i can use one of the bolts next to the ignition for a close ground... thanks guys ill get alot more pictures up tonight or tomorrow morning, i should be wrapping this car up and start driving it this weekend.
Never mind i found out that i can use one of the bolts next to the ignition for a close ground... thanks guys ill get alot more pictures up tonight or tomorrow morning, i should be wrapping this car up and start driving it this weekend.
Last edited by igtabg1; Oct 26, 2012 at 09:36 AM.
Thread Starter
Racer
Joined: Sep 2006
Posts: 314
Likes: 0
well guys i got everything but the plate and the window switch installed, I know i've been slacking but this week has been crazy. A couple questions i had. When splicing the rmp tac wire (i was going to use the aqua color one off the coil pack) can i use the add a splice from radio shack? I just wanted to see if any one had done this before.. so now for some more pictures.
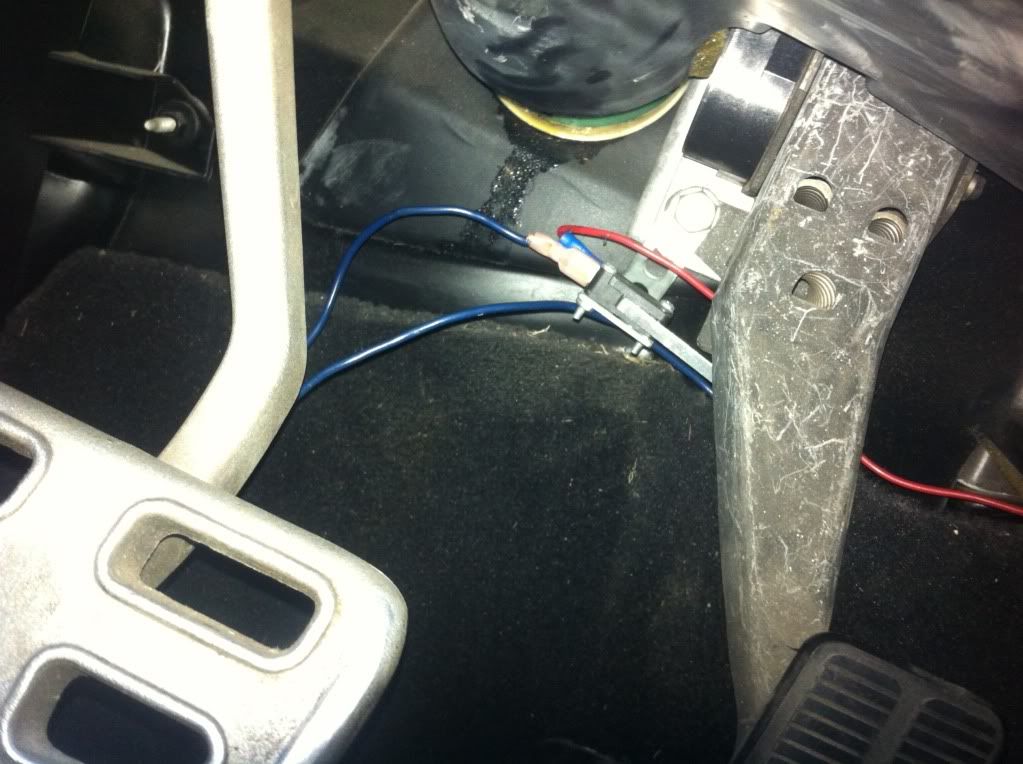
Power to the switch panel
The ground i used for the switch panel..
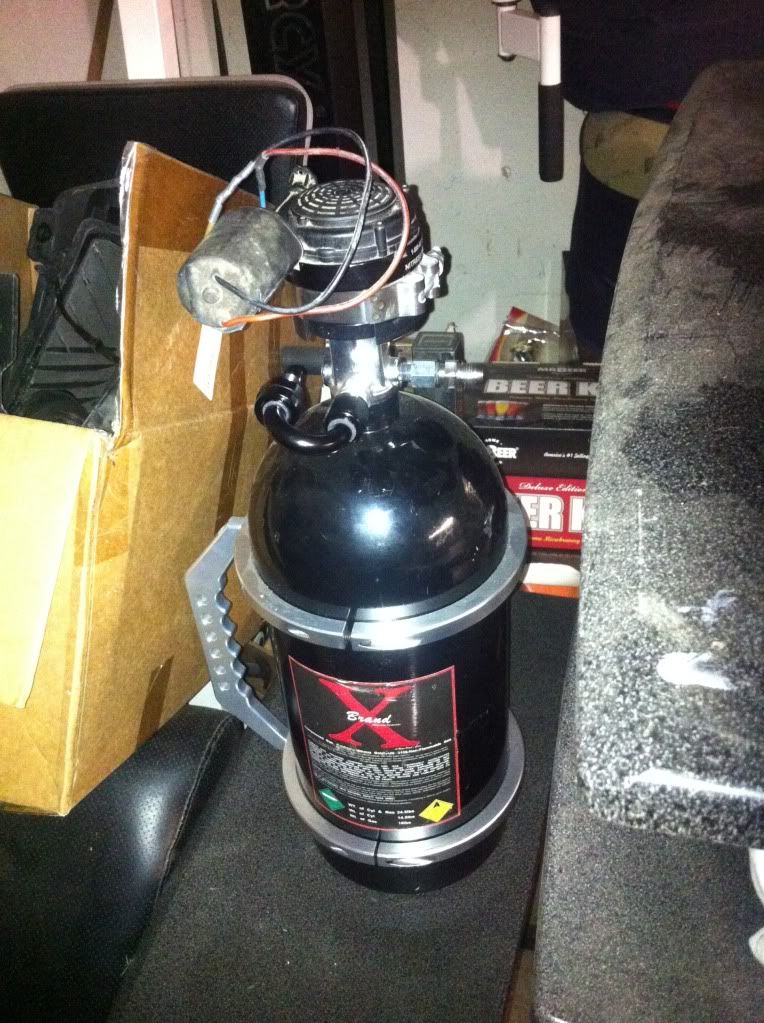
The remote bottle opener i had laying around..
Thanks again guys.
Charles
Power to the switch panel
The ground i used for the switch panel..
The remote bottle opener i had laying around..
Thanks again guys.
Charles
Thread Starter
Racer
Joined: Sep 2006
Posts: 314
Likes: 0
Well iam nearly finished with my install. I just need to fill my nitrous bottle and NANO bottle (any suggestions around the garland/ rowlett area?) and install my window switch (im being a big baby about cutting into the RMP tach wire for fear i wont be able to drive my car in till i take it to the tuner, please some one put my mind to rest on this). So here are some pictures... Ill have my gauges up this weekend (nitrous & AEM AFR)
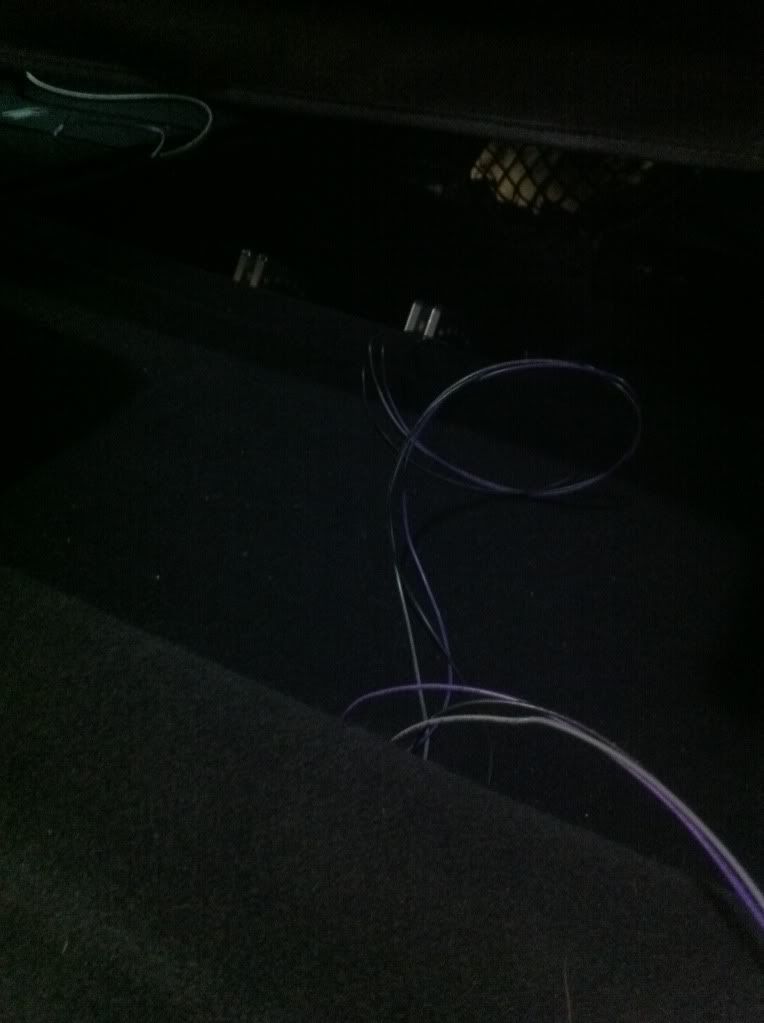
Wires ran to the back for my nitrous gauge
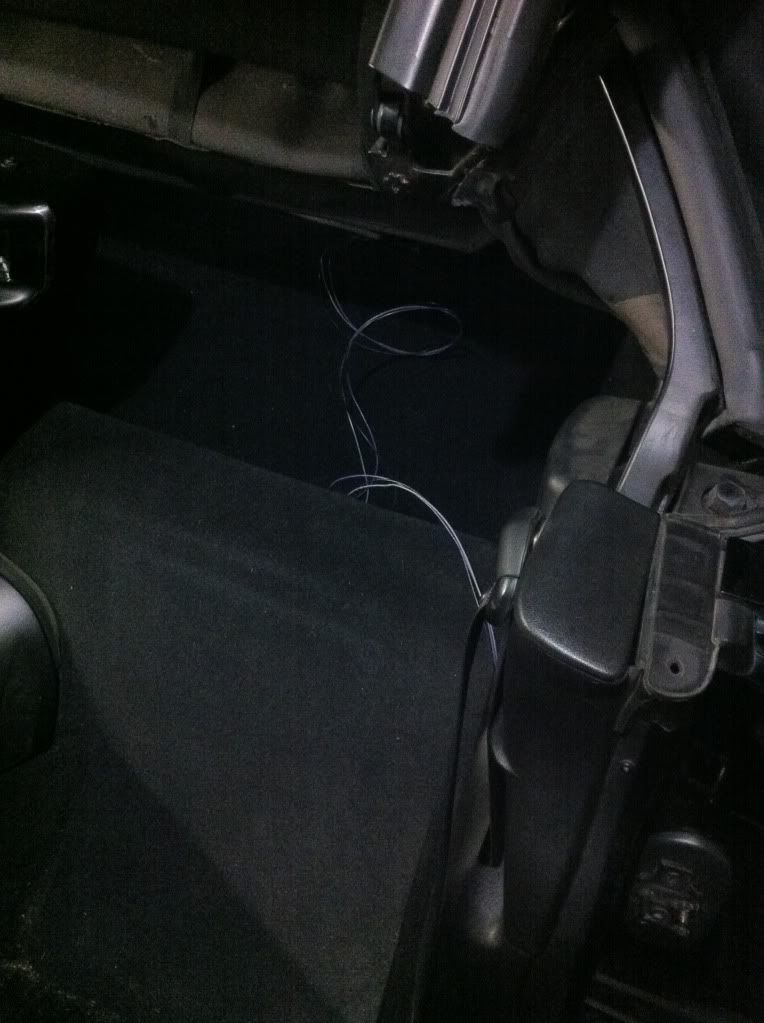
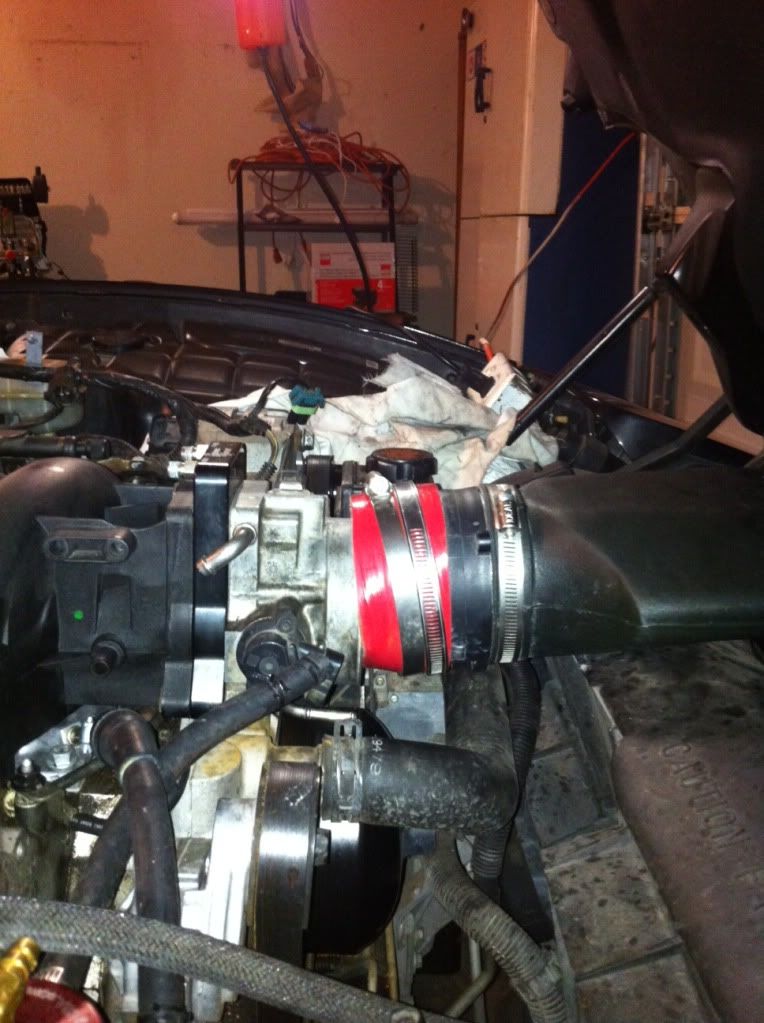
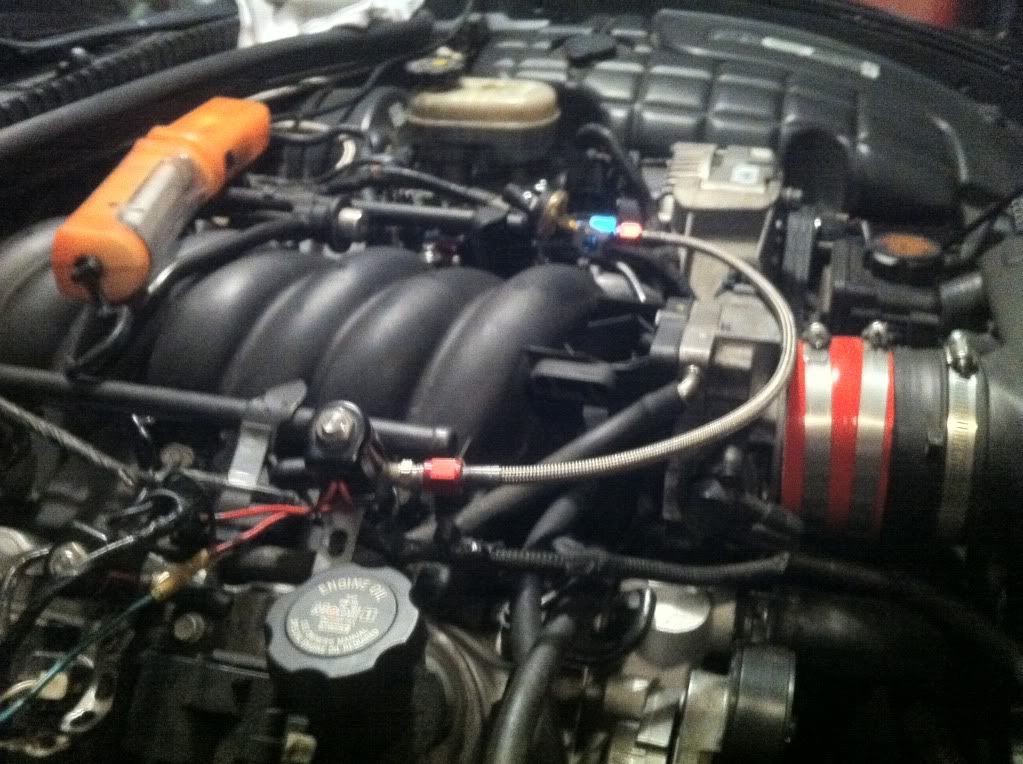
everything installed except the window switch
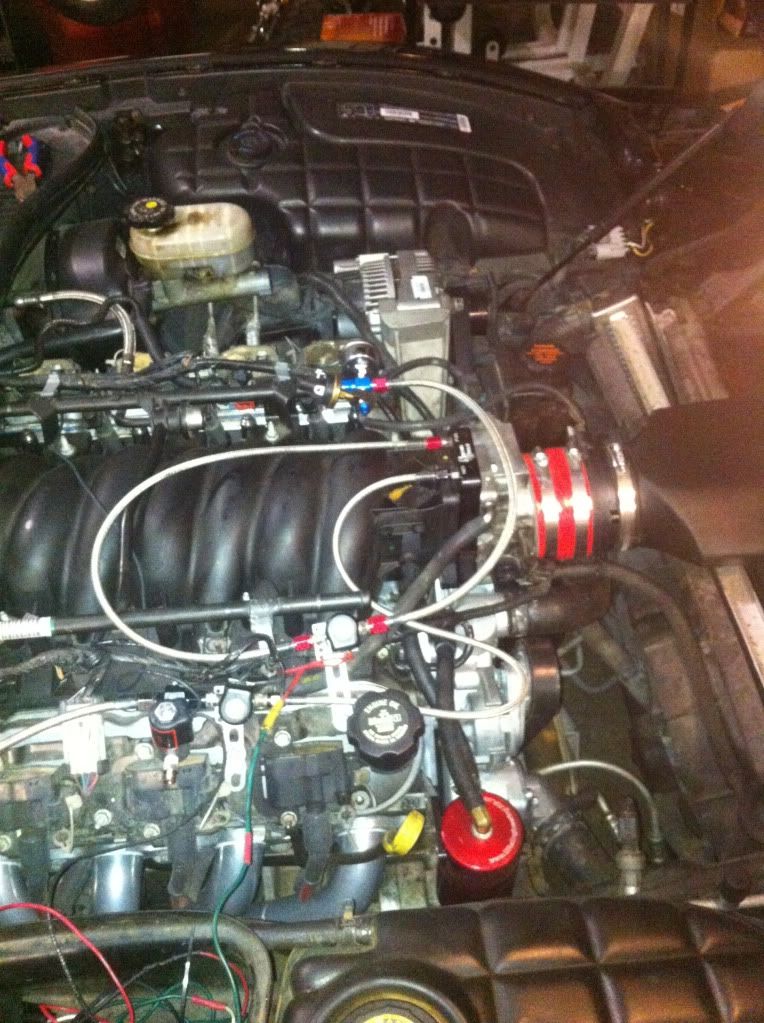
finally got enough room to make the nitrous plate fit without cutting a bunch of stuff up
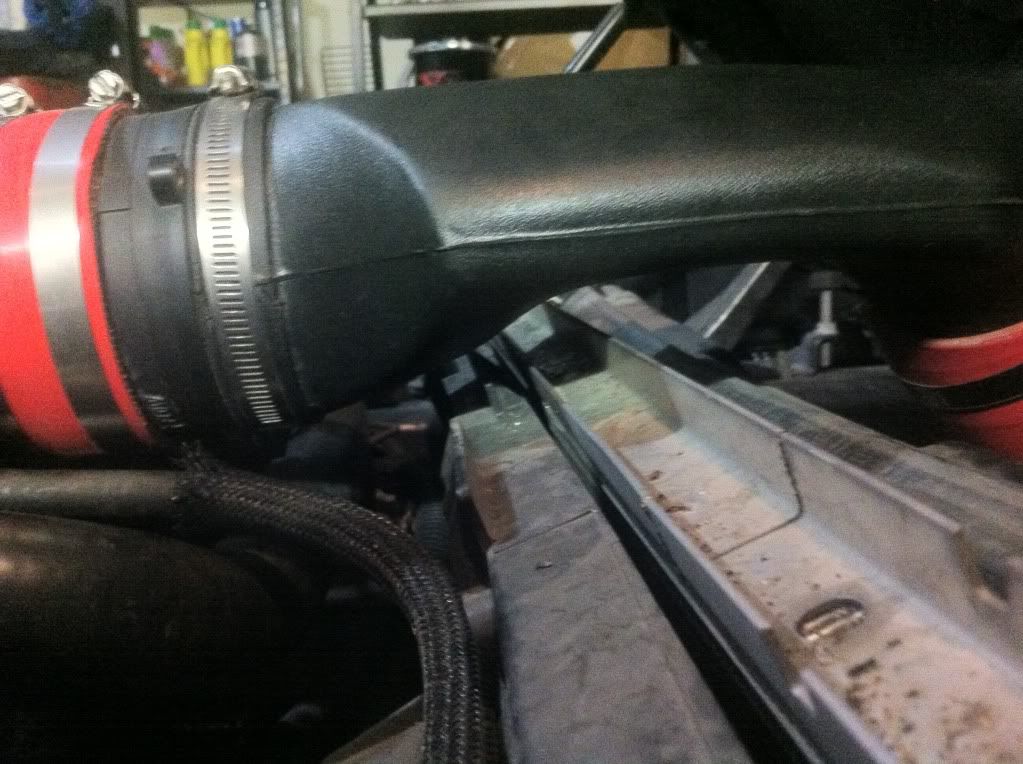
And don't be worried i'm going to modify the radiator cover shroud so my power duct will fit.
Ohh one more thing, i ordered a longer purge line because the one they send you is too short for my setup, once i get everything hooked up im going to tuck and hide all the wires.
Wires ran to the back for my nitrous gauge
everything installed except the window switch
finally got enough room to make the nitrous plate fit without cutting a bunch of stuff up
And don't be worried i'm going to modify the radiator cover shroud so my power duct will fit.
Ohh one more thing, i ordered a longer purge line because the one they send you is too short for my setup, once i get everything hooked up im going to tuck and hide all the wires.