When you click on links to various merchants on this site and make a purchase, this can result in this site earning a commission. Affiliate programs and affiliations include, but are not limited to, the eBay Partner Network.
I came across a great deal on a NX stand alone fuel safe system to supply my fuel needs on my 03Z. Of course this means locating the battery to the trunk which is a win/win deal.
Would love to hear suggestions on what anyone else did. Purchased kit, made your own etc. Thanks for any feedback !
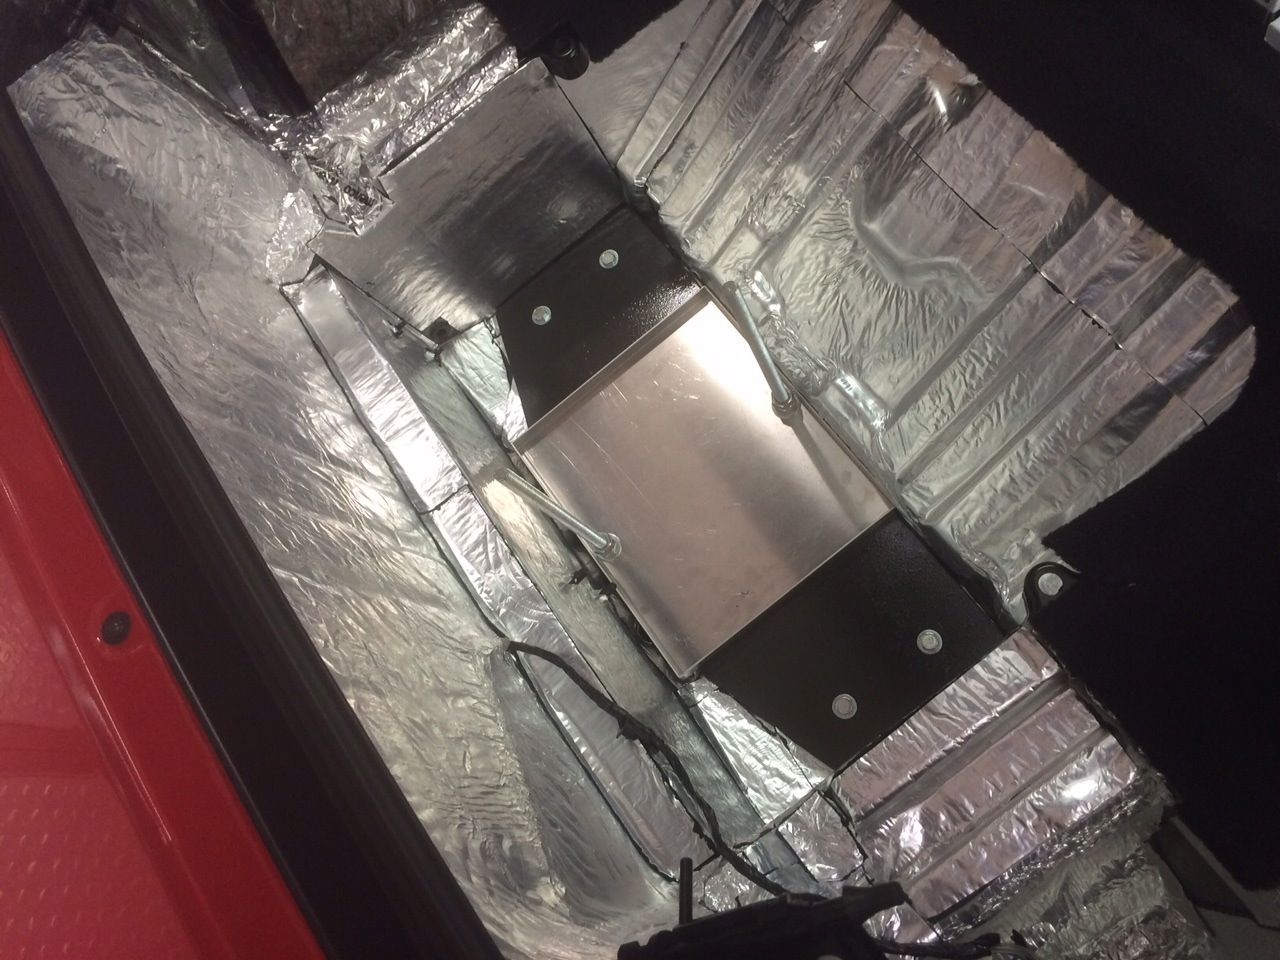
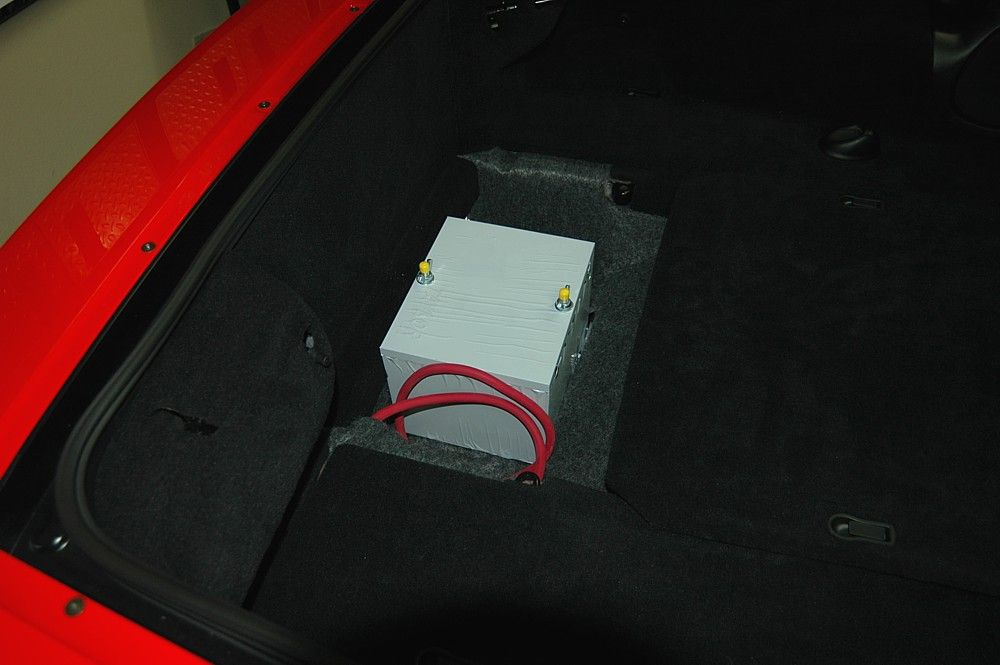
I bought a Taylor box, some 00 cable and a heavy duty marine disconnect switch and mounted the box in the rear center well.
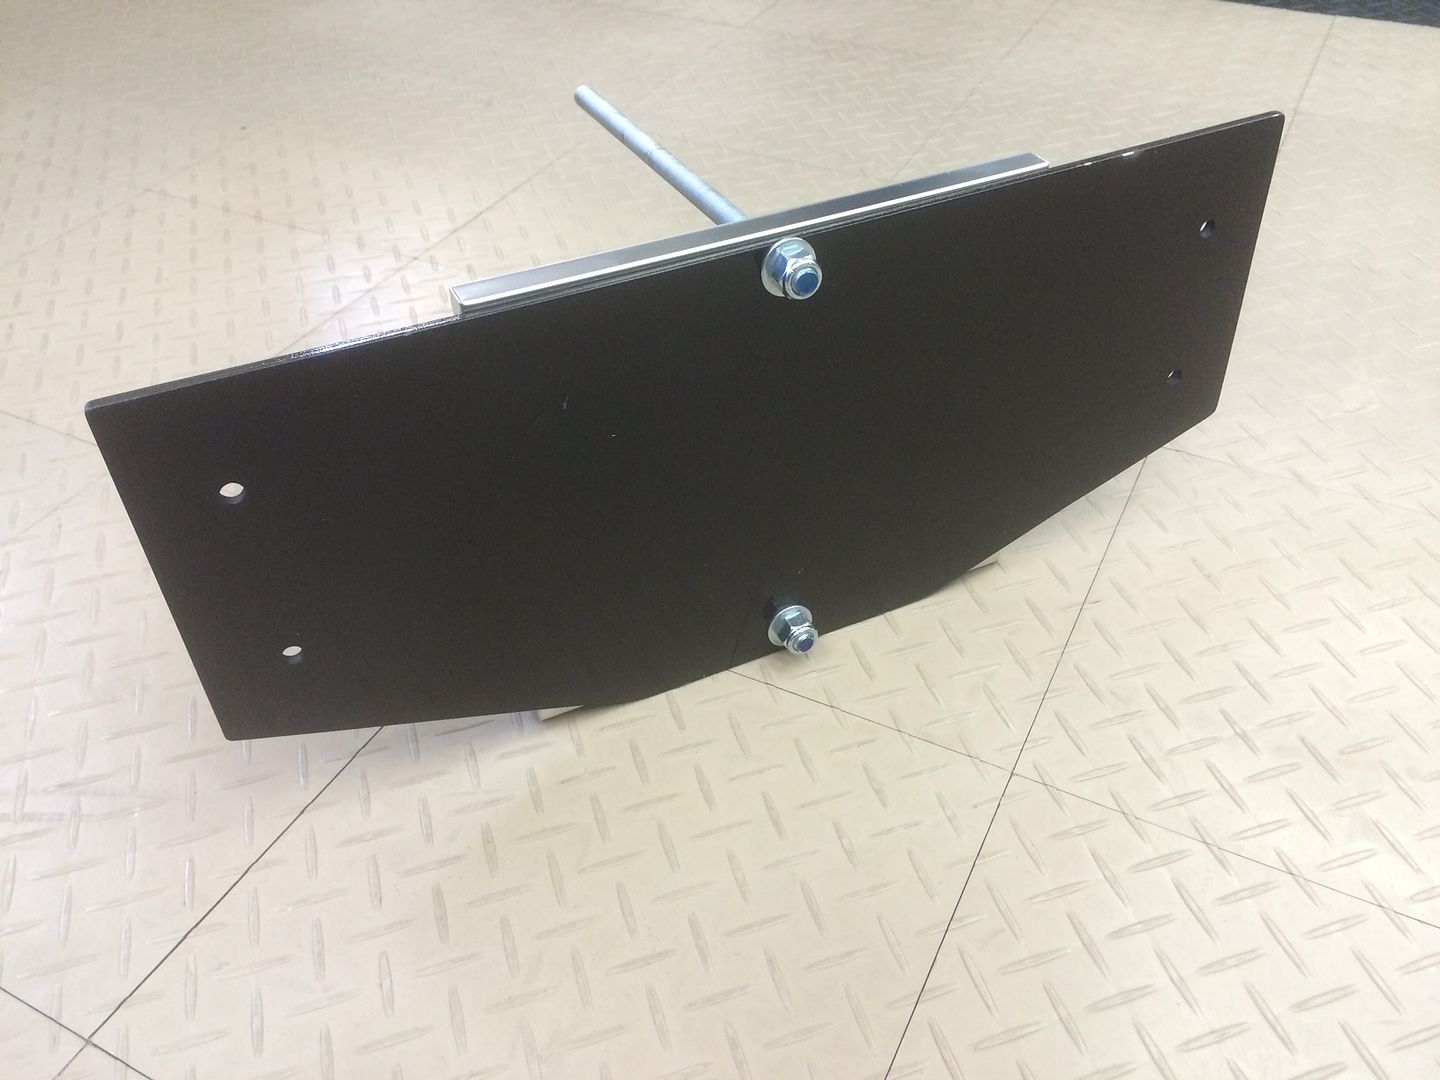
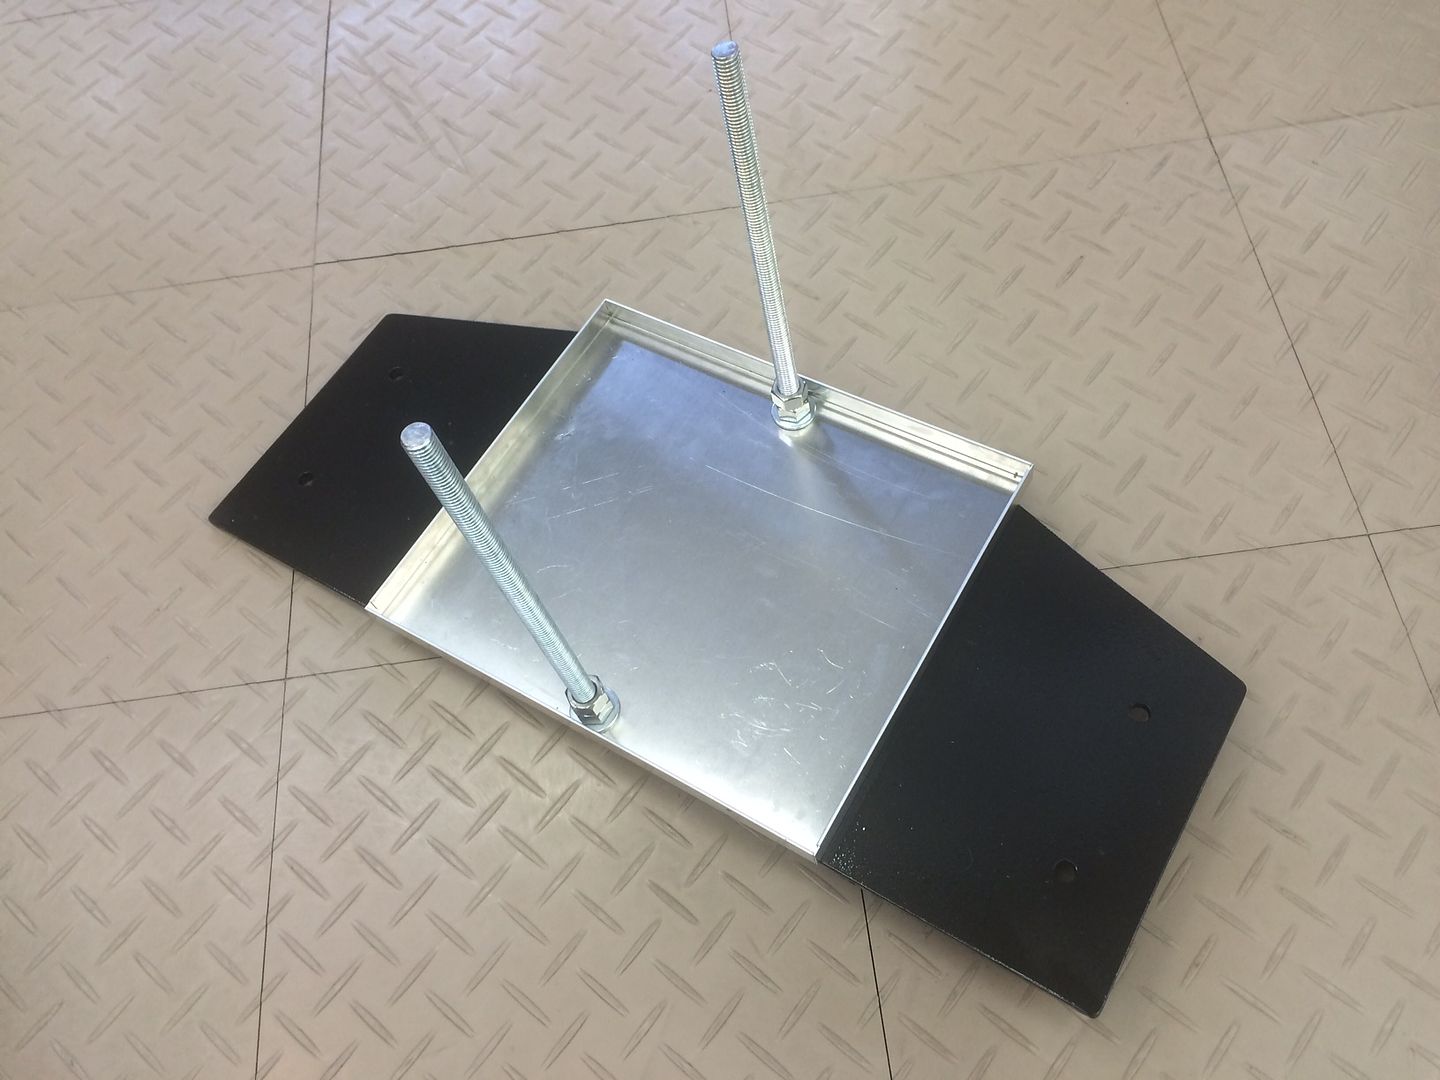
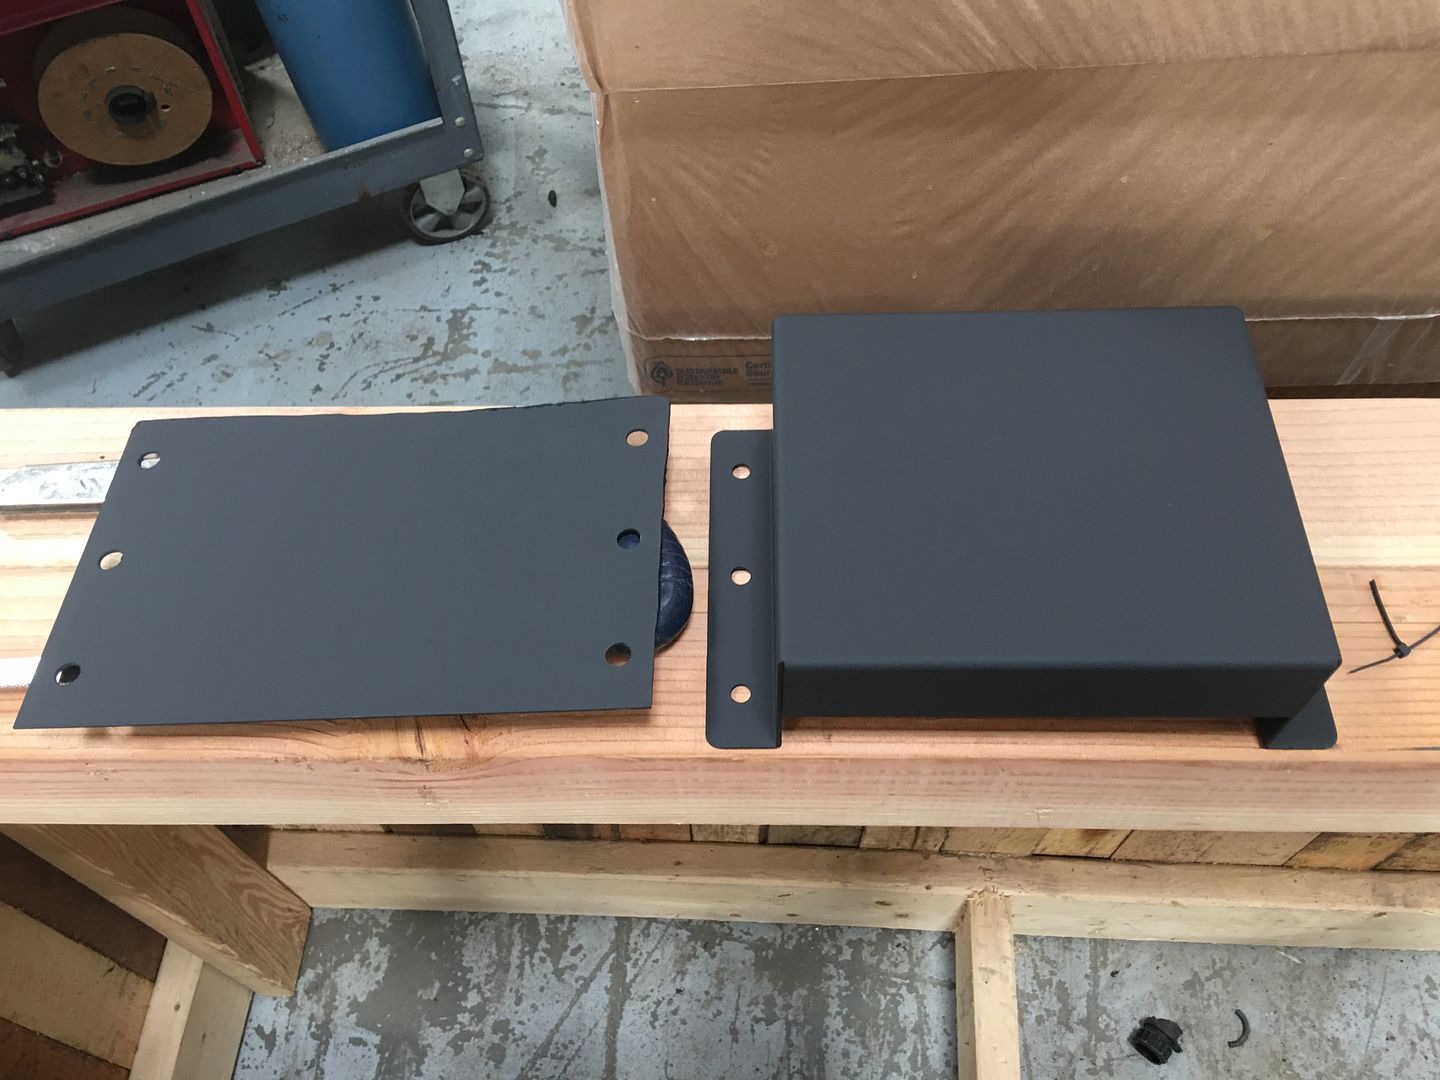
I fabbed and painted a custom mounting plate from some aluminum I picked up at a scrap yard. I replaced the allthread and hardware in the Taylor kit with heavy duty stuff.
Used HD mastic to seal the mounting holes in the well, both inside and outside.
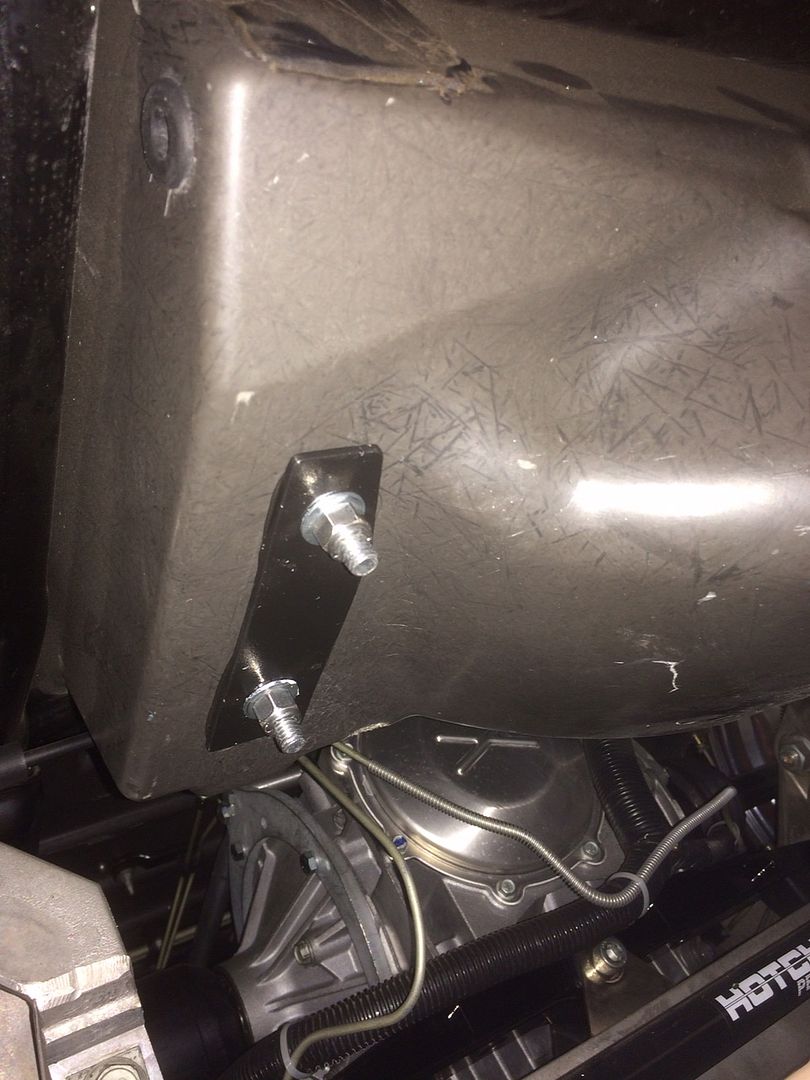
Fabbed some clamping brackets to secure the mounting plate.
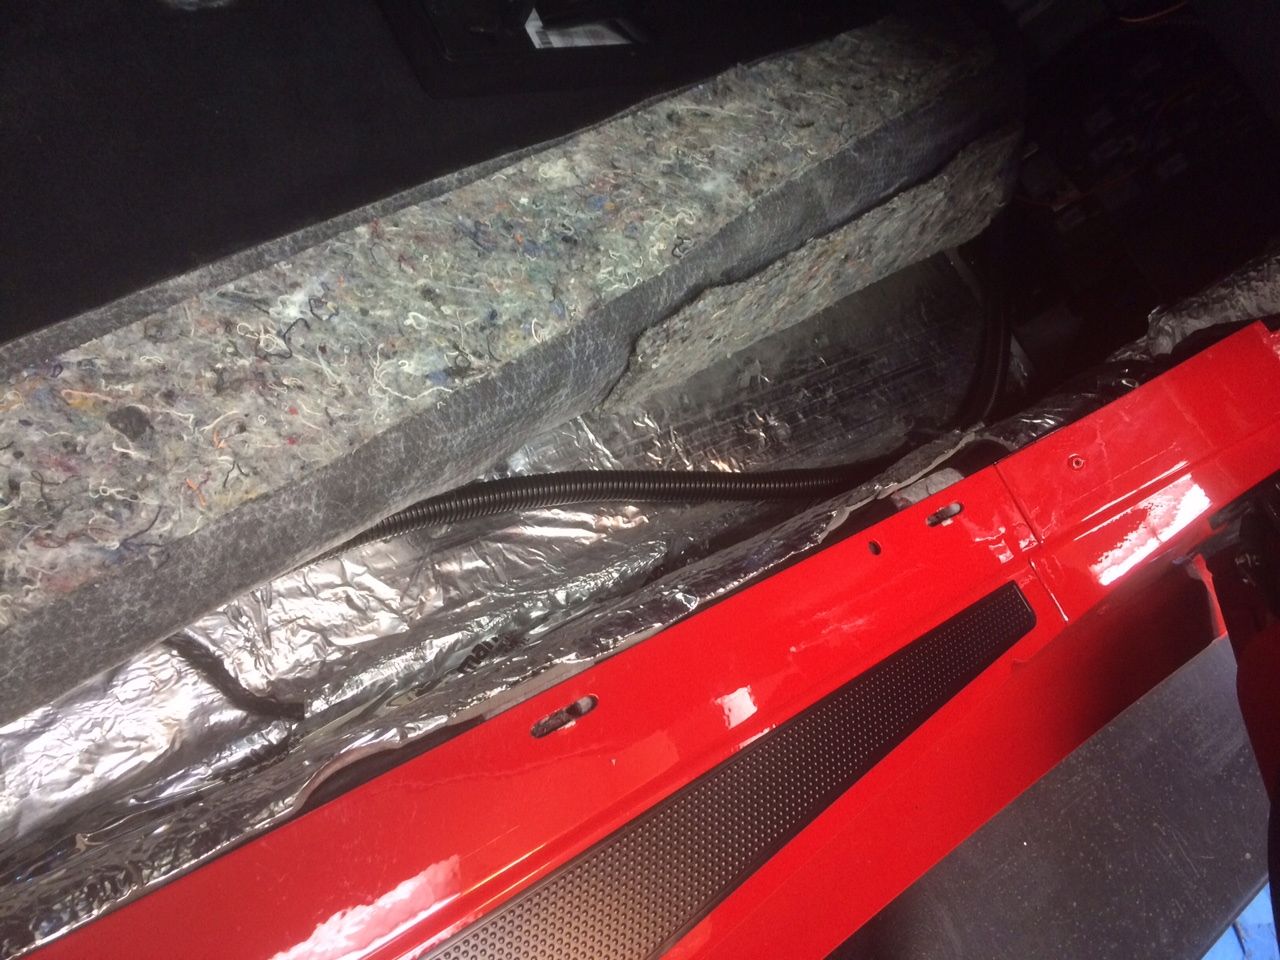
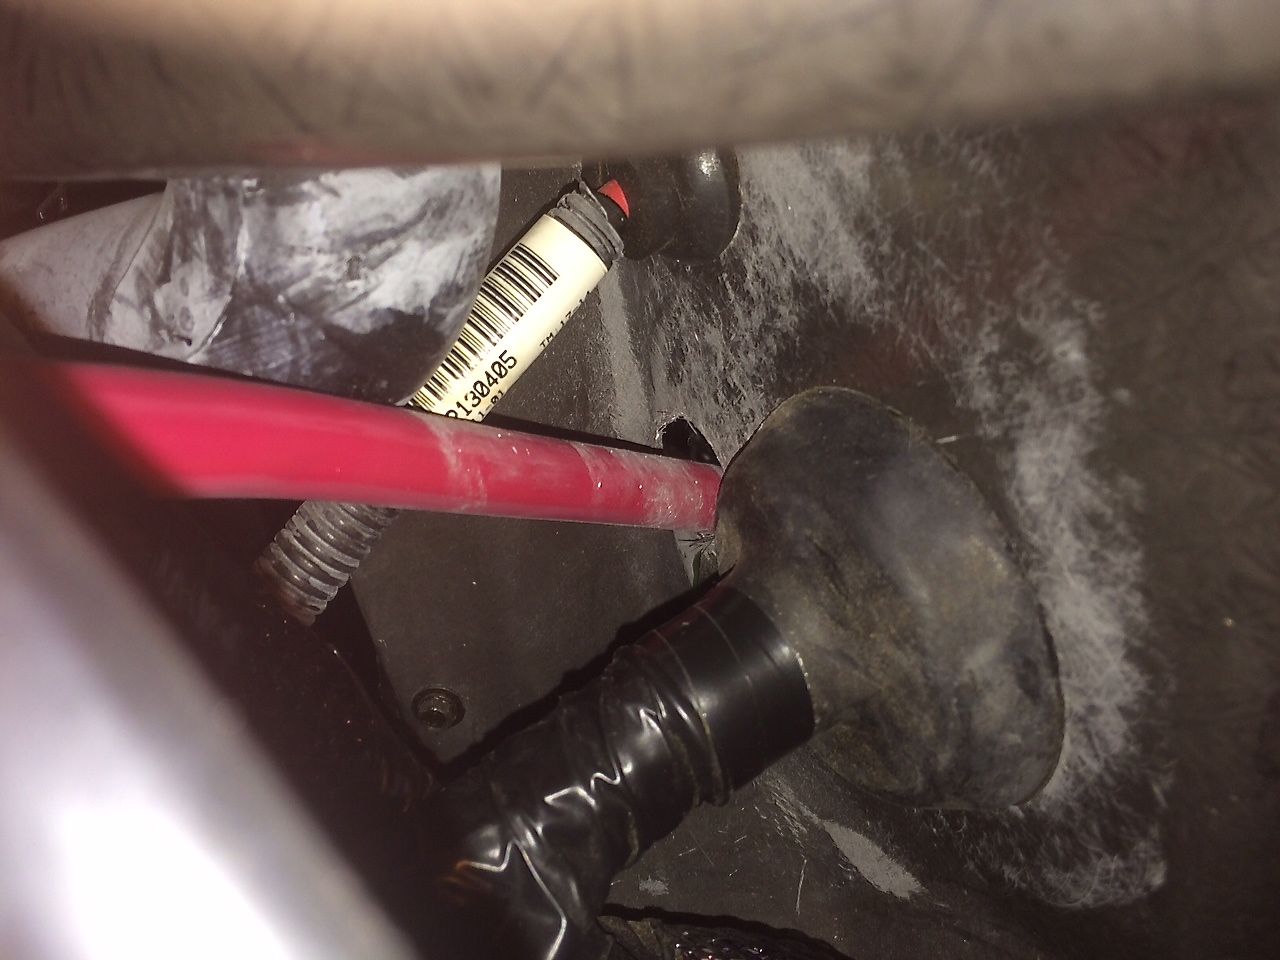
Ran the positive cable from the engine bay through the cabin to the rear. I used HD loom to protect it where needed..
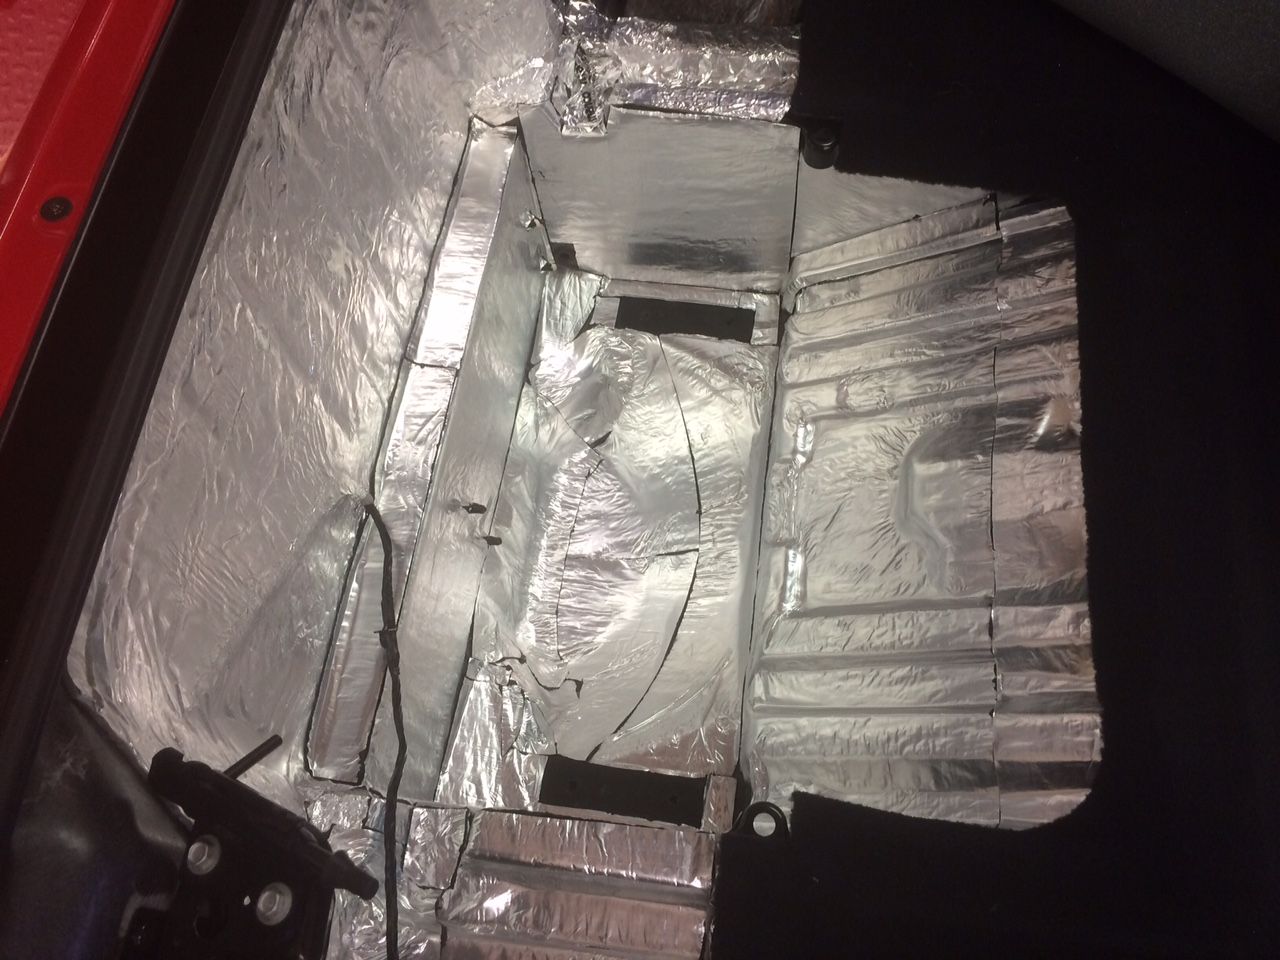
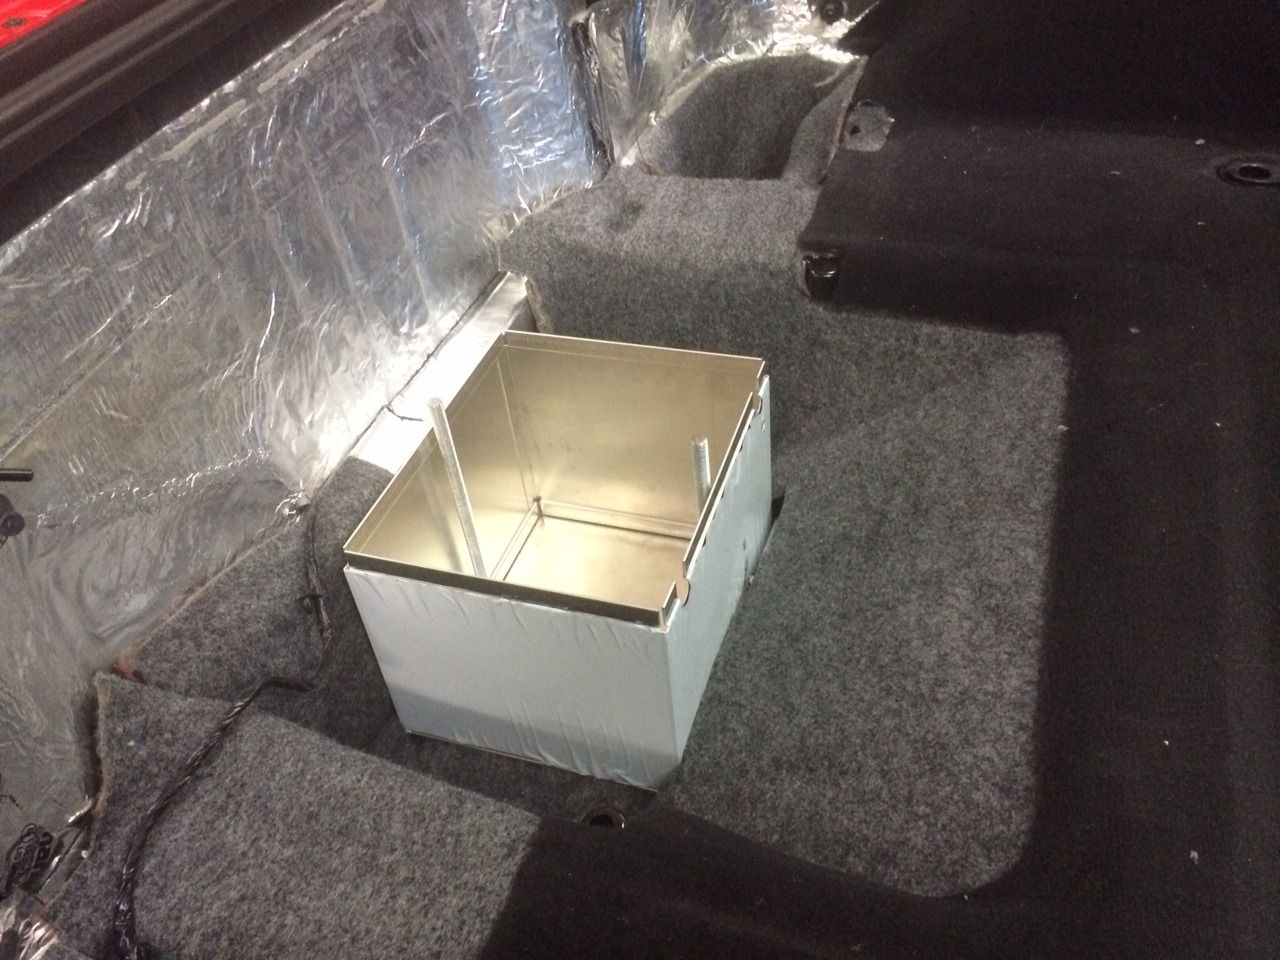
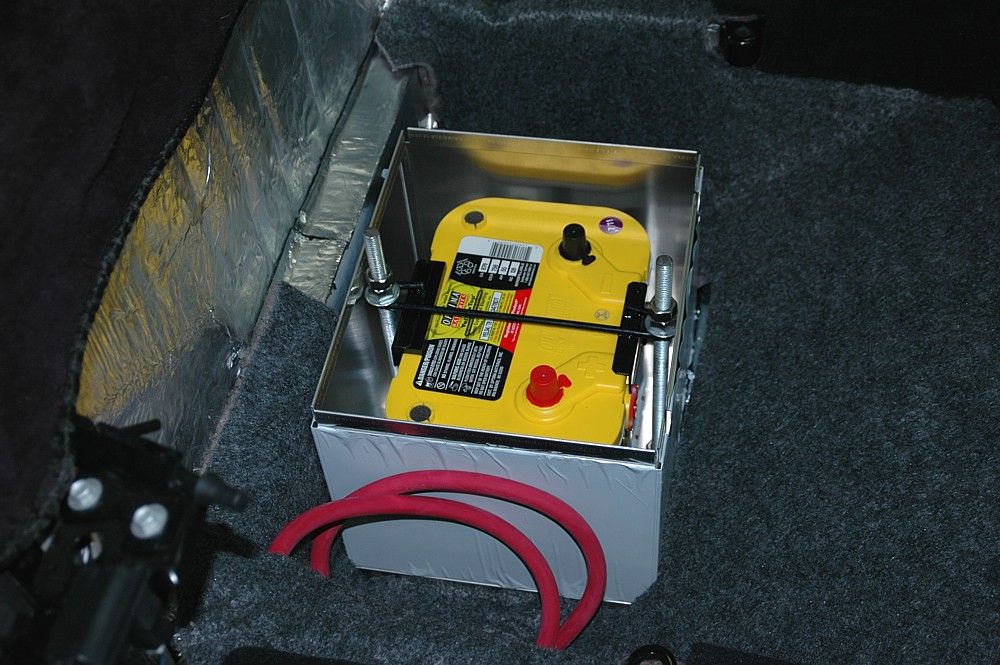
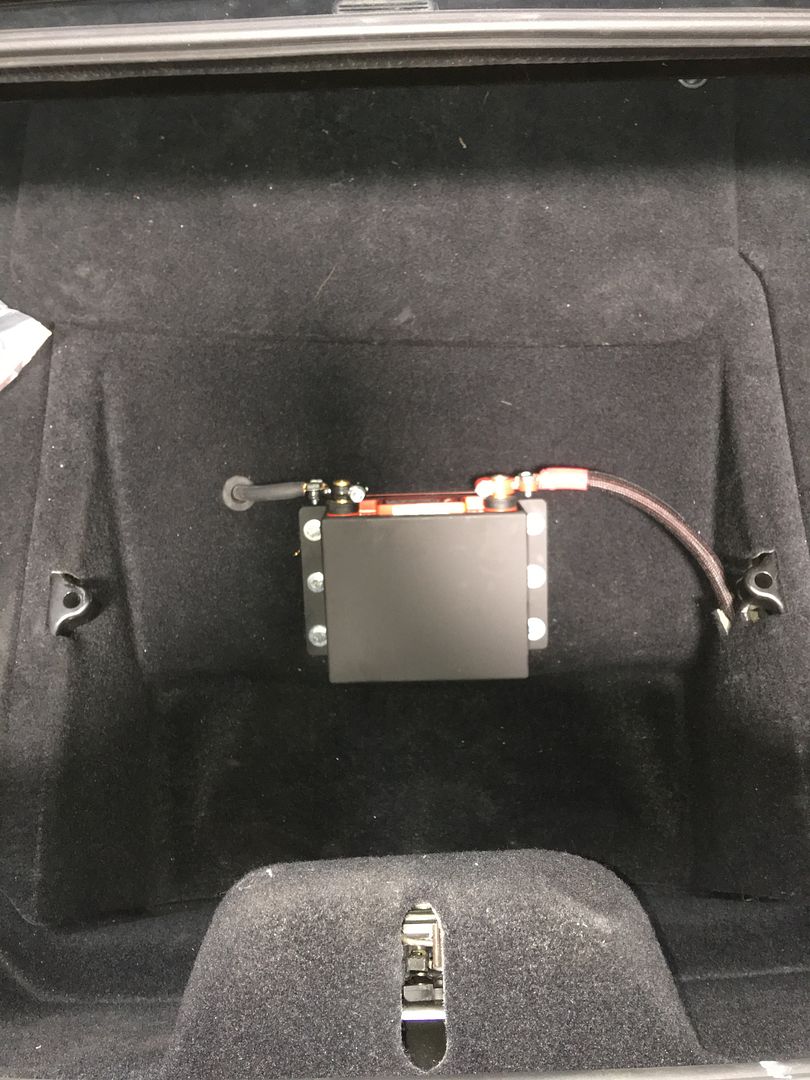
Mounted the box and installed the battery. The vent tube goes out the bottom of the well and the negative cable through the other side to the frame. Both holes have grommets/seals. This is as far as I got - need to do the final switch mount and cable hookup.
I bought a Taylor box, some 00 cable and a heavy duty marine disconnect switch and mounted the box in the rear center well.
I fabbed and painted a custom mounting plate from some aluminum I picked up at a scrap yard. I replaced the allthread and hardware in the Taylor kit with heavy duty stuff.
Used HD mastic to seal the mounting holes in the well, both inside and outside.
Fabbed some clamping brackets to secure the mounting plate.
Ran the positive cable from the engine bay through the cabin to the rear. I used HD loom to protect it where needed..
Mounted the box and installed the battery. The vent tube goes out the bottom of the well and the negative cable through the other side to the frame. Both holes have grommets/seals. This is as far as I got - need to do the final switch mount and cable hookup.
The reviews on that suxed it seemed. Lingenfelter has a kit that's 400 but jeez there has to be a better deal.
Per say the only diff from this one for 400.00 the the jeg one is a bracket that the 400.00 cost that goes under the car for a brace and bolt. Ask me how I know that.I do think the car may need the bracket. Robert
I have an Odyssey PC680 in my trunk using the Odyssey bracket to hold the battery to the cubby hole and a sheet of steel with matching holes drilled to mount on the underside of the trunk.
Last edited by Turpid porpoise; 01-05-2017 at 10:54 AM.
I will be using a combination of all the posts above to relocate the battery starting today. Would love to see more people chime in with what they have done as this is one topic I have come across but everything was c6 related and lack of info for c5. Although everything from c6 threads can be used towards the c5, but its just nice to come across this post.
Ok I got couple questions for those above who have already done this mod.
Approximately where did you guys drill the hole in the firewall to allow the positive cable to come out to connect to the starter.
Second, where are you guys getting ground from. I've seen several threads in the c6 section and the LPE pdf but everything is different.
And finally has anyone tested the Jegs kit above. What are your thoughts about it. I am in the middle of installing a TT kit i have 26 feet of 2/0 awg cable but I feel the cable may be to thick and I think that is due to the rubber coating. Let me know what your thoughts are?
I drilled a hole on the firewall next to the main access factory hole where a large harness goes into the passenger footwell - this is just behind the stock battery location. I have a grommet that I will be fitting to that hole to seal it off.
The negative cable from my battery will go through a hole in the rear tub and will attach to the driver side frame next to the tub where the battery resides. You can see the hole/grommet for the neg. cable in the tub at top of this pic.
when I bought the car it already had it but it looks like a plastic GM battery tray that was bolted down and not really what's needed.
This setup is the bomb. I'm going to cut up my package tray to use a 3" c6 style exh so I'll be looking to update. Really like the top notch work here!
I bought a Taylor box, some 00 cable and a heavy duty marine disconnect switch and mounted the box in the rear center well.
I fabbed and painted a custom mounting plate from some aluminum I picked up at a scrap yard. I replaced the allthread and hardware in the Taylor kit with heavy duty stuff.
Used HD mastic to seal the mounting holes in the well, both inside and outside.
Fabbed some clamping brackets to secure the mounting plate.
Ran the positive cable from the engine bay through the cabin to the rear. I used HD loom to protect it where needed..
Mounted the box and installed the battery. The vent tube goes out the bottom of the well and the negative cable through the other side to the frame. Both holes have grommets/seals. This is as far as I got - need to do the final switch mount and cable hookup.
That is some beautiful work right there. Just an artist at work.
I think I am going to take Patches' idea and expand on it so that I am NHRA legal. Going to use my Odyssey PC680, buy a sealed box, make the mounting plate and then make a support beam that runs under the cubby from frame rail to frame rail for the mounting plate to attach to. That way I have the battery attached to the frame as per NHRA guidelines.I'll be mounting a kill switch in one of my reverse lights and I'll post pics as I make progress on this little project.
I was looking into this and given some of the newer lithium iron batteries which literally weigh 3lbs (~$200), if those are reliable then I'd think instead of going through the trouble and cost of relocating just use one of those lithium batteries and be done. they are tiny too so if you need the space you still get it.
I am very tempted to try one of them and just put my stock battery in the back cubby while I drive around for awhile until I gain confidence or learn if they work. Lots of guys in the lotus and race car world seem to use them fine.

 12-31-2016, 11:36 AM