
Auto shifter LED install

Thread Starter
Melting Slicks

Joined: Mar 2005
Posts: 2,104
Likes: 0
From: Boise Idaho
Has anyone with an auto changed the lights for the various gears from the stock white bulb to the blue LEDs? I tried tackling it today, but got a little apprehensive when it looked like I need to take the entire shifter assembly off.
Any help would be insightful!!!
Any help would be insightful!!!
Race Director


Joined: Feb 2004
Posts: 11,651
Likes: 9
From: HOW FAST WAS I GOING OFFICER? Los Angeles Hating GM Dealership Service Dept.'s Since Sept. 2004
St. Jude Donor '04-'05-'06-'07
Okay here you go ...
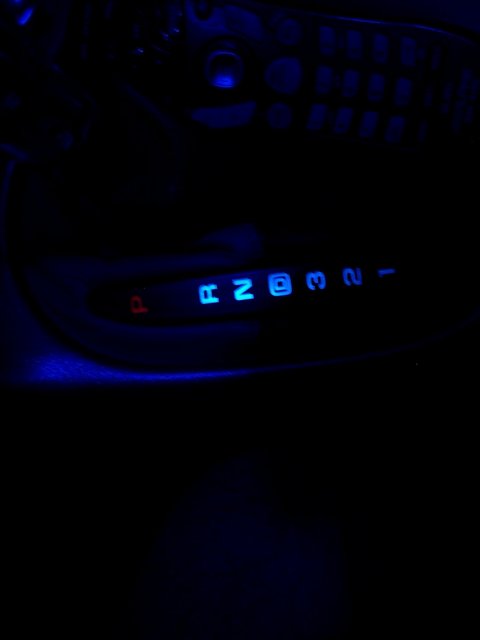
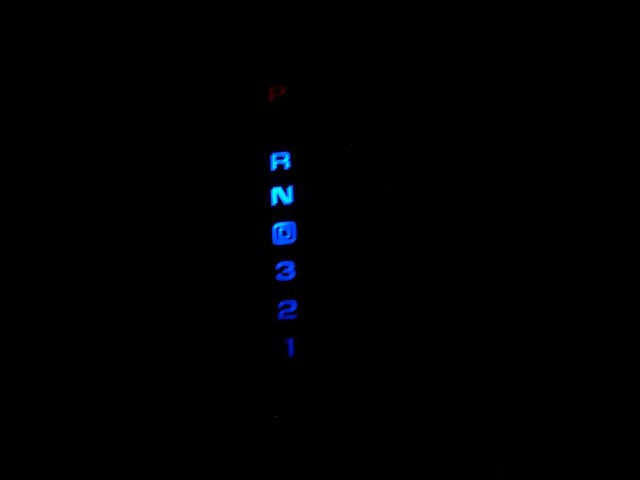
Before you go further, you need a 194 LED replacement. I used 4, 5mm LED's and 194 socket to get the light spread needed for this.
When taking your shift indicator apart, remember the orientation of the pieces. The orange piece which actually moves is a little tricky during the reinstall.
1. Remove the center console.
2. The gear shift stuff is held in by tabs. Take it apart. The tabs are on the sides, more like "forks".
3. There is a piece of Lexan over which has the P,R,N,OD,3,2,1
4. When you take this out, you'll see that it has a sort of "keel". The "keel" helps disperse the light from the halogen bulb throughout the Lexan so all the gears are illuminated.
This next step is optional depending on how effectively you can aim the LED's to get a effective beam spread (#5 (OPTION)- Shave the off the keel)
I found that shaving off the Lexan in the center, allowed more light to shine through from the LED's since they can be more directional/focused than the halogen bulb. I tried it before with that piece there and the LED's, but it was dim during daylight. I found, without the extra piece, the blue light came right through, but needed to be focused. I used a Dremal.
5 or 6. Look inside, you'll see the bulb. Replace it with your LED bulb.
The halogen bulb gets hot and stays hot, so be careful. Also, it's a tight squeeze getting your fingers in there to get a grip on it.
7. Replace the Lexan piece to check for lighting effectiveness.
8. Reinstall your shift indicator.
www.superlumination.com sells some 194 LED bulbs (ready made). My suggestion would be to get the bulb which spreads the beam most. You'll see the "canal" in the gear shifter area once you have it taken apart.
It took me about 45 minutes to get it in right and complete the job.
Hope this helps.
Dave Q.
EDIT::::Here are a couple of shots I just took for ya ... the red seems dim in the pix, but it's much brighter in person.
Last edited by MyVetteDream; Jun 20, 2005 at 03:06 AM.


