







blackwing trouble

Thread Starter
Instructor


Joined: Aug 2009
Posts: 246
Likes: 26
From: Virginia Beach
 blackwing trouble
I'm installing a blackwing in my vette now and having a really hard time making the parts fit. I've read some stuff on the forum about getting the power duct to attach to the radiator shroud but everytime I try to do any of that stuff it comes undone where the filter attaches to the MAF. I have an 01 and am seriously struggling to get the right fit with the straight sleeve... Any help would be appreciated
Thanks, Matt
Thanks, Matt

Race Director

Joined: Jan 2006
Posts: 10,554
Likes: 33
From: Not on either liberal coast.
I had the same issue with the (rigid) straight/thick after market silicone connector I initially used. You might consider just using the oem accordion bellows or the SLP silicone connector from SLP. It has a bump in the middle which allows for a little more flexibility.
My other suggestion is to install the system backwards, starting with attachment of the rubber grommets over the TORX pegs on the cross member first. Use lubricant to facilitate the grommets installation over the pegs. Once you have the filter assembly installed, then continue backwards towards the throttle body. With the air filter and air bridge installed correctly over the pegs, you should be able to see where the silicone connectors need trimming or adjustments at the MAF, air bridge and throttle body.
Due to whatever reasons (high altitude, air leaks, etc), I experienced annoying codes after going through the installation. I eventually removed it and re-installed my (modified) oem Z06 intake assembly. It doesn't look as sexy, but it sounds the same as the "Blackwing" and performs as well if not better...and no codes.
The increased sound of the air flow into an after market intake system are what most owners associate with more power anyway...
My other suggestion is to install the system backwards, starting with attachment of the rubber grommets over the TORX pegs on the cross member first. Use lubricant to facilitate the grommets installation over the pegs. Once you have the filter assembly installed, then continue backwards towards the throttle body. With the air filter and air bridge installed correctly over the pegs, you should be able to see where the silicone connectors need trimming or adjustments at the MAF, air bridge and throttle body.
Due to whatever reasons (high altitude, air leaks, etc), I experienced annoying codes after going through the installation. I eventually removed it and re-installed my (modified) oem Z06 intake assembly. It doesn't look as sexy, but it sounds the same as the "Blackwing" and performs as well if not better...and no codes.
The increased sound of the air flow into an after market intake system are what most owners associate with more power anyway...

Team Owner


Joined: Sep 2001
Posts: 23,283
Likes: 906
From: Lake Elsinore, CA
What a lot of folks fail to realize on the Blackwing is that you often need to cut the coupler just a bit shorter to allow the assembly to lay flat. Otherwise, you'll have the problem you're describing more often than not. The last one (Mrs. Patches installed this one on her C5) we cut a little off the coupler and it fits perfectly. Cut a little at a time until you get the right fit.
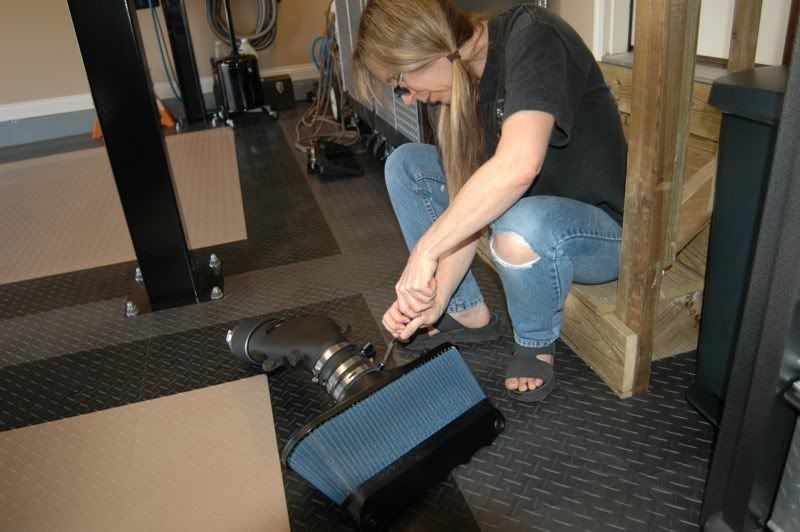
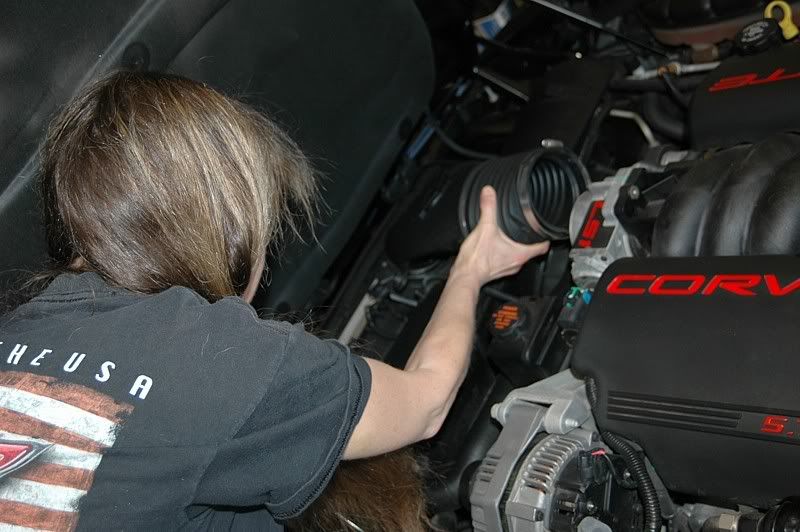
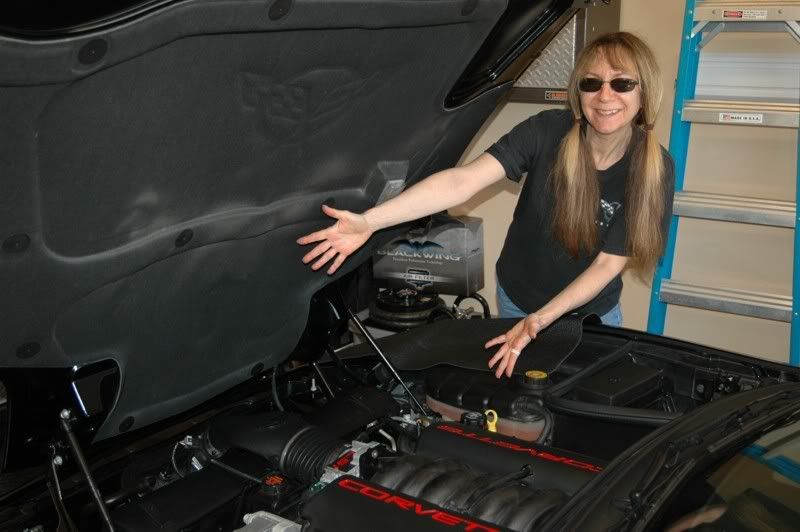
I added the CF air bridge recently. I cut a bit off the red silicone coupler when I did this to get a good fit again.

I added the CF air bridge recently. I cut a bit off the red silicone coupler when I did this to get a good fit again.
Last edited by Patches; Sep 3, 2009 at 02:44 PM.

Instructor
Joined: Apr 2008
Posts: 183
Likes: 8
From: Winnipeg Manitoba
Here is what I did when I installed one on my 01
http://forums.corvetteforum.com/c5-t...g-install.html
http://forums.corvetteforum.com/c5-t...g-install.html

Team Owner
Joined: Mar 2004
Posts: 58,510
Likes: 1,843
From: Oklahoma City OK
C6 of Year Finalist (appearance mods) 2019
Corvette Stories
The Best of Corvette for Corvette Enthusiasts

5 Best & 5 Worst Corvette Daily Drivers
Joe Kucinski
The Headlights of Every Corvette Generation Explained
Joe Kucinski
5 Best & 5 Most Overrated Corvette Track Packages of All Time!
Joe Kucinski
Every 2027 Corvette Engine Explained
Joe Kucinski
Designer Imagines A Corvette That Looks More Like a Corvette Than the Corvette
Verdad Gallardo
10 Ugly Corvettes That We Still Kinda Love
Joe Kucinski
Top 10 Most Expensive Corvettes Ever Sold on Bring A Trailer
Brett Foote
10 Things Every Corvette Owner Needs (2026 Edition)
Michael S. Palmer
8 Most "Only Corvette Owners Understand" Quirks and Problems
Pouria Savadkouei
Melting Slicks


Joined: Jan 2008
Posts: 3,164
Likes: 7
From: CA
What a lot of folks fail to realize on the Blackwing is that you often need to cut the coupler just a bit shorter to allow the assembly to lay flat. Otherwise, you'll have the problem you're describing more often than not. The last one (Mrs. Patches installed this one on her C5) we cut a little off the coupler and it fits perfectly. Cut a little at a time until you get the right fit.
I like that CF air bridge. Who makes it ?
I added the CF air bridge recently. I cut a bit off the red silicone coupler when I did this to get a good fit again.
I like that CF air bridge. Who makes it ?
I added the CF air bridge recently. I cut a bit off the red silicone coupler when I did this to get a good fit again.

Instructor
Joined: Oct 2006
Posts: 180
Likes: 0
From: St. Louis MO
Keep trying!
I feel your pain, I struggled too.......If I remember right I had to install the power duct and coupler then try to get the Blackwing in......I took a while but i got......I love the sound!
I have a corsa exhaust and it really completed everything.....
Keep pushin on.....you'll get it eventually
I have a corsa exhaust and it really completed everything.....
Keep pushin on.....you'll get it eventually

Team Owner


Joined: Sep 2002
Posts: 30,723
Likes: 4,632
From: Bonita Springs, Florida
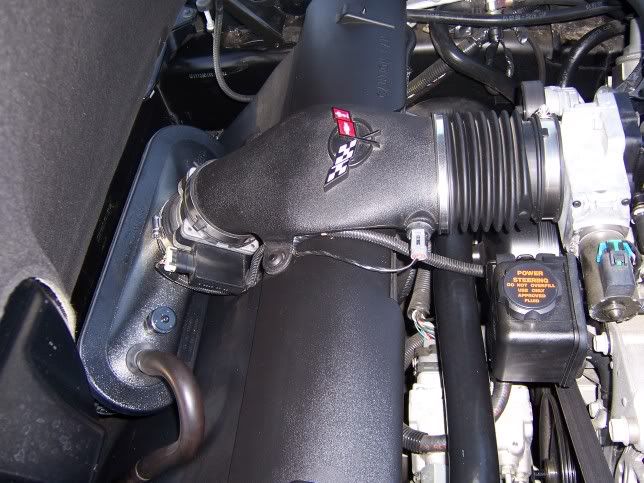
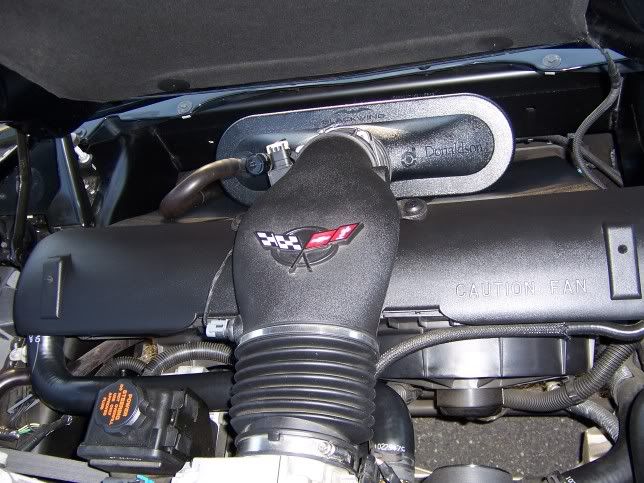
Carefully press the MAF firmly onto the Blackwing and tighten the clamp. It is important that the MAF is completely pressed onto the Blackwing so that the grommets at the top of the radiator cover line up and the airbridge duct will fit just like it did with the factory stock airbox. Once you have it all together, put the grommets in the Blackwing. (Using silicon spray on the rubber grommets and frame posts will make the assembly easier.) Next press the entire assembled unit onto the posts in the frame. Then press the airbridge down and into place and install the coupler. This works every time for me.
Installation instructions:
http://97vette.com/howto/blackwing/index.html
Installation instructions:
http://97vette.com/howto/blackwing/index.html
Thread Starter
Instructor
Joined: Aug 2009
Posts: 246
Likes: 26
From: Virginia Beach
Where can I get the silicone spray or lube for the grommets? They are all lined up but I cant get them to slide in! Also, do you think I should buy an after market power duct/ air bridge? Vararam? Carbon fiber? would it make a difference?
Thanks for everyone's help.
Matt
Thanks for everyone's help.
Matt
Race Director
Joined: Jan 2006
Posts: 10,554
Likes: 33
From: Not on either liberal coast.
Any lubricant will work. Use something that will stay in place for the next R&R. I use white lithium grease. WD40 will work, a little motor oil, anything slippery. Everyone has some product they like to use on tires/vinyl, etc. If you don't have anything, a little spit or WINDEX will work, but it'll dry out. Make certain you're trying to align the TORX pegs correctly to the grommets. The beveled side of the grommet goes over the pegs first.
You're in TX, so any hardware store, farm supply store, home improvement store, automotive parts source will have something slippery.
The air bridge is 99% cosmetic. If you like the looks, pick whatever you like the best. Unless you're making serious horsepower over stock, don't expect it's going to make a significant difference you can feel. And the after market air bridges don't have the mounting ears for the grommets/TORX pegs which support the weight and keep things aligned.
The after market air bridge can come with some issues. Because they're over sized, you might expect it to crush your hood insulator or not allow your hood to close as well or oem. Both have been documented by owners. An after market air bridge might also require drilling for the installation of the oem IAT. The use of one will almost guarantee the need to use after market silicone couplings as well.
The oem air bridge will support a lot more power than a stock horsepower LSx motor produces. CALLAWAY continued to use the oem air bridge on their upgraded C5 cars. You can also dress up an oem air bridge by painting the Corvette logo or applying an after market decal.
You're in TX, so any hardware store, farm supply store, home improvement store, automotive parts source will have something slippery.
The air bridge is 99% cosmetic. If you like the looks, pick whatever you like the best. Unless you're making serious horsepower over stock, don't expect it's going to make a significant difference you can feel. And the after market air bridges don't have the mounting ears for the grommets/TORX pegs which support the weight and keep things aligned.
The after market air bridge can come with some issues. Because they're over sized, you might expect it to crush your hood insulator or not allow your hood to close as well or oem. Both have been documented by owners. An after market air bridge might also require drilling for the installation of the oem IAT. The use of one will almost guarantee the need to use after market silicone couplings as well.
The oem air bridge will support a lot more power than a stock horsepower LSx motor produces. CALLAWAY continued to use the oem air bridge on their upgraded C5 cars. You can also dress up an oem air bridge by painting the Corvette logo or applying an after market decal.
Last edited by hotwheels57; Sep 5, 2009 at 12:29 PM.
