
New HID Projectors and Clear Corner Lights Install...lots of pics!
 01-08-2011, 08:34 PM
#1
Advanced

Thread Starter

Member Since: Jun 2010
Location: Lebanon Tennessee
Posts: 70
Likes: 0
Received 0 Likes
on
0 Posts

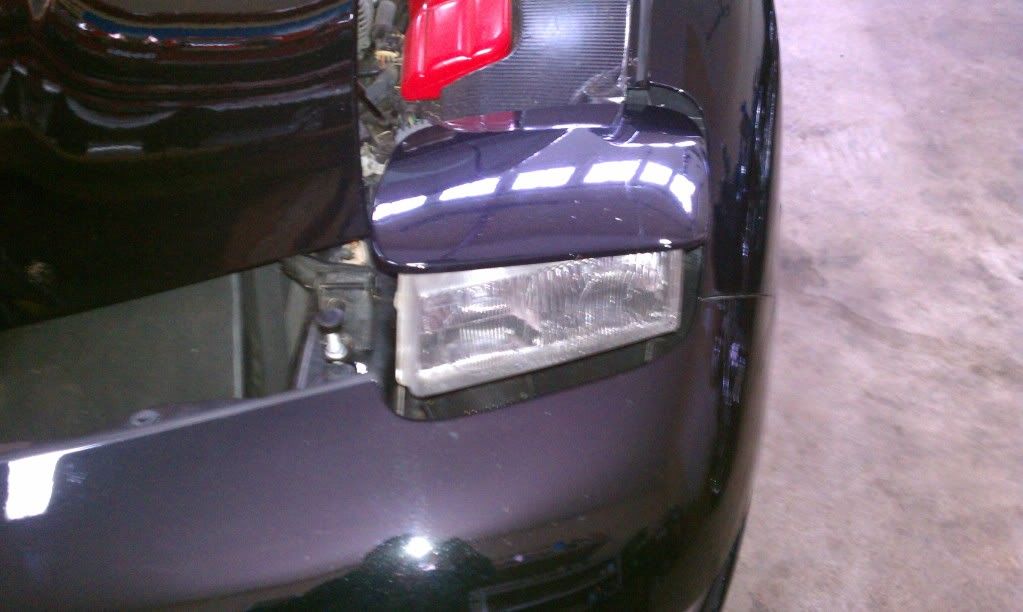
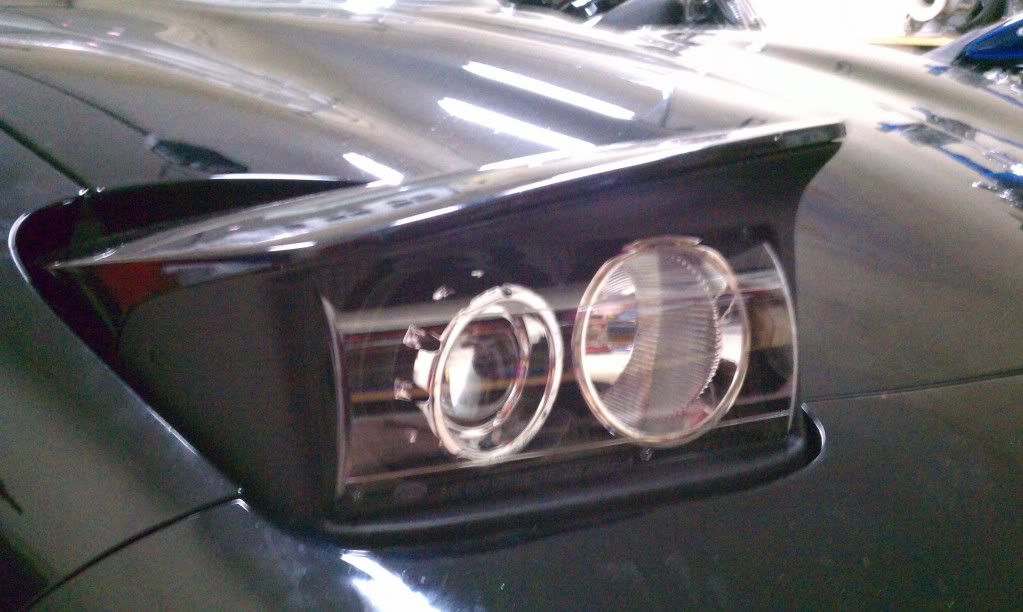
My new projector headlights, clear corner lights, and 6000K HID bulbs arrived this week. With snow on the ground and the temp in the 20’s today it seemed like a good day to fire up the heater in the garage install them. A couple of weeks ago I installed HID’s in the fogs and after seeing the difference I ordered these. I admit I got them off eBay, but for $311.98 it was a deal I couldn’t pass up. Installation was a lot easier than I expected. Even though I bought the projectors and corner lights from one dealer and the HID’s from another, everything was plug and play.
Tools Required
Phillips screwdriver
�” drive ratchet
�” drive extension 1”
�” drive extension 3”
10mm socket �” drive
7mm socket �” drive
#15 Torx driver
First turn the headlights fully on and then back one click so that the parking lights are on and the headlights stay up. Then disconnect the negative battery cable.
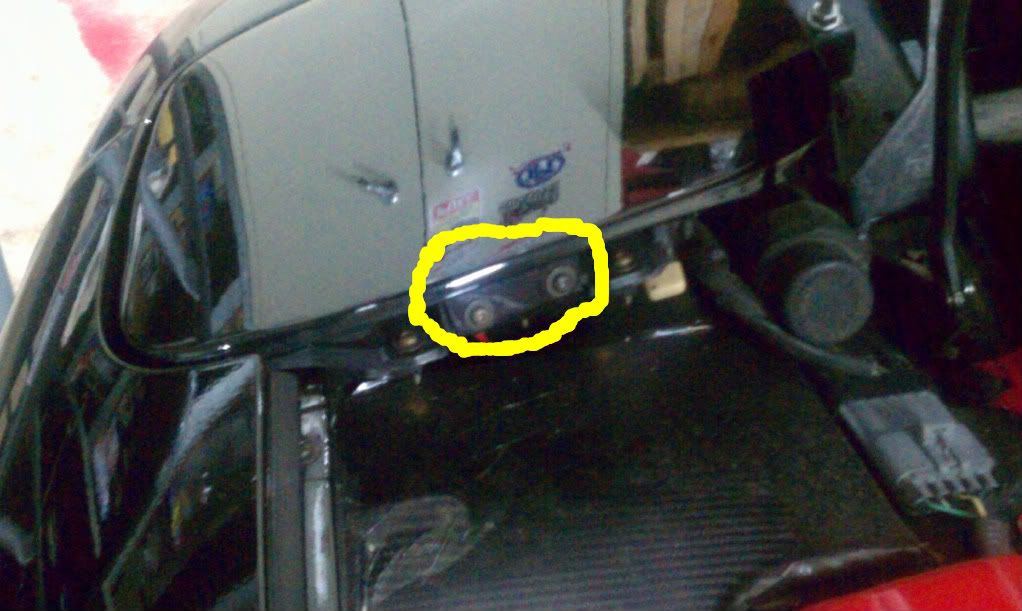
Remove the 3 screws that hold on the plastic shroud and remove the shroud. There are 2 screws on the inside and 1 on the outside.
Remove the #15 Torx screws that hold on the headlight cover and remove. There are 2 screws at the back and 1 on each side.
Remove the 4 #15 Torx screws that hold on the headlight cover bracket. Be sure to mark its location.
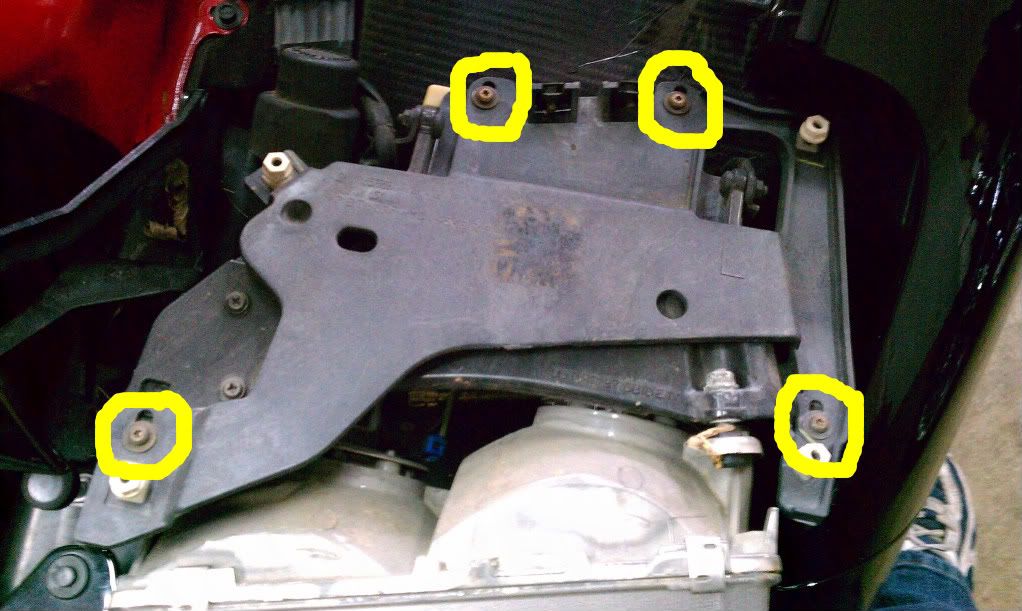
With the bracket removed...
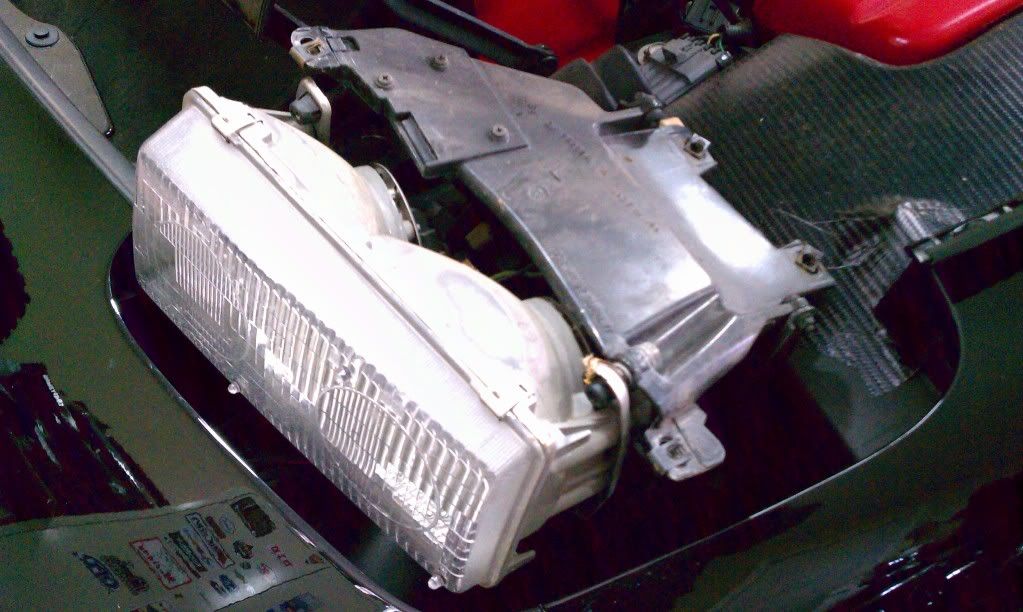
Remove the 3 10mm bolts that hold the headlight assembly to the mount…2 bolts on the outside and 1 on the inside. I used a 10mm socket, 3" extension and 1/4" drive ratchet as the bolts are recessed.
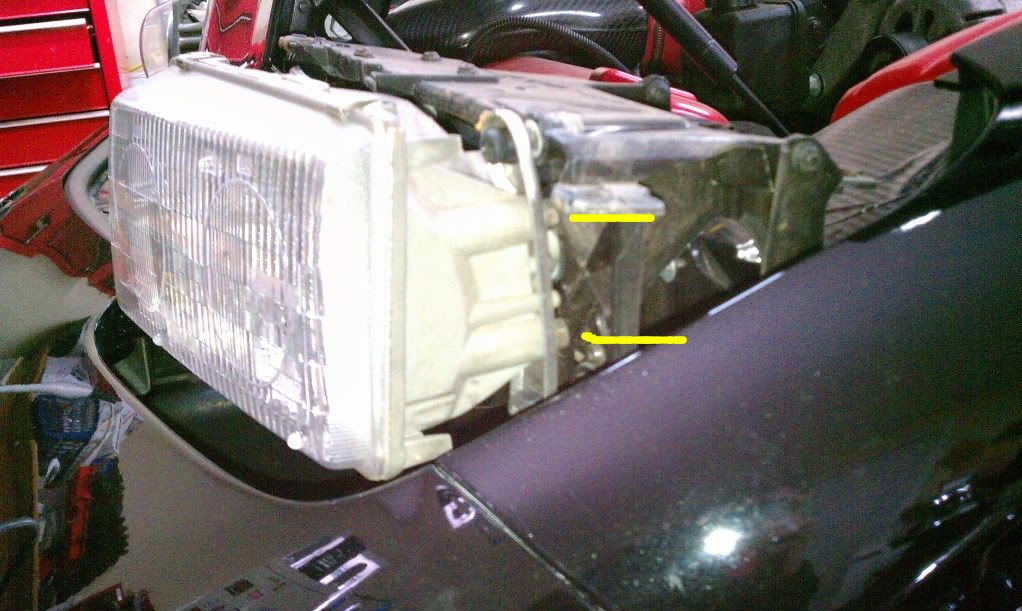
Remove the bulbs from the headloght assembly…both low and high beam and remove the headlight assembly. Then disconnect the bulbs from the wiring.
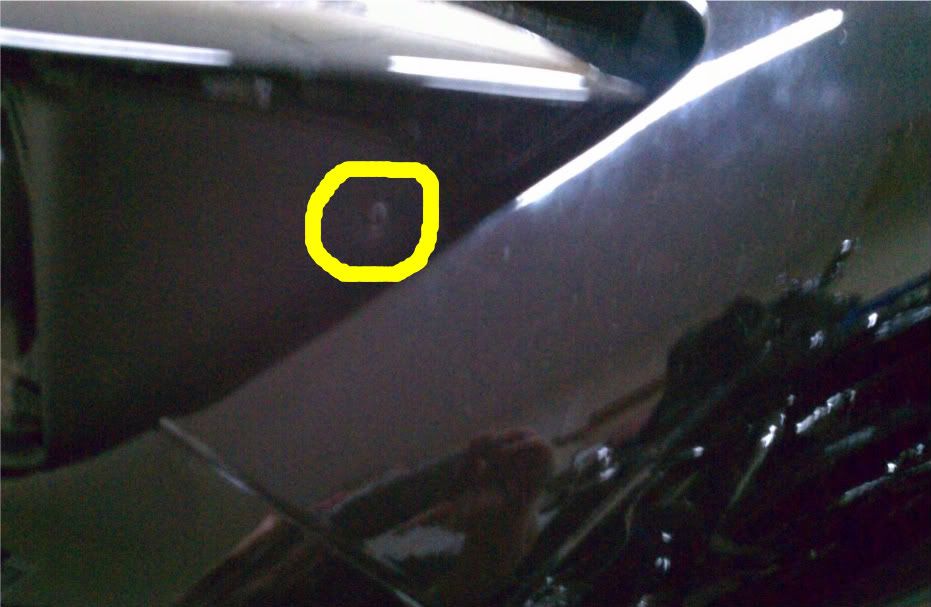
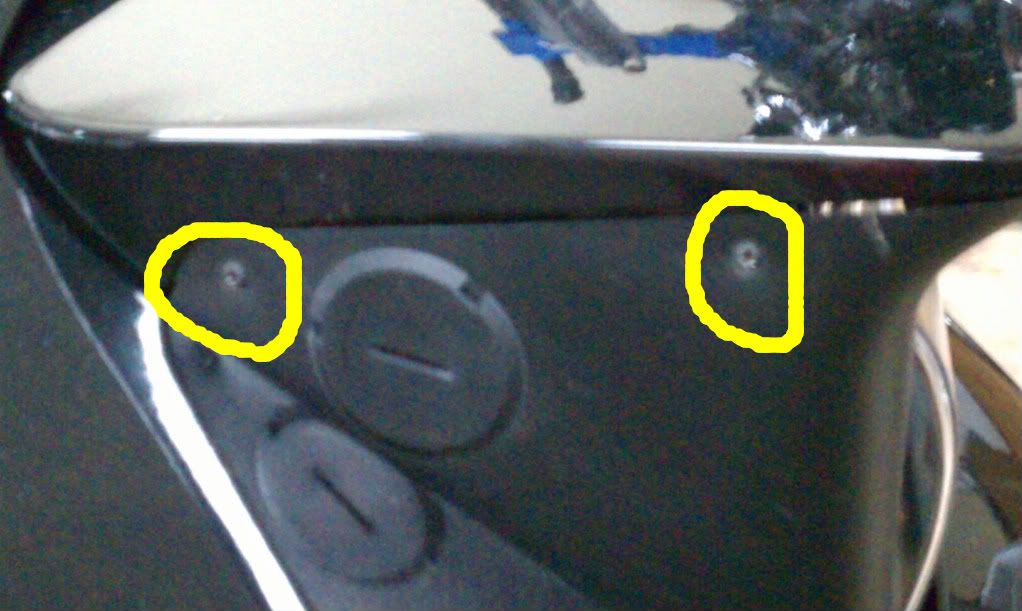
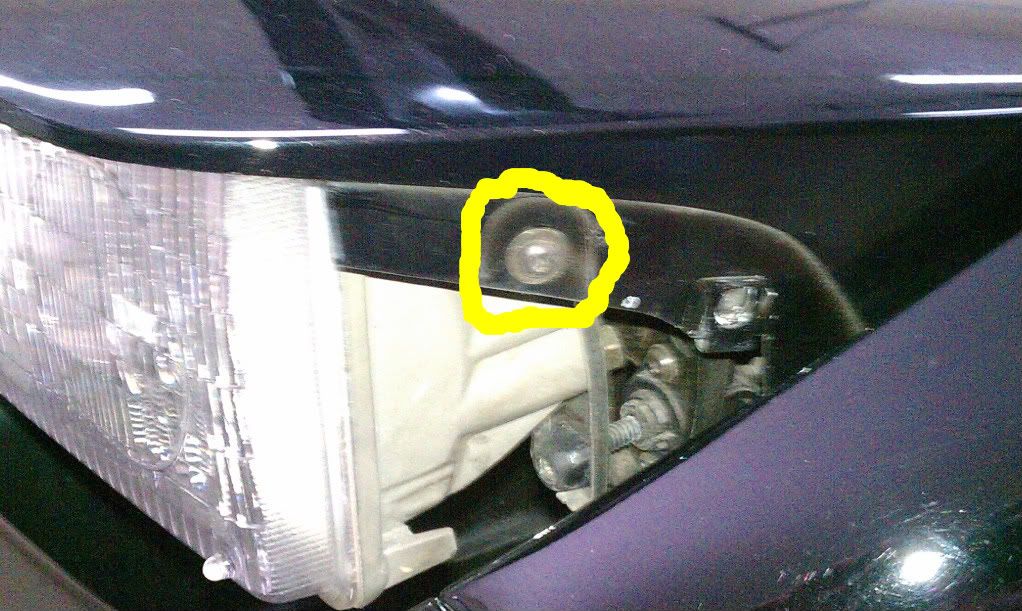
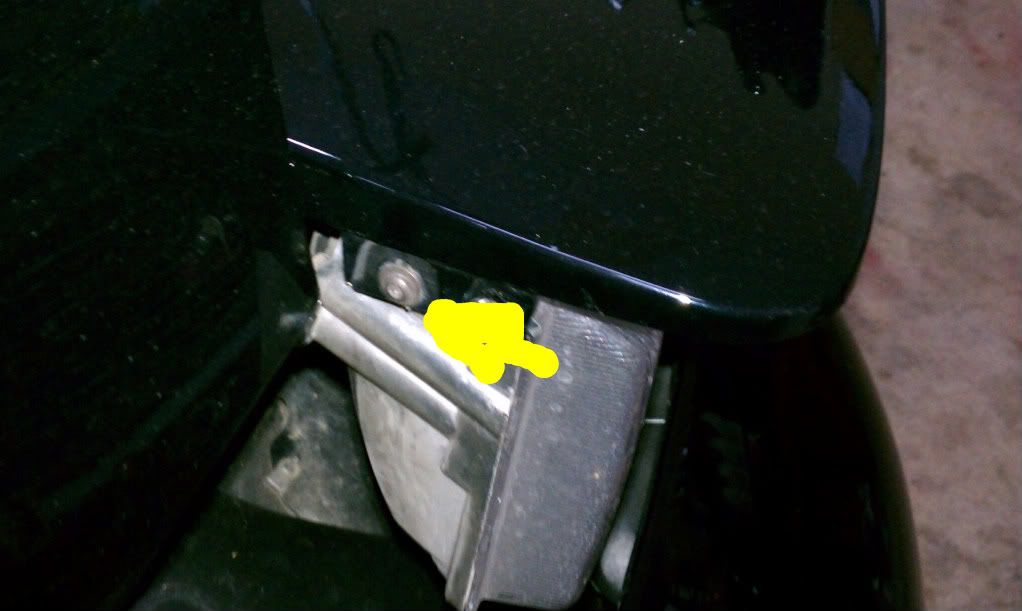
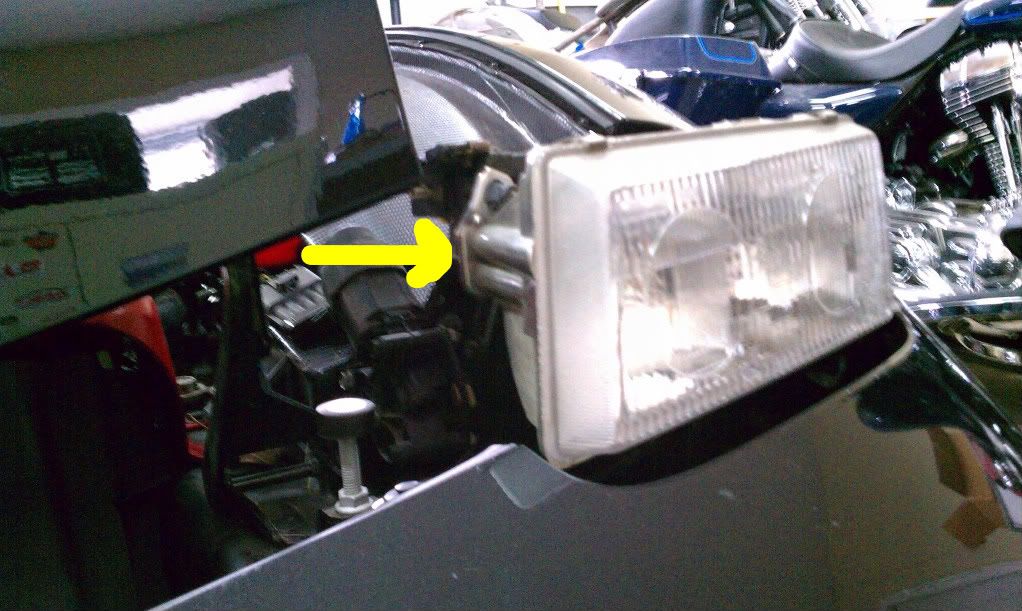
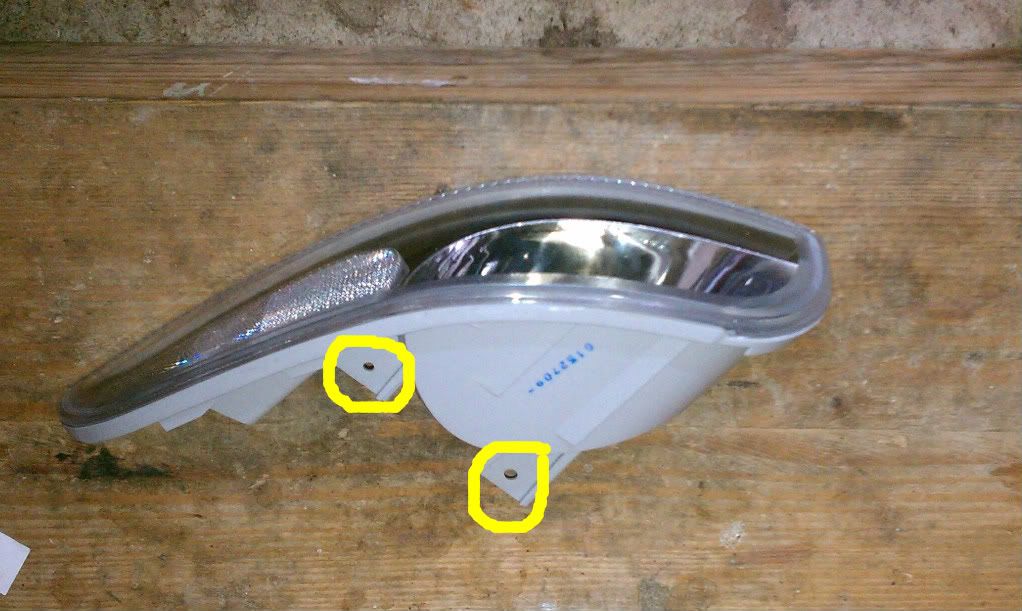
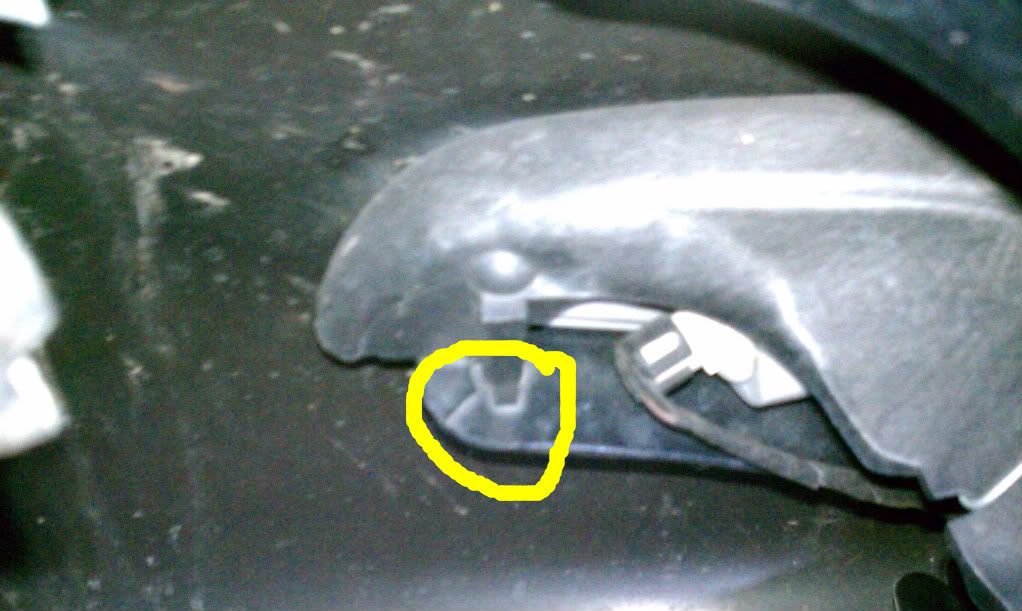
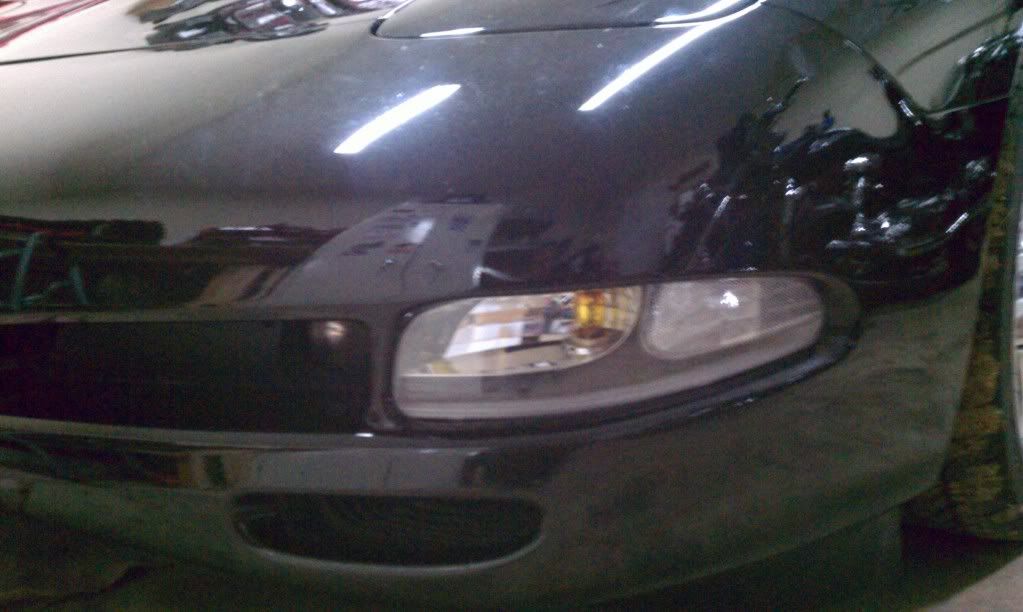
Now since the headlight assembly is out of the way, time to install the clear corner lights. There are 3 bolts that are somewhat of a pain to locate and get out since they go in from the bottom. Look at the new light and note the 2 holes, this will be where the screws are located. The 3rd bolt is near the fender. Remove it and the spring and then remove the bulbs and the corner light should come right out. Installation is the reverse. All 3 bolts are 7mm.
Here is the location of the 3rd bolt.
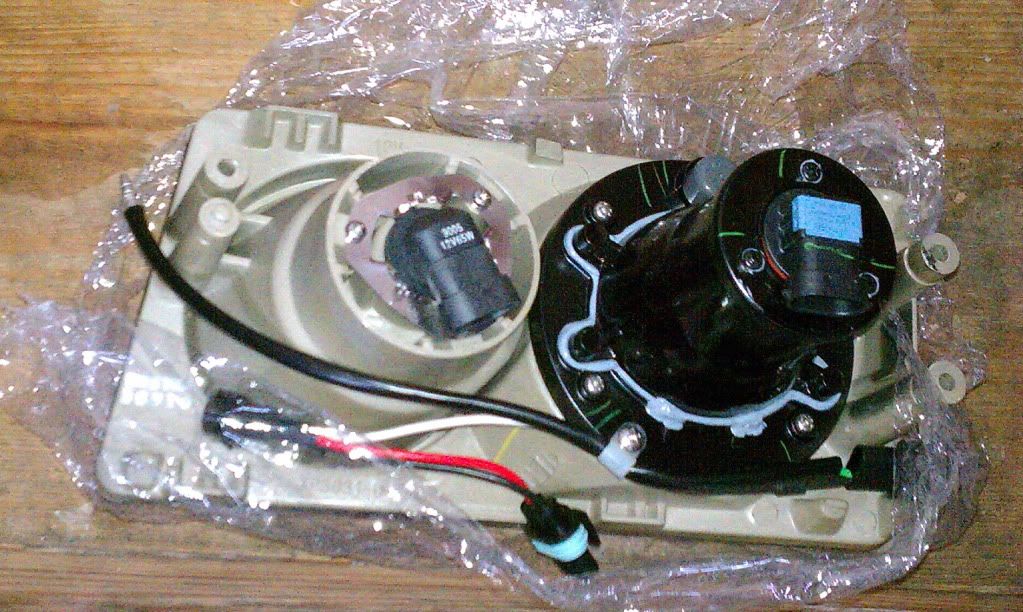
Back to the headlights. Mine came new halogen bulbs in both high and low beam. Remove the low beam and replace with the new HID bulb.

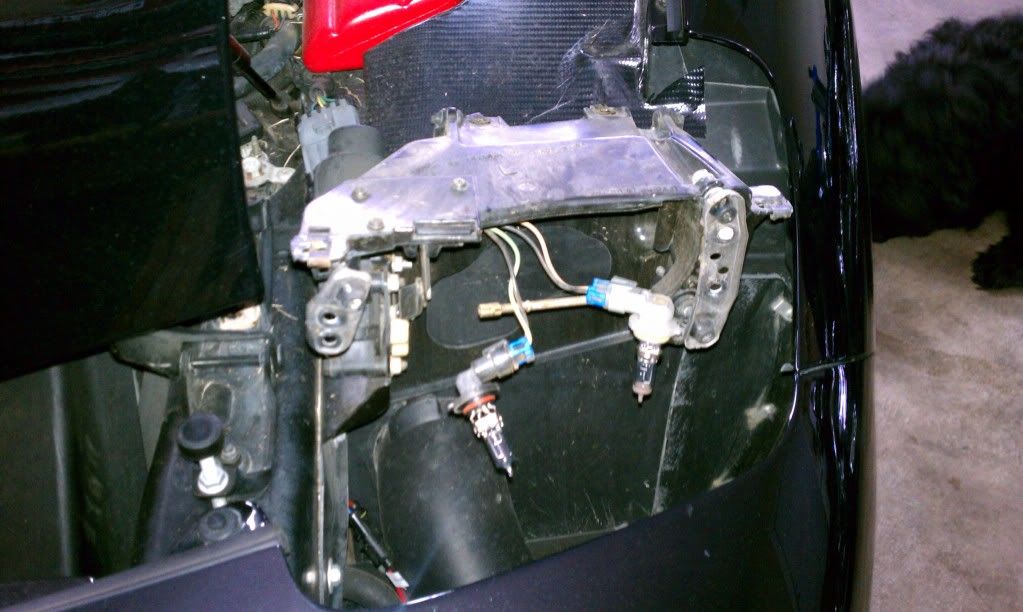
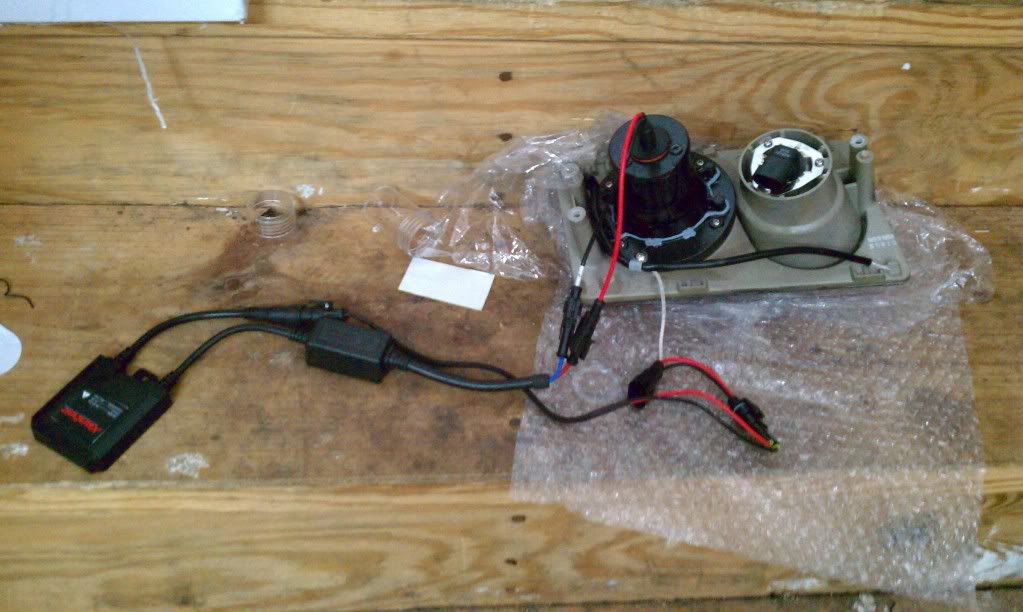
Connect the 2 wires from the bulb to the 2 wires from the ballast. They are pretty much idiot proof as the connectors can only go one way. The kit provided an extension that I used just to make sure I had plenty of length in the wiring. There was a connector on the projector assembly that was not needed. Here everything wired together ready to install.
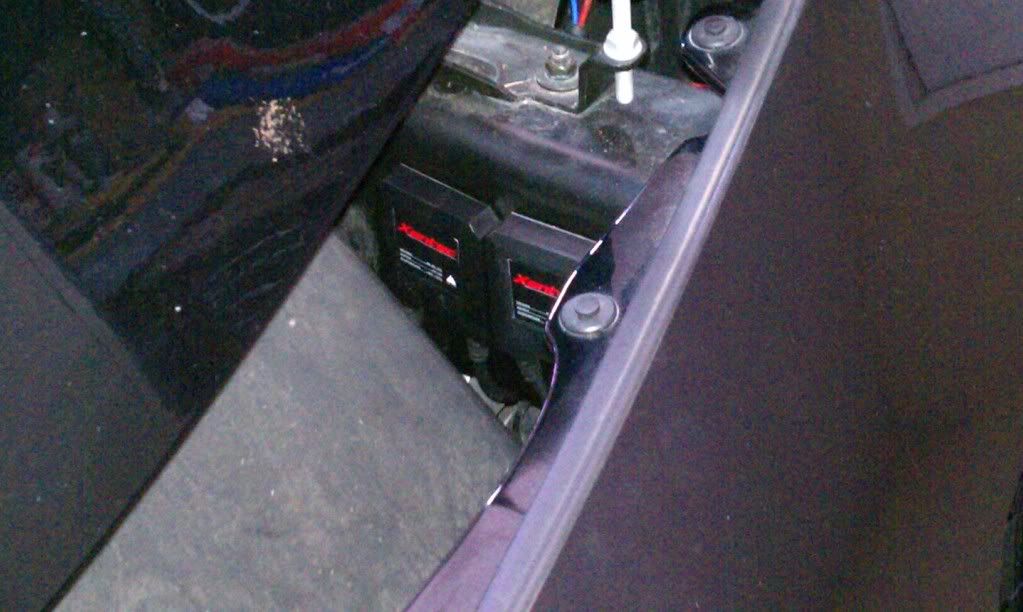
Next mount the ballast. The kit included double sided tape that I used since I didn't want to drill a hole. I mounted mine next to the ballast for the HID fogs on the inside of the rail. Do not mount the ballast on the outside of the rail, the projector assembly will hit it when it closes...Don't ask me how I know this.
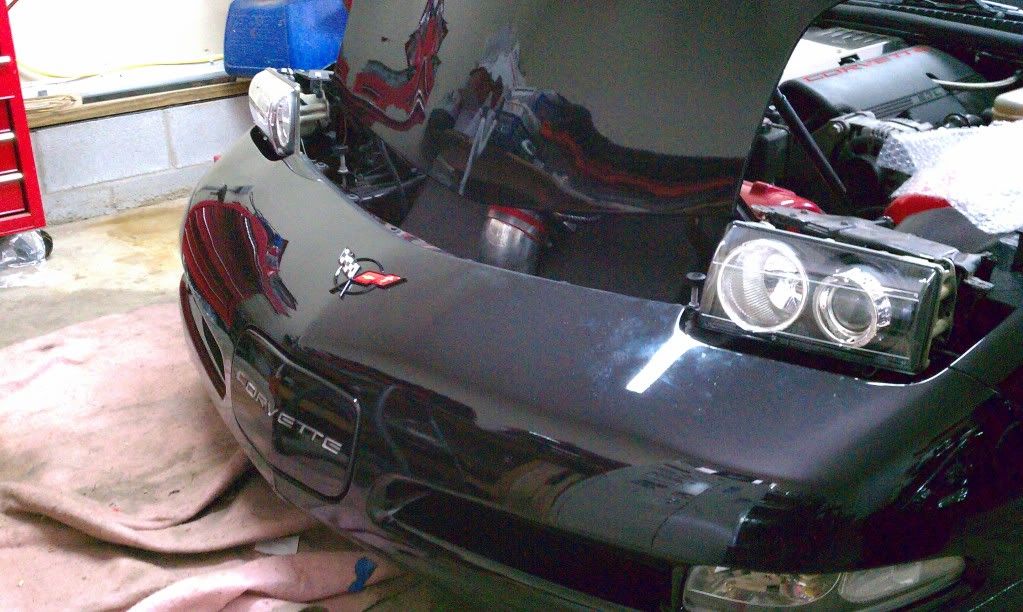
Plug in the connectors to the high beam bulb and the HID low beam. Then install the projector assembly with the 3 10mm bolts...Make sure that the "DOT APPROVED" is right side up at the bottom and not upside down on the top....I found this out the hard way...LOL
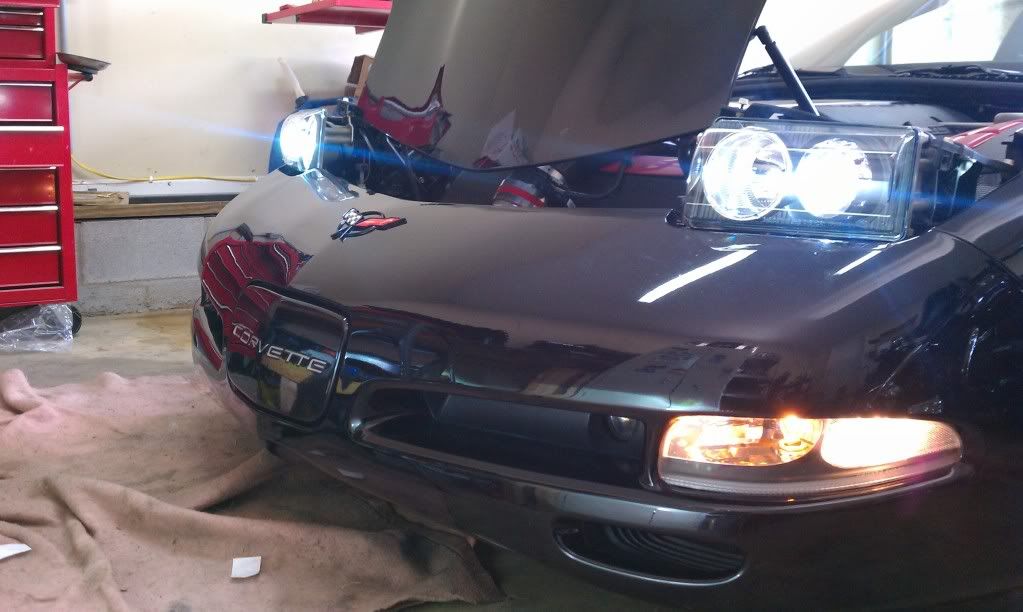
Now connect the negative terminal and start the car and test the lights.
Reinstall the cover mount bracket, the cover, and the shroud and stand back and admire!
Tools Required
Phillips screwdriver
�” drive ratchet
�” drive extension 1”
�” drive extension 3”
10mm socket �” drive
7mm socket �” drive
#15 Torx driver
First turn the headlights fully on and then back one click so that the parking lights are on and the headlights stay up. Then disconnect the negative battery cable.
Remove the 3 screws that hold on the plastic shroud and remove the shroud. There are 2 screws on the inside and 1 on the outside.
Remove the #15 Torx screws that hold on the headlight cover and remove. There are 2 screws at the back and 1 on each side.
Remove the 4 #15 Torx screws that hold on the headlight cover bracket. Be sure to mark its location.
With the bracket removed...
Remove the 3 10mm bolts that hold the headlight assembly to the mount…2 bolts on the outside and 1 on the inside. I used a 10mm socket, 3" extension and 1/4" drive ratchet as the bolts are recessed.
Remove the bulbs from the headloght assembly…both low and high beam and remove the headlight assembly. Then disconnect the bulbs from the wiring.
Now since the headlight assembly is out of the way, time to install the clear corner lights. There are 3 bolts that are somewhat of a pain to locate and get out since they go in from the bottom. Look at the new light and note the 2 holes, this will be where the screws are located. The 3rd bolt is near the fender. Remove it and the spring and then remove the bulbs and the corner light should come right out. Installation is the reverse. All 3 bolts are 7mm.
Here is the location of the 3rd bolt.
Back to the headlights. Mine came new halogen bulbs in both high and low beam. Remove the low beam and replace with the new HID bulb.
Connect the 2 wires from the bulb to the 2 wires from the ballast. They are pretty much idiot proof as the connectors can only go one way. The kit provided an extension that I used just to make sure I had plenty of length in the wiring. There was a connector on the projector assembly that was not needed. Here everything wired together ready to install.
Next mount the ballast. The kit included double sided tape that I used since I didn't want to drill a hole. I mounted mine next to the ballast for the HID fogs on the inside of the rail. Do not mount the ballast on the outside of the rail, the projector assembly will hit it when it closes...Don't ask me how I know this.
Plug in the connectors to the high beam bulb and the HID low beam. Then install the projector assembly with the 3 10mm bolts...Make sure that the "DOT APPROVED" is right side up at the bottom and not upside down on the top....I found this out the hard way...LOL
Now connect the negative terminal and start the car and test the lights.
Reinstall the cover mount bracket, the cover, and the shroud and stand back and admire!
 01-08-2011, 08:46 PM
#2
Tech Contributor

Very nice ! 
I installed thoes lights, and clear corners too ! I put switchbacks in my clear corners though.
Toque
I installed thoes lights, and clear corners too ! I put switchbacks in my clear corners though.
Toque


 01-08-2011, 09:41 PM
#8
Race Director


Member Since: Jul 2008
Location: The Sunshine State
Posts: 17,008
Received 2,685 Likes
on
1,484 Posts
2022 C5 of the Year Finalist - Modified
2021 C5 of the Year Finalist - Modified
C7 of the Year - Modified Finalist 2021
Finalist 2020 C7 of the Year -- Modified
2020 C5 of the Year Finalist - Modified
C5 of Year Finalist (appearance mods) 2019
2018 C5 of Year Finalist

Nice job! I did the same installation last spring. I'm surprised the ballasts worked at that location. I had mine there originally, however I thought the light housings would hit them on the way down.
01-08-2011, 09:43 PM
#9
Racer
 01-08-2011, 10:15 PM
#10
Team Owner

Those look fantastic - that is the same I am going to do to my Vette
Tagging for future reference
Thanks,Matt
Tagging for future reference
Thanks,Matt
01-08-2011, 11:19 PM
#11
Le Mans Master

I installed by ACA knock offs last summer with 55 watt 6K HID's and fogs, what a difference, I know throughly enjou driving the car with more confidence at night. I just purchased the 6K high beams, not that I need them but, I don't like the differnt colored lighting comming off them.

 01-09-2011, 12:08 PM
#14
Le Mans Master
But when ACAs were still selling they came with original Phillips ballasts, bulbs, and wiring harness.

 01-09-2011, 12:11 PM
#16
Advanced
Thread Starter
Member Since: Jun 2010
Location: Lebanon Tennessee
Posts: 70
Likes: 0
Received 0 Likes
on
0 Posts
they will hit if they are on the outside of the frame rail...i have mine on the inside of theframe rail above the radiator
01-09-2011, 06:50 PM
#17
Racer
So the projector kit was just the housings and harness and didn't come with any HIDs or bulbs at all? Then you added your own HIDs and ballasts?
Last edited by SugarDemon; 01-09-2011 at 06:57 PM.