When you click on links to various merchants on this site and make a purchase, this can result in this site earning a commission. Affiliate programs and affiliations include, but are not limited to, the eBay Partner Network.
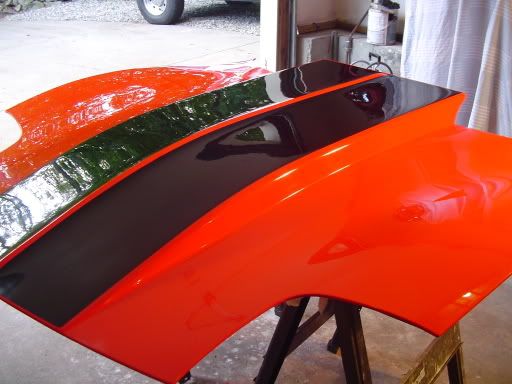
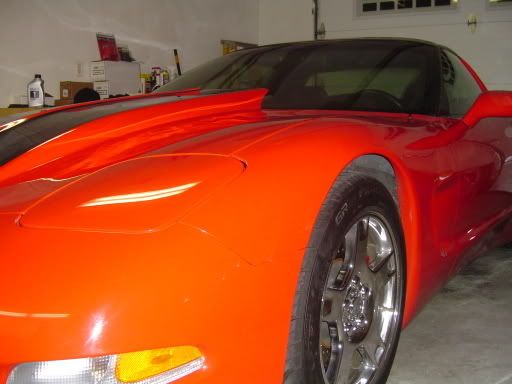
Took out my center console from my 2007 Corvette and sanded it down. I used $8 can of auto spray paint from Autozone and clear coated it. Took me about 5 hours altogether.
I like that. Would look nice on a vert with the water fall. I would do that except mine is an 08 and has the CF look.
I sprayed them down with brake cleaner then used some fine scotch brite pads "GRAY ONES" and rubbed them all down "Front, back and hubs" I then used some fine steel wool and hit the front and back where the pad makes contact and wiped them all down with lacquer thinner to degrease them. I masked of the pad contact area on the front with painters tape leaving the rotor hat exposed and sprayed it with about 3 coats of Satin Black VHT caliper paint Pulled the tape and let it dry. Came out looking like money ... Took about 30 mins a rotor, Most of time is spent getting a good radius on the rotor with the tape so It looks factory painted...
Hockey pucks from Dick's sporting goods - $1.99 each
Eye bolts from Home Depot - $0.63 each
Eye bolt dimensions 5/16" X 3-1/4"
Drill a 1/4" hole near center
Home Depot actually cut the bolts to length for free in the rental section.
I guessed on length because I didn't want excess sticking out the bottom interfering with a jack or stand.
Twist the eyebolt into the hole and adjust accordingly. These actually twist into the frame and will hang in place all by themselves.
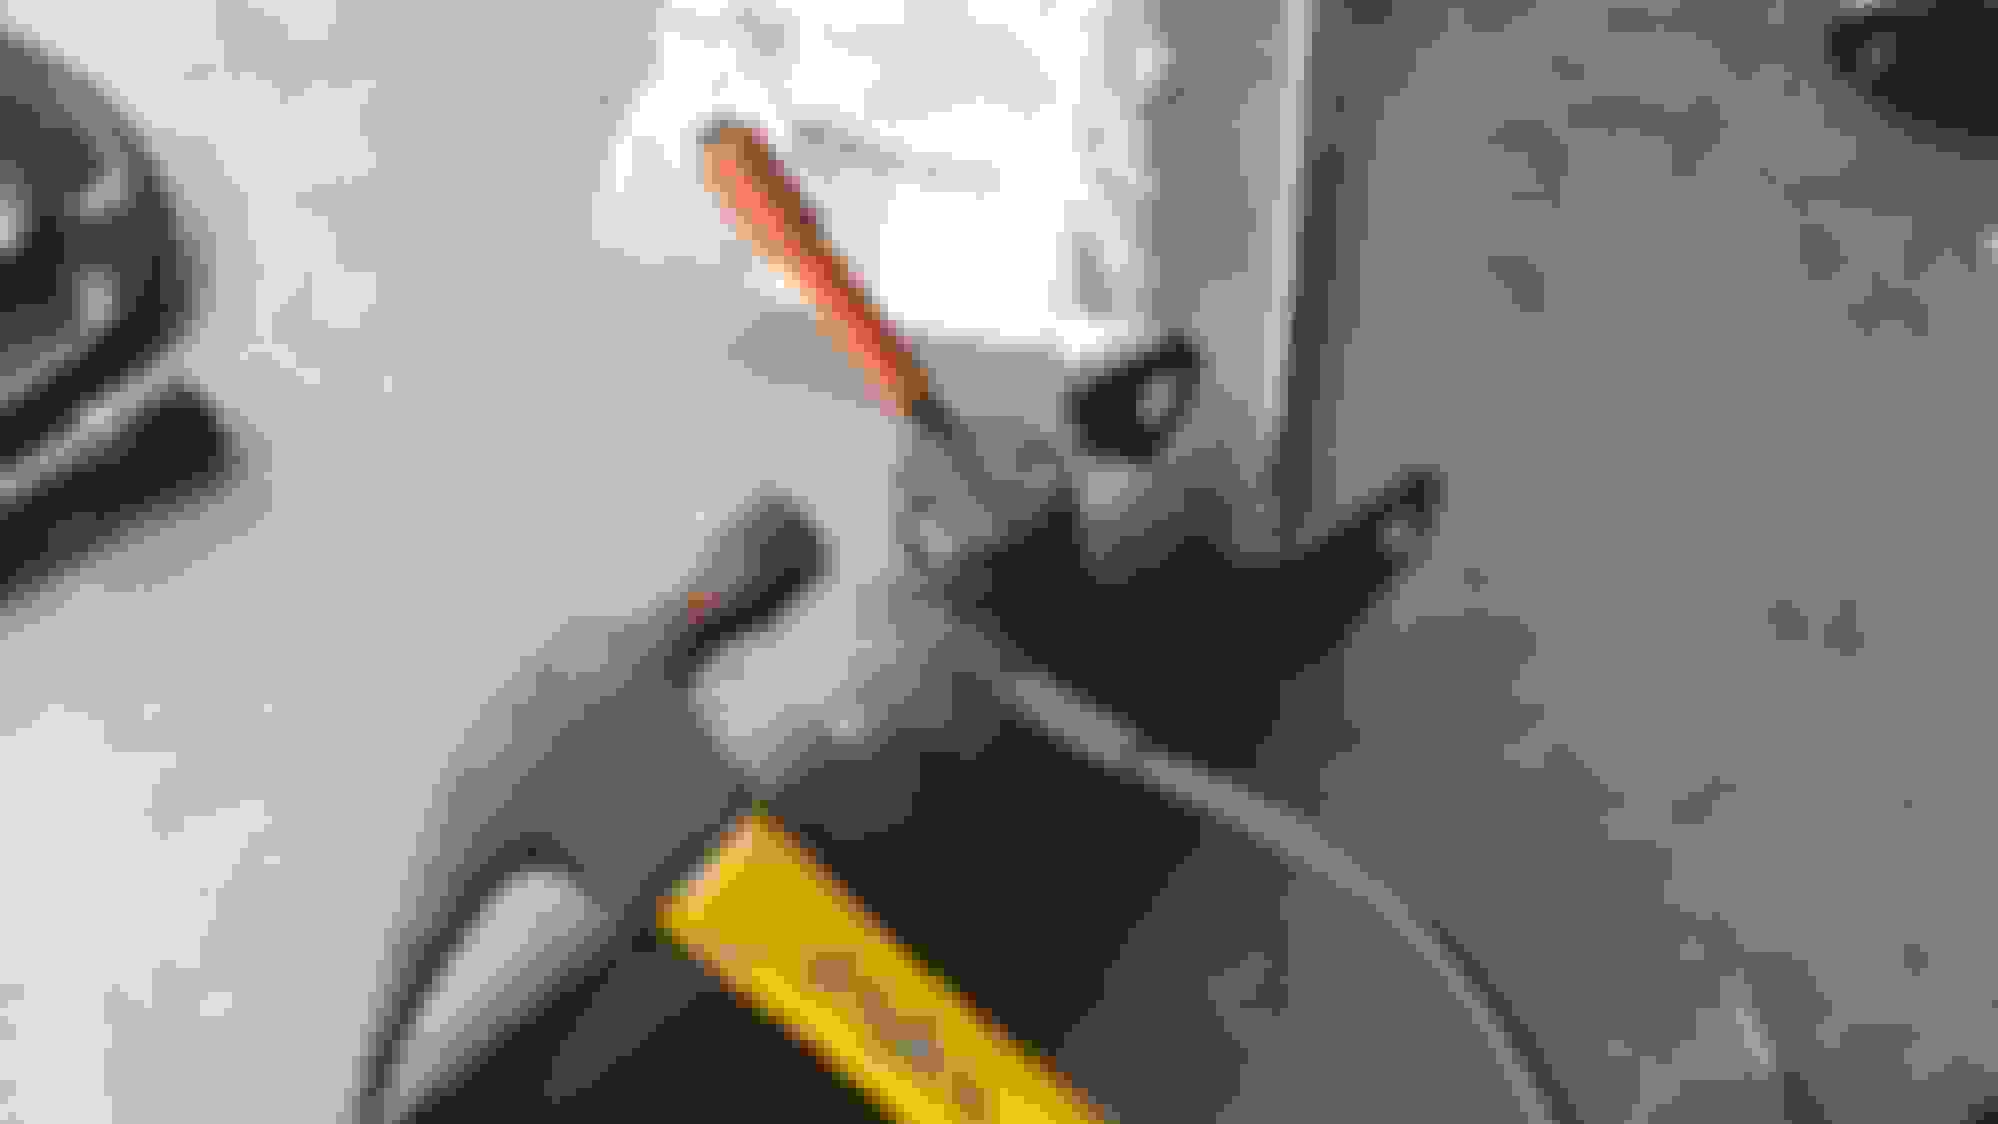
and you take a punch or screwdriver and hit the holes in a counter clockwise position and it starts to unscrew. It took me a few wacks for it to break free. Unscrew it and wiggle the sensor out.You may have to pop that piece to the right off with a flat head. I did...
Once your done just plug it back up and ziptie the wires out of the way. You can actually attach the sensor rubber piece on the side of the brake line where you popped the other part off its a perfect fit. I have no codes and I sat there for 30 minutes unhooking it and hooking it up to see if it would throw any codes. the only time it did was when I disconnected it from the harness. SO I am a happy camper..
Picture tells all ,used the same touch up paint as for my water tanks and rad. support. In
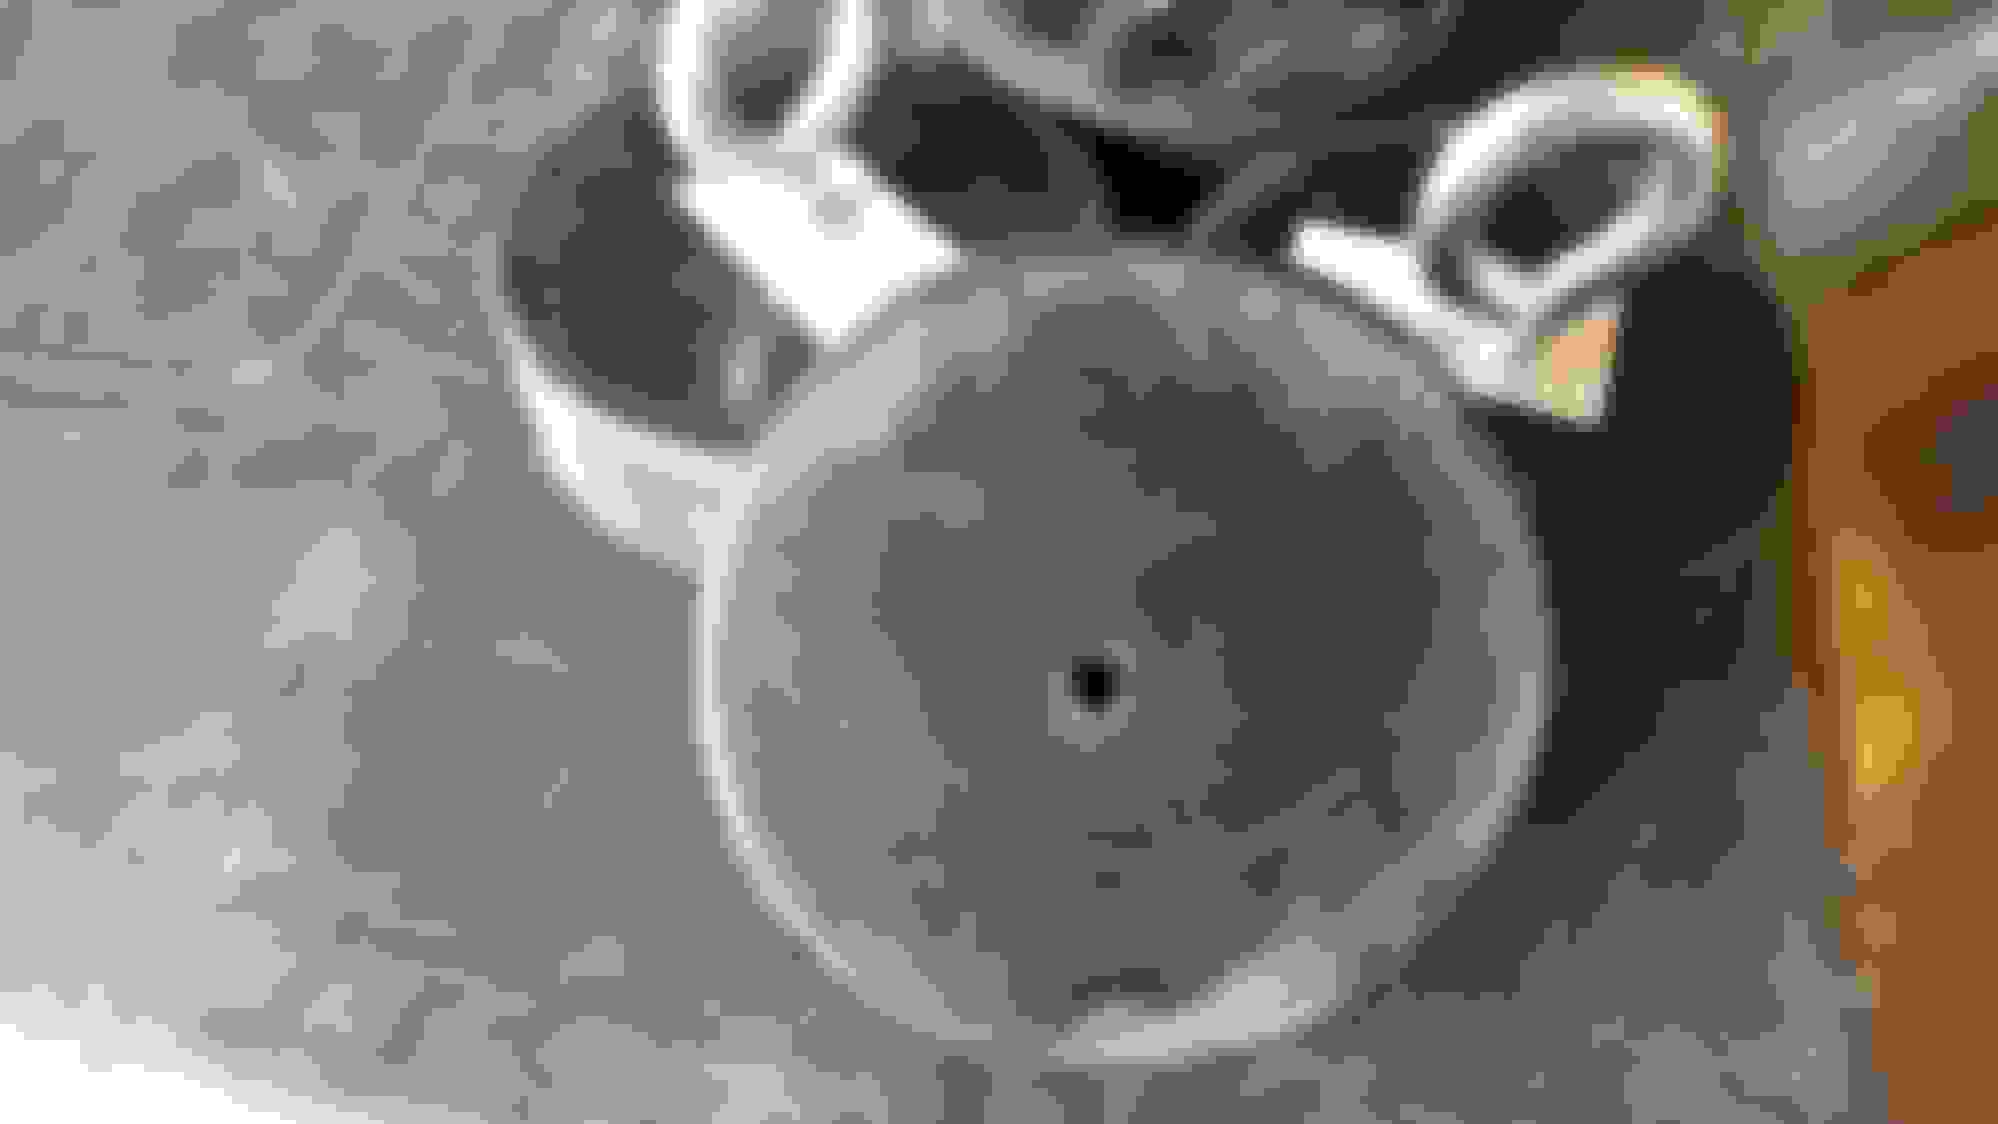
case you don't know what these are -----golf ball markers, free by the hand full. You have to find the ones with a thick stem.
the spring loaded door on the key hole holds them in, once they are in just a little turn to the right and they seat flush. The ones I used even had a little chamfer on them so they fit tight .
Picture tells all ,used the same touch up paint as for my water tanks and rad. support. In
case you don't know what these are -----golf ball markers, free by the hand full. You have to find the ones with a thick stem.
the spring loaded door on the key hole holds them in, once they are in just a little turn to the right and they seat flush. The ones I used even had a little chamfer on them so they fit tight .
where did you get them? I don't golf and I assume your car is quicksilver?
where did you get them? I don't golf and I assume your car is quicksilver?
It is Sebring Silver Metallic, I don't know where you are, but everywhere in Michigan any golf course club shop has bowls full of them, any where I have gone they are free !!!!!
It is Sebring Silver Metallic, I don't know where you are, but everywhere in Michigan any golf course club shop has bowls full of them, any where I have gone they are free !!!!!
If you need to remove them , do they come out easy ?
and you take a punch or screwdriver and hit the holes in a counter clockwise position and it starts to unscrew. It took me a few wacks for it to break free. Unscrew it and wiggle the sensor out.You may have to pop that piece to the right off with a flat head. I did...
Once your done just plug it back up and ziptie the wires out of the way. You can actually attach the sensor rubber piece on the side of the brake line where you popped the other part off its a perfect fit. I have no codes and I sat there for 30 minutes unhooking it and hooking it up to see if it would throw any codes. the only time it did was when I disconnected it from the harness. SO I am a happy camper..
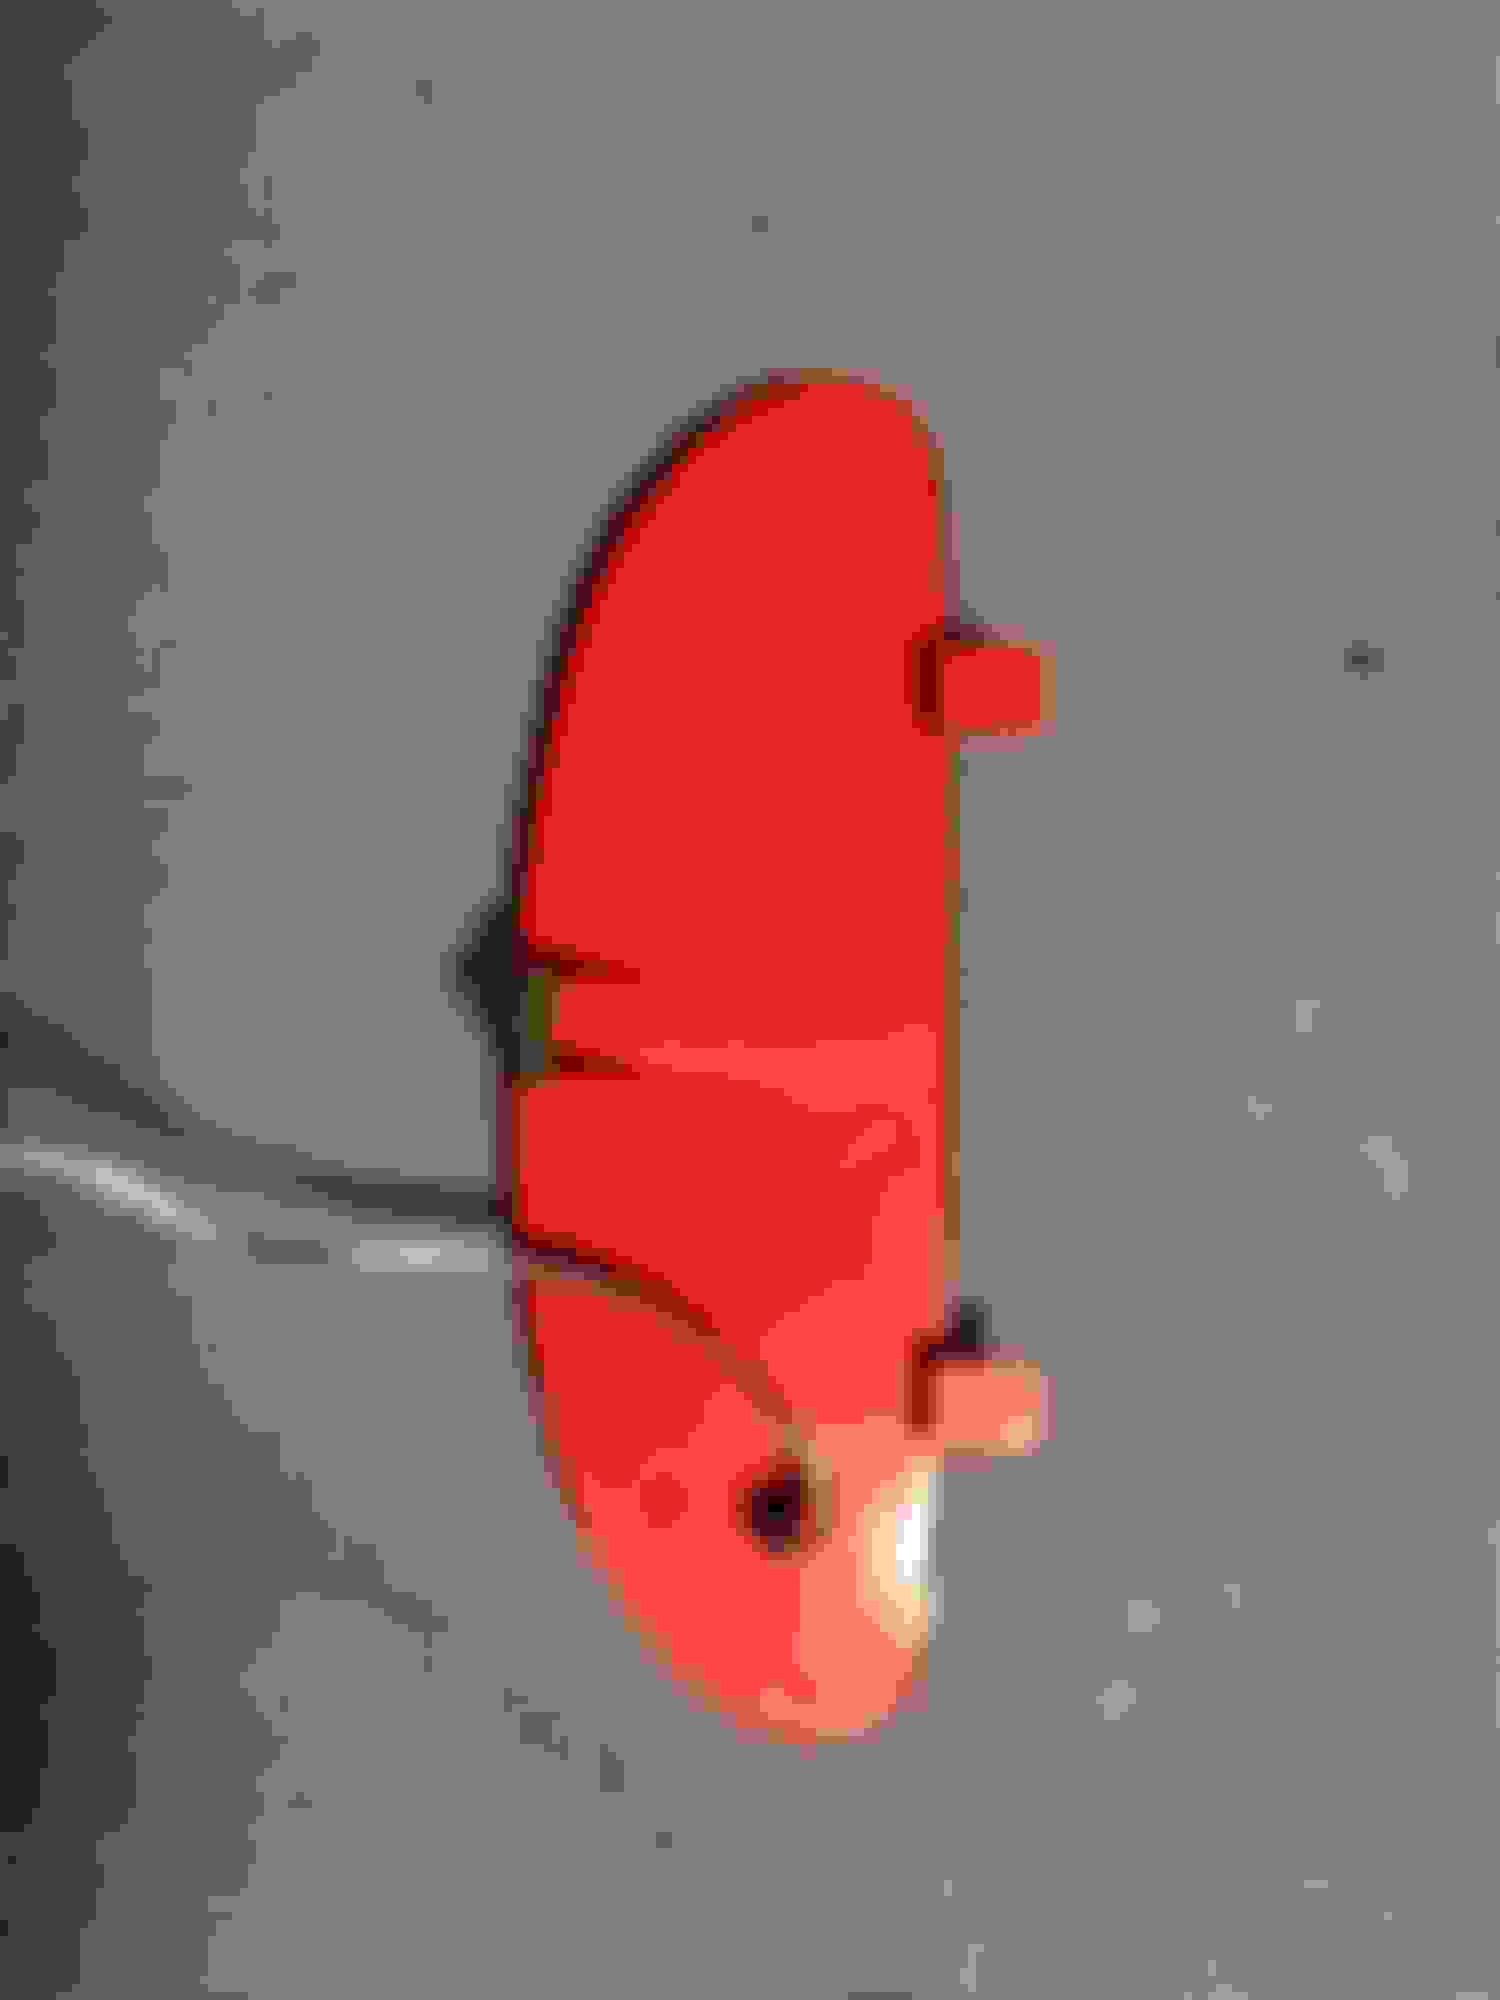
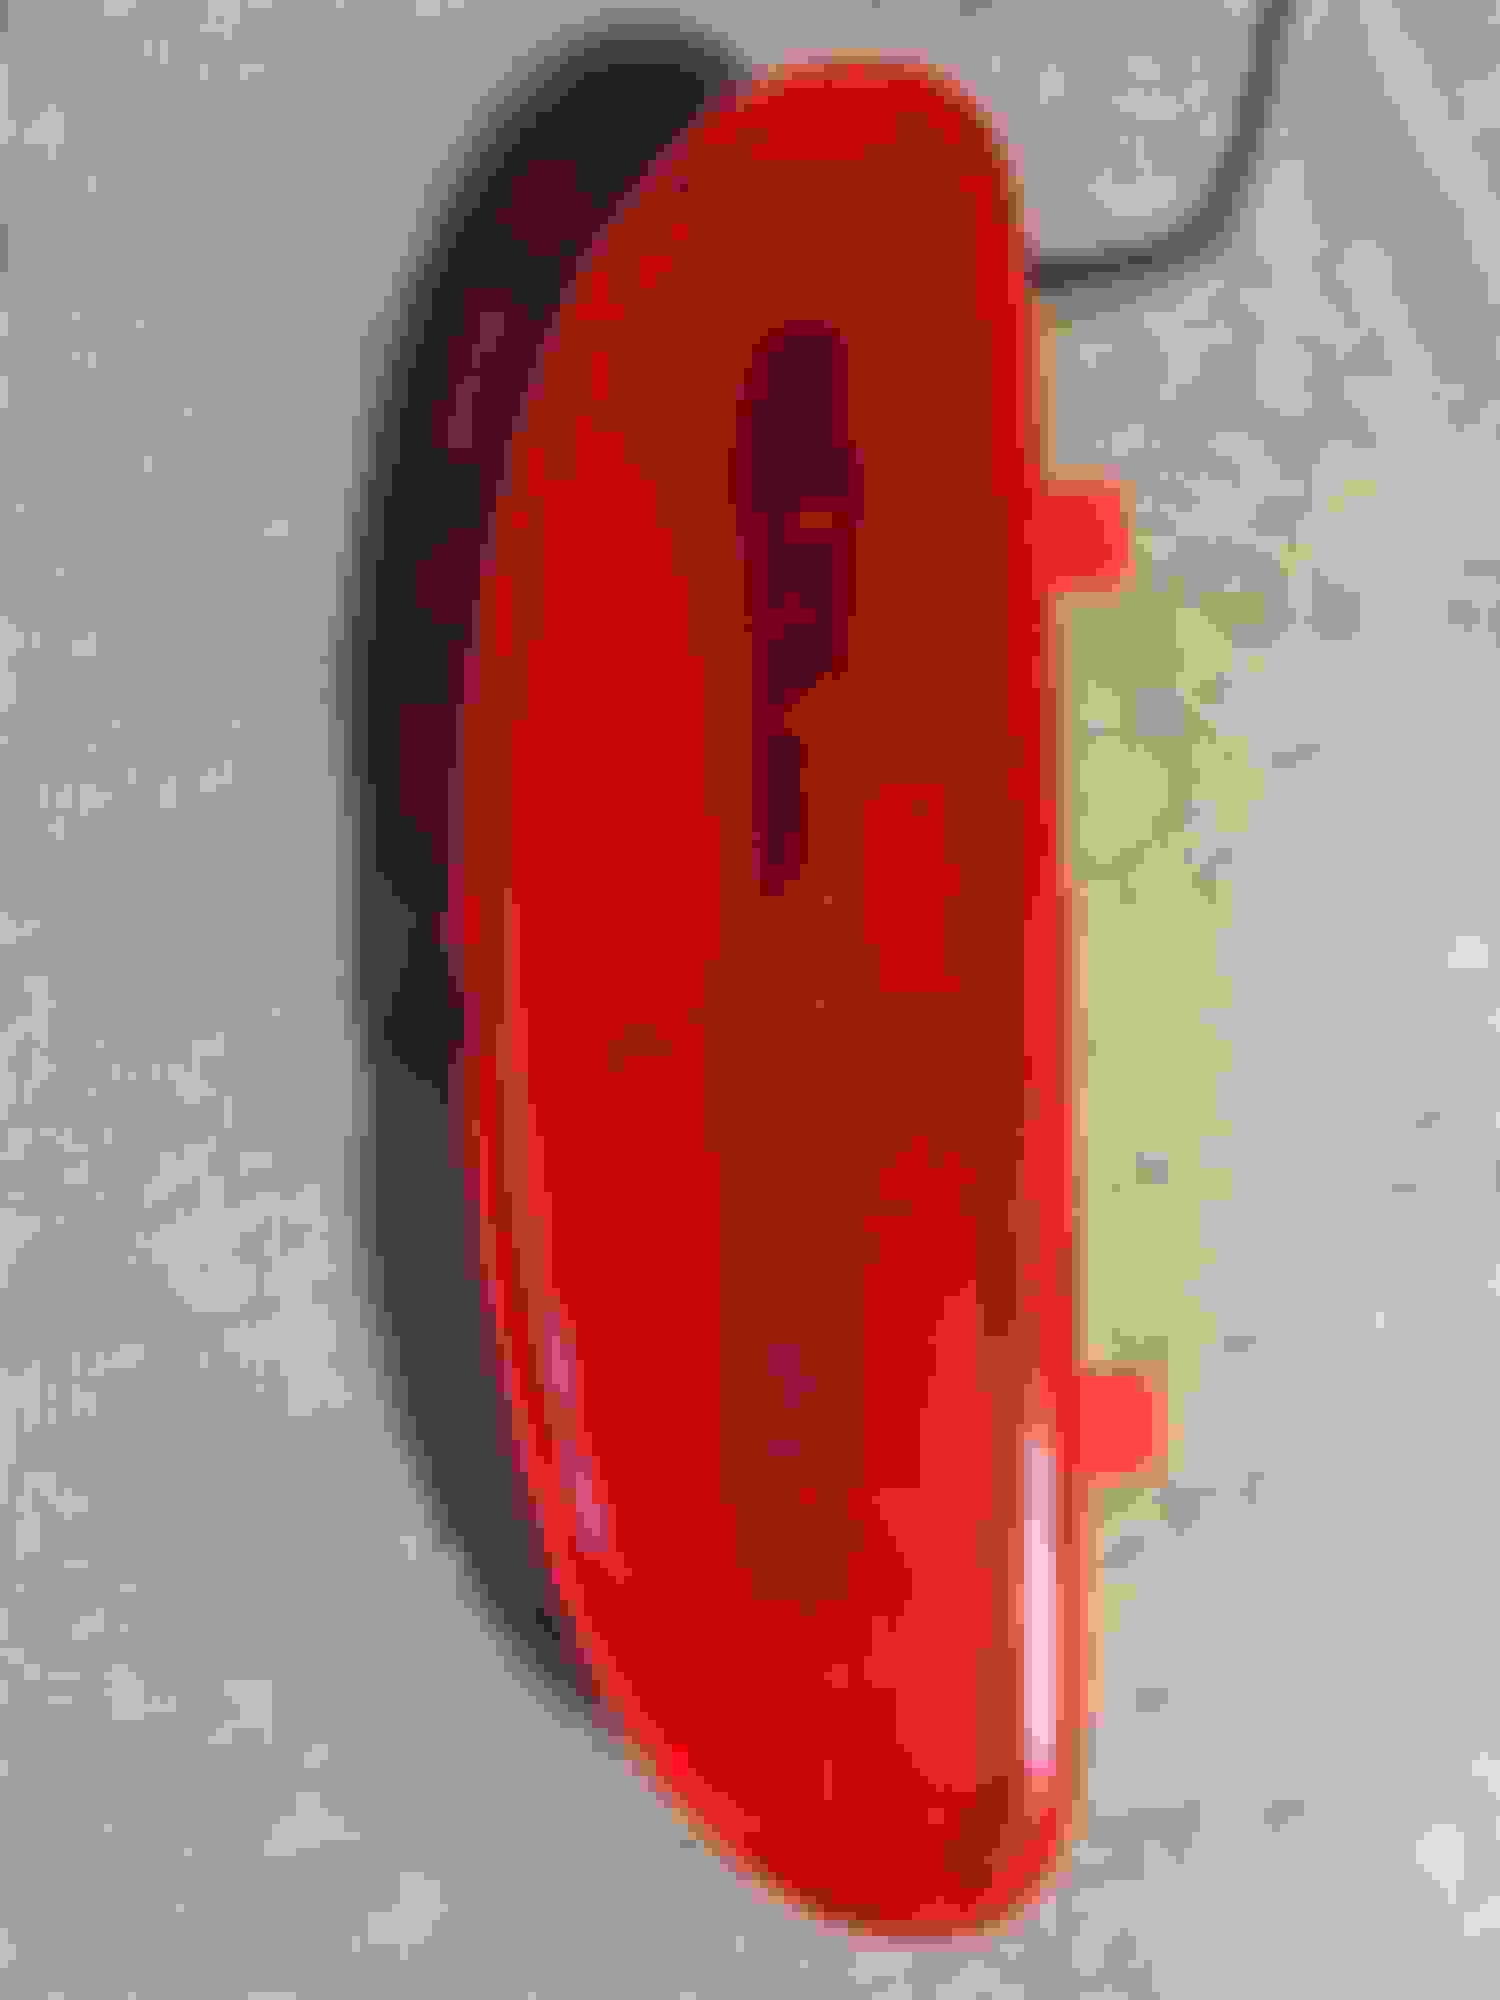
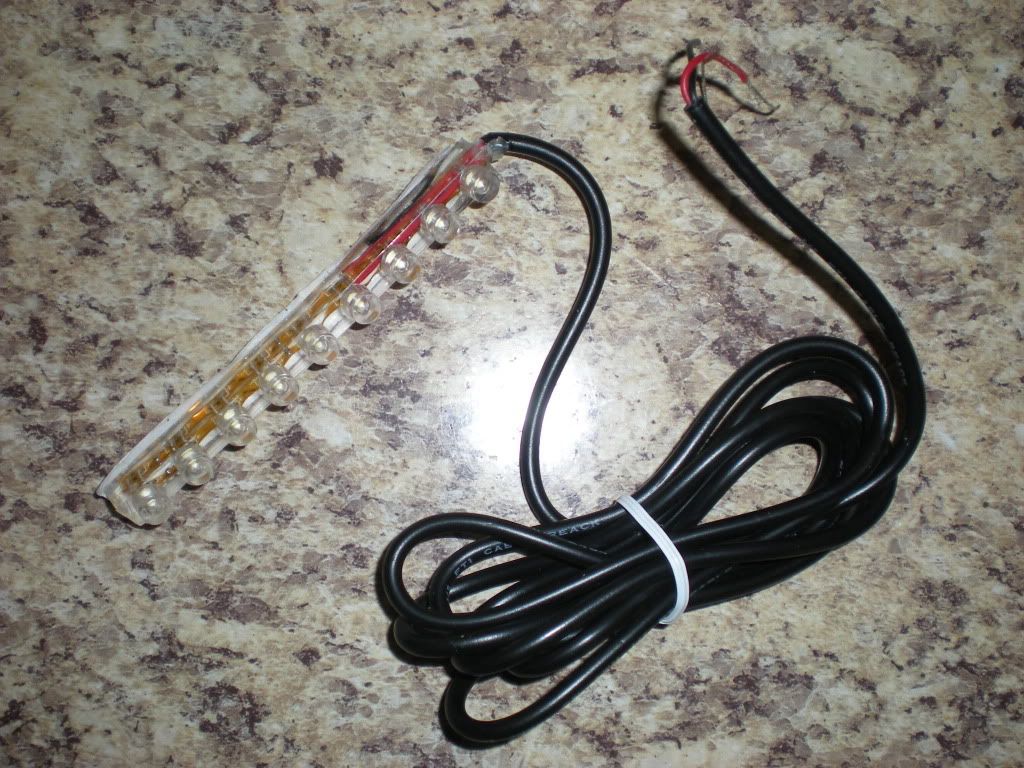
When I added my ghost lights, ($20.00 eBay) I took the door reflectors out popped them apart then placed a small led strip inside. Then used silicone to reseal them. I wired them to the footwell lights.
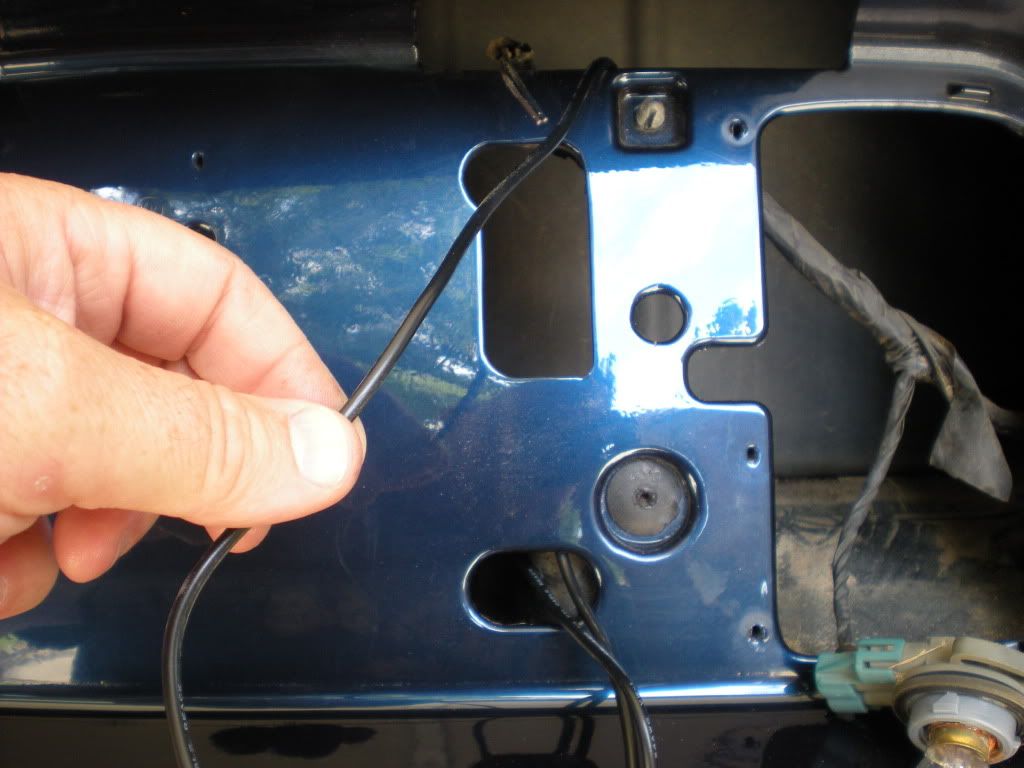
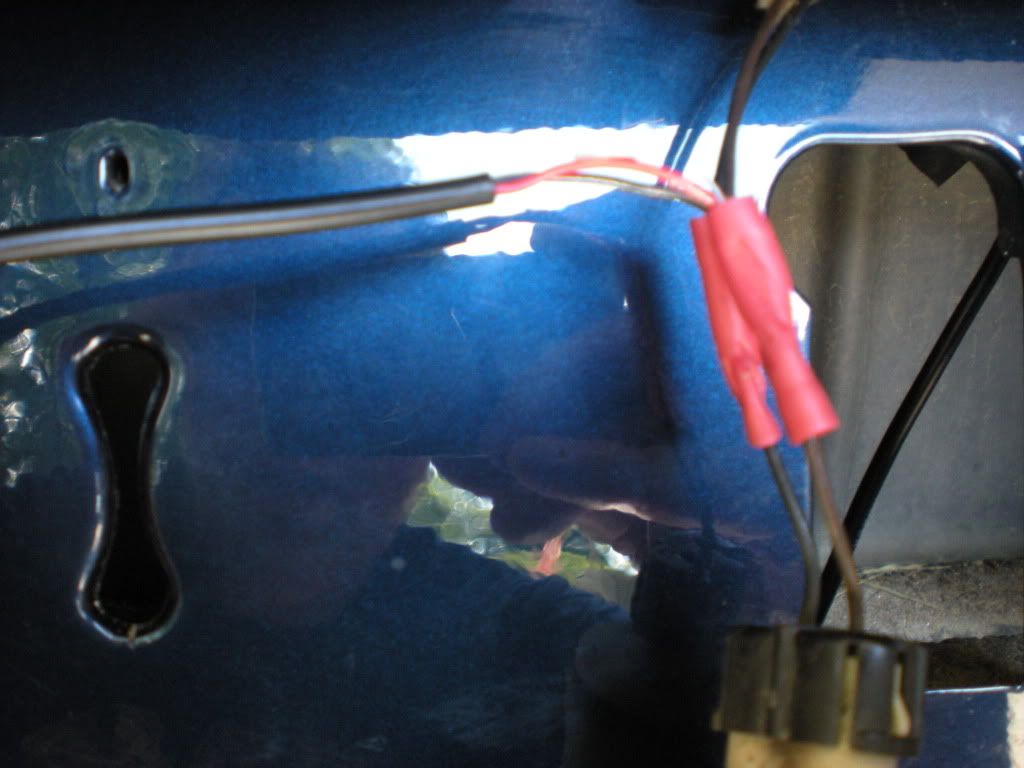
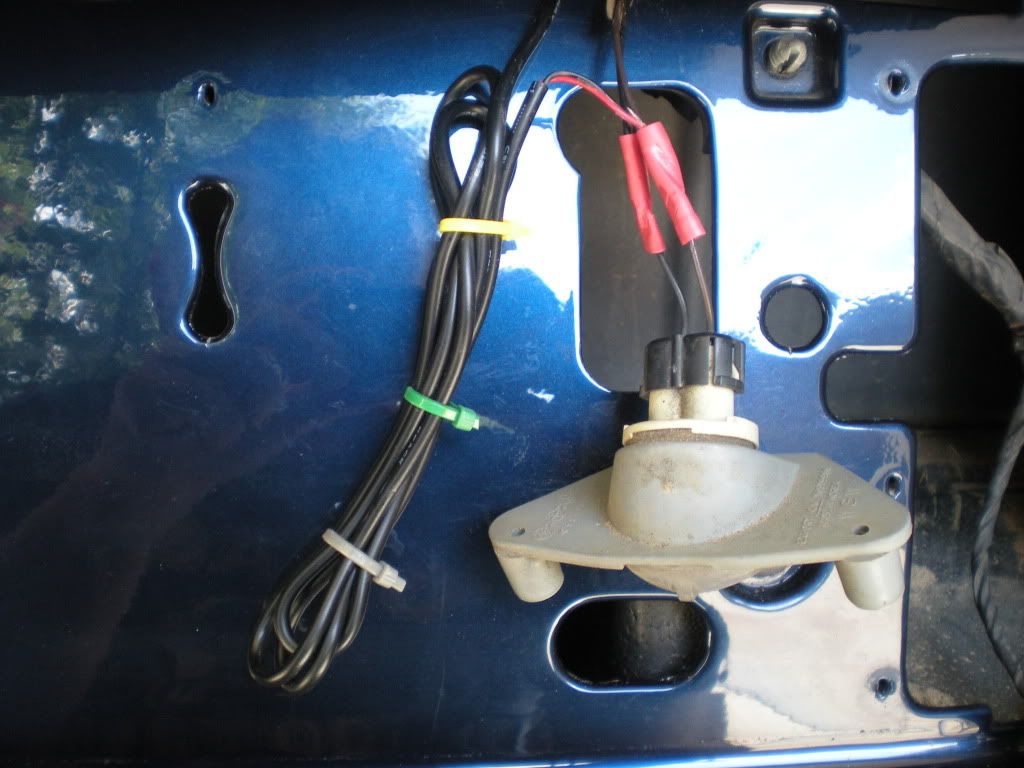
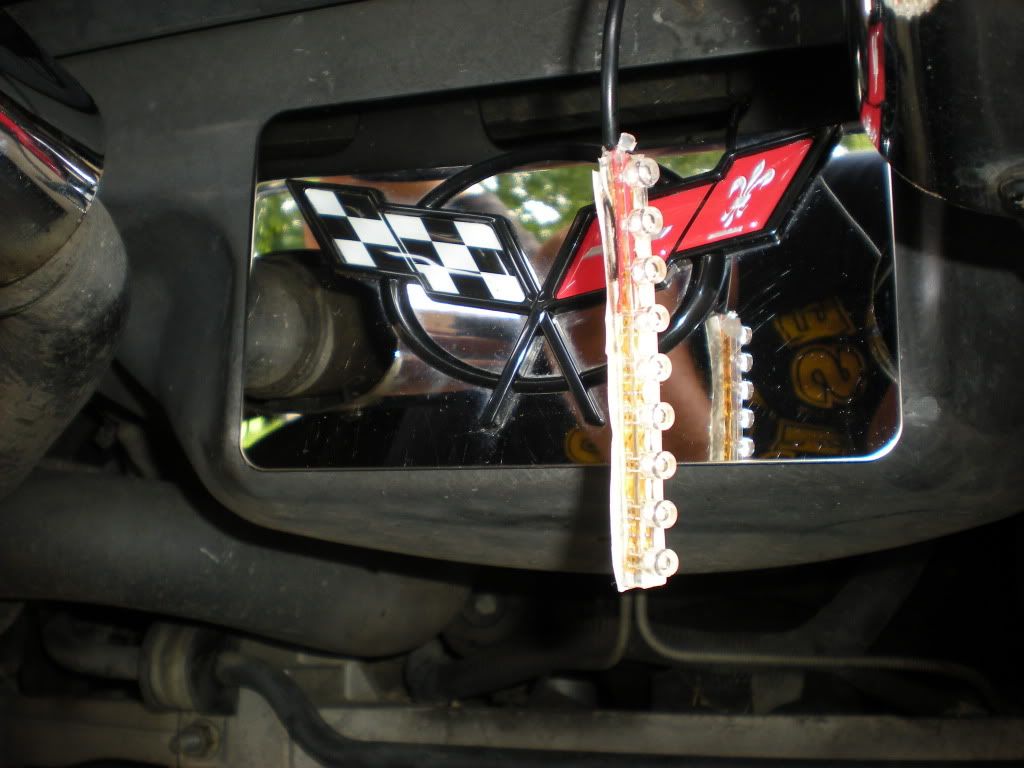
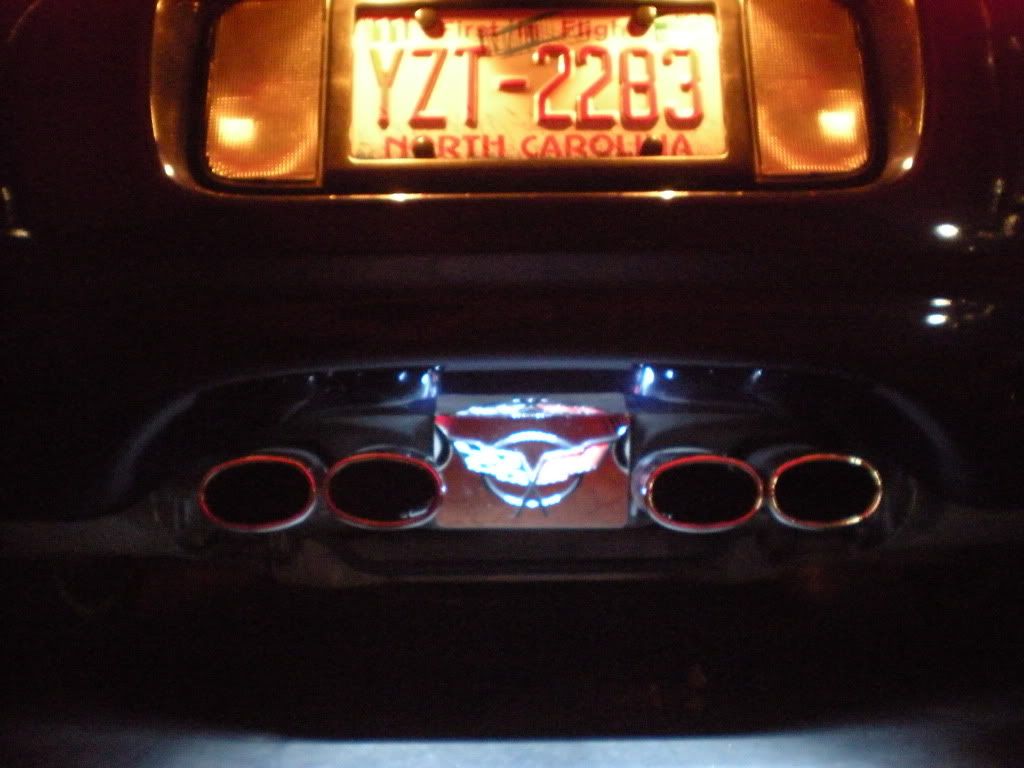
Heres another one I did recently for less than $10. It lights up the area where most of us put the chrome cover for the fuel tank between the exhaust.
Here goes, hope you enjoy!!
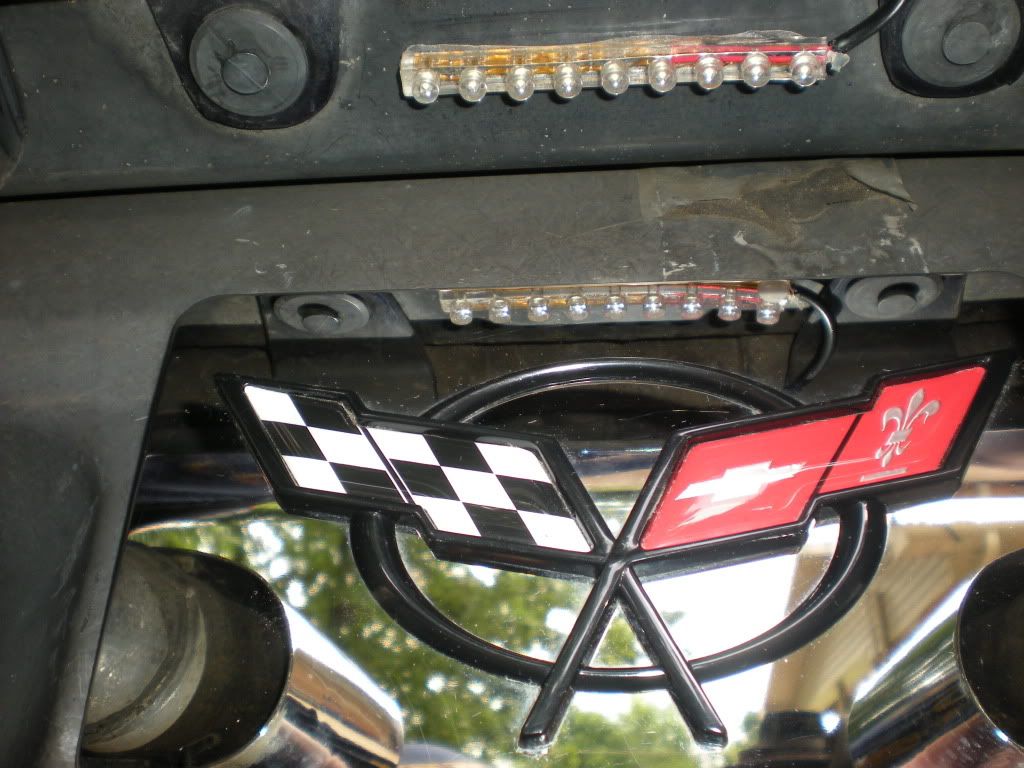
Here is the lights as they come out of the pack
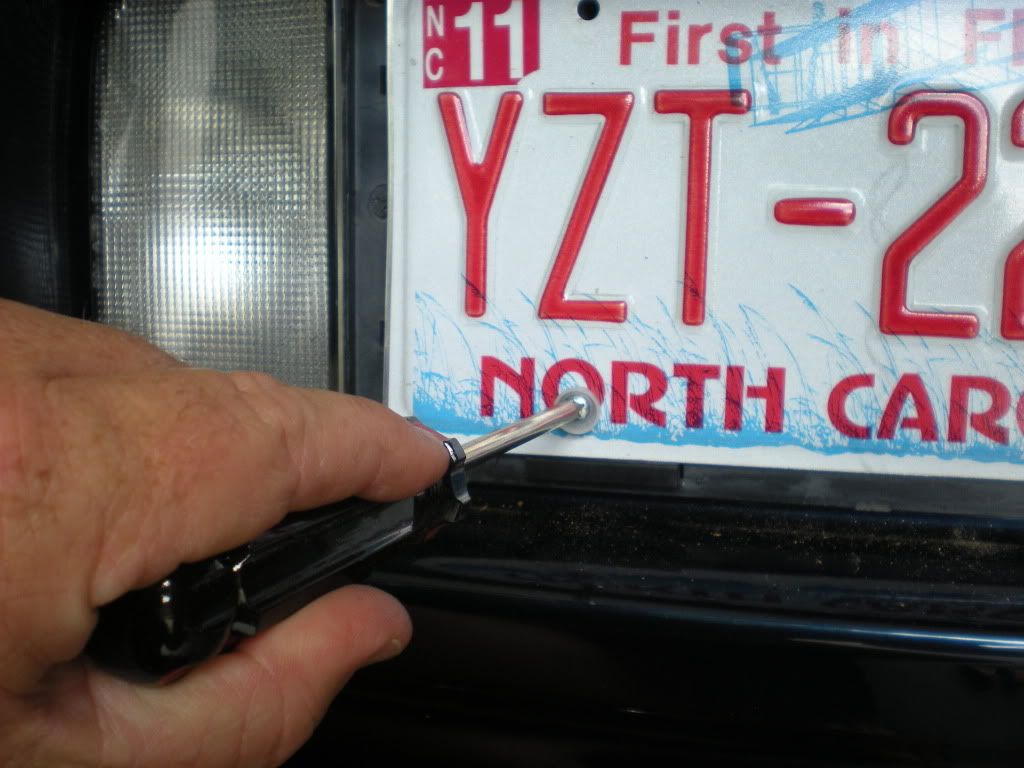
Take your tag off
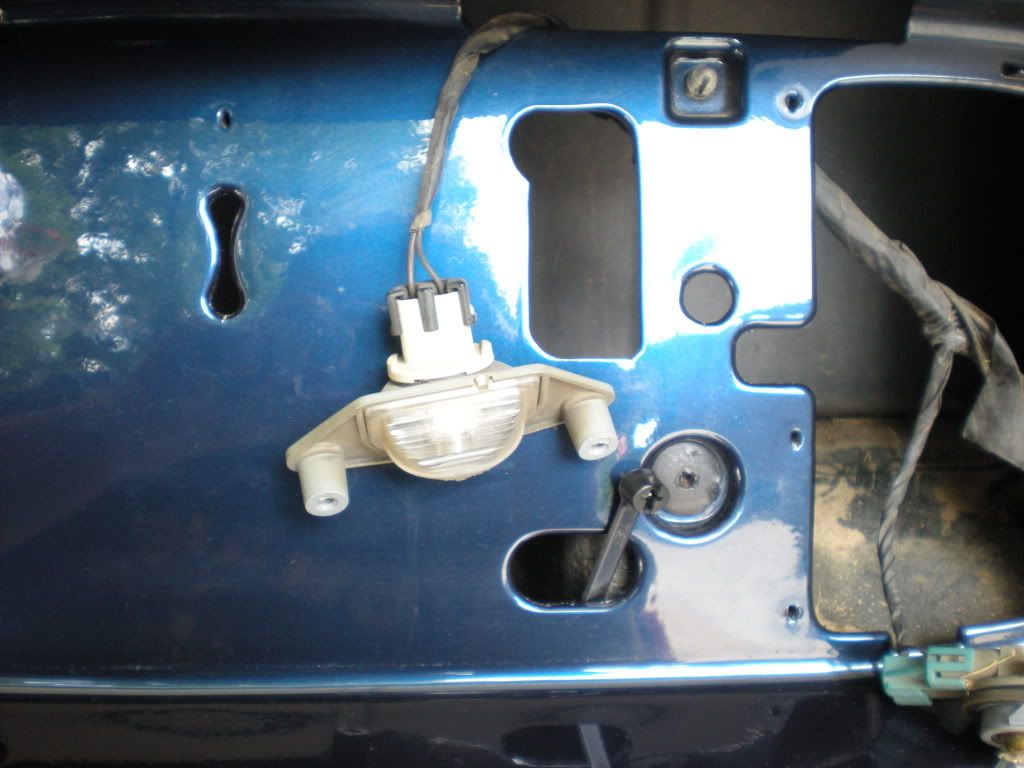
Remove your back up plate assembly
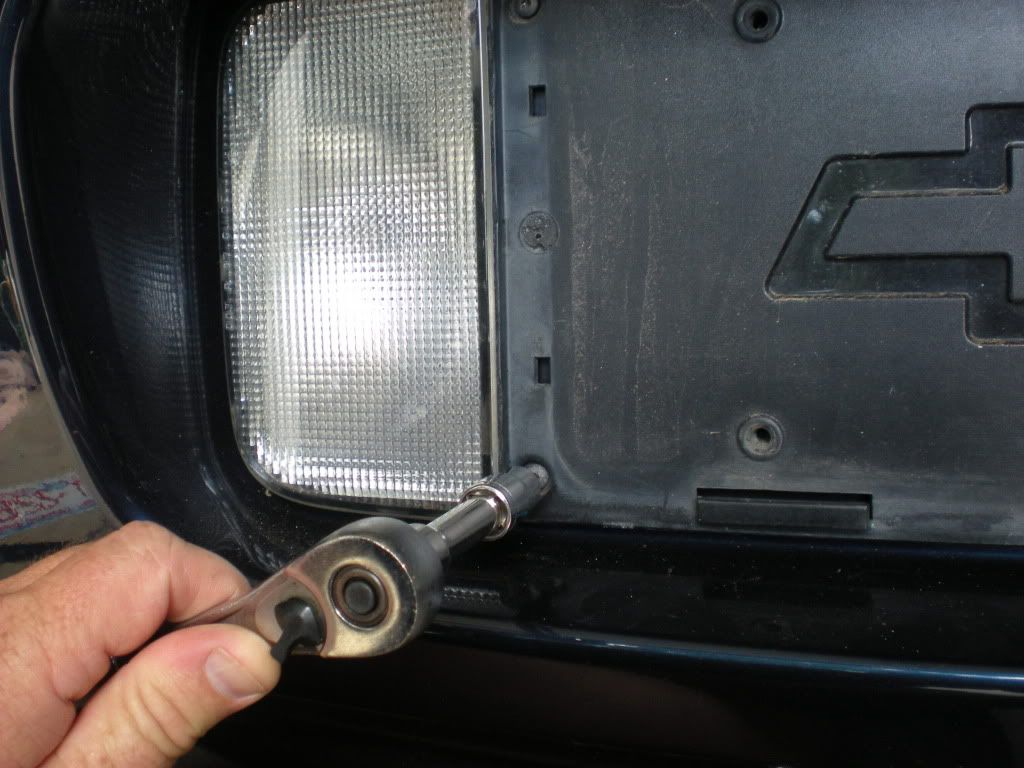
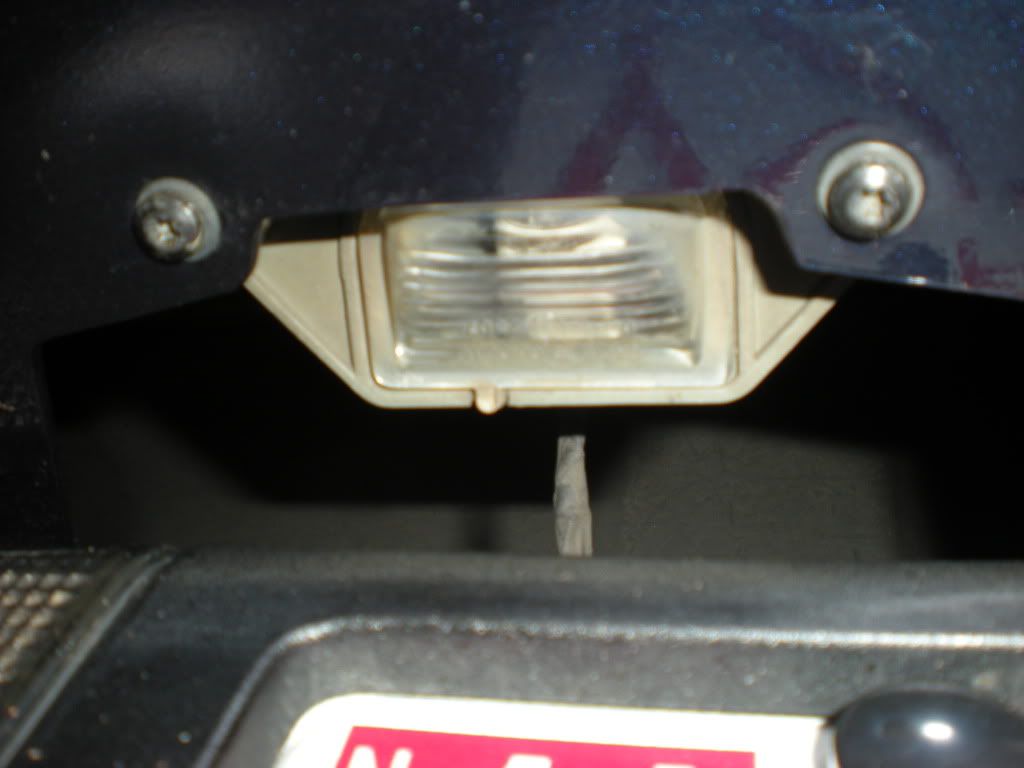
Take out 1 of your tag lights
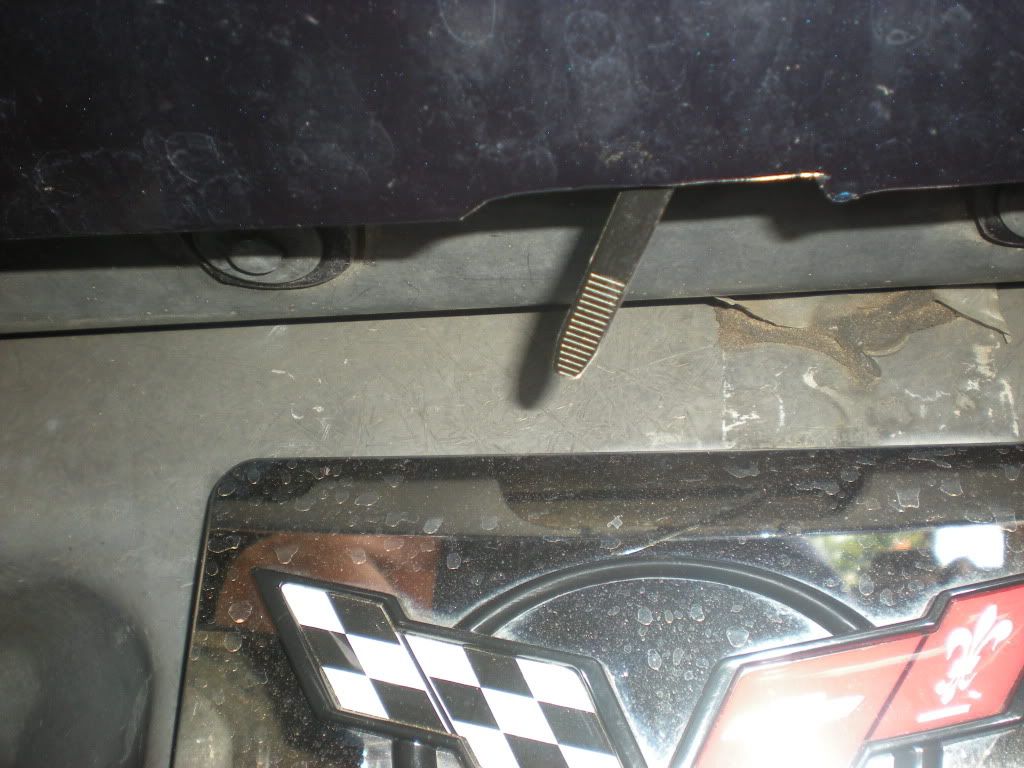
I ran a long zip tie down from the back plate down the bumper cover
Here you can see the bottom of the bumper cover where the long zip tie came out of the bottom of the cover
Pull the 51" long LED pigtail up to where the tag light is
Cut the wires going to the tag light, and using butt connectors splice the LED lights in line
Tidy the remaining wire up before buttoning everything up
Here is the LED's hanging getting ready to be installed
After wiping down the area for the LED's to be stuck, secure LED's by peeling the backing off and sticking in place
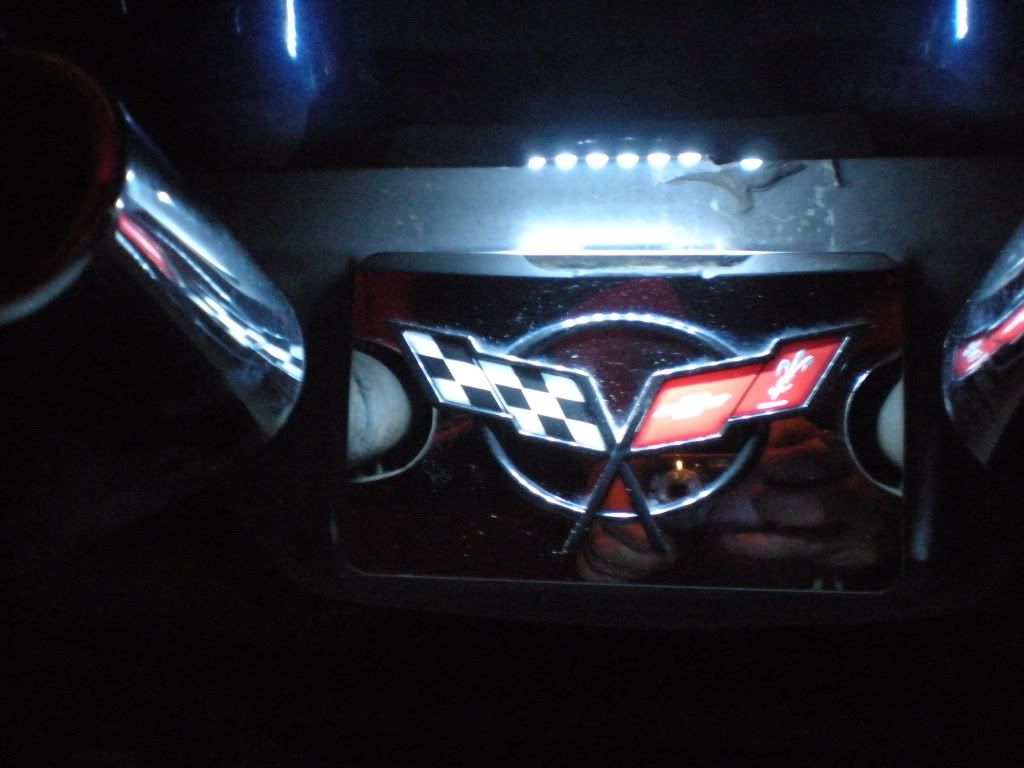
Finished job after only 30 minutes
Another finished shot
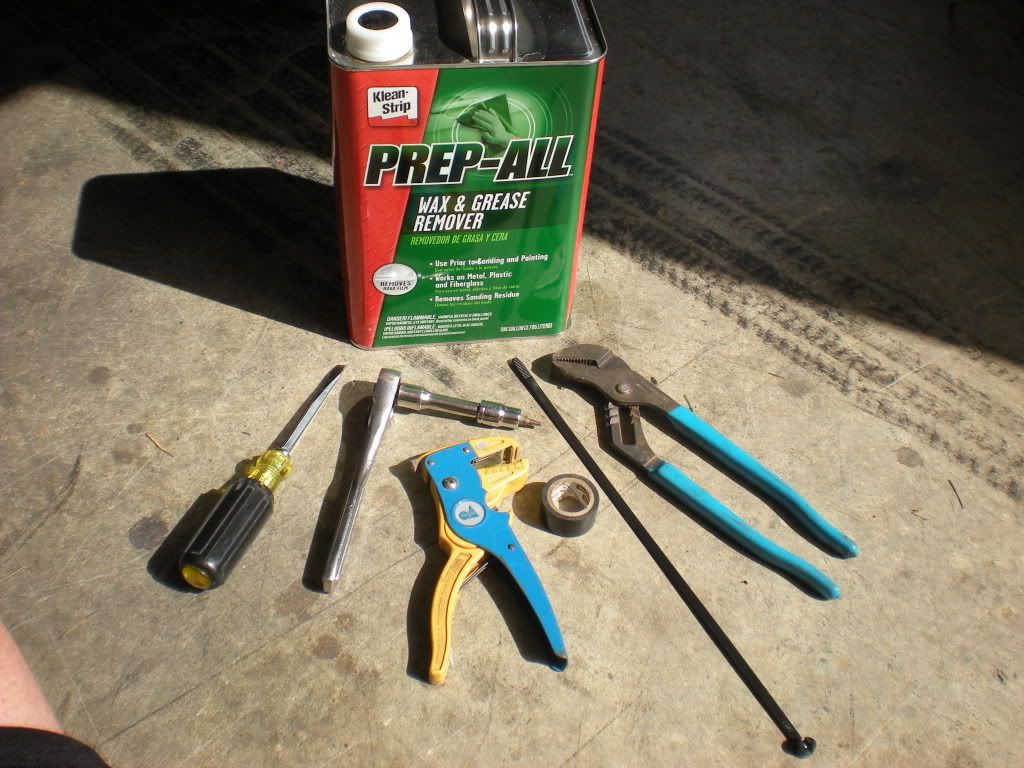
Products and equipment to be used for mod
Where did you purchase the LED lights? Is there a name associated with the LED light bar? I could do a search on the name of them. Thanks, Pretty cool mod.
Where did you purchase the LED lights? Is there a name associated with the LED light bar? I could do a search on the name of them. Thanks, Pretty cool mod.
Honestly, I would stay away from that type of LED strip. We used them in our corner light modifications for years and around 2010, the quality control dropped off a cliff. The strip design is old, outdated and prone to failure. The newer low-profile LED strips are much more durable and usually come with adhesive backing already.
Chadwicks works very well for me and it's faster !!!!!!!!!
This is a detail shop trick and the results are amazing. The glass looks brand new and it only costs a few cents. It does take a few minutes to do. I do it once a year and Invisible Glass keeps it clean the rest of the time.

 02-25-2015, 08:56 AM


 ... Took about 30 mins a rotor, Most of time is spent getting a good radius on the rotor with the tape so It looks factory painted...
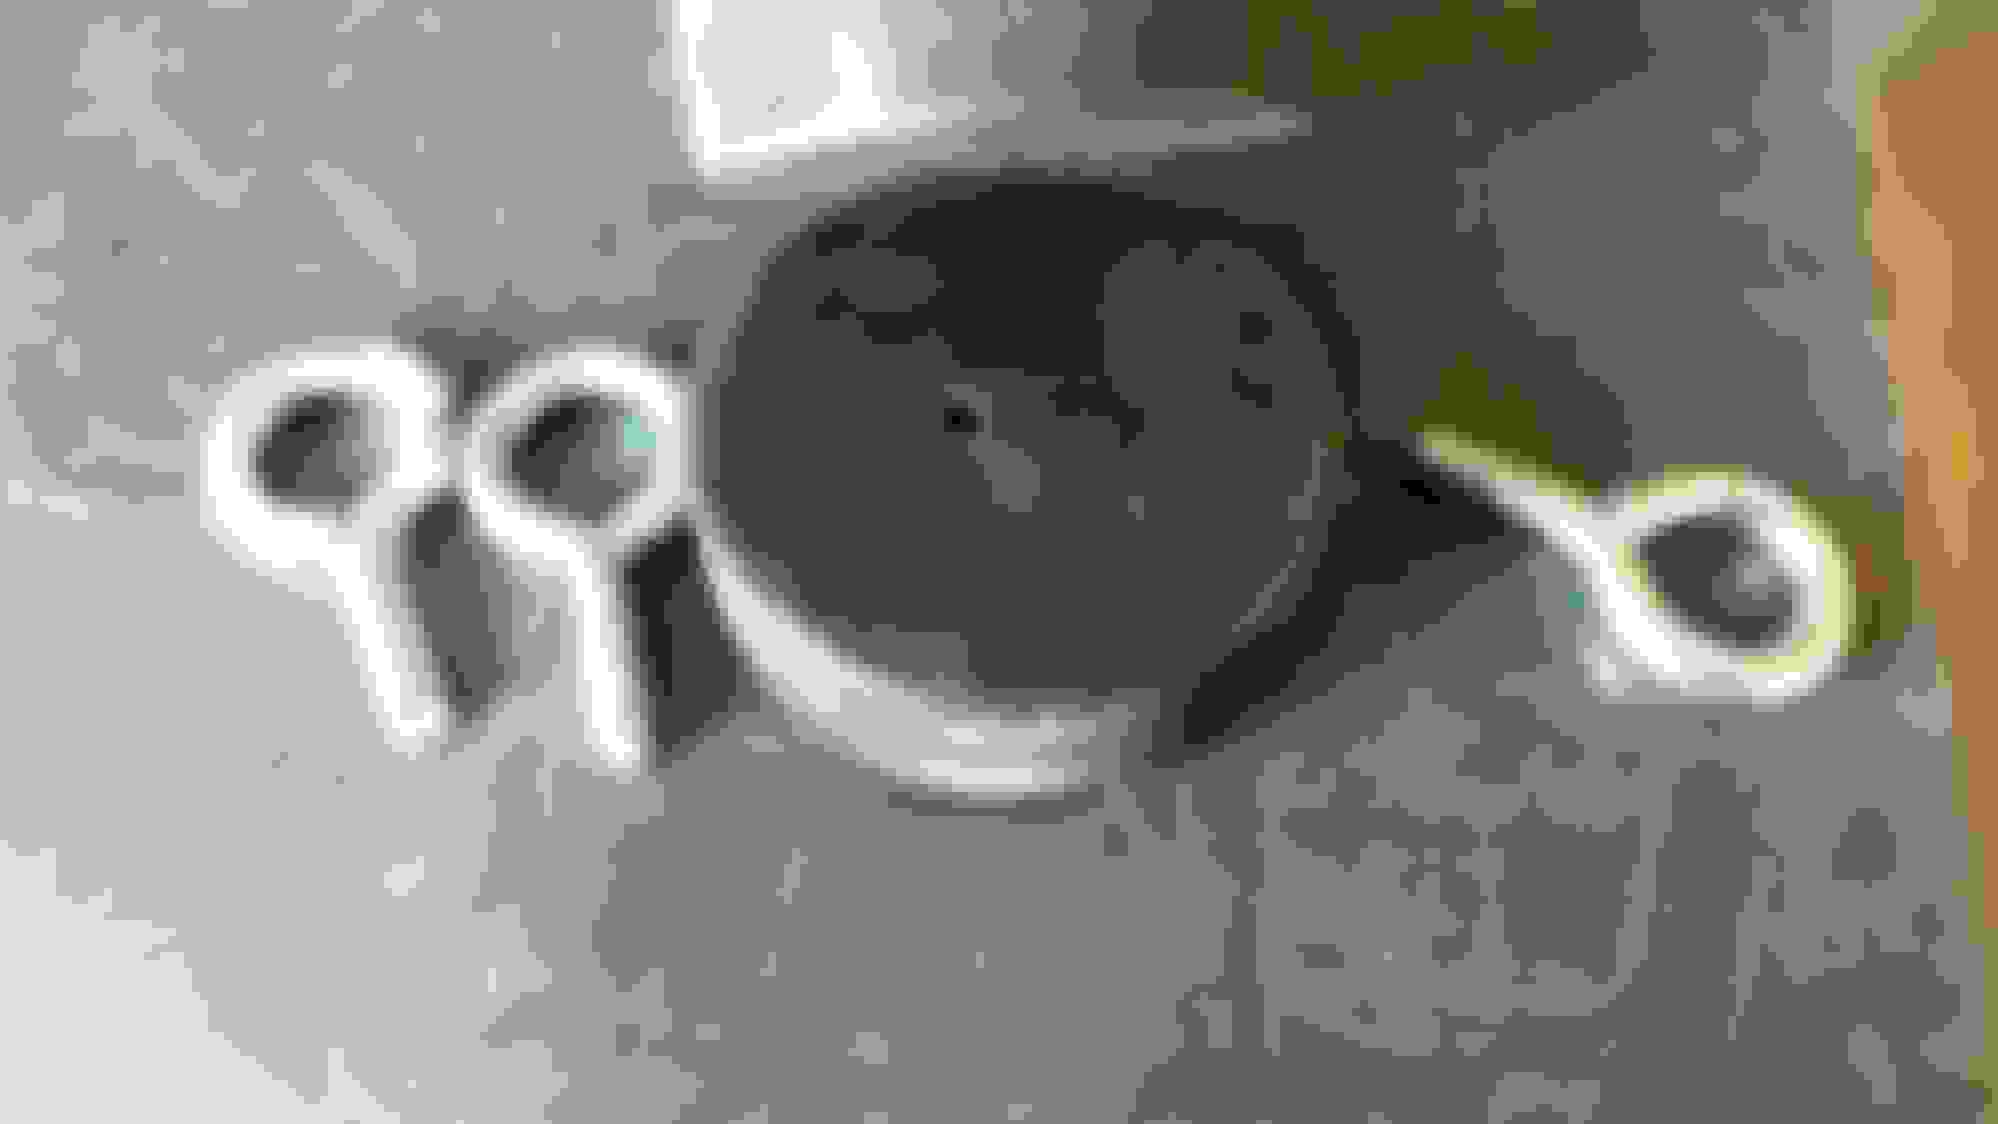


 where did you get them? I don't golf and I assume your car is quicksilver?