


2000 Black FRC Progress Thread!
Burning Brakes

Joined: Nov 2015
Posts: 775
Likes: 76
From: Mooresboro NC
got that sweet bumper mod going
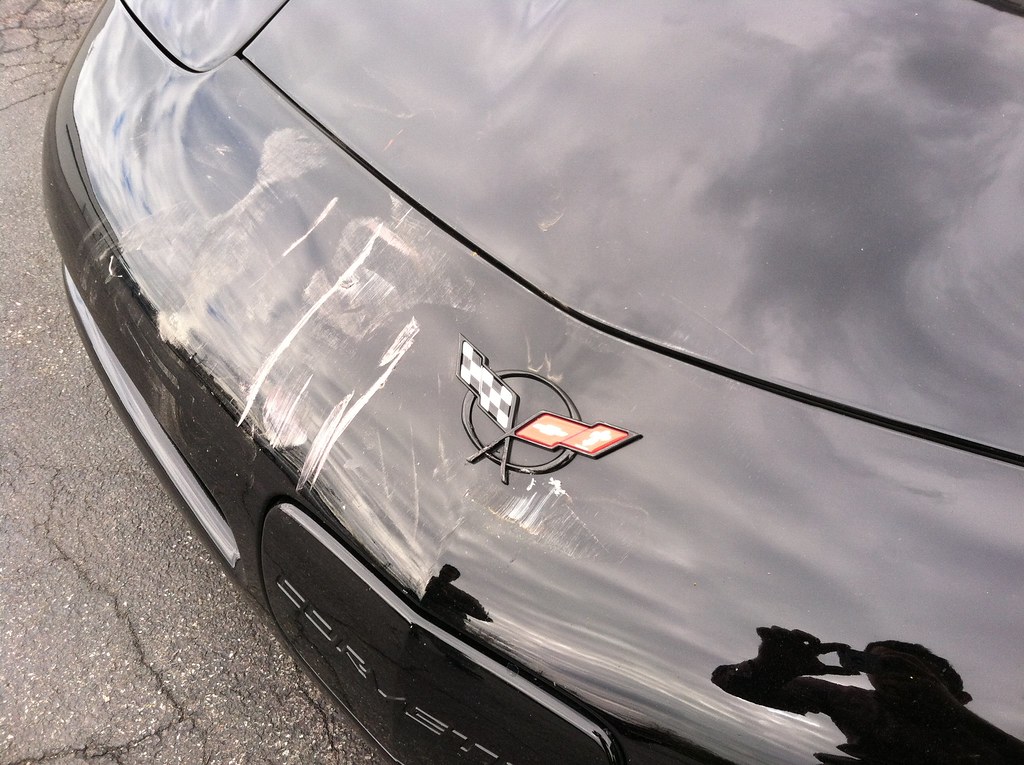 photo by Norbert Ogiba, on Flickr
Coworker was waiting to leave the parking lot onto the street, when a kid on a bike comes whizzing down the sidewalk. Coworker decides to back up to let the kid pass in front of him. Coworker doesn't see my low car and crunches up and over my front bumper.
I hope the bumper can be saved, if not, oh well. This is why we have insurance. If I can buy a used cover I'll toss that on and use the rest of the dough for new tires
I think it's time to get those cutouts finished up so people know where I am, even if they can't see me!
photo by Norbert Ogiba, on FlickrCoworker was waiting to leave the parking lot onto the street, when a kid on a bike comes whizzing down the sidewalk. Coworker decides to back up to let the kid pass in front of him. Coworker doesn't see my low car and crunches up and over my front bumper.
I hope the bumper can be saved, if not, oh well. This is why we have insurance. If I can buy a used cover I'll toss that on and use the rest of the dough for new tires
I think it's time to get those cutouts finished up so people know where I am, even if they can't see me!

Thread Starter
Drifting


Joined: Apr 2015
Posts: 1,893
Likes: 295
From: Buffalo NY
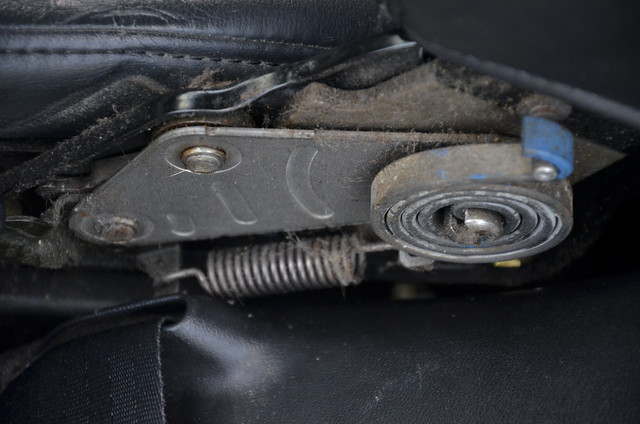
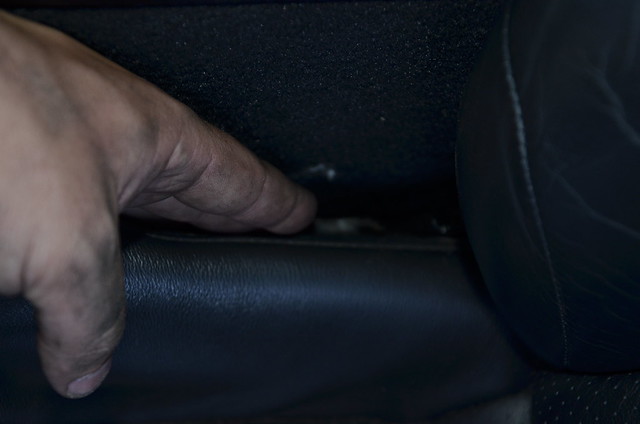
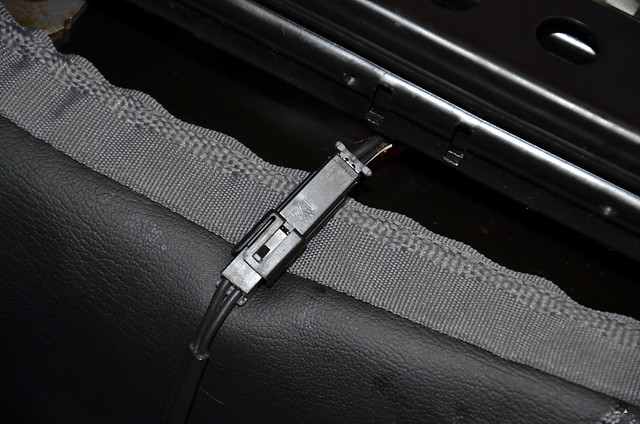
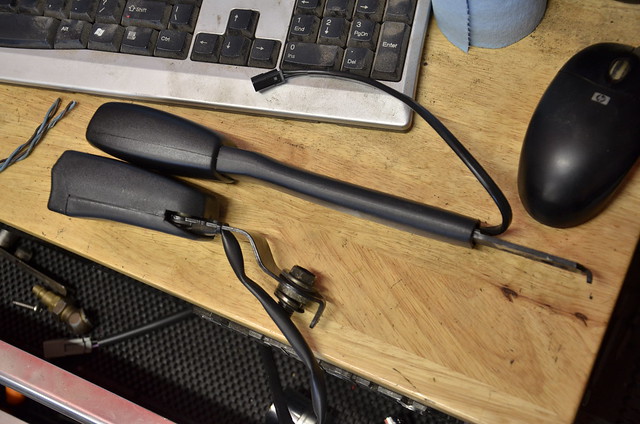
Finally got my cutout setup finished up. Quick video of a rigged setup, using vacuum from the engine and power from a 12V adapter plugged into the wall. Just testing operation here.
I ran the wiring inside the car and tapped into the fused switched power and kept blowing fuses - took the console back apart on Memorial Day and found 2 spots where the console had pinched the power wire, which broke the insulation and grounded it to the metal chassis tunnel. Replaced that section of wire, and got the whole interior finally back together. Test drive went great, works exactly as expected, the nice part is how quickly the cutouts close when you want them off. The spring snaps them shut in about half a second. In car videos to come.
I ran the wiring inside the car and tapped into the fused switched power and kept blowing fuses - took the console back apart on Memorial Day and found 2 spots where the console had pinched the power wire, which broke the insulation and grounded it to the metal chassis tunnel. Replaced that section of wire, and got the whole interior finally back together. Test drive went great, works exactly as expected, the nice part is how quickly the cutouts close when you want them off. The spring snaps them shut in about half a second. In car videos to come.
Thread Starter
Drifting
Joined: Apr 2015
Posts: 1,893
Likes: 295
From: Buffalo NY
Thread Starter
Drifting
Joined: Apr 2015
Posts: 1,893
Likes: 295
From: Buffalo NY
been putting in some time in the garage last couple days. I have been chasing a clunk/creak in the front end, haven't had any luck yet, despite replacing front end links, tightening subframe/control arm/sway bar bolts all to spec. I am thinking possibly tie rods since I have minor mushiness in the steering, but need to do some more investigation.
Swaybar end links needed to be replaced anyways as they were obviously original
 _DSC5114 by Norbert Ogiba, on Flickr
Starting on the installation of S2000 seats. The C5 seats are garbage, I don't care how much you refinish or replace foam, they have poor control and really make the aggressive driving experience terrible.
I have no intention of keeping the heavy C5 power seat adjustments and adapting the S2000 seat to the C5 rails, so I decided to keep the S2000 seat attached to the Honda rails and adapt them to a bracket, which would be bolted to the stock C5 floor studs. The retains the stock S2000 manual seat adjustments, and also keeps the entire C5 seat/floor setup completely stock and untouched, in case I decide to reinstall the stock seats.
I did not get any pics of this process, but I simply removed the 4x nuts holding the C5 seat in place and immediately realized that the floor is recessed around the mounting studs. As such I wasn't able to bolt a flat unistrut rail directly to the floor; it needed to come up at least an inch or more. I bought some hex couplers, washers, and bolts that all matched the factory C5 M10x1.5 studs. The hex couplers threaded onto the studs and provided a raised platform to which I could bolt the unistrut bracket.
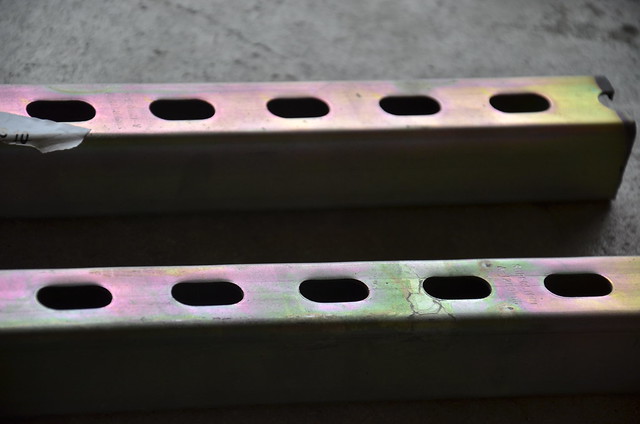
In the fall of '14 I installed a unit heater in my garage and mounted it to the joists in the ceiling using a long stick of zinc-plated Unistrut.
 _DSC5115 by Norbert Ogiba, on Flickr
I think the stick was at least 12' long, I only used about 20" of it for the heater install. The remained collected dust in the corner of the garage for a couple of years until today.
 _DSC5118 by Norbert Ogiba, on Flickr
I chopped them to 23" lengths and mounted to the tops of the hex adapters lengthwise in the car. One end of each rail needed to have the slot slightly enlarged to allow it to fit. No pics, will get them next time I take the seat out of the car.
These will get a coat of black paint before final installation and should blend in with the floor nicely.
 _DSC5119 by Norbert Ogiba, on Flickr
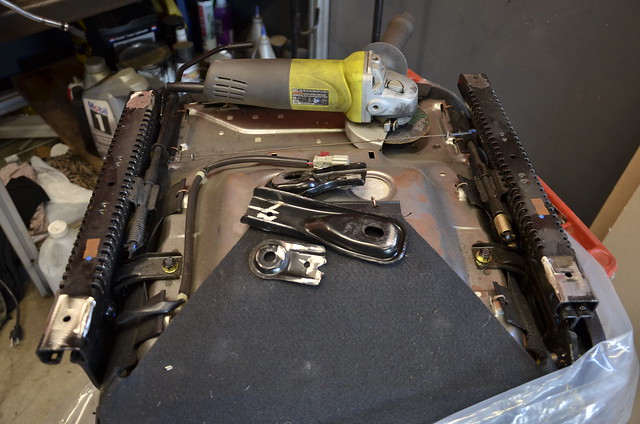
The S2000 floor mounting points are NOTHING like the C5 so I cut the mounting tabs off the S2000 rails right away. They are riveted AND spot welded to the rails, so some quality time with the cutoff wheel needs to be spent. I tend to enjoy grinding as I can throw in headphones, turn up the tunes, and go to town.
Note 4 shiny corners where brackets are gone.
 _DSC5120 by Norbert Ogiba, on Flickr
S2000 mounting tabs cut off.
_DSC5120 by Norbert Ogiba, on Flickr
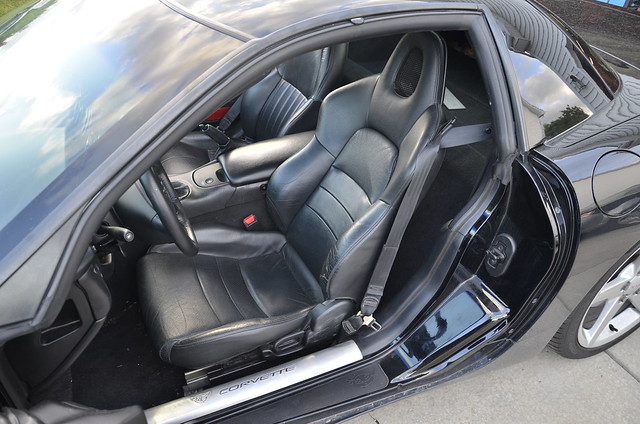
So now that the unistrut rails were firmly bolted in place, and the S2000 seat had a nice flat bottom to work with, it was time to put the seat in the car and see where I had fitment issues.
These things looks awesome.
 _DSC5123 by Norbert Ogiba, on Flickr
 _DSC5124 by Norbert Ogiba, on Flickr
Swaybar end links needed to be replaced anyways as they were obviously original
_DSC5114 by Norbert Ogiba, on FlickrStarting on the installation of S2000 seats. The C5 seats are garbage, I don't care how much you refinish or replace foam, they have poor control and really make the aggressive driving experience terrible.
I have no intention of keeping the heavy C5 power seat adjustments and adapting the S2000 seat to the C5 rails, so I decided to keep the S2000 seat attached to the Honda rails and adapt them to a bracket, which would be bolted to the stock C5 floor studs. The retains the stock S2000 manual seat adjustments, and also keeps the entire C5 seat/floor setup completely stock and untouched, in case I decide to reinstall the stock seats.
I did not get any pics of this process, but I simply removed the 4x nuts holding the C5 seat in place and immediately realized that the floor is recessed around the mounting studs. As such I wasn't able to bolt a flat unistrut rail directly to the floor; it needed to come up at least an inch or more. I bought some hex couplers, washers, and bolts that all matched the factory C5 M10x1.5 studs. The hex couplers threaded onto the studs and provided a raised platform to which I could bolt the unistrut bracket.
In the fall of '14 I installed a unit heater in my garage and mounted it to the joists in the ceiling using a long stick of zinc-plated Unistrut.
_DSC5115 by Norbert Ogiba, on FlickrI think the stick was at least 12' long, I only used about 20" of it for the heater install. The remained collected dust in the corner of the garage for a couple of years until today.
_DSC5118 by Norbert Ogiba, on FlickrI chopped them to 23" lengths and mounted to the tops of the hex adapters lengthwise in the car. One end of each rail needed to have the slot slightly enlarged to allow it to fit. No pics, will get them next time I take the seat out of the car.
These will get a coat of black paint before final installation and should blend in with the floor nicely.
_DSC5119 by Norbert Ogiba, on FlickrThe S2000 floor mounting points are NOTHING like the C5 so I cut the mounting tabs off the S2000 rails right away. They are riveted AND spot welded to the rails, so some quality time with the cutoff wheel needs to be spent. I tend to enjoy grinding as I can throw in headphones, turn up the tunes, and go to town.
Note 4 shiny corners where brackets are gone.
_DSC5120 by Norbert Ogiba, on FlickrS2000 mounting tabs cut off.
_DSC5120 by Norbert Ogiba, on FlickrSo now that the unistrut rails were firmly bolted in place, and the S2000 seat had a nice flat bottom to work with, it was time to put the seat in the car and see where I had fitment issues.
These things looks awesome.
_DSC5123 by Norbert Ogiba, on Flickr_DSC5124 by Norbert Ogiba, on Flickr
Last edited by nsogiba; Jun 7, 2016 at 09:31 PM.
Thread Starter
Drifting
Joined: Apr 2015
Posts: 1,893
Likes: 295
From: Buffalo NY
Agree, the C5 deserves far better.
The S2000 reclining mechanism and handle cover have serious contact with the C5 lower seatbelt reel cover.
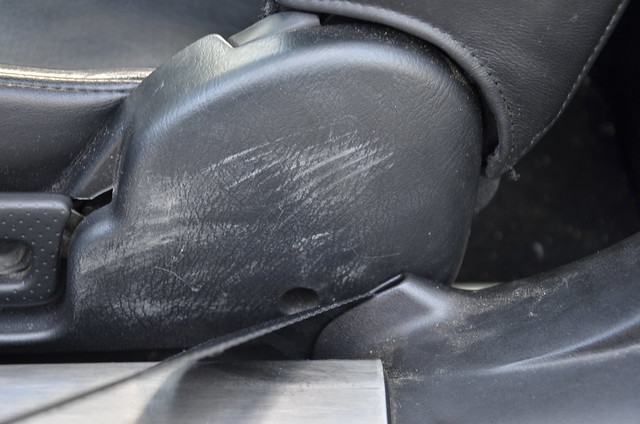 _DSC5125 by Norbert Ogiba, on Flickr
and the S2000 seat belt receptacle is pushed up against the tunnel.
 _DSC5126 by Norbert Ogiba, on Flickr
In this position the seat is WAY too far forward (I'm 5'8") and needs to come back.
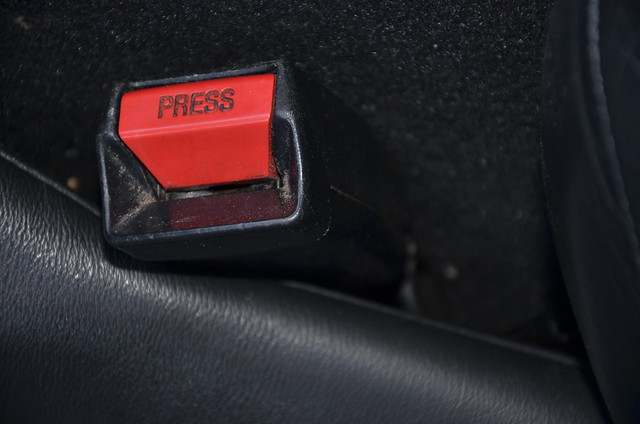
The S2000 seat came out of the car and onto the bench to have some stuff taken off it. First came the seatbelt buckle
 _DSC5128 by Norbert Ogiba, on Flickr
...along with the related Z-shaped harness. I won't need this as it doesn't interface with the C5 seatbelt OR the C5 electrical seat harness.
 _DSC5129 by Norbert Ogiba, on Flickr
You're now looking at the rear of the S2000 seat, driver's side, reclining mechanism plastic cover. It sticks out WAY past the rail, which is already far wide than the C5 bolt spacing. It will have to go.
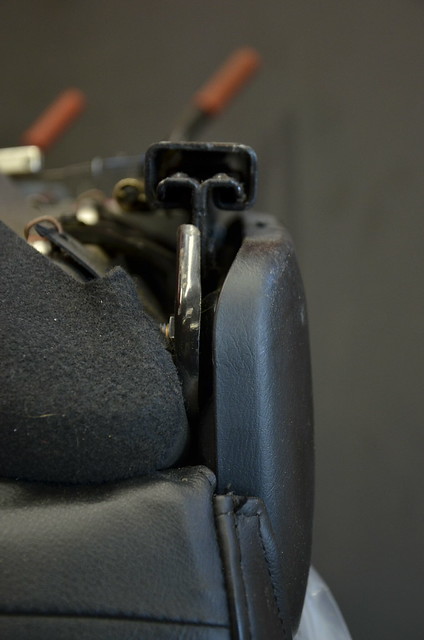 _DSC5130 by Norbert Ogiba, on Flickr
Firmly pull on the cool looking reclining handle to remove it
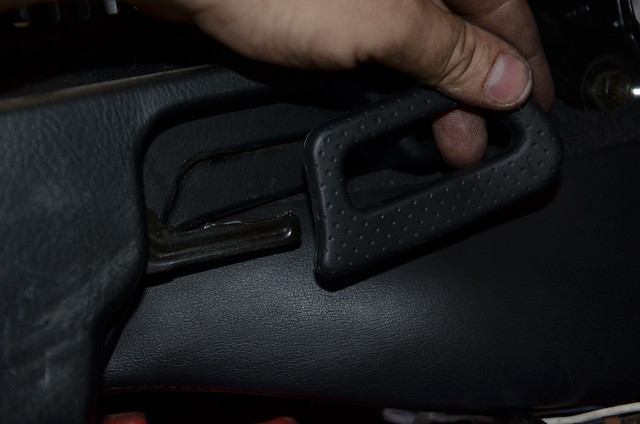 _DSC5131 by Norbert Ogiba, on Flickr
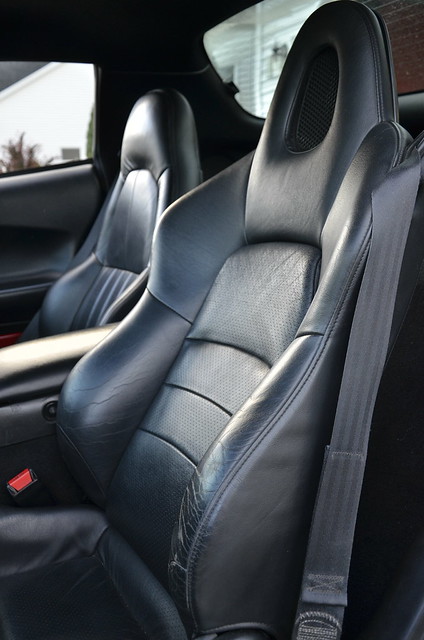
now that the 2 items that were in the way are now gone, I stuck the seat back in the car to see what it looked like. The good news is that the seat can now slide all the way back. This keeps with the OEM+ theme, keeping full functionality of adjustment. Note the absolute lack of shoulder bolsters. I still can't over how much better these seats look than the stockers.
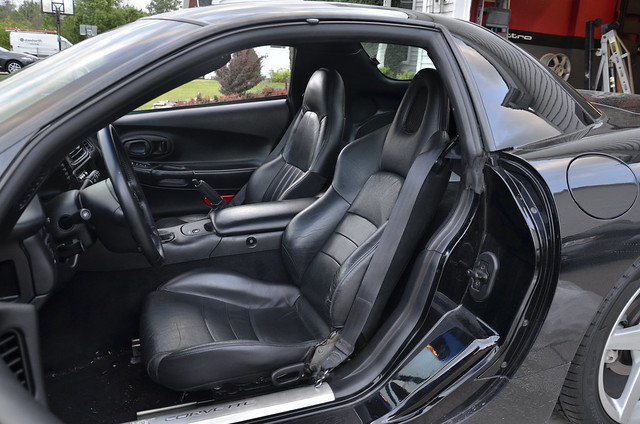 _DSC5132 by Norbert Ogiba, on Flickr
The bad news is that the reclining mechanism is now exposed and sticks out like a sore thumb. I'll have to come up with something to fix this.
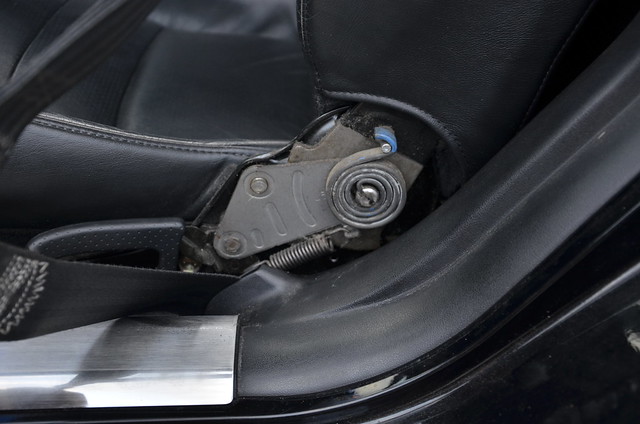 _DSC5133 by Norbert Ogiba, on Flickr
Now we can see just how close that mechanism is to the C5 seatbelt retractor
 _DSC5134 by Norbert Ogiba, on Flickr
on the right side the seatbelt buckle area is tight as well but this will be easier to fix.
 _DSC5135 by Norbert Ogiba, on Flickr
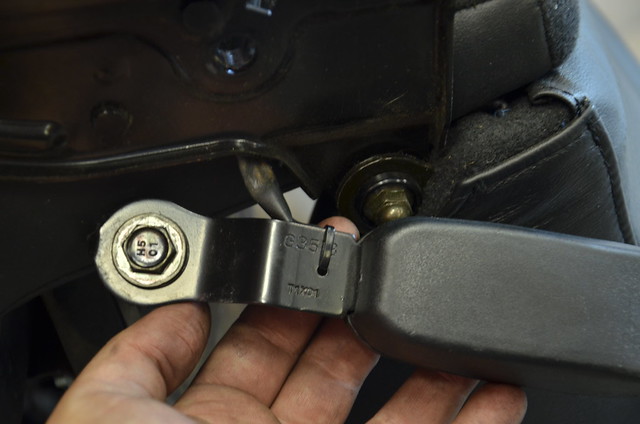
Back to the C5 seat - need to see how the buckle does, bolted to the S2000 seat.
 _DSC5136 by Norbert Ogiba, on Flickr
18mm thin nut and a connector, and the buckle comes out
 _DSC5138 by Norbert Ogiba, on Flickr
Here's where I left off for the night. S2000 buckle on bottom with goofy Z offset, C5 on top with straight shot
 _DSC5140 by Norbert Ogiba, on Flickr
Til Tomorrow
The S2000 reclining mechanism and handle cover have serious contact with the C5 lower seatbelt reel cover.
_DSC5125 by Norbert Ogiba, on Flickrand the S2000 seat belt receptacle is pushed up against the tunnel.
_DSC5126 by Norbert Ogiba, on FlickrIn this position the seat is WAY too far forward (I'm 5'8") and needs to come back.
The S2000 seat came out of the car and onto the bench to have some stuff taken off it. First came the seatbelt buckle
_DSC5128 by Norbert Ogiba, on Flickr...along with the related Z-shaped harness. I won't need this as it doesn't interface with the C5 seatbelt OR the C5 electrical seat harness.
_DSC5129 by Norbert Ogiba, on FlickrYou're now looking at the rear of the S2000 seat, driver's side, reclining mechanism plastic cover. It sticks out WAY past the rail, which is already far wide than the C5 bolt spacing. It will have to go.
_DSC5130 by Norbert Ogiba, on FlickrFirmly pull on the cool looking reclining handle to remove it
_DSC5131 by Norbert Ogiba, on Flickrnow that the 2 items that were in the way are now gone, I stuck the seat back in the car to see what it looked like. The good news is that the seat can now slide all the way back. This keeps with the OEM+ theme, keeping full functionality of adjustment. Note the absolute lack of shoulder bolsters. I still can't over how much better these seats look than the stockers.
_DSC5132 by Norbert Ogiba, on FlickrThe bad news is that the reclining mechanism is now exposed and sticks out like a sore thumb. I'll have to come up with something to fix this.
_DSC5133 by Norbert Ogiba, on FlickrNow we can see just how close that mechanism is to the C5 seatbelt retractor
_DSC5134 by Norbert Ogiba, on Flickron the right side the seatbelt buckle area is tight as well but this will be easier to fix.
_DSC5135 by Norbert Ogiba, on FlickrBack to the C5 seat - need to see how the buckle does, bolted to the S2000 seat.
_DSC5136 by Norbert Ogiba, on Flickr18mm thin nut and a connector, and the buckle comes out
_DSC5138 by Norbert Ogiba, on FlickrHere's where I left off for the night. S2000 buckle on bottom with goofy Z offset, C5 on top with straight shot
_DSC5140 by Norbert Ogiba, on FlickrTil Tomorrow
Corvette Stories
The Best of Corvette for Corvette Enthusiasts

Top 10 Corvette Engines RANKED by Peak Torque (70+ Years of Muscle!)
Joe Kucinski
Corvette ZR1X Will Be Pacing the Indy 500, And Could Probably Race, Too!
Verdad Gallardo
Top 10 Corvettes Coming to Mecum Indy 2026!
Brett Foote
Top 10 C9 Corvette MUST-HAVES to Fix These C8 Generation Flaws!
Michael S. Palmer
10 Revolutionary 'Corvette Firsts' Most People Don't Know
Joe Kucinski
5 Reasons to Upgrade to an LS6-Powered Corvette; 5 Reasons to Stay LT2
Michael S. Palmer
2027 Corvette vs The World: Every C8 vs Its Closest Competitor
Joe Kucinski
10 Most Common Corvette Problems of the Last 20 Years!
Joe Kucinski
5 MOST and 5 LEAST Popular Corvette Model Years in History!
Joe Kucinski

Thread Starter
Drifting
Joined: Apr 2015
Posts: 1,893
Likes: 295
From: Buffalo NY
I have been chasing a noise in the front end for a few weeks now - a creaking/clunking at slow speeds when turning, loading and unloading the suspension in the front right. Already changed the front sway bar end links and made sure all control arm bolts were tight, and it persists, so I placed an order for some polyurethane Energy Suspension front sway bar bushings as the current ones are probably original and look like they have some slop in them. Also snagged C6 Z06 shocks for all 4 corners, a new window regulator for the passenger side, and some new drive belts just for good measure. Will document my install.
The S2000 seat has been fantastic, but it's mounted slightly too high and needs to be reclined a bit more to be really comfortable - so I picked up a set of aftermarket universal C5 seat brackets that I will weld to the S2000 rails. They have the incline built in, will bolt up to the C5 floor, and sit a lot lower than my custom stuff.

I want to get all this done before my 4th of July trip down to Nashville, so the clock is ticking.
The S2000 seat has been fantastic, but it's mounted slightly too high and needs to be reclined a bit more to be really comfortable - so I picked up a set of aftermarket universal C5 seat brackets that I will weld to the S2000 rails. They have the incline built in, will bolt up to the C5 floor, and sit a lot lower than my custom stuff.
I want to get all this done before my 4th of July trip down to Nashville, so the clock is ticking.
Thread Starter
Drifting
Joined: Apr 2015
Posts: 1,893
Likes: 295
From: Buffalo NY
Been busy the last couple weeks, getting ready for my trip down to Tail of the Dragon, Nashville, National Corvette Musuem.
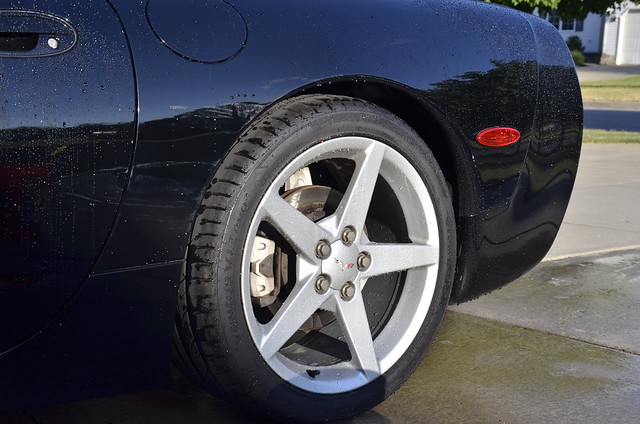
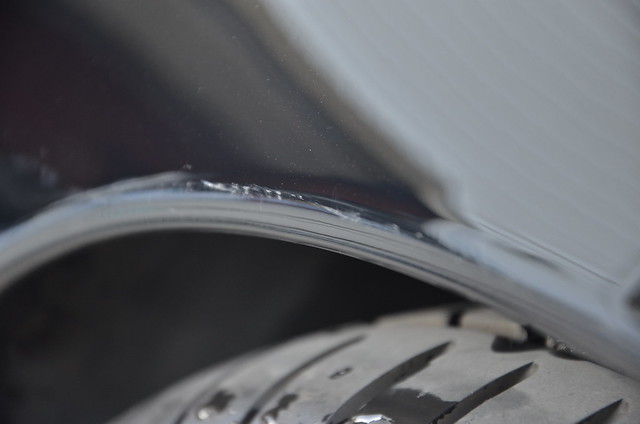
C6 wheels in the rear always looked sunk in due to offset, so I grabbed some 1” hubcentric spacers and got them bolted up.
 _DSC5142 by Norbert Ogiba, on Flickr
 _DSC5143 by Norbert Ogiba, on Flickr
The unthreaded bullnose tips on the factory studs needed to be trimmed as they were interfering with the insides of the wheels. Sick colors bro
 _DSC5147 by Norbert Ogiba, on Flickr
Got everything all bolted up, no vibrations, rode perfect. Squeezed in an oil change too, 2nd one since buying the car.
 _DSC5144 by Norbert Ogiba, on Flickr
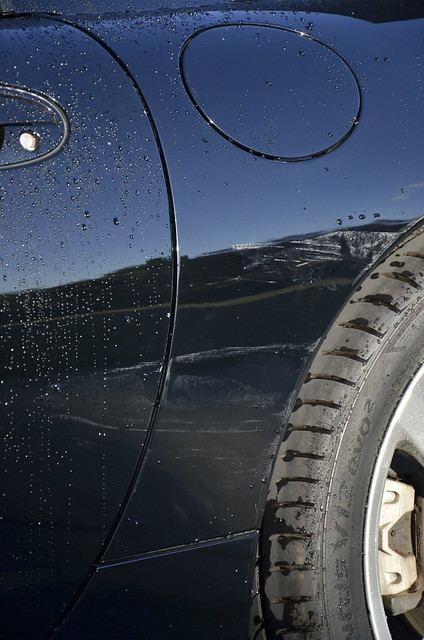
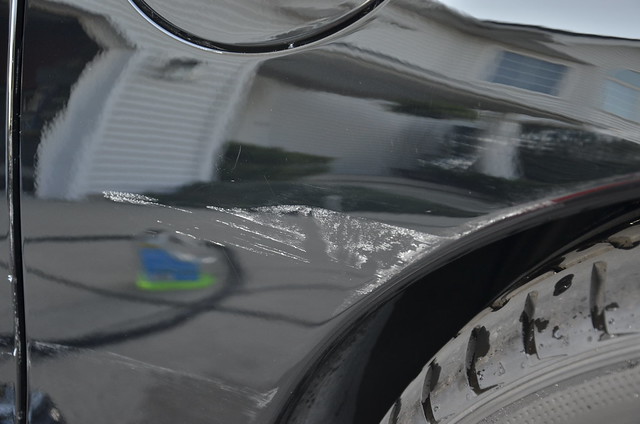
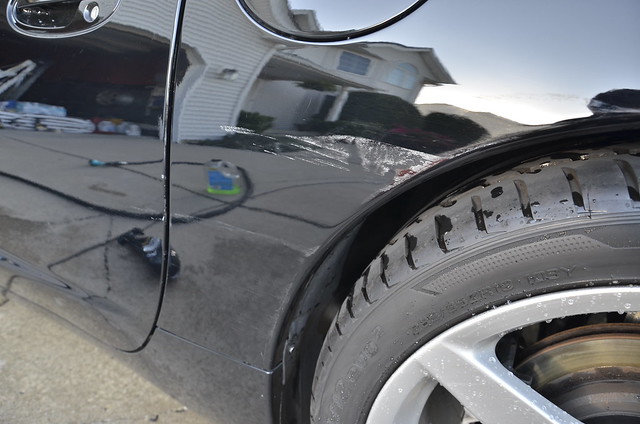
Next day at work - kid in a Buick sideswiped me as I was leaving work. Right as I had got the front bumper fixed, too.

Luckily, the damage was fairly superficial…we settled without a claim, as I was confident I could get it looking exactly as before, if not better. BEFORE:
 _DSC5150 by Norbert Ogiba, on Flickr
 _DSC5151 by Norbert Ogiba, on Flickr
 _DSC5153 by Norbert Ogiba, on Flickr
 _DSC5154 by Norbert Ogiba, on Flickr
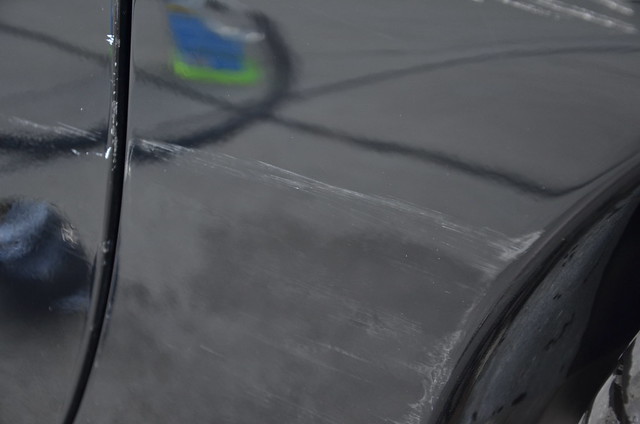 _DSC5155 by Norbert Ogiba, on Flickr
 _DSC5156 by Norbert Ogiba, on Flickr
I did not want to alter the factory paint work if I didn’t need to, so out came the wet sanding supplies, clay, compound, and polish…
Popped the headphones in, cracked a fine cold PBR, and GOT TO IT
 _DSC5158 by Norbert Ogiba, on Flickr
 _DSC5160 by Norbert Ogiba, on Flickr
Nice and glassy!
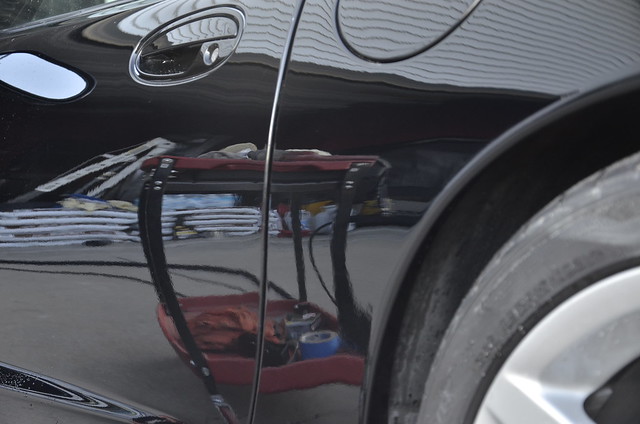 _DSC5162 by Norbert Ogiba, on Flickr

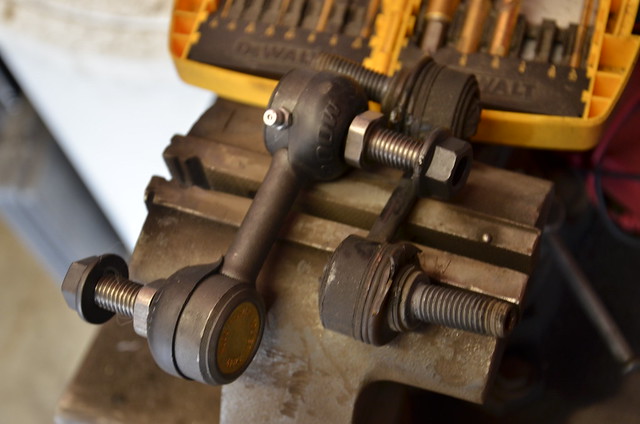
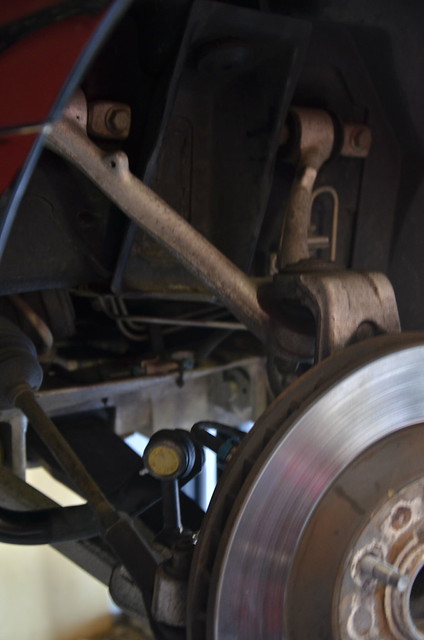
So with the exterior looking better again, I turned to this annoying clunk in the front end that had been bothering me. It occurred when the wheel was turned - and with the suspension getting loaded/unloaded.
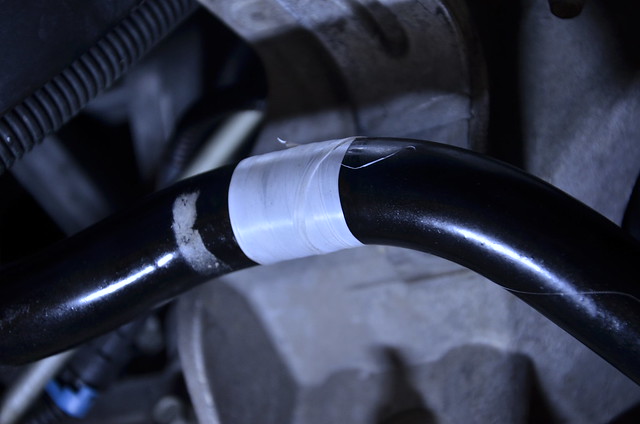
I had already replaced the sway bar end links front and rear, so the search continued. Found that the sway bar bracket bushings were looking sorry and original
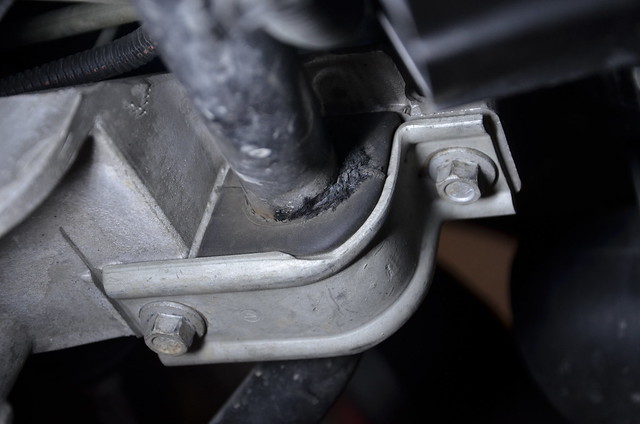 _DSC5164 by Norbert Ogiba, on Flickr
 _DSC5166 by Norbert Ogiba, on Flickr
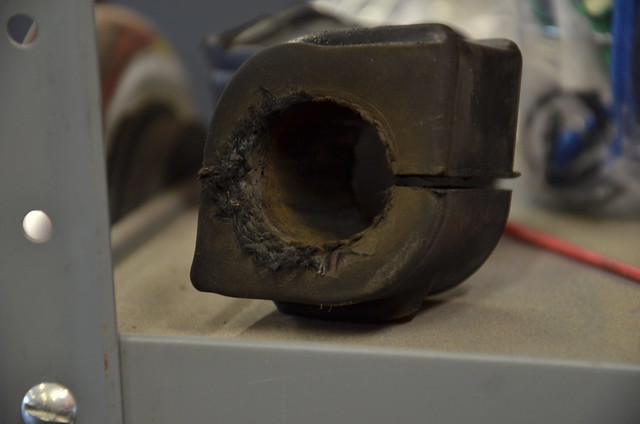 _DSC5168 by Norbert Ogiba, on Flickr
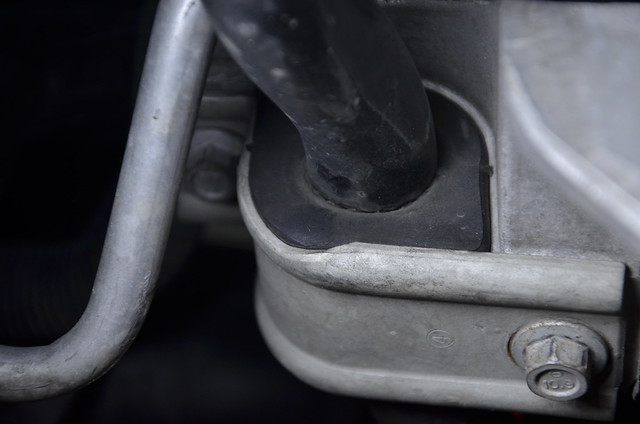
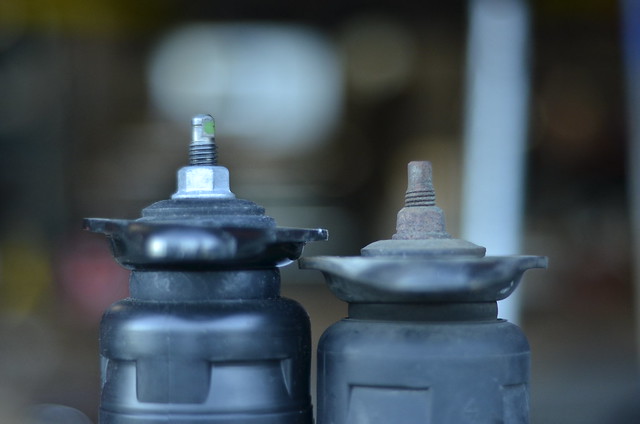
New parts - polyurethane Energy Suspension pieces - teflon tape to prevent squeaks
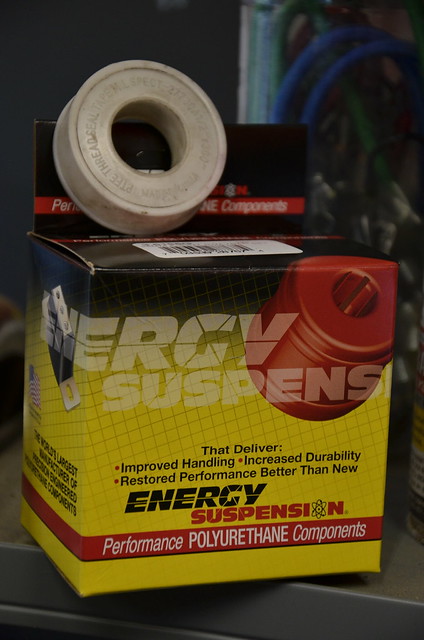 _DSC5170 by Norbert Ogiba, on Flickr
 _DSC5172 by Norbert Ogiba, on Flickr
The new bushings fit great and compressed nicely with the bracket torqued down. I also added the supplied grease to make sure things were lubed up.
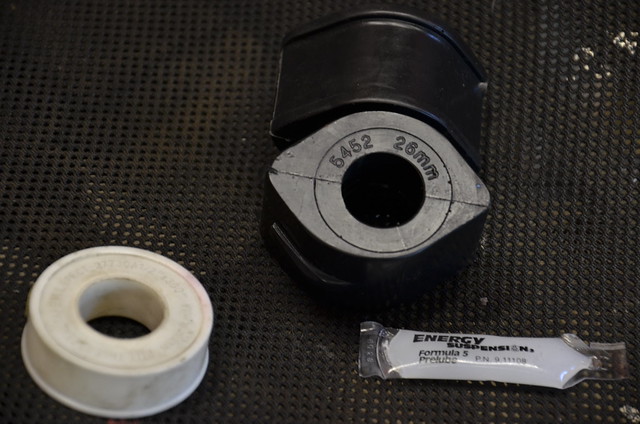 _DSC5171 by Norbert Ogiba, on Flickr
C6 wheels in the rear always looked sunk in due to offset, so I grabbed some 1” hubcentric spacers and got them bolted up.
_DSC5142 by Norbert Ogiba, on Flickr_DSC5143 by Norbert Ogiba, on FlickrThe unthreaded bullnose tips on the factory studs needed to be trimmed as they were interfering with the insides of the wheels. Sick colors bro
_DSC5147 by Norbert Ogiba, on FlickrGot everything all bolted up, no vibrations, rode perfect. Squeezed in an oil change too, 2nd one since buying the car.
_DSC5144 by Norbert Ogiba, on FlickrNext day at work - kid in a Buick sideswiped me as I was leaving work. Right as I had got the front bumper fixed, too.
Luckily, the damage was fairly superficial…we settled without a claim, as I was confident I could get it looking exactly as before, if not better. BEFORE:
_DSC5150 by Norbert Ogiba, on Flickr_DSC5151 by Norbert Ogiba, on Flickr_DSC5153 by Norbert Ogiba, on Flickr_DSC5154 by Norbert Ogiba, on Flickr_DSC5155 by Norbert Ogiba, on Flickr_DSC5156 by Norbert Ogiba, on FlickrI did not want to alter the factory paint work if I didn’t need to, so out came the wet sanding supplies, clay, compound, and polish…
Popped the headphones in, cracked a fine cold PBR, and GOT TO IT
_DSC5158 by Norbert Ogiba, on Flickr_DSC5160 by Norbert Ogiba, on FlickrNice and glassy!
_DSC5162 by Norbert Ogiba, on FlickrSo with the exterior looking better again, I turned to this annoying clunk in the front end that had been bothering me. It occurred when the wheel was turned - and with the suspension getting loaded/unloaded.
I had already replaced the sway bar end links front and rear, so the search continued. Found that the sway bar bracket bushings were looking sorry and original
_DSC5164 by Norbert Ogiba, on Flickr_DSC5166 by Norbert Ogiba, on Flickr_DSC5168 by Norbert Ogiba, on FlickrNew parts - polyurethane Energy Suspension pieces - teflon tape to prevent squeaks
_DSC5170 by Norbert Ogiba, on Flickr_DSC5172 by Norbert Ogiba, on FlickrThe new bushings fit great and compressed nicely with the bracket torqued down. I also added the supplied grease to make sure things were lubed up.
_DSC5171 by Norbert Ogiba, on Flickr
Thread Starter
Drifting
Joined: Apr 2015
Posts: 1,893
Likes: 295
From: Buffalo NY
Still no dice on the noise - so the list of “while I’m in there” continued. C6 Z06 shocks at all 4 corners. Definitely necessary since the old shocks were 16 years old, 110K on them. The shock mounts themselves were also worn, and included with the new stuff. At just $250 for all 4 new shocks, why not? I also dusted off my old “nifty fifty” 50mm 1.8 fixed lens!
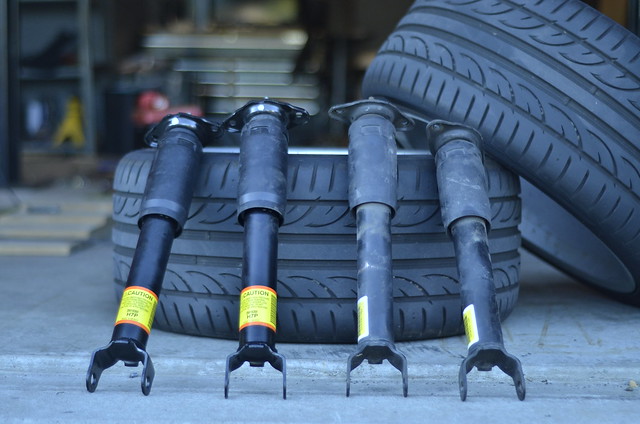 _DSC5187 by Norbert Ogiba, on Flickr
Old units out, front mounts.
 _DSC5173 by Norbert Ogiba, on Flickr
 _DSC5181 by Norbert Ogiba, on Flickr
Oddly enough the C6 top mounts were different, slightly angled, and they didn’t fit the C5 chassis, so I swapped the C5 mounts over onto the C6Z shocks.
 _DSC5188 by Norbert Ogiba, on Flickr
Rest of the shock install went quick and easy. Next up, while looking over the front suspension, I had noticed the belts were looking sad. Out they came
 _DSC5184 by Norbert Ogiba, on Flickr
New parts. I used Goodyear Gatorback belts on my 6.0 LS BMW with great luck, but I couldn’t find them for a C5 application on any website. Some closer looks on Rockauto revealed that Continental listed some belts that had that telltalle cross hatch pattern on the belt ribs. Decided to pull the trigger
 _DSC5198 by Norbert Ogiba, on Flickr
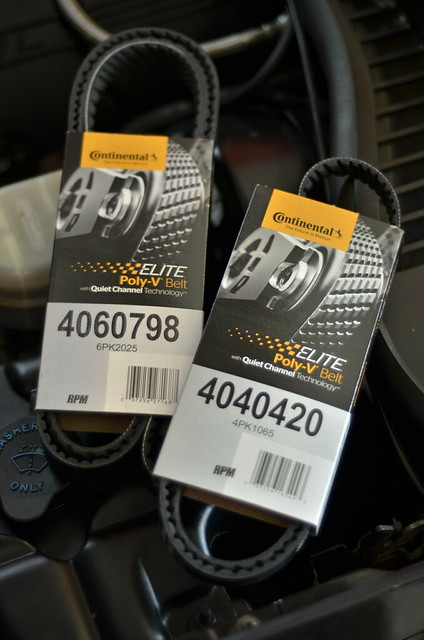 _DSC5193 by Norbert Ogiba, on Flickr
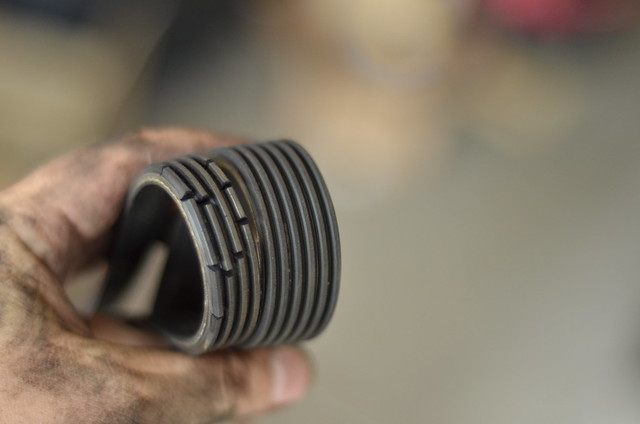
I wasn’t expecting to have to replace the idler and tensioner pulleys but they were worn - and the bearings were noisy. Quick trip to the store for some new parts:
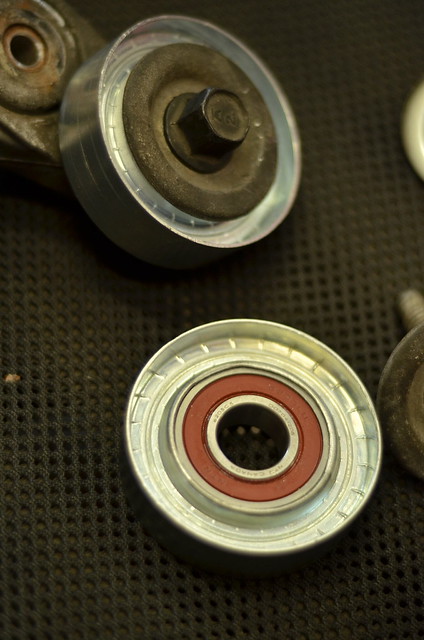 _DSC5200 by Norbert Ogiba, on Flickr
After allllll that stuff, I finally tested out a theory - that the fiberglass front spring was binding on the aluminum control arm after the front leaf spring bolts had been removed. An old tire sacrificed its life and offered some insulating material. Cutoff wheel + tire means ultimate smokeshow!
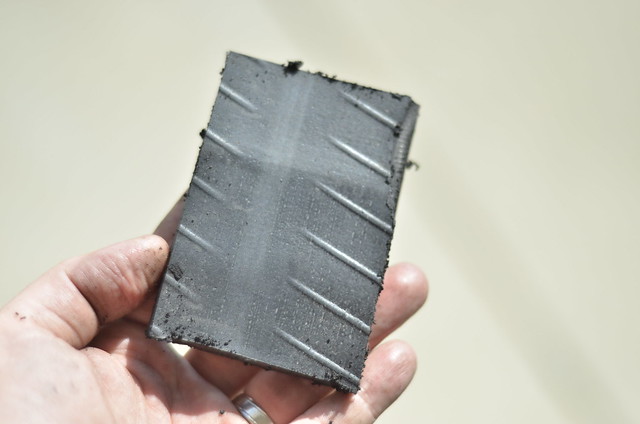 _DSC5194 by Norbert Ogiba, on Flickr
So I compressed the spring on each side, greased up the side that contacted the spring, and slid it in. SUCCESS! Noise fixed. The spring now moves freely with no binding against the control arms.
Next up: passenger window regulator, LMC5 install, and S2000 seat mounting revision.
_DSC5187 by Norbert Ogiba, on FlickrOld units out, front mounts.
_DSC5173 by Norbert Ogiba, on Flickr_DSC5181 by Norbert Ogiba, on FlickrOddly enough the C6 top mounts were different, slightly angled, and they didn’t fit the C5 chassis, so I swapped the C5 mounts over onto the C6Z shocks.
_DSC5188 by Norbert Ogiba, on FlickrRest of the shock install went quick and easy. Next up, while looking over the front suspension, I had noticed the belts were looking sad. Out they came
_DSC5184 by Norbert Ogiba, on FlickrNew parts. I used Goodyear Gatorback belts on my 6.0 LS BMW with great luck, but I couldn’t find them for a C5 application on any website. Some closer looks on Rockauto revealed that Continental listed some belts that had that telltalle cross hatch pattern on the belt ribs. Decided to pull the trigger
_DSC5198 by Norbert Ogiba, on Flickr_DSC5193 by Norbert Ogiba, on FlickrI wasn’t expecting to have to replace the idler and tensioner pulleys but they were worn - and the bearings were noisy. Quick trip to the store for some new parts:
_DSC5200 by Norbert Ogiba, on FlickrAfter allllll that stuff, I finally tested out a theory - that the fiberglass front spring was binding on the aluminum control arm after the front leaf spring bolts had been removed. An old tire sacrificed its life and offered some insulating material. Cutoff wheel + tire means ultimate smokeshow!
_DSC5194 by Norbert Ogiba, on FlickrSo I compressed the spring on each side, greased up the side that contacted the spring, and slid it in. SUCCESS! Noise fixed. The spring now moves freely with no binding against the control arms.
Next up: passenger window regulator, LMC5 install, and S2000 seat mounting revision.
Thread Starter
Drifting
Joined: Apr 2015
Posts: 1,893
Likes: 295
From: Buffalo NY
 _DSC5538 by Norbert Ogiba, on Flickr
 _DSC5537 by Norbert Ogiba, on Flickr
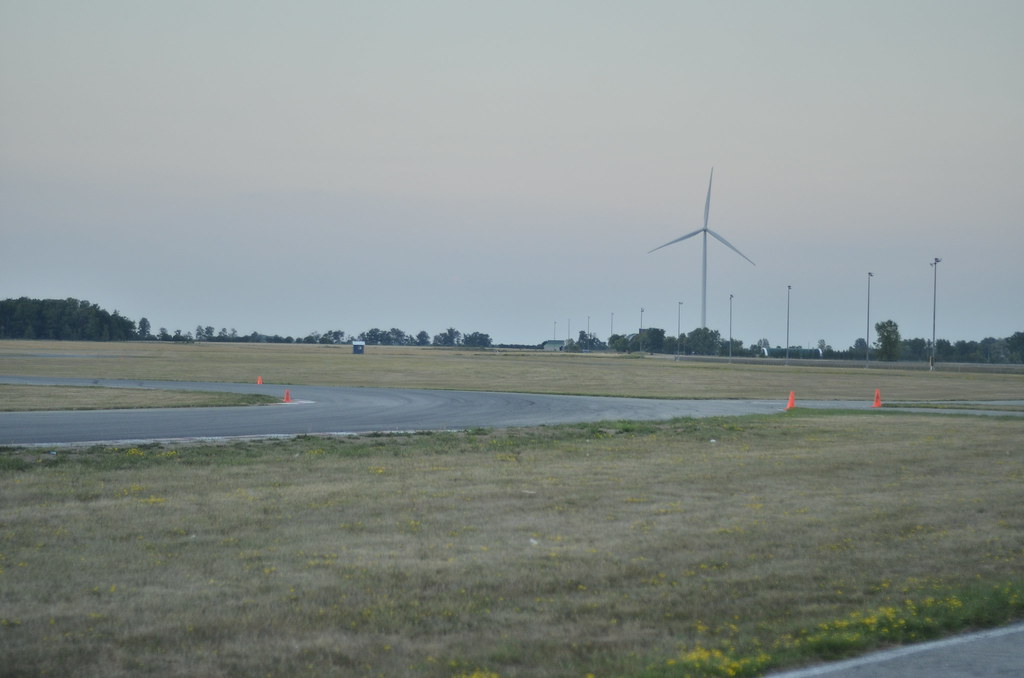 _DSC5539 by Norbert Ogiba, on Flickr
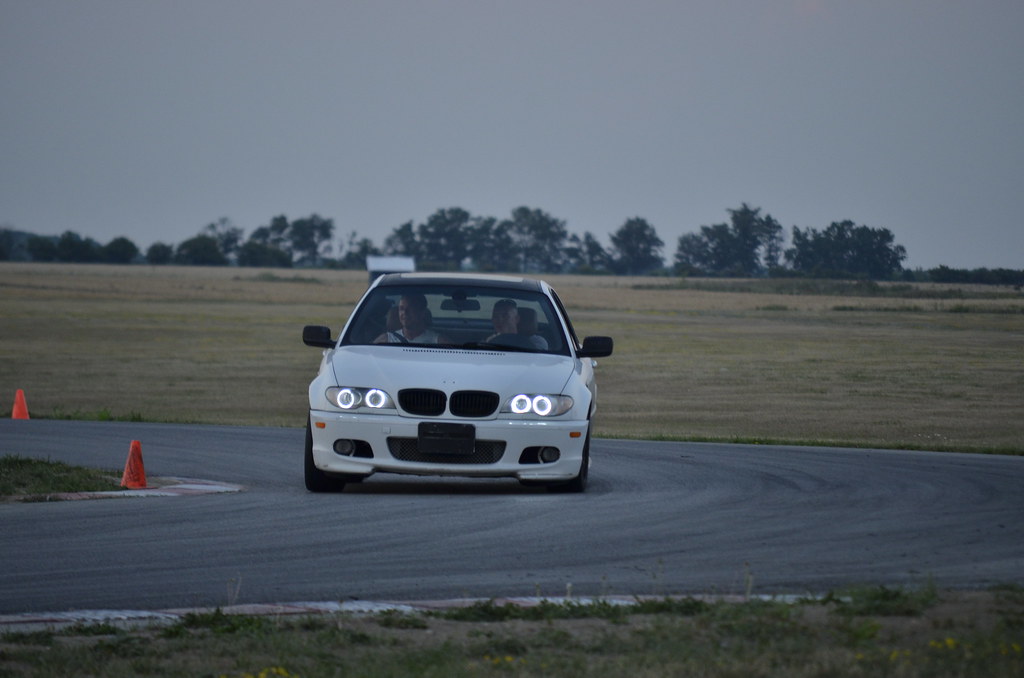 _DSC5541 by Norbert Ogiba, on Flickr
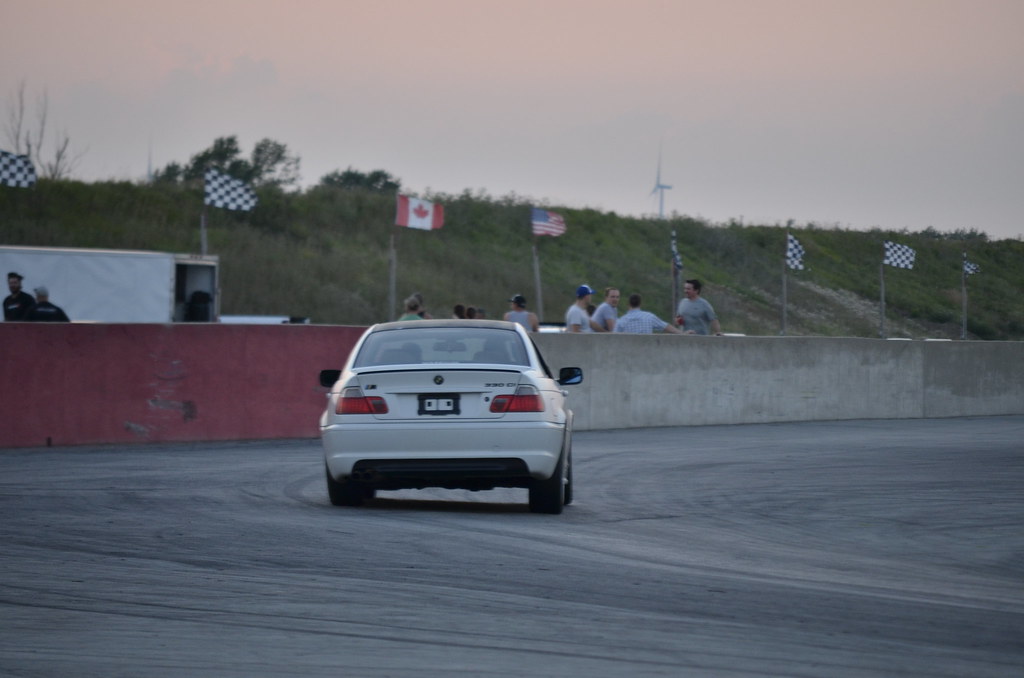 _DSC5546 by Norbert Ogiba, on Flickr
 _DSC5548 by Norbert Ogiba, on Flickr
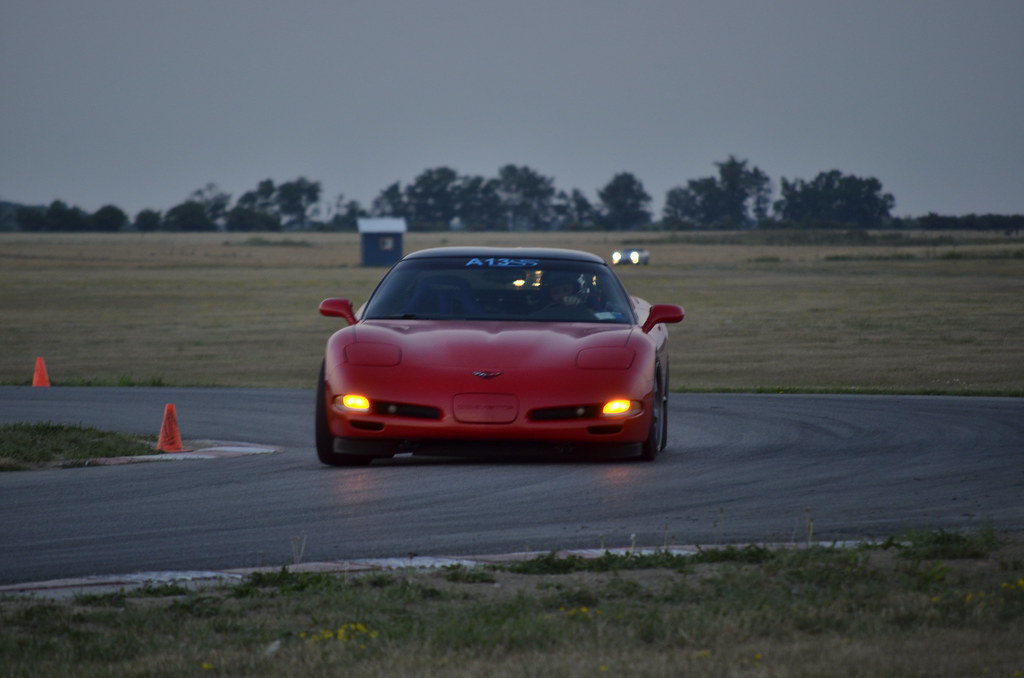 _DSC5549 by Norbert Ogiba, on Flickr
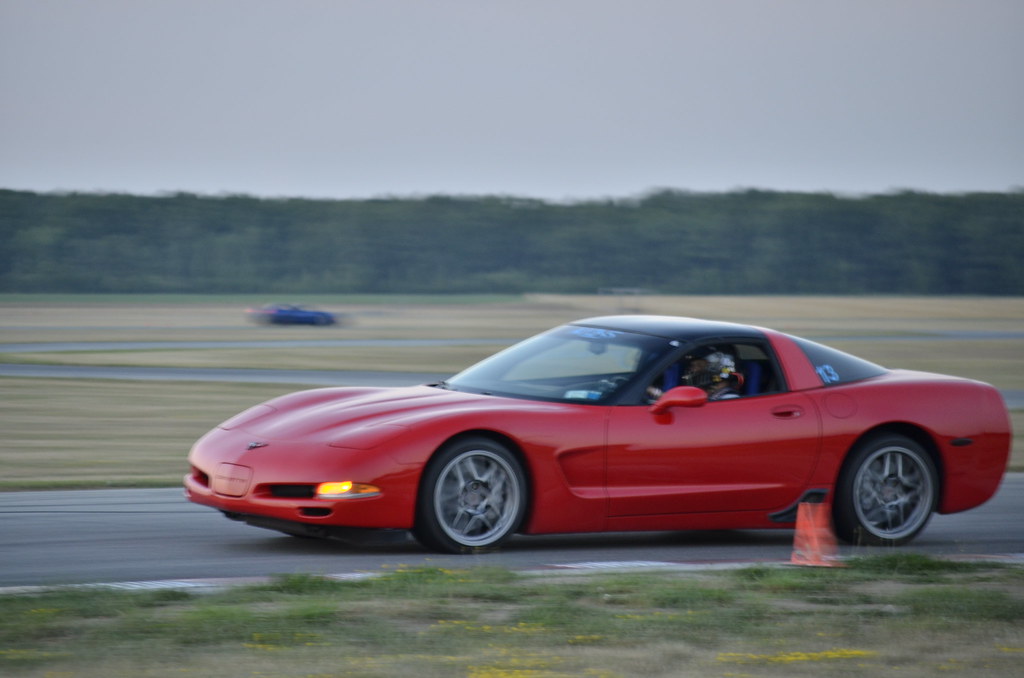 _DSC5551 by Norbert Ogiba, on Flickr
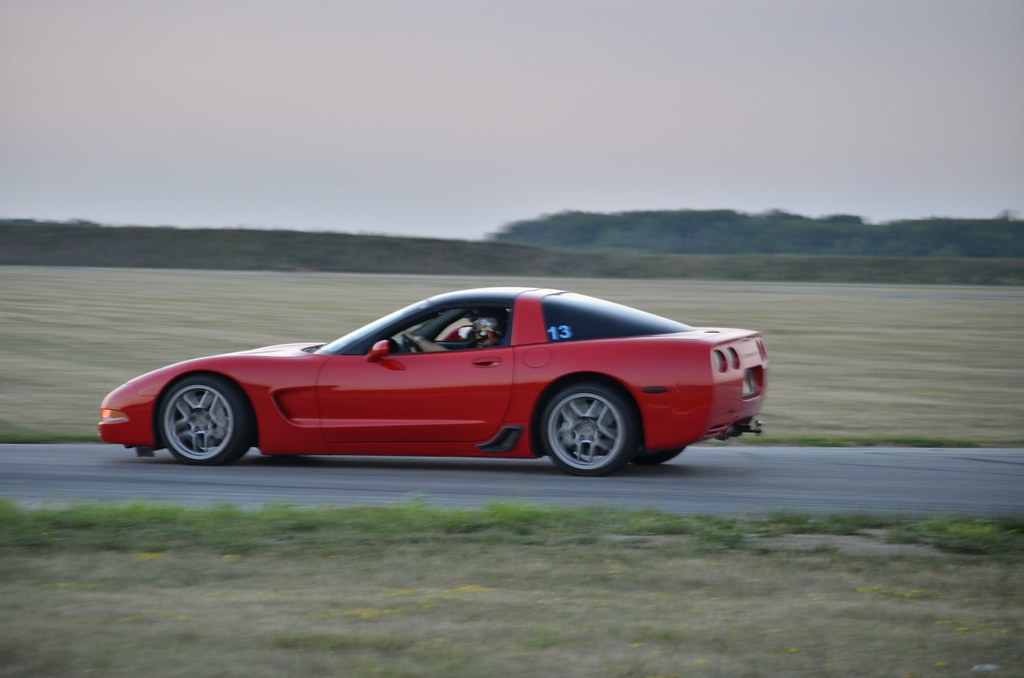 _DSC5552 by Norbert Ogiba, on Flickr
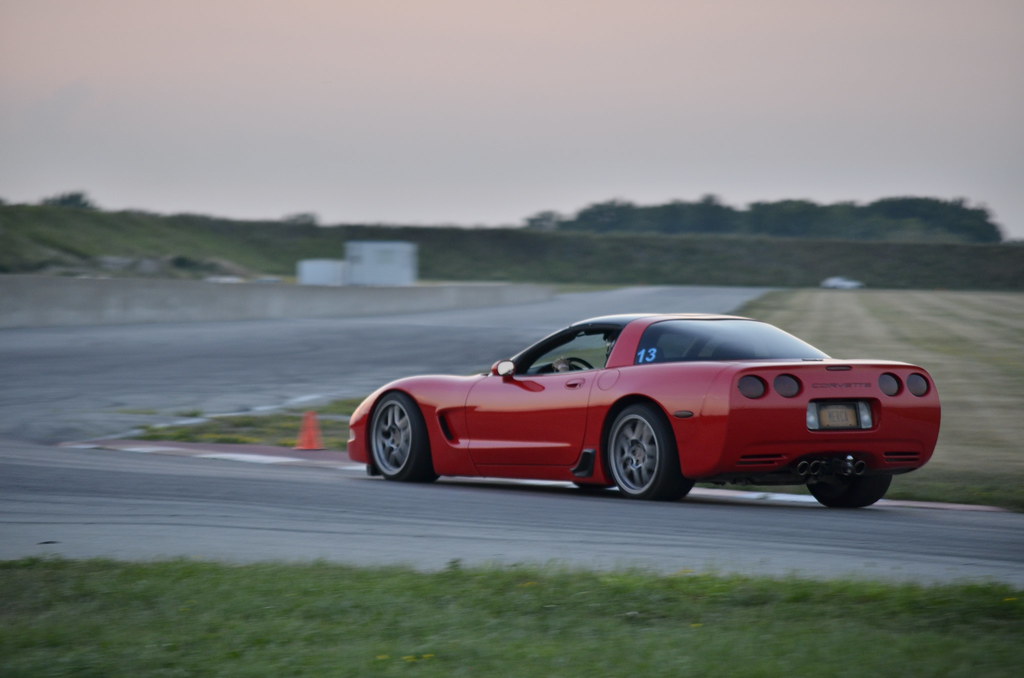 _DSC5553 by Norbert Ogiba, on Flickr
 _DSC5559 by Norbert Ogiba, on Flickr
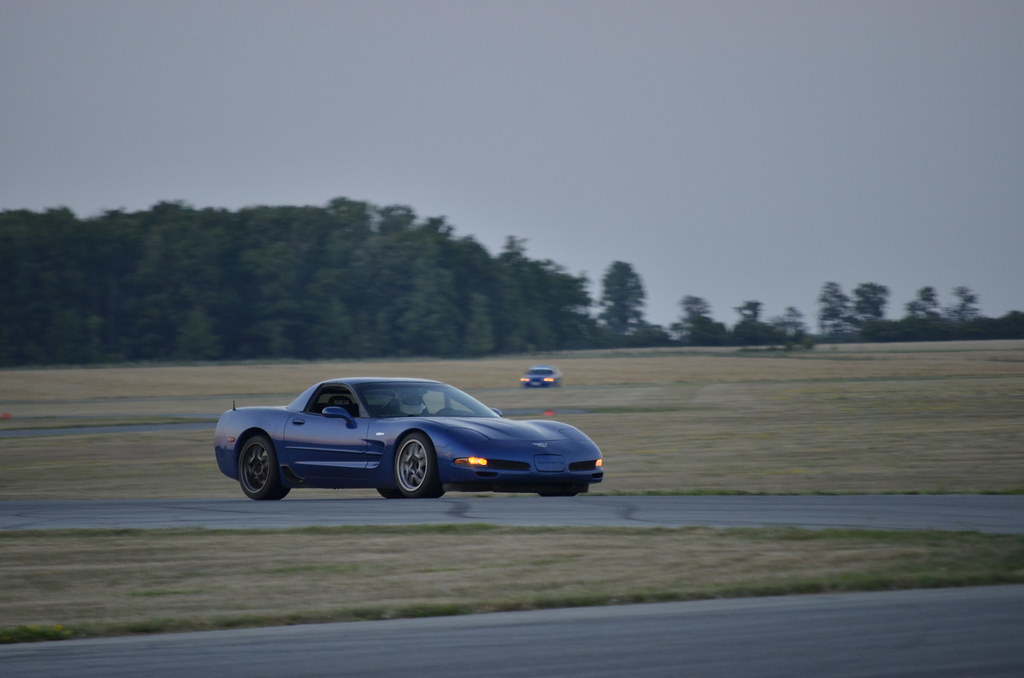 _DSC5560 by Norbert Ogiba, on Flickr
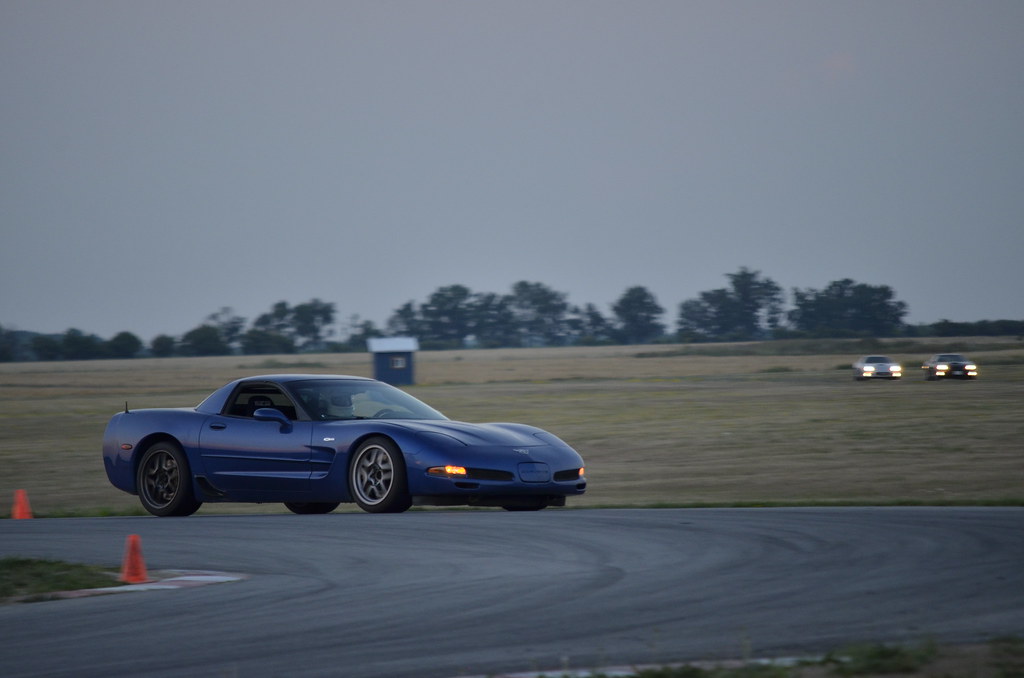 _DSC5561 by Norbert Ogiba, on Flickr
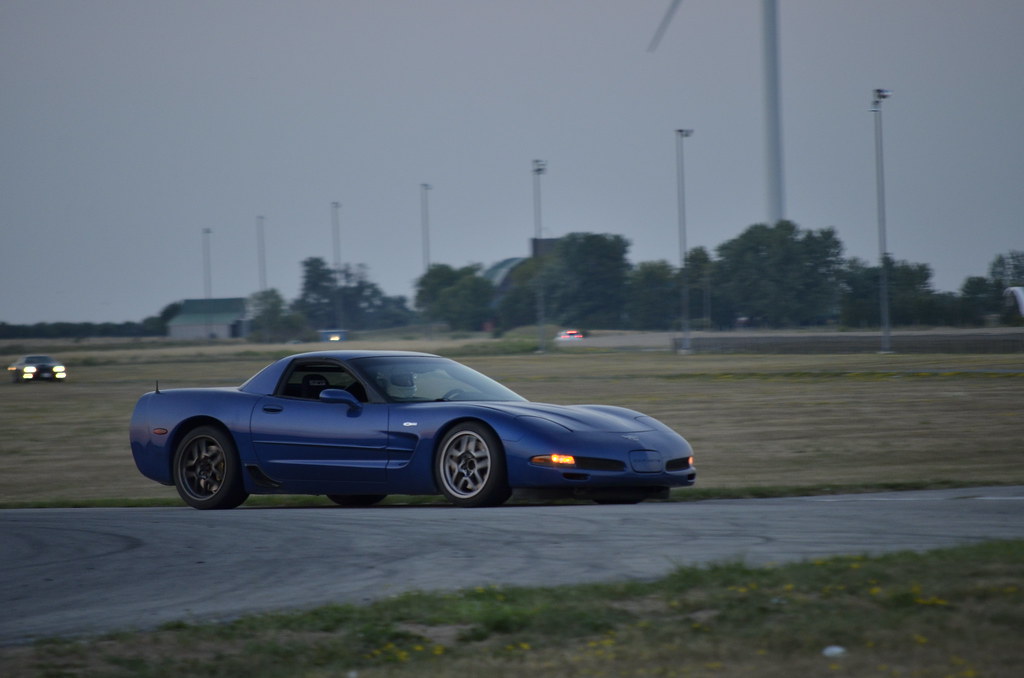 _DSC5562 by Norbert Ogiba, on Flickr
 _DSC5565 by Norbert Ogiba, on Flickr
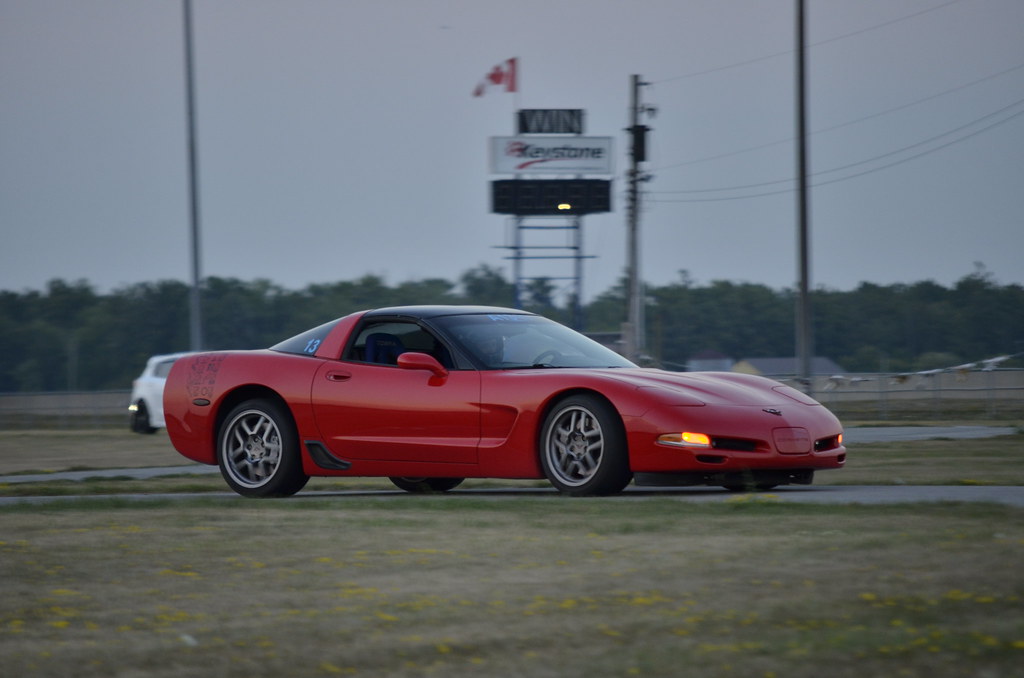 _DSC5567 by Norbert Ogiba, on Flickr
 _DSC5568 by Norbert Ogiba, on Flickr
 _DSC5569 by Norbert Ogiba, on Flickr
 _DSC5570 by Norbert Ogiba, on Flickr
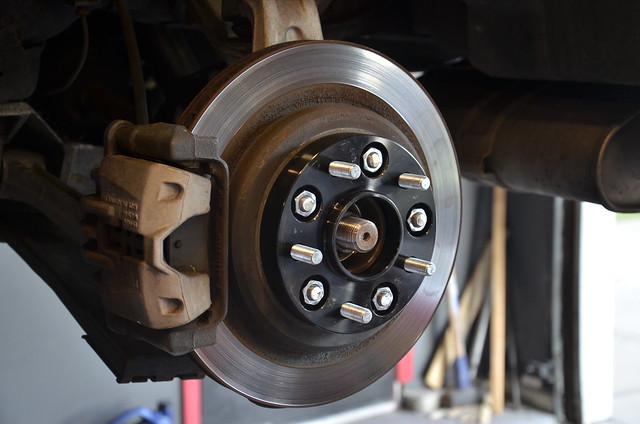
Note severe front brake dust
 _DSC5571 by Norbert Ogiba, on Flickr
 _DSC5572 by Norbert Ogiba, on Flickr
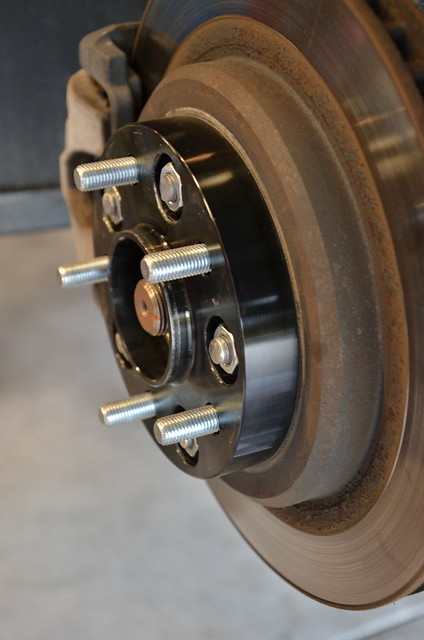
Post mortem
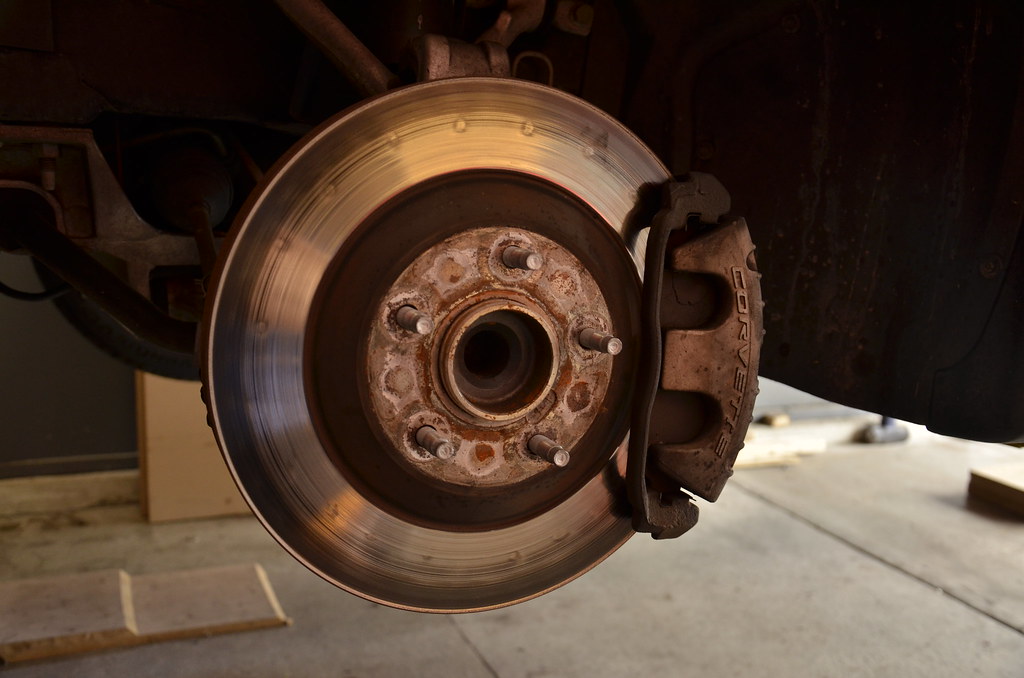 _DSC5573 by Norbert Ogiba, on Flickr
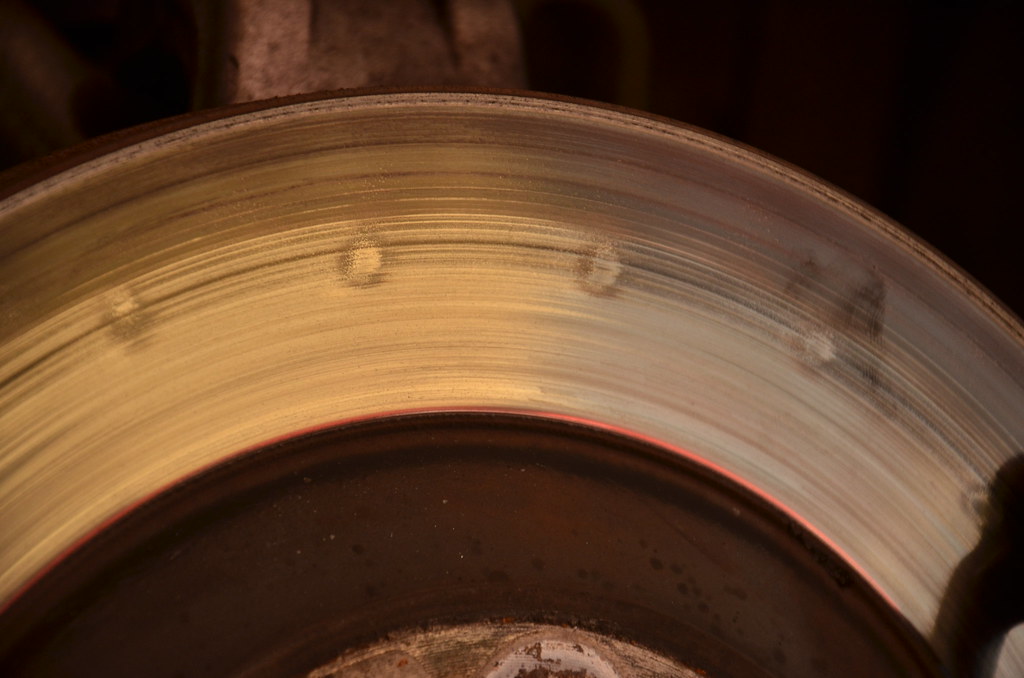 _DSC5574 by Norbert Ogiba, on Flickr
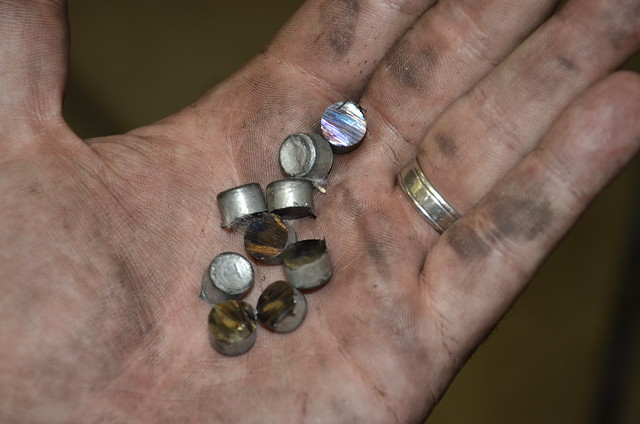
Cooked pads
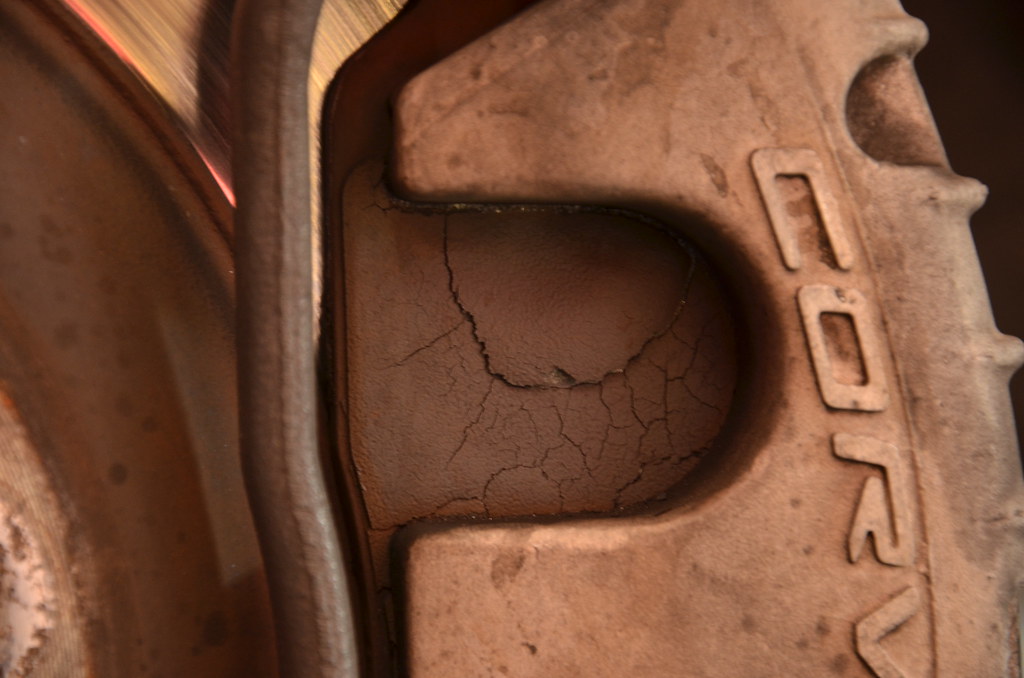 _DSC5575 by Norbert Ogiba, on Flickr
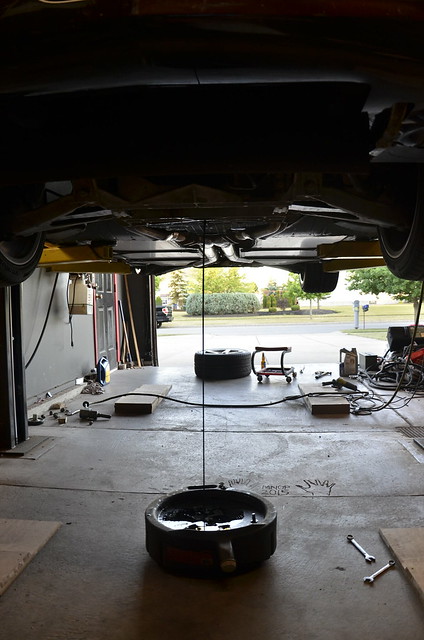
Corner exits slightly sideways on gravel will do that
 _DSC5576 by Norbert Ogiba, on Flickr
Last edited by nsogiba; Aug 9, 2016 at 09:49 AM.
Thread Starter
Drifting
Joined: Apr 2015
Posts: 1,893
Likes: 295
From: Buffalo NY
1:28 range, the biggest factors that slowed me down were (in order of most importance)
-(lack of) driver skill and familiarity with the track
-cooked the front pads and rotors
-overheated the ancient brake fluid
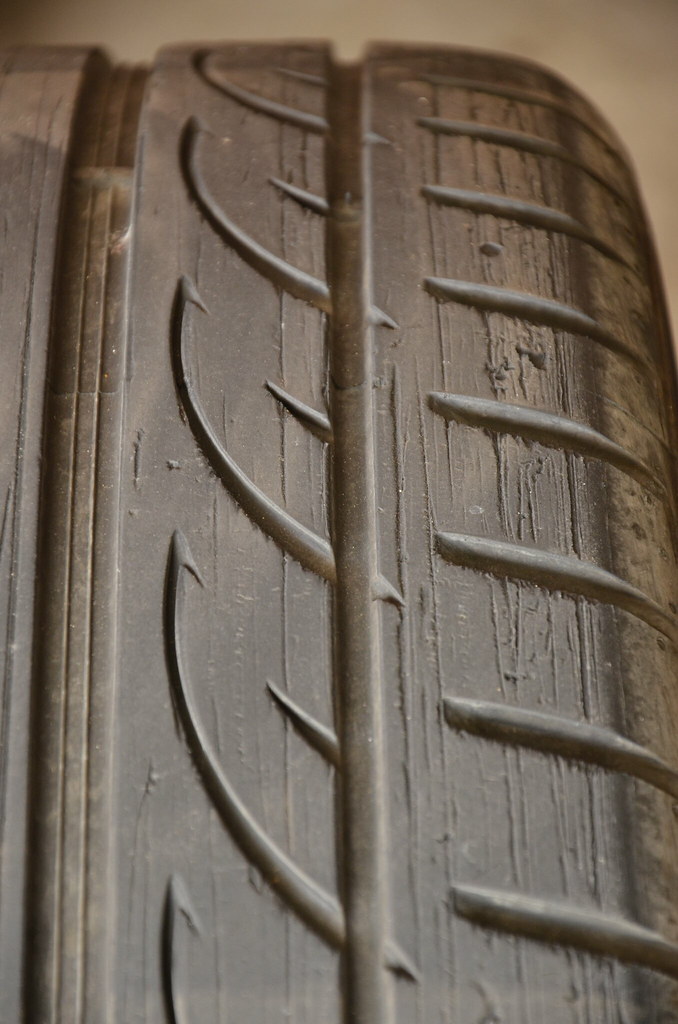
-fairly pedestrian street tires
-puff of blue smoke on decel at high revs meant I short shifted on the straights.
I have track pads and Motul RBF600 fluid in the mail - and am looking into a catch can.
I am also pondering putting together a cross bar that will bolt in behind the seats to hold a camera/gopro.
-(lack of) driver skill and familiarity with the track
-cooked the front pads and rotors
-overheated the ancient brake fluid
-fairly pedestrian street tires
-puff of blue smoke on decel at high revs meant I short shifted on the straights.
I have track pads and Motul RBF600 fluid in the mail - and am looking into a catch can.
I am also pondering putting together a cross bar that will bolt in behind the seats to hold a camera/gopro.

Thread Starter
Drifting
Joined: Apr 2015
Posts: 1,893
Likes: 295
From: Buffalo NY
I came out of work the other day to find that kids had throw rocks at my car for fun, chipping the hood/roof/trunk - so that was kind of the last straw for me. I am very heavily considering a vinyl wrap and have some samples on the way.

Instructor

Joined: Nov 2012
Posts: 114
Likes: 5
From: Fowlerville Michigan
Finally got my cutout setup finished up. Quick video of a rigged setup, using vacuum from the engine and power from a 12V adapter plugged into the wall. Just testing operation here.
https://www.youtube.com/watch?v=wRMpBEDMFtc
I ran the wiring inside the car and tapped into the fused switched power and kept blowing fuses - took the console back apart on Memorial Day and found 2 spots where the console had pinched the power wire, which broke the insulation and grounded it to the metal chassis tunnel. Replaced that section of wire, and got the whole interior finally back together. Test drive went great, works exactly as expected, the nice part is how quickly the cutouts close when you want them off. The spring snaps them shut in about half a second. In car videos to come.

Just driving around, closed I was seeing temps of ~120*F. With them open I was seeing over 200*F just cruising around.
I copied this setup, too:
My next steps are heat shielding and a complete 90* turn instead of just the 45* from QTP.
Last edited by BMan0660; Aug 10, 2016 at 11:41 AM.
Racer
Joined: Oct 2015
Posts: 312
Likes: 49
Where do you work? Maybe you should find something else to drive to work or a new job.... Three incidents on the work parking lot?