When you click on links to various merchants on this site and make a purchase, this can result in this site earning a commission. Affiliate programs and affiliations include, but are not limited to, the eBay Partner Network.
This is an inexpensive way to upgrade your interior if you are willing to put in some man hours.
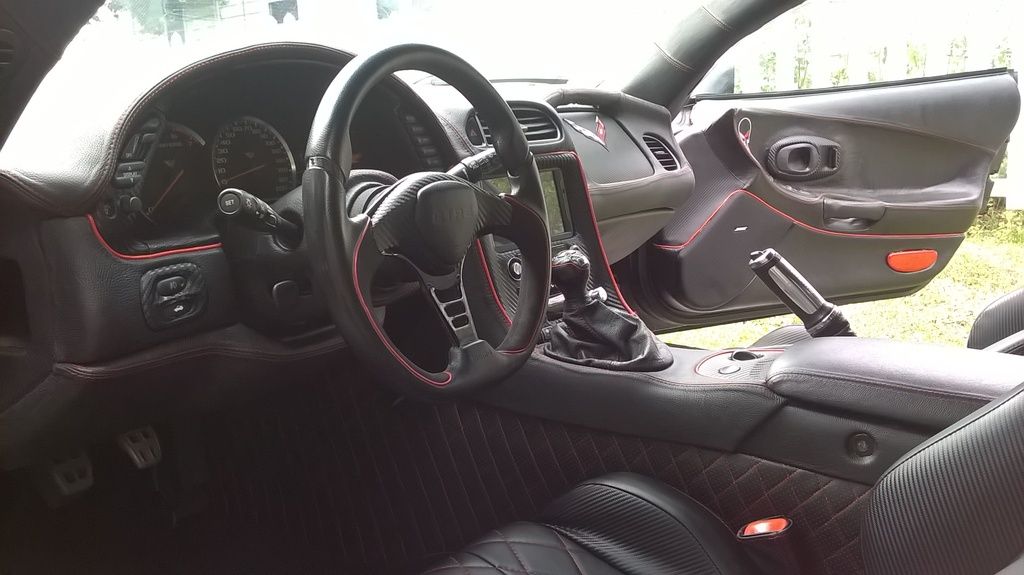
As some may remember last year I took on the challenge of leather wrapping my own interior using premade red stitch pieces from a company called Gaiter Boots found on fleabay, Matching plain black hide and Dinoc Carbon Fiber.
Basic Pic From Last Year
The Good
1. Pieces that worked great from Gaiter boots Driver Door, Armrest console, Pillars.
2. Wrapped with plain black leather glovebox, all interior trim around door threshold, seatbelt panels, rear speaker panels, roof panels.
Changes for this year
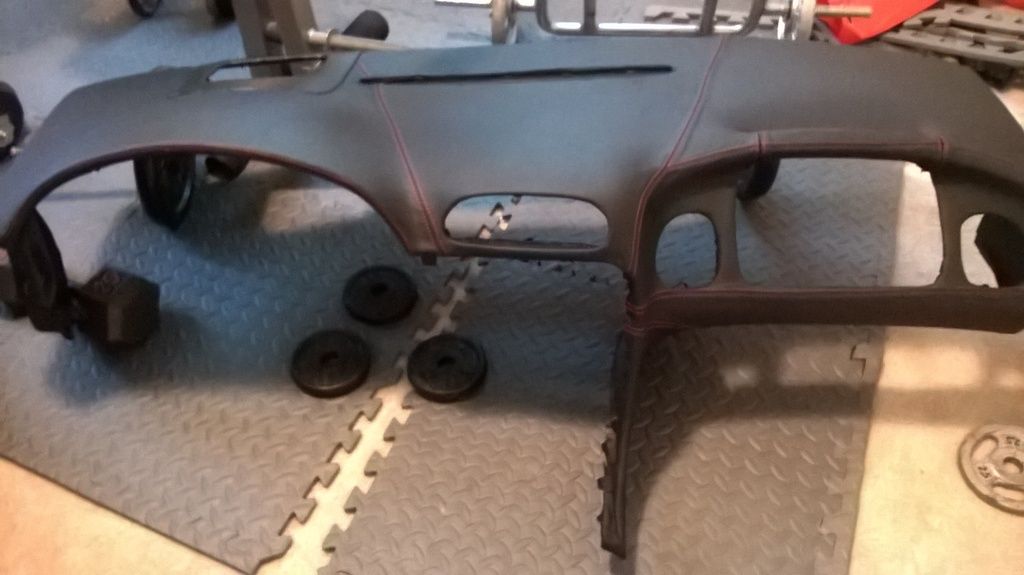
1. New dash. My inexperience and the dash taking a beating under the sun didn't hold up great. Do more prep work sanding and cleaning the surface. Also allowing the glue to bond for a week before putting back in the car and applying conditioner. Also wrapped the vents in a steel metallic wrap.
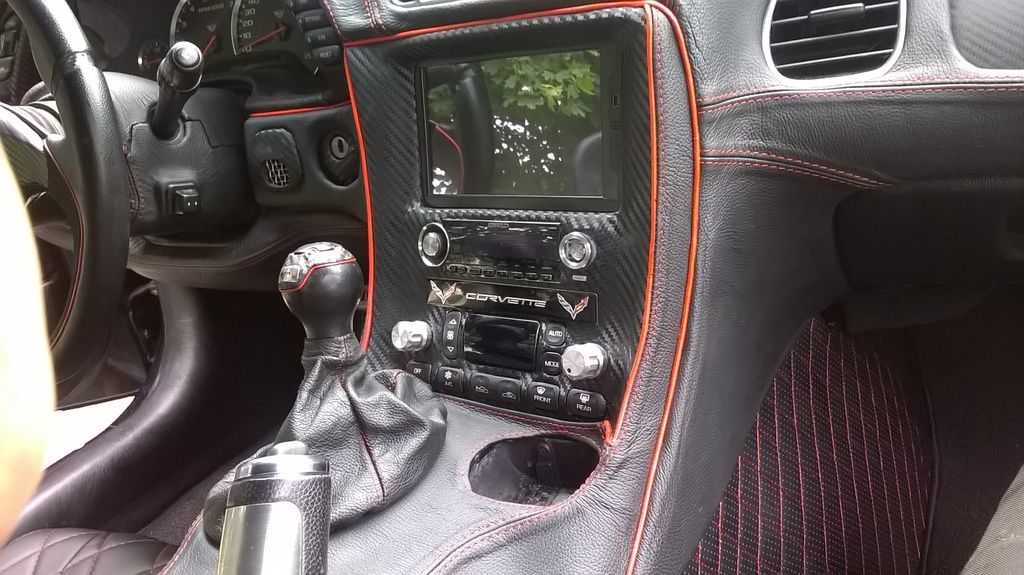
2. Gaiters Boots is going by the name j-f-customs now and has some new pieces. I'm trying their radio bezel cover (will be modified), steering shaft cover, seatbelt receptacle cover, and sun visor cover.
3. Also loved pics of others cars with Diamond stitch in their tunnel area. Found a company on aliexpress that makes perforated leather sheets of it.
4. Had mixed reviews of the red trim. I was on the borderline of love/hate but found a thinner version that is genuine leather. about 3mm thick vs 5mm thick used last. I think it pops without being overkill.
Made a risky move but cut out the stock carpet from the tunnel area to use as a template. Used 1/4" heavy duty rubber roll from homedepot to make the piece to wrap around. A bit thicker and heavier that then stock carpet/mat combo should help with heat and noise also. Cut an inch wider than the template to over lap the stock carpet on the floor. The material is a prestitched perforated PU Leather found on aliexpress about $60 for a huge piece like 6' x 10'
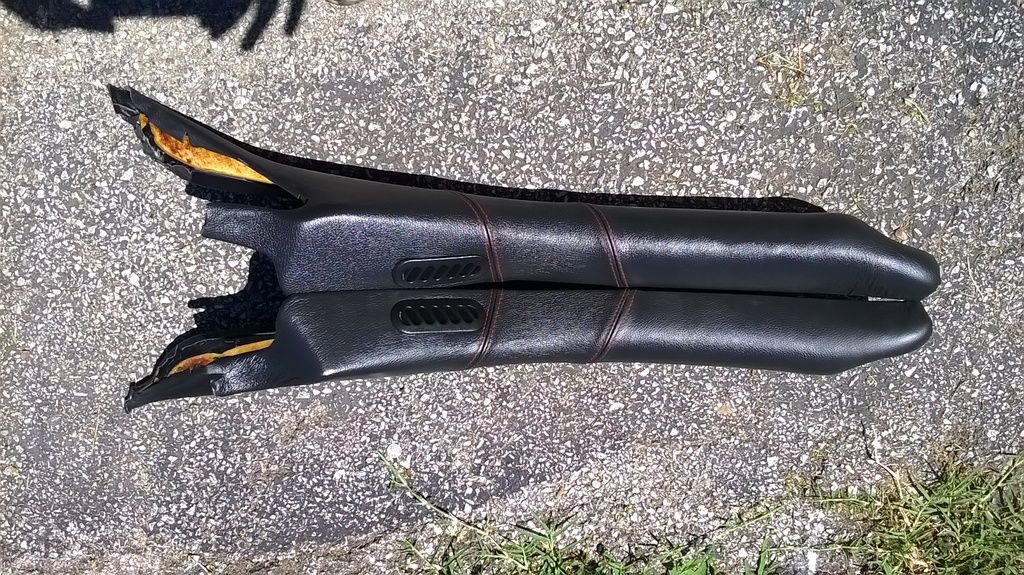
I kinda halfassed them because they were pretty distraught and had the floppy ears going. The gaiter boots pieces were Velcro at the top. I should have rebuilt them but they are much studier with the leather over top
Also gloss black wrapped my steering wheel back round and renewed the alcantara on the insides. Bad pic
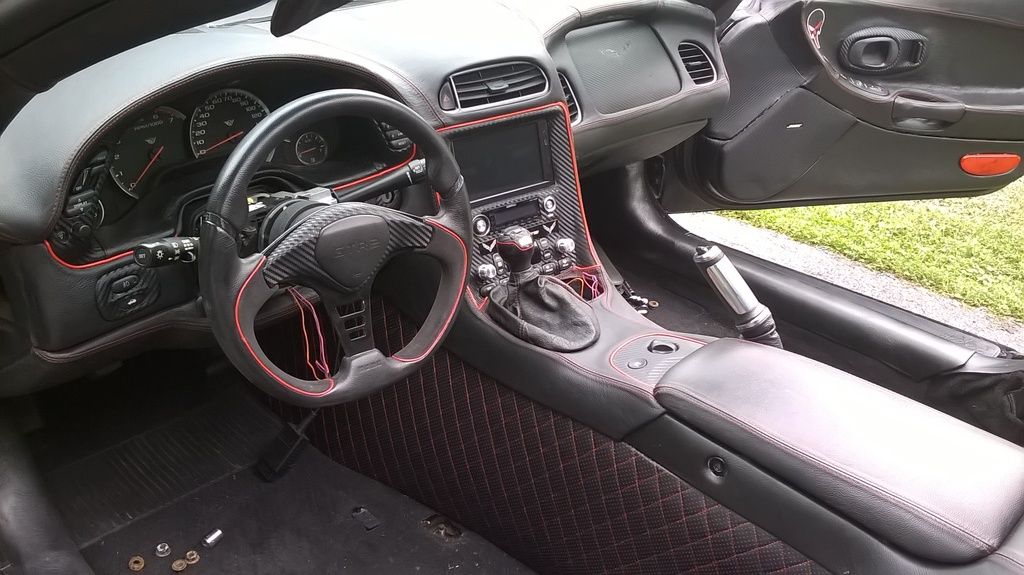
Coming together nicely I will finish up tomorrow and include pics of the radio bezel area and steering column piece and all cleaned up and more detailed pics.
Tom, it's looking great! Trying to figure out what to do with my seats, I have more of my double diamond stitched trim coming for the glove compartment and knee kick panel. The standard radio bezel is looking "old " now. I covered my Z's bezel with perf vinyl, but had a heck of a time with it, trying to avoid seams, etc. I was thinking of using black Dinoc on the bezel and door handle surrounds since it's so much easier to work with. I'd also like to know where you got that diamond stitch material you used for the trans tunnel!
I have been seriously been seriously considering doing this. Obviously there is a learning curve involved. I figured I would do the easiest pieces first and hope that I develop a technique by the time I get to the dash. One concern I have is that it may not hold up the Florida heat.
Tom, it's looking great! Trying to figure out what to do with my seats, I have more of my double diamond stitched trim coming for the glove compartment and knee kick panel. The standard radio bezel is looking "old " now. I covered my Z's bezel with perf vinyl, but had a heck of a time with it, trying to avoid seams, etc. I was thinking of using black Dinoc on the bezel and door handle surrounds since it's so much easier to work with. I'd also like to know where you got that diamond stitch material you used for the trans tunnel!
Yeah out of all the wraps the CF is the easiest to use. I have CF on the door handle surrounds but I did the handles with brushed black metallic. The vents I did with brushed steel. The diamond stitch I got from Aliexpress. Its really the only piece that's not pure leather. Type in " alcantara fabric furniture PU leather perforated " and it should pop up. If anyone finds it in real leather at a decent price let me know, for now it works
I have been seriously been seriously considering doing this. Obviously there is a learning curve involved. I figured I would do the easiest pieces first and hope that I develop a technique by the time I get to the dash. One concern I have is that it may not hold up the Florida heat.
What kind of glue do you recommend?
This is tough to answer and I hope my current method holds up. I used basic Welwood contact cement this time as that is what I used on my smaller pieces last year. I used Welwood Landau Top Cement last year on the dash as that was supposed to hold up to better heat. Like I said in the begging I screwed up the prep work and bonding time the first try. Also Since my car is outside all the time I got one of those window accordions to help with direct heat.
Originally Posted by K-Spaz
Wow, you've got a bunch of work in that. Nice job I especially like the way the tunnel looks.
How many hours would you guess you've got in the car so far? If I may ask...
I was on vacation all this week spent a lot of that time on this plus the pieces from last year. Also found a few days to finish my rear brakes while the glue dried. Money saved on interior went to some good stuff
Originally Posted by CactusCat
They don't call him "Super" Tom for nuttin' !!!!!
Haha thanks for the compliments everyone I guess Ive earned my name
Here is the rest in today just in time for some beer
Steering wheel cover
Buttoned up
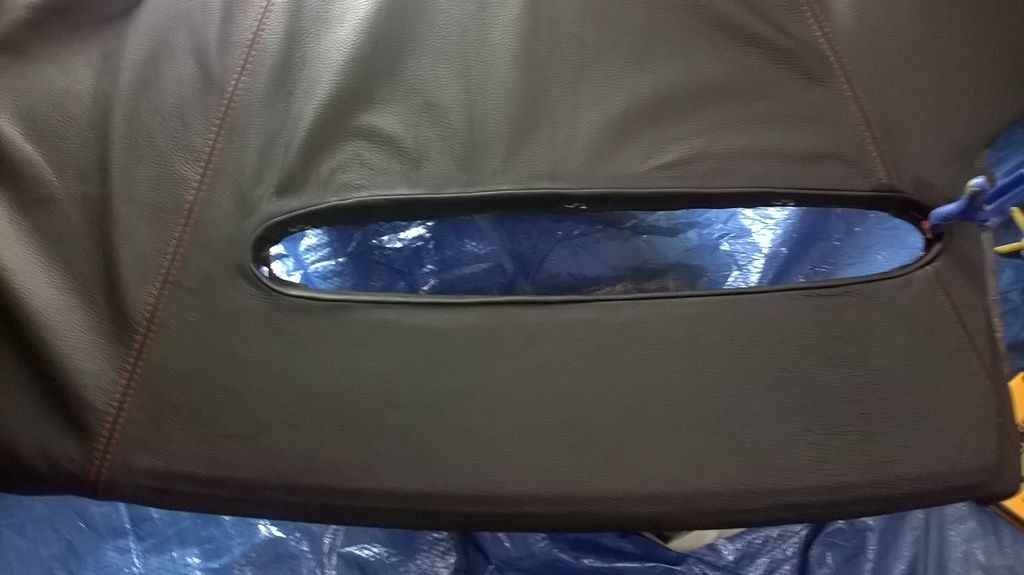
Getting that damn little vent to fit in the tunnel was one of the biggest PITA of this project
Radio bezel as promised. This piece was modified since the part made from Gaiters Boots is for a stock bezel. Was somewhat disappointed the cup lid wouldn't fit with this. Ive found a rubber fill piece that should make it look better later on
Found some hide of Real leather CF pattern I used for the Airbag. Some may love/hate the C7 emblem but I hate the oval hooked to the c5 flags. And you can see the Brushed steel wrapped vents. I also noticed the Velcro for the handrail was bothering me after looking at this pic. Ive since used some black silicone to fill the seam
Pinstripe on doors complete
Can't forget the covers for my C6 Seatbelt recepticals
Tom, a few questions:
How did you deal with the airbag cover? Did you work with it in place?
That final steering wheel piece was from JF customs? What other pieces did you get from them?
Where did you get the seat covers?
I'm gratified to see the combination of textures in your car. I'm including a pic of the beginnings of my interior design. Do you think the addition of dinoc to the bezel and door handle surrounds?
You also did the door handles? That must have been a bear.
Here's what I have so far: