


HVAC Blower issue - Redux part 2
Thread Starter
Pro


Joined: Dec 2010
Posts: 508
Likes: 3
From: Tallahassee, FL
I'm having continuing HVAC Blower issues. Replaced Module & Blower Motor. All worked fine for 3 months. Had 4 days of rain, Humidity was high in car, but mildly damp carpet, no condensation on glass or instruments.
Started up put on A/C and set blower to high. Roll down driveway backwards and a waterfall of water comes from behind the dash on to pass. side floor. 2 minutes later, blower stops. Get back home and start to work on it
Fusebox and computer in kick area was bone dry. Disconnected battery, removed carpet, dried everything with fans in an A/C garage set to COLD.
Removed and inspected all 4 udders and HVAC drain tube. All were dry and without foreign material. Check all fuses and OK. Pulled blower motor and module. Area inside plenum was bone dry motor has some signs of surface rust but bench tests good. Module looks pristine, opened and no signs of corrosion on the circuitry. Bench tests good too.
Reassemble and hook up, no blower. A/C compressor kicks on and engine cooling fans come on properly.
The PS sill was quite wet so this leads me to leaky door, window or windshield gaskets which I'll address tonight. I'm thinking ground connector F202 is corroded and not completing the circuit.
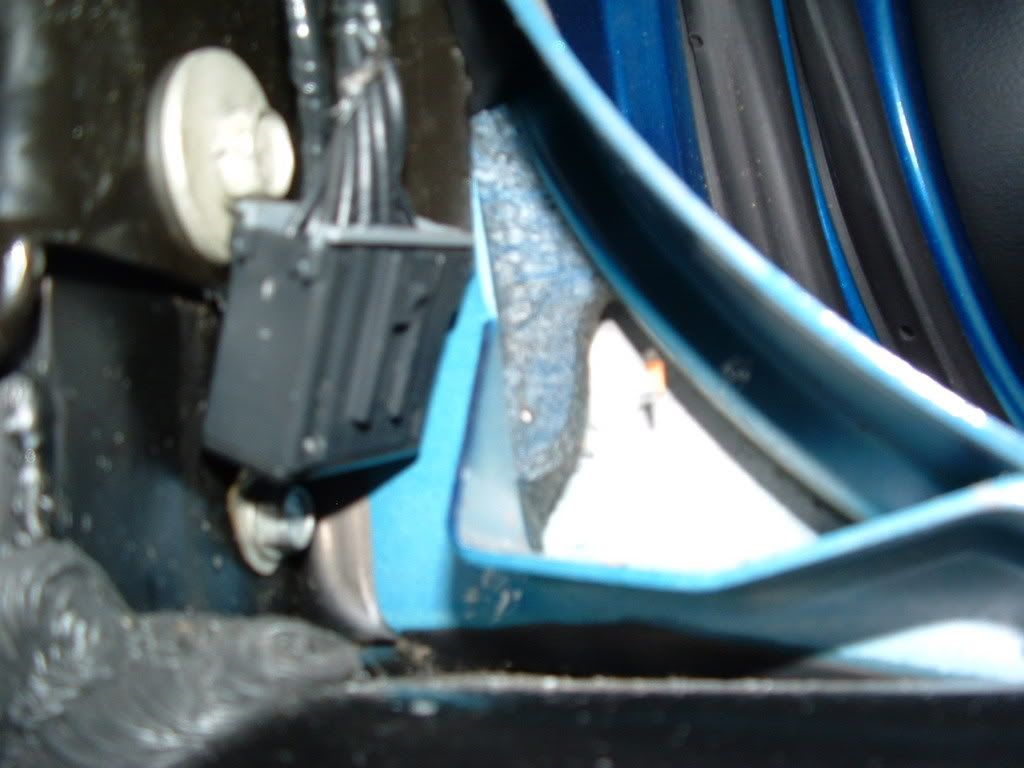
So question is, how do you access the ground bolt shown in this photo I borrowed from Bill Curlee? Can't get a wrench on it or a universal socket.
Or can it be disassembled while still bolted down?
Started up put on A/C and set blower to high. Roll down driveway backwards and a waterfall of water comes from behind the dash on to pass. side floor. 2 minutes later, blower stops. Get back home and start to work on it
Fusebox and computer in kick area was bone dry. Disconnected battery, removed carpet, dried everything with fans in an A/C garage set to COLD.
Removed and inspected all 4 udders and HVAC drain tube. All were dry and without foreign material. Check all fuses and OK. Pulled blower motor and module. Area inside plenum was bone dry motor has some signs of surface rust but bench tests good. Module looks pristine, opened and no signs of corrosion on the circuitry. Bench tests good too.
Reassemble and hook up, no blower. A/C compressor kicks on and engine cooling fans come on properly.
The PS sill was quite wet so this leads me to leaky door, window or windshield gaskets which I'll address tonight. I'm thinking ground connector F202 is corroded and not completing the circuit.
So question is, how do you access the ground bolt shown in this photo I borrowed from Bill Curlee? Can't get a wrench on it or a universal socket.
Or can it be disassembled while still bolted down?
Drifting


Joined: Sep 2009
Posts: 1,862
Likes: 594
From: Prescott, Arizona
I thought the passenger side was the easier of the two sides to get out. I used a small box end wrench, 1/12 turn at a time. You might have to grind the wrench (last resort, grind the car) to get the 1/12 turn.
Getting the driver side bolt started was the hardest for me. One pinky for guidance, 1/12 turn and it started.
I use dialectric grease on everything, like I have been doing on automotive electrical connections for the last 15 years. Once they are clean and greased, no more corrosion or connection problem.
The connection pack can be dissassembled, but I don't think in place because the back tab is inaccessable in place.
Thread Starter
Pro
Joined: Dec 2010
Posts: 508
Likes: 3
From: Tallahassee, FL
I can get it about a 1/4 turn, but the whole assembly turns together, even if I hold the connector with my other hand. I totally concur with dielectric grease, I use it on all the connections I R&R.
But here's a twist, It's not the ground (I don't think anyway). While I'm down here doing these circus freak contortions, I decided to run a jumper from the ground bolt to the blower case. Fan runs, 1 speed only. I think this is telling me the module is not good?
But here's a twist, It's not the ground (I don't think anyway). While I'm down here doing these circus freak contortions, I decided to run a jumper from the ground bolt to the blower case. Fan runs, 1 speed only. I think this is telling me the module is not good?
Thread Starter
Pro
Joined: Dec 2010
Posts: 508
Likes: 3
From: Tallahassee, FL
Just got it done. Went and got a offset box end at Autozone. Ground a notch in it and it only took 20 mins of miniscule turns. 
Connector looked good, but I sanded the male contacts and lug lightly anyway. Sprayed with Boeshield and reassembled. Cleaned the bolt and tapped hole with thread chaser and sprayed with Boeshield. Reinstalled and still nothing. Called the vendor I purchased the module from 3 months ago and he's shipping me a new one tomorrow, no questions asked.
Connector looked good, but I sanded the male contacts and lug lightly anyway. Sprayed with Boeshield and reassembled. Cleaned the bolt and tapped hole with thread chaser and sprayed with Boeshield. Reinstalled and still nothing. Called the vendor I purchased the module from 3 months ago and he's shipping me a new one tomorrow, no questions asked.
Drifting
Joined: Sep 2009
Posts: 1,862
Likes: 594
From: Prescott, Arizona
Good luck.
Save that wrench for the driver's side. There are two ground packs there, the upper one has a wire going to the bolt through the tab on the lower one. I remember even less room there.
Save that wrench for the driver's side. There are two ground packs there, the upper one has a wire going to the bolt through the tab on the lower one. I remember even less room there.
Thread Starter
Pro
Joined: Dec 2010
Posts: 508
Likes: 3
From: Tallahassee, FL
!!!*$$%#
Just put in brand new module and no joy.
So, to recap... '03Z, fuses all good. Removed, tested with meter and checked contacts, applied Boeshield. reinstalled and made sure seated positvely. Check with meter and 12v going through all.
Replace module with 2nd new one (from GM), blower still no workie. Works full blast when ground case to chasis.
Disassemble G202 and SP202. Look clean. Lightly sand contacts and clean threads. Spry with Boeshield. Still nothing.
Any new suggestions?
Tech Contributor


Joined: Jan 2007
Posts: 19,475
Likes: 1,171
From: Dyer, IN
!!!*$$%#
Just put in brand new module and no joy.
So, to recap... '03Z, fuses all good. Removed, tested with meter and checked contacts, applied Boeshield. reinstalled and made sure seated positvely. Check with meter and 12v going through all.
Replace module with 2nd new one (from GM), blower still no workie. Works full blast when ground case to chasis.
Disassemble G202 and SP202. Look clean. Lightly sand contacts and clean threads. Spry with Boeshield. Still nothing.
Any new suggestions?
Just put in brand new module and no joy.
So, to recap... '03Z, fuses all good. Removed, tested with meter and checked contacts, applied Boeshield. reinstalled and made sure seated positvely. Check with meter and 12v going through all.
Replace module with 2nd new one (from GM), blower still no workie. Works full blast when ground case to chasis.
Disassemble G202 and SP202. Look clean. Lightly sand contacts and clean threads. Spry with Boeshield. Still nothing.
Any new suggestions?

Corvette Stories
The Best of Corvette for Corvette Enthusiasts

Top 10 Most Expensive Corvettes Ever Sold on Bring A Trailer
Brett Foote
10 Things Every Corvette Owner Needs (2026 Edition)
Michael S. Palmer
8 Most "Only Corvette Owners Understand" Quirks and Problems
Pouria Savadkouei
10 Reasons the C6 Z06 is Still A Performance Benchmark After 20 Years
Joe Kucinski
How Much Horsepower Every Corvette Engine "LOST" in 1972
Joe Kucinski
Top 10 DOs and DON'Ts for Protecting Your Convertible Top!
Michael S. Palmer
Top 10 Most Explosive Corvettes Ever Made: Power-to-Weight Ratio Ranked!
Joe Kucinski
150 hp to 1,250 hp: Every Corvette Generation Compared by the Specs That Matter
Joe Kucinski
8 Coolest Corvette Pace Cars (and Replicas) of All Time
Verdad Gallardo
Thread Starter
Pro
Joined: Dec 2010
Posts: 508
Likes: 3
From: Tallahassee, FL
Tech Contributor
Joined: Jan 2007
Posts: 19,475
Likes: 1,171
From: Dyer, IN
Thread Starter
Pro
Joined: Dec 2010
Posts: 508
Likes: 3
From: Tallahassee, FL
Since I'm not good with elec schematics, I've pulled and checked all related fuses... 51, 27, 18 in Pass footwell, 34, 24 in engine compartment. Verified 12v though them. Pulled SP202 at G202 inspected and cleaned, replaced. all other circuits running through that ground pack function properly. There is 12v coming from module pin out, grounded blower case, runs full blast.
Last edited by FNFastZ06; Nov 14, 2011 at 12:44 PM.
Tech Contributor
Joined: Jan 2007
Posts: 19,475
Likes: 1,171
From: Dyer, IN
Since I'm not good with elec schematics, I've pulled and checked all related fuses... 51, 27, 18 in Pass footwell, 34, 24 in engine compartment. Verified 12v though them. Pulled SP202 at G202 inspected and cleaned, replaced. all other circuits running through that ground pack function properly. There is 12v coming from module pin out, grounded blower case, runs full blast.
Pin B - Battery (red wire) - you grounded the case, so that suggests this is good
Pin C - Variable output from the control module for blower speed (tan wire)
Pin A - Ground (black wire)
Do you have a good ground at Pin A?
When backprobing Pin C , does the voltage vary as you change the blower speed on the control panel?
Tech Contributor
Joined: Jan 2007
Posts: 19,475
Likes: 1,171
From: Dyer, IN
Hmmm....that's not good.
I had to dig on my hard drive, because I know that I had taken pics last time I troubleshot this for someone.
Back probing the connector can be a challenge, so I always remove the contact seals to ensure I get the jumper wires wedged in snug.
Pics top to bottom:
1) Connector seals pulled back
2) Jumper wires in place. Even though I'm only testing the tan wire for the blower control circuit, I always use an additional jumper for the battery feed, so I can double check I have a good ground, ,meter connections, etc. Tested with connector plugged into the BMCP.
3) Meter reading with blower at full (high speed) : 1.146 VDC
4) Meter reading with blower at mid way (medium speed) : 3.465 VDC
5) Meter reading with blower off (lowest setting) : 4.636 VDC
Last edited by lucky131969; Nov 14, 2011 at 02:14 PM.