The Dreadded Oil Pressure Sensor
#21
Team Owner


I got mine "somewhat loose", but it wouldn't come out. I just put it back in place, snugged the bolt, and so far, it's been OK..........
#22
Le Mans Master


What I did after two brass replacements failed in a row.
You can save a bit if your handy. Once you have the failed OP sender out you can break off the plastic top and pull out the electronics. Then you can tap the oil hole in the brass base of the old OPS to accept a 1/8" or 1/4" male SS braided flex hose that can be run to a location under the fuel rail covers. There is also a Buick version of the Chevy brass OP sender that uses the same wiring connections but has 1/8" NPT brass nipple on it making it much easier to find connecting parts.
https://www.summitracing.com/parts/smp-ps401 or for less you can get a lifetime warranty version ffom O'Riley's Auto Parts BWD - Oil Pressure Sender
Part # S4201 $39.99 Each
http://www.oreillyauto.com/site/c/de...ensor!s!switch
I also used a Earl's Performance Speed-Flex SS brake line https://www.summitracing.com/parts/ear-64151518erl
and a Edelmann 203200 1/8-1/8 coupler https://www.summitracing.com/parts/edd-203200
to connect up the sensor to the SS line.
Total cost was about $57.00 for parts.
#23
8th Gear


Thread Starter
First off, thank you to everyone for the advice. I replaced the sensor this afternoon. Spent all last night tracking down the 1 1/16 socket which of course I could only find in 1/2 drive, which meant I needed an adaptor to get the universal on it. I spent about 20 minutes trying to figure out how to get to it with the manifold in place. Couldn't see it, couldn't feel it.... that wasn't gonna happen (at least not for me).
So, off with the manifold. Took my time, double checked everything. Manifold out, valley cleaned, manifold cleaned, throttle body cleaned, new gaskets installed and reinstalled in about 4 hours. Which included the trip back to the store to get the fuel line separator tool. Most challenging part of the whole process was the PITA rear drivers side manifold bolt which I could only get to with a tiny box end wrench and could only turn about a 1/2 turn at a time.
So, off with the manifold. Took my time, double checked everything. Manifold out, valley cleaned, manifold cleaned, throttle body cleaned, new gaskets installed and reinstalled in about 4 hours. Which included the trip back to the store to get the fuel line separator tool. Most challenging part of the whole process was the PITA rear drivers side manifold bolt which I could only get to with a tiny box end wrench and could only turn about a 1/2 turn at a time.
#24
Heel & Toe


RiddicZ06;
I have my intake off now for the dreaded air check valve replace.
The spaces between the ports are filthy. Also, the ports seem to have a black gummy film in them. Did you clean all of that as well as the ports? What did you use?
I have my intake off now for the dreaded air check valve replace.
The spaces between the ports are filthy. Also, the ports seem to have a black gummy film in them. Did you clean all of that as well as the ports? What did you use?
#25
mike v

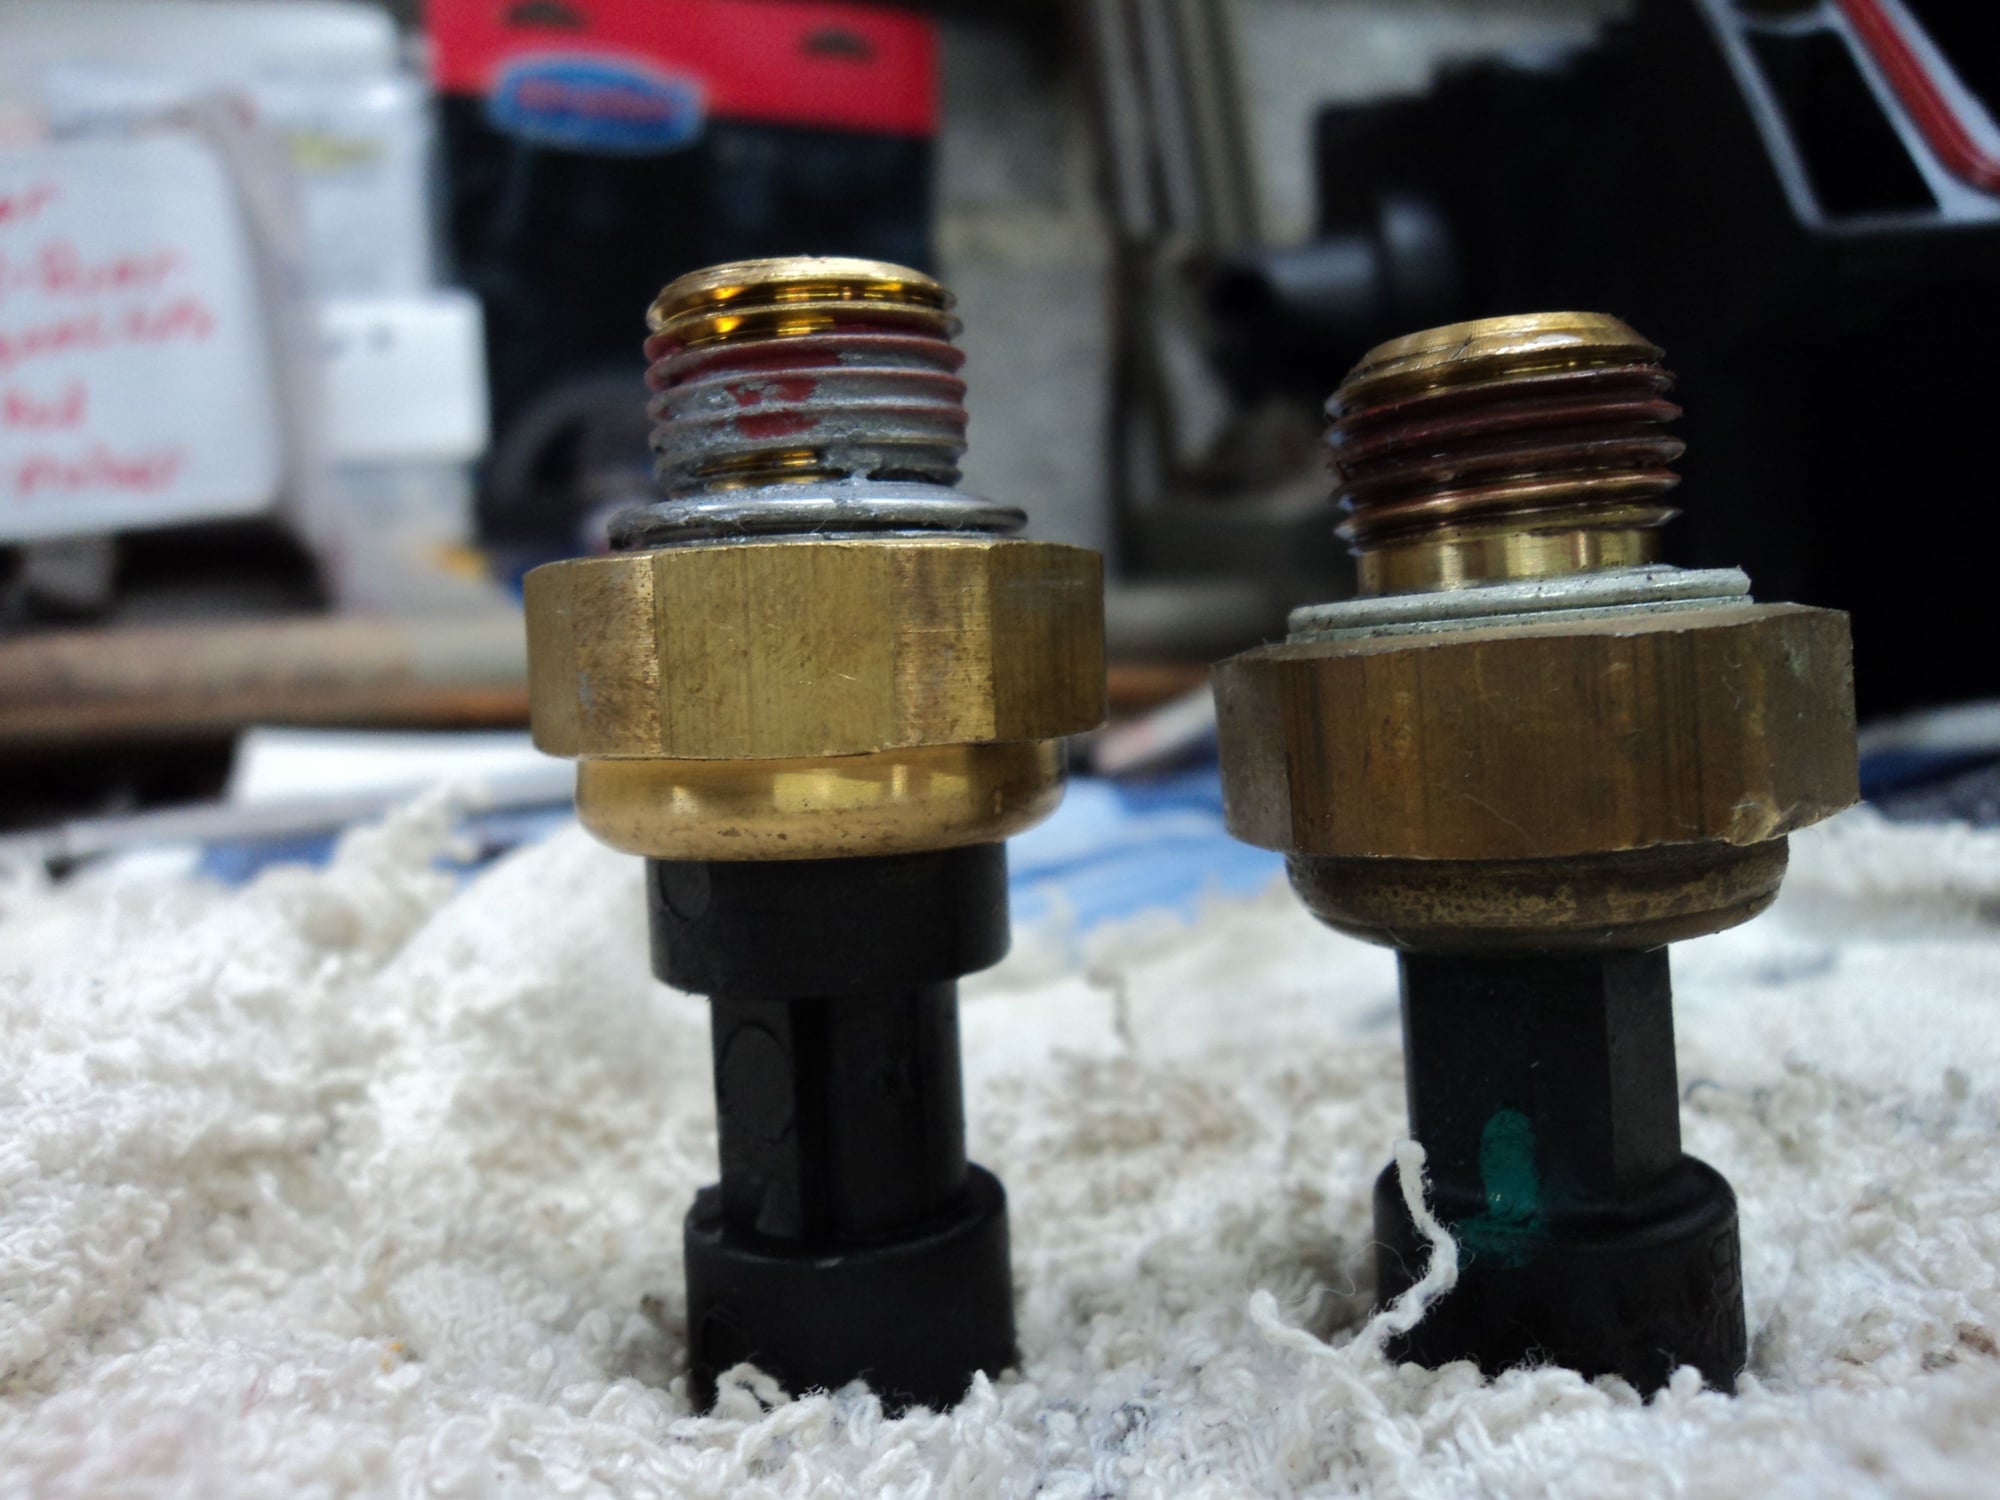
I got from o'reilly's, be careful not to crack the plastic area when torqueing it down.
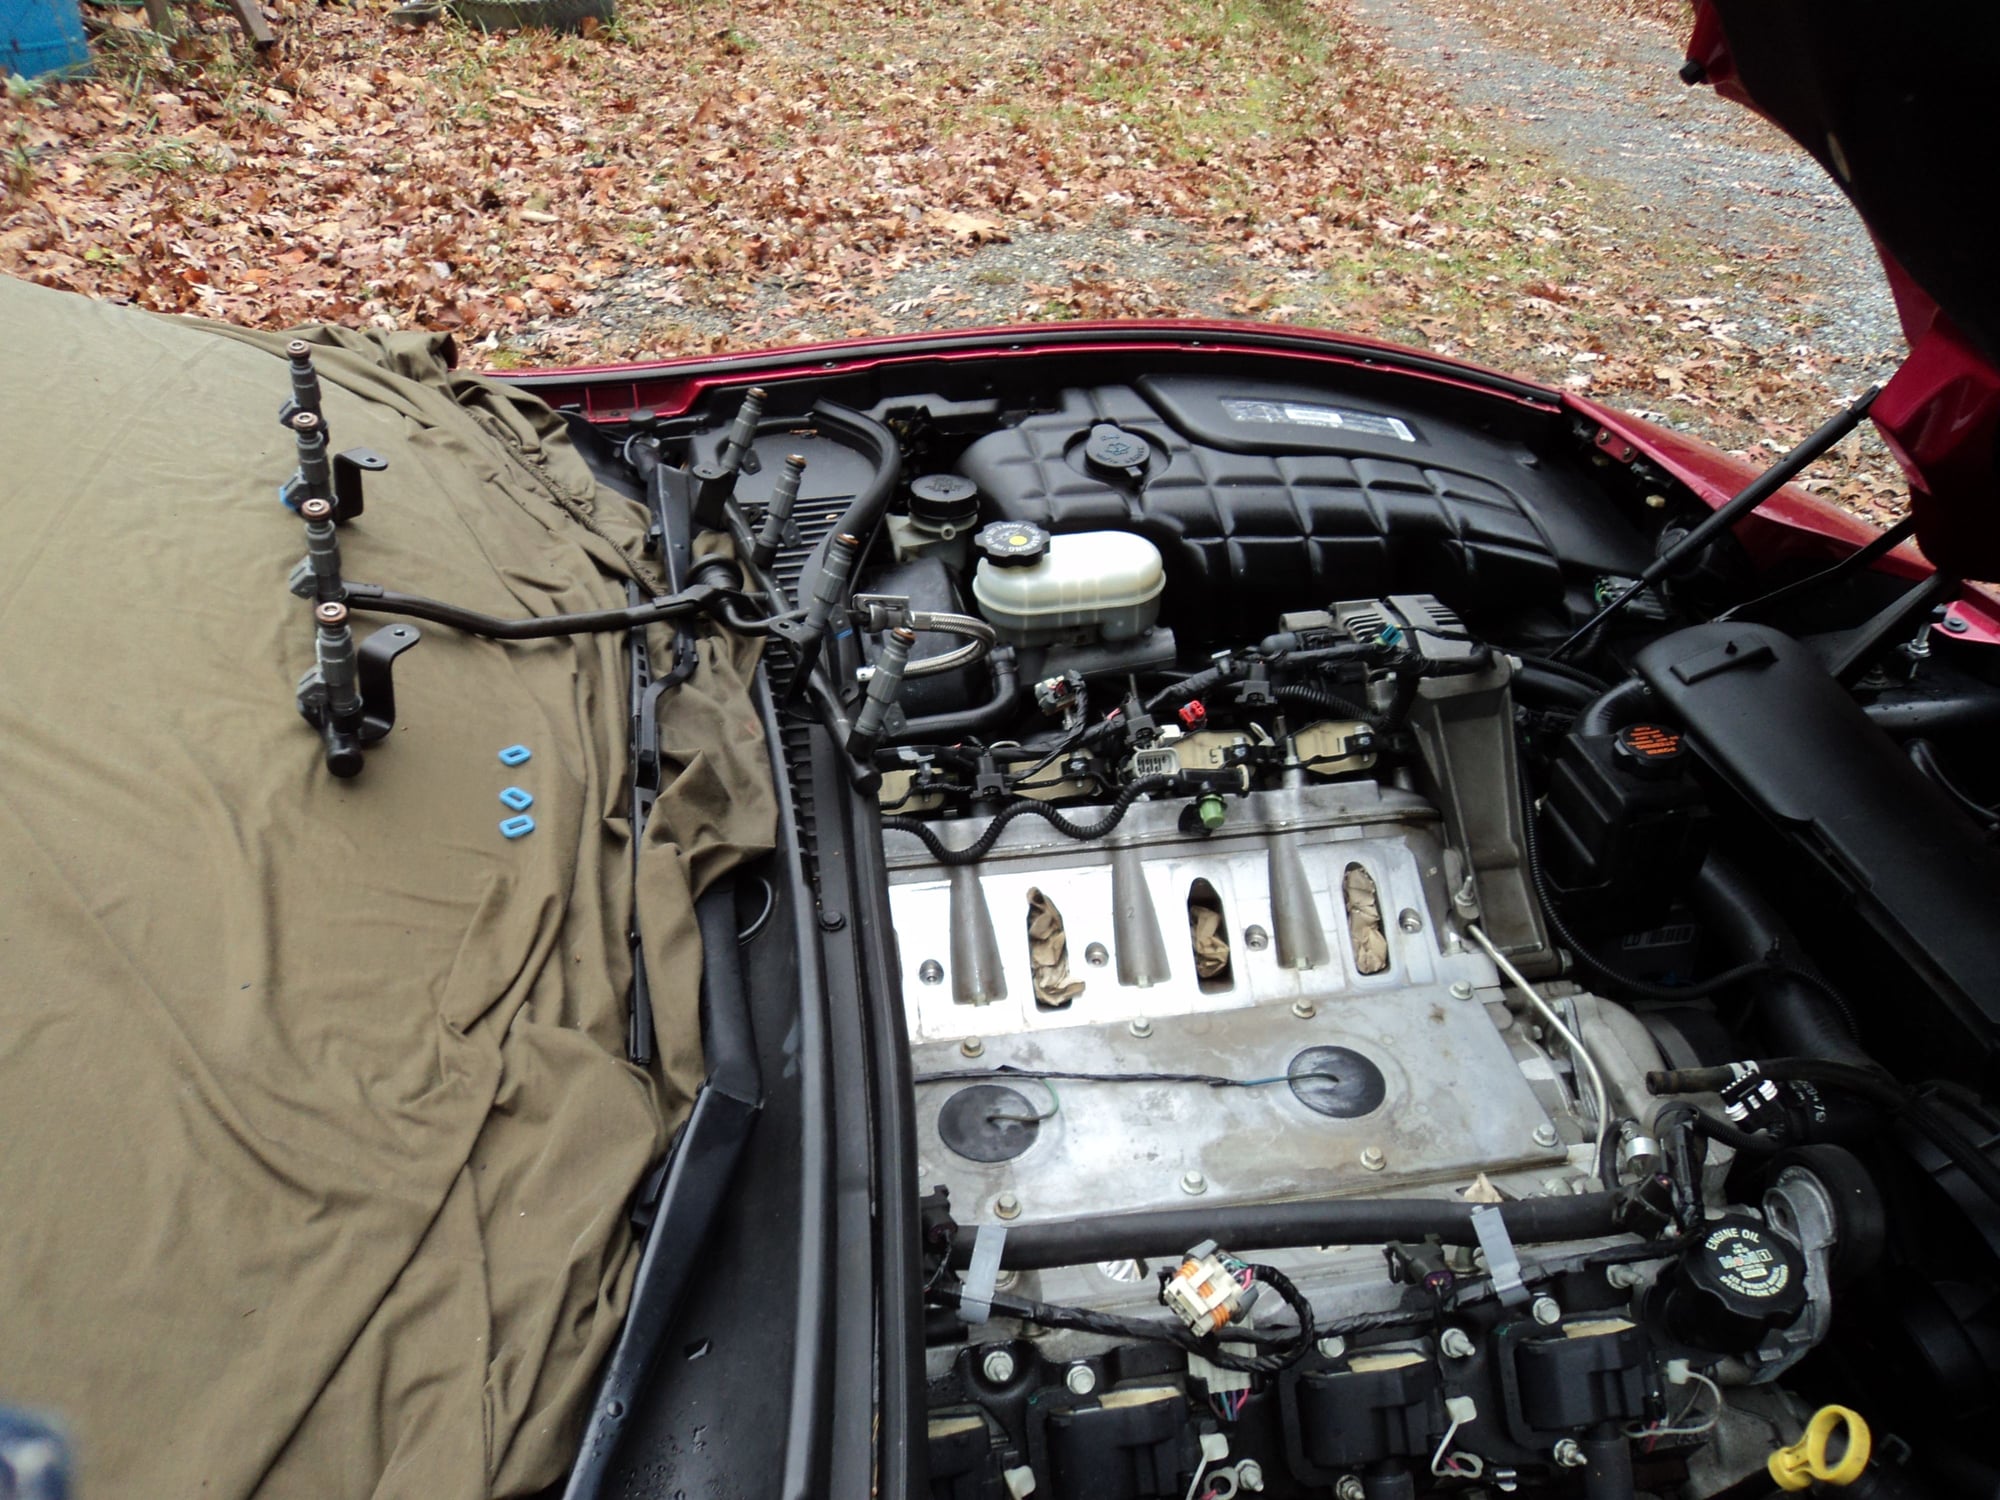
While its apart good time to do some cleaning under the intake, also put some PVC around the spark-rubbers if they are old to avoid leaks or junk getting under them(thanks Bill C for the heads up). mike
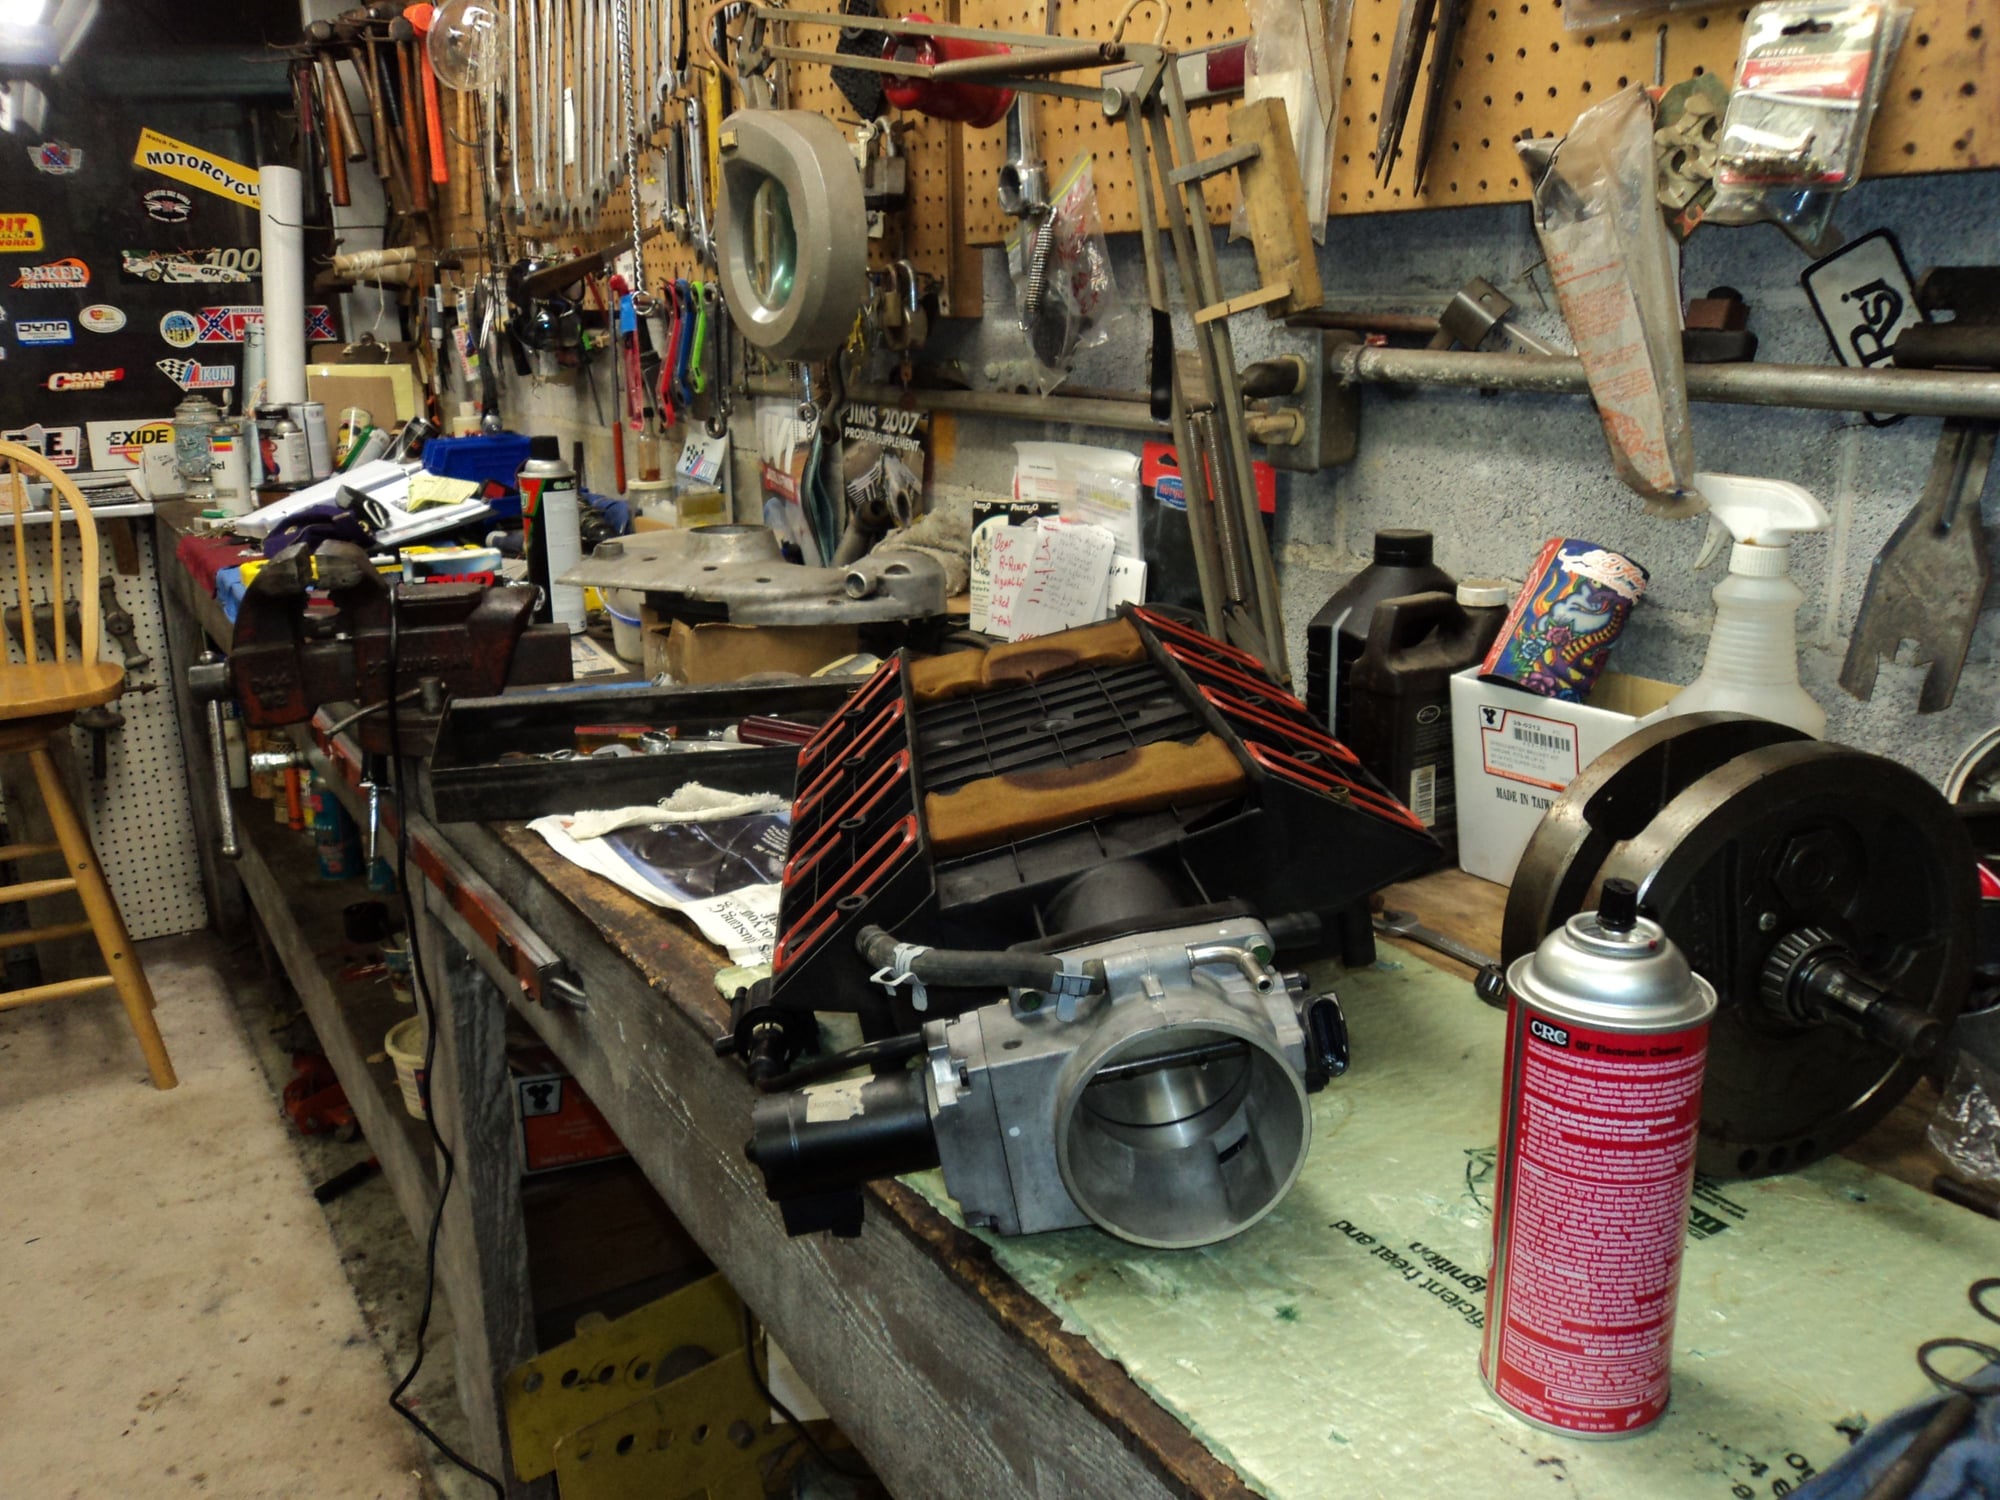
I also took advantage of having the intake off to clean out all the oil inside of it. Coulden't believe how dirty and oily it was. Put new gaskets on it also.
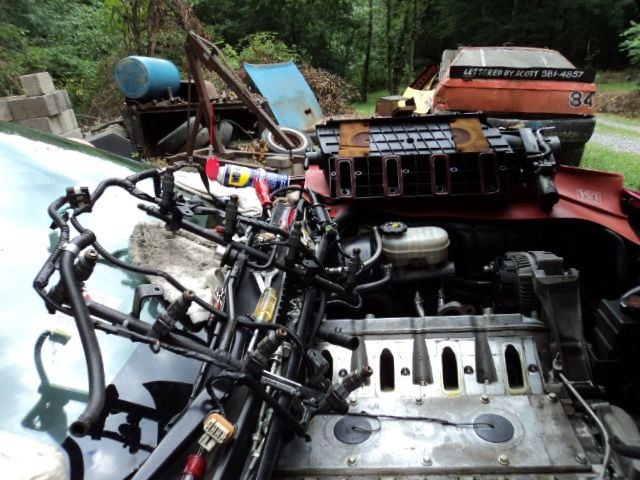
I just layed the fuel rails back out of the way!! Be easy....

PS be sure to remove the TB and cleaning and replace the gasket, and while off clean the TB real good. You can buy the all gaskets separately from most local auto parts stores... Way less then stealership. mike v
#26
mike v

More info---Just came across this also
Sensor relocate for dummies
Well, I want this nightmare to be over after swapping this thing out now coming on the 3rd time. I needed a step by step on the parts that could be purchased from a vendor and did not require any special custom parts not readily available. Kudos to J.R. who posted earlier in this thread for hooking me up with all the details that even a non plumber like me could follow. (Thanks for being incredibly patient with my many questions J.R.) This should be a robust setup which avoids any possibility of melting tubes and uses the steel braided line shown in previous posts. Don't forget some high temp thread sealant too. So here are the pics including where you can buy these things and pricing:
1) ATM-2268 M16 x 1.5 to 1/8 " NPT female gets you out of the block:
$10.88 from Summit Racing
2) Earl's 982203ERL AN3 to 1/8 " pipe 90 degree
This fitting attaches to above adaptor and allows for braided hose attachment. The cost is $6.75 from Summit.
( Alternatively depending on space requirements, a 45 degree adaptor could be used instead of the 90 degree above which would be part 982303ERL if needed.)
3) 15in steel braided AN3 hose RUS-658080 from Summit for $19.99:
4)Russell 660410 AN3 to 1/8 In pipe straight fitting $2.88 from Summit:
5) NAPA part # 3200 x 4 x 2 (1/4 in to 1/8 in brass fitting). This attaches to above fitting (price in pic):
6) 1/4-1/4 female coupler from NAPA (pricing and part # below):
(Alternatively, you could use a 1/8-1/4" female-female coupler instead of the above 2 mentioned parts in steps 5 and 6 from Home Depot mentioned in the post prior to this one but I already had these parts and they worked so...)
7) Lastly, the buick sender which is part # 12584940 from GM parts direct for $41.58 shipped to my door. Here are all the parts assembled and ready for install:
Use some thread sealer as you go and that should do it. J.R. looped this setup around and tucked it under the fuel rail cover. I'm installing it later this week. Hope that helps anyone who wishes to do this mod. Now lets get the modding ON!
Ok, here's the finished product:
1)Here's a good view showing the relocate line coming out of the block:
2) Here you get an idea of the curve I'll put on this to loop it back toward the sensor harness:
3) All installed and this looped steel braided setup will be tucked under the fuel rail cover:
4) Done and clean! Yep, it's in there...
UPDATE: FYI: As it turned out, I did use the 45 degree elbow and not the 90 degree elbow. It seemed to work better to provide a nice bend direction for the steel line to hook up and make it's way around the back of the intake manifold.
Could not load pics, mabie someone else has them
mike v
#27
Le Mans Master


Hey all, I am planning to replace the oil pressure sensor on my 02 this weekend. Since I have to pull the intake manifold to do this, I was wondering if there are any additional maintenance items I should take care of while I have it that far apart. For info, my car has over 100K on it but runs like a champ. Thanks for the input.
#28
mike v

When I had mine off I replaced the PVC hose line also. They are plastic and rubber and will crack, making for air leaks. Also check for chafed wires on the driver side engine. There is a metal bracket that will sometimes wear some bare spots on the wire harness. Mabie new spark plug wires, some time getting them off will damage them. Also see my thread #25 above.
mike v
mike v
#29
I replaced mine via the "cut the cowl" method--very easy and no one is any the wiser. The bad one was brass and I replaced it with a stock alum Delco unit as I read somewhere that since the manifold is alum so should the sensors be as the two metals expand at a different rate and handle temps differently that can/will cause issues. Not sure if that is a fact, but I do know that mine has been working for about two yrs w/no issues. ( and my car is still holding together ) 
The ones that built this car certainly know more than I do so who am I to second guess their choices for what works better?

The ones that built this car certainly know more than I do so who am I to second guess their choices for what works better?

#30
Team Owner


More info---Just came across this also
Sensor relocate for dummies
Well, I want this nightmare to be over after swapping this thing out now coming on the 3rd time. I needed a step by step on the parts that could be purchased from a vendor and did not require any special custom parts not readily available. Kudos to J.R. who posted earlier in this thread for hooking me up with all the details that even a non plumber like me could follow. (Thanks for being incredibly patient with my many questions J.R.) This should be a robust setup which avoids any possibility of melting tubes and uses the steel braided line shown in previous posts. Don't forget some high temp thread sealant too. So here are the pics including where you can buy these things and pricing:
1) ATM-2268 M16 x 1.5 to 1/8 " NPT female gets you out of the block:
$10.88 from Summit Racing
2) Earl's 982203ERL AN3 to 1/8 " pipe 90 degree
This fitting attaches to above adaptor and allows for braided hose attachment. The cost is $6.75 from Summit.
( Alternatively depending on space requirements, a 45 degree adaptor could be used instead of the 90 degree above which would be part 982303ERL if needed.)
3) 15in steel braided AN3 hose RUS-658080 from Summit for $19.99:
4)Russell 660410 AN3 to 1/8 In pipe straight fitting $2.88 from Summit:
5) NAPA part # 3200 x 4 x 2 (1/4 in to 1/8 in brass fitting). This attaches to above fitting (price in pic):
6) 1/4-1/4 female coupler from NAPA (pricing and part # below):
(Alternatively, you could use a 1/8-1/4" female-female coupler instead of the above 2 mentioned parts in steps 5 and 6 from Home Depot mentioned in the post prior to this one but I already had these parts and they worked so...)
7) Lastly, the buick sender which is part # 12584940 from GM parts direct for $41.58 shipped to my door. Here are all the parts assembled and ready for install:
Use some thread sealer as you go and that should do it. J.R. looped this setup around and tucked it under the fuel rail cover. I'm installing it later this week. Hope that helps anyone who wishes to do this mod. Now lets get the modding ON!
Ok, here's the finished product:
1)Here's a good view showing the relocate line coming out of the block:
2) Here you get an idea of the curve I'll put on this to loop it back toward the sensor harness:
3) All installed and this looped steel braided setup will be tucked under the fuel rail cover:
4) Done and clean! Yep, it's in there...
UPDATE: FYI: As it turned out, I did use the 45 degree elbow and not the 90 degree elbow. It seemed to work better to provide a nice bend direction for the steel line to hook up and make it's way around the back of the intake manifold.
Could not load pics, mabie someone else has them
mike v
Sensor relocate for dummies
Well, I want this nightmare to be over after swapping this thing out now coming on the 3rd time. I needed a step by step on the parts that could be purchased from a vendor and did not require any special custom parts not readily available. Kudos to J.R. who posted earlier in this thread for hooking me up with all the details that even a non plumber like me could follow. (Thanks for being incredibly patient with my many questions J.R.) This should be a robust setup which avoids any possibility of melting tubes and uses the steel braided line shown in previous posts. Don't forget some high temp thread sealant too. So here are the pics including where you can buy these things and pricing:
1) ATM-2268 M16 x 1.5 to 1/8 " NPT female gets you out of the block:
$10.88 from Summit Racing
2) Earl's 982203ERL AN3 to 1/8 " pipe 90 degree
This fitting attaches to above adaptor and allows for braided hose attachment. The cost is $6.75 from Summit.
( Alternatively depending on space requirements, a 45 degree adaptor could be used instead of the 90 degree above which would be part 982303ERL if needed.)
3) 15in steel braided AN3 hose RUS-658080 from Summit for $19.99:
4)Russell 660410 AN3 to 1/8 In pipe straight fitting $2.88 from Summit:
5) NAPA part # 3200 x 4 x 2 (1/4 in to 1/8 in brass fitting). This attaches to above fitting (price in pic):
6) 1/4-1/4 female coupler from NAPA (pricing and part # below):
(Alternatively, you could use a 1/8-1/4" female-female coupler instead of the above 2 mentioned parts in steps 5 and 6 from Home Depot mentioned in the post prior to this one but I already had these parts and they worked so...)
7) Lastly, the buick sender which is part # 12584940 from GM parts direct for $41.58 shipped to my door. Here are all the parts assembled and ready for install:
Use some thread sealer as you go and that should do it. J.R. looped this setup around and tucked it under the fuel rail cover. I'm installing it later this week. Hope that helps anyone who wishes to do this mod. Now lets get the modding ON!
Ok, here's the finished product:
1)Here's a good view showing the relocate line coming out of the block:
2) Here you get an idea of the curve I'll put on this to loop it back toward the sensor harness:
3) All installed and this looped steel braided setup will be tucked under the fuel rail cover:
4) Done and clean! Yep, it's in there...
UPDATE: FYI: As it turned out, I did use the 45 degree elbow and not the 90 degree elbow. It seemed to work better to provide a nice bend direction for the steel line to hook up and make it's way around the back of the intake manifold.
Could not load pics, mabie someone else has them
mike v

 Don't cut your car up for such a simple repair.
#31
Though having worked on many a Gen 1/2 SBC, I understand where the aversion to pulling the intake is coming from. The LS intakes however don't have water jackets, felt gaskets that fuse them to the heads, nor hidden bolt heads. Pulling these intakes is trivial. Additionally while the intake is off you can take care of a number of other things such as cleaning out any oil that may be pooled up in it, resealing the knock sensors, cleaning all the electrical harnesses, etc.
Last edited by wcsinx; 05-31-2017 at 12:44 PM.
#32
#33
mike v

I never use gaskets/O-rings twice. reason for removing injectors & TB was to clean intake in my parts washer. Sprayed injectors with carb cleaner before re-installing them also. BUt good point...
#35
Team Owner


If you do the remote sensor upgrade, you only have to do this once and in my opinion you get a more reliable sensor. I would be more concerned with cracking the plastic trim using the method of cutting your car or cracking the windshield with a stubborn wiper arm, than problems or hassle of pulling the intake.
Last edited by 93Polo; 05-31-2017 at 01:42 PM.
#36

The following users liked this post:
mike venth (05-31-2017)
#37
Team Owner


https://cimg5.ibsrv.net/gimg/www.cor...4ba24a903d.jpg
As you can see in this picture, there are pieces of foam at each end of the manifold. What are they for?
Last year, I had the manifold off, in order to be able to get at the RH side AIR check valve, so I could replace it. Right before I did this, I was reading the article in "Vette" magazine, about the heatshield for the underside on the intake. So I bought one of them.
Naturally, you have to remove the foam, to get the heatshield to adhere to the bottom of the manifold, so I didn't stick the new ones to the manifold. Will I be OK?
#38
mike v

https://cimg5.ibsrv.net/gimg/www.cor...4ba24a903d.jpg
As you can see in this picture, there are pieces of foam at each end of the manifold. What are they for?
Last year, I had the manifold off, in order to be able to get at the RH side AIR check valve, so I could replace it. Right before I did this, I was reading the article in "Vette" magazine, about the heatshield for the underside on the intake. So I bought one of them.
Naturally, you have to remove the foam, to get the heatshield to adhere to the bottom of the manifold, so I didn't stick the new ones to the manifold. Will I be OK?
As you can see in this picture, there are pieces of foam at each end of the manifold. What are they for?
Last year, I had the manifold off, in order to be able to get at the RH side AIR check valve, so I could replace it. Right before I did this, I was reading the article in "Vette" magazine, about the heatshield for the underside on the intake. So I bought one of them.
Naturally, you have to remove the foam, to get the heatshield to adhere to the bottom of the manifold, so I didn't stick the new ones to the manifold. Will I be OK?
#39
Team Owner


#40
mike v

When I was doing mine, Bill C said I should put so PVC silicone around it to help keep it in place and keep junk/dirt from getting inside the Eng..
When mine was assembled from the factory (see photo above#25) they only half *** covered them. They should pop into place and stay..
mike v


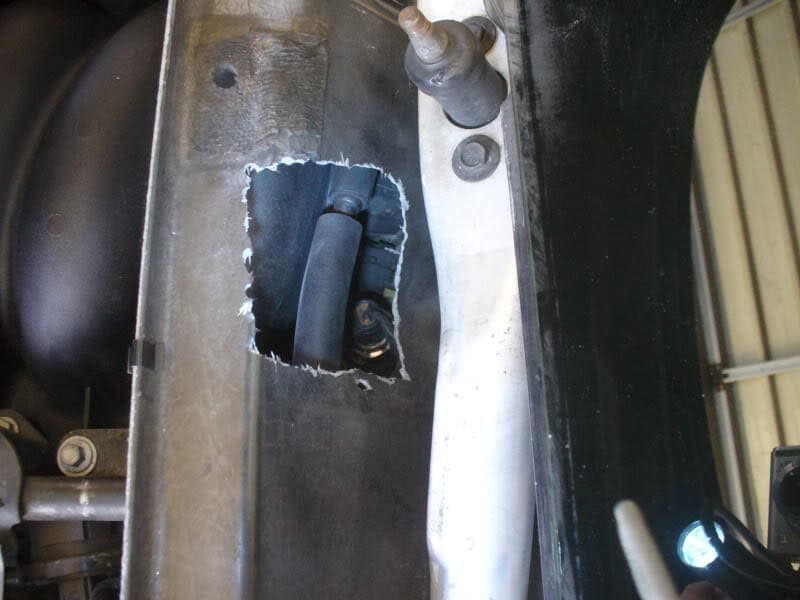

 don't have to remove intake. Hello