When you click on links to various merchants on this site and make a purchase, this can result in this site earning a commission. Affiliate programs and affiliations include, but are not limited to, the eBay Partner Network.
Hi there. this is the first time a question after joined here.
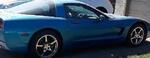
I have a c5 2001.
Currently, my headlights are able to pop-up but they can't close.
I think that no gear's problem because I could have closed with manually.
I figured out a problem. it was too hot on the driver side's motor cover. (picture) and there was some noise for 2-3 seconds (zzzzz...)
It didn't hot that passenger side's cover. I think opposite headlight didn't work because of driver side headlight has a problem.
As far as I know, the module made that both sides can be moving at the same time.
What should I work to fix it?
What's the problem? please help me..
the noise you hear(zzzzzzz) is a stripped spot on aa nylon gear in the headlight motor. when activated the motor cannot open the headlight because that gear is stripped. They are simple to rebuild
the noise you hear(zzzzzzz) is a stripped spot on aa nylon gear in the headlight motor. when activated the motor cannot open the headlight because that gear is stripped. They are simple to rebuild
This is a common problem with the C5, search this forum and you will find the solution. There are a couple of vendors that sell rebuild kits, I'd suggest that you invest in one that sells the brass gears.
It seems you probably have a broken plastic gear. The only doubt I have is that you describe the noise as a "zzzzzzzzz", while I would say a broken plastic gear sounds more like a loud "rat-tat-tat".
Get a kit like this one (pay attention because there are 2 different kits: one for "97 to early 2000" and another for "late 2000 to 2004") and follow these step-by-step directions. You'll save money and they will last forever.
It would be wise to replace as well the rubber bump stops in both sides (#4 in diagram below). You can get them here.
There is a TSB, that calls for shimming the driver's side motor. The parts needed for this are included in the above mentioned kit (#2 in diagram below).
I replaced the driver's side headlight motor gear on my 2000 C5 4 years ago (2015) with another plastic one. I also replaced the bump stops. This week, the headlight would not open or close completely, so I removed the motor and this is what I found (see photos). It appears that the rubber inside the plastic gear disintegrated. There is no wear on the teeth, but there is rubber between them. The motor cover was detached, too. Any idea what could have caused this failure?
I replaced the driver's side headlight motor gear on my 2000 C5 4 years ago (2015) with another plastic one. I also replaced the bump stops. This week, the headlight would not open or close completely, so I removed the motor and this is what I found (see photos). It appears that the rubber inside the plastic gear disintegrated. There is no wear on the teeth, but there is rubber between them. The motor cover was detached, too. Any idea what could have caused this failure?
That's why good kits include a new inside rubber isolator/damper and a metal T-Brace with plastic bushing.
Without the metal T-Brace is just a matter of time before the glue fails and the cover gets detached, which probably accelerated the disintegration of the old inside rubber isolator/damper.
Both can be separately purchased from Rodney Dickman.
I bought the Rodney Dickman gear kit. The instructions for headlight removal describe removing the entire headlight unit from the frame and wheel well, and realignment of the headlight with the frame when reinstalled. I had followed the youtube video from 'dennisbsutube' for disassembly, which involved removing the headlight cover plate and removing the headlight pivot screws to get access to the motor. A realignment with the frame is not necessary. I'm inclined to do my other headlight the same way. Which one would you recommend?
Oh. I didn't realize that was you. I would not be too worried about surface rust on the motor, though I would be more worried why there's surface rust - I don't see that often. Clean it all up nicely and use the kits to disassemble, re-grease, re-assemble the motor with new hardware, with the T-brace, etc. Put it all back together and keep an eye on it for more surface rust.
I just rebuilt the driver's side motor with Rodney Dickman's kit. I'm a little confused about the proper placement of the 3 spacer washers. On his website, Rodney explains that they 'move the headlight drivers side headlight motor over so the headlight lift arm hits the insulators (bumper stops) better'. In the instructions with the kit, it says the washers can be placed on either side of the T-brace, but it seems the position of the linkage activator (lift arm) will depend on which side of the T-brace they are positioned.
Am I mistaken? I put them between the T-brace and the motor.
I just rebuilt the driver's side motor with Rodney Dickman's kit. I'm a little confused about the proper placement of the 3 spacer washers... ...it seems the position of the linkage activator (lift arm) will depend on which side of the T-brace they are positioned.
Am I mistaken? I put them between the T-brace and the motor.
As you can see in the diagram below, the net effect of shimming the motor is to displace it to the left, in relation to the anchoring platform (number 3 in diagram). Since the bump stops (number 4 in diagram) are installed on two tabs (number 5 in diagram) that are part of the platform and the linkage lever is secured to the motor shaft, this will cause the lever to hit the bump stops a little farther away from their tips (towards the left in diagram). The relative position of the washers and the T-Brace won't change the new position of the motor in relation to the anchoring platform.
I installed my washers between the T-Brace and the anchoring platform
By the way, the T-Brace thickness (.05" for Rodney Dickman's) is already a bit more than half the recommended shim (.08"). If you want to get closer to this value, you can replace the included spacers with 3 (1 per anchoring screw) thin stainless steel washers (.04") as I did. This will produce a total shim of .09", instead of .13"
Thanks GCD. I understand the net effect now. BTW, I used half of the grease packet (saving the rest for the other motor), but it barely seemed like enough for both the worm gear and brass gear.
Oh. I didn't realize that was you. I would not be too worried about surface rust on the motor, though I would be more worried why there's surface rust - I don't see that often. Clean it all up nicely and use the kits to disassemble, re-grease, re-assemble the motor with new hardware, with the T-brace, etc. Put it all back together and keep an eye on it for more surface rust.
I'm pretty sure this rust was due to a missing headlight motor access cap on the plastic shroud, allowing rain inside the assembly. I replaced the cap a few years ago.
Thanks GCD. I understand the net effect now. BTW, I used half of the grease packet (saving the rest for the other motor), but it barely seemed like enough for both the worm gear and brass gear.
I replaced the other motor gear today and there was plenty of grease left over from the first repair, so I grossly misjudged the packet contents. I'm debating whether or not to add more grease to the first motor, which means opening and re-gluing the cover. I've already re-glued the cover twice. Is it worth any risks of doing it again?
Designer Imagines A Corvette That Looks More Like a Corvette Than the Corvette
Slideshow: A Jaguar designer's personal project imagines what a modern front-engined Corvette might look like if Chevrolet revisited the golden age of the Stingray.






 C5 headlight problem that didn't close!







