


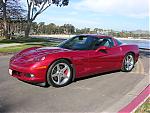

Need help on Interior

Thread Starter
Instructor

Joined: Apr 2005
Posts: 182
Likes: 0
 Need help on Interior
Thinking of ordering the two tone 07 Interior for my 2005 I have the sports seats with side airbags I know this comes as a 3 part set How easy is it to replace the old seat covers?
Any issues with the Air Bags in the seats?
Any issues with the Air Bags in the seats?

Burning Brakes


Joined: Feb 2005
Posts: 1,198
Likes: 73
From: palm harbor Florida
interior changeout
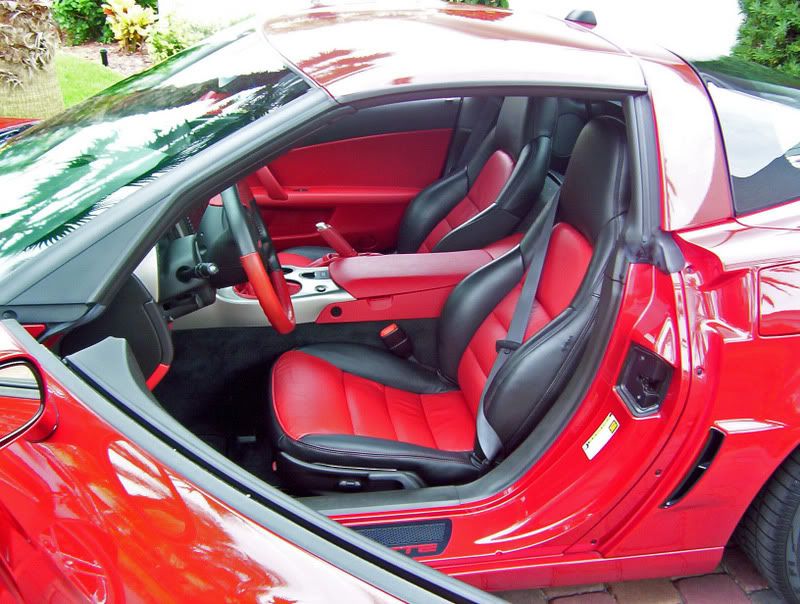
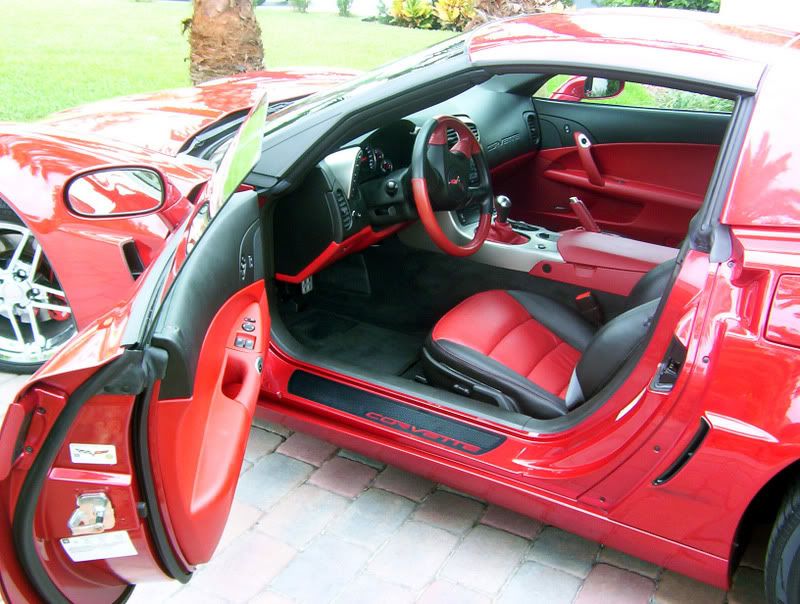
Decided to swap it out for two tone red/black.
Traded the lower dash, console and door panels with another forum member and did the lower dash, door panels and console in less than 3 hours total.
Kept my upper black seat outer surrounds and added new two tone bottom and red seat back insets ($450) from GM dealer. Took about 5 hours to swap out. Didn't disconect the battery. No problem with the airbags as they are on the side of the upper seat back bolsters. Still, wouldn't have been a problem as they are well contained.
If you need instructions, PM me with your E mail and I will help you through it. I can save you some time.
 [/IMG]
 [/IMG]
Charlie

Race Director


Joined: Mar 2005
Posts: 16,684
Likes: 1,193
From: La Center WA

Team Owner

Joined: Sep 2005
Posts: 20,352
Likes: 568
From: Ventura County, Calif
I know Chucky did it but please be aware, upholstery work is not easy. There is a lot of work involved, and even with proper tools you tend to get stabbed and cut by the metal parts and hog rings, etc. Not trying to discourage a DIY project, just want to let you know it isn't a cake walk.
Good luck, be careful.
Good luck, be careful.

Safety Car

Joined: Oct 2007
Posts: 4,269
Likes: 4
From: Mililani HI
I used to have the all ebony (black) interior.
Decided to swap it out for two tone red/black.
Traded the lower dash, console and door panels with another forum member and did the lower dash, door panels and console in less than 3 hours total.
Kept my upper black seat outer surrounds and added new two tone bottom and red seat back insets ($450) from GM dealer. Took about 5 hours to swap out. Didn't disconect the battery. No problem with the airbags as they are on the side of the upper seat back bolsters. Still, wouldn't have been a problem as they are well contained.
If you need instructions, PM me with your E mail and I will help you through it. I can save you some time.
[/IMG]
[/IMG]
Charlie
Decided to swap it out for two tone red/black.
Traded the lower dash, console and door panels with another forum member and did the lower dash, door panels and console in less than 3 hours total.
Kept my upper black seat outer surrounds and added new two tone bottom and red seat back insets ($450) from GM dealer. Took about 5 hours to swap out. Didn't disconect the battery. No problem with the airbags as they are on the side of the upper seat back bolsters. Still, wouldn't have been a problem as they are well contained.
If you need instructions, PM me with your E mail and I will help you through it. I can save you some time.
[/IMG][/IMG]Charlie
Charlie that is one nice interior that you made, I love that red and black theme that is the nicest interior I have seen yet. Take a bow my friend, outstanding work.
Safety Car
Joined: Feb 2007
Posts: 4,942
Likes: 4
From: LINCOLN RI - 2010 GS Coupe - 2007 Coupe

Team Owner
Joined: Jan 2007
Posts: 40,718
Likes: 6
St. Jude Donor '08-'09
I used to have the all ebony (black) interior.
Decided to swap it out for two tone red/black.
Traded the lower dash, console and door panels with another forum member and did the lower dash, door panels and console in less than 3 hours total.
Kept my upper black seat outer surrounds and added new two tone bottom and red seat back insets ($450) from GM dealer. Took about 5 hours to swap out. Didn't disconect the battery. No problem with the airbags as they are on the side of the upper seat back bolsters. Still, wouldn't have been a problem as they are well contained.
If you need instructions, PM me with your E mail and I will help you through it. I can save you some time.
[/IMG]
[/IMG]
Charlie
Decided to swap it out for two tone red/black.
Traded the lower dash, console and door panels with another forum member and did the lower dash, door panels and console in less than 3 hours total.
Kept my upper black seat outer surrounds and added new two tone bottom and red seat back insets ($450) from GM dealer. Took about 5 hours to swap out. Didn't disconect the battery. No problem with the airbags as they are on the side of the upper seat back bolsters. Still, wouldn't have been a problem as they are well contained.
If you need instructions, PM me with your E mail and I will help you through it. I can save you some time.
[/IMG][/IMG]Charlie
 What did your total cost end up being? I want that same interior.
Corvette Stories
The Best of Corvette for Corvette Enthusiasts

10 Reasons the C6 Z06 is Still A Performance Benchmark After 20 Years
Joe Kucinski
How Much Horsepower Every Corvette Engine "LOST" in 1972
Joe Kucinski
Top 10 DOs and DON'Ts for Protecting Your Convertible Top!
Michael S. Palmer
Top 10 Most Explosive Corvettes Ever Made: Power-to-Weight Ratio Ranked!
Joe Kucinski
150 hp to 1,250 hp: Every Corvette Generation Compared by the Specs That Matter
Joe Kucinski
8 Coolest Corvette Pace Cars (and Replicas) of All Time
Verdad Gallardo
Top 10 Corvette Engines RANKED by Peak Torque (70+ Years of Muscle!)
Joe Kucinski
Corvette ZR1X Will Be Pacing the Indy 500, And Could Probably Race, Too!
Verdad Gallardo
Top 10 Corvettes Coming to Mecum Indy 2026!
Brett Foote
Burning Brakes
Joined: Feb 2005
Posts: 1,198
Likes: 73
From: palm harbor Florida
total cost
Steering wheel by down south vettes and installation by chevy ...$400?
Seats (just needed the red insert backs and one piece two tone bottoms from my dealer $450 plus a cheap set of hog ring pliers $20.
Brake boot and handle and shifter boot (Ebay $100).
So, I guess it cost total ...$1200 if that. (including steering wheel).
You might want to look at the reverse of mine by Bone Daddy.
Here's his picture.
 [/IMG]
Team Owner
Joined: Jan 2007
Posts: 40,718
Likes: 6
St. Jude Donor '08-'09
Just paid for the shipping swapout to another forum member for the dash parts, door panels and console ....maybe $250????
Steering wheel by down south vettes and installation by chevy ...$400?
Seats (just needed the red insert backs and one piece two tone bottoms from my dealer $450 plus a cheap set of hog ring pliers $20.
Brake boot and handle and shifter boot (Ebay $100).
So, I guess it cost total ...$1200 if that. (including steering wheel).
You might want to look at the reverse of mine by Bone Daddy.
Here's his picture.
Steering wheel by down south vettes and installation by chevy ...$400?
Seats (just needed the red insert backs and one piece two tone bottoms from my dealer $450 plus a cheap set of hog ring pliers $20.
Brake boot and handle and shifter boot (Ebay $100).
So, I guess it cost total ...$1200 if that. (including steering wheel).
You might want to look at the reverse of mine by Bone Daddy.
Here's his picture.
Thats a thought too. Got anymore info on his? More pics and who did his seats?
Burning Brakes
Joined: Feb 2005
Posts: 1,198
Likes: 73
From: palm harbor Florida
If you are good mechanically, there is a step by step thread of how to do it with pictures. I worked on a firm folding table in my garage and took the seats out first. (30 minutes). Then simply undid the seat covers and cut the old hog rings out and removed the covers.
There are a few items that one should understand before doing this to make it easier.
1) to remove the seats, remove the push pins in the plastic covers on the floor covers and be carefull to slide the covers forward or rearward before lifting them off of the brackets or you will break the tabs.
2) I didn't remove the battery cable before unplugging the connectors under the seat and had no problem. Some people do remove it for safety.
3) After unbolting the seats from the floor, and seat belt bolt from the side of the seat, I used a couple of small blocks of 2" X 4" wood to raise the front or rear of the seat off of the floor so you could see under the seat to unplug the 2 connectors.
4) I cut the old hog rings off of the seat using sharp diagonal cutter pliars rather than trying to unbend them.
5) Make sure you have a new set ($20) of Hog ring pliars and rings for the re-install.
6) To remove the seat tilt handle on the side of the seat, I found that a good flashlite and skinny flat blade screwdriver worked the best.
I put a small wedge between the seat side handle and the seat and shinned the light behind the handle to look for the "C" ring spring that fits on the round indented shaft. If you push the tiny flat screwdriver in the slot on the bottom of the side handle, and push up around where the "C" ring spring is snapped into place, you can remove it fairly easily. Be carefull not to loose it when it pops off. That is why I reccomend doing this in your garage on a clean environment with lots of light.
When removing the old seat cover, I found it easier to go slowly and try not to disturb the old foam from where it fits down onto the seat screen. If you disturb it, it kind of pops out of where it was set and floats around on the screen where it sits. If you don't disturb it, it is easier to work with as it won't move around while you are working on the covers. It's not a big deal, but just a litlle easier. You must work the small connector around a few places under the seat to snake it through the old and into the new seat cover. Just take your time, again, not a big deal.
Make sure the the new covers are tight. Each one has a rope the must be pulled tight and knotted tightly. I found that you can get very good at using the hog ring pliers after some practice. There isn't really many of them anyhow to replace.
If you do an advanced search for the thread on replacing the seat covers, you can find it or gsend me your E mail & I will send the info to you.
If you are fairly mechanical, I found that this car is extrmely easy to work on...Changing widebody fenders, seats, cutting bushings and lowering the car etc etc etc. Even the door panels (using the instructions) were a snap. When swapping out the dash parts, there is only one part which you should be aware of that must be done.
On the passenger side of the lower dash between the door and lower dash, there is a small piece that needs to be changed, It is pop rivited onto the dash in two places. You must drill out the old pop rivit with an oversized drill bit and re-pop rivit the new piece in. Still not a big deal. 5 minutes if you are aware of it first and have the tools ready.
Once again, This car is extremely plug and play. One of the easiest cars to work on. Just take your time and DO THE REASEARCH ON THE PROJECT BEFORE YOU JUMP IN. IT is available on this forum in detail.
Charlie


Drifting


Joined: Mar 2002
Posts: 1,253
Likes: 265
From: 48th state
Fantastic work! I want to do that (red/black interior). Any help you can provide would be greatly appreciated.
I used to have the all ebony (black) interior.
Decided to swap it out for two tone red/black.
Traded the lower dash, console and door panels with another forum member and did the lower dash, door panels and console in less than 3 hours total.
Kept my upper black seat outer surrounds and added new two tone bottom and red seat back insets ($450) from GM dealer. Took about 5 hours to swap out. Didn't disconect the battery. No problem with the airbags as they are on the side of the upper seat back bolsters. Still, wouldn't have been a problem as they are well contained.
If you need instructions, PM me with your E mail and I will help you through it. I can save you some time.
[/IMG]
[/IMG]
Charlie
Decided to swap it out for two tone red/black.
Traded the lower dash, console and door panels with another forum member and did the lower dash, door panels and console in less than 3 hours total.
Kept my upper black seat outer surrounds and added new two tone bottom and red seat back insets ($450) from GM dealer. Took about 5 hours to swap out. Didn't disconect the battery. No problem with the airbags as they are on the side of the upper seat back bolsters. Still, wouldn't have been a problem as they are well contained.
If you need instructions, PM me with your E mail and I will help you through it. I can save you some time.
[/IMG][/IMG]Charlie
Melting Slicks

Joined: Oct 2006
Posts: 2,672
Likes: 0
From: Made in USA Show Me State
 Wonderful job Charlie...
 ...like Dan, I would like to do the changeout...anybody out there who wants to exchange part or all their red interior please PM me...