
Shift Light Install Instructions C6, Finally!
 03-10-2008, 11:18 PM
#1
Intermediate

Thread Starter
Member Since: Mar 2008
Location: Murrieta CA
Posts: 44
Likes: 0
Received 0 Likes
on
0 Posts
Hey Folks,
I installed a Raptor shift light in my C6 this weekend. I wrote up a post with pics, in Word. I had hoped to paste it into here, but apparently I can't as a new member. If i can mail it to someone to post, let me know. Its pretty thorough.
I installed a Raptor shift light in my C6 this weekend. I wrote up a post with pics, in Word. I had hoped to paste it into here, but apparently I can't as a new member. If i can mail it to someone to post, let me know. Its pretty thorough.
 03-10-2008, 11:35 PM
#2
Team Owner


Being a new member has nothing to do with it. Unless you're a supporting member, you must host the document somewhere on the internet and post links to it. Here's how you would do it with most documents.
http://forums.corvetteforum.com/show....php?t=1336867
http://forums.corvetteforum.com/show....php?t=1336867
03-11-2008, 12:32 AM
#4
Melting Slicks


Member Since: Dec 2006
Location: Exhaust Commander Wireless Bi-Mode Exhaust Controllers, Innovative and advanced technology! --- Check out our website @ www.sunsetorangecreations.com
Posts: 2,887
Likes: 0
Received 2 Likes
on
2 Posts
St. Jude Donor '13
I'll bet finding the tach wire was the trickiest part?
My first Ultimate Exhaust Commander controller used the tach wire for the rpm signal and people had the hardest time finding it because its a white wire and there are so many white wires in the car.
I gave up on the tach wire and went another route for the rpm signal.
Looking forward to seeing your instal how-to for the shift light!
 Ben
Ben
My first Ultimate Exhaust Commander controller used the tach wire for the rpm signal and people had the hardest time finding it because its a white wire and there are so many white wires in the car.
I gave up on the tach wire and went another route for the rpm signal.
Looking forward to seeing your instal how-to for the shift light!
Ben
03-11-2008, 10:48 PM
#5
Intermediate
Thread Starter
Member Since: Mar 2008
Location: Murrieta CA
Posts: 44
Likes: 0
Received 0 Likes
on
0 Posts
Ok folks,
Hope this helps someone. I installed my Raptor shift light this weekend. Here are my dos, and don�ts.
This is the installation diary of a Raptor shift light, into a C6, A6.
We need to locate three things:
1) Ground
2) Switched power ( controlled by ignition)
3) Tach wire ( engine speed wire)
It turns out that the hardest thing for me to find was the switched power. Anyway, here goes.
1. Remove the knee bolster
a. Remove two torx screws at the bottom, and the rest of it is all clips, just pull
b. You may need to pop out the two lower clips that hold the frame around the instrument cluster. One is below the vent on the left side, and the other below the start button
c. Disconnect the trunk and gas door release connectors, so you can remove the bolster completely.
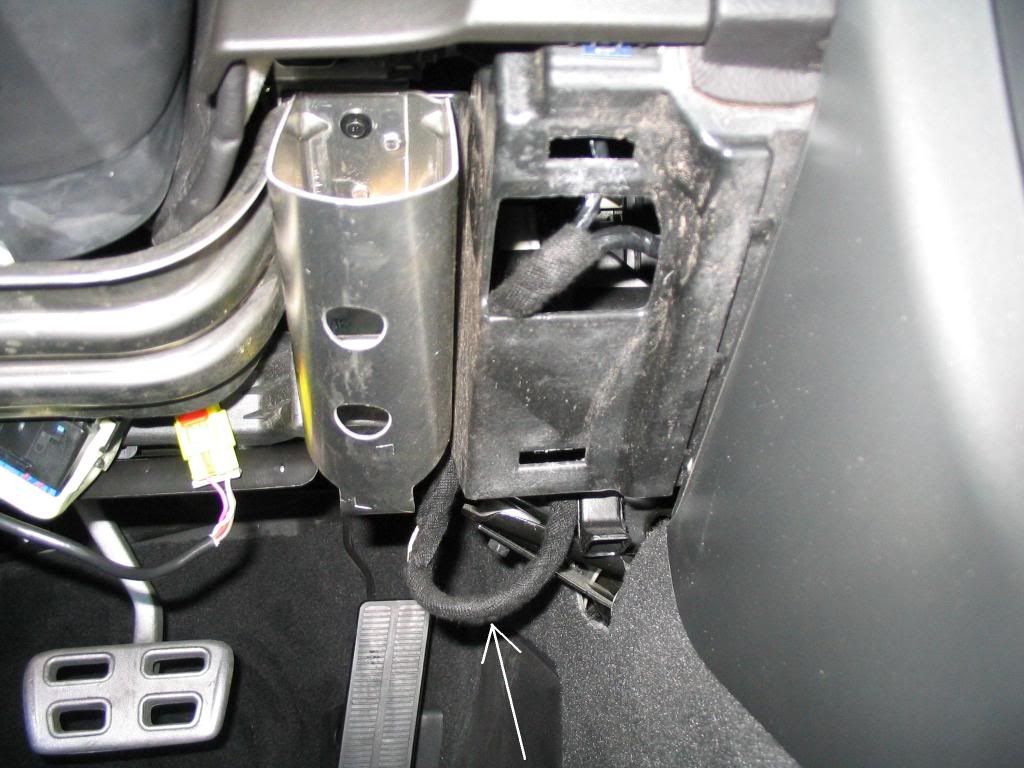
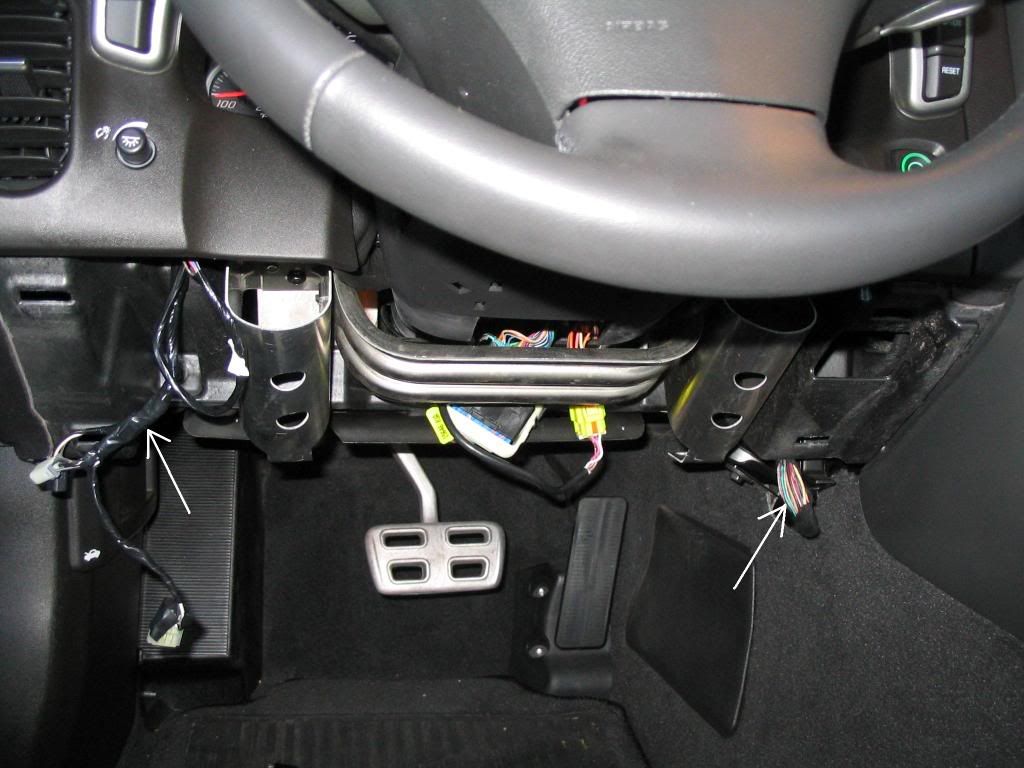
2. Locate the fabric wrapped wire bundle in the picture below. It�s on the right side of the driver�s foot well. There is a lot of slack. Here I have pulled it down�
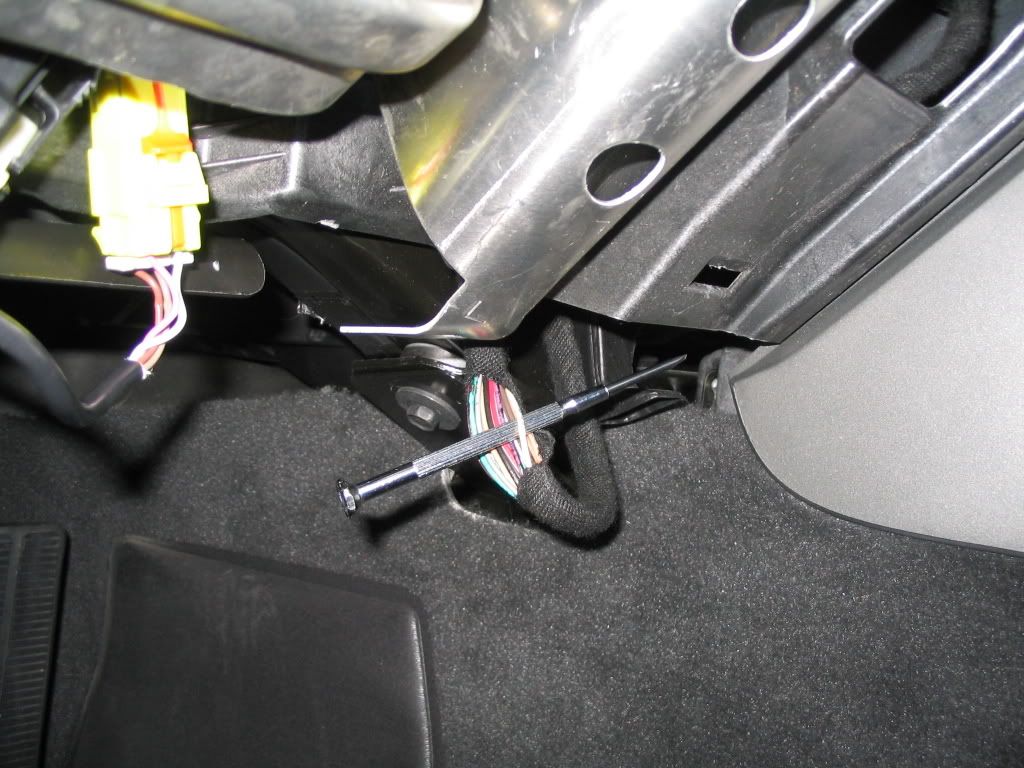
a. and located the tach wire. It is a light tan wire. (yes, it is a little scary cutting into this, just do it � be careful!)
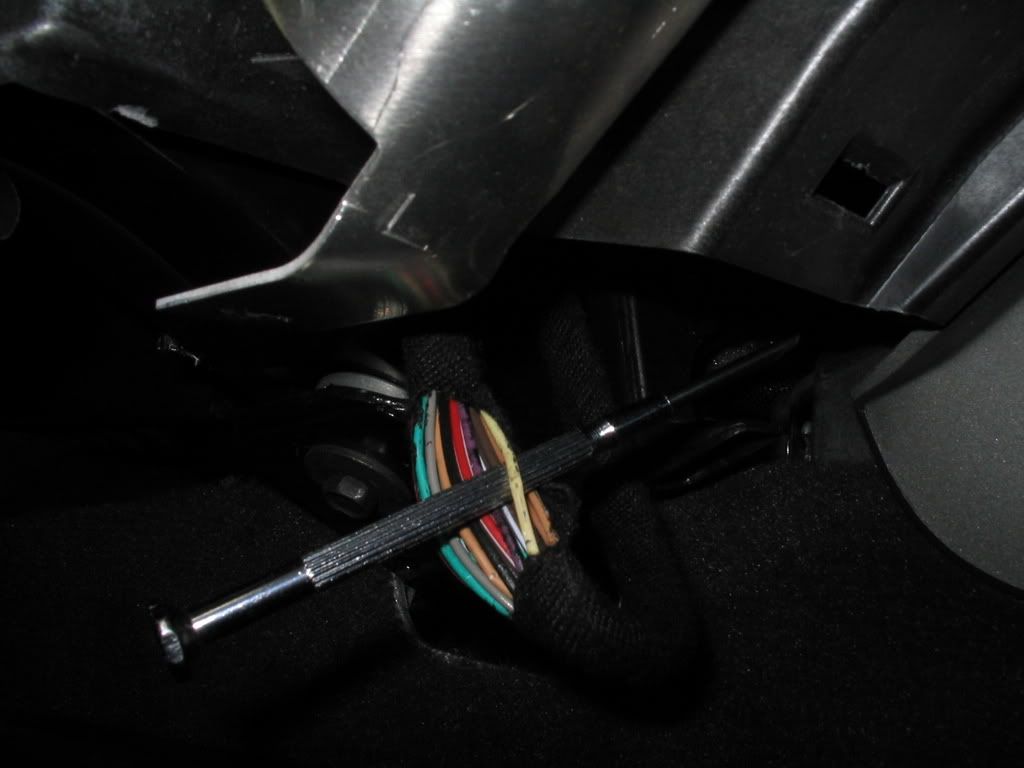
b. Your tach connection connectes here. I used easy push connects, they worked pretty well.
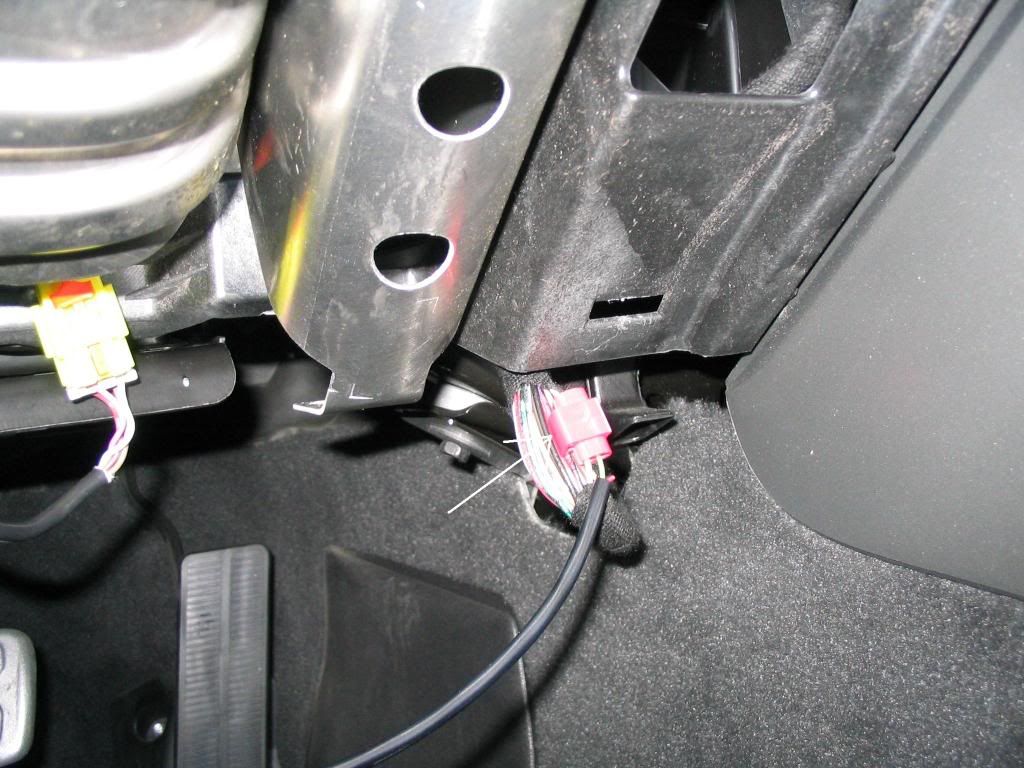
c. I grabbed ground from the trunk/gas lid lines. On the right in the pic below. A multimeter really helps out here. Here is a pic of that area. The third bundle is where I wired my HomeLink. Yours won�t have this.
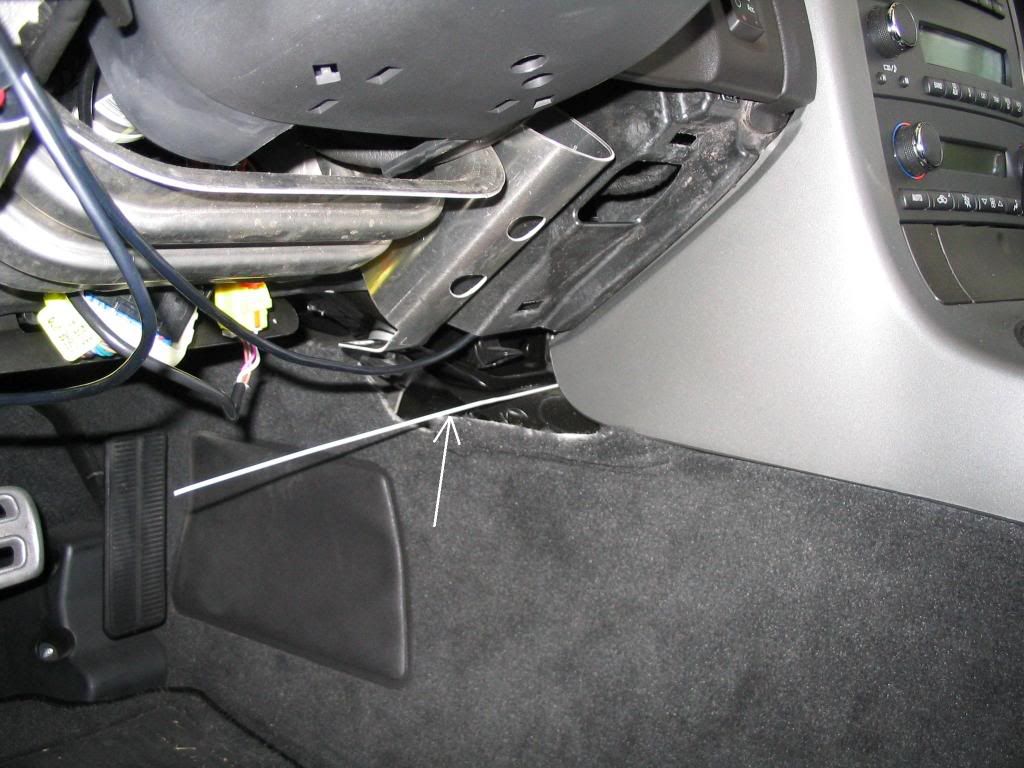
d. So, we have ground and speed signal, now we need power. I had a hard time finding switched power. It is important that it is switched. I first grabbed power from the interior light/ dimmer switch in the dash. Bad idea, my shift light only functioned when my headlights were on. Worked great in my garage! But I usually do not driver very fast in my garage .I probed a lot of wires on the driver side, never found anything suitable. So, I routed to the fuse box in the passenger side foot well. Would be helpful if someone finds a good power in the driver side.
e. I used a coat hanger to probe from driver side to passenger side and pull the wire. Slide it under the center console as shown.
f. Here it is coming out the passenger side.
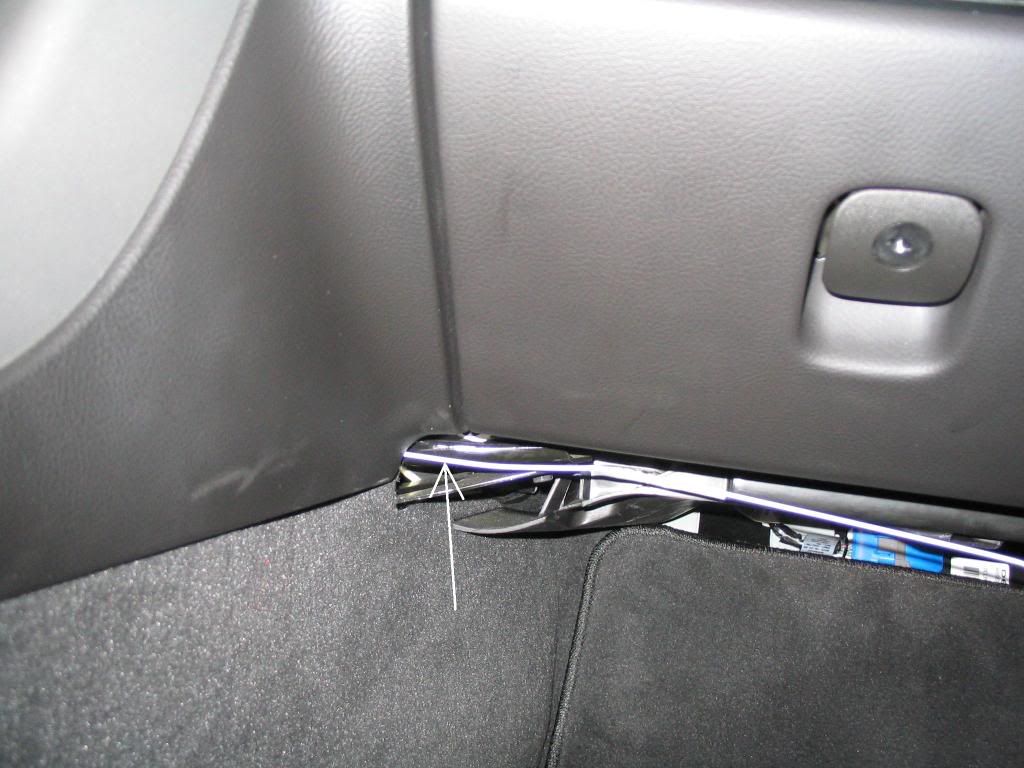
g. I used an �add a circuit� to tap into my fuse box in the passenger foot well. (no pics)
h. I just ran the power wire under the center console, and to the fuse box. I tapped into the heated seat/ wiper fuse. Use the most heavily insulated wire you can find. You are routing over the area where the exhaust runs. It gets very hot there.
3. I mounted my light above my rear view mirror. To route the wire it pulled off the pillar cover. Its all clips. Start on the (top right in the pic) top outside. You don�t need to remove the whole thing. Just as much as I did in the pic. You can then send the shift light bundle down toward the foot well.

4. Here it is from pillar to well
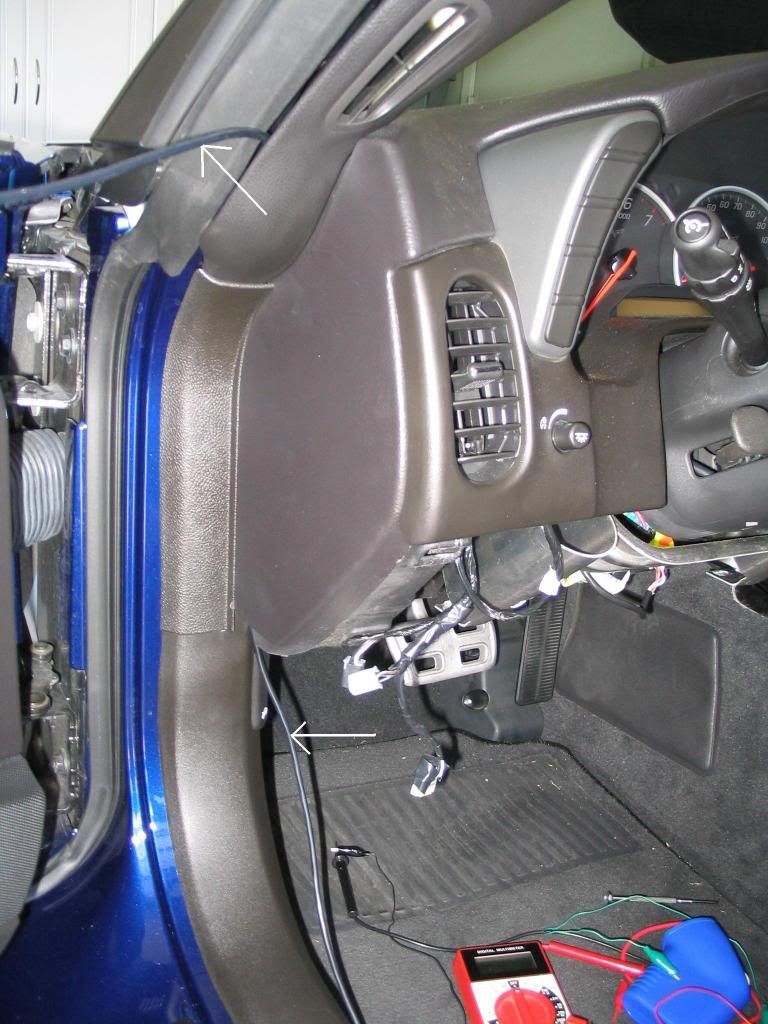
5. It�s pretty easy to tuck the shift light bundle under the casing at the top of the windshield to get the light over to the mirror.
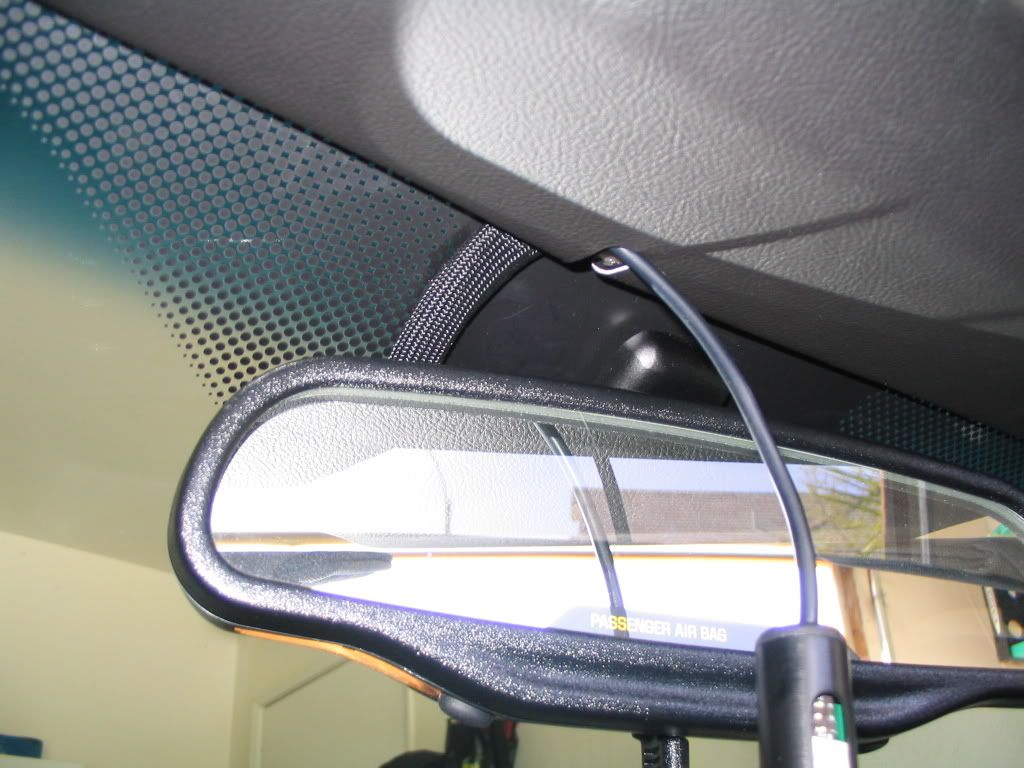
6. I used double stick tape to find a suitable location ( temporary ). Once I found a location I liked after driving around, I used a small screw to fasten the light clip. The tape won�t work in a hot car, of course.
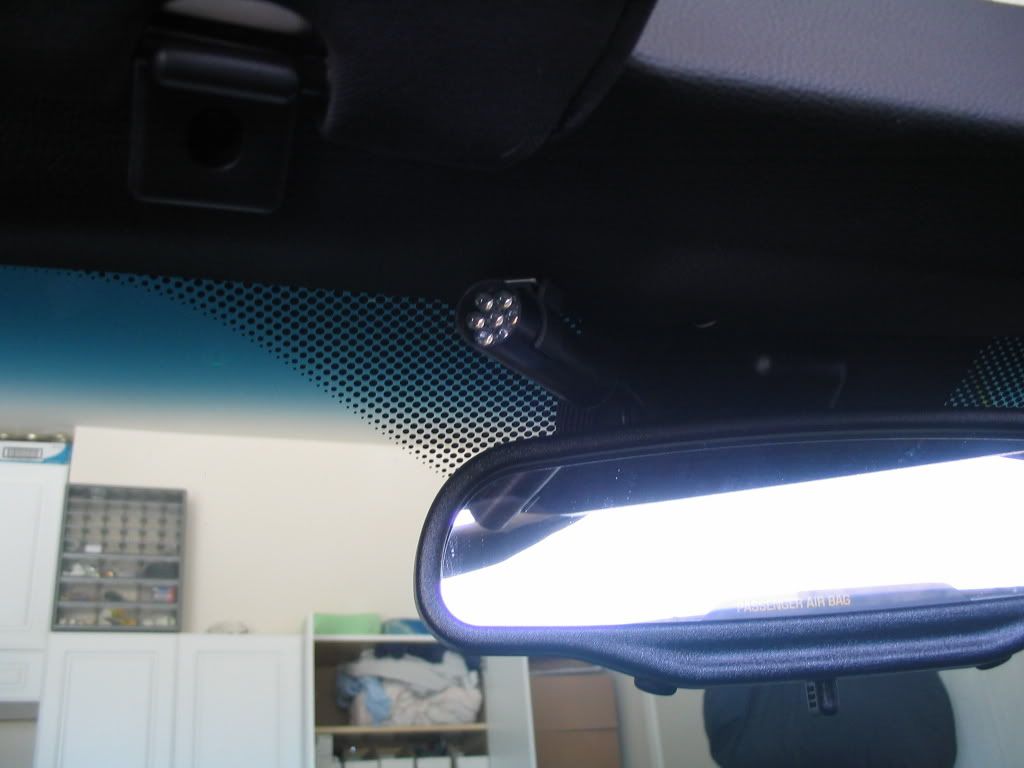
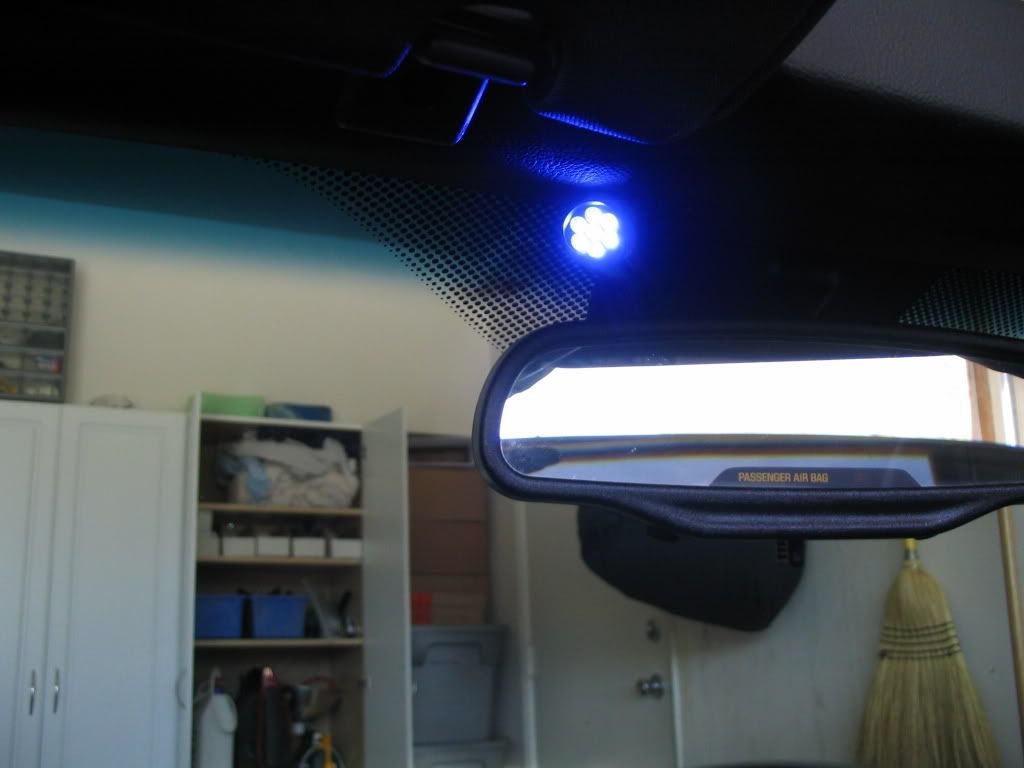
7. Here I am all set up, other than the led�s, it is very stealth.
8. It works awesome.
9. I set it to 1k in the garage, and 4k to test in the neighborhood.
10. I am slowly ratcheting it up. Want to make sure I have enough time to shift before the ecm shuts me down. I hate that.
11. Feel free to pm me w/ any questions
12. Btw, I just banged out this diary, no proof reading or anything, so please add any comments to this post. Good luck, hope this saves you some time. If I did it again tomorrow, it would take me about an hour.
Hope this helps someone. I installed my Raptor shift light this weekend. Here are my dos, and don�ts.
This is the installation diary of a Raptor shift light, into a C6, A6.
We need to locate three things:
1) Ground
2) Switched power ( controlled by ignition)
3) Tach wire ( engine speed wire)
It turns out that the hardest thing for me to find was the switched power. Anyway, here goes.
1. Remove the knee bolster
a. Remove two torx screws at the bottom, and the rest of it is all clips, just pull
b. You may need to pop out the two lower clips that hold the frame around the instrument cluster. One is below the vent on the left side, and the other below the start button
c. Disconnect the trunk and gas door release connectors, so you can remove the bolster completely.
2. Locate the fabric wrapped wire bundle in the picture below. It�s on the right side of the driver�s foot well. There is a lot of slack. Here I have pulled it down�
a. and located the tach wire. It is a light tan wire. (yes, it is a little scary cutting into this, just do it � be careful!)
b. Your tach connection connectes here. I used easy push connects, they worked pretty well.
c. I grabbed ground from the trunk/gas lid lines. On the right in the pic below. A multimeter really helps out here. Here is a pic of that area. The third bundle is where I wired my HomeLink. Yours won�t have this.
d. So, we have ground and speed signal, now we need power. I had a hard time finding switched power. It is important that it is switched. I first grabbed power from the interior light/ dimmer switch in the dash. Bad idea, my shift light only functioned when my headlights were on. Worked great in my garage! But I usually do not driver very fast in my garage .I probed a lot of wires on the driver side, never found anything suitable. So, I routed to the fuse box in the passenger side foot well. Would be helpful if someone finds a good power in the driver side.
e. I used a coat hanger to probe from driver side to passenger side and pull the wire. Slide it under the center console as shown.
f. Here it is coming out the passenger side.
g. I used an �add a circuit� to tap into my fuse box in the passenger foot well. (no pics)
h. I just ran the power wire under the center console, and to the fuse box. I tapped into the heated seat/ wiper fuse. Use the most heavily insulated wire you can find. You are routing over the area where the exhaust runs. It gets very hot there.
3. I mounted my light above my rear view mirror. To route the wire it pulled off the pillar cover. Its all clips. Start on the (top right in the pic) top outside. You don�t need to remove the whole thing. Just as much as I did in the pic. You can then send the shift light bundle down toward the foot well.
4. Here it is from pillar to well
5. It�s pretty easy to tuck the shift light bundle under the casing at the top of the windshield to get the light over to the mirror.
6. I used double stick tape to find a suitable location ( temporary ). Once I found a location I liked after driving around, I used a small screw to fasten the light clip. The tape won�t work in a hot car, of course.
7. Here I am all set up, other than the led�s, it is very stealth.
8. It works awesome.
9. I set it to 1k in the garage, and 4k to test in the neighborhood.
10. I am slowly ratcheting it up. Want to make sure I have enough time to shift before the ecm shuts me down. I hate that.
11. Feel free to pm me w/ any questions
12. Btw, I just banged out this diary, no proof reading or anything, so please add any comments to this post. Good luck, hope this saves you some time. If I did it again tomorrow, it would take me about an hour.


 03-12-2008, 09:01 PM
#12
Le Mans Master


great job get a trans tune and no worries about leaving enough room to shift! youll be setting the shift light to about , i like where you put it when i read your first post i was thinking where would you put it?
get a trans tune and no worries about leaving enough room to shift! youll be setting the shift light to about , i like where you put it when i read your first post i was thinking where would you put it?


 04-07-2008, 09:32 PM
#16
Moderator


Member Since: Dec 2002
Location: Lakewood Ranch, FL
Posts: 40,083
Received 3,589 Likes
on
1,626 Posts

