
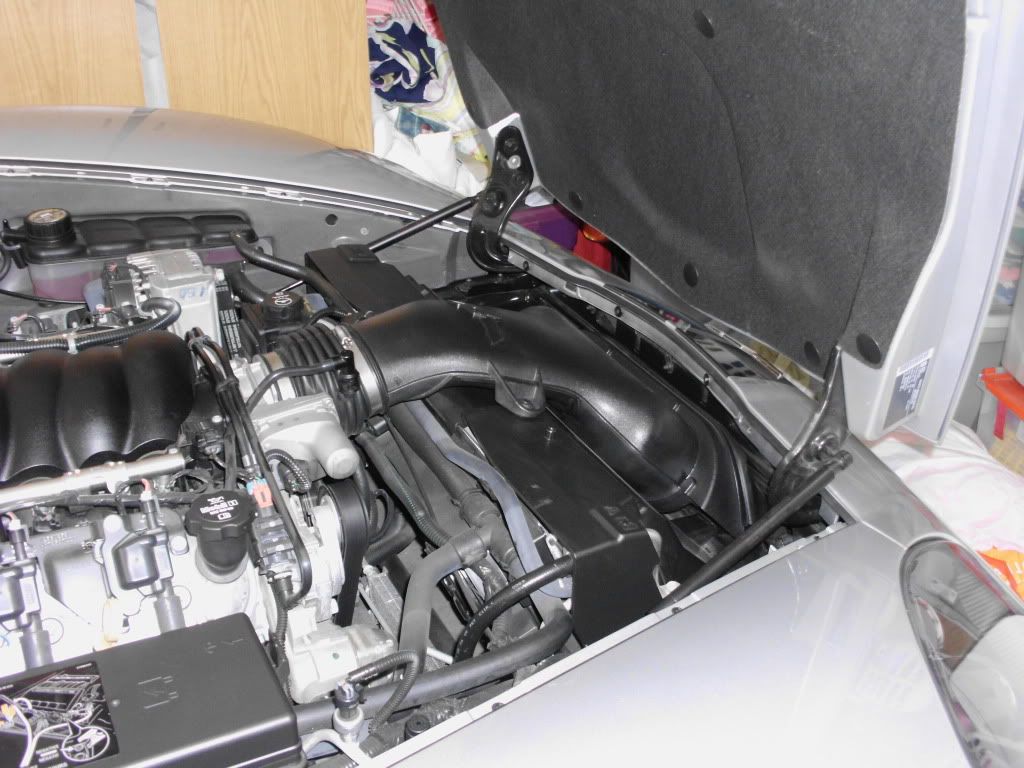
Replacing air filter is easy -- and few pointers with pics...


 11-14-2009, 07:42 PM
#24
Premium Supporting Vendor
Member Since: Aug 2004
Location: ★ Performance Parts & Accessories ★ 1800 778 9898
Posts: 17,128
Received 279 Likes
on
222 Posts
St. Jude Donor '07-'08-'11-'12-'13-'14-'15-'16-'17


__________________

Serving The Corvette Forum For 21 Years!!
Allow us to add you to the list of extremely satisfied customers.
Order Securely Online 24/7: http://tkoperformance.com/index.html
Feel Free To Contact Us By Phone: 1800 -778- 9898 Monday- Friday 9:00am to 4:30pm
Click Here: http://www.facebook.com/pages/TKO-Pe...e/367433626633
12-04-2009, 09:15 PM
#25
7th Gear

Member Since: Feb 2009
Location: Ontario California
Posts: 7
Likes: 0
Received 0 Likes
on
0 Posts
Thanks to all for the pics and tips. Just finished installing the filter and can't wait to give it a go this weekend! I left the MAF in and just 'flipped' the intake over on top of the manifold. Thanks to all of you, it was an easy task.
 06-05-2010, 12:10 PM
#29
Team Owner


I installed the vette-Air along with the Attack Blue filter yesterday. At 70MPH the surging/bucking was so bad I got the Service traction Control and Service Active Handling message on the DIC, along with the Check Engine light.
I removed the Attack Blue filter this morning but still have a little suring/bucking with the Vette-Air and stock OEM factory filter. Still have CEL.
I have the Attack Blue filter and cleaning/re-oiling kit for sale in the parts for sale section.
I removed the Attack Blue filter this morning but still have a little suring/bucking with the Vette-Air and stock OEM factory filter. Still have CEL.
I have the Attack Blue filter and cleaning/re-oiling kit for sale in the parts for sale section.
06-05-2010, 12:12 PM
#30
Team Owner
The main advantage of the way I am doing it is that I don't have to worry about dropping the maf screws or the maf plastic clip. Both of which would likely be hard to replace if lost. I will be going to the track and swapping filters in the pits soon to compare so that's why.
*** dyno's are notoriously unreliable, but the car does feel stronger, fwiw. I'll be going to the track soon and will be doing filter swaps between runs. I'm also using the vette air and I got a check engine light last night as the car was surging some. The surging was also occuring with the stock filter/vette air but now it is a little worse.
*** dyno's are notoriously unreliable, but the car does feel stronger, fwiw. I'll be going to the track soon and will be doing filter swaps between runs. I'm also using the vette air and I got a check engine light last night as the car was surging some. The surging was also occuring with the stock filter/vette air but now it is a little worse.
06-05-2010, 12:34 PM
#31
Safety Car


I used Jim Halltech's method of opening two elongated holes at the bottom ends of the shroud and installed the Beehive. No surging with either the LS3 intake or Killer Bee intake.
Good luck
06-05-2010, 01:14 PM
#32
Team Owner
Some people with the LS3 intake or aftermarket intake had issues with the Vette Air. The LS3 MAF sensor is sensitive to turbulent air flow and this maybe the cause of your surging. Do a search, some have resolved the surge issue using baffles on the Vette air to reduce or stabilize the air flow.
I used Jim Halltech's method of opening two elongated holes at the bottom ends of the shroud and installed the Beehive. No surging with either the LS3 intake or Killer Bee intake.
Good luck
I used Jim Halltech's method of opening two elongated holes at the bottom ends of the shroud and installed the Beehive. No surging with either the LS3 intake or Killer Bee intake.
Good luck
Last edited by JoesC5; 06-05-2010 at 05:13 PM.
 06-05-2010, 03:47 PM
#34
Drifting

The only real issue, unless you are clumsy with the sensor is the strong chance to drop the 2 screws that hold it in place. Very easy to do. The sensor is fine to be handled. I am in the electronics business and the only real chance to damage it is if you damage a solder joint. If you were to remove it completely from the car, which you really do not need to do, and to drop it on the floor, then it would be an issue. Just folding the wire harness back so that the sensor is resting on the top if the intake is NOT going to damage it. To attempt to work with the 6 screws holding the filter in the housing would be next to impossible with the unit still in the engine bay. Remove the entire filter assembly. I drove the car on a uphill section of road that I have drove every day for 2 years with the stock filter and then with the Attack filter and then with the stock filter back on the car. I know that it just my opinion, but the car was more responsive between 1500 and 4000 rpms. I did not dyno nor run a 1/4 mile at a track but to me it was worth it. There are 2 other threads reviewing this very subject. Both pro and con. To each their own whether oiled filters are safe or not.
Last edited by Crossofiron; 06-05-2010 at 03:50 PM.
09-05-2011, 09:55 AM
#35
Safety Car
 09-05-2011, 12:40 PM
#36
Team Owner
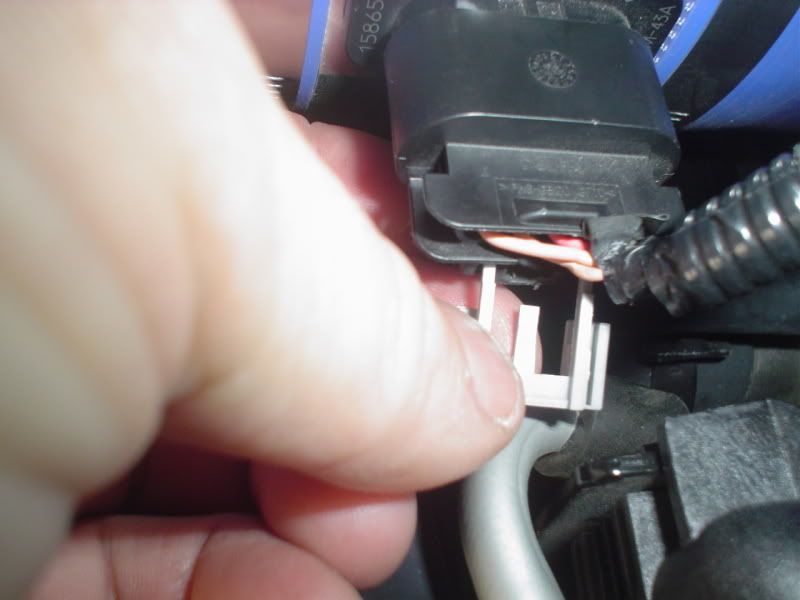
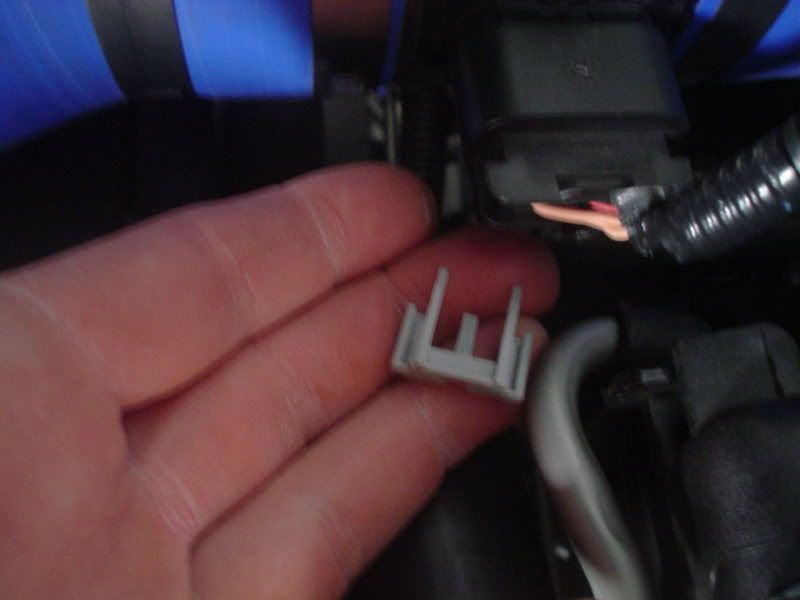
Knowing GM, you will probably have to buy a complete wiring harness to get that $.10 clip.
09-15-2012, 12:44 PM
#37
Instructor
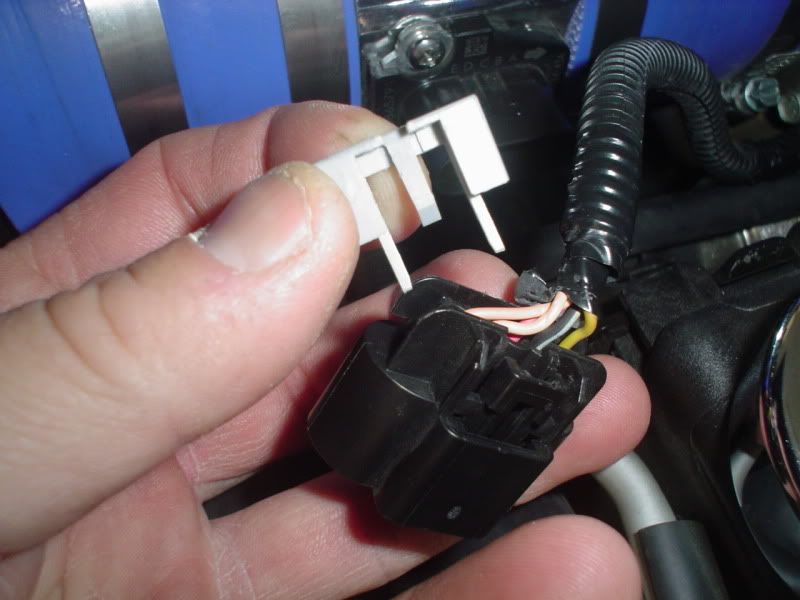
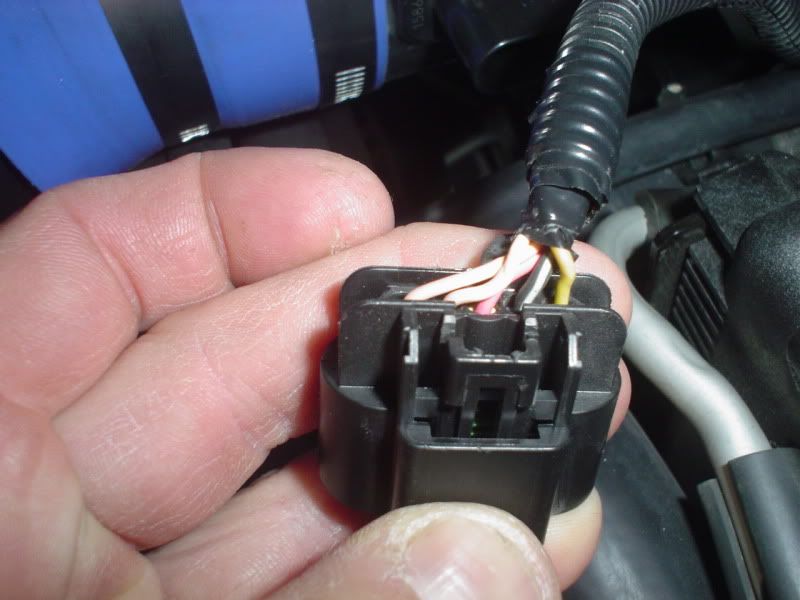
I spent hours looking at "how to" on this.I'm a New Corvette owner and a Audio Engineer not much of a wrencher. "Cost to fix your screw up is High. I will add this, The Manaul said to Loosen the rear Clamp and Remove Tube you don't need to do that, Just Loosen the front clamp as others have said. The AFM Sensor is easy to unclip the Gray lock once that it's upside down, by removing the the duct, and lay it over. You will see the center release pin, The Fasteners on my GS stayed on the retainer pins I just pulled them off and reattached to the air assembly from the bottem.
Last edited by rcwsound; 09-15-2012 at 12:49 PM.

 01-19-2013, 03:21 PM
#39
Instructor
Actually, there is no need to disconnect the MAF sensor or even remove it from the air cleaner. The wire that attaches to it has a clip that holds that wire to a small metal brace. Just pull up on that clip. This will give you the slack you'll need to proceed. Next, loosen the front hose clamp and lightly pop the air cleaner assembly off the rubber grommets and just swing the system around so you have access to the torx screws holding the filter in.
Thanks again, Roger
