
How I made my "custom" rear diffuser
 12-01-2016, 01:43 PM
#1
Racer

Thread Starter
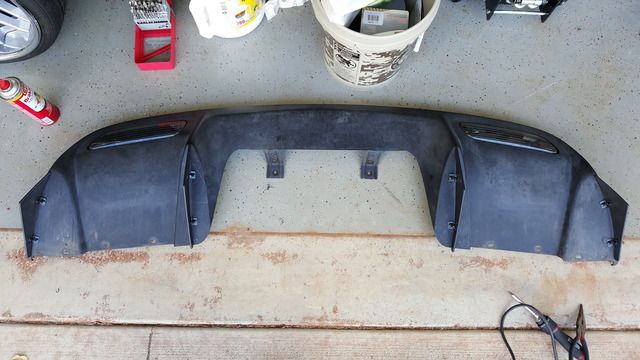
Because I've had several PMs asking how I added the fins to my stock diffuser, I thought I'd post a few pics of the process. Just another person's take on trying to personalize his vehicle to his own taste.
My decision to do this was in part because I was really short on funds, and I needed to retain the stock reverse lights for the hard core inspections we have here. In total, this project cost me about $50. My painter already agreed to paint my stock diffuser gloss black as part of my paint package, so there was no real extra cost for paint for me. If you were to do something like this, you would need to account for that. So far it's holding up well and everyone that sees it likes it, but at some point, when I do get more funds, I will may purchase a carbon fiber version.
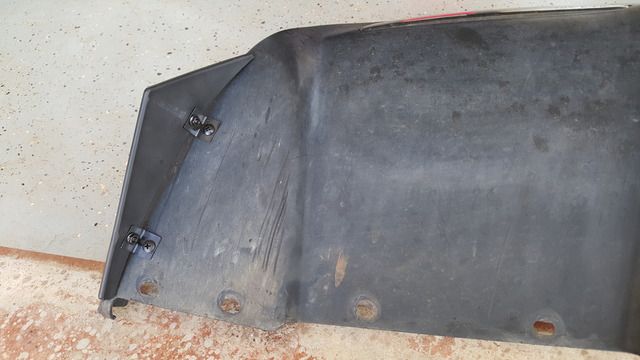
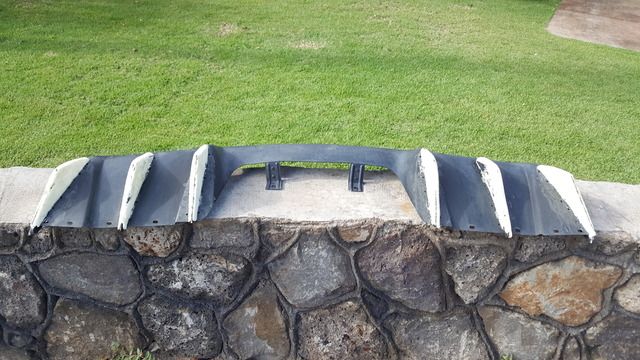
I used some cheap cannards I purchased off of ebay and bolted them in the places I wanted them.
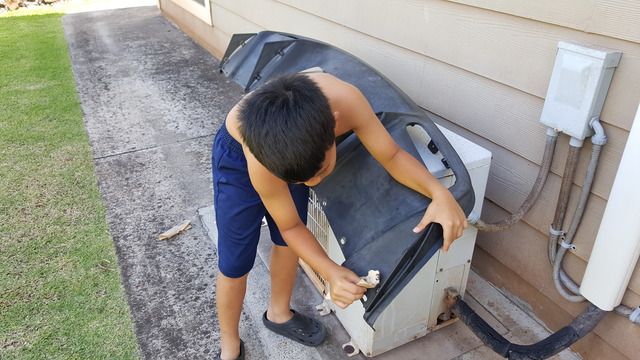
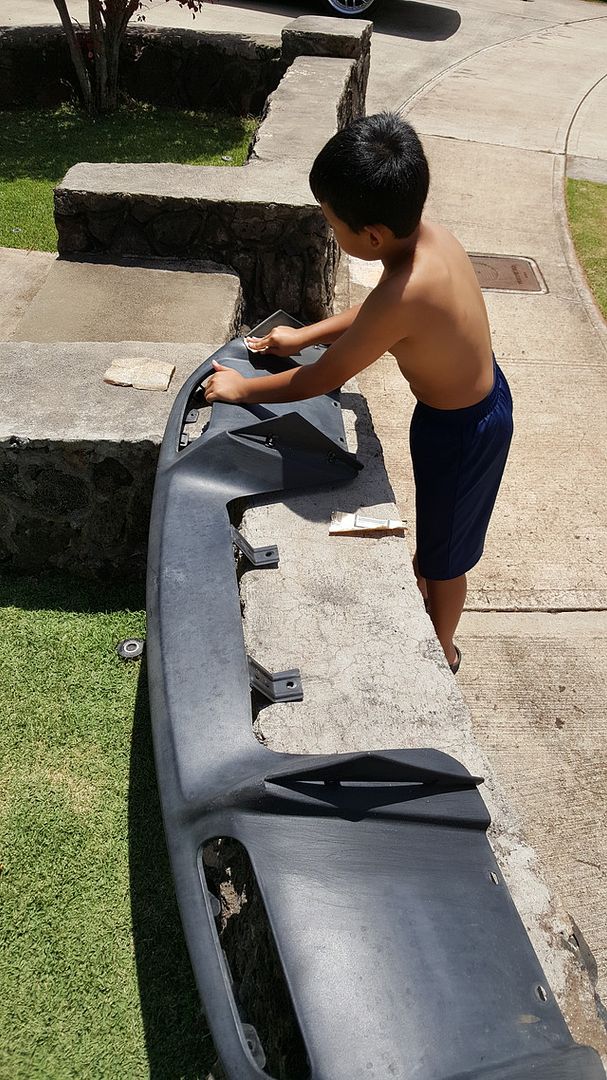
Found cheap help to sand and prep the stock diffuser.
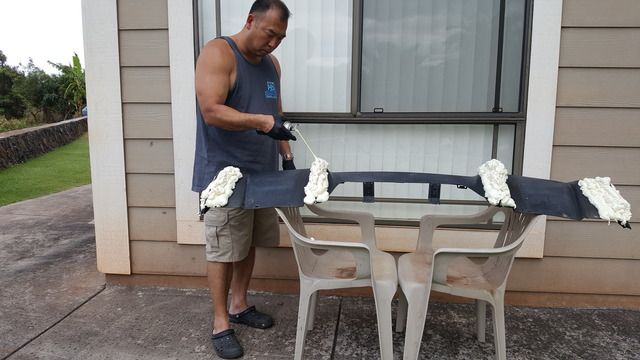
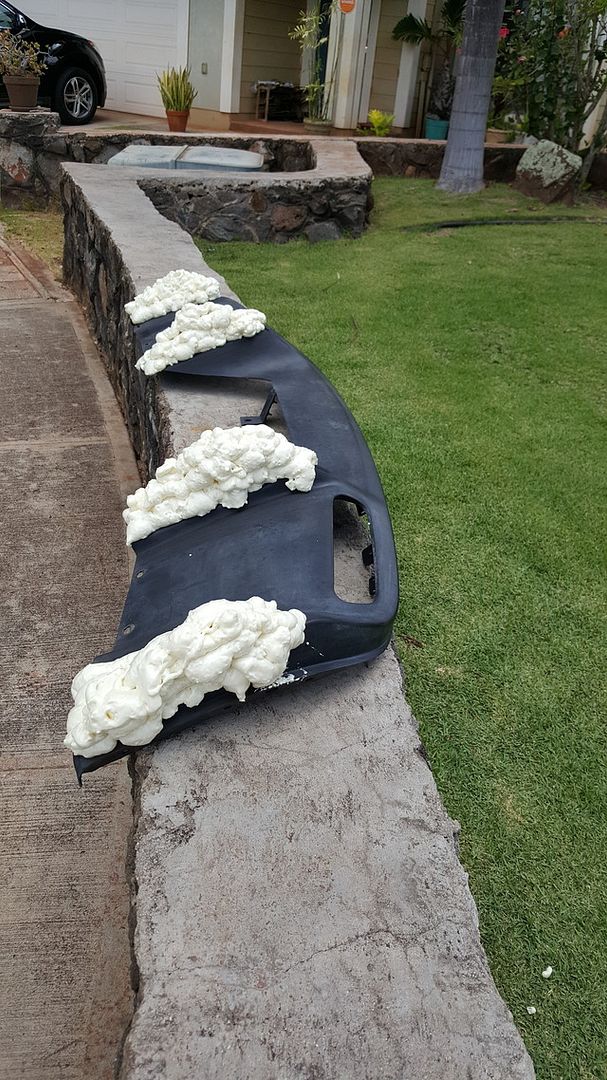
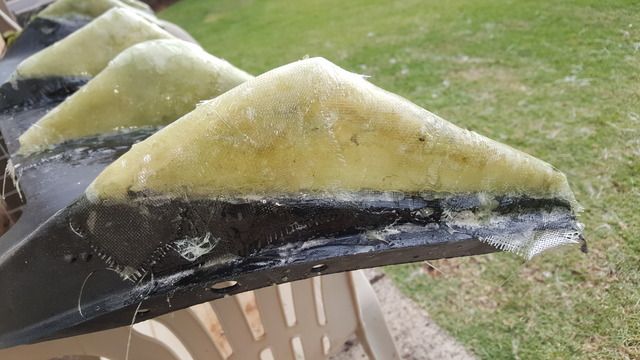
Used that Good Stuff expanding foam to help increase the thickness of the fins.
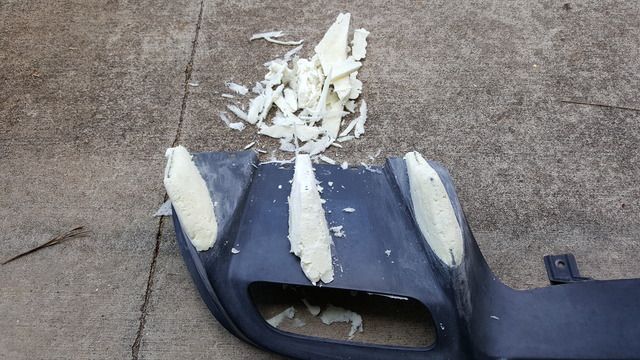
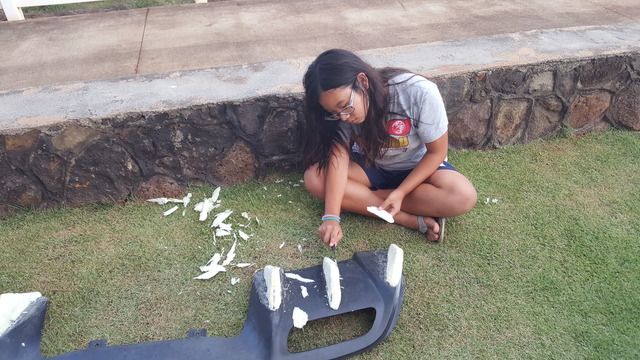
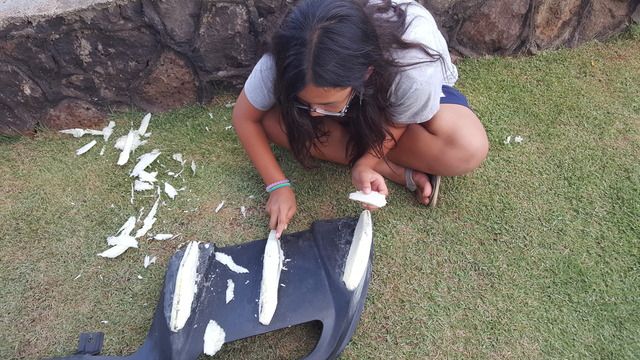
Start shaping the foam by cutting it. I used an old serrated steak knife.
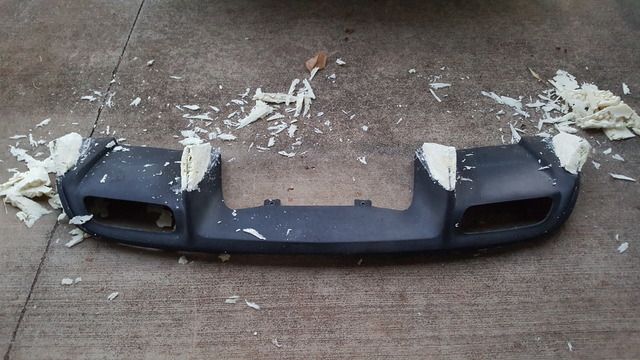
At some point, I decided to add a third fin to each side.
I gave my daughter a try at shaping.
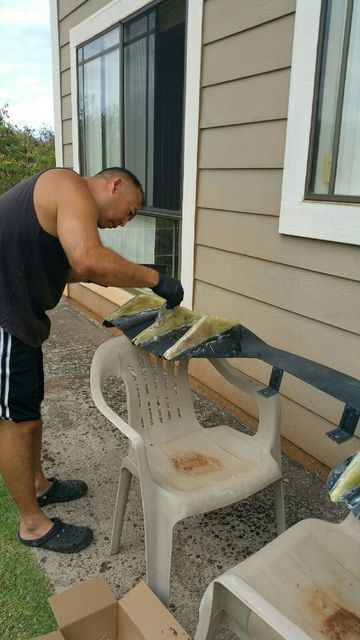
Started glassing the foam with resin and fiberglass cloth.
After a lot of sanding and using more fiberglass filler, I got to the point that it was ready for priming and paint. Painter needed to use a lot of flex agent in the painting process to prevent cracking of the paint as the diffuser flexes.
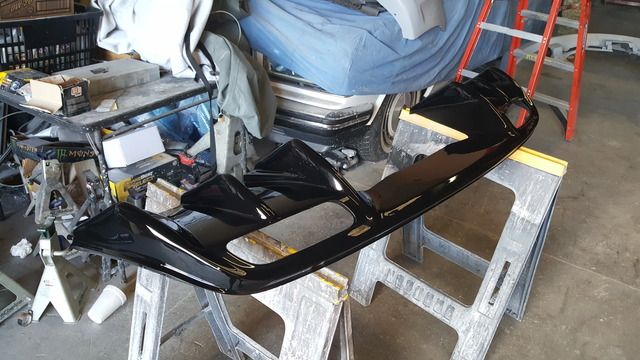
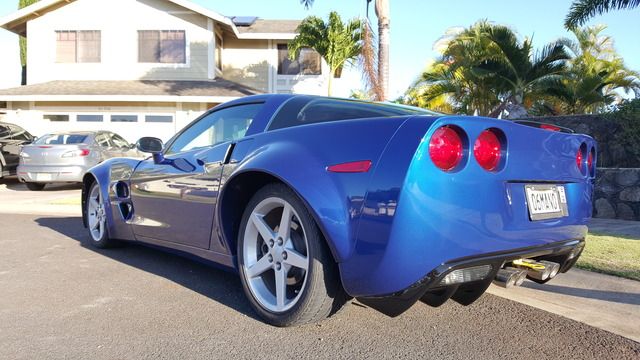
Just got my car back from paint.
Here's a rear end shot with my wickerbill spoiler from Innovative Auto Concepts! Messy garage... Sorry! LOL!
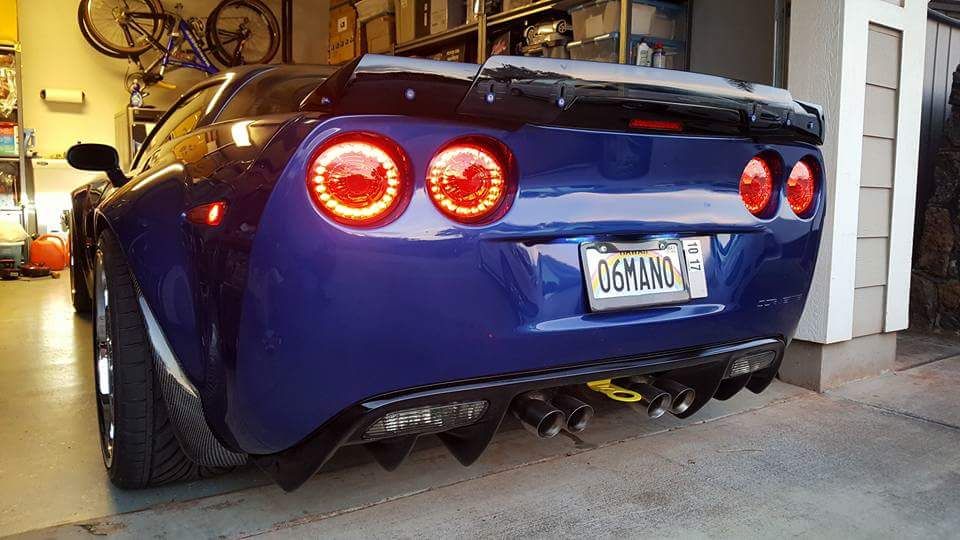
Hey, I just noticed my 15 year old mountain bike hanging up in the garage has almost the exact same colors that's on my car. What a coincidence. I must truly love that color combination. I am a LA Rams and Lakers fan too btw.
Hope you guys enjoyed the short tutorial.
My decision to do this was in part because I was really short on funds, and I needed to retain the stock reverse lights for the hard core inspections we have here. In total, this project cost me about $50. My painter already agreed to paint my stock diffuser gloss black as part of my paint package, so there was no real extra cost for paint for me. If you were to do something like this, you would need to account for that. So far it's holding up well and everyone that sees it likes it, but at some point, when I do get more funds, I will may purchase a carbon fiber version.
I used some cheap cannards I purchased off of ebay and bolted them in the places I wanted them.


Found cheap help to sand and prep the stock diffuser.


Used that Good Stuff expanding foam to help increase the thickness of the fins.


Start shaping the foam by cutting it. I used an old serrated steak knife.

At some point, I decided to add a third fin to each side.

I gave my daughter a try at shaping.


Started glassing the foam with resin and fiberglass cloth.


After a lot of sanding and using more fiberglass filler, I got to the point that it was ready for priming and paint. Painter needed to use a lot of flex agent in the painting process to prevent cracking of the paint as the diffuser flexes.

Just got my car back from paint.

Here's a rear end shot with my wickerbill spoiler from Innovative Auto Concepts! Messy garage... Sorry! LOL!

Hey, I just noticed my 15 year old mountain bike hanging up in the garage has almost the exact same colors that's on my car. What a coincidence. I must truly love that color combination. I am a LA Rams and Lakers fan too btw.
Hope you guys enjoyed the short tutorial.
Last edited by Magik; 12-01-2016 at 05:25 PM.

The following users liked this post:
Magik (12-01-2016)
12-01-2016, 02:10 PM
#4
Racer
Thread Starter

And here's a link to the whole build of my car and other widebody cars:
https://www.corvetteforum.com/forums...-zr8x-kit.html


Last edited by Magik; 12-01-2016 at 02:22 PM.
12-01-2016, 02:29 PM
#5
Racer
Thread Starter
The hardest part was all the sanding and reapplying of fiberglass filler. I found the more I sanded the more air pockets in my fiberglass cloth I found. Went out and bought an electric sander just for this too.
12-01-2016, 02:29 PM
#6
Team Owner

Member Since: Mar 2004
Location: Oklahoma City OK
Posts: 58,260
Received 1,675 Likes
on
1,298 Posts
C6 of Year Finalist (appearance mods) 2019

Nice job!
The following users liked this post:
Magik (12-01-2016)


The following users liked this post:
Magik (12-01-2016)
12-01-2016, 02:48 PM
#8
Melting Slicks

Holy Do-it-Yourself batman!!! That looks great. From the pics, it looks just as good or better than any aftermarket product. If I were you, I would not trade up carbon. I would simply hydro yours if you like the carbon pattern.
Great job!!!
Great job!!!
The following users liked this post:
Magik (12-01-2016)
12-01-2016, 03:15 PM
#9
Team Owner
Member Since: Dec 2012
Location: Outside the Quick Stop N.J.
Posts: 30,426
Received 1,596 Likes
on
1,074 Posts

Nice work, great to see your kids helping out. Is that a RR hiding under the cover ?
The following users liked this post:
Magik (12-01-2016)
12-01-2016, 04:53 PM
#10
Racer
Thread Starter
Not sure what was under the cover. I never noticed it at my painter's shop to tell you the truth.
12-01-2016, 05:40 PM
#11
Melting Slicks
AWWWWWWWWWWWW shoot Magik got skillz lol great job, I just got mine yesterday, its off to the paint shop tomorrow. This will be the 6th painter to paint something on my car lol.
The following users liked this post:
Magik (12-01-2016)
12-01-2016, 05:49 PM
#12
Team Owner
Member Since: Jun 2005
Location: Northern, VA
Posts: 46,106
Received 2,481 Likes
on
1,944 Posts
St. Jude Donor '15
"In honor of jpee"
 12-01-2016, 06:05 PM
#13
Le Mans Master

Very cool!


 12-01-2016, 06:50 PM
#16
Burning Brakes

Member Since: Jul 2011
Location: Myrtle Beach South Carolina
Posts: 781
Likes: 0
Received 183 Likes
on
121 Posts
Hey Majik, my girlfriend just relocated here to the mainland from Oahu and I noticed they put the inspection sticker on her rear bumper, it's on the paint. Is that standard procedure over there? If so, are you going to be able to get around that?
Love your build thread btw!!
Love your build thread btw!!
Last edited by sluggballz; 12-01-2016 at 06:51 PM.


 12-01-2016, 08:35 PM
#20
Racer
Thread Starter
