
Bonecrrushers 2005 C6 Build Thread


 01-23-2018, 07:51 PM
#23
Race Director

Member Since: Apr 2016
Location: Pittsburgh
Posts: 10,679
Received 4,713 Likes
on
2,998 Posts
2023 C6 of the Year Finalist - Unmodified
2022 C6 of the Year Finalist - Unmodified
2021 C6 of the Year Finalist - Unmodified
 01-24-2018, 11:19 AM
#24
Drifting


Keep it coming Craig!
01-24-2018, 02:40 PM
#25
Drifting
Thread Starter
 01-24-2018, 03:05 PM
#27
Drifting
Thread Starter
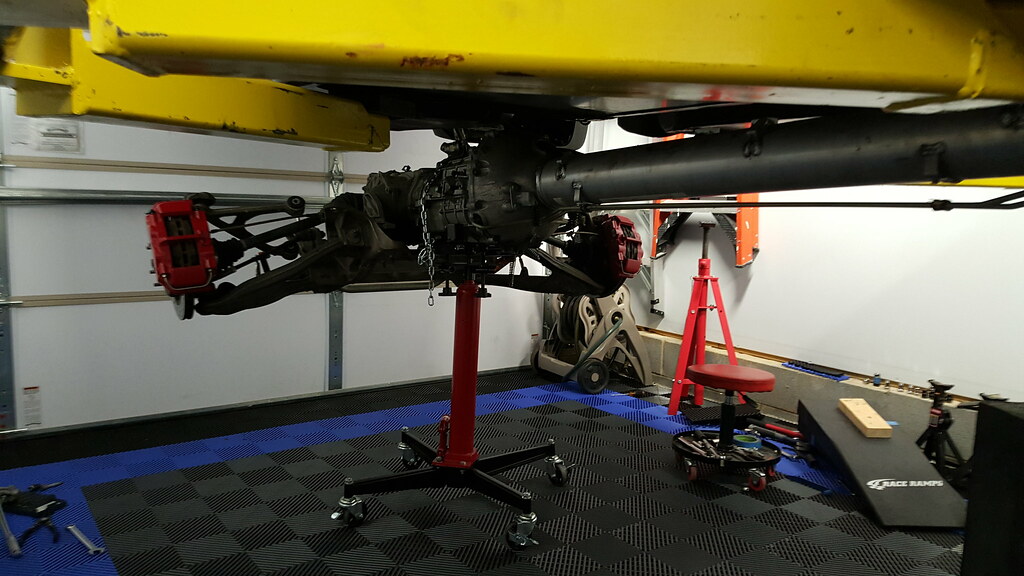
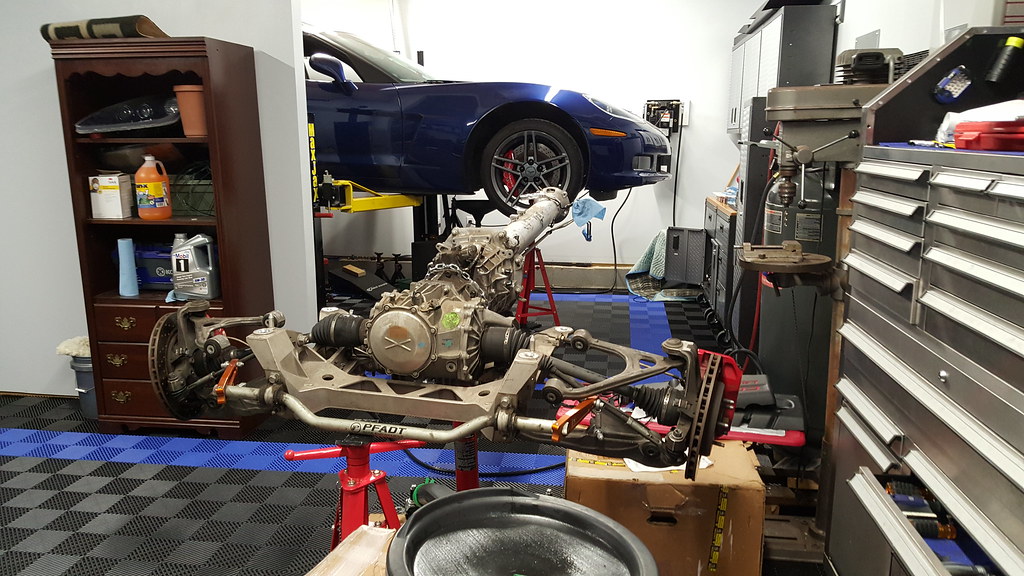
Like I was saying - the Fuel system project turned into a nightmare - I snapped the plastic tubes inside the crossover tube - and broke one of the lines on the inside of the drivers side of the tank.
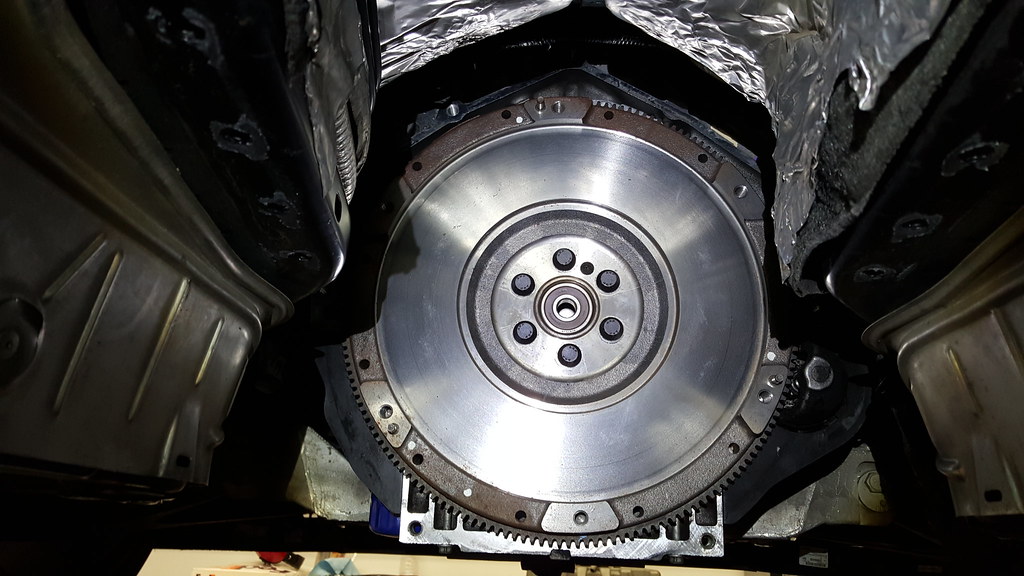
Since the C6 fuel system has the worst design on the planet - I decided to drop the torque tube and transaxle - and swap in an LS7 clutch since we where in there.


Here are my LS7 clutch overview videos:
Since the C6 fuel system has the worst design on the planet - I decided to drop the torque tube and transaxle - and swap in an LS7 clutch since we where in there.
Here are my LS7 clutch overview videos:

The following users liked this post:
bonecrrusher (01-24-2018)
01-24-2018, 06:41 PM
#29
Instructor

 01-24-2018, 09:54 PM
#30
Drifting
Thread Starter
The following 2 users liked this post by bonecrrusher:
BlownC6Cpe (01-24-2018),
thetastelingers (06-13-2018)
01-24-2018, 09:58 PM
#31
Instructor
01-24-2018, 10:01 PM
#32
Drifting
Thread Starter
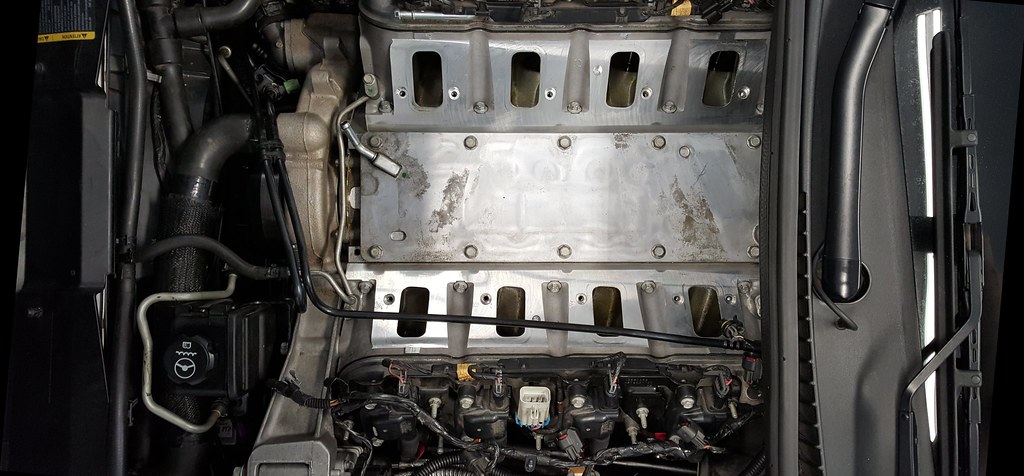
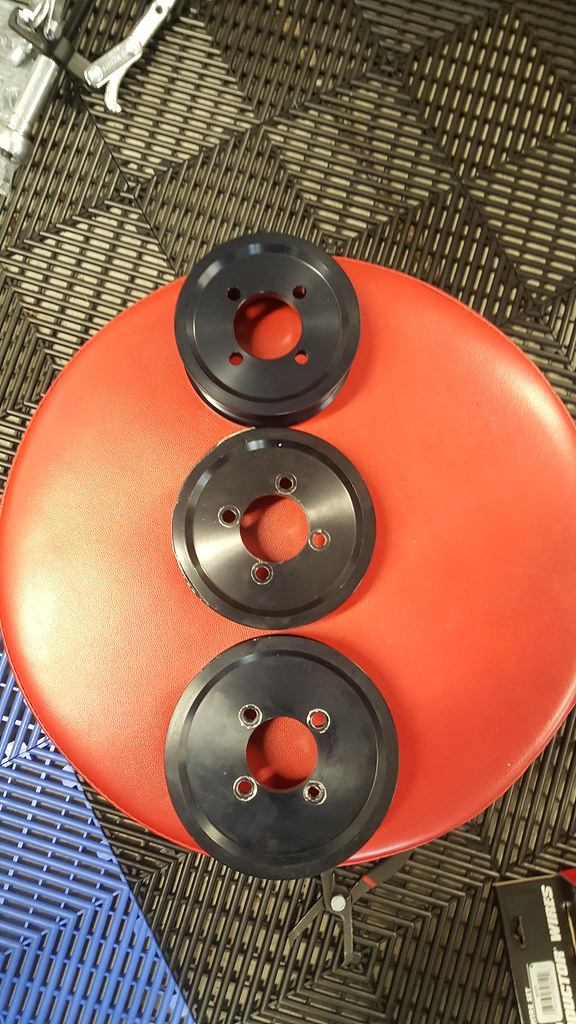
The next phase of the build was upgrading the valve springs - I swapped in a set of Comp Cam 918 springs to replace the truck springs that where on the heads - yes I did say truck springs.
Turns out my GMPP heads had L76/L92 springs in them - and not LS3 springs.
So I went aftermarket with the Comp setup.

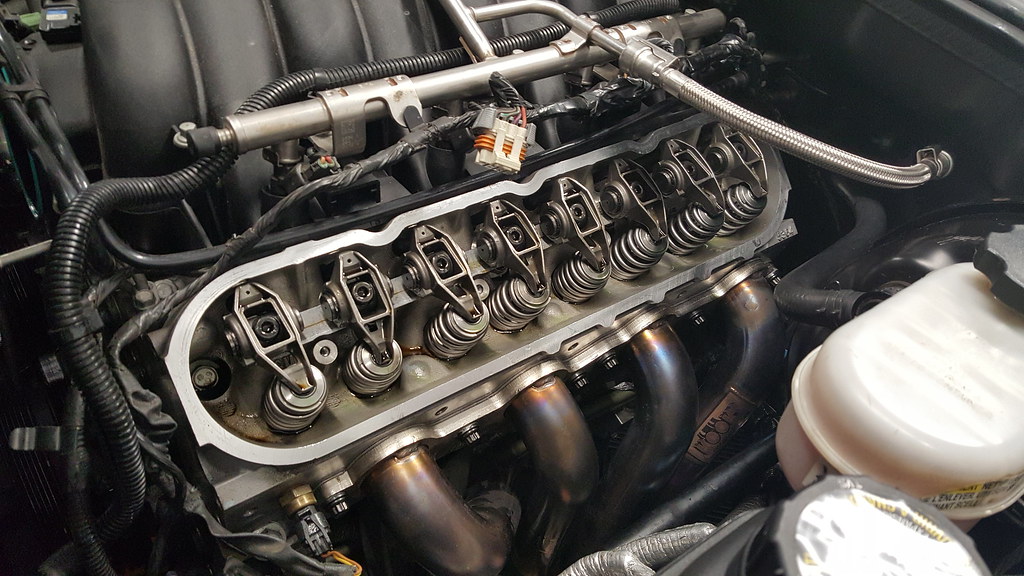
I then started tearing down the car for something that weights like 90 lbs - and makes some whining noises.
So I pinned the crank, and upgraded to an ARP crank bolt.
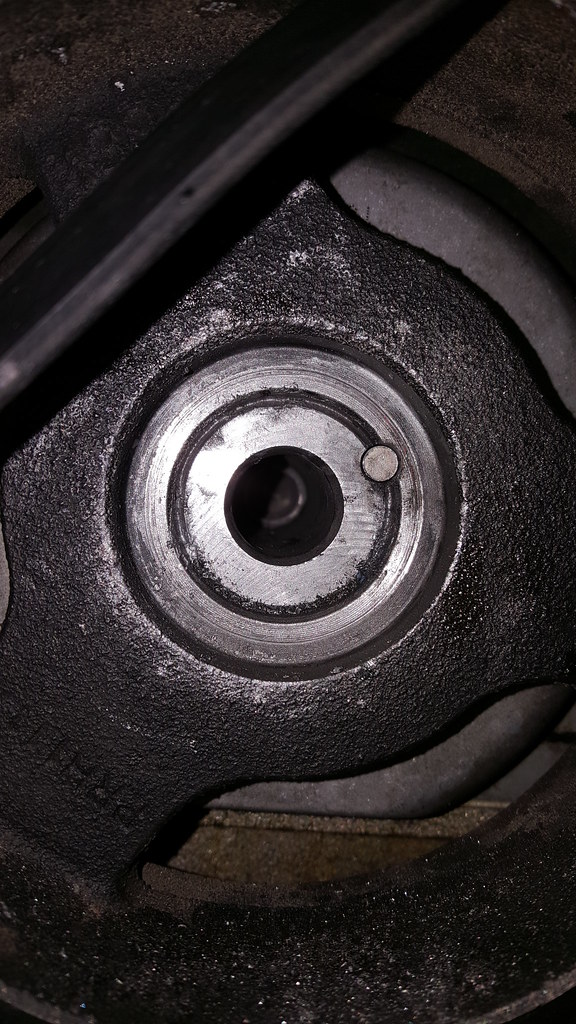
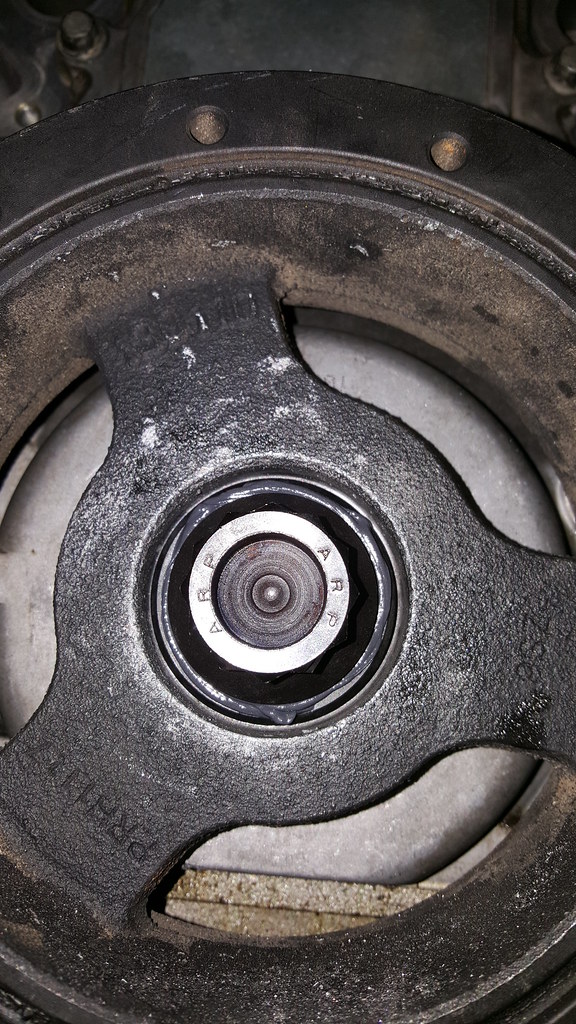
Here is the first fire up with the valve springs - and crank pulley mods.
Turns out my GMPP heads had L76/L92 springs in them - and not LS3 springs.
So I went aftermarket with the Comp setup.
I then started tearing down the car for something that weights like 90 lbs - and makes some whining noises.
So I pinned the crank, and upgraded to an ARP crank bolt.
Here is the first fire up with the valve springs - and crank pulley mods.
Last edited by bonecrrusher; 01-24-2018 at 10:06 PM.
 01-24-2018, 10:19 PM
#34
Drifting
Thread Starter
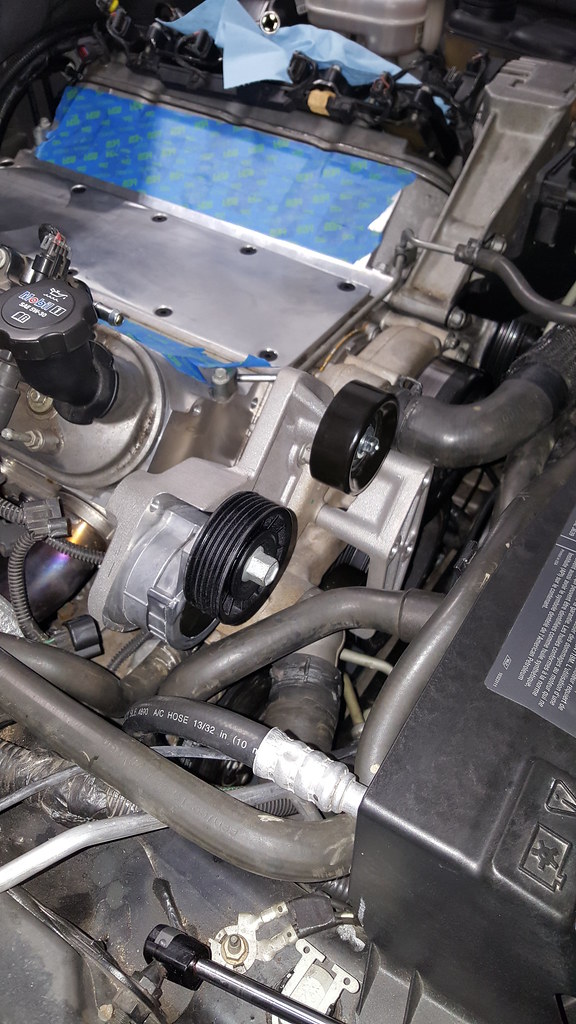
Finally tearing the car down enough - it was time to start adding some parts from the kit.
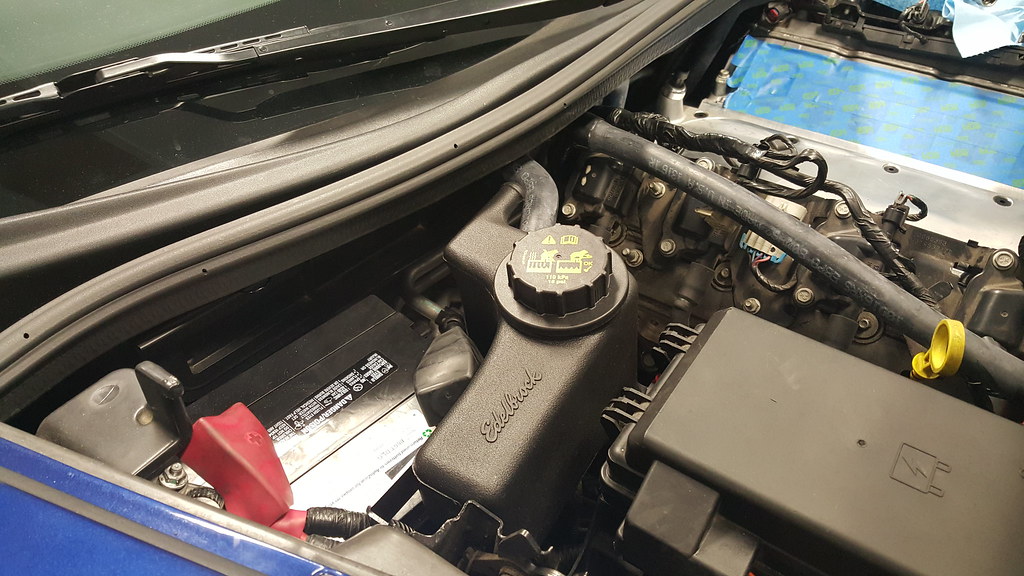
Then it was time to install the big ol lump of metal..

The install pretty much finished up:
Then it was time to install the big ol lump of metal..
The install pretty much finished up:
01-24-2018, 10:28 PM
#35
Drifting
Thread Starter
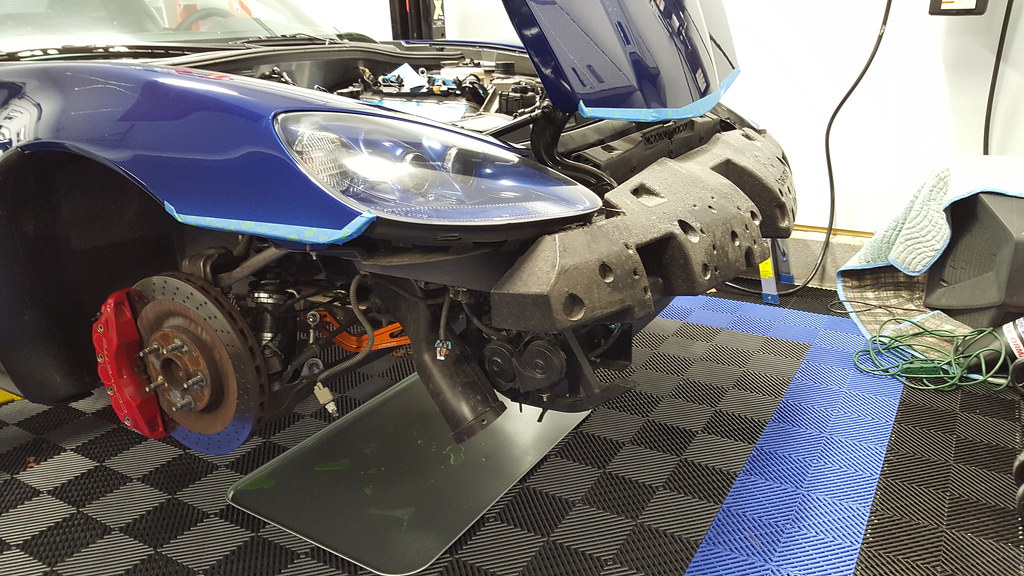
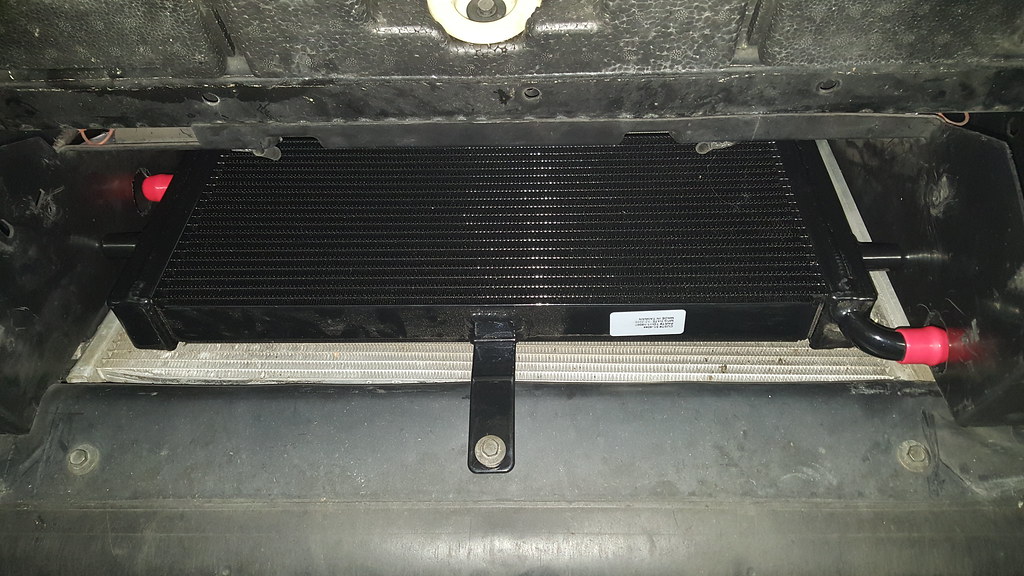
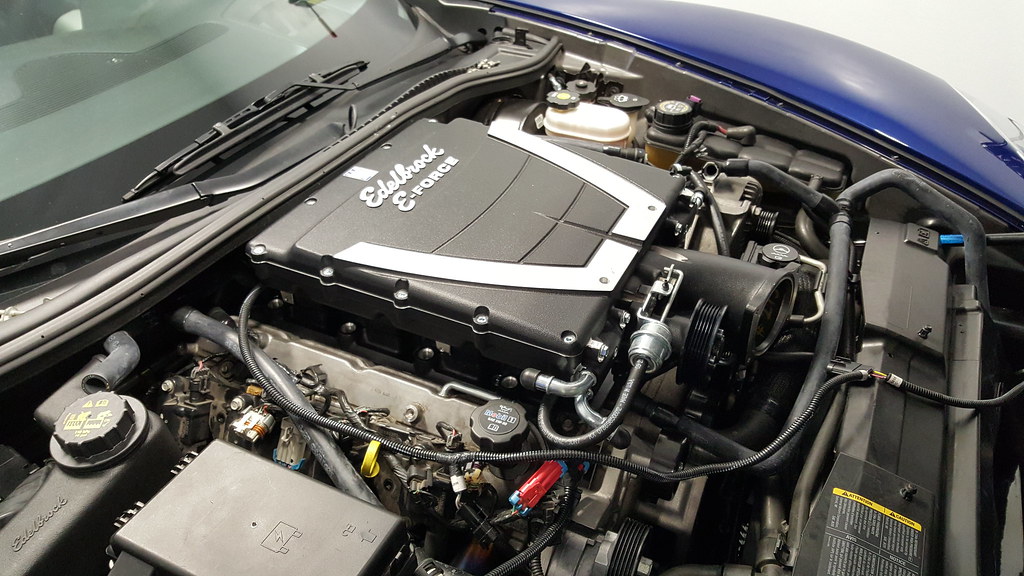
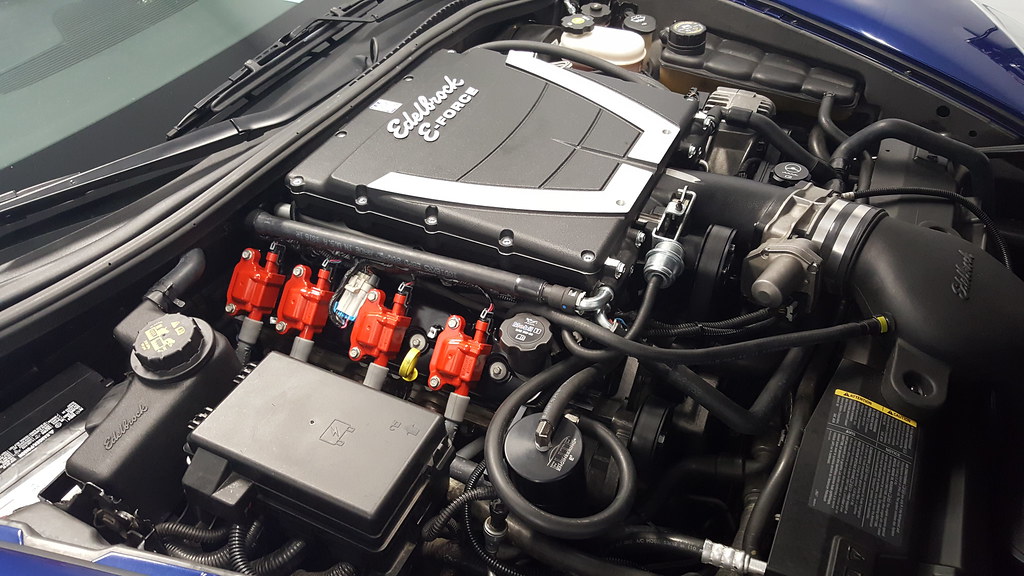
Since I can't leave anything alone - I had to do some upgrades.
1) I installed the upgraded Tensioner kit from Edelbrock - they had released the kit as an upgrade to the earlier blowers.
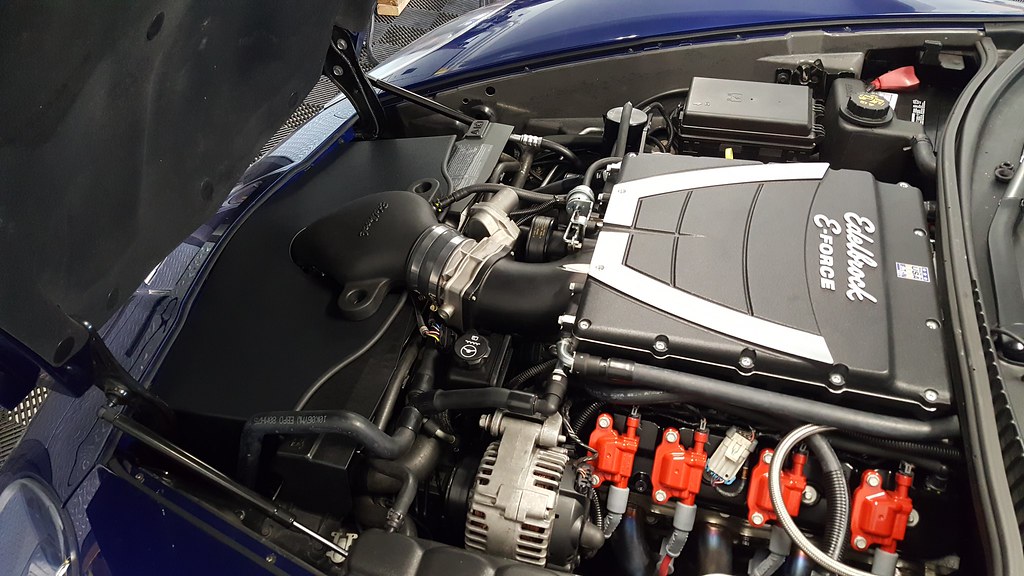
2) Since I had CNC heads, headers, LS9 cam, bigger injectors - the provided tune wasn't going to work on my car - so I decided to add more boost.
I went with a 3.25" pulley - the stock pulley was 3.875".
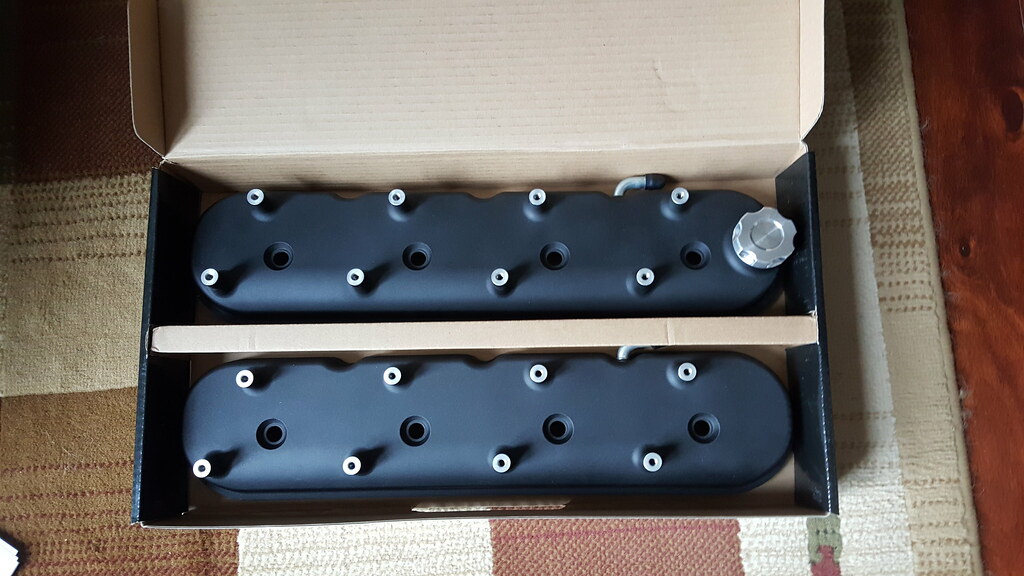
I also decided to change out the valve covers - these covers suck something aweful - more on that later.
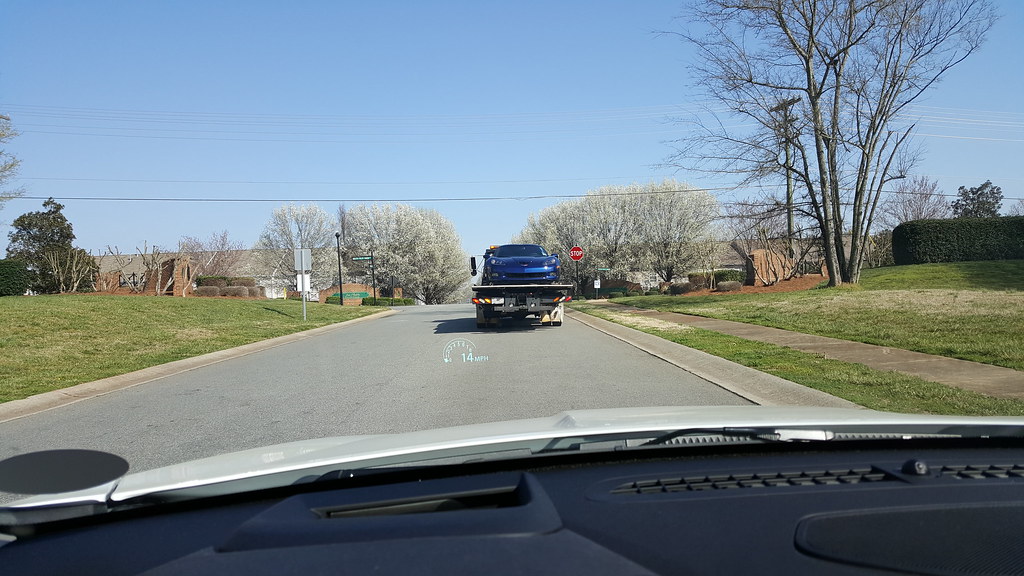
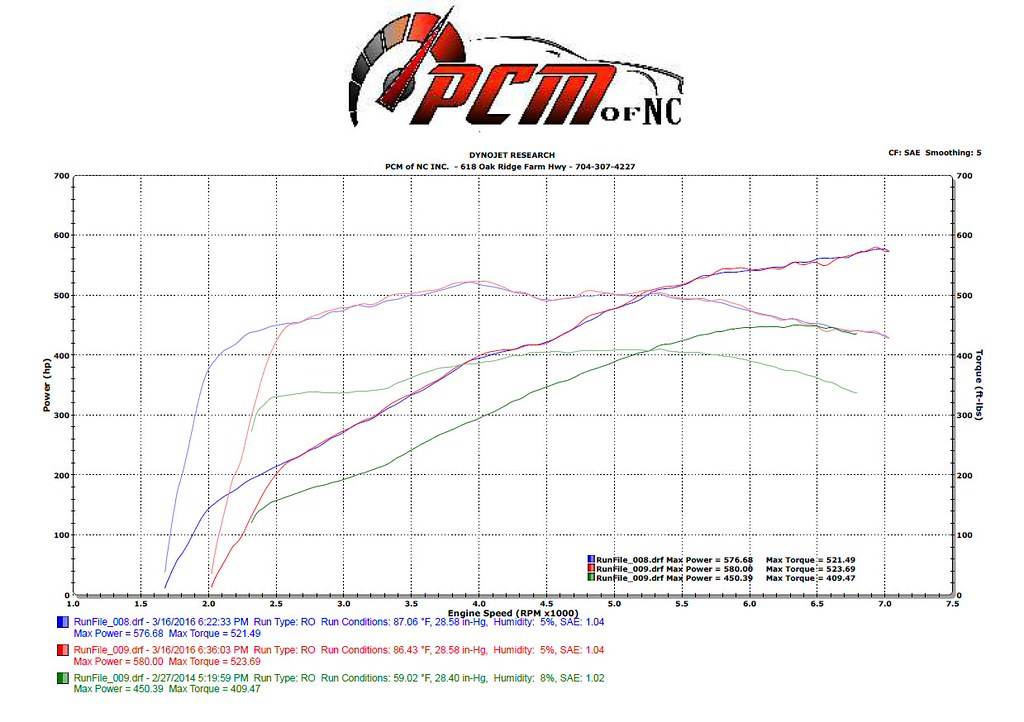
I had the car towed up to PCM of NC for my chassis dyno tune - and they had the car for a few days - and had no major problems.

The car ended up making 580 rwhp / 523 rear torque.
The previous best with the heads/cam/intake + injectors was 450 rwhp/ 409 rear torque.
1) I installed the upgraded Tensioner kit from Edelbrock - they had released the kit as an upgrade to the earlier blowers.
2) Since I had CNC heads, headers, LS9 cam, bigger injectors - the provided tune wasn't going to work on my car - so I decided to add more boost.
I went with a 3.25" pulley - the stock pulley was 3.875".
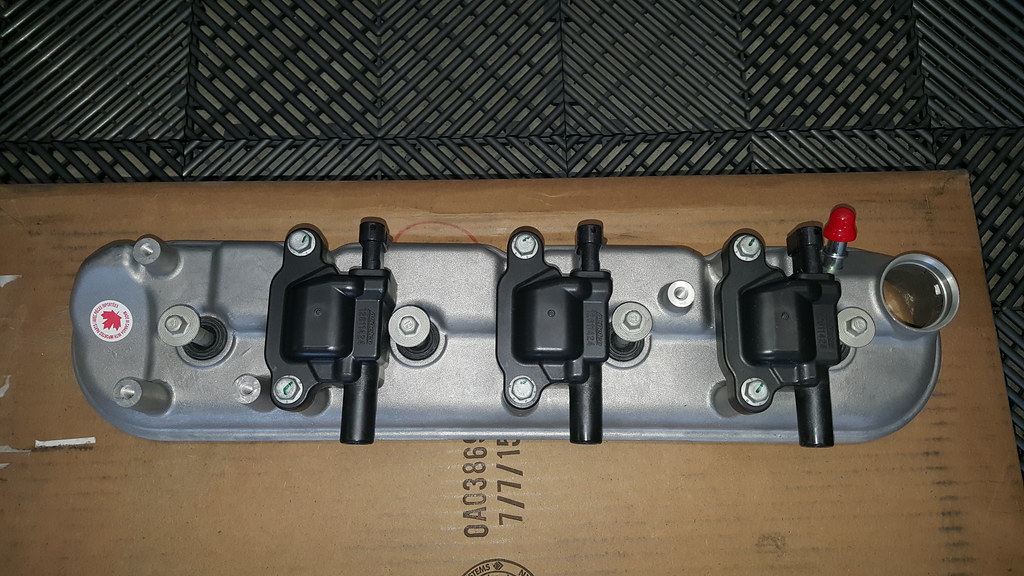
I also decided to change out the valve covers - these covers suck something aweful - more on that later.
I had the car towed up to PCM of NC for my chassis dyno tune - and they had the car for a few days - and had no major problems.
The car ended up making 580 rwhp / 523 rear torque.
The previous best with the heads/cam/intake + injectors was 450 rwhp/ 409 rear torque.
Last edited by bonecrrusher; 01-24-2018 at 10:29 PM.
01-24-2018, 10:39 PM
#36
Drifting
Thread Starter
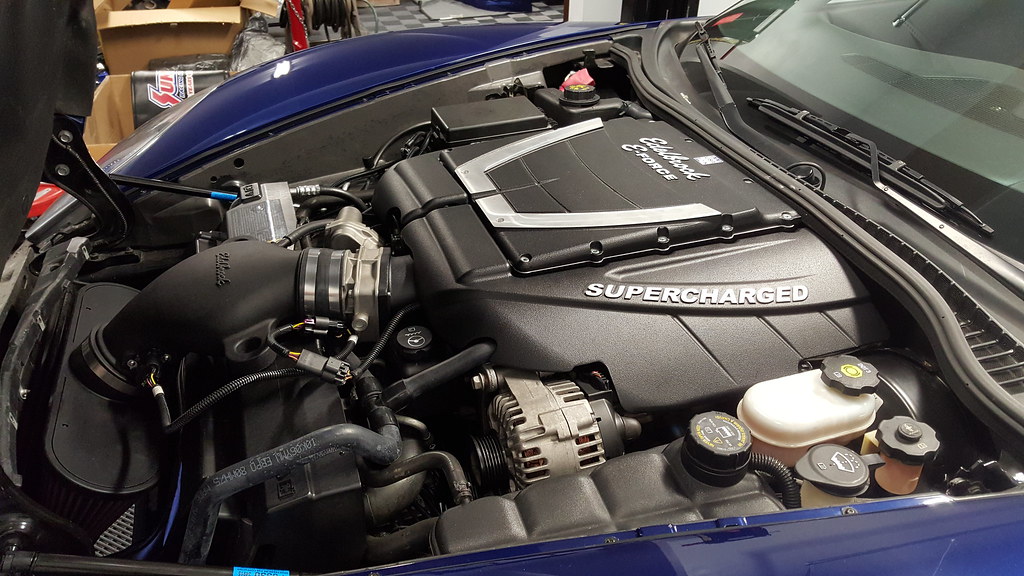
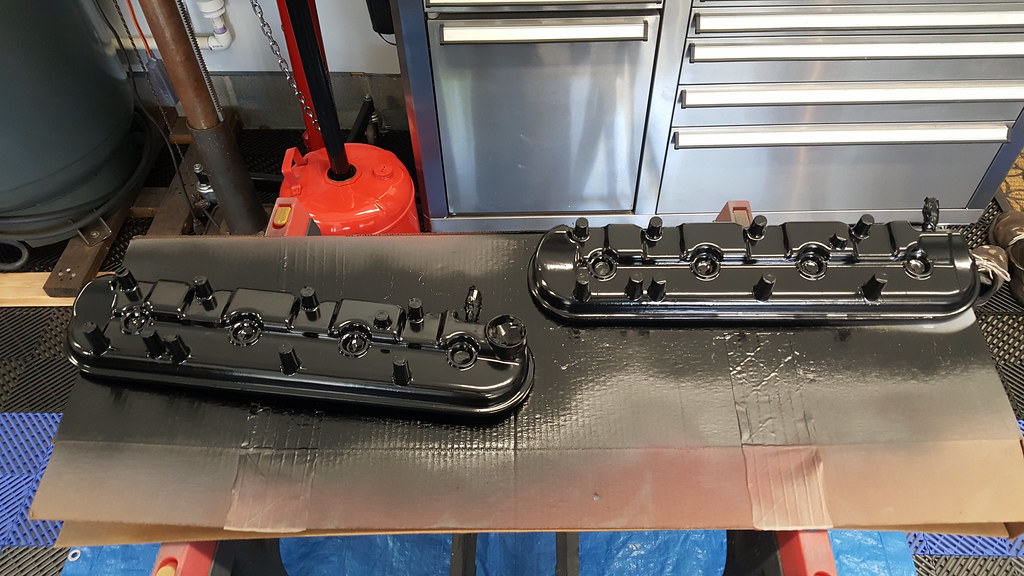
I got the car back from the dyno - and installed the Holley Valve covers.
I had NOTHING but issues with them - while they looked good - they performed terribly.
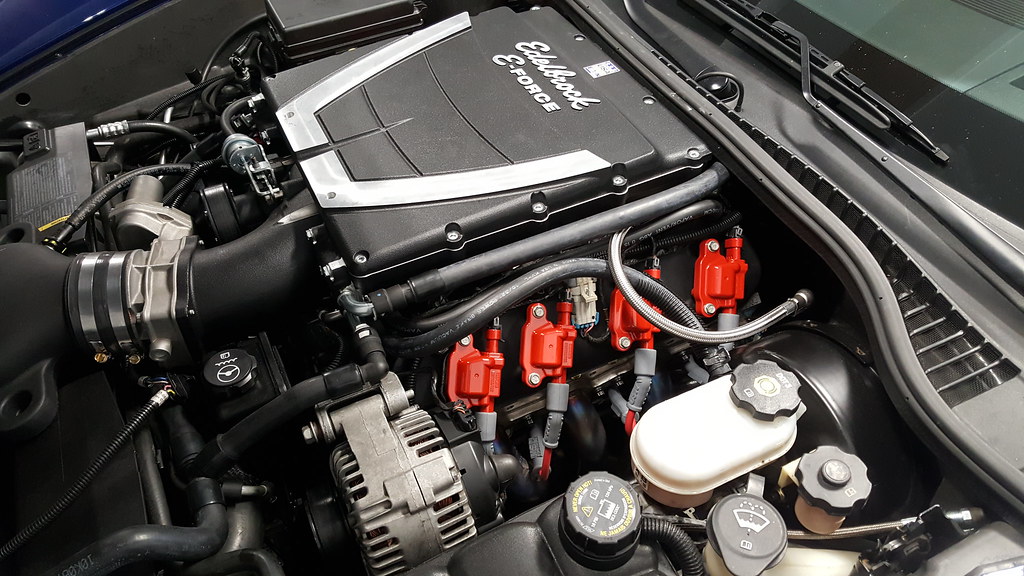
1) They leaked terribly - out the center bolt holes - as well as around the main valve cover gasket.
2) The rough textured finish looked like crap when oil got on them.
3) They are vented / restricted properly - and totally messed up the PCV system on the car.
Since the E-Force system eliminates the valley cover port - the blower ended up sucking a quart of oil through the drivers side cover - right into the blower.
I was at a car show and the oil level warning light came on during the drive home.
To resolve all of the above issues - I decided to go with a set of LS9 covers.
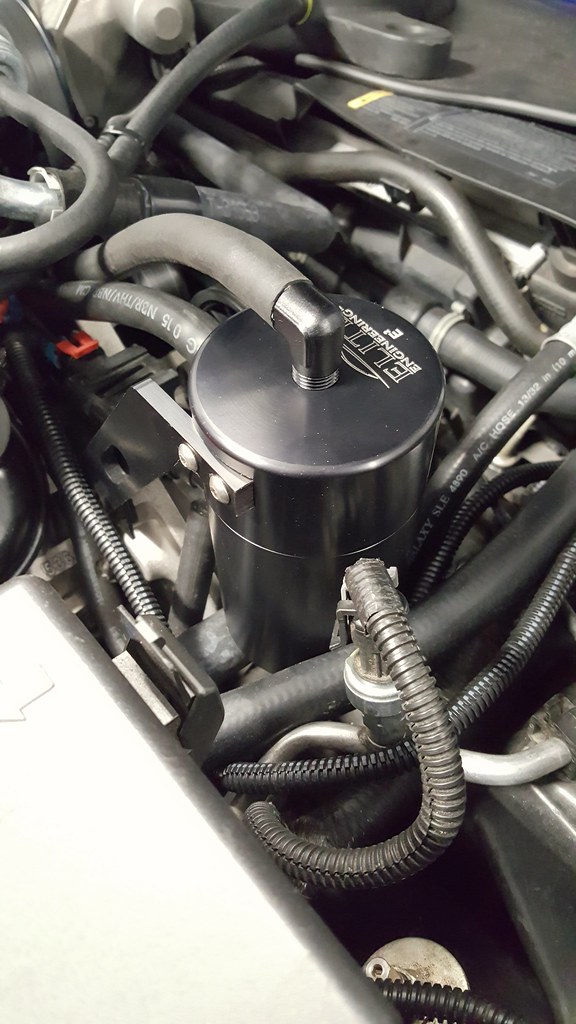
I also added a PCV check valve coming out of the drivers side vent port - and I also added an Elite Engineering catch can.
My video covering my PCV/oiling issues:
I had NOTHING but issues with them - while they looked good - they performed terribly.
1) They leaked terribly - out the center bolt holes - as well as around the main valve cover gasket.
2) The rough textured finish looked like crap when oil got on them.
3) They are vented / restricted properly - and totally messed up the PCV system on the car.
Since the E-Force system eliminates the valley cover port - the blower ended up sucking a quart of oil through the drivers side cover - right into the blower.
I was at a car show and the oil level warning light came on during the drive home.
To resolve all of the above issues - I decided to go with a set of LS9 covers.
I also added a PCV check valve coming out of the drivers side vent port - and I also added an Elite Engineering catch can.
My video covering my PCV/oiling issues:
01-24-2018, 10:46 PM
#37
Drifting
Thread Starter
Since I can't leave anything alone - I decided that I hated staring at the E-Force intake.
I had seen a few Corvette owners modify the Halltech Beehive intake shroud.
With a few modifications - I was able to get the Halltech under the stock intake - and everything installed.

I also threw together a review/overview of my E-Force install and my experience with the kit.
Mind you this is one of my older Youtube videos - and I was using my older camera still.
I had seen a few Corvette owners modify the Halltech Beehive intake shroud.
With a few modifications - I was able to get the Halltech under the stock intake - and everything installed.
I also threw together a review/overview of my E-Force install and my experience with the kit.
Mind you this is one of my older Youtube videos - and I was using my older camera still.
Last edited by bonecrrusher; 01-24-2018 at 10:46 PM.
01-25-2018, 07:53 AM
#39
Drifting
Thread Starter
People like seeing track numbers - I took the Vette out a while after the tune was complete.
I got 3 runs in - and managed not to break the car.
My times where:
13.1 @ 111
13.7 @ 115
13.5 @ 121
I didn't launch the car hard off the line - I barely have 1k miles on the clutch. I rolled into the throttle and screwed up the 1-2 shift twice.
My times are terrible - I know!
I only go drag racing a few times a year - I def need driver mod.
My video of the runs:
01-25-2018, 09:58 AM
#40
Drifting
Thread Starter
I also decided to clean up the Elite Engineering Catch Can. The catch can came with some nickel finished fittings that I never liked. I ordered some black 1/4" NPT to 3/8" Hose barbs from Fragola - and Vibrant performance. I installed the new fittings with no major issue - I really think it cleaned up the catch can installation.
Video overview of the install:
Video overview of the install: