


Katech Splitter and Spoiler Install


Thread Starter
Heel & Toe

Joined: May 2013
Posts: 17
Likes: 0
From: Ormond Beach Florida
 Katech Splitter and Spoiler Install
The aerodynamics of the base C6 leave something to be desired at high speed. A front splitter and rear spoiler are required. After doing considerable research, I settled on Katech carbon fiber parts.
Katech (www.katechengines.com) ran actual wind tunnel tests showing the increase in front and rear downforce for various combos (test results and video are available on their website). Some other vendors that I talked to couldn't give any hard figures and it became clear that they had never really tested their parts and that they were just cosmetic pieces that might or might not provide any real aerodynamic benefit. Besides working, the Katech parts are 100% carbon fiber and look really great.
The rear spoiler P/N KAT-4978 cost $1130. The front splitter P/N KAT-6414 cost $700. There was an additional charge of about $270 for packaging and shipping (mostly for the splitter). They had an elaborate, precisely cut foam insert that protected the splitter and it arrived without any damage.
Installation of the rear spoiler was a no-brainer that took 15 minutes. Remove two screws that hold in two rear taillights and then remove four flange nuts that secure the stock "mini" spoiler. Transfer the third taillight to the Katech spoiler and reverse the process. That's it. Done.
The front splitter was a different story. The instructions provided were somewhat preliminary (after talking to their tech, I suspect that I'm one of the first customers to install one of these). It's not a really a DIY job and it takes more than one person.
Since the car was getting a Z06 widebody conversion done (subject of another post), it seemed prudent to let the body shop handle the splitter installation.
There were two major issues:
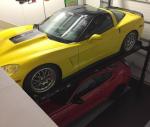
1. The splitter aligns with the front fascia (bumper cover) at the ends. There are no other fixed alignment points per se. You have to align it perfectly and then mark off over a dozen drill hole locations. You cannot drill the holes while the splitter is in place. No procedure was given. We used masking tape to hold the splitter in place for hole location marking, starting at the ends, then the center, and finally along the edges. This is shown in the attached pictures.
2. The splitter is held in place by screws inserted from inside the fascia to "E" clips installed on the edge of the splitter. It was quickly determined that this would be exceeding difficult to do with the fascia in place on the vehicle. It was much easier to remove the entire fascia for easy access to the required screw locations.
The end result was a very clean, precise installation with everthing lines up to within 1/8". Paying the body shop (Body Werks in Holly Hill, Florida) a few hundred dollars to do the job was money well spent.
Katech (www.katechengines.com) ran actual wind tunnel tests showing the increase in front and rear downforce for various combos (test results and video are available on their website). Some other vendors that I talked to couldn't give any hard figures and it became clear that they had never really tested their parts and that they were just cosmetic pieces that might or might not provide any real aerodynamic benefit. Besides working, the Katech parts are 100% carbon fiber and look really great.
The rear spoiler P/N KAT-4978 cost $1130. The front splitter P/N KAT-6414 cost $700. There was an additional charge of about $270 for packaging and shipping (mostly for the splitter). They had an elaborate, precisely cut foam insert that protected the splitter and it arrived without any damage.
Installation of the rear spoiler was a no-brainer that took 15 minutes. Remove two screws that hold in two rear taillights and then remove four flange nuts that secure the stock "mini" spoiler. Transfer the third taillight to the Katech spoiler and reverse the process. That's it. Done.
The front splitter was a different story. The instructions provided were somewhat preliminary (after talking to their tech, I suspect that I'm one of the first customers to install one of these). It's not a really a DIY job and it takes more than one person.
Since the car was getting a Z06 widebody conversion done (subject of another post), it seemed prudent to let the body shop handle the splitter installation.
There were two major issues:
1. The splitter aligns with the front fascia (bumper cover) at the ends. There are no other fixed alignment points per se. You have to align it perfectly and then mark off over a dozen drill hole locations. You cannot drill the holes while the splitter is in place. No procedure was given. We used masking tape to hold the splitter in place for hole location marking, starting at the ends, then the center, and finally along the edges. This is shown in the attached pictures.
2. The splitter is held in place by screws inserted from inside the fascia to "E" clips installed on the edge of the splitter. It was quickly determined that this would be exceeding difficult to do with the fascia in place on the vehicle. It was much easier to remove the entire fascia for easy access to the required screw locations.
The end result was a very clean, precise installation with everthing lines up to within 1/8". Paying the body shop (Body Werks in Holly Hill, Florida) a few hundred dollars to do the job was money well spent.


Race Director


Joined: Aug 2005
Posts: 13,592
Likes: 187
From: Hudson WI
NCM Sinkhole Donor
Interesting! I just installed the APR splitter and diffuser. I am surprised at how it mounts. Is there a set of big washers on the inside of the bumper to stop the bolts from pulling through? The APR has a flat bottom that goes all the way back to the back of the bumper. Just another way to do it.
You need the APR diffuser to go with all the other parts!
You need the APR diffuser to go with all the other parts!
Thread Starter
Heel & Toe
Joined: May 2013
Posts: 17
Likes: 0
From: Ormond Beach Florida
Splitter Installation
The picture shows the type of flange screws used. And there are lots of them (close to 20).
What impressed me about Katech is that they did actual wind tunnel tests. APR has some computational flow dynamics (CFD) results for their wings. CFD is better than nothing, which is exactly what a lot of vendors do, i.e. just designing some nice looking piece and hoping for the best.
I have a mini video camera mounted at the center of the front grill and connected to a Kenwood unit so I can see curb stones and such that would turn the splitter into splinters. The view angle is wide enough to see the edges of the splitter. There is no observable flutter at highway speeds. The whole thing (fascia and splitter) seems pretty stiff.
What impressed me about Katech is that they did actual wind tunnel tests. APR has some computational flow dynamics (CFD) results for their wings. CFD is better than nothing, which is exactly what a lot of vendors do, i.e. just designing some nice looking piece and hoping for the best.
I have a mini video camera mounted at the center of the front grill and connected to a Kenwood unit so I can see curb stones and such that would turn the splitter into splinters. The view angle is wide enough to see the edges of the splitter. There is no observable flutter at highway speeds. The whole thing (fascia and splitter) seems pretty stiff.
Thread Starter
Heel & Toe
Joined: May 2013
Posts: 17
Likes: 0
From: Ormond Beach Florida
Pictures of Completed Installation
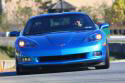
The weather finally cleared up here in Florida, so I had a chance to take front and rear pix of the completed conversion, including the Katech carbon fiber splitter and spoiler.
Next week the car gets some suspension and brake upgrades, a bigger fuel pump (an ugly job) and then the Edelbrock E-Force supercharger.
Next week the car gets some suspension and brake upgrades, a bigger fuel pump (an ugly job) and then the Edelbrock E-Force supercharger.









