
Nav Radio Case - Openning it up
 07-23-2017, 09:33 AM
#41
Le Mans Master

The first thing I think everyone should try is another set of disks .... a lot of people are quick to think they need to clean the lenses etc when they get a read error , remember there are plenty of these units in all different types of GM vehicles that use the same player and do not have any problems with dirt or dust on the lenses causing reading errors . It takes a lot of dust on a prism or lens to cause a read error ....
Many have tried all types of cleaning , from disks to canned air etc only to have the problem return .... you know why ? It's not dirt
The disks are easy to copy ( for your own personal use only !)
During the copy process error correction will kick in if there are any errors discovered on the original disks ..
I am running a copy of a copy now .....
Do yourself a favor , if you are getting a read error make a copy first before tearing into the unit , it can't hurt
Dave
Last edited by Dcasole; 07-23-2017 at 09:34 AM.
 07-23-2017, 10:00 AM
#42
Racer


Dcasole is right, try another disc before anything else. This fixed my problem, thank goodness. But if you get that far into it to remove the dvd player ,considering all the work that took, I would replace the player........seen brand spanking new ones for 77.00.
 07-23-2017, 11:44 AM
#43
Le Mans Master
Thread Starter


Hi all,
I think I answered the other disk question in one of my earlier posts.
Although not brand new out of the package.
I have three disks...2 OEM 1 burned...all had the same error message.
Although, certainly making a new burned copy is advisable and will do before replacing the unit.
Seems to require a disk with at least 710 MB free space.
Also note I was not able to remove the Nav player, only could remove the Music player.
Nav player removal, at least in my case, requires more guidance or experience.
Nav still working this AM.
Last edited by Kenny94945; 07-23-2017 at 10:27 PM. Reason: clarity
07-23-2017, 01:10 PM
#44


To copy the nav disc, you need a Double Layer DVD+R disc.
Note, I use verbatim brand discs, and end up with no coasters from bad burns. The memorex discs will work as well.
https://chevroletforum.com/forum/tah...ion-dvd-26503/
Note, I use verbatim brand discs, and end up with no coasters from bad burns. The memorex discs will work as well.
https://chevroletforum.com/forum/tah...ion-dvd-26503/
07-29-2017, 08:28 AM
#45
Le Mans Master
Thread Starter
Hi all,
Happy to report.......Nav unit is functioning 100%
It has been a week with dozens of start/ stops.
In closing, well worth the effort to clean the Nav laser lens. Only really issue, in hindsight, is the removal of the wiring cable from the front screen. I could NOT remove this cable, yet was able to complete the repair with the front screen attached. Repeating if you can remove the center console, you can disassemble the Nav/ Radio case far enough to clean the laser lens.
07-29-2017, 09:16 AM
#46
Race Car Tech

Hi all,
Happy to report.......Nav unit is functioning 100%
It has been a week with dozens of start/ stops.
In closing, well worth the effort to clean the Nav laser lens. Only really issue, in hindsight, is the removal of the wiring cable from the front screen. I could NOT remove this cable, yet was able to complete the repair with the front screen attached. Repeating if you can remove the center console, you can disassemble the Nav/ Radio case far enough to clean the laser lens.
Happy to report.......Nav unit is functioning 100%
It has been a week with dozens of start/ stops.
In closing, well worth the effort to clean the Nav laser lens. Only really issue, in hindsight, is the removal of the wiring cable from the front screen. I could NOT remove this cable, yet was able to complete the repair with the front screen attached. Repeating if you can remove the center console, you can disassemble the Nav/ Radio case far enough to clean the laser lens.
So far, my DVD and CD players have worked great over 85K miles, but they are due for a good cleaning.
01-04-2022, 05:32 PM
#47

Did you ever get around to doing this? My CD player has the no read issue and I�m going to do this cleaning if it is a long term solution. Thanks
01-04-2022, 06:41 PM
#48
Race Car Tech
Over the past few years, I did purchase 2 Nav units at great prices, one from a 2008 Z06 and the other from a 2010 ZR1. During this winter hibernation period, I will hook up these 2 units to make sure they both work OK, with the plan of installing one or the other to replace my my original unit with 110,000+ miles on the clock. I can try both of these units in ignition Aux mode without the theft lock being initiated. The theft lock only initiates when one puts the ignition in Run mode. I have a GM Nano on order so I will be able to pair up the unit to the car Vin #, once I set up the Nano on my laptop.
Once I have the newer unit installed and paired, I'll take my original unit and try to remove the CD player top laser lens carefully, to see if I can access the mirror prism below. Hopefully, I can do this without damaging the upper lens assembly. We shall see. If I do have success, I'll post on here.
Good Luck
Last edited by 4SUMERZ; 01-04-2022 at 08:52 PM.
The following users liked this post:
Gypsy883 (01-04-2022)
01-04-2022, 07:38 PM
#49
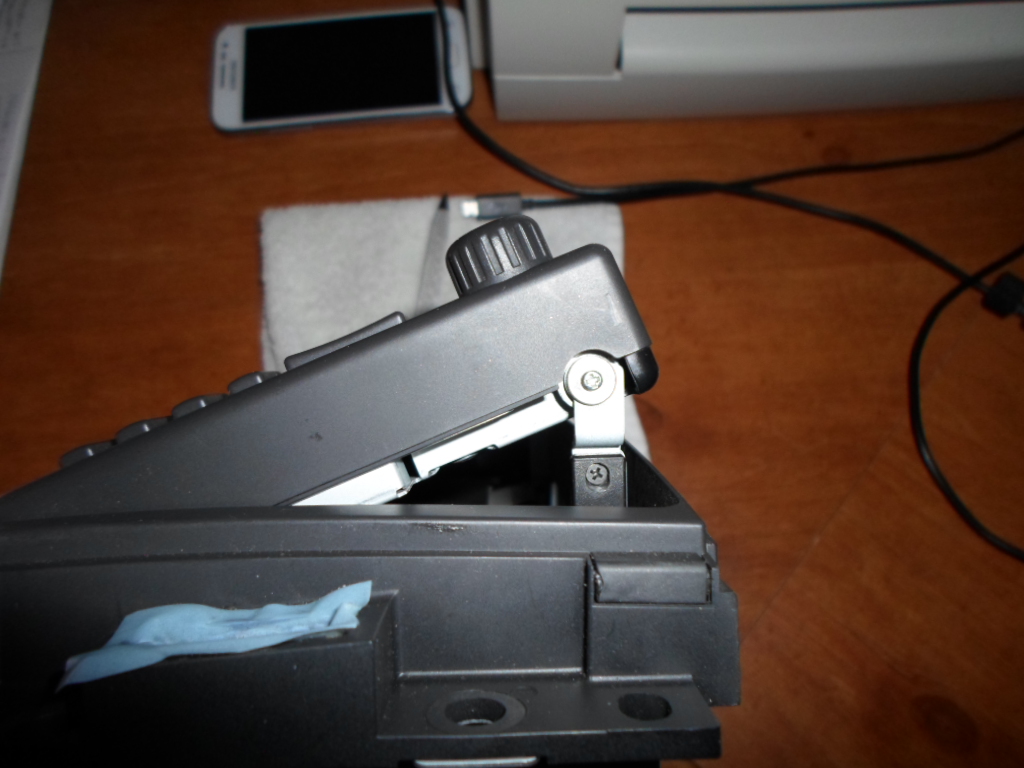
FYI, but to get to the front 4 screws behind the front screw, all you need to do is slowly pull the front screw forward (bottom side has a slot that you can use a small screw driver to start sliding the bottom gear rack forward to get to the two screws) then will have a philips screw and sleeve on both sides of the lower outer side of the screen that you remove, and will will allow you to drop the front screw down and tilt forward enough to get to the 4 player screws.
Hence front screen has a gear drive that pushed the bottom out and top of screen has pegs that will slip down on the track slot as the bottom is being pushed out.
Now with the top and back three support brackets removed, you can take the top CD players out via its front and back support screws, pop the connector side tabs to pull the ribbon, then do the bottom DVD player the same way.
Now with both players in hand, getting to lens to clean them (blowing to start with top and bottom, then Q tip on the top of the lens with cleaner), as well as lubing the gears if needed, if straight forward.
Hence problem most of the time is not that the top of lens is dirty, but inside the lens assembly that has dust that is screwing with the lower prism splitter and needs to be cleaned/blow out isntead.
So bottom channel that we can use to start to slide the bottom of the screen forward via the worm drive rack to get it started moving forward.
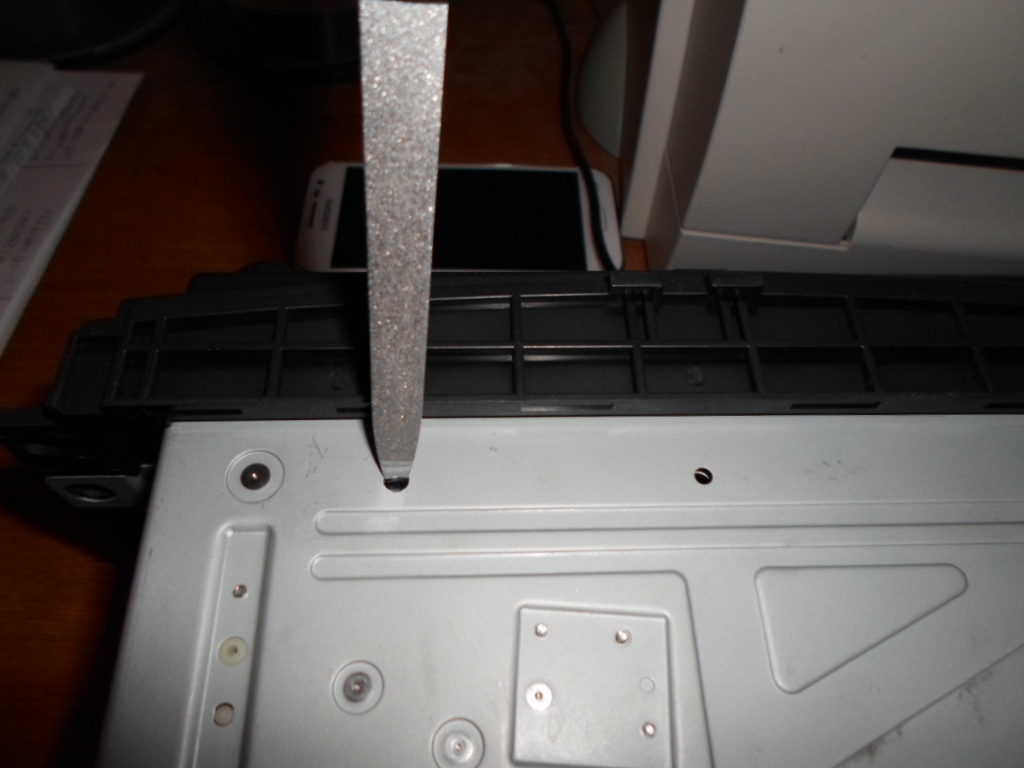
Then gently pull the bottom of the screen forward with your fingers until you get the screen out enough to remove the silver side Philips screws/center bushings both side to remove the front screen from the lower rack pivots, push the gear rack back in, and the screen has enough room now to pivot down/forward to get to the front player screws without out having to remove the front screen ribbons.
________________________________________ _____________________________
As for burnt disc (either cd or DVD), lot to be said here as well.
In either cases, slow the burner down in copy speeds to get a better burn/ make sure to use OPC for the burns, and lastly make sure that the discs you are using to burn are not coaster producers to begin with. Hence with thumb drives the norm nowadays, what used to be great Burn disc brands, has really fallen off the mark today to just end up with coaster. So before buying burn disc now like the double layer discs needed to back up a OEM Nav disc, get some feed back on the lot of disc you are buying from other, to see if they are having problems with the discs not burning correctly.
Hence front screen has a gear drive that pushed the bottom out and top of screen has pegs that will slip down on the track slot as the bottom is being pushed out.
Now with the top and back three support brackets removed, you can take the top CD players out via its front and back support screws, pop the connector side tabs to pull the ribbon, then do the bottom DVD player the same way.
Now with both players in hand, getting to lens to clean them (blowing to start with top and bottom, then Q tip on the top of the lens with cleaner), as well as lubing the gears if needed, if straight forward.
Hence problem most of the time is not that the top of lens is dirty, but inside the lens assembly that has dust that is screwing with the lower prism splitter and needs to be cleaned/blow out isntead.
So bottom channel that we can use to start to slide the bottom of the screen forward via the worm drive rack to get it started moving forward.
Then gently pull the bottom of the screen forward with your fingers until you get the screen out enough to remove the silver side Philips screws/center bushings both side to remove the front screen from the lower rack pivots, push the gear rack back in, and the screen has enough room now to pivot down/forward to get to the front player screws without out having to remove the front screen ribbons.
________________________________________ _____________________________
As for burnt disc (either cd or DVD), lot to be said here as well.
In either cases, slow the burner down in copy speeds to get a better burn/ make sure to use OPC for the burns, and lastly make sure that the discs you are using to burn are not coaster producers to begin with. Hence with thumb drives the norm nowadays, what used to be great Burn disc brands, has really fallen off the mark today to just end up with coaster. So before buying burn disc now like the double layer discs needed to back up a OEM Nav disc, get some feed back on the lot of disc you are buying from other, to see if they are having problems with the discs not burning correctly.
Last edited by Dano523; 01-04-2022 at 07:47 PM.
The following users liked this post:
Gypsy883 (01-05-2022)
01-04-2022, 07:53 PM
#50
And again on the laser clean up, most of the time is not the top of lens that is dirty, but down inside on the mirror and prism lens that needs to be cleaned up instead.

The worst cases will be someone that smoked in the car, or car was subject to salt water humidity that will film the lens in the first place. Blowing to get the lower lens/mirror works most of the time, while some time is the film is too thick, then you have to pull the laser out/apart to alcohol clean the surfaces isntead. So on that note, once you do have the top lens clean, use a light to look down through the top lens to see the condition of the lower lens and mirror.
The worst cases will be someone that smoked in the car, or car was subject to salt water humidity that will film the lens in the first place. Blowing to get the lower lens/mirror works most of the time, while some time is the film is too thick, then you have to pull the laser out/apart to alcohol clean the surfaces isntead. So on that note, once you do have the top lens clean, use a light to look down through the top lens to see the condition of the lower lens and mirror.
The following users liked this post:
Gypsy883 (01-05-2022)
01-04-2022, 08:03 PM
#51
And the last one, since the latest Nav update disc has a 8 year old map (V10), older C6's did not have Blue tooth in the VCIM to connect a phone to the unit (only can make voice calls via Onstar with them) or steering wheel control on the units up to say 2008, short of say an later year nav unit that did have the USB port on the back to port a phone in that way if you have a non VCIM blue tooth car,

Really a waste of time repairing the unit to stick back in the car (short of a show car that you are trying to keep all stock isntead).
So push comes to shove, not hard to fix a dirty lens unit, or one that the gear/rack need to be silicone grease lubed to correct, but when you are all said and done, still putting a unit back in the car that it just one step away from being an 8 track player with it's outdated features.
The following users liked this post:
Gypsy883 (01-05-2022)
01-04-2022, 08:52 PM
#52
Race Car Tech
^^ I agree with all you mentioned. Ideally, replacing the OEM Nav unit with aftermarket is the best solution to be sure. The version 10 map was produced in 2016, so it is outdated for sure. I'm partial to 8 track players, and outdated Nav units, 😁, thus why I'm trying to keep the Nav unit working for as long as I can in the C6. I'm not sure how much longer I will keep the C6, but for a few more years I hope. The newer vehicles are smart phone compatible for navigation using google maps, which keeps them current.
If I ever want to replace the OEM nav with aftermarket, I would go with one that has Garmin GPS, which I believe Kenwood units have that option.
Thanks for your insight and knowledge on all things C6.
If I ever want to replace the OEM nav with aftermarket, I would go with one that has Garmin GPS, which I believe Kenwood units have that option.
Thanks for your insight and knowledge on all things C6.
01-05-2022, 08:41 PM
#53
Thank you 4sumerz and dano. I�m going to attempt to clean mine and this will come in handy. Wanting to keep my Zr1 as stock as possible. If this doesn�t work I would most definitely buy aftermarket before I spent more than about 100 on a used one. Most for sale, they want more, much more. Not worth it to me.
Hoping this fixes my issues, thanks. But how do you remove the top lens in order to clean the bottom? Is it self explanatory when it�s in your hand?
Hoping this fixes my issues, thanks. But how do you remove the top lens in order to clean the bottom? Is it self explanatory when it�s in your hand?
Last edited by Gypsy883; 01-05-2022 at 08:52 PM.
01-06-2022, 09:37 AM
#54
Thank you 4sumerz and dano. I�m going to attempt to clean mine and this will come in handy. Wanting to keep my Zr1 as stock as possible. If this doesn�t work I would most definitely buy aftermarket before I spent more than about 100 on a used one. Most for sale, they want more, much more. Not worth it to me.
Hoping this fixes my issues, thanks. But how do you remove the top lens in order to clean the bottom? Is it self explanatory when it�s in your hand?
Hoping this fixes my issues, thanks. But how do you remove the top lens in order to clean the bottom? Is it self explanatory when it�s in your hand?
If you need to pull the laser assembly out of the disc player/ unit in hand to pop the top lens itself cover out to get down inside the laser assembly, it gets a lot more complex just getting it out to begin with, and at that point, not for the novice/time to just think about after market nav unit. Hell, most repair shops will not even go this far of tear down of the laser internals lens, and unless they have another unit to savage a good laser out of it to swap in instead, will just call the unit toasted/beyond repair (cost wise).
The following users liked this post:
Gypsy883 (01-06-2022)