


WeaponX Diffuser Install
Thread Starter
Team Owner


Joined: Mar 2012
Posts: 49,419
Likes: 3,933
From: Best Island in the U.S.
St. Jude Donor '12 thru '17
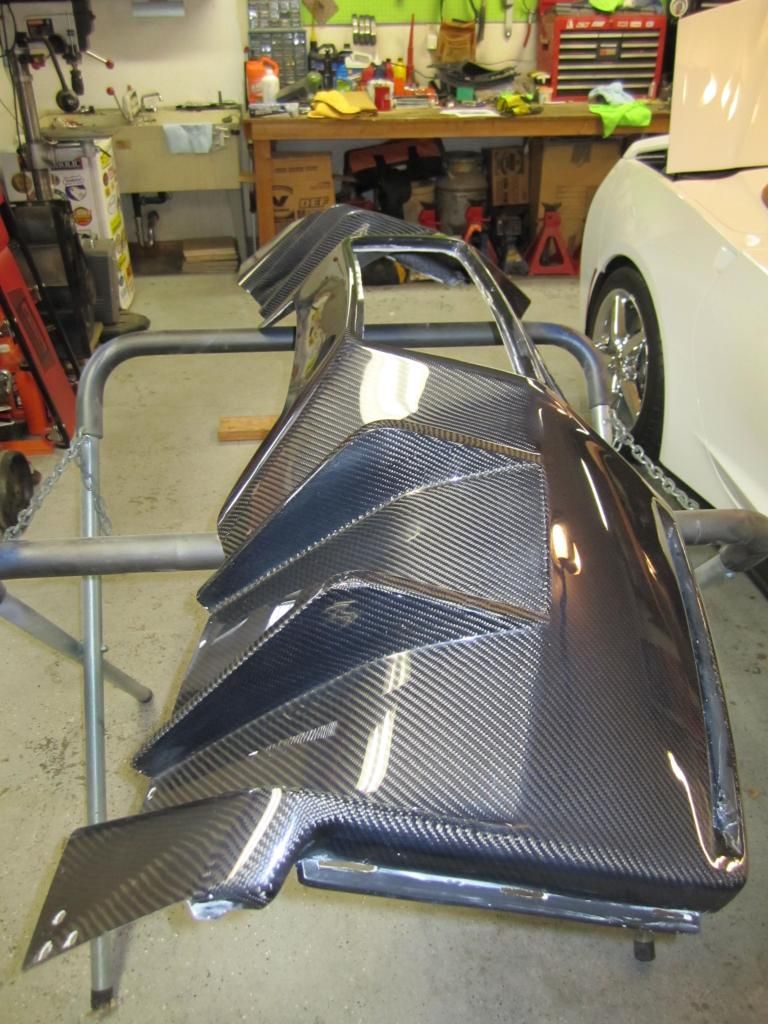
Installed my WeaponX CF diffuser this weekend. Not terribly difficult but since the stock diffuser is thin plastic and very flexible while the CF one is not, I had some "adjustments" to do, but finally got it on. Huge improvement over the stick plastic piece.
A few pics:
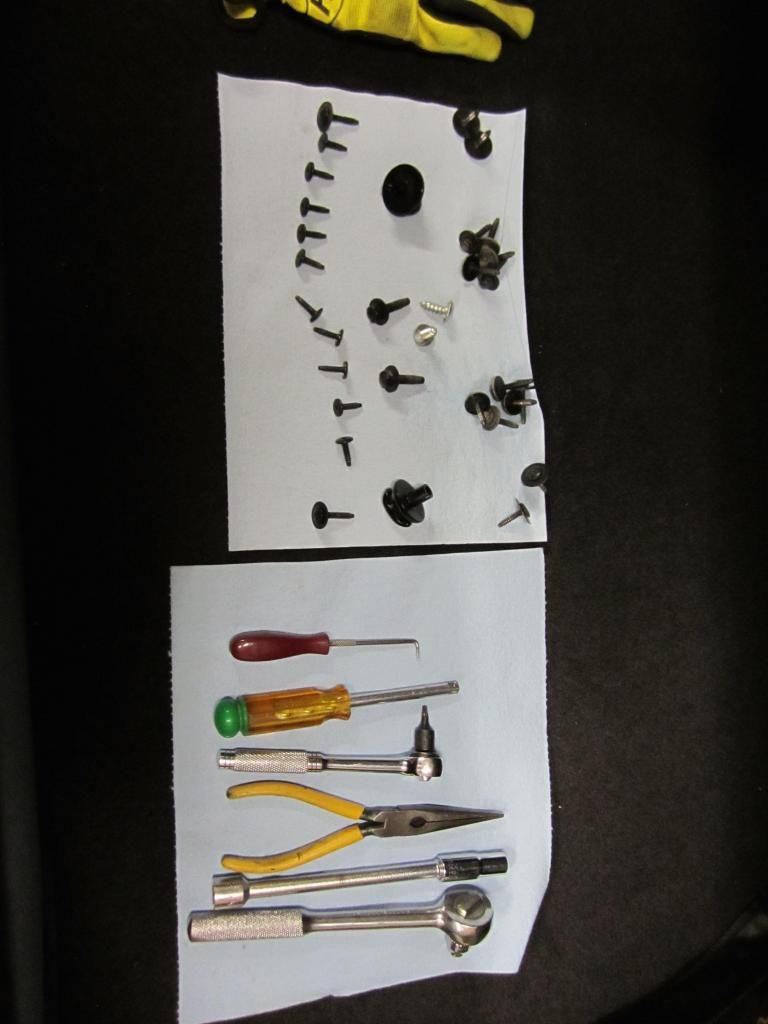
Here are the essential tools and all of the fasteners that hold the bumper cover on:
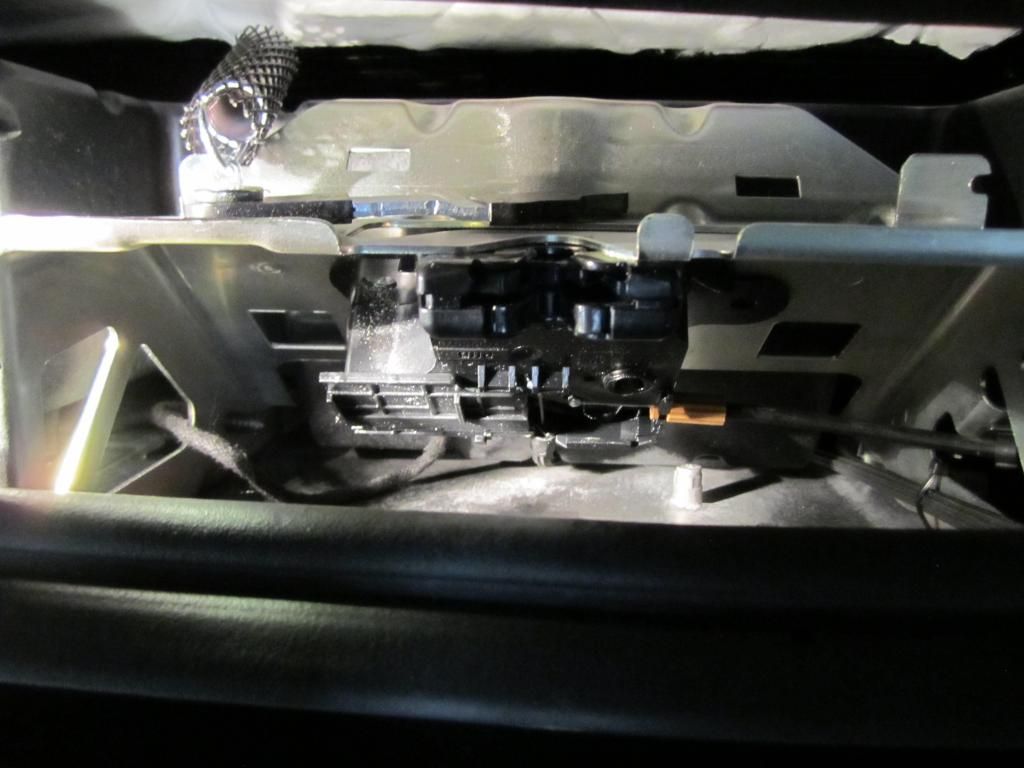
The instructions (which are pretty good) say to disconnect the trunk latch cable that comes from the key. It took a bit to figure out how to do that. There's a sliding "door" that slides to the left, so you can get to the cable, which has an oval shaped fitting on the end that you twist to get it out. This shows the door slid to the left:
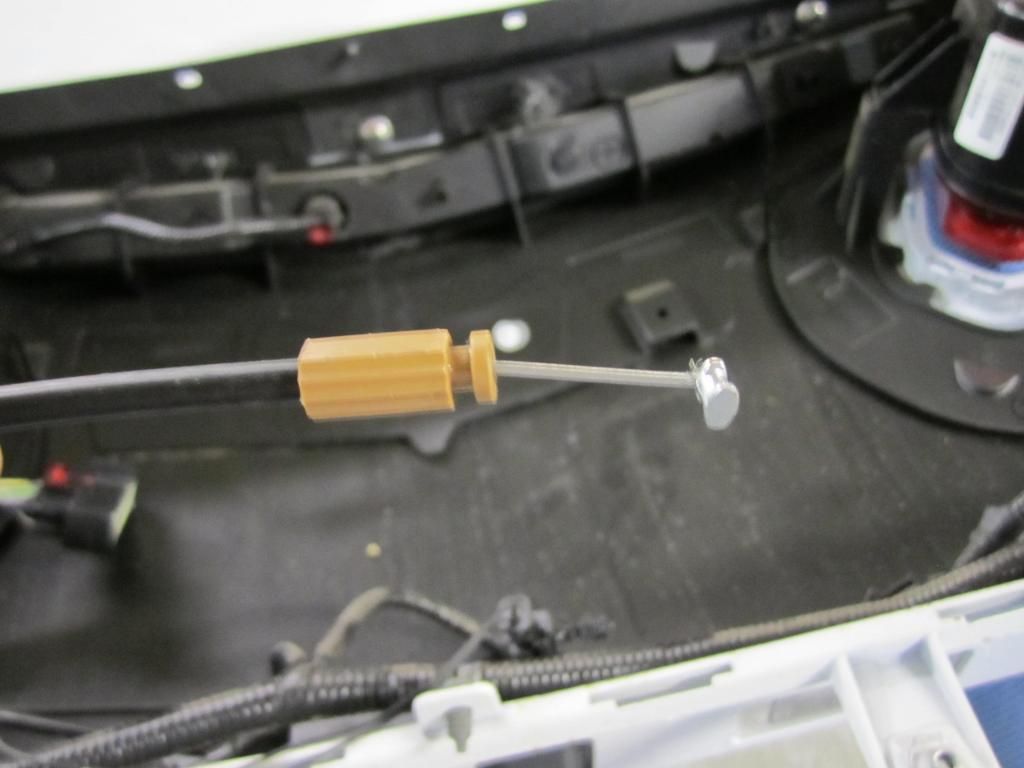
Here's the end of the cable:
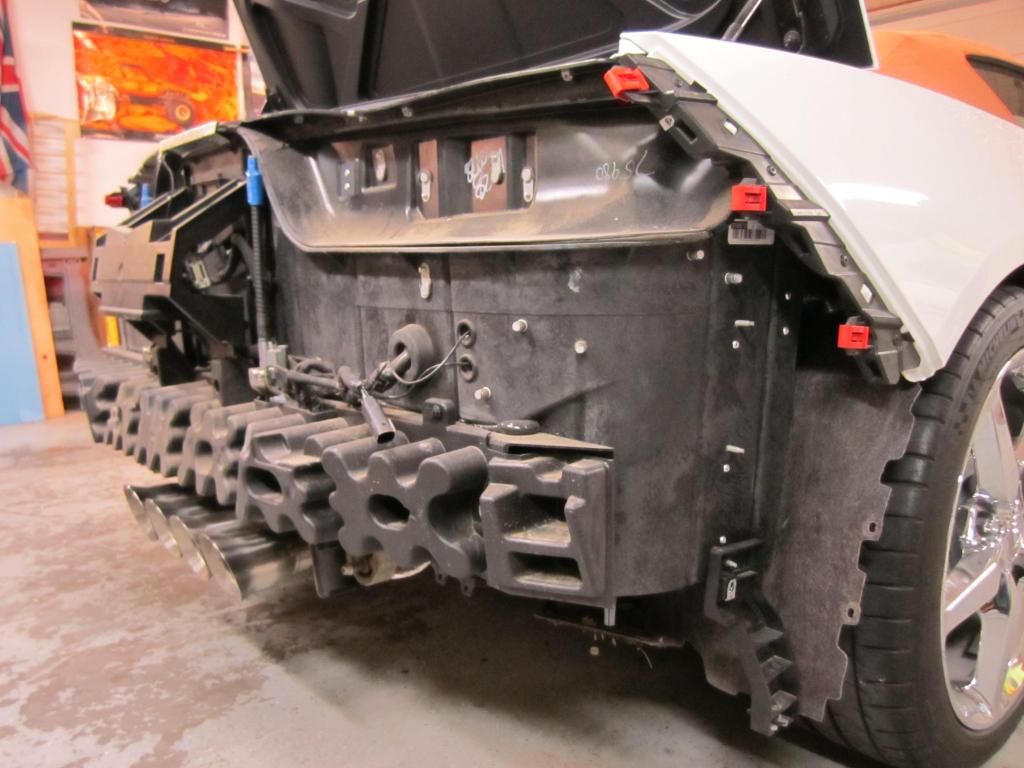
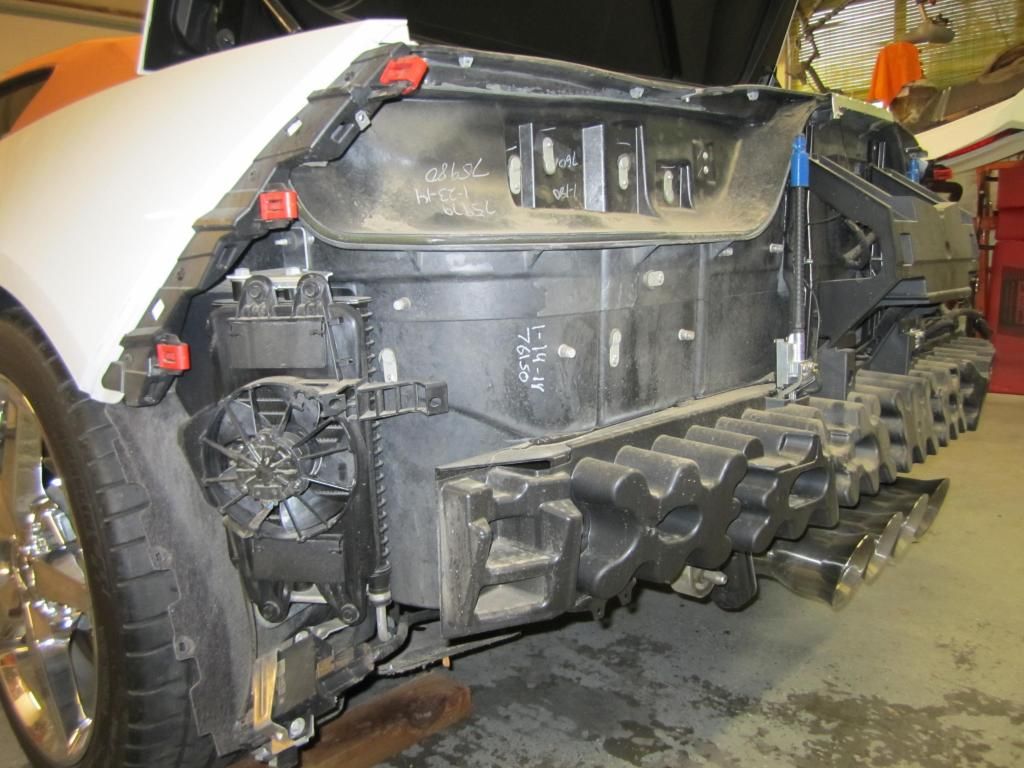
Bumper cover removed; amazing how dirty it is behind it:
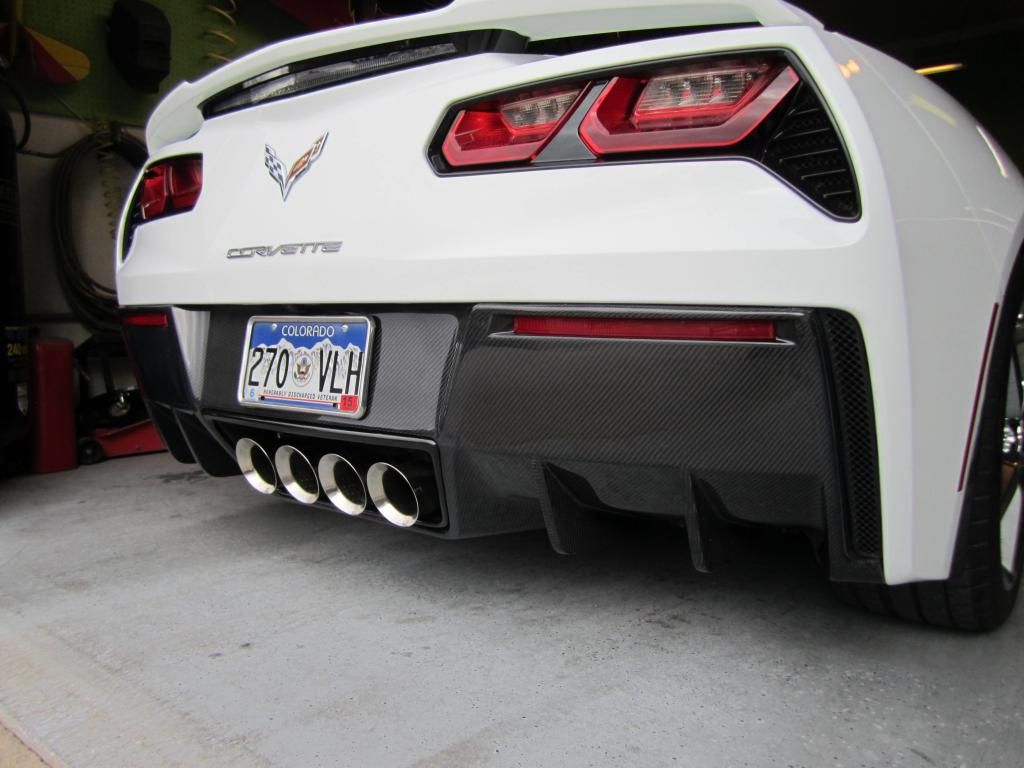
Completed install.
While I was at it I Plasti-dipped the retainer:
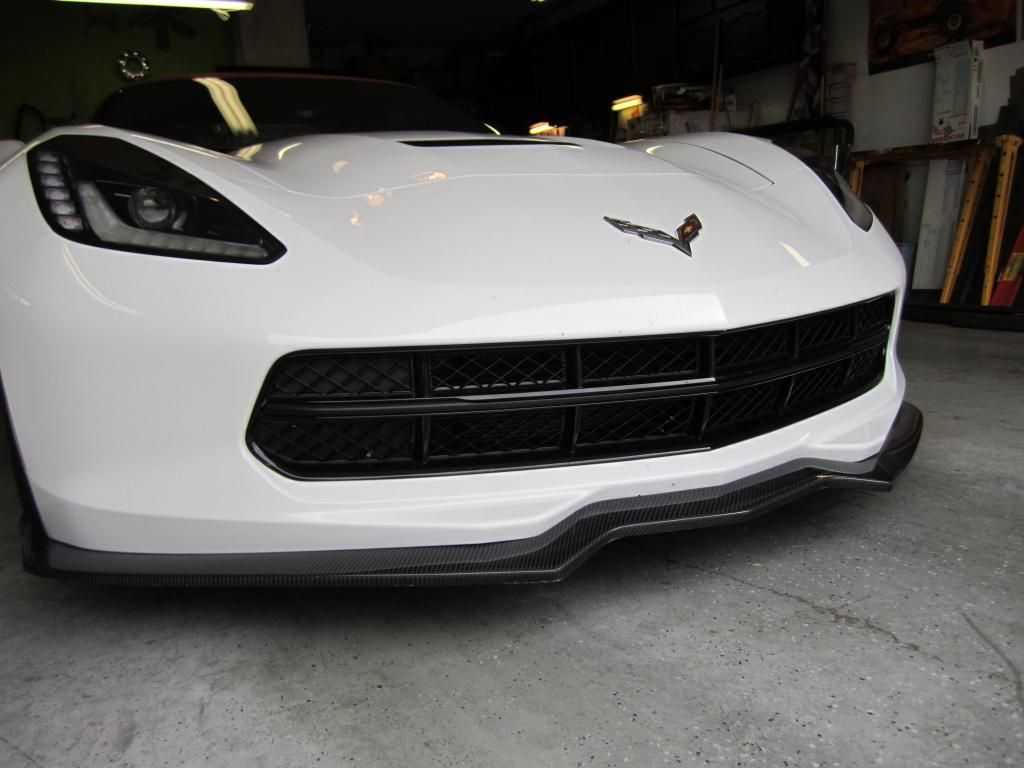
I'll get better pics of the diffuser, splitter and skirts (all CF from WeaponX) when it quits raining here later this week.
A few pics:

Here are the essential tools and all of the fasteners that hold the bumper cover on:

The instructions (which are pretty good) say to disconnect the trunk latch cable that comes from the key. It took a bit to figure out how to do that. There's a sliding "door" that slides to the left, so you can get to the cable, which has an oval shaped fitting on the end that you twist to get it out. This shows the door slid to the left:

Here's the end of the cable:

Bumper cover removed; amazing how dirty it is behind it:


Completed install.

While I was at it I Plasti-dipped the retainer:

I'll get better pics of the diffuser, splitter and skirts (all CF from WeaponX) when it quits raining here later this week.
Thread Starter
Team Owner
Joined: Mar 2012
Posts: 49,419
Likes: 3,933
From: Best Island in the U.S.
St. Jude Donor '12 thru '17
Corvette Stories
The Best of Corvette for Corvette Enthusiasts

5 Best & 5 Worst Corvette Daily Drivers
Joe Kucinski
The Headlights of Every Corvette Generation Explained
Joe Kucinski
5 Best & 5 Most Overrated Corvette Track Packages of All Time!
Joe Kucinski
Every 2027 Corvette Engine Explained
Joe Kucinski
Designer Imagines A Corvette That Looks More Like a Corvette Than the Corvette
Verdad Gallardo
10 Ugly Corvettes That We Still Kinda Love
Joe Kucinski
Top 10 Most Expensive Corvettes Ever Sold on Bring A Trailer
Brett Foote
10 Things Every Corvette Owner Needs (2026 Edition)
Michael S. Palmer
8 Most "Only Corvette Owners Understand" Quirks and Problems
Pouria Savadkouei


Safety Car

Joined: Jan 2012
Posts: 4,885
Likes: 486
From: Cin City
St. Jude Donor '14
beautiful SR!
Installed my WeaponX CF diffuser this weekend. Not terribly difficult but since the stock diffuser is thin plastic and very flexible while the CF one is not, I had some "adjustments" to do, but finally got it on. Huge improvement over the stick plastic piece.
A few pics:
Here are the essential tools and all of the fasteners that hold the bumper cover on:
The instructions (which are pretty good) say to disconnect the trunk latch cable that comes from the key. It took a bit to figure out how to do that. There's a sliding "door" that slides to the left, so you can get to the cable, which has an oval shaped fitting on the end that you twist to get it out. This shows the door slid to the left:
Here's the end of the cable:
Bumper cover removed; amazing how dirty it is behind it:
Completed install.
While I was at it I Plasti-dipped the retainer:
I'll get better pics of the diffuser, splitter and skirts (all CF from WeaponX) when it quits raining here later this week.
Burning Brakes


Joined: Apr 2010
Posts: 1,213
Likes: 254
From: Folsom CA
Fantastic! I'm going to try to save this "how to" for after the first of the year when I can finally take delivery of my Z. I really like how the CF and diffuser "vanes" compliment the rear end. I want to also convert my tailight/vent surrounds and spoiler to CF to completely coordinate all the black/carbon flash to CF. Cool.


