
C7 Spolier Installation
 06-27-2016, 07:25 PM
#1
1st Gear

Thread Starter

Member Since: Jun 2016
Posts: 1
Likes: 0
Received 0 Likes
on
0 Posts
Fellas- I recently traded in my C6 on a 2016 C7 Stingray. I am considering installing a spolier. I didn't find many videos online on installation and was wondering if anyone out there had a dealer install one and what was the cost. Thanks for any input. Frank.
 06-27-2016, 08:24 PM
#2
Race Director


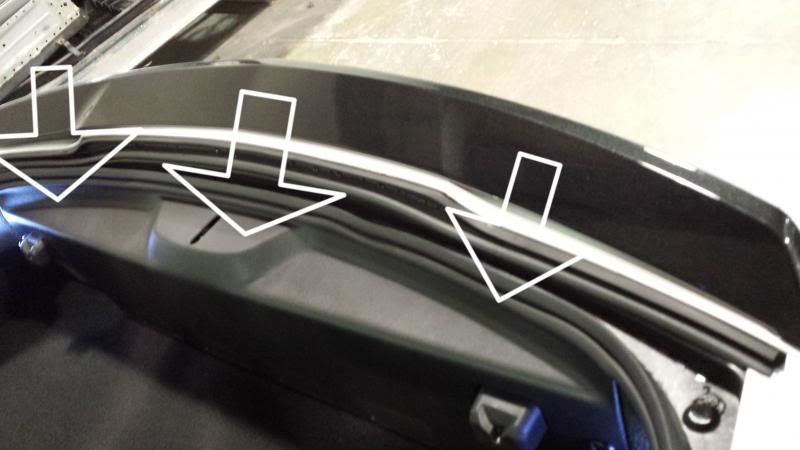
1st, start by loosening the interior trim panel by pulling towards the front of the vehicle. You do not want to remove this completely as it is not necessary. You are just loosening it to reveal the cable that attaches to your trunk latch. Once you locate this, you must remove it from the latch.
Next remove the rubber gasket trim piece that covers the Torx screws that you need to remove. Grab it and givie it a wiggle. You should be able to remove the entire trim piece by doing so. If it does not wiggle out, a flat head screw driver will help by depressing the tabs to they come out easier. Once this trim piece is removed, you will see the T15 screws that need to be removed.
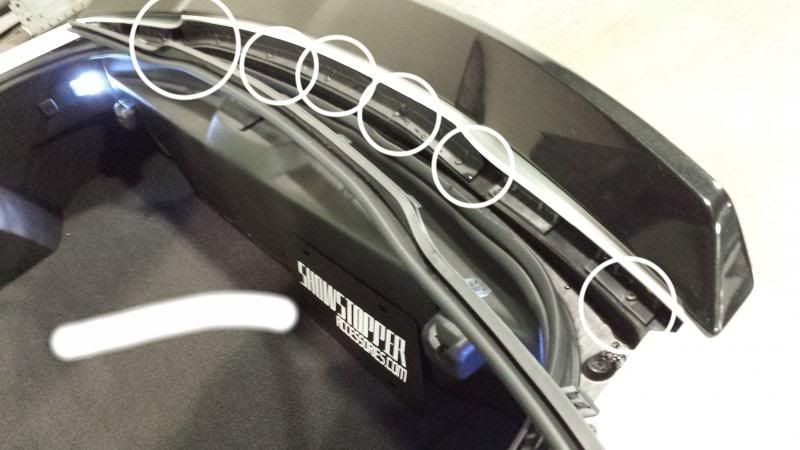
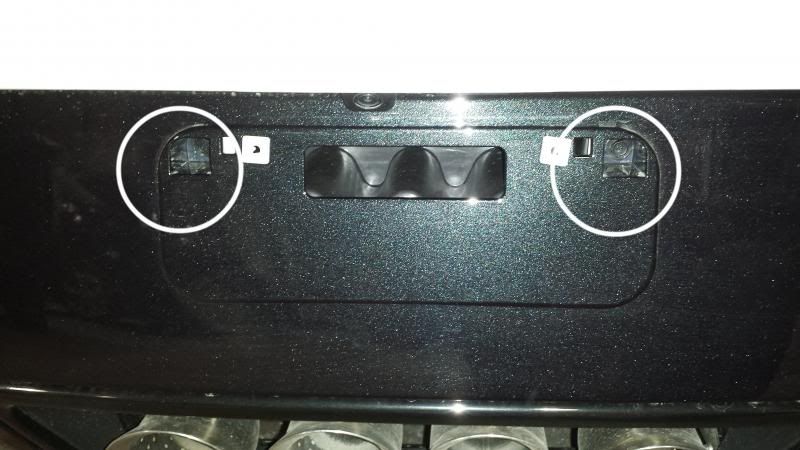
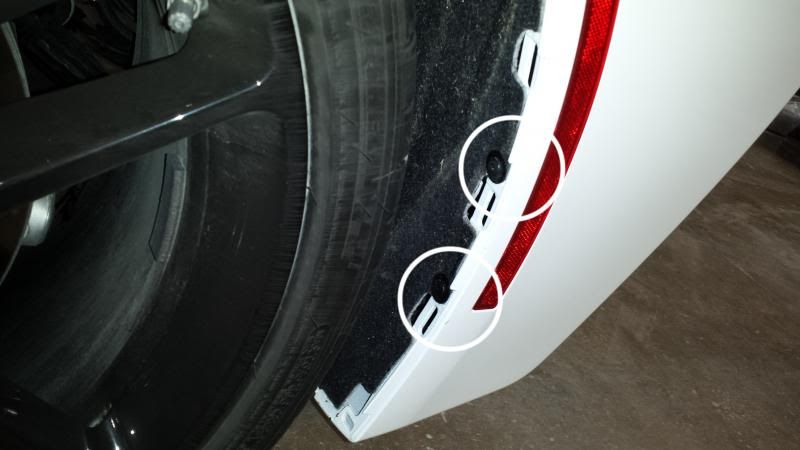
After you remove the T15 screws along the top, it is time to start removing fasteners towards the bottom. In order to do this, remove your rear license plate. You will reveal two 10mm bolts. Remove these.
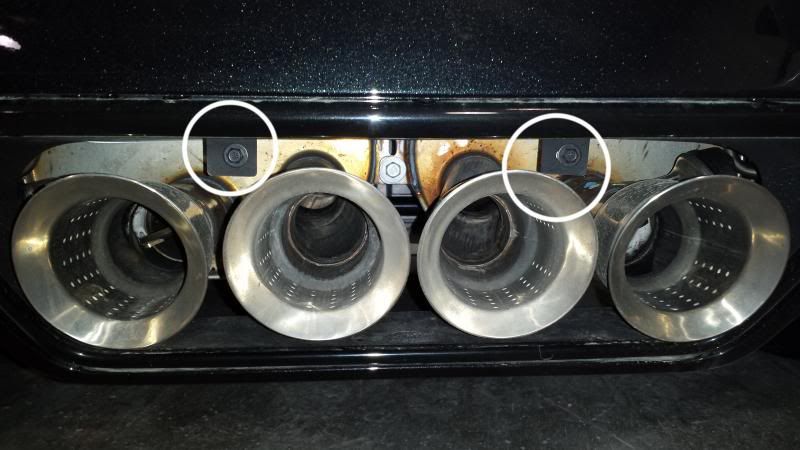
Once those two bolts behind the license plate are removed there are two additional 10mm bolts that also need to be removed that are located just above the exhaust tip. You will most likely need a short 6 inch extension for these.
Next, way at the bottom of the bumper there will be a total of 10 7mm bolts that need to be removed. 5 on the left and 5 on the right.
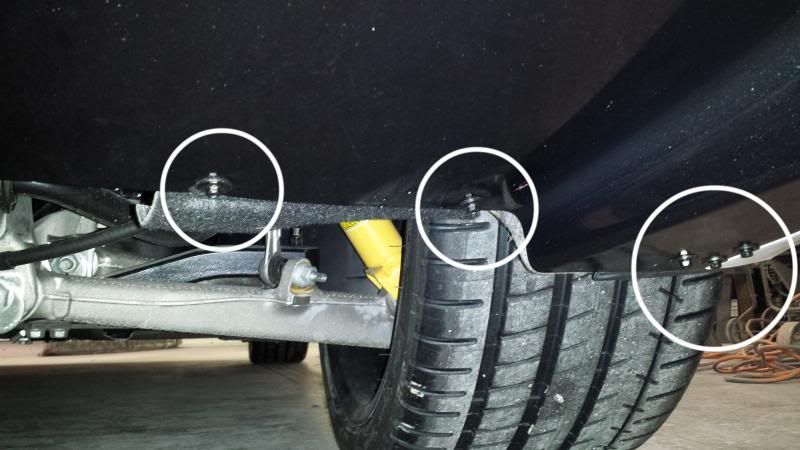
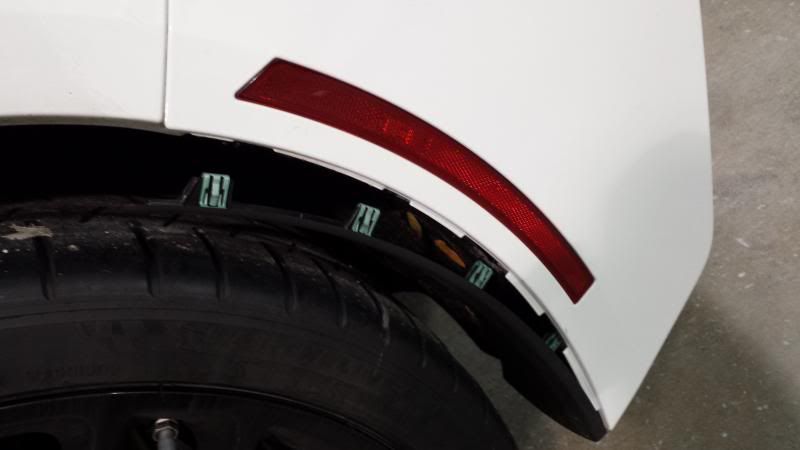
Once the 7mm bolts on the bottom of the bumper are removed the next step will be to remove the mudflaps that are just snapped into the bumper. It is best to use a plastic pry tool to get this started then once it is started you can pull the rest off by hand. After this mudflap is removed, it will reveal two t15 torx screws. Remove these as well.
This next step is a little tedious. You need a small tool that has a hook on it. You want to hook the tool in the mesh part of the bezel around your taillights. Pulling back, the corner will release. Once the corner is released you will be able to persuade the rest of the bezel out. Do this same step for the other side.
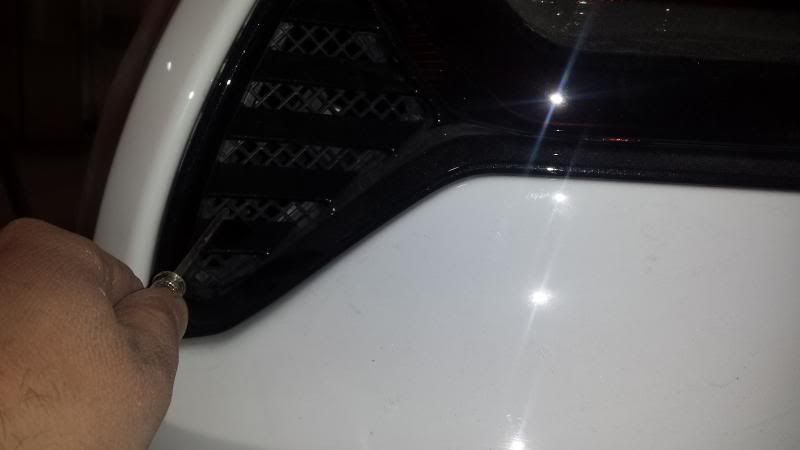
Now that the bezel is out, you will reveal a t15 torx screw. Remove that screw. You want to repeat this for the other side as well.

So all of the bolts are removed. What do you do next? This is when you want to call over a neighbor to give you a hand. One person should be on each side of the car. Grab the bumper and pull straight back. Don't be afraid. It will seem like you are breaking stuff but you are not. Once you pull back, you will need to fish the rest of the cable out that was connected to your trunk latch. In additions to this there are two electrical connectors that also need to be disconnected. After this is all done, your bumper is free.

Next remove the rubber gasket trim piece that covers the Torx screws that you need to remove. Grab it and givie it a wiggle. You should be able to remove the entire trim piece by doing so. If it does not wiggle out, a flat head screw driver will help by depressing the tabs to they come out easier. Once this trim piece is removed, you will see the T15 screws that need to be removed.

After you remove the T15 screws along the top, it is time to start removing fasteners towards the bottom. In order to do this, remove your rear license plate. You will reveal two 10mm bolts. Remove these.

Once those two bolts behind the license plate are removed there are two additional 10mm bolts that also need to be removed that are located just above the exhaust tip. You will most likely need a short 6 inch extension for these.

Next, way at the bottom of the bumper there will be a total of 10 7mm bolts that need to be removed. 5 on the left and 5 on the right.

Once the 7mm bolts on the bottom of the bumper are removed the next step will be to remove the mudflaps that are just snapped into the bumper. It is best to use a plastic pry tool to get this started then once it is started you can pull the rest off by hand. After this mudflap is removed, it will reveal two t15 torx screws. Remove these as well.


This next step is a little tedious. You need a small tool that has a hook on it. You want to hook the tool in the mesh part of the bezel around your taillights. Pulling back, the corner will release. Once the corner is released you will be able to persuade the rest of the bezel out. Do this same step for the other side.

Now that the bezel is out, you will reveal a t15 torx screw. Remove that screw. You want to repeat this for the other side as well.

So all of the bolts are removed. What do you do next? This is when you want to call over a neighbor to give you a hand. One person should be on each side of the car. Grab the bumper and pull straight back. Don't be afraid. It will seem like you are breaking stuff but you are not. Once you pull back, you will need to fish the rest of the cable out that was connected to your trunk latch. In additions to this there are two electrical connectors that also need to be disconnected. After this is all done, your bumper is free.
Last edited by C8Jake; 06-27-2016 at 08:29 PM.
The following users liked this post:
3dpilot (10-02-2019)